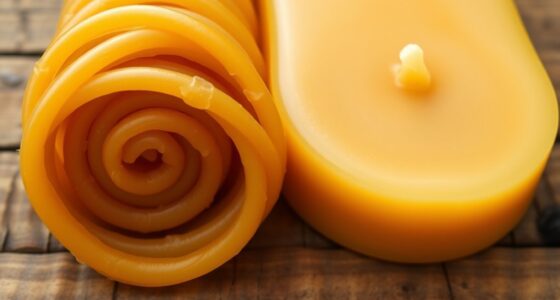
Making your own candles is an easy and enjoyable way to create charming, custom home decorations. Just **five simple steps** stand between you and a lovely scented candle suitable for any event. All you require are a glass container, wax, a wick, and your preferred scented oil. Experience the satisfaction of crafting candles today!
Simply melt the wax in a double boiler, add the fragrance oil, and then pour it into the glass container. Allow the wax to cool and harden, and trim the wick to the desired length. Your homemade candle is now ready to enjoy!

How to Make Candles in 5 Easy Steps
Making candles is a fun and easy way to add extra ambiance to your home. All you need is a little patience and some basic supplies. The first step is to choose the right type of wax.
Many different kinds are available, but paraffin wax and soy wax are the most popular. Paraffin wax is cheaper, but soy wax burns cleaner and is better for the environment. Once you’ve decided on the wax, you’ll need to choose your wicks. Cotton wicks are the most common, but wooden wicks are also available. N
ext, you’ll need to gather your molds. You can use anything from muffin tins to mason jars. Just make sure that whatever you use is heat-resistant. Finally, you’ll need a pot or double boiler to melt the wax. Once everything is gathered, simply follow these five steps:
- Measure and Melt the wax in your pot or double boiler
- Add color or fragrance if desired
- Pour the melted wax into your molds
- Place the wicks into the center of each mold
- Allow the candles to cool completely before removing them from the molds
And that’s it! You’ve now made your candles that are perfect for any occasion. Enjoy!

Measure & Melt the Wax
The first step is to measure and melt the wax. You will need twice as much wax as the final volume of your candle. Pour the wax into a double boiler and heat for 10-15 minutes, stirring frequently.

Vtopmart 25 PCS Clear Plastic Drawer Organizers Set, 4-Size Versatile Bathroom and Vanity Drawer Organizer Trays, Storage Bins for Makeup, Bedroom, Kitchen Gadgets Utensils and Office
- Versatile Drawer Organizer Set: Fits various home drawers and spaces
- Includes 25 Bins in 4 Sizes: Customizable storage options for different items
- Non-Slip and Durable Design: Silicone pads prevent slipping, sturdy plastic construction
As an affiliate, we earn on qualifying purchases.
Add Color or Fragrance if Desired
Once the wax is melted, you can add your desired fragrance oil and colorant. Adding fragrance oil to your melted candle wax is a quick and easy way to boost the smell of your candles. Simply pour the oil into the wax and stir for a few seconds. You can find fragrance oils at most craft stores or order them online.

When choosing a fragrance oil, pick one that is compatible with the type of wax you are using. For instance, if you are using beeswax, choose a beeswax-compatible fragrance oil. Otherwise, you may end up with an unpleasant smell. We recommend adding fragrance oil to all your candles, which is especially important for floral scents.
Pour the Melted Wax Into Your Molds
Making candles is a fun and rewarding hobby that anyone can enjoy. The key to making a great candle is to pour the wax at the perfect temperature. If the wax is too hot, it evaporates quickly and produces a weak candle.
If the wax is too cold, it will be difficult to pour and will have an uneven candle. The sweet spot for pouring wax is between 130 and 140 degrees Fahrenheit. When the thermometer reads 140 degrees, slowly pour the wax into your container.
Place the Wicks Into the Center of Each Mold
Hold the wick in place, but don’t pull on it. Leave a small amount of wax in the boiler for topping off your candle later. Following these simple tips, you can make beautiful candles that will fill your home with light and fragrance.

Allow the Candles to Cool Completely
After you have poured the wax into your molds, allow them to cool completely. This can take several hours, depending on the size of your candles.
Can You Cool a Candle in the Fridge?
No, candles should be allowed to cool on their own. If you store a candle in the refrigerator, it may not adhere to the glass properly, resulting in wet spots.
If you’re looking for a way to harden your candles at room temperature and pop them into the refrigerator, this is the technique for you. This speeds up the final cooling and firming times for the still-slightly-warm candles. The fridge-set candles will release from their molds more efficiently too. All you need to do is set your candles in the fridge. That’s it! This simple technique can save you time and hassle when making your candles. So next time you’re feeling crafty, give it a try. You can speed up the process by placing the candles in the refrigerator or freezer for 30-60 minutes.
Once they are cooled, remove them from the molds and trim the wicks to your desired length. Your homemade candles are now ready to enjoy!