Are you prepared to explore the art of candle making? Come along as we journey through the process of creating a sand candle!
Just like building a sandcastle, this craft allows you to create something beautiful while enjoying the soothing texture of sand.
In this guide, we will show you the step-by-step process of creating your own unique sand candle. From gathering materials to adding layers of colored sand, we’ll guide you through each stage, ensuring a fun and rewarding experience.
So, grab your molds and let’s get started on this exciting journey of crafting a stunning sand candle!

Key Takeaways
- Choose a variety of sand colors for a visually appealing candle.
- Prepare molds by coating them with a thin layer of oil.
- Explore alternative mold options like seashells or glass containers.
- Enhance the scent of sand candles by choosing fragrance or essential oils.
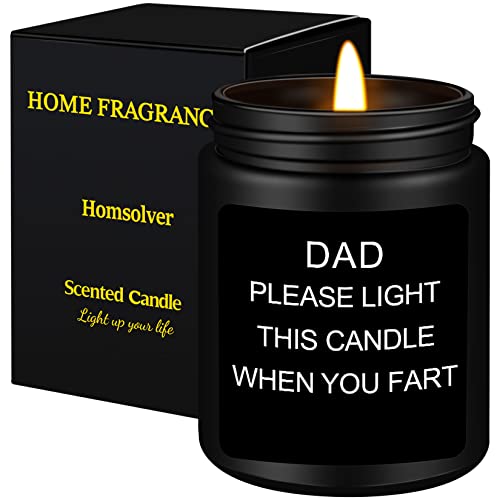
Homsolver Gift for Dad, Fathers Day Christmas Birthday Dad Gifts from Daughter Son - Sandalwood Scented Candle (7OZ)
FUNNY GIFTS FOR DAD- This black cedarwood juniper & sandalwood candle with a humorous saying: Dad, Please Light...
As an affiliate, we earn on qualifying purchases.
Gather Your Materials
To begin making a sand candle, we’ll need to gather our materials.
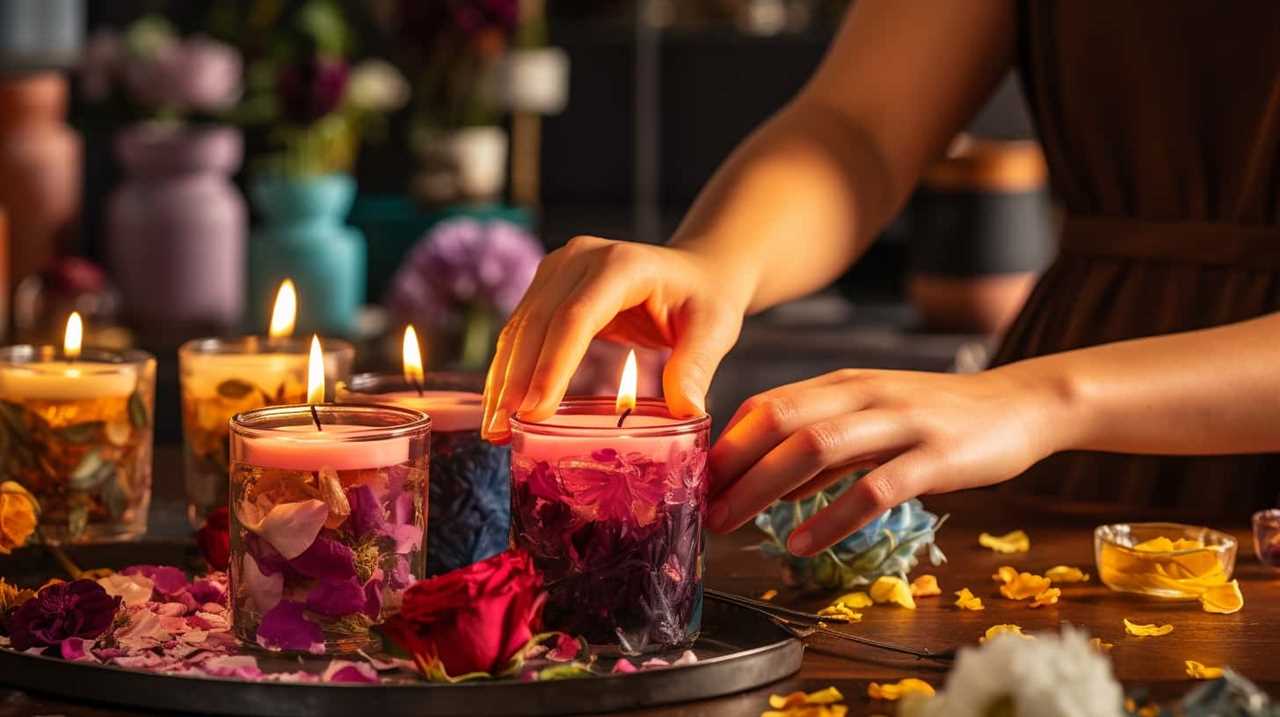
First, let’s start with the sand. Choose a variety of colors to create a beautiful and visually appealing candle. You can opt for natural sand colors like beige, brown, and white, or get creative with vibrant shades like blue, pink, and green.
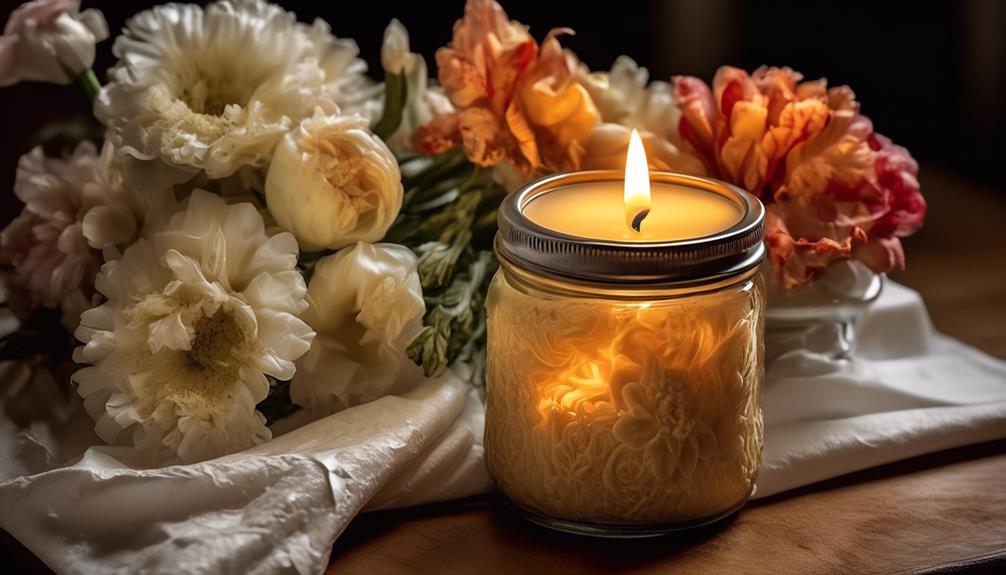
Next, we need a container to shape our candle. A glass jar or a small bucket works well.
Additionally, gather some candle wicks, wax, and a double boiler to melt the wax.
Lastly, don’t forget about the finishing touches! Once the candle is set and cooled, you can decorate it with seashells, pebbles, or even small charms, giving it a unique and personalized touch.

Dad Gifts from Daughter Son - Fathers Day Gift for Dad, Funny Daddy Birthday Gifts - Dad’s Last Nerve Scented Candle, Black
FUNNY GIFTS FOR DAD: Humorous quote "Dad's Last Nerve, Oh Look...It's on Fire" makes this a memorable gag...
As an affiliate, we earn on qualifying purchases.
Choose Your Sand Colors
For our sand candle, we’ll need to select a variety of colors for the sand. The choice of sand colors can greatly enhance the overall aesthetic appeal of your candle. Here are some important points to consider when choosing your sand colors:
- Sand color symbolism: Different colors can evoke different emotions and meanings. For example, white sand symbolizes purity and tranquility, while blue sand represents calmness and serenity. Think about the mood or atmosphere you want to create with your candle and choose sand colors accordingly.
- Natural vs. dyed sand options: Natural sand comes in a range of earthy tones, such as beige, brown, and gray. It provides a more organic and rustic look to your candle. On the other hand, dyed sand offers a wider array of vibrant colors, allowing for more creativity and customization.
- Mixing and layering: Experiment with different combinations of sand colors to create beautiful patterns and gradients. Layering different colors can add depth and visual interest to your candle.
- Quantity and texture: Consider the amount of sand needed for your candle and its desired texture. If you want a smoother finish, use finer sand particles. Coarser sand can add texture and a more rugged appearance.

Dad Birthday Gifts, Christmas Gifts from Daughter Son Kids, Husband Gift from Wife, Grandpa Father's Day Gift for Dad Boyfriend Who Wants Nothing, Mens Funny Presents Bonus Daddy, Scented Candle
Father's Day Gifts for Dad: This candle is a perfect combination of humor and appreciation. It will make...
As an affiliate, we earn on qualifying purchases.
Prepare Your Molds
Now let’s move on to preparing our molds for the sand candles.
First, we need to consider the types and sizes of molds we’ll be using. This is important because different molds will yield different shapes and sizes of candles.

Next, we’ll share some mold preparation tips to ensure that our candles come out smoothly and easily.
Lastly, we’ll explore alternative mold options for those who want to get creative with their candle shapes.
Let’s get started!
Mold Types and Sizes
We gathered various mold types and sizes and prepared them for making our sand candles. Having the right molds is crucial to ensure that our candles turn out beautifully. Here are the steps we took to prepare our molds:
- Choose your mold types: We selected a variety of mold types, including cylindrical, square, and novelty shapes like seashells and starfish. This allowed us to create unique and eye-catching candles.
- Consider the size: We made sure to have molds in different sizes to cater to our design preferences. Smaller molds are perfect for creating tealight candles, while larger ones are ideal for statement pieces.
- Prepare the molds: Before pouring the hot wax and sand mixture, we coated the inside of the molds with a thin layer of mold release spray. This made it easier to remove the candles once they’d hardened.
- Experiment with sand colors: We also tried using different sand colors to add visual interest to our candles. By layering different colored sands, we were able to achieve stunning and vibrant designs.
Mold Preparation Tips
To ensure successful candle-making, it is essential to properly prepare the molds for pouring the hot wax and sand mixture. Mold cleaning is an important step to remove any dirt or residue that may affect the quality of your sand candle. Here are some mold preparation tips to follow:
| Mold Preparation Tips | Description |
|---|---|
| Clean the molds | Before using the molds, make sure to clean them thoroughly with warm soapy water. Rinse and dry them completely to ensure no residue remains. |
| Check for cracks | Inspect the molds for any cracks or damage that could leak the hot wax. If you find any, it’s best to replace them with new molds to ensure safety. |
| Apply a release agent | To easily remove the candles from the molds, apply a thin layer of mold release agent or cooking spray inside the molds. This will prevent the wax from sticking to the mold surface. |
| Set up a safe workspace | Prioritize safety by setting up your workspace away from flammable materials. Keep a fire extinguisher nearby and ensure proper ventilation. |
Alternative Mold Options
After thoroughly cleaning the molds, it’s important to consider alternative mold options for preparing your sand candles. Here are four different types of sand molds you can use:
- Seashells: Collect various sizes and shapes of seashells to create unique candle molds. Make sure to clean them thoroughly before pouring the hot wax.
- Silicone molds: These flexible molds are great for creating intricate designs and shapes. Simply pour the wax into the silicone mold and wait for it to harden before removing the candle.
- Glass containers: Recycle glass jars or cups by using them as molds for your sand candles. They can add a rustic and charming touch to your candle.
- Metal molds: If you’re looking for a more traditional mold option, metal molds are a great choice. They come in various shapes and sizes, allowing you to create different candle designs.
Now that you have alternative mold options, let’s move on to creative ways to decorate your sand candles.

WEMEET Candle Gifts for Father, Dad Birthday Gifts for Daughter Son, 7oz Scented Candle for Fathers Day, Christmas, Smoked Vanilla Candle Gift for Thanksgiving Day, Halloween
A Heartfelt Gift for Dad: This humorous-scented candle, printed with the phrase “Dad Please Light This Candle”, is...
As an affiliate, we earn on qualifying purchases.
Melt the Wax
To melt the wax, place it in a heat-safe container and heat it gradually until fully liquefied. You can use a double boiler or a makeshift one by placing a smaller heat-safe container inside a larger pot filled with water. This indirect heating method helps to prevent the wax from overheating or catching fire.

Always remember to exercise caution and follow safety measures when working with hot wax. Never leave it unattended and keep a fire extinguisher nearby. Use a thermometer to monitor the temperature and ensure it stays within the recommended range.
Slowly heat the wax over low to medium heat until it reaches a temperature of around 160-180°F (71-82°C). Once the wax is completely melted, we can move on to the next step of adding fragrance or essential oils to enhance the scent of our sand candle.
Add Fragrance or Essential Oils
Now that we’ve melted the wax and prepared the sand, it’s time to add fragrance or essential oils to our sand candle.
Scenting the sand won’t only enhance the aesthetic appeal of the candle, but it can also provide various aromatherapy benefits.
By choosing the right fragrance or essential oil, we can create a soothing, relaxing atmosphere or invigorate our senses with an energizing scent.
Let’s explore how to add fragrance or essential oils to our sand candle and enjoy the delightful aromas it will create.
Scenting the Sand
We enhance the sand’s aroma by incorporating fragrance or essential oils into it. Scented sand adds an extra touch of elegance and personalization to your sand candles. Here’s how to scent the sand for your candle decorations:
- Choose your fragrance:
Select a fragrance or essential oil that complements the theme or mood you want to create. Popular choices include lavender for relaxation, citrus for a refreshing scent, and vanilla for a warm and inviting aroma. - Add the scent:
Start by pouring a small amount of sand into a container. Add a few drops of fragrance or essential oil to the sand and mix well. Gradually add more sand and oil until you achieve the desired scent strength. - Let it sit:
Allow the scented sand to sit for at least 24 hours. This will allow the sand to fully absorb the fragrance and ensure a consistent scent throughout. - Use in your sand candles:
Once the scented sand is ready, you can use it to create beautiful and fragrant sand candle decorations.
Aromatherapy Benefits
One of the benefits of adding fragrance or essential oils to your sand candles is the aromatherapy experience they provide. Aromatherapy is the use of healing scents to promote relaxation, balance, and overall well-being. By incorporating these scents into your sand candles, you can create a calming and soothing atmosphere in your home.
To enhance the aromatherapy benefits of your sand candles, you can choose from a variety of essential oils with different properties. For example, lavender oil is known for its calming effects and can help reduce stress and anxiety. Eucalyptus oil, on the other hand, has a refreshing and invigorating scent that can clear the mind and promote mental clarity.
To give you a better understanding of the different essential oils and their benefits, here is a table showcasing some popular options:
| Essential Oil | Healing Properties |
|---|---|
| Lavender | Calming, soothing |
| Eucalyptus | Invigorating, refreshing |
| Peppermint | Energizing, uplifting |
Pour the First Layer of Sand
After preparing the candle mold, it’s essential to carefully pour the first layer of sand using a funnel. This step is crucial in creating a beautiful and sturdy sand candle. Here are some tips for pouring sand layers:
- Start by placing the funnel securely into the opening of the mold. Make sure it fits snugly to prevent any sand from spilling out.
- Slowly pour the sand into the funnel, allowing it to flow gently into the mold. Avoid pouring too quickly to prevent the sand from clumping together.
- Use a spoon or a small stick to spread the sand evenly across the bottom of the mold. This will ensure an even and smooth surface for the next layer.
- Tap the sides of the mold gently to remove any air bubbles trapped in the sand.
Now that the first layer of sand is in place, it’s time to move on to the next step: pouring the wax into the mold.

Pour the Wax Into the Mold
To continue the candle-making process, let’s carefully pour the melted wax into the mold. This step is crucial in creating beautiful scented candles that will enhance any space. The melted wax should be at the right temperature, not too hot or too cold, to ensure a smooth and even pour.
Before pouring the wax, let’s set the mood with a table that showcases the beauty of sand art and scented candles. This 3 column and 3 row table will evoke an emotional response from the audience:
| Column 1 | Column 2 | Column 3 |
|---|---|---|
| Tranquility | Serenity | Relaxation |
| Beach Vibes | Calmness | Escape |
| Zen-like | Peaceful | Soothing |
Now, let’s pour the wax into the mold. Slowly and steadily, pour the melted wax into the mold, making sure not to overflow it. Leave a little space at the top to allow for the wick. Allow the wax to cool and solidify completely before moving on to the next step.
Add Layers of Colored Sand
Let’s talk about adding layers of colored sand to our sand candle.

One point to consider is the sand color combinations that will create a visually appealing design.
Additionally, we need to discuss techniques for layering the sand to achieve a neat and professional look.
Sand Color Combinations
We often create beautiful sand candles by adding layers of colored sand using different combinations. This technique allows us to create stunning effects and customize our sand art to match any beach themed decor.
Here are four sand color combinations that you can try for your sand candles:

- Sunset Blend: Start with a layer of golden yellow sand at the bottom, followed by a layer of orange sand in the middle, and finish with a layer of deep red sand at the top. This combination will give your candle a warm and vibrant sunset look.
- Ocean Blues: Begin with a layer of light blue sand at the base, then add a layer of turquoise sand in the middle, and finally finish with a layer of dark blue sand on top. This combination will create a calming and serene ocean-inspired candle.
- Tropical Paradise: Start with a layer of light pink sand at the bottom, followed by a layer of bright green sand in the middle, and finish with a layer of vibrant yellow sand on top. This combination will give your candle a tropical and lively feel.
- Neutral Elegance: Begin with a layer of beige sand at the base, then add a layer of light gray sand in the middle, and finally finish with a layer of white sand on top. This combination will create a sophisticated and elegant sand candle that will complement any decor.
Techniques for Layering?
To achieve a visually captivating sand candle, we employ various techniques for layering colored sand. This step is crucial in creating a stunning sand art piece that will make a beautiful addition to your beach crafts collection. Follow these steps to add layers of colored sand to your candle:
- Start by preparing your colored sand. You can either purchase pre-colored sand or make your own by mixing sand with powdered pigments or food coloring.
- Begin by pouring a thin layer of one color of sand into the bottom of your candle mold. Use a spoon or small funnel to ensure an even and precise layer.
- Gently tap the mold to settle the sand layer and create a solid base.
- Repeat the process with different colors of sand, adding one layer at a time. You can create patterns or gradients by alternating colors.
- Continue layering until you reach your desired height, making sure to tap the mold after each layer to remove any air bubbles.
- Once you’ve finished layering, carefully pour melted wax into the mold, filling it to the top.
- Allow the candle to cool and solidify before removing it from the mold.
Insert the Wick
To insert the wick into the sand candle, position the pre-waxed wick in the center of the sand-filled container. Make sure the wick is tall enough to reach the top of the candle when it’s finished.
Here are four important steps to consider for successful wick placement:
- Measure the wick size: Use a ruler to measure the height of your container. Add a few extra inches to ensure the wick is long enough.
- Secure the wick: Hold the wick in place by wrapping the excess length around a pencil or wooden skewer. This will prevent the wick from moving while pouring the melted wax.
- Position the wick: Carefully lower the secured wick into the center of the sand-filled container. Gently press it into the sand to ensure stability.
- Adjust the wick: Before pouring the wax, double-check the wick’s position. It should be centered and standing upright.
Once the wick is securely in place, you can move on to the next step of letting the candle cool and set.

Let the Candle Cool and Set
After inserting the wick into the sand candle, we can now proceed to allow the candle to cool and set.
This step is crucial in ensuring that the candle solidifies properly and maintains its shape. As the candle cools, it will harden and become firm, creating a stable base for burning.
The cooling process typically takes around 2-3 hours, but it may vary depending on the size of the candle. During this time, it’s important to resist the temptation to touch or move the candle, as this can disrupt the setting process.
Once the candle has completely cooled and set, it’s ready to be used and enjoyed. The layering technique used in making the sand candle not only adds visual appeal but also allows for the release of aromatherapy benefits as each layer burns.
Remove the Candle From the Mold
We carefully lift the molded sand candle out of the mold. Removing the candle from the mold can be a delicate process to ensure the sand mold remains intact. Here are some techniques and tips for removing the candle without damaging the sand mold:
- Gently tap the sides of the mold: Lightly tapping the sides of the mold helps loosen the candle and allows it to slide out more easily.
- Use a knife or spatula: Carefully insert a knife or spatula between the candle and the mold, gently prying it away from the edges. Be cautious not to apply too much pressure to avoid damaging the sand mold.
- Wiggle the mold: Slowly wiggle the mold from side to side while lifting it upwards. This movement helps loosen the candle and allows it to pop out smoothly.
- Patience is key: If the candle doesn’t come out easily, avoid forcefully pulling or twisting it. Instead, give it some time to cool down and set further, then try again using the previous techniques.
Frequently Asked Questions
How Long Does It Take for the Candle to Cool and Set?
The cooling and setting time for the candle varies depending on factors such as the size and composition of the candle. It can take anywhere from a few hours to overnight for the candle to cool and fully set.
Can I Use Regular Beach Sand for This Project?
Yes, we can use regular beach sand for this project. It’s a great alternative to specialty sand. We can also experiment with different techniques for decorating sand candles, like adding shells or colored sand.
What Type of Wax Should I Use for Making Sand Candles?
Choosing the right wax for sand candles is crucial for a successful project. We recommend using paraffin wax, as it is easy to work with and has a low melting point. Here are some tips for successful sand candle making.
How Do I Prevent Air Bubbles From Forming in the Candle?
To prevent air bubbles in your candle, start by ensuring your wax is at the right temperature and stirring it gently. Tap the mold to release any trapped air and use a heat gun to remove any remaining bubbles.
Can I Use Different Types of Molds for Making Sand Candles?
Yes, we can use different types of molds for making sand candles. We can get creative and use unconventional materials like seashells, glass jars, or even fruit peels. The possibilities are endless!
Conclusion
In conclusion, making a sand candle is a fun and creative project that anyone can enjoy. By following the simple steps outlined above, you can create a beautiful and unique candle that will bring a touch of the beach into your home.
So gather your materials, melt the wax, add layers of colored sand, and let your creativity flow like the waves of the ocean. Let your imagination soar as you create a sand candle that will light up your space like a warm sunset on a summer evening.