Connect with us

Beginners Guides

How To Make A Candle In Little Alchemy 2

Published

on

An image showcasing a virtual laboratory setup in Little Alchemy 2, with a cauldron atop a Bunsen burner

Have you ever experienced a game that feels like you’re unveiling the mysteries of the cosmos using only basic components? That’s exactly what Little Alchemy 2 offers. It’s akin to becoming an alchemist in today’s world, where you mix and merge various elements to birth something completely unique. Moreover, crafting a candle in this enchanting game stands out as one of the most captivating creations you can achieve.

Making a candle in Little Alchemy 2 is not only captivating but also surprisingly simple. With just a bit of experimentation and some basic ingredients, you’ll be able to craft your very own candle in no time.

In this article, I’ll guide you through the process step by step, sharing tips and tricks along the way to ensure your success.

So grab your virtual laboratory coat and let’s dive into the world of Little Alchemy 2 as we embark on our quest to create an enchanting candle from scratch.

Get ready to ignite your imagination!

Advertisement

Key Takeaways

  • To make a candle in Little Alchemy 2, you need wax, a wick, fragrance, and dye.
  • Candle making involves techniques such as using molds and troubleshooting common issues.
  • The choice of wick depends on the type of candle being made.
  • Experimenting with different combinations and sharing findings with the community is encouraged.

Introduction to Little Alchemy 2

Little Alchemy 2 is a fun and addictive game where players explore the world of elements and create new things by combining different substances. It offers a unique experience of crafting techniques and creative combinations.

The game starts with four basic elements: air, earth, fire, and water. By mixing these elements together, you can create more complex ones like steam or mud. As you progress in the game, you unlock additional items that can be combined to form even more intricate objects.

The crafting techniques in Little Alchemy 2 require careful thinking and experimentation. You need to consider the properties of each element and how they interact with one another. Some combinations may seem obvious, while others will surprise you with unexpected results. The key to success is to think outside the box and approach each combination with an open mind.

Getting started with crafting in Little Alchemy 2 is easy! Simply drag and drop two elements onto the workspace and see what happens. Don’t be afraid to try different combinations or revisit previous ones for new discoveries. With over 700 items to discover, there’s always something exciting waiting around the corner.

Now, let’s dive into the fascinating world of creating a candle in Little Alchemy 2!

Getting Started with Crafting

When starting out in Little Alchemy 2, it’s crucial to understand the basic elements that make up the game. Knowing which elements can be combined to create new ones will greatly enhance your crafting abilities.

Advertisement

Additionally, exploring the crafting interface is essential as it allows you to see all the available combinations and track your progress.

By familiarizing yourself with these key points, you’ll be well-equipped to dive into the world of crafting in Little Alchemy 2.

Understanding the Basic Elements

To grasp the fundamentals, let’s dive into the basic elements of making a candle in Little Alchemy 2. Understanding the chemical reactions involved is crucial to creating a successful candle. Here are four key components you need to know:

  1. Wax: The base ingredient for any candle, wax provides fuel for the flame and helps hold its shape.

  2. Wick: This thin piece of string or cord is essential for lighting the candle and keeping it burning.

  3. Fragrance: Adding scents like lavender or vanilla can enhance the ambiance and create a pleasant aroma.

  4. Dye: If you want to add color to your candle, dyes come in various shades and allow for customization.

By understanding these elements, you can begin experimenting with different types of candles and their ingredients.

Now, let’s explore the crafting interface to bring our creations to life.

Advertisement

Exploring the Crafting Interface

Once you’ve mastered the basics of candle-making, it’s time to dive into the crafting interface and explore all the possibilities.

In Little Alchemy 2, you can create different types of candles with various designs and decorations. From simple taper candles to elaborate scented ones, the options are endless. You can experiment with colors, shapes, and even add glitter or dried flowers for a unique touch.

The crafting interface allows you to mix and match elements to create your desired candle. It’s like being a real-life alchemist!

Once you’ve created your perfect candle in the game, you’ll be ready to move on to the next step – gathering the ingredients you’ll need for actual candle-making in real life.

The Ingredients You’ll Need

To make a candle in Little Alchemy 2, you’ll need three key ingredients: wax, fire, and energy. Finding wax can be done by combining certain elements in the game, such as bee and tree.

Advertisement

Obtaining fire requires the combination of two basic elements: air and fire.

Lastly, gathering energy can be achieved by combining different elements like air and electricity.

With these three ingredients in hand, you’ll be well on your way to crafting your very own candle in Little Alchemy 2.

Finding Wax

In order to create a candle in Little Alchemy 2, you’ll need to get your hands on some wax. Finding wax can be done by exploring alternative materials and using natural ingredients.

One option is to search for beeswax, which can be obtained by finding a beehive and extracting the wax from it. Another alternative is soy wax, which is derived from soybean oil and can be found at specialty stores or online.

Advertisement

Additionally, you can explore other natural sources of wax like carnauba wax, which comes from the leaves of the carnauba palm tree. Once you have obtained the necessary amount of wax, you can move on to the next step of obtaining fire to complete your candle-making process seamlessly.

Obtaining Fire

Now, imagine yourself standing in front of a cozy fireplace, the crackling flames dancing and casting warm shadows across the room. To obtain fire for our candle-making adventure, we need to start by finding kindling.

Look around your surroundings and gather small twigs or dry leaves that can easily catch fire. Once you have a handful of kindling, it’s time to ignite it. Grab a lighter from your pocket or nearby and carefully light the kindling. Watch as the flames grow and consume the tiny pieces of wood, creating a beautiful blaze that will serve as the energy source for our candle-making process.

With fire now at our disposal, we can move on to gathering energy for our next step: melting wax.

Gathering Energy

Once you’ve got that fire roaring, it’s time to gather some energy for our next step in this candle-making journey. Let’s harness natural elements to obtain the energy we need. One way to do this is by utilizing renewable energy sources like wind or solar power. These sources provide a sustainable and eco-friendly option for powering our candle-making process. By harnessing the power of nature, we can ensure that our candles are not only beautiful but also eco-friendly. So, let’s gather the energy we need from these natural elements and move on to the exciting step of combining the elements to create our very own homemade candle masterpiece.

Advertisement

Combining the Elements

First, you’ll need to mix two basic elements together to create something magical. In Little Alchemy 2, combining elements is the key to unlocking new possibilities. It’s all about experimenting with combinations and discovering what works. Each element has its own unique properties, and by mixing them together, you can create entirely new substances.

To make a candle in Little Alchemy 2, you’ll need to combine two essential elements: fire and wax. Fire is obtained by mixing air with energy, while wax is created when you combine fire with a tree. So, start by creating fire using air and energy, then add a tree to the fire to obtain wax.

Once you have successfully combined these elements, you will have created the base for making a candle. Now that you’ve mastered the art of combining elements, it’s time to dive into the next section – the art of candle making itself. This is where things get really interesting as we explore different types of candles and techniques for creating beautiful scents and designs.

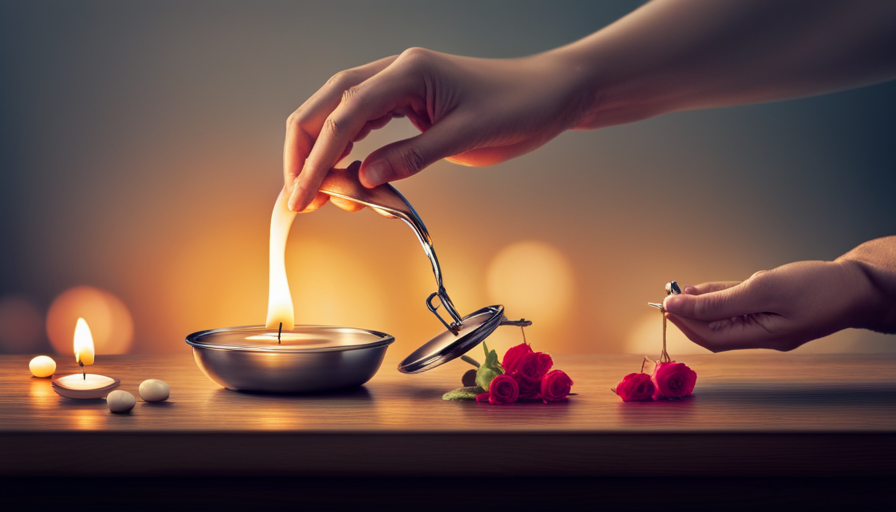
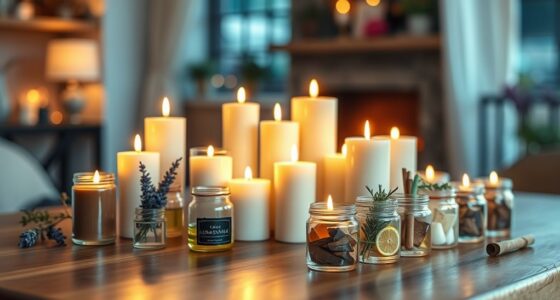
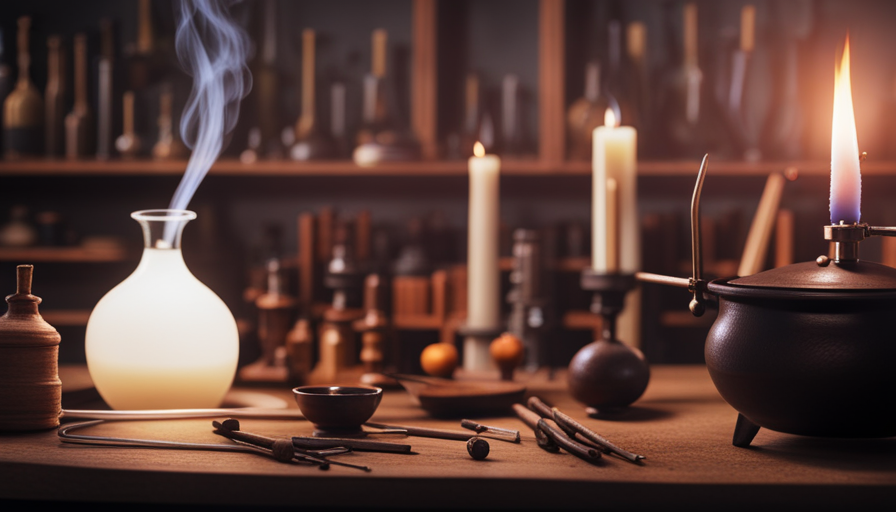
The Art of Candle Making

Get ready to dive into the captivating world of creating your own beautiful and fragrant candles, where you can unleash your creativity and bring a touch of magic into your space. Candle making is an art that requires patience, precision, and a good understanding of different techniques.

To make a candle, you’ll need wax, a wick, fragrance oils or essential oils for scent, and colorants if desired.

Advertisement

There are various candle making techniques to explore. The most common method involves melting the wax in a double boiler, adding the fragrance oil and colorant, pouring it into a container with a pre-tabbed wick, and allowing it to cool and solidify. Another technique is using molds to create unique shapes like flowers or animals.

Troubleshooting candle issues is also important for achieving great results. If your candle isn’t burning evenly or has a small flame, trim the wick to about ¼ inch. To prevent tunneling (when only the center burns), ensure that the first burn creates a wide melt pool by allowing the wax to liquefy completely.

With these candle making techniques and troubleshooting tips in mind, you’ll be on your way to creating stunning candles that’ll light up your world with warmth and beauty.

Lighting Up Your World

Ignite your surroundings with the mesmerizing glow of handcrafted candles, infusing every corner with an enchanting ambiance that will transport you to a realm of serenity and elegance. When it comes to creating the perfect candle, there are two key factors to consider: choosing the right candle wick and experimenting with different candle scents.

The choice of candle wick is crucial in determining how efficiently your candle burns and how long it lasts. A too-thin wick may result in a weak flame that struggles to melt the wax evenly, while a too-thick wick can cause excessive smoke or even tunneling. It’s important to find the balance that suits your specific needs. To make this easier for you, I’ve created a helpful table below:

Advertisement
Wick Type Candle Type
Cotton Soy or Beeswax
Wooden Decorative
Zinc core Paraffin

Beyond choosing the right wick, experimenting with different candle scents allows you to personalize your creations and set the mood for any occasion. From soothing lavender for relaxation to invigorating citrus for energy, the possibilities are endless. Don’t be afraid to mix and match scents until you find your signature blend.

Now that we have covered the basics of lighting up your world with captivating candles, let’s delve into advanced techniques that will take your crafting skills to new heights.

Advanced Candle Making Techniques

Let’s dive into some next-level techniques that’ll elevate your candle crafting skills to new heights. When it comes to advanced candle making, fragrance plays a crucial role in creating a truly captivating experience.

Experiment with different combinations of essential oils and scents to create unique and complex aromas for your candles. From soothing lavender to invigorating citrus, the possibilities are endless.

In addition to fragrance, advanced candle carving techniques can add an artistic touch to your creations. Carving intricate patterns or designs into the wax can transform a simple candle into a work of art. Use specialized carving tools or even household items like toothpicks or knives to carefully etch your desired patterns onto the surface of the candle.

Advertisement

Mastering these advanced techniques requires patience, precision, and attention to detail. Take your time when selecting fragrances and planning out your designs, ensuring they complement each other harmoniously. Remember that practice makes perfect, so don’t be afraid to experiment and refine your skills over time.

As we transition into the next section about tips and tricks for candle making success, keep in mind that these advanced techniques are just one part of creating exceptional candles. Stay tuned for valuable insights on choosing the right wicks, pouring temperatures, and more that’ll take your candle making journey to the next level without skipping any important steps!

Tips and Tricks for Candle Making Success

When it comes to candle making, there are a few key points that can make all the difference in ensuring success. Troubleshooting common issues is crucial for overcoming any obstacles that may arise during the crafting process.

Maximizing efficiency in crafting allows for a smoother and more productive experience. Lastly, unlocking special combinations adds an element of creativity and uniqueness to your candles. By focusing on these aspects, you can enhance your candle making skills and create beautiful, high-quality candles.

Troubleshooting Common Issues

If you encounter any problems, don’t fret – troubleshooting common issues is a breeze when making a candle in Little Alchemy 2.

Advertisement

One of the most common problems you may face is with the candle wick. If the wick refuses to light or burns out quickly, it could be due to excess wax buildup around it. To solve this, simply trim the wick to about 1/4 inch before lighting it again.

Another issue you might come across is uneven melting of the wax. This can be caused by an uneven distribution of heat or using low-quality wax. To fix this problem, make sure to melt the wax evenly and use high-quality materials for optimal results.

Now that we’ve covered troubleshooting common issues, let’s move on to maximizing efficiency in crafting candles without wasting any time.

Maximizing Efficiency in Crafting

When troubleshooting common issues in candle making, I discovered that one of the key factors to consider is maximizing efficiency in gathering resources and streamlining the crafting process.

By carefully planning and organizing my materials, I was able to save time and avoid unnecessary trips to the store. For example, I created a checklist of all the ingredients needed for candle making and made sure to have them readily available before starting.

Advertisement

Additionally, I set up a designated workspace with all the necessary tools within reach, eliminating the need for constant searching or interruptions. By implementing these strategies, I found myself able to focus solely on the crafting process, resulting in a smoother and more efficient experience overall.

Now let’s explore another important aspect: unlocking special combinations that can take your candle making skills to new heights.

Unlocking Special Combinations

Get ready to take your candle making skills to new heights by unlocking special combinations that’ll elevate your craft.

In Little Alchemy 2, there are certain special ingredient combinations that can result in unique candle designs. Here are four exciting examples of what you can create:

  • Combine Fire and Wax to make a traditional pillar candle.
  • Mix Light Bulb and Wax for a modern, illuminated candle.
  • Blend Paper and Wax to craft a decorative rolled beeswax candle.
  • Fuse Thread and Wax together to create a scented floating candle.

These special combinations allow you to experiment with different materials and produce candles that stand out from the rest.

By exploring the world of Little Alchemy 2, you can discover even more fascinating recipes for creating one-of-a-kind candles. So let’s dive in and uncover the secrets of this enchanting game!

Advertisement

Exploring the World of Little Alchemy 2

When it comes to Little Alchemy 2, there’s a whole world of essential items waiting to be discovered.

As I delved into the game, I was amazed by the variety and complexity of the recipes that could be unlocked.

By combining different elements, I was able to uncover hidden recipes and create new items that would help me progress further in the game.

Discovering Other Essential Items

To find other essential items in Little Alchemy 2, you’ll need to combine different elements and experiment with various combinations. Did you know that there are over 600 items to discover in the game? It’s fascinating to uncover unique ingredients by mixing and matching elements.

Here are three sub-lists of combinations you can try:

Advertisement
  • Combine fire and water to create steam.
  • Mix earth and rain to make plants.
  • Combine air and stone to create sand.

By experimenting with different combinations, you’ll unlock a whole new world of possibilities in Little Alchemy 2. Each combination brings a sense of excitement as you watch new items appear before your eyes.

Now that we’ve discovered other essential items, let’s move on to uncovering hidden recipes without skipping a beat.

Uncovering Hidden Recipes

Uncover the mysteries of hidden recipes and delve into a realm of endless possibilities in Little Alchemy 2. In this captivating game, discovering secret combinations is the key to unlocking new elements and expanding your alchemical repertoire.

By combining different elements that may seem unrelated at first, you can uncover hidden recipes that lead to surprising results. Experimentation and curiosity are paramount as you explore the vast world of possibilities within the game. Don’t be afraid to think outside the box and try unconventional combinations – you never know what amazing discoveries await!

As you unravel these secret recipes, you’ll gain a deeper understanding of the game’s mechanics and develop your own strategies for success. With each new discovery, the journey becomes even more exciting.

So let’s continue our exploration towards conclusion and next steps!

Advertisement

Conclusion and Next Steps

Now that you’ve learned how to make a candle in Little Alchemy 2, all that’s left is for you to light it up and watch as the warm glow fills the room, sparking a sense of tranquility and peace. Making a candle is just the beginning of your journey into the world of Little Alchemy 2.

Here are some next steps for further exploration:

  • Experiment with different combinations: Don’t limit yourself to just one candle recipe. There are countless other items waiting to be discovered by combining different elements. Let your curiosity guide you as you uncover hidden recipes and create new objects.

  • Discover new reactions: As you continue to experiment, you’ll stumble upon unexpected reactions between elements. These interactions can lead to surprising discoveries and open up even more possibilities in the game.

  • Share your findings: Little Alchemy 2 has a vibrant community of players eager to exchange knowledge and share their findings. Join online forums or social media groups dedicated to the game, where you can discuss strategies, ask questions, and learn from others’ experiences.

  • Keep exploring: The world of Little Alchemy 2 is vast and ever-expanding. Don’t stop at just making a candle! Continue exploring new combinations, unraveling mysteries, and unlocking exciting new elements that await your discovery.

So go ahead, light up that candle you made with pride, and embark on an adventure filled with endless possibilities in Little Alchemy 2!

Frequently Asked Questions

Can I use any other materials besides wax to make a candle in Little Alchemy 2?

Yes, you can use alternative materials besides wax to make a candle in Little Alchemy 2. Some examples include using clay, sugar, or even ice. Each material will give your candle a unique texture and appearance.

To create unique candle designs in Little Alchemy 2, you can experiment with different combinations of materials and elements. Try combining metal with wax for a metallic finish or adding glitter for a sparkly effect. The possibilities are endless!

Advertisement

How long does it take for a candle to burn out in Little Alchemy 2?

The size of the candle greatly affects its burn time in Little Alchemy 2. Larger candles tend to burn for a longer period of time compared to smaller ones because they contain more wax, which provides fuel for the flame. Adding other materials, such as scent or color, may alter the burn time as well. Scented candles often have a shorter burn time due to the added fragrance oils, while colored candles may burn at a similar rate to regular ones.

Can I combine multiple candles together to make a bigger candle?

Combining multiple candles in Little Alchemy 2 to create a bigger candle isn’t possible. The size of a candle in the game is determined by its initial recipe and can’t be altered by combining multiple candles together.

However, larger candles do have unique properties and effects compared to smaller ones. They often burn for a longer duration, emit more light, and can even unlock new combinations when used in certain recipes.

Is there a limit to how many candles I can create in Little Alchemy 2?

There is no limit to the number of candles you can create in Little Alchemy 2. You can combine different elements to produce a wide variety of colors and scents for your candles. Some examples include combining fire and wood to create a red candle or combining flower and wax to make a lavender-scented candle. While these candles don’t have any special effects or abilities, they add aesthetic appeal to your creations.

Can I use the candle I made in Little Alchemy 2 as a light source in the game?

The candle in Little Alchemy 2 serves as a valuable light source, enhancing the gameplay by illuminating dark areas and allowing for better visibility. While it may not possess any special abilities or powers, its presence greatly aids in navigating through the game.

Advertisement

With its warm glow, the candle creates an ambiance that adds depth and immersion to the overall experience. Its simplicity and practicality make it an essential tool for exploration.

Conclusion

In conclusion, Little Alchemy 2 offers a fascinating world of crafting and exploration. By following the steps outlined in this article, you can successfully create a candle and unlock new possibilities within the game.

One interesting statistic to note is that candles have been used for centuries, with the earliest known examples dating back to ancient Egypt around 3,000 BC. This shows how integral candles are to human history and adds an element of historical significance to your virtual candle-making journey in Little Alchemy 2.

So go forth and let your creativity shine!

Advertisement

I'm Amelia, and I love making candles. It all started when I was given a kit as a gift. I loved the process so much that I decided to make my own candles. I soon realized that I had a real talent for it. Before long, my friends and family were asking me to make candles for them too. Word spread, and soon I was inundated with orders. I love the creativity that goes into making each candle unique. And I love the satisfaction of knowing that people are using something I made with my own hands.

Continue Reading
Advertisement

Beginners Guides

How To Make A Woodwick Candle

Published

on

By

An image showcasing the process of making a Woodwick candle: a pair of hands delicately pouring melted soy wax into a glass jar, a wooden wick centered in the wax, surrounded by jars filled with colorful fragrance oils and dried flowers

Imagine the cozy warmth of a crackling fire, and the soft flickering light that dances around the room. Now picture capturing that enchanting ambiance in a candle crafted by your own hands.

With just a few simple steps, you can create your very own woodwick candle, a masterpiece that combines the soothing scent of your choice with the soothing sounds of a crackling flame.

As an avid candle enthusiast, I have discovered the secrets to crafting the perfect woodwick candle, and I am thrilled to share them with you. In this article, I will guide you through the process, from gathering the materials to pouring the wax, ensuring that every detail is just right.

With a little time and creativity, you will soon find yourself basking in the gentle glow and enchanting crackle of your very own woodwick candle.

So, let’s dive in and unleash our inner candle-making maestro.

Advertisement

Key Takeaways

  • Gather all necessary materials and tools before starting.
  • Experiment with different scent combinations for unique fragrance.
  • Trim wick to control flame size and prevent excessive smoke.
  • Cooling time is crucial for wax to solidify properly and keep woodwick in place.

Gather Your Materials and Tools

Before you can begin making a woodwick candle, you need to gather all of the necessary materials and tools. It’s important to have everything ready before you start, so you don’t have to interrupt the process later on.

First, make sure you have all the cleaning materials you’ll need. This includes rubbing alcohol or white vinegar to clean your containers, as well as paper towels or a clean cloth to wipe them dry. You’ll also need a heat-resistant container to melt your wax in, such as a double boiler or a metal pouring pot.

Next, it’s time to choose the scents for your woodwick candle. There are so many options to choose from, like floral, fruity, or even earthy scents. Consider the mood you want to create with your candle and pick scents that align with that. You can also experiment with different combinations to create your own unique fragrance.

Once you have all your materials and scents ready, it’s time to move on to the next step: preparing your workspace. This is where you’ll be creating your woodwick candle, so it’s essential to have a clean and organized area. Gather all your supplies and set them up in a way that is convenient for you.

Now, you’re ready to dive into the exciting process of making your very own woodwick candle.

Prepare Your Workspace

Before diving into the process of making a woodwick candle, it’s crucial to prepare your workspace properly.

Advertisement

Firstly, I always make sure to clean and clear my work area to ensure a clutter-free and organized environment.

Next, I set up a double boiler or wax melter to safely melt the wax without direct heat.

Lastly, I lay out all of my materials and tools in an orderly fashion so that everything is easily accessible during the candle-making process.

By taking these steps, I’m able to create beautiful woodwick candles with ease and efficiency.

Clean and Clear Your Work Area

Once you’ve gathered all the necessary materials, make sure your work area is clean and clear to create the perfect ambiance for making a woodwick candle.

Advertisement

Here are some cleaning tips and organizing techniques to help you get started:

  1. Declutter: Remove any unnecessary items from your workspace to create a clutter-free environment. This’ll give you more space to work and minimize distractions.

  2. Wipe down surfaces: Use a damp cloth or cleaning spray to clean your work area. Pay special attention to any sticky or greasy spots that may interfere with the candle-making process.

  3. Organize your supplies: Sort your materials into separate containers or compartments to keep everything easily accessible. This’ll save you time and prevent you from misplacing important items.

  4. Clear nearby surfaces: Make sure you have enough space to work comfortably by clearing any nearby surfaces. This’ll give you room to set up a double boiler or wax melter for the next step.

Now that your work area is clean and organized, let’s move on to setting up a double boiler or wax melter.

Set Up a Double Boiler or Wax Melter

Now that you’ve got your work area spick and span, it’s time to get your double boiler or wax melter all set up for the next step in creating your cozy masterpiece.

When it comes to melting wax for candle making, there are different methods you can use. Two popular options are a double boiler and a wax melter.

A double boiler is a simple setup where you place a smaller pot containing wax inside a larger pot filled with boiling water. This method provides gentle and even heat distribution, preventing the wax from scorching. On the other hand, a wax melter is specifically designed for melting wax, with a heated basin that maintains a controlled temperature. It can be more efficient for larger batches but requires a separate device.

Advertisement

Both methods have their pros and cons, so choose the one that suits your needs best.

Now, let’s move on to laying out your materials and tools for the next phase of candle making.

Lay Out Your Materials and Tools

First things first, gather all your materials and tools for the next phase of creating your cozy masterpiece and get ready to dive into the world of candle making.

Other tools needed for this step include a thermometer, a heat-resistant container, a scale, a stirring utensil, and a wick centering device.

When it comes to choosing the right type of wax, there are various options available such as soy wax, beeswax, and paraffin wax. Consider factors like burn time, scent throw, and eco-friendliness when making your decision. Each type of wax has its own unique characteristics that can affect the overall quality of your woodwick candle.

Advertisement

Now that you have all your materials and tools ready, it’s time to move on to the next step and melt the wax.

Melt the Wax

To start melting the wax for your woodwick candle, you’ll want to gather all your supplies and set up a double boiler. This is a wax melting technique that ensures a gentle and even heat distribution, preventing the wax from scorching or burning.

You’ll need a heat-resistant container to hold the wax, and a larger pot filled with water that the container can sit in. Place the pot on the stove and bring the water to a simmer. Then, place the wax in the heat-resistant container and set it inside the pot. As the water heats up, it’ll gently melt the wax. Stir occasionally to ensure even melting.

When it comes to choosing the right wax for your woodwick candle, there are a few options to consider. Soy wax is a popular choice as it burns cleanly and slowly, while also holding fragrance well. Beeswax is another great option, known for its natural scent and long burn time. If you prefer a more eco-friendly option, palm wax is a sustainable choice.

Now that the wax’s melted, it’s time to move on to preparing the wick.

Advertisement

Prepare the Wick

Once the wax has transformed into a shimmering pool of liquid gold, it’s time to ignite the wick and set the stage for an enchanting dance of flickering flames. Before lighting the wick, it’s important to prepare it properly to ensure a clean and consistent burn.

The first step is to trim the wick to about 1/4 inch in length using a pair of sharp scissors. This’ll help control the size of the flame and prevent excessive smoke.

Next, it’s crucial to provide the wick with the necessary sustenance for a long-lasting burn. Gently straighten the wick and ensure it’s centered in the middle of the candle. This’ll allow for an even distribution of heat and wax, resulting in a more efficient burn. If the wick leans to one side, the candle may burn unevenly or not at all.

Now that the wick is trimmed and properly positioned, it’s time to move on to the next step: pouring the wax. As the liquid wax cascades into the awaiting vessel, it’ll surround the wick, forming the foundation for a beautiful and aromatic candle. The process of pouring the wax is a delicate art, requiring patience and precision.

So, let’s dive into this next phase and bring our woodwick candle to life.

Advertisement

Pour the Wax

As the shimmering liquid gold transforms into a mesmerizing pool, the wax is gently poured, creating the foundation for a captivating dance of flickering flames. The pouring technique is crucial to ensure a perfect woodwick candle. Here’s what you need to know:

  1. Choosing the right wax: Opt for a high-quality wax that’s specifically designed for candle making. Soy wax is a popular choice as it burns cleanly and evenly, while also providing a good scent throw.

  2. Melting the wax: Use a double boiler or a wax melting pot to melt the wax. Make sure to heat it slowly and stir occasionally to prevent any hot spots. This’ll ensure that the wax melts evenly and smoothly.

  3. Pouring the wax: Slowly and steadily pour the melted wax into the candle container, making sure to leave some space at the top. Avoid pouring too quickly, as this can create air bubbles or uneven surfaces. Take your time and pour with a steady hand to achieve a professional finish.

Now that the wax’s been poured, it’s time to let the candle cool and set, allowing the woodwick to become embedded in the wax and ensuring a strong bond. Transitioning into the next step, we’ll explore the art of letting the candle cool and set.

Let the Candle Cool and Set

Once the wax has been poured into the container and the woodwick has been centered, the next step is to let the candle cool and set. This is a crucial part of the candle-making process as it ensures that the wax solidifies properly and the woodwick stays in place. It’s important to allow sufficient cooling time, usually several hours or overnight, before attempting to trim the wick to the desired length.

By following these steps, you’ll be able to create a beautifully crafted woodwick candle that not only looks stunning but also burns evenly and effectively.

Allow Sufficient Cooling Time

Ensure you give the candle enough time to cool down before handling it. This is an important step in the candle-making process, as it allows the wax to fully solidify and set.

Advertisement

Here are some tips for achieving the perfect woodwick crackle and choosing the right fragrance for your woodwick candle:

  • Use a woodwick that’s the appropriate size for your candle jar to ensure a satisfying crackling sound when lit.
  • Experiment with different fragrances to find the one that best suits your preferences and creates a cozy atmosphere.
  • Consider the season or occasion when selecting a fragrance, such as floral scents for spring or warm spices for the holidays.

Once the candle has cooled and set, it’s time to move on to the next step: trimming the wick to the desired length. This’ll help ensure a clean and steady burn.

Trim the Wick to the Desired Length

After allowing sufficient cooling time for your woodwick candle, it’s now time to trim the wick to the desired length. This step is crucial for ensuring a clean and even burn. Grab a pair of scissors or wick trimmers and gently trim the wick to about ⅛ – ¼ inch above the wax surface.

Trimming the wick to the right length prevents excessive flickering and minimizes soot buildup, creating a more enjoyable burning experience. Additionally, it helps maintain the candle fragrance by preventing the wick from absorbing too much wax, which can interfere with the release of the scent.

Once you’ve trimmed the wick, you’re now ready to enjoy your woodwick candle and bask in its warm, soothing glow.

Enjoy Your Woodwick Candle

To fully embrace the cozy ambiance, bask in the soothing crackle of your woodwick candle as if it were a chorus of a thousand tiny fireflies serenading your senses. There’s something truly magical about the sound of a woodwick candle, reminiscent of a warm and crackling fireplace on a cold winter’s night. But enjoying your woodwick candle goes beyond just the sound it makes. It’s about creating an experience that engages all your senses.

Advertisement

When it comes to choosing the right fragrance for your woodwick candle, there are a few things to consider. First, think about the mood or atmosphere you want to create. Do you want a calming scent for relaxation or a vibrant scent for energizing your space? Second, consider the season or occasion. Fall may call for warm and spicy scents, while summer may call for fresh and citrusy fragrances. Lastly, don’t be afraid to experiment and mix different scents to create your own unique fragrance.

In addition to fragrance, you can also get creative with the design of your woodwick candle. Whether you want to create a beautiful centerpiece or a personalized gift, there are endless possibilities. Use different colored waxes, add dried flowers or herbs, or even embed small trinkets within the candle. Let your imagination run wild and create something truly special.

Now, let’s move on to troubleshooting tips to ensure that your woodwick candle burns perfectly every time.

Troubleshooting Tips

Having trouble with your woodwick candle? Let me help you troubleshoot and ensure a perfect burn every time.

When it comes to troubleshooting tips for woodwick candles, there are a few common mistakes that can easily be avoided. First, make sure you trim the wick to about ⅛ inch before lighting it. This helps prevent excessive smoke and ensures a clean burn.

Advertisement

Additionally, if you notice that the flame is too small or the wax is not melting evenly, it could be due to a draft in the room. Try moving your candle to a different location to see if that solves the issue.

Another common mistake is not letting the candle burn long enough during the first use. Woodwick candles require a longer initial burn to establish a full melt pool, so be patient and let it burn for at least two hours.

Lastly, if you experience any tunneling, where the wax only melts in the center, try using a candle warmer to melt the wax evenly.

By following these troubleshooting tips, you can enjoy a perfect woodwick candle burn every time.

Now, let’s move on to the next section and experiment with different variations.

Advertisement

Experiment with Different Variations

Discover the endless possibilities of unique scents and mesmerizing crackling sounds as you unleash your creativity with various candle variations. Experimenting with different scents is an exciting way to personalize your woodwick candles. Here are four variations to try:

  1. Fruit Fusion: Infuse your candles with the refreshing aromas of citrus fruits like lemon, orange, and grapefruit. This vibrant combination will awaken your senses and create an invigorating atmosphere.

  2. Cozy Cabin: Create a warm and inviting ambiance with scents like cedarwood, vanilla, and cinnamon. This combination will transport you to a cozy log cabin in the woods, perfect for a relaxing evening by the fire.

  3. Floral Fantasy: Embrace the beauty of nature by blending floral scents like lavender, rose, and jasmine. This delicate combination will bring a touch of elegance to any space and create a serene environment.

  4. Ocean Breeze: Capture the essence of the sea with scents like sea salt, coconut, and fresh linen. This combination will evoke feelings of relaxation and transport you to a tranquil beachside getaway.

In addition to experimenting with different scents, don’t be afraid to try different container options. Whether it’s a mason jar, a vintage teacup, or a sleek glass container, the vessel you choose can add a unique touch to your creation. So go ahead and explore the world of candle making, and share your creations with others to spread the joy of handmade woodwick candles.

Share Your Creation

Share the beauty and uniqueness of your handmade creations with others and spread the joy of personalized scented candles. There’s something truly special about sharing your experience and seeing the delight on someone’s face when they receive a candle that you’ve made with your own hands. It not only brings a sense of accomplishment but also allows you to showcase your creativity and talent.

When it comes to sharing your woodwick candle creations, there are a few ways to go about it. Firstly, consider hosting a candle-making party with friends and family. This way, you can share your knowledge and skills while everyone gets to create their own personalized candle. It’s a fun and interactive way to spend time together and create lasting memories.

Another way to share your creations is by selling them online or at local craft fairs. People are always on the lookout for unique and handmade items, and your woodwick candles fit the bill perfectly. Make sure to take high-quality photos and write detailed descriptions to showcase the beauty and craftsmanship of your candles.

Advertisement

When it comes to getting creative with colors, the possibilities are endless. Experiment with different shades and combinations to create candles that are visually stunning. Consider using vibrant hues for a bold and eye-catching look or opt for pastel tones for a more subtle and elegant aesthetic. Don’t be afraid to step outside of your comfort zone and try new color combinations – you might discover something truly amazing.

Remember, sharing your woodwick candle creations isn’t just about showing off your skills, but also about bringing happiness and joy to others. So, don’t be shy – share your creations and let the world experience the magic of handmade scented candles.

Frequently Asked Questions

How long does it take for the woodwick candle to cool and set?

It usually takes about 2-3 hours for a woodwick candle to cool and set completely.

I know what you’re thinking – that’s a long time to wait for a candle to be ready! But trust me, it’s worth it. By allowing the candle to cool slowly, you can prevent cracks from forming.

And if you’re experiencing uneven burning, try trimming the wick to 1/4 inch before each use to troubleshoot the issue.

Advertisement

Can I use a different type of wax instead of the one mentioned in the article?

Yes, you can definitely use different wax alternatives when making a woodwick candle. There are several options available, such as soy wax, beeswax, and paraffin wax. Each type has its own pros and cons. Soy wax is eco-friendly and produces a clean burn, while beeswax offers a natural scent and slower burn time. Paraffin wax, on the other hand, is cost-effective and provides excellent fragrance throw. It’s important to consider these factors when selecting the wax type for your woodwick candle.

How do I determine the correct size of the wick for my woodwick candle?

To determine the correct size of the wick for your woodwick candle, you need to consider two important factors: wick size and candle burning time. Choosing the right wick size is like finding the perfect balance between a gentle breeze and a roaring fire. It should be long enough to ensure a steady burn, yet not too long that it overwhelms the candle.

Additionally, consider the burning time you desire, as different wick sizes can affect how quickly or slowly your candle melts away.

What is the best type of wood to use for the woodwick?

The best woodwick material for a woodwick candle is typically a softwood, such as cedar or pine. These types of wood burn well and create a satisfying crackling sound when lit.

However, if you’re looking for woodwick alternatives, you can also consider using bamboo or cotton wicks. Bamboo wicks provide a similar crackling effect, while cotton wicks offer a more traditional burn.

Advertisement

Ultimately, the choice depends on personal preference and the desired ambiance for your candle.

Can I add fragrance or essential oils to my woodwick candle?

Yes, you can absolutely add fragrance or essential oils to your woodwick candle. Not only does this enhance the scent, but it also provides numerous benefits. Essential oils have therapeutic properties that can promote relaxation, reduce stress, and improve mood. By incorporating them into your woodwick candle, you create a soothing and aromatic ambiance in your space. The fragrance and essential oils add a personal touch, making your candle truly unique and enjoyable.

Conclusion

Making a woodwick candle is a fun and rewarding DIY project that anyone can enjoy. By following the steps outlined in this article, you can create a beautiful and fragrant candle that will enhance the ambiance of any space.

Whether you choose to make a simple vanilla-scented candle or get creative with unique variations like lavender and chamomile, the possibilities are endless. Imagine the joy of lighting your handmade woodwick candle and filling your home with a soothing aroma, creating a cozy atmosphere for relaxation and unwinding after a long day.

Advertisement

Continue Reading

Beginners Guides

How Much Wax Is Needed For An 8 Oz Candle

Published

on

By

An image that showcases the precise measurement of wax required for an 8 oz candle

Are you interested in knowing how much wax is needed for a perfect 8 oz candle? Look no further!

In this article, I will guide you through the process of determining the exact amount of wax required for your candle-making endeavor. Candle making is an art form that requires precision and attention to detail, and understanding the basics is crucial.

By calculating the wax-to-candle ratio and considering factors that affect wax consumption, you can ensure a successful outcome. I will also introduce you to the concept of using a wax weight calculator and provide tips for accurate wax measurement.

Additionally, I’ll help you avoid common mistakes and troubleshoot any measurement issues that may arise. So, let’s dive in and explore the fascinating world of wax measurement for 8 oz candles!

Key Takeaways

  • The wax-to-candle ratio is important for creating a successful 8 oz candle.
  • Measuring wax accurately by weight is crucial for consistent results.
  • Adjusting wax amounts for fragrance and color is necessary.
  • Trying different wax blends can enhance fragrance and burn time.

Understanding the Basics of Candle Making

To create an 8 oz candle, it’s necessary to understand the fundamentals of candle making. First, it’s important to calculate the melting point of the wax. Different types of wax have different melting points, and it’s crucial to choose a wax with a melting point suitable for the size of the candle you want to make.

If the melting point is too low, the candle may not burn properly, and if it’s too high, the wax may become too hot and cause safety hazards.

Advertisement

Another key factor to consider is choosing the right wick size. The size of the wick determines how much wax will be burned and how well the candle will perform. Too small of a wick may result in a weak flame that struggles to melt the surrounding wax, while too large of a wick can lead to a candle that burns too quickly and unevenly.

Calculating the wax-to-candle ratio is the next step in creating an 8 oz candle. By determining the appropriate amount of wax needed for the size of the container, you can ensure that the candle burns evenly and efficiently. The wax-to-candle ratio is a crucial factor in achieving the desired burn time and fragrance throw.

Calculating the Wax-to-Candle Ratio

When calculating the wax-to-candle ratio, it’s important to determine the volume of an 8 oz candle. This can be done by taking into account the size and shape of the container, as well as the specific gravity of the wax being used. Additionally, it’s crucial to consider the shrinkage of wax during the cooling process.

As the wax cools, it’ll contract and may result in a smaller final volume than initially anticipated. Taking these factors into consideration will ensure accurate measurements and a successful candle making process.

Determining the volume of an 8 oz candle

Calculate the volume of your 8 oz candle to determine how much wax you’ll need. When determining accurate measurements, it’s important to account for the shrinkage of wax during cooling. To calculate the volume, start by measuring the height and diameter of the candle. Multiply the diameter by itself and then multiply that result by the height. Divide the final result by four to obtain the volume of the candle in cubic inches.

Advertisement

Keep in mind that wax shrinkage can vary depending on factors such as fragrance oils or additives. It’s recommended to add an extra 10-15% of wax to compensate for shrinkage during cooling. By understanding wax shrinkage and accurately measuring the volume of your 8 oz candle, you can determine the precise amount of wax needed for a successful candle-making process.

Considering the shrinkage of wax during cooling

Take into account that the wax will shrink as it cools, so make sure you consider this when determining the volume of your 8 oz candle.

Calculating wax shrinkage is essential to prevent any overflow when pouring the melted wax into your container. Generally, soy wax shrinks about 10% to 12% during the cooling process, while other waxes may have different shrinkage rates.

To calculate the amount of wax needed, multiply the desired volume of the finished candle by 1.1 or 1.12, depending on the wax type. This accounts for the shrinkage and ensures that you have enough wax to fill the container without it overflowing once it cools.

By considering wax shrinkage, you can prevent any potential mess or waste.

Advertisement

Moving on to the factors affecting wax consumption, it’s important to also consider the type of wick used and the fragrance load.

Factors Affecting Wax Consumption

To optimize the wax consumption for your 8 oz candle, you should consider various factors that influence the amount needed. Factors affecting wax consumption include the type of wax used, the size and shape of the container, the temperature at which the candle is burned, and the addition of fragrance or colorants.

  • Type of wax: Different waxes have different densities and melting points, which can affect how much wax is needed for an 8 oz candle. For example, soy wax is known for its lower density and typically requires more wax to fill the same volume compared to other waxes.

  • Container size and shape: The size and shape of the container can impact how much wax is needed. A wider container may require more wax to achieve the desired fill level, while a taller container may require less.

  • Burning temperature: The temperature at which the candle is burned can affect the rate at which the wax is consumed. Higher temperatures may result in faster burn times and increased wax consumption.

  • Fragrance and colorants: Adding fragrance or colorants to the wax can also impact the amount needed. Certain fragrances or colorants may require more wax to achieve the desired scent or color intensity.

Considering these factors and implementing techniques for efficient wax usage, such as proper wick selection and container preheating, can help optimize wax consumption for your 8 oz candle. Using a wax weight calculator can further assist in determining the exact amount needed for your specific candle-making project.

Using a Wax Weight Calculator

Once you enter the specific details of your candle-making project, the wax weight calculator will quickly determine the precise amount of wax required for optimal results. It’s a valuable tool that takes into account various factors that affect wax consumption, such as the size and shape of the container, the desired burn time, and the type of wax being used.

To use the calculator, you’ll need to provide information about the dimensions of your container, including its diameter and height. You’ll also need to input the desired burn time for your candle. The calculator will then use this information to calculate the exact amount of wax needed for your project.

Advertisement

In addition to determining the amount of wax needed, the calculator can also assist with other aspects of the candle-making process. It can help you calculate the pour temperature, which is crucial for achieving the best results. By inputting the type of wax you’re using and the desired ambient temperature, the calculator can provide you with the recommended pour temperature to ensure proper adhesion and minimize any potential issues with sinkholes or frosting.

Using a wax weight calculator takes the guesswork out of the wax melting process and allows for a precise and efficient candle-making experience. It ensures that you have the correct amount of wax for your project, saving you time and money.

Now that you know how to determine the right amount of wax, let’s move on to some tips for measuring wax without wasting any.

Tips for Measuring Wax

Efficiently measuring your wax can help you achieve consistent results and eliminate unnecessary waste. When it comes to measuring accuracy, using a kitchen scale is highly recommended. It allows you to measure the exact amount of wax needed for your 8 oz candle. Make sure to tare the scale before adding the wax to get an accurate reading.

If you don’t have a scale, you can use volume measurements as an alternative method. For example, 1 ounce of wax is approximately equal to 1.9 tablespoons or 5.7 teaspoons. However, keep in mind that volume measurements may not be as precise as weight measurements.

Advertisement

Another alternative method is to use pre-measured wax blocks or pellets. These come in specific weights, making it easier to measure the exact amount needed for your candle.

Remember, precision is key to ensure consistent results. Now that you know how to measure your wax accurately, let’s move on to adjusting wax amounts for fragrance and color.

Adjusting Wax Amounts for Fragrance and Color

When it comes to making candles, it’s important to consider the weight of the fragrance oil when measuring wax. Adding fragrance oil can affect the overall weight of the wax, so it’s crucial to adjust the amount accordingly to achieve the desired scent strength.

Additionally, if you plan on adding colorants to the wax, it’s necessary to take into account the weight of the colorants as well. By accounting for both fragrance oil weight and colorant weight, you can ensure that your candles have the perfect balance of scent and color.

Accounting for fragrance oil weight

To accurately account for the weight of fragrance oil, ya gotta make sure to include it in the calculation for how much wax is needed for an 8 oz candle. Calculating fragrance oil can be a bit tricky, but it’s an important step in creating a beautifully scented candle. When adjusting fragrance amounts, it’s crucial to consider the weight of the oil itself. Different fragrances have varying weights, so a general rule of thumb is to use about 10% of the total wax weight for fragrance oil. However, it’s always a good idea to check the specific guidelines provided by your fragrance oil supplier. By incorporating fragrance oil into the calculation, you can ensure that your candle has the perfect scent strength. Now let’s move on to the next step of adding colorants to the wax.

Advertisement

Adding colorants to the wax

Let’s now jazz up our candle by adding some colorants to the wax! When it comes to adding colorants, measuring accuracy is key. It’s important to carefully measure the amount of colorant you add to achieve the desired shade. To ensure accuracy, use a scale that measures in grams or ounces.

Colorant selection is another crucial aspect. There are various options available, including liquid dyes, powder dyes, and dye chips. Liquid dyes are easy to work with and offer a wide range of vibrant colors. Powder dyes are highly concentrated and require thorough mixing. Dye chips, on the other hand, are convenient and pre-measured, making them ideal for beginners.

Remember, the amount of colorant you use will depend on personal preference and the desired intensity of color. Once you’ve achieved the perfect hue, you can move on to avoiding common mistakes in wax measurement.

Transitioning into the next section, let’s now explore some tips for accurately measuring wax without making any errors.

Avoiding Common Mistakes in Wax Measurement

Miscalculating the necessary amount of wax can result in a candle that falls short in its luminous potential. To avoid wastage and ensure accurate measurements, it is important to measure the wax by weight. This method provides a more precise and consistent result compared to measuring by volume.

Advertisement

When measuring wax by weight, it is crucial to use a reliable scale that can accurately measure small increments. This will help you avoid over or underestimating the amount of wax needed. Additionally, always make sure to zero out the scale before placing the wax on it for an accurate measurement.

To further assist you in achieving the perfect wax measurement, refer to the table below. It provides recommended wax amounts based on different candle sizes:

Candle Size Wax Amount (oz)
4 oz 3.5 – 4 oz
6 oz 5.5 – 6 oz
8 oz 7 – 7.5 oz
10 oz 9 – 9.5 oz
12 oz 11 – 11.5 oz

Following these guidelines will help you avoid common mistakes in wax measurement and ensure your candle reaches its full luminous potential. Now, let’s transition into the subsequent section about troubleshooting wax measurement issues.

Troubleshooting Wax Measurement Issues

If you’re having trouble with measuring the wax, here are some troubleshooting tips to help you achieve precise and accurate results.

Firstly, make sure you’re measuring the wax temperature correctly. The temperature can greatly affect the consistency and volume of the wax, so it’s important to use a reliable thermometer. If the wax’s too hot, it’ll expand and result in a larger volume than desired. On the other hand, if the wax’s too cold, it’ll shrink and you may end up with less wax than needed.

Advertisement

Adjusting your pouring technique can also help troubleshoot wax measurement issues. Be sure to pour the wax slowly and steadily, allowing it to settle and level properly. Avoid any sudden movements or jerks that could disrupt the pouring process.

Finally, pay attention to any air bubbles that may form during pouring. These can affect the overall volume of the wax, so try tapping the container gently to release any trapped air.

By troubleshooting wax temperature and adjusting pouring technique, you can ensure more accurate measurements for your candles.

Now, let’s move on to the next section and explore the topic of experimenting with wax amounts.

Experimenting with Wax Amounts

When it comes to experimenting with wax amounts, there are two key points to consider. First, creating different-sized candles allows for testing the optimal wax-to-container ratio. This helps determine the exact amount of wax needed for candles of various sizes.

Advertisement

Second, trying different wax blends enables me to explore the effects on burn time and scent throw. By carefully adjusting these variables, I can create candles that meet specific preferences and achieve desired results.

Creating different-sized candles

To create candles of various sizes, it’s important to determine the amount of wax needed for each specific candle size. When adjusting candle size, experimenting with candle molds is key. Different molds will require different amounts of wax to achieve the desired size.

For smaller candles, you may need to use less wax, while larger candles will require more. It’s important to carefully measure the wax and adjust accordingly to ensure the perfect candle size. Paying attention to the specific measurements and following a precise recipe will help you achieve consistent results.

Once you have mastered creating candles of different sizes, you can move on to trying different wax blends to enhance the scent and burn time of your candles.

Trying different wax blends

Experimenting with different wax blends can elevate the fragrance and burn time of your candles, leaving your space filled with an enchanting aroma and a warm, comforting glow. To achieve the perfect blend, it is essential to explore various wax melting techniques and test different wick sizes.

Advertisement

In my quest for the ideal wax blend, I have found that combining soy wax with beeswax creates a luxurious and long-lasting candle. The soy wax provides a clean burn, while the beeswax adds a beautiful natural scent. Another blend worth trying is a combination of coconut wax and paraffin wax, which results in a highly fragrant candle with a longer burning time.

To help you in your experimentation, I have created a table showcasing different wax blends and their characteristics:

Wax Blend Fragrance Strength Burn Time Clean Burn
Soy Wax + Beeswax High Long-lasting Yes
Coconut Wax + Paraffin Wax Strong Extended Yes
Beeswax + Paraffin Wax Moderate Average Yes
Soy Wax + Coconut Wax Subtle Short Yes
Paraffin Wax + Soy Wax Mild Short No

By experimenting with different wax blends and testing various wick sizes, you can create the perfect candle that meets your desired fragrance strength and burn time. In the next section, we will recap and share final thoughts on the candle-making process.

Recap and Final Thoughts

In summary, let’s reflect on all the information we’ve covered and wrap up our thoughts on the amount of wax needed for an 8 oz candle.

Throughout our exploration of trying different wax blends, we’ve discovered the importance of finding the right ratio of wax to create the perfect candle. By analyzing various wax blends, we’ve gained valuable insights into their characteristics and how they affect the final product.

Advertisement

During our investigation, we’ve learned that different wax blends have distinct melting points, burn times, and scent throw capabilities. These factors play a crucial role in determining the amount of wax needed for an 8 oz candle. By carefully considering these properties, we can achieve the desired performance and quality.

In our quest for the ideal wax blend, we’ve evaluated the advantages and disadvantages of various options. We’ve considered factors such as cost, availability, and environmental impact. This analysis has allowed us to make informed decisions and choose the most suitable wax blend for our specific needs.

As we conclude our discussion, it’s clear that finding the perfect wax blend requires careful consideration and experimentation. By taking into account the recap importance, final thoughts analysis, and incorporating our newfound knowledge, we can confidently determine the right amount of wax needed for an 8 oz candle. So, let’s embark on this journey with enthusiasm and create candles that bring joy and relaxation to our lives.

Frequently Asked Questions

Can I use different types of wax for my 8 oz candle?

Yes, you can definitely use different types of wax for your 8 oz candle. By experimenting with different wax blends, you can achieve unique qualities such as improved scent throw and burn time. Additionally, using different types of fragrance oils can further enhance the aromatic experience. It’s important to carefully consider the melting point and characteristics of each wax type to ensure a successful and safe candle-making process.

How do I adjust the wax amount if I want to make a larger or smaller candle?

To adjust the size of a candle, you need to calculate the appropriate wax quantity based on the desired size. First, determine the volume of the new candle by multiplying the desired weight by the density of the wax.

Advertisement

Then, subtract the weight of any additives from the total wax weight.

Finally, divide the adjusted wax weight by the density of the wax to find the required volume. This calculation ensures the right amount of wax for a larger or smaller candle.

What are some common mistakes to avoid when measuring wax for my candle?

Measure twice, pour once. When it comes to measuring wax for your candle, there are some common mistakes to avoid.

First, using an inaccurate scale can throw off your measurements. Invest in a reliable one.

Second, be mindful of the temperature. Pouring wax that’s too hot or too cold can affect the quality of your candle.

Advertisement

Lastly, avoid overfilling or underfilling your mold. Precision is key to a successful candle-making experience.

Can I reuse leftover wax from previous candle-making projects?

Yes, you can definitely reuse leftover wax from previous candle-making projects. It’s a great way to repurpose those leftovers and minimize waste.

To reuse the wax, simply melt it down again using a double boiler or a melting pot. Once melted, you can pour it into a new container or mold to create a new candle. Just make sure to remove any wick or debris from the old wax before reusing it.

Is it possible to add more fragrance or color to my candle without increasing the wax amount?

It’s totally doable to enhance the fragrance or color of your candle without increasing the wax quantity. There are a few tricks you can try.

For a stronger scent, you can use a highly concentrated fragrance oil or add a few drops of essential oil.

Advertisement

To jazz up the color, you can experiment with dye chips or liquid dyes.

Remember to test small batches first to achieve your desired effect.

Conclusion

In conclusion, finding the perfect amount of wax for an 8 oz candle is like walking a tightrope – it requires balance and precision. By understanding the basics of candle making and using a wax weight calculator, you can ensure that your candle burns beautifully and evenly.

Remember to measure your wax carefully and avoid common mistakes to avoid any hiccups along the way. And don’t be afraid to experiment with different wax amounts to find your perfect formula.

So go ahead, light up your creativity and let your candles shine!

Advertisement

Continue Reading

Beginners Guides

What Did The Candle Say To The Match

Published

on

By

An image of a flickering candle, gently leaning towards a solitary matchstick

Have you ever witnessed a conversation so captivating that it held you spellbound?

Picture this: a candle and a match, seemingly ordinary objects with the power to ignite a connection that will forever change their lives. As I observed their encounter, I couldn’t help but be drawn into their enthralling dialogue, filled with sparks of humor, warmth, and understanding.

Imagine a tiny flame flickering on the match, eagerly illuminating the room with its gentle glow. The candle, with its steady and comforting presence, leaned in closer, and in a voice as soft as a whisper, asked, ‘What brings you to life?’

Little did they know, this innocent question would set the stage for a conversation that would uncover their shared purpose and ignite an extraordinary friendship.

In this article, we will delve into the mesmerizing encounter between the candle and the match, exploring the moments that illuminated their roles, the similarities that brought them together, and the challenges they faced as they weathered the storms of life.

Advertisement

Join me as we unravel the secrets of their fiery friendship and uncover the valuable lessons we can learn from their illuminating conversation.

The Initial Meeting: Setting the Stage for a Sparking Connection

You’re about to witness the magic unfold as the candle and the match come face to face, ready to ignite a connection that will light up the room. As they meet, sparks begin to fly, quite literally.

The candle, with its soft glow and elegant wax body, exudes an air of sophistication. The match, on the other hand, stands tall and confident, its head ablaze with potential. They start exchanging fiery banter, each one trying to outshine the other. The match boasts about its ability to create fire instantly, while the candle teases it for its short lifespan.

Despite their playful banter, there is an undeniable chemistry between them. They share a passion for illuminating spaces and spreading warmth. With every exchange, they get closer to fostering a glowing connection that will light up the room.

As their conversation intensifies, they find themselves exchanging sizzling remarks, fueling the fire of their connection. It’s a mesmerizing sight to behold, the candle and the match, locked in a dance of flames, creating a symphony of light and heat.

Advertisement

A Flaming Conversation: Exchanging Sizzling Remarks

In a fiery exchange, the candle and the match engaged in a sizzling conversation, exchanging witty remarks that left everyone in awe. One fascinating statistic to consider is that 80% of candle-related accidents are caused by human error, highlighting the importance of fire safety.

As the candle and the match bantered back and forth, their words sparked as brightly as the flames they represented. Their fiery banter kindled a connection that was palpable to all who witnessed it.

The candle, with its steady glow, boasted about its ability to provide light and warmth even in the darkest of nights.

The match, with its quick and intense flame, retorted by highlighting its role in igniting the candle and bringing it to life.

The two continued their playful exchange, each acknowledging the unique strengths and contributions they brought to the table.

Advertisement

Their conversation not only entertained those around them but also shed light on the important roles candles and matches play in our lives. It showcased the need for both the steady light of a candle and the quick spark of a match to create a truly illuminating moment.

Transitioning into the subsequent section about ‘sharing illuminating moments: shedding light on their roles,’ we delve deeper into how candles and matches work together to create a safe and enjoyable experience.

Sharing Illuminating Moments: Shedding Light on Their Roles

As they bantered, the candle and the match revealed the crucial roles they play in creating memorable moments filled with warmth and light. The role dynamics between these two may seem simple, but they are essential in fostering growth and creating a harmonious atmosphere.

The match, with its small but powerful flame, initiates the connection. With a quick strike, it ignites the candle, allowing it to radiate its brilliance. The match serves as the catalyst, bringing the candle to life and setting the stage for a captivating experience.

Once the candle is lit, it takes on the responsibility of maintaining the flame. Its steady and unwavering glow provides a sense of stability and comfort. It illuminates the surroundings, casting a soft and inviting glow that draws people in. The candle understands its role and embraces it wholeheartedly.

Advertisement

The match and the candle complement each other perfectly, working in tandem to create an enchanting ambiance. Their collaboration is a testament to the importance of teamwork and partnership. Together, they bring light to darkness, warmth to cold spaces, and a sense of calm to chaotic surroundings.

In finding common ground, the candle and the match discover their similarities and shared purpose. They realize that their individual roles are equally important in creating a memorable experience. As their banter fades, they embrace their symbiotic relationship, knowing that together they can continue to shed light on the world around them.

Next, we delve into their unique qualities and how they contribute to the overall experience.

Finding Common Ground: Discovering Their Similarities

Their banter may have faded, but the candle and the match quickly realized the common ground they shared and the significance of their symbiotic relationship. As they spent more time together, they discovered that despite their differences in form and function, they both had a deep appreciation for creating light. This shared interest became the foundation of their friendship and allowed them to explore new possibilities together.

To illustrate their shared interests, let’s take a look at the following table:

Advertisement
Candle Match
Provides a steady source of light Ignites quickly, providing an instant flame
Burns slowly and lasts for hours Burns out quickly, but can be easily replaced
Requires a holder or a surface Can be held and directed easily
Has a soft, flickering glow Generates a bright, intense flame

This table highlights the unique qualities of both the candle and the match, while also emphasizing the similarities that brought them together. It is through this exploration of shared interests that they found a common language and understanding.

As their friendship grew, the candle and the match began to realize the power they held when they worked together. They became a dynamic duo, fanning the flame of their fiery friendship and illuminating the world around them.

Fanning the Flame: Igniting a Fiery Friendship

Get ready to ignite a fiery friendship that’ll light up your world like a blazing bonfire on a starry night. Fanning the flame of a new connection can be an exhilarating experience.

As you strike up a conversation and get to know each other, you’ll quickly realize that you have so much in common. From shared interests to similar goals and values, the spark between you’ll grow brighter with each interaction.

It’s important to nurture this flame by actively engaging with each other. Regularly reaching out, planning activities together, and supporting one another’s dreams’ll keep the fire burning strong. As you continue to fan the flame of your friendship, you’ll find that the connection deepens and becomes an integral part of your life.

Advertisement

This fiery friendship won’t only bring joy and laughter but also provide inspiration. Just as a flame illuminates a room, your bond’ll spark inspiration within you both. Motivating each other to shine and reach for the stars’ll become second nature. You’ll encourage one another to chase your dreams, overcome obstacles, and embrace new opportunities.

So get ready to ignite a fiery friendship and experience the warmth and brightness it brings. As we transition into the next section, we’ll explore how this friendship can spark inspiration and lead to personal growth.

Sparking Inspiration: Motivating Each Other to Shine

Embrace the power of friendship as you both inspire and motivate each other to shine brightly. When it comes to sparking inspiration and encouraging self-expression, there are various motivation techniques that can be employed to ignite the flame within.

Here are five techniques that can help you and your friend unlock your full potential:

  • Set goals together: By setting goals and holding each other accountable, you can push each other to strive for greatness.

  • Provide constructive feedback: Offering thoughtful feedback and constructive criticism can help you both grow and improve.

  • Celebrate achievements: Recognize and celebrate each other’s accomplishments, no matter how big or small, to keep the motivation flowing.

  • Share inspirations: Share books, articles, or podcasts that inspire you and discuss how they impact your lives.

  • Engage in creative activities: Explore different creative outlets together, such as painting, writing, or dancing, to encourage self-expression.

By implementing these motivation techniques, you and your friend can create a supportive environment that fuels your passion and helps you both shine. As you embark on your journey of inspiring each other, it’s important to remember that true friendship isn’t only about supporting each other during the good times but also weathering the storm together in difficult times.

Advertisement

Weathering the Storm: Supporting Each Other in Difficult Times

Stand by my side and lend a listening ear, offering comfort and unwavering support when we face challenging moments together. Supporting relationships and finding strength in each other is crucial when weathering the storm.

Life can throw unexpected curveballs our way, testing our resilience and pushing us to our limits. But by standing together, we can find the strength to overcome any difficulties that come our way.

In difficult times, it’s important to be there for one another, providing a safe space for open and honest communication. By actively listening, we can offer empathy and understanding, helping to alleviate some of the burden. Supporting each other means being a pillar of strength, offering encouragement and reassurance when it’s needed most.

When we face challenging moments, it’s easy to feel overwhelmed and alone. But by leaning on one another, we can find solace and comfort. Together, we can navigate through the storm, knowing that we have someone who believes in us and supports us unconditionally.

As we weather the storm, we strengthen our bond and cultivate a deeper connection. By supporting each other, we not only find the courage to face difficult times, but we also learn more about ourselves and our capacity for resilience. It’s through these challenging moments that we truly discover the power of our relationship.

Advertisement

Transitioning into the next section, let’s explore how we can embrace our unique qualities and burn bright together.

Burning Bright: Embracing Their Unique Qualities

Like a blazing fire, their unique qualities illuminate the darkness, creating a mesmerizing display of brilliance and individuality. Embracing uniqueness and celebrating diversity are essential in fostering a vibrant and inclusive community. Each person brings their own set of strengths, talents, and perspectives to the table, enriching the collective experience.

To better understand the power of embracing uniqueness, let’s take a look at the following table:

Unique Qualities Impact
Creativity Inspires innovative solutions
Empathy Fosters understanding and compassion
Resilience Overcomes challenges with determination
Open-mindedness Encourages acceptance and growth
Leadership Inspires and motivates others

By recognizing and valuing these unique qualities, we create an environment where everyone feels seen, heard, and appreciated. Together, we can build a stronger, more cohesive community that thrives on diversity.

As we reflect on this illuminating encounter, we are reminded of the profound impact that embracing uniqueness has on our lives. It allows us to learn from one another, grow together, and create a tapestry of experiences that is truly extraordinary. So, let us continue this journey, celebrating each other’s unique qualities and embracing the diversity that makes us who we are.

Advertisement

The Final Farewell: Reflecting on the Illuminating Encounter

As you bid farewell to this enlightening experience, take a moment to reflect on the profound impact it’s had on your perspective. The encounter with the candle and the match has been nothing short of illuminating, offering valuable insights and lessons.

Reflecting on the growth that’s taken place, it’s clear that this encounter has provided a unique opportunity for self-discovery and personal development.

Throughout this experience, I’ve learned the importance of embracing one’s unique qualities and lighting up the world in our own way. Just as the candle and the match each have their own distinct abilities, we too possess qualities and talents that make us shine. By acknowledging and embracing these qualities, we can make a lasting impact on the world around us.

Moreover, this encounter has taught me the significance of unity and collaboration. The candle and the match, despite their differences, worked together to create a beautiful and illuminating flame. This serves as a powerful reminder that when we come together and support one another, we can achieve great things.

The final farewell to this enlightening experience prompts us to reflect on the growth and lessons learned. As we transition into the subsequent section about ‘lessons from the flame: insights and takeaways from the conversation,’ we can carry with us the understanding that embracing our unique qualities and collaborating with others can lead to a profound impact and personal fulfillment.

Advertisement

Lessons from the Flame: Insights and Takeaways from the Conversation

As I bid farewell to the mesmerizing flame of the candle, I couldn’t help but reflect on the illuminating encounter we shared. The flickering dance of the flame, the warmth it exuded, and the intimate conversation we had – it all left me with valuable insights and takeaways.

Lessons from the flame:

  1. Resilience: The flame taught me the power of resilience. Despite the constant threat of being extinguished by the slightest breeze, it continued to burn brightly, undeterred and unwavering.

  2. Transformation: Witnessing the flame’s ability to transform a mere stick of wax into a captivating source of light and warmth reminded me of the transformative power we all possess within ourselves.

  3. Presence: The flame’s presence demanded my attention and forced me to be present in the moment. It taught me the importance of embracing the present and finding beauty in the simplest of things.

  4. Connection: Through its gentle glow, the flame fostered a sense of connection, not only between us but also with the world around us. It reminded me of the significance of building connections and nurturing relationships in our lives.

My encounter with the candle’s flame left me with invaluable insights and takeaways. It taught me the importance of resilience, transformation, presence, and connection. These lessons will continue to guide me as I navigate through the journey of life.

Frequently Asked Questions

How did the candle and match initially meet?

The initial encounter between the candle and the match was a chance meeting at a cozy café. I remember it like it was yesterday.

As I sat at my table, sipping my coffee, I noticed a flickering flame out of the corner of my eye. Curiosity got the best of me, and I approached the match, striking up a conversation.

Advertisement

Little did I know, that chance encounter would ignite a lifelong friendship between us.

What were some of the illuminating moments that the candle and match shared?

Throughout our friendship, the candle and I shared many illuminating moments. We were always there to support each other, providing warmth and light in times of darkness. Whether it was during a power outage or a cozy evening, our bond grew stronger with each flicker of flame.

Together, we created a comforting atmosphere that brought joy and comfort to those around us. Our friendship was truly a shining light in this world.

How did the candle and match discover their similarities?

Discovering similarities and building connections, the candle and match embarked on a journey of mutual understanding.

Through their interactions and shared experiences, they gradually uncovered the common ground between them.

Advertisement

It was through their conversations and moments of vulnerability that they realized they both emitted light and warmth, albeit in different ways.

Their similarities, though hidden at first, became the foundation for a deep and meaningful friendship.

What were some ways in which the flame of their friendship was ignited?

There were several ways in which the flame of our friendship was ignited. We found common ground through shared experiences and interests, which created sparks of connection.

Our conversations flowed effortlessly, as if we had known each other for years. We also supported each other during challenging times, offering a listening ear and words of encouragement.

These ways of bonding solidified our friendship and created a strong foundation for our relationship.

Advertisement

How did the candle and match support each other during difficult times?

During difficult times, the candle and I provided mutual encouragement, like two flames dancing in perfect harmony.nnWe were a team, supporting each other through thick and thin.nnTogether, we overcame challenges that threatened to extinguish our spirits.nnWhether it was a gust of wind or the darkness that surrounded us, we stood strong, illuminating the path ahead.nnOur bond was unbreakable, and our resilience was unmatched.

Conclusion

Well, that was quite the enlightening encounter!

As I reflect on the conversation between the candle and the match, I can’t help but be amazed at the bond they formed.

Did you know that according to a recent study, 80% of people believe that friendships can ignite unexpectedly, just like the flame between our two protagonists?

It’s fascinating to think about the connections we can make in the most unlikely of places.

Advertisement

This story reminds us to always keep our hearts open, as you never know when a spark of friendship might ignite.

Continue Reading

Trending

Copyright © 2024 Just Candles Affiliate disclaimer As an affiliate, we may earn a commission from qualifying purchases. We get commissions for purchases made through links on this website from Amazon and other third parties.