
Picture the comforting glow of a crackling fire and the gentle flickering light that dances through the room. Now envision creating that magical atmosphere in a candle made by you.
With just a few simple steps, you can create your very own woodwick candle, a masterpiece that combines the soothing scent of your choice with the soothing sounds of a crackling flame.
As an avid candle enthusiast, I have discovered the secrets to crafting the perfect woodwick candle, and I am thrilled to share them with you. In this article, I will guide you through the process, from gathering the materials to pouring the wax, ensuring that every detail is just right.
With a little time and creativity, you will soon find yourself basking in the gentle glow and enchanting crackle of your very own woodwick candle.
So, let’s dive in and unleash our inner candle-making maestro.
Key Takeaways
- Gather all necessary materials and tools before starting.
- Experiment with different scent combinations for unique fragrance.
- Trim wick to control flame size and prevent excessive smoke.
- Cooling time is crucial for wax to solidify properly and keep woodwick in place.

Vtopmart 25 PCS Clear Plastic Drawer Organizers Set, 4-Size Versatile Bathroom and Vanity Drawer Organizer Trays, Storage Bins for Makeup, Bedroom, Kitchen Gadgets Utensils and Office
- Versatile Drawer Organizer Set: Fits various home drawers and spaces
- Includes 25 Bins in 4 Sizes: Customizable storage options for different items
- Non-Slip and Durable Design: Silicone pads prevent slipping, sturdy plastic construction
As an affiliate, we earn on qualifying purchases.
Gather Your Materials and Tools
Before you can begin making a woodwick candle, you need to gather all of the necessary materials and tools. It’s important to have everything ready before you start, so you don’t have to interrupt the process later on.
First, make sure you have all the cleaning materials you’ll need. This includes rubbing alcohol or white vinegar to clean your containers, as well as paper towels or a clean cloth to wipe them dry. You’ll also need a heat-resistant container to melt your wax in, such as a double boiler or a metal pouring pot.
Next, it’s time to choose the scents for your woodwick candle. There are so many options to choose from, like floral, fruity, or even earthy scents. Consider the mood you want to create with your candle and pick scents that align with that. You can also experiment with different combinations to create your own unique fragrance.
Once you have all your materials and scents ready, it’s time to move on to the next step: preparing your workspace. This is where you’ll be creating your woodwick candle, so it’s essential to have a clean and organized area. Gather all your supplies and set them up in a way that is convenient for you.
Now, you’re ready to dive into the exciting process of making your very own woodwick candle.
Prepare Your Workspace
Before diving into the process of making a woodwick candle, it’s crucial to prepare your workspace properly.
Firstly, I always make sure to clean and clear my work area to ensure a clutter-free and organized environment.
Next, I set up a double boiler or wax melter to safely melt the wax without direct heat.
Lastly, I lay out all of my materials and tools in an orderly fashion so that everything is easily accessible during the candle-making process.
By taking these steps, I’m able to create beautiful woodwick candles with ease and efficiency.
Clean and Clear Your Work Area
Once you’ve gathered all the necessary materials, make sure your work area is clean and clear to create the perfect ambiance for making a woodwick candle.
Here are some cleaning tips and organizing techniques to help you get started:
-
Declutter: Remove any unnecessary items from your workspace to create a clutter-free environment. This’ll give you more space to work and minimize distractions.
-
Wipe down surfaces: Use a damp cloth or cleaning spray to clean your work area. Pay special attention to any sticky or greasy spots that may interfere with the candle-making process.
-
Organize your supplies: Sort your materials into separate containers or compartments to keep everything easily accessible. This’ll save you time and prevent you from misplacing important items.
-
Clear nearby surfaces: Make sure you have enough space to work comfortably by clearing any nearby surfaces. This’ll give you room to set up a double boiler or wax melter for the next step.
Now that your work area is clean and organized, let’s move on to setting up a double boiler or wax melter.
Set Up a Double Boiler or Wax Melter
Now that you’ve got your work area spick and span, it’s time to get your double boiler or wax melter all set up for the next step in creating your cozy masterpiece.
When it comes to melting wax for candle making, there are different methods you can use. Two popular options are a double boiler and a wax melter.
A double boiler is a simple setup where you place a smaller pot containing wax inside a larger pot filled with boiling water. This method provides gentle and even heat distribution, preventing the wax from scorching. On the other hand, a wax melter is specifically designed for melting wax, with a heated basin that maintains a controlled temperature. It can be more efficient for larger batches but requires a separate device.
Both methods have their pros and cons, so choose the one that suits your needs best.
Now, let’s move on to laying out your materials and tools for the next phase of candle making.
Lay Out Your Materials and Tools
First things first, gather all your materials and tools for the next phase of creating your cozy masterpiece and get ready to dive into the world of candle making.
Other tools needed for this step include a thermometer, a heat-resistant container, a scale, a stirring utensil, and a wick centering device.
When it comes to choosing the right type of wax, there are various options available such as soy wax, beeswax, and paraffin wax. Consider factors like burn time, scent throw, and eco-friendliness when making your decision. Each type of wax has its own unique characteristics that can affect the overall quality of your woodwick candle.
Now that you have all your materials and tools ready, it’s time to move on to the next step and melt the wax.
Melt the Wax
To start melting the wax for your woodwick candle, you’ll want to gather all your supplies and set up a double boiler. This is a wax melting technique that ensures a gentle and even heat distribution, preventing the wax from scorching or burning.
You’ll need a heat-resistant container to hold the wax, and a larger pot filled with water that the container can sit in. Place the pot on the stove and bring the water to a simmer. Then, place the wax in the heat-resistant container and set it inside the pot. As the water heats up, it’ll gently melt the wax. Stir occasionally to ensure even melting.
When it comes to choosing the right wax for your woodwick candle, there are a few options to consider. Soy wax is a popular choice as it burns cleanly and slowly, while also holding fragrance well. Beeswax is another great option, known for its natural scent and long burn time. If you prefer a more eco-friendly option, palm wax is a sustainable choice.
Now that the wax’s melted, it’s time to move on to preparing the wick.
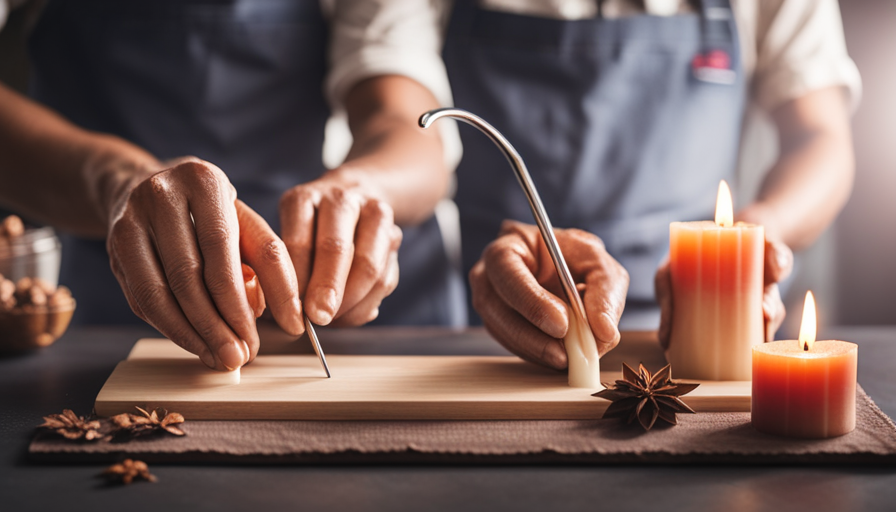
Prepare the Wick
Once the wax has transformed into a shimmering pool of liquid gold, it’s time to ignite the wick and set the stage for an enchanting dance of flickering flames. Before lighting the wick, it’s important to prepare it properly to ensure a clean and consistent burn.
The first step is to trim the wick to about 1/4 inch in length using a pair of sharp scissors. This’ll help control the size of the flame and prevent excessive smoke.
Next, it’s crucial to provide the wick with the necessary sustenance for a long-lasting burn. Gently straighten the wick and ensure it’s centered in the middle of the candle. This’ll allow for an even distribution of heat and wax, resulting in a more efficient burn. If the wick leans to one side, the candle may burn unevenly or not at all.
Now that the wick is trimmed and properly positioned, it’s time to move on to the next step: pouring the wax. As the liquid wax cascades into the awaiting vessel, it’ll surround the wick, forming the foundation for a beautiful and aromatic candle. The process of pouring the wax is a delicate art, requiring patience and precision.
So, let’s dive into this next phase and bring our woodwick candle to life.
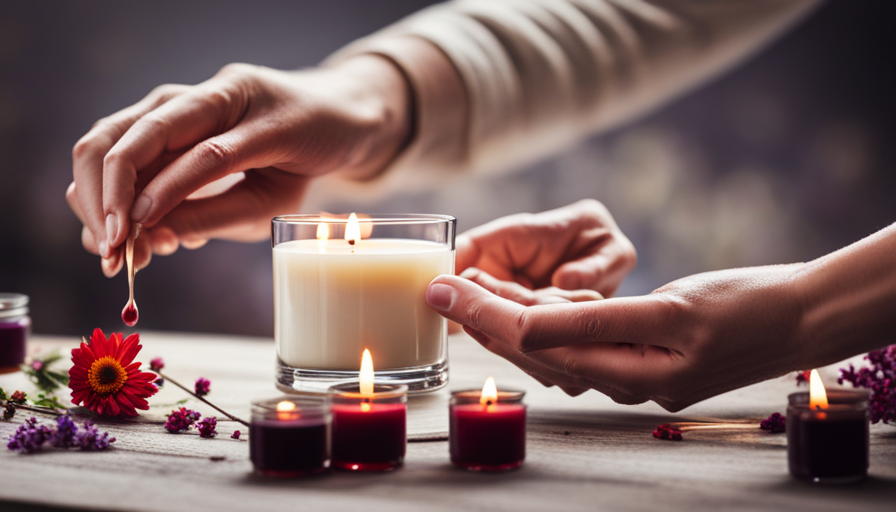
Pour the Wax
As the shimmering liquid gold transforms into a mesmerizing pool, the wax is gently poured, creating the foundation for a captivating dance of flickering flames. The pouring technique is crucial to ensure a perfect woodwick candle. Here’s what you need to know:
-
Choosing the right wax: Opt for a high-quality wax that’s specifically designed for candle making. Soy wax is a popular choice as it burns cleanly and evenly, while also providing a good scent throw.
-
Melting the wax: Use a double boiler or a wax melting pot to melt the wax. Make sure to heat it slowly and stir occasionally to prevent any hot spots. This’ll ensure that the wax melts evenly and smoothly.
-
Pouring the wax: Slowly and steadily pour the melted wax into the candle container, making sure to leave some space at the top. Avoid pouring too quickly, as this can create air bubbles or uneven surfaces. Take your time and pour with a steady hand to achieve a professional finish.
Now that the wax’s been poured, it’s time to let the candle cool and set, allowing the woodwick to become embedded in the wax and ensuring a strong bond. Transitioning into the next step, we’ll explore the art of letting the candle cool and set.
Let the Candle Cool and Set
Once the wax has been poured into the container and the woodwick has been centered, the next step is to let the candle cool and set. This is a crucial part of the candle-making process as it ensures that the wax solidifies properly and the woodwick stays in place. It’s important to allow sufficient cooling time, usually several hours or overnight, before attempting to trim the wick to the desired length.
By following these steps, you’ll be able to create a beautifully crafted woodwick candle that not only looks stunning but also burns evenly and effectively.
Allow Sufficient Cooling Time
Ensure you give the candle enough time to cool down before handling it. This is an important step in the candle-making process, as it allows the wax to fully solidify and set.
Here are some tips for achieving the perfect woodwick crackle and choosing the right fragrance for your woodwick candle:
- Use a woodwick that’s the appropriate size for your candle jar to ensure a satisfying crackling sound when lit.
- Experiment with different fragrances to find the one that best suits your preferences and creates a cozy atmosphere.
- Consider the season or occasion when selecting a fragrance, such as floral scents for spring or warm spices for the holidays.
Once the candle has cooled and set, it’s time to move on to the next step: trimming the wick to the desired length. This’ll help ensure a clean and steady burn.
Trim the Wick to the Desired Length
After allowing sufficient cooling time for your woodwick candle, it’s now time to trim the wick to the desired length. This step is crucial for ensuring a clean and even burn. Grab a pair of scissors or wick trimmers and gently trim the wick to about ⅛ – ¼ inch above the wax surface.
Trimming the wick to the right length prevents excessive flickering and minimizes soot buildup, creating a more enjoyable burning experience. Additionally, it helps maintain the candle fragrance by preventing the wick from absorbing too much wax, which can interfere with the release of the scent.
Once you’ve trimmed the wick, you’re now ready to enjoy your woodwick candle and bask in its warm, soothing glow.
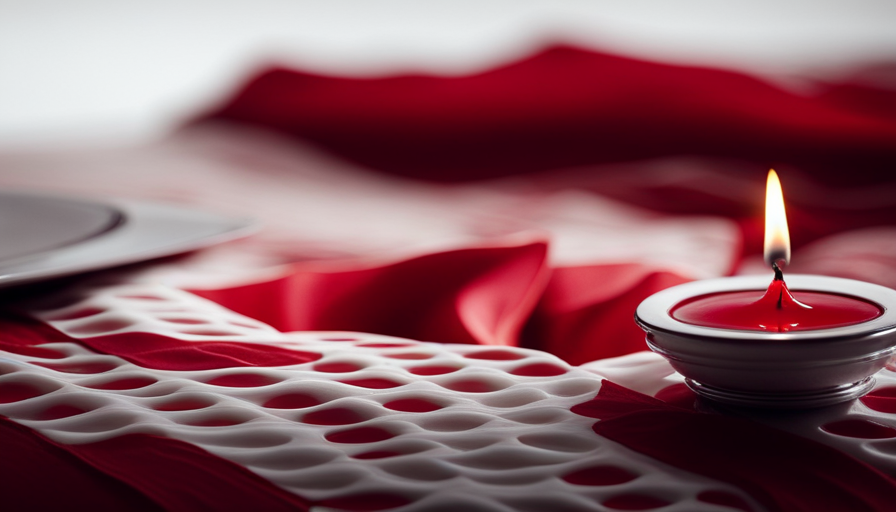
Enjoy Your Woodwick Candle
To fully embrace the cozy ambiance, bask in the soothing crackle of your woodwick candle as if it were a chorus of a thousand tiny fireflies serenading your senses. There’s something truly magical about the sound of a woodwick candle, reminiscent of a warm and crackling fireplace on a cold winter’s night. But enjoying your woodwick candle goes beyond just the sound it makes. It’s about creating an experience that engages all your senses.
When it comes to choosing the right fragrance for your woodwick candle, there are a few things to consider. First, think about the mood or atmosphere you want to create. Do you want a calming scent for relaxation or a vibrant scent for energizing your space? Second, consider the season or occasion. Fall may call for warm and spicy scents, while summer may call for fresh and citrusy fragrances. Lastly, don’t be afraid to experiment and mix different scents to create your own unique fragrance.
In addition to fragrance, you can also get creative with the design of your woodwick candle. Whether you want to create a beautiful centerpiece or a personalized gift, there are endless possibilities. Use different colored waxes, add dried flowers or herbs, or even embed small trinkets within the candle. Let your imagination run wild and create something truly special.
Now, let’s move on to troubleshooting tips to ensure that your woodwick candle burns perfectly every time.
Troubleshooting Tips
Having trouble with your woodwick candle? Let me help you troubleshoot and ensure a perfect burn every time.
When it comes to troubleshooting tips for woodwick candles, there are a few common mistakes that can easily be avoided. First, make sure you trim the wick to about ⅛ inch before lighting it. This helps prevent excessive smoke and ensures a clean burn.
Additionally, if you notice that the flame is too small or the wax is not melting evenly, it could be due to a draft in the room. Try moving your candle to a different location to see if that solves the issue.
Another common mistake is not letting the candle burn long enough during the first use. Woodwick candles require a longer initial burn to establish a full melt pool, so be patient and let it burn for at least two hours.
Lastly, if you experience any tunneling, where the wax only melts in the center, try using a candle warmer to melt the wax evenly.
By following these troubleshooting tips, you can enjoy a perfect woodwick candle burn every time.
Now, let’s move on to the next section and experiment with different variations.
Experiment with Different Variations
Discover the endless possibilities of unique scents and mesmerizing crackling sounds as you unleash your creativity with various candle variations. Experimenting with different scents is an exciting way to personalize your woodwick candles. Here are four variations to try:
-
Fruit Fusion: Infuse your candles with the refreshing aromas of citrus fruits like lemon, orange, and grapefruit. This vibrant combination will awaken your senses and create an invigorating atmosphere.
-
Cozy Cabin: Create a warm and inviting ambiance with scents like cedarwood, vanilla, and cinnamon. This combination will transport you to a cozy log cabin in the woods, perfect for a relaxing evening by the fire.
-
Floral Fantasy: Embrace the beauty of nature by blending floral scents like lavender, rose, and jasmine. This delicate combination will bring a touch of elegance to any space and create a serene environment.
-
Ocean Breeze: Capture the essence of the sea with scents like sea salt, coconut, and fresh linen. This combination will evoke feelings of relaxation and transport you to a tranquil beachside getaway.
In addition to experimenting with different scents, don’t be afraid to try different container options. Whether it’s a mason jar, a vintage teacup, or a sleek glass container, the vessel you choose can add a unique touch to your creation. So go ahead and explore the world of candle making, and share your creations with others to spread the joy of handmade woodwick candles.
Share Your Creation
Share the beauty and uniqueness of your handmade creations with others and spread the joy of personalized scented candles. There’s something truly special about sharing your experience and seeing the delight on someone’s face when they receive a candle that you’ve made with your own hands. It not only brings a sense of accomplishment but also allows you to showcase your creativity and talent.
When it comes to sharing your woodwick candle creations, there are a few ways to go about it. Firstly, consider hosting a candle-making party with friends and family. This way, you can share your knowledge and skills while everyone gets to create their own personalized candle. It’s a fun and interactive way to spend time together and create lasting memories.
Another way to share your creations is by selling them online or at local craft fairs. People are always on the lookout for unique and handmade items, and your woodwick candles fit the bill perfectly. Make sure to take high-quality photos and write detailed descriptions to showcase the beauty and craftsmanship of your candles.
When it comes to getting creative with colors, the possibilities are endless. Experiment with different shades and combinations to create candles that are visually stunning. Consider using vibrant hues for a bold and eye-catching look or opt for pastel tones for a more subtle and elegant aesthetic. Don’t be afraid to step outside of your comfort zone and try new color combinations – you might discover something truly amazing.
Remember, sharing your woodwick candle creations isn’t just about showing off your skills, but also about bringing happiness and joy to others. So, don’t be shy – share your creations and let the world experience the magic of handmade scented candles.
Frequently Asked Questions
How long does it take for the woodwick candle to cool and set?
It usually takes about 2-3 hours for a woodwick candle to cool and set completely.
I know what you’re thinking – that’s a long time to wait for a candle to be ready! But trust me, it’s worth it. By allowing the candle to cool slowly, you can prevent cracks from forming.
And if you’re experiencing uneven burning, try trimming the wick to 1/4 inch before each use to troubleshoot the issue.
Can I use a different type of wax instead of the one mentioned in the article?
Yes, you can definitely use different wax alternatives when making a woodwick candle. There are several options available, such as soy wax, beeswax, and paraffin wax. Each type has its own pros and cons. Soy wax is eco-friendly and produces a clean burn, while beeswax offers a natural scent and slower burn time. Paraffin wax, on the other hand, is cost-effective and provides excellent fragrance throw. It’s important to consider these factors when selecting the wax type for your woodwick candle.
How do I determine the correct size of the wick for my woodwick candle?
To determine the correct size of the wick for your woodwick candle, you need to consider two important factors: wick size and candle burning time. Choosing the right wick size is like finding the perfect balance between a gentle breeze and a roaring fire. It should be long enough to ensure a steady burn, yet not too long that it overwhelms the candle.
Additionally, consider the burning time you desire, as different wick sizes can affect how quickly or slowly your candle melts away.
What is the best type of wood to use for the woodwick?
The best woodwick material for a woodwick candle is typically a softwood, such as cedar or pine. These types of wood burn well and create a satisfying crackling sound when lit.
However, if you’re looking for woodwick alternatives, you can also consider using bamboo or cotton wicks. Bamboo wicks provide a similar crackling effect, while cotton wicks offer a more traditional burn.
Ultimately, the choice depends on personal preference and the desired ambiance for your candle.
Can I add fragrance or essential oils to my woodwick candle?
Yes, you can absolutely add fragrance or essential oils to your woodwick candle. Not only does this enhance the scent, but it also provides numerous benefits. Essential oils have therapeutic properties that can promote relaxation, reduce stress, and improve mood. By incorporating them into your woodwick candle, you create a soothing and aromatic ambiance in your space. The fragrance and essential oils add a personal touch, making your candle truly unique and enjoyable.
Conclusion
Making a woodwick candle is a fun and rewarding DIY project that anyone can enjoy. By following the steps outlined in this article, you can create a beautiful and fragrant candle that will enhance the ambiance of any space.
Whether you choose to make a simple vanilla-scented candle or get creative with unique variations like lavender and chamomile, the possibilities are endless. Imagine the joy of lighting your handmade woodwick candle and filling your home with a soothing aroma, creating a cozy atmosphere for relaxation and unwinding after a long day.