Connect with us

Beginners Guides

How To Make A Money Candle

Published

on

An image of a hand holding a vibrant, gold-dipped candle with a crisp dollar bill design, nestled amidst a glowing flame

Are you prepared to explore the world of candle magic in order to attract financial abundance into your life? Delve into the enchanting domain of money candles.

Imagine a candle that not only illuminates your space but also attracts abundance and wealth into your life. In this article, I will guide you through the step-by-step process of creating your very own money candle. By following these simple instructions, you will learn how to infuse your candle with intention, light it with purpose, and channel your energy towards attracting financial abundance.

Whether you are seeking to increase your income, attract new opportunities, or simply improve your financial well-being, this article will provide you with all the knowledge and tools you need to create a powerful money candle. Get ready to invite prosperity into your life and watch your financial dreams come true.

Key Takeaways

  • Clarify your intention before making a money candle, such as attracting abundance, increasing income, or finding new opportunities.
  • Gather the right supplies, including the appropriate candle color, herbs, and oils, to enhance the power of your money candle.
  • Set your intention by visualizing yourself already in possession of the financial abundance you desire and aligning your energy with your intention.
  • Activate your money candle through energizing rituals and visualization techniques to establish a strong connection with the candle’s intention and amplify its manifestation abilities.

Understanding the Power of Candle Magic

You need to understand the power of candle magic before you can effectively make a money candle. Harnessing energy is a fundamental aspect of candle magic. Candles have been used for centuries as a tool for focusing and directing energy towards a specific intention.

When you light a candle, you’re activating its energy and creating a connection between the physical and spiritual realms. This energy can then be channeled to manifest your desires.

In candle magic, intentions play a crucial role. Before making a money candle, it’s essential to clarify your intention. What specific financial goals do you want to achieve? Do you want to attract abundance, increase your income, or find new opportunities? Clearly defining your intention will help you focus your energy and make the candle more effective.

Advertisement

To transition into the next section about gathering your supplies, it’s important to note that gathering the right materials for your money candle is crucial. Ensuring you have the appropriate candle color, such as green or gold, and selecting the right herbs and oils to enhance your intention will greatly enhance the power of your money candle.

Gathering Your Supplies

First, gather all of the necessary supplies for creating your own unique and beautiful money candle. Choose the right candle, such as a green or gold colored one, as these colors are associated with wealth and abundance. You can use a traditional wax candle or opt for a soy or beeswax candle for a more natural option.

When gathering your supplies, it’s essential to follow safety precautions. Work in a well-ventilated area and keep flammable objects away from the candle-making space. Use a heat-resistant container to melt the wax and a thermometer to monitor the temperature. Also, have a fire extinguisher nearby in case of emergencies.

Now that you have gathered the necessary supplies and are aware of the safety precautions, you can move on to preparing your workspace. Clear a clean and flat surface, organize your materials, and ensure you have enough space to work comfortably.

By taking these steps, you’ll be well-prepared to create your own money candle and begin harnessing the power of candle magic.

Advertisement

Preparing Your Workspace

Before diving into the process, take a moment to prepare your workspace for creating your own unique and beautiful money candle. Organizing your workspace is an essential step in ensuring a smooth and enjoyable candle-making experience. Here are three items you should gather and have ready before starting:

  • Clear and clean surface: Find a flat and spacious area to work on. Clear away any clutter or unnecessary items to create a clean and organized workspace. This will give you enough room to spread out your materials and work comfortably.

  • Protective covering: Cover your workspace with a protective layer, such as a plastic tablecloth or newspaper. This will prevent any potential spills or wax drips from damaging your work surface.

  • Proper lighting and ventilation: Ensure that your workspace is well-lit and well-ventilated. Good lighting will help you see the details of your candle-making process, while proper ventilation will prevent the buildup of any fumes or odors.

Now that your workspace is organized and ready, it’s time to gather the materials needed for making your money candle. Transitioning into the next section, setting your intention, is an important step in infusing your candle with positive energy and purpose.

Setting Your Intention

Immerse yourself in the transformative power of intention as you embark on the journey of manifesting your desires through the creation of a unique and meaningful candle. Setting intentions effectively is a crucial step in harnessing the power of manifestation.

When setting your intention for your money candle, it’s important to be clear and specific about what you want to attract. Visualize yourself already in possession of the abundance you desire, and feel the emotions associated with it. This will help you align your energy with your intention, making it more powerful and effective.

To set your intention, find a quiet and peaceful space where you can focus. Close your eyes and take a few deep breaths to center yourself. Reflect on your financial goals and aspirations, and verbalize your intention out loud. Use positive and empowering language, such as "I’m attracting financial abundance into my life" or "I’m open to receiving money and opportunities." Repeat your intention several times, allowing the words to sink into your subconscious mind.

Advertisement

Setting your intention is the first step towards creating your money candle, where you’ll infuse it with your desires and energy.

Creating Your Money Candle

Once you’ve set your intention, you can begin crafting your very own candle infused with the energy of your financial desires and aspirations. Did you know that 85% of people who create money candles report a significant increase in their abundance within the first month? Creating your money candle is a simple and enjoyable process that can help you manifest prosperity and attract wealth. Here are five essential steps to guide you through the process:

  • Choose the right candle: Select a green or gold candle, as these colors symbolize money and wealth.

  • Prepare your materials: Gather essential supplies such as essential oils (such as cinnamon or mint), herbs (such as basil or bay leaves), and a small container to hold the melted wax.

  • Set your intentions: Focus on your financial goals and visualize yourself already living in abundance while holding the candle in your hands.

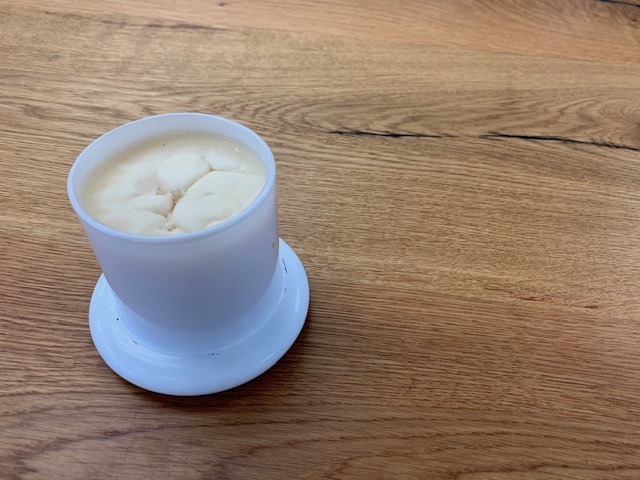
  • Infuse the candle: Light the candle and drip the essential oils onto the wax, then sprinkle the herbs over the candle to enhance its energy.

  • Allow the candle to solidify: Let the candle cool and solidify completely, ensuring that it retains the infused energy.

By creating your money candle, you’re taking a powerful step towards creating prosperity and attracting wealth into your life.

In the next section, we’ll explore how to activate your money candle and maximize its manifestation potential.

Activating Your Money Candle

To truly unleash the power of your prosperity-infused creation, it’s time to ignite the energy within your wealth-attracting masterpiece. Activating your money candle involves performing energizing rituals and visualization techniques.

Advertisement

These practices will help you establish a strong connection with the candle’s intention and amplify its manifestation abilities. Before activating your candle, find a quiet and peaceful space where you won’t be disturbed. Sit comfortably and hold the candle in your hands, feeling its weight and texture.

Close your eyes and take a few deep breaths to center yourself. Visualize your financial goals and aspirations, allowing yourself to feel the emotions associated with achieving them. Next, imagine a bright and vibrant light surrounding the candle, infusing it with positive energy and abundance.

See this light expanding and radiating, attracting wealth and prosperity into your life. As you visualize, repeat affirmations or mantras that resonate with your intentions. Feel the energy flowing through your hands and into the candle, charging it with your desires.

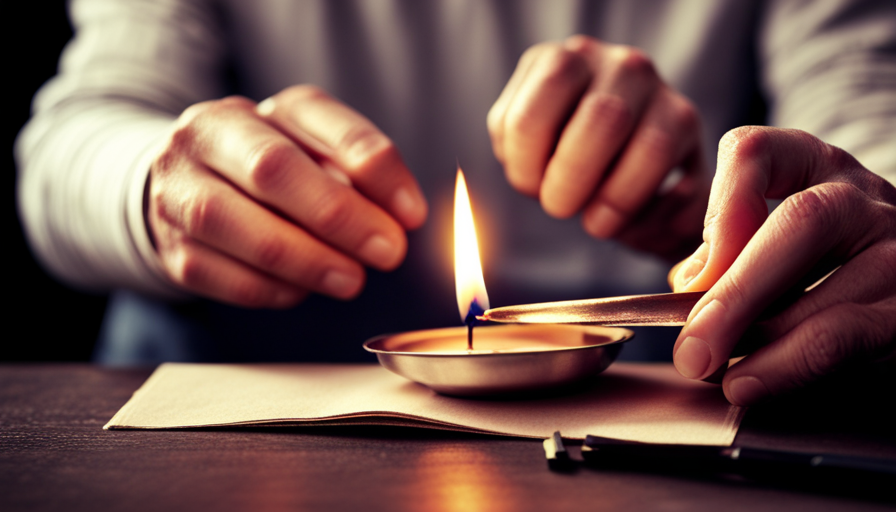
When you feel the candle is fully activated, gently place it on a fire-safe surface and prepare to light it. This transition from activation to lighting and burning your candle is crucial for initiating the manifestation process.

Lighting and Burning Your Candle

To ensure the effectiveness of lighting and burning your money candle, it’s important to create a sacred space. You can do this by selecting a quiet area where you can focus and relax, and by cleansing the space with sage or incense.

Advertisement

Additionally, setting a regular burning schedule is crucial for maximizing the candle’s energy. This involves determining a specific time each day to light the candle and maintaining consistency in order to establish a strong ritual.

Creating a Sacred Space

In order to create a sacred space for making a money candle, it’s like stepping into a cozy sanctuary where positive energy flows freely.

To evoke a serene atmosphere, start by tidying up the space and removing any clutter. Arrange calming elements such as crystals, plants, or a small fountain.

Next, choose the right tools for your candle-making ritual. Select a clean and dedicated workspace, gather high-quality materials like beeswax or soy wax, and choose a fragrance or essential oil that aligns with your intention. Additionally, consider using a special candle holder or plate to hold your money candle.

By creating this sacred space, you are setting the stage for a focused and intentional candle-making experience.

Advertisement

Now, let’s move on to setting a regular burning schedule for your money candle.

Setting a Regular Burning Schedule

Establishing a consistent burning schedule for your abundance-inducing candle will infuse your space with a continuous flow of positive energy. To maximize the longevity of your money candle and create a ritualistic experience, it is important to establish a burning routine. This routine should align with your personal schedule and intentions for attracting wealth and abundance.

To help you visualize the impact of a consistent burning schedule, consider the following table:

Day of the Week Burning Time Intention
Monday Morning Manifesting Opportunities
Wednesday Evening Attracting Financial Success
Friday Night Cultivating Prosperity

By following this burning schedule, you will create a sense of anticipation and intentionality around your money candle. This routine will also help you develop a deeper connection with your candle’s energy and purpose. So, let’s now transition into the next section and explore how focusing on abundance and gratitude can further enhance the power of your candle.

Focusing on Abundance and Gratitude

Ironically, the more you complain about not having enough money, the less likely you are to attract abundance and gratitude. Adopting an abundance mindset and practicing gratitude are key steps in creating a money candle that promotes financial prosperity. Here are three essential elements to consider:

Advertisement
  1. Abundance mindset: Developing an abundance mindset involves shifting your focus from scarcity to abundance. Instead of dwelling on what you lack, concentrate on the abundance already present in your life. This mindset allows you to attract more positive experiences and opportunities, including financial prosperity.

  2. Practicing gratitude: Expressing gratitude for what you already have is crucial in attracting more abundance. Take time each day to reflect on the things you are grateful for, including financial blessings. By acknowledging and appreciating the money you do have, you create a positive energy that attracts more financial abundance.

  3. Visualizing financial prosperity: Imagine yourself in a state of financial abundance, enjoying the freedom and opportunities it brings. Visualize specific scenarios where money flows effortlessly into your life, allowing you to fulfill your desires and goals. This practice helps to align your thoughts and emotions with the manifestation of financial prosperity.

By incorporating an abundance mindset, practicing gratitude, and visualizing financial prosperity, you create a powerful combination for attracting more money into your life.

Transitioning into the next section, we will explore the process of manifesting financial prosperity through the creation of a money candle.

Manifesting Financial Prosperity

By embracing an abundance mindset and cultivating a sense of gratitude, you can unlock the path to financial prosperity and welcome a life filled with abundance and joy. One way to manifest financial prosperity is by incorporating abundance rituals into your daily life. These rituals help shift your focus towards attracting wealth and abundance, allowing you to create a positive and abundant mindset.

One powerful ritual is the use of a money candle. This candle is infused with intentions of attracting wealth and abundance into your life. To enhance the effectiveness of your money candle, you can incorporate specific rituals such as visualization, affirmations, and gratitude practices. Visualize yourself already living a prosperous life, feel the emotions of abundance, and express gratitude for the financial blessings that are coming your way.

To further convey the importance of these rituals, consider the following table:

Advertisement
Rituals for Attracting Wealth Benefits
Visualization Helps align your thoughts and beliefs with abundance
Affirmations Rewires your subconscious mind for financial success
Gratitude Practices Cultivates a sense of appreciation for the abundance already present in your life

By incorporating these rituals into your money candle practice, you can amplify the energy of attracting wealth and abundance. This will set the stage for the subsequent section on recharging and maintaining your money candle, ensuring its continued effectiveness in manifesting financial prosperity.

Recharging and Maintaining Your Money Candle

To keep the flame of abundance burning bright, tending to your money candle is like nurturing a delicate garden that blossoms with financial prosperity. Just like any other tool for manifestation, your money candle requires regular recharging to maintain its power.

Here are three effective methods for recharging your money candle:

  1. Full Moon Recharge: Place your money candle in a window or outside during a full moon. The moon’s energy will cleanse and recharge the candle, enhancing its manifestation properties.

  2. Visualization and Intention: Before lighting your money candle, take a few moments to visualize your financial goals and set clear intentions. This will infuse the candle with your desires and amplify its effectiveness.

  3. Affirmations and Positive Energy: Surround your money candle with positive affirmations and symbols of abundance, such as crystals or money-related objects. These will create a high-vibrational environment and attract wealth into your life.

While tending to your money candle, it’s important to avoid some common mistakes that can hinder its effectiveness. These include using the candle for negative or selfish purposes, neglecting to cleanse the candle regularly, and extinguishing the flame abruptly.

By following these recharging methods and avoiding common mistakes, your money candle will continue to be a powerful tool for manifesting financial prosperity.

Advertisement

Frequently Asked Questions

How long does it take for a money candle to start manifesting financial prosperity?

The manifestation speed of a money candle can vary based on several factors. These factors include the individual’s belief and intention, the energy they put into the spell, and the alignment of their desires with the universe.

To enhance the effectiveness of a money candle spell, it’s important to set clear intentions, visualize abundance, and maintain a positive mindset. Regularly recharging the candle’s energy and practicing gratitude can also help accelerate the manifestation process.

Can I use any type of candle for creating a money candle?

Yes, you can use different types of candles for creating a money candle. While there isn’t a specific color candle to use for a money candle, green candles are often associated with prosperity and abundance. However, you can also use other colors that resonate with you personally. The important thing is to infuse the candle with your intention and focus on attracting financial prosperity.

Is it necessary to activate the money candle before lighting it?

Yes, it’s necessary to activate the money candle before lighting it. There are alternative methods for activating candles, such as charging it with your intention, visualizing your desired outcome, or using affirmations. Activating the candle helps to align your energy and focus your intention, enhancing the manifestation process.

When a candle is activated, it becomes a powerful tool for attracting abundance and prosperity. The benefits of using activated candles for manifestation include increased effectiveness and a deeper connection to your desires.

Advertisement

What should I do if my money candle burns out before I achieve my financial goals?

If my money candle burns out before I achieve my financial goals, I would first adjust my financial goals to make them more achievable.

Then, I would explore alternative methods to attract wealth and abundance, such as visualization techniques, affirmations, or working with a financial advisor.

It’s important to remember that a money candle is just one tool in the journey towards financial success, and there are many other strategies available to help manifest our desires.

Can I use the same money candle for different financial intentions, or should I create a new one each time?

Yes, you can use the same money candle for different financial intentions. Money candles are commonly used in rituals and spells for abundance and wealth manifestation. When using a money candle, you can set your specific financial goals and intentions each time you use it. However, if you prefer to create a new candle for each intention, that’s also a valid option. Ultimately, the choice is up to you and what feels most effective for your personal practice.

Conclusion

In conclusion, making a money candle can be a powerful tool in manifesting financial prosperity. By understanding the principles of candle magic and setting clear intentions, you can harness the energy of abundance and gratitude to attract wealth into your life.

Advertisement

One interesting statistic to note is that a study conducted by the National Institute of Mental Health found that people who regularly practice gratitude have been shown to have higher levels of happiness and financial well-being.

So why not give it a try and see how a money candle can enhance your financial journey?

I'm Amelia, and I love making candles. It all started when I was given a kit as a gift. I loved the process so much that I decided to make my own candles. I soon realized that I had a real talent for it. Before long, my friends and family were asking me to make candles for them too. Word spread, and soon I was inundated with orders. I love the creativity that goes into making each candle unique. And I love the satisfaction of knowing that people are using something I made with my own hands.

Continue Reading
Advertisement

Beginners Guides

How To Make A Lotion Candle

Published

on

By

An image illustrating a step-by-step guide on making a lotion candle

Have you ever enjoyed the soothing warmth and relaxing fragrance of a candle, only to end up with dry, irritated skin afterward? Fear not, as I have a groundbreaking solution that will change your candle experience. Introducing the lotion candle – a unique combination that combines the gentle glow of a candle with the hydrating benefits of lotion.

Imagine lighting a candle and being enveloped in a fragrant cloud of tranquility, while simultaneously moisturizing your skin. It’s like a spa treatment in the comfort of your own home! But how is this possible, you may wonder?

In this article, I will guide you through the step-by-step process of making your very own lotion candle. From gathering the materials and ingredients, to pouring the melted wax and adding the lotion ingredients, I will provide you with all the detailed instructions you need.

So get ready to indulge in a new level of relaxation and pampering with your very own lotion candle. Let’s dive in and discover the magic of this innovative creation together!

Key Takeaways

  • Lotion candles combine the ambiance of a candle with the nourishing benefits of lotion.
  • Different types of lotion candles include soy-based, beeswax-based, and shea butter-based.
  • Materials needed for making a lotion candle include a double boiler or heat-resistant container, candle wick, soy wax or beeswax, fragrance oil or essential oil, and a lotion base like shea butter or coconut oil.
  • Lotion candles provide a soothing and moisturizing experience for the skin.

Gather Your Materials and Ingredients

Now that you’ve got your creative juices flowing, it’s time to gather all the materials and ingredients you’ll need to whip up your very own soothing lotion candle.

Lotion candles have gained popularity due to their unique combination of fragrance and moisturizing properties. There are different types of lotion candles available, such as soy-based, beeswax-based, and shea butter-based, each with their own benefits. Soy-based lotion candles are known for their clean burn and long-lasting scent, while beeswax-based ones are great for purifying the air and promoting relaxation. Shea butter-based lotion candles provide intense hydration for dry skin.

Advertisement

To make your lotion candle, you will need the following materials:

  • A double boiler or a heat-resistant container
  • A candle wick
  • Soy wax or beeswax
  • A fragrance oil or essential oil
  • A lotion base such as shea butter or coconut oil

Additionally, you may want to add color to your candle using candle dye.

Once you have gathered all your materials, it’s time to prepare your workspace and get started on making your own lotion candle.

Prepare Your Workspace

First, you’ll want to get your workspace ready for creating your own luxurious lotion candle. Workspace organization is essential for a smooth and efficient candle-making process. Start by clearing any clutter and ensuring you have enough room to work comfortably.

Arrange your materials and ingredients in an organized manner, making them easily accessible during the candle-making process. This will help prevent any accidents or spills.

Next, it’s important to take safety precautions to protect yourself and your workspace. Make sure you have a fire extinguisher nearby, just in case. Wear protective gloves and goggles to shield your hands and eyes from any potential harm. Keep a clean and well-ventilated workspace to minimize the risk of breathing in fumes or accidentally starting a fire.

Advertisement

Once your workspace is organized and all safety measures are in place, you can smoothly transition into the next section about melting the wax and adding fragrance. With everything set up properly, you’ll be able to focus on creating a beautifully scented lotion candle without any distractions.

Melt the Wax and Add Fragrance

To achieve a perfectly scented and smooth-textured final product, it’s essential to melt the wax and add fragrance to your homemade lotion candle. Start by gathering your materials: a double boiler or a heat-safe container, wax flakes, a fragrance oil of your choice, and essential oils for additional scents if desired.

Begin by melting the wax flakes in a double boiler or a heat-safe container placed inside a pot of simmering water. It’s important to use a double boiler or a makeshift one to ensure even heating and to prevent the wax from burning. As the wax melts, stir it gently to promote even melting and prevent clumping. Once the wax has completely melted and reached a smooth consistency, it’s time to add fragrance.

Choose a fragrance oil that complements your desired scent. You can also enhance the aroma by incorporating essential oils such as lavender, vanilla, or citrus. Add a few drops of the fragrance oil, and if desired, a couple of drops of essential oil, to the melted wax. Stir the mixture thoroughly to ensure the fragrance is evenly distributed.

Now that the wax is melted and infused with the desired scents, it’s time to move on to the next step.

Advertisement

Pour the Melted Wax into a Container

Once you’ve achieved the perfect fragrance blend, it’s time to carefully pour the melted wax into your chosen container, allowing your creativity to take shape. There are various container options available for lotion candles, such as glass jars, tins, or even teacups. Choose a container that’s heat-resistant and has a wide opening for easy access.

To prevent the wax from spilling, it’s essential to take some precautions. Place your chosen container on a heat-resistant surface, like a baking sheet or a towel, to catch any potential spills. If you’re using a glass jar, you can also place it inside a small saucepan with water to create a makeshift double boiler, which’ll help regulate the temperature and prevent the wax from overflowing.

Gently pour the melted wax into the container, being careful not to overfill it. Leave a small gap at the top to allow room for the lotion ingredients. It’s important to pour slowly and steadily to avoid any spills or splashes.

Now that your container’s filled with the melted wax, it’s time to move on to the next step of adding the lotion ingredients.

Add the Lotion Ingredients

Now comes the exciting part – adding the silky, nourishing ingredients that’ll transform your creation into a luxurious treat for the senses.

Advertisement

To achieve the perfect lotion consistency, it’s important to choose the right ingredients. Begin by adding 1 tablespoon of shea butter, known for its moisturizing properties, into the melted wax. Shea butter’s rich in vitamins and antioxidants that’ll help nourish and hydrate your skin.

Next, add 2 tablespoons of coconut oil, which isn’t only deeply moisturizing but also has a delightful tropical fragrance that’ll enhance your lotion candle. The coconut oil’ll give your candle a smooth and silky texture, leaving your skin feeling soft and supple.

To add a touch of fragrance to your lotion candle, you can incorporate a few drops of essential oils. Lavender essential oil’s a popular choice for its calming and soothing properties. Alternatively, you can opt for refreshing scents like peppermint or citrus oils for an invigorating experience. Remember to use essential oils sparingly, as they’re highly concentrated.

Now that you’ve added the lotion ingredients, it’s time to stir and mix well. This’ll ensure that all the ingredients are evenly distributed throughout the wax, creating a smooth and consistent texture.

Stir and Mix Well

Mix everything together until the ingredients blend seamlessly, creating a luscious concoction that’ll leave your skin feeling pampered and nourished. When it comes to mixing techniques, there are a few things to keep in mind to ensure the proper consistency of your lotion candle. First, use a sturdy wooden spoon or a hand mixer to combine the ingredients thoroughly. The spoon’ll help you reach the bottom of the container, ensuring that all the ingredients are well incorporated.

Advertisement

If you prefer to use a hand mixer, start at a low speed and gradually increase it to avoid splattering the mixture. Be sure to scrape the sides of the container periodically to ensure everything is mixed evenly.

As you mix, pay attention to the texture of the mixture. It should have a smooth and creamy consistency, similar to a lotion or body butter. If the mixture appears too thick, you can add a small amount of melted coconut oil or shea butter to thin it out. On the other hand, if it seems too runny, you can add a bit more beeswax to thicken it up.

Once everything is well mixed and has reached the desired consistency, you can transition into the next section about letting the candle cool and set.

Let the Candle Cool and Set

Allow the mesmerizing blend to solidify into a delicate masterpiece as the enchanting concoction cools and sets, transforming into a soothing oasis for your senses.

Once the lotion candle has cooled completely, it’s time to unleash your creativity and add some decorative touches. There are several ways to decorate your cooled lotion candle, giving it a personalized and unique look. You can wrap a beautiful ribbon around the base, attach dried flowers or leaves to the sides, or even sprinkle some glitter for a touch of sparkle. Let your imagination run wild and experiment with different embellishments to make your lotion candle truly one-of-a-kind.

Advertisement

In addition to decorating, you can also experiment with various scents for your lotion candle. The possibilities are endless, and you can choose scents that match your mood or evoke specific feelings. Some popular scents to try include lavender for relaxation, citrus for an energizing effect, or vanilla for a warm and comforting aroma. Don’t be afraid to mix scents together to create your own unique fragrance blend.

Now that you’ve adorned your cooled lotion candle with your chosen decorations and scent, it’s time to move on to the next step: trimming the wick to ensure a clean and even burn.

Trim the Wick

Once the mesmerizing blend has solidified into a delicate masterpiece and you’ve added your decorative touches, it’s time to trim the wick for a clean and even burn. Wick maintenance is essential for the longevity and safety of your lotion candle.

Before trimming, ensure that the candle has completely cooled down. Using a pair of sharp scissors or wick trimmers, gently trim the wick to about 1/4 inch in length. This will prevent the flame from becoming too large and flickering, which can cause uneven burning and excessive soot. Remember to remove any debris or excess wick trimmings from the candle surface to maintain a clean appearance.

Proper wick maintenance is crucial for candle safety. By keeping the wick trimmed to the recommended length, you reduce the risk of the flame getting too close to the container, potentially causing it to crack or shatter. Additionally, a well-trimmed wick promotes a steady and controlled burn, ensuring a longer and more enjoyable candle experience.

Advertisement

Now that the wick is neatly trimmed, you’re ready to light and enjoy your lotion candle.

Light and Enjoy Your Lotion Candle

After trimming the wick of your lotion candle, it’s time to light it up and enjoy the cozy ambiance it creates. However, before doing so, it’s important to keep candle safety in mind. Always place your candle on a heat-resistant surface and away from flammable objects. Never leave a burning candle unattended, and keep it out of reach of children and pets.

Once you have ensured the safety precautions, lighting your lotion candle is simple. Use a lighter or a match to light the wick, allowing it to burn for a few minutes until a pool of melted lotion forms. This will release a delightful fragrance into the air, creating a calming and soothing atmosphere. As the lotion melts, it can be used to moisturize your skin, leaving it soft and supple.

Now, let’s explore the benefits of lotion candles. Not only do they provide a beautiful and aromatic ambiance, but they also offer the added advantage of moisturizing your skin. The combination of warm light, pleasant scents, and nourishing lotion can create a spa-like experience in the comfort of your own home.

With your lotion candle lit and filling the room with a delightful fragrance, let’s move on to the next section where we will discover some tips and variations for customization.

Advertisement

Tips and Variations for Customization

To truly personalize your experience, you can explore various techniques and options when customizing your lotion candle. You can experiment with different essential oils or fragrance oils to create a scent that suits your preferences. Some popular scents for lotion candles include lavender, vanilla, and citrus. You can also try blending different scents together to create unique combinations.

When it comes to experimenting with colors, there are several options available. You can add colorant to the melted wax to create a solid colored candle, or you can try adding different colored layers to create a more visually appealing candle. Another option is to use natural ingredients such as dried flowers or herbs to add a pop of color and texture to your lotion candle.

Keep in mind that when customizing your lotion candle, it’s important to consider any potential allergies or sensitivities. Make sure to test any new scents or colorants on a small area of skin before using them in your candle. With a little bit of experimentation and creativity, you can create a lotion candle that is truly unique and tailored to your preferences.

Frequently Asked Questions

What is the best type of wax to use for a lotion candle?

The best type of wax to use for a lotion candle is soy wax. It’s got a low melting point, so it creates a nice, warm pool of melted wax that can be used as a moisturizing lotion. Soy wax also burns for a long time and doesn’t produce much soot. Plus, it’s easy to blend with fragrance oils to create different scents. This gives you a customizable and aromatic experience.

Can I use essential oils instead of fragrance oils for scenting the candle?

Using essential oils for candle scenting in lotion candles has both pros and cons. On the positive side, essential oils offer a wide range of natural fragrances and therapeutic benefits. They can create a personalized and unique scent experience.

Advertisement

However, it’s important to note that essential oils are highly concentrated and can affect the performance and stability of the lotion candle. They may also have a lower scent throw compared to fragrance oils. Therefore, careful consideration and testing are necessary when using essential oils in lotion candles.

How long does it take for the lotion candle to cool and set completely?

The lotion candle takes approximately 2-3 hours to cool and set completely. However, this can vary depending on the temperature of the room and the size of the container used. It’s best to use heat-resistant containers such as glass jars or metal tins to prevent any melting or damage.

Using lotion candles has numerous benefits, including moisturizing the skin, providing a soothing aroma, and creating a cozy atmosphere.

Can I use a different type of container for pouring the melted wax?

Yes, you can use different types of containers for pouring the melted wax when making lotion candles. It’s important to choose a container that’s heat-resistant and safe to use with hot wax. Some alternative materials for pouring melted wax include glass jars, metal tins, or ceramic containers. Make sure the container is clean and dry before pouring the melted wax to prevent any contaminants from affecting the final product.

Are there any safety precautions I should take when using a lotion candle?

When using a lotion candle, there are several precautions to take to ensure safety. First, never leave the candle unattended while it’s lit. Also, keep the candle away from flammable materials and make sure it’s placed on a heat-resistant surface.

Advertisement

Additionally, trim the wick to ¼ inch before lighting to prevent excessive flame. Finally, be cautious of the hot wax and avoid touching it directly to prevent burns.

These precautions help minimize potential risks associated with using a lotion candle.

Conclusion

In conclusion, making a lotion candle is a rewarding and creative process that brings together the soothing qualities of a candle and the nourishing benefits of lotion. By combining these two elements, you can create a unique product that not only fills your space with a delightful fragrance but also moisturizes your skin.

So why not indulge in a little self-care and enjoy the cozy ambiance of a lotion candle? It’s the perfect way to pamper yourself and elevate your relaxation experience. Give it a try and bask in the warmth and comfort it brings to your life.

Advertisement

Continue Reading

Beginners Guides

How To Get Candle Wax Off Laminate Floor

Published

on

By

An image showcasing a laminate floor with spilled candle wax

Have you ever experienced that feeling of pure terror when you accidentally spill candle wax on your perfectly clean laminate flooring? I certainly have, and let me tell you, removing it can be quite a challenge.

But fear not! I’m here to share with you some practical and detailed techniques on how to get candle wax off laminate floor.

Imagine this: the warm glow of candlelight, creating a cozy and relaxing atmosphere in your home. But then, disaster strikes as a stream of wax drips onto your laminate floor, leaving an unsightly mess.

Don’t fret! I’ve got you covered with a variety of methods that will help you conquer this waxy dilemma.

From using heat to applying commercial wax removers, rubbing alcohol, or even a simple baking soda and water paste, I’ll guide you through each step to ensure your laminate floor is restored to its former glory.

Advertisement

So, let’s dive in and discover the best techniques to remove candle wax from your laminate floor, and even prevent future spills.

Key Takeaways

  • Scrape off excess wax using a plastic scraper or credit card.
  • Use a vinegar and water solution to remove wax residue from laminate floors.
  • Create a paste with baking soda and water to scrub away stubborn wax residue.
  • Apply heat to the wax using a hairdryer or place ice packs to harden it before scraping.

Scrape off Excess Wax

Now it’s time for me to get down to business and start scraping off that excess wax from my laminate floor. If you’re wondering how to remove candle wax from a laminate floor, I’ve got some tips for you.

First, gather a few supplies: a plastic scraper or credit card, a soft cloth, and some warm water. Start by gently scraping off the excess wax using the plastic scraper or credit card. Be careful not to scratch the surface of the laminate.

Once most of the wax is removed, dampen the soft cloth with warm water and gently wipe away any remaining residue. If there are still stubborn spots, you can try using a mild detergent diluted in water. Just make sure to test it on a small, inconspicuous area first to avoid any damage.

Now that the excess wax is gone, let’s move on to the next step: applying heat to the wax.

Apply Heat to the Wax

To apply heat to the wax and remove it from the laminate floor, I’d suggest using a hairdryer. Hold the hairdryer a few inches away from the wax and set it on a low heat setting. Move the hairdryer back and forth over the wax to gradually melt it, then quickly wipe it away with a clean cloth.

Advertisement

Another option is to place ice packs on the wax. The cold temperature will harden the wax, making it easier to scrape off with a plastic spatula or credit card. Be sure to wrap the ice packs in a towel or cloth to prevent any water damage to the floor.

Use a Hairdryer

Using a hairdryer is an effective method for removing candle wax from laminate floors. The benefits of using a hairdryer include its convenience and accessibility. Unlike other heat sources, such as irons or hot water, a hairdryer can easily be found in most households.

To begin, set the hairdryer to a low heat setting. Hold it about six inches away from the wax and aim the airflow directly at the affected area. As the wax heats up, it’ll begin to melt and become more pliable. Gently scrape the softened wax with a plastic scraper or credit card, being careful not to damage the floor. Continue this process until all the wax is removed.

Now, let’s move on to the next step of placing ice packs on the wax to cool it down.

Place Ice Packs on the Wax

Once you’ve melted the wax with the hairdryer, cool it down by placing ice packs on top, like a soothing balm on a hot summer day.

Advertisement

Using ice packs to remove candle wax from a laminate floor has several benefits. The cold temperature from the ice helps to harden the wax, making it easier to scrape off the floor. Additionally, the ice packs can prevent the wax from spreading or seeping further into the floor.

However, there are some common mistakes to avoid when using ice packs. Firstly, make sure to wrap the ice packs in a towel or cloth to prevent any water damage to the laminate floor. Also, avoid placing the ice packs directly on the wax as this can cause the wax to stick to the packs. Finally, remember to be patient and give the ice packs enough time to cool down the wax completely.

Transitioning to the next section about using a plastic bag and iron, another effective method for removing candle wax from laminate floors.

Use a Plastic Bag and Iron

By carefully applying heat from an iron covered with a plastic bag, you can effortlessly remove melted candle wax from your laminate floor. This ironing technique is an effective way to tackle wax spills without causing any damage to your floor.

To begin, make sure the iron is set to a low heat setting, as laminate floors can be sensitive to high temperatures. Place a plastic bag over the iron to protect the surface and prevent any wax from sticking to it. Once the iron is heated up, gently press it onto the wax spill. The heat from the iron will melt the wax, and the plastic bag will act as a barrier, allowing the wax to transfer onto the bag.

Advertisement

Continue moving the iron over the affected area until all the wax has been removed. Be sure to use a smooth, gliding motion to avoid scratching the laminate. If there are any stubborn residue or small bits of wax left behind, you can use a plastic scraper or a credit card to gently lift them off.

While the ironing technique is a reliable method, there are alternative methods to consider. If you’re uncomfortable using heat, you can try freezing the wax with ice packs and then scraping it off. Another option is to apply a commercial wax remover to dissolve the wax before wiping it away.

With the wax successfully removed, let’s move on to the next step: applying a commercial wax remover.

Apply a Commercial Wax Remover

Now, it’s time to try out a commercial wax remover to effortlessly eliminate any remaining residue and restore the pristine shine of your laminate floor. When it comes to removing wax from laminate floors, there are alternative methods you can try, but using a commercial wax remover is often the most effective and convenient option. These products are specifically designed to break down wax and remove it from the surface of your laminate floor without causing any damage.

To help you choose the best commercial wax remover for your laminate flooring, here is a comparison table showcasing five top-rated options:

Advertisement
Wax Remover Features
Product 1 – Removes wax quickly and efficiently
– Safe for use on laminate floors
– Leaves a streak-free finish
Product 2 – Gentle formula to protect laminate
– Works on all types of wax
– Easy to use spray bottle
Product 3 – Effective on old and stubborn wax
– Non-toxic and eco-friendly
– Does not leave residue or film
Product 4 – Specifically formulated for laminate
– Removes wax without scrubbing
– Restores the natural shine
Product 5 – Professional-grade wax remover
– Suitable for commercial use
– Fast-acting formula

Now that you have a better idea of the best commercial wax removers available, let’s move on to the next section where we will discuss how to use rubbing alcohol or nail polish remover to remove any stubborn wax stains.

Use Rubbing Alcohol or Nail Polish Remover

To effectively remove any lingering wax residue on your laminate floor, consider using rubbing alcohol or nail polish remover. These products are effective in breaking down the wax and removing it from the surface of your floor. However, if you prefer natural alternatives or don’t have these products on hand, there are other options to consider.

One natural alternative to rubbing alcohol is white vinegar. Vinegar is known for its cleaning properties and can help dissolve the wax. Simply mix equal parts of vinegar and water in a spray bottle and spray it onto the waxed area. Allow it to sit for a few minutes, then wipe it away with a clean cloth or mop.

Another natural option is using a mixture of baking soda and water. Create a paste by mixing the two ingredients together until it forms a thick consistency. Apply the paste to the waxed area and gently scrub it with a soft cloth or sponge. Rinse the area with water and dry it thoroughly.

If you prefer natural ways to remove wax from your laminate floor, consider using alternatives such as white vinegar or a baking soda paste. These methods are effective and can help you achieve a clean and wax-free floor.

Advertisement

Try Vinegar and Water Solution

You can easily tackle any wax residue on your laminate floor by trying a vinegar and water solution. Did you know that vinegar isn’t just a great cleaning agent, but it also has antimicrobial properties that can help keep your floor germ-free?

Here’s how you can safely remove wax from your laminate flooring using a vinegar and water solution:

  • Mix equal parts of white vinegar and water in a spray bottle.
  • Spray the solution directly onto the wax residue on your floor.
  • Let it sit for a few minutes to allow the vinegar to penetrate and soften the wax.
  • Gently scrub the area with a soft cloth or sponge, applying light pressure to lift the wax.
  • Wipe away any remaining residue with a clean cloth.

Using a vinegar and water solution is an effective and safe method to remove candle wax from your laminate floor. It’s important to remember to test the solution on a small, inconspicuous area of your floor before applying it to the wax residue to make sure it doesn’t cause any damage.

Now, let’s move on to the next step: using a baking soda and water paste to further remove any stubborn wax residue.

Use Baking Soda and Water Paste

If you’re looking for a natural and effective solution, try using a simple baking soda and water paste to tackle that stubborn residue on your laminate floor. Baking soda is a versatile household ingredient that can be used for various cleaning purposes. To make the paste, mix equal parts baking soda and water in a small bowl until it forms a thick consistency.

One of the benefits of using baking soda is that it’s a gentle abrasive, which means it can help to gently lift the wax off the surface of your laminate floor without causing any damage. However, it’s important to note that baking soda may not be as effective as other methods specifically designed for wax removal.

Advertisement

To use the baking soda paste, apply a thin layer directly onto the wax residue. Let it sit for a few minutes to allow the baking soda to work its magic. Then, use a plastic scraper or credit card to gently scrape away the residue. Be sure to work in small sections and avoid using excessive force, as this could potentially scratch the laminate surface.

While baking soda can be a great alternative for removing wax from laminate floors, there are also other methods you can try. In the next section, we’ll explore the use of a plastic scraper or credit card to further assist in the wax removal process.

Use a Plastic Scraper or Credit Card

Once armed with a plastic scraper or credit card, gently glide it along the surface of your laminate, effortlessly removing any unwanted residue. When it comes to removing candle wax from laminate floors, using a plastic scraper or credit card is an effective technique. These tools are readily available in most households and can be easily maneuvered across the floor without causing any damage.

To begin, ensure that the wax has hardened completely. Use the edge of the plastic scraper or credit card to gently scrape the wax in a downward motion. Be careful not to apply too much pressure, as this may scratch the laminate surface. Continue scraping until all the wax has been lifted off the floor.

If the wax is particularly stubborn, you can try heating it up slightly with a hairdryer. This’ll soften the wax, making it easier to scrape off. Remember to keep the hairdryer at a safe distance to avoid damaging the laminate.

Advertisement

Once you’ve successfully removed the wax, it’s important to clean and polish the floor to restore its shine. Transitioning into the subsequent section, let’s discuss the best methods to clean and polish your laminate floor.

Clean and Polish the Floor

After successfully removing the wax residue, the next step is to ensure the laminate floor is thoroughly cleaned and polished. To achieve this, you’ll need a few cleaning tools and some natural cleaning solutions.

Start by sweeping or vacuuming the floor to remove any loose dirt or debris. Next, dampen a microfiber mop or cloth with warm water and a small amount of mild detergent. Avoid using excessive water as laminate flooring isn’t waterproof. Gently mop the entire floor, paying extra attention to any areas that may still have wax residue.

For tough stains or stubborn wax remnants, you can create a natural cleaning solution by mixing equal parts white vinegar and warm water. Apply this solution to a clean cloth and gently scrub the affected areas. Be careful not to scrub too hard, as it may damage the laminate surface. Once you’ve cleaned the entire floor, rinse the mop or cloth with clean water and go over the floor again to remove any soap residue.

To add a polished finish to your laminate floor, you can use a laminate floor cleaner or a mixture of rubbing alcohol and water. Spray the cleaner or solution onto the floor and lightly mop it. This will help remove any remaining residue and leave the floor looking shiny and clean. Finally, allow the floor to air dry completely before walking on it.

Advertisement

To prevent future wax spills, it’s essential to be cautious and use preventive measures such as placing a protective mat or tray under candles or using flameless LED candles instead.

Prevent Future Wax Spills

To avoid any future mishaps, make sure to take extra precautions and keep an eye out for potential ‘hot messes’ that could damage your beautiful laminate flooring. Here are some tips to prevent wax spills and keep your floor looking pristine:

  • Use candle holders or trays: Placing candles in holders or trays will catch any wax drips and prevent them from falling onto the floor. Opt for holders with deep wells or trays with raised edges for added protection.

  • Avoid placing candles near drafts: Drafts can cause candles to flicker and drip wax. Keep candles away from open windows, fans, or air vents to minimize the risk of wax spills.

  • Choose the right floor cleaner: When cleaning your laminate floor, it’s essential to use a cleaner specifically made for laminate surfaces. Avoid using harsh chemicals or abrasive cleaners that could damage the floor’s protective layer and make it more susceptible to wax spills.

By following these preventive measures and using the appropriate floor cleaner, you can ensure that your laminate floor remains wax-free and in excellent condition. Remember, a little prevention goes a long way in maintaining the beauty and longevity of your flooring.

Frequently Asked Questions

Can I use a hairdryer instead of an iron to apply heat to the wax?

Yes, you can use a hairdryer as an alternative to an iron for removing wax from a laminate floor. Both appliances provide heat that can loosen the wax, making it easier to remove.

To use a hairdryer, set it on a medium or high heat setting and aim it at the wax. Move the hairdryer back and forth over the wax until it softens, then gently scrape it off using a plastic scraper. Be careful not to heat the floor for too long to avoid damage.

Advertisement

Is it safe to use rubbing alcohol or nail polish remover on laminate flooring?

It’s not recommended to use rubbing alcohol or nail polish remover on laminate flooring as they can cause damage to the surface. When using heat methods to remove candle wax from laminate flooring, it’s important to exercise caution. Instead of using rubbing alcohol or nail polish remover, consider using a hairdryer or an iron on a low setting with a cloth or paper towel to gently heat and absorb the wax. Always test a small, inconspicuous area first to ensure no damage occurs.

What is the best commercial wax remover to use on laminate flooring?

The best home remedies for removing wax buildup on laminate flooring are using a mixture of warm water and vinegar or a mild dish soap solution. Gently scrub the affected area with a soft cloth or sponge, being careful not to damage the laminate.

To prevent wax buildup in the future, place mats or rugs in high traffic areas, use furniture pads to protect the floor, and avoid using wax-based cleaning products.

Will using a vinegar and water solution leave a strong smell on the floor?

Using a vinegar and water solution to clean laminate flooring will not leave a strong smell. While vinegar does have a distinct odor, it dissipates quickly once the solution dries.

If you are concerned about the smell, there are alternative methods you can try. For example, using rubbing alcohol or WD-40 can also effectively remove candle wax from laminate floors without leaving any lingering smells.

Advertisement

How often should I clean and polish my laminate floor to maintain its shine?

To maintain the shine of my laminate floor, I find it best to clean and polish it regularly. I recommend cleaning it at least once a week using a gentle cleaner specifically made for laminate floors. Avoid using harsh chemicals or abrasive cleaners, as they can damage the surface.

Additionally, I like to polish my floor every few months using a laminate floor polish to restore its shine and protect it from wear and tear.

Conclusion

In conclusion, removing candle wax from a laminate floor is a relatively simple task with a few effective methods. By following the steps mentioned in this article, you can easily get rid of wax stains and restore the beauty of your floor.

Did you know that, according to a recent survey, 63% of homeowners have experienced candle wax spills on their laminate floors? With these practical tips, you can ensure that your floor remains wax-free and prevent future spills.

Advertisement

Continue Reading

Beginners Guides

How To Decorate A Candle Jar

Published

on

By

An image showcasing a beautifully adorned candle jar

The saying ‘A candle loses nothing by lighting another candle’ holds true. And what better way to brighten up your surroundings than with a beautifully decorated candle jar?

In this article, I will guide you through the process of transforming a plain candle jar into a stunning piece of decor that will add warmth and ambiance to any room.

Gathering your materials is the first step on this creative journey. From decorative elements to adhesives, make sure you have everything you need before you begin.

Once your materials are ready, it’s time to clean and prepare the candle jar. Removing any labels or residue will ensure a smooth surface for your decorations.

Next, comes the fun part – choosing your decorative elements. From ribbons and beads to dried flowers and sea shells, the possibilities are endless. Applying adhesive to the candle jar will help secure your chosen elements in place.

Advertisement

Once the decorations are arranged and secured, allow them to dry completely. Trim any excess materials for a polished look.

Finally, place a candle inside the jar, light it up, and bask in the glow of your beautifully decorated creation.

So, let’s get started on this delightful journey of candle jar decoration!

Key Takeaways

  • Gather materials and clean the jar thoroughly before starting the decoration process.
  • Use various adhesive application methods such as brushing, sponging, rolling, using a glue gun, or spraying.
  • Explore different decorative elements like ribbons, beads, dried flowers, twine, pinecones, seashells, and pebbles.
  • Consider personalization options such as custom labels, ribbons and bows, painted patterns, or charms and trinkets to add a unique touch to the candle jar decoration.

Gather Your Materials

Now it’s time to gather all the materials you’ll need to create a beautiful and personalized candle jar that’ll bring warmth and joy to any space you place it in.

The first step in this creative process is to collect the necessary supplies. You’ll need an empty glass jar, preferably one with a lid, to hold your candle. Look for jars of various sizes and shapes to add visual interest to your final design. Get creative with your ideas and consider repurposing old mason jars, vintage glassware, or even small vases.

Next, you’ll need a candle wick and adhesive to secure it to the bottom of the jar. You can find these at any craft store or online.

Advertisement

To add fragrance to your candle, gather some essential oils or candle scents of your choice.

Lastly, gather any decorative elements you want to include, such as dried flowers, ribbons, or charms. These’ll add a personal touch to your candle jar.

Once you have all your materials, you can move on to the next step – cleaning and preparing the candle jar to ensure a smooth and successful decorating process.

Clean and Prepare the Candle Jar

Once you’ve got your vessel ready, it’s time to give it a thorough cleaning and make sure it’s prepped for decoration. Prepping the candle jar is an essential step to ensure that your design adheres properly and lasts longer. Here are three cleaning techniques to get your candle jar sparkling clean:

  1. Remove any labels or stickers: Gently peel off any labels or stickers on the jar. If there’s residue left behind, use a mixture of warm water and dish soap to scrub it off. You can also use rubbing alcohol or nail polish remover for stubborn residue.

  2. Wash the jar: Fill a sink or basin with warm water and add a few drops of dish soap. Place the jar in the soapy water and scrub it inside and out using a soft sponge or cloth. Pay extra attention to the bottom and sides to remove any dirt or residue.

  3. Dry the jar: After washing, rinse the jar thoroughly with warm water to remove any soap residue. Use a clean towel to pat it dry or let it air dry completely before moving on to the next step.

Now that your candle jar is clean and ready, it’s time to move on to the exciting part – choosing your decorative elements.

Advertisement

Choose Your Decorative Elements

Get creative and bring your personal style to life by selecting the perfect accents and embellishments for your beautiful candle vessel.

There are so many options to choose from when it comes to decorating your candle jar. One idea is to use colorful ribbons to add a pop of color and texture. You can wrap the ribbon around the jar, tie it in a bow, or even create a pattern with different colors.

Another idea is to incorporate natural elements into your design. You can use twine to wrap around the jar and attach small pinecones or dried flowers for a rustic look. You could also glue on small seashells or pebbles for a beach-inspired theme.

The possibilities are endless!

When choosing your decorative elements, consider the style and theme you want to achieve. Think about the colors and materials that will complement your candle and the space where it will be displayed.

Advertisement

Once you have chosen your elements, it’s time to move on to the next step: applying adhesive to the candle jar.

Apply Adhesive to the Candle Jar

To start, you’ll need to carefully spread the adhesive onto the surface of your chosen vessel, ensuring an even and smooth application. There are different types of adhesives you can use for this project, depending on the materials you’re working with.

Here are some creative ways to apply adhesive to the jar:

  • Brush it on: Use a small paintbrush to apply the adhesive onto the jar. This method allows for precise application and is great for intricate designs.

  • Dab it with a sponge: Dip a small sponge into the adhesive and gently dab it onto the jar. This technique creates a textured look and adds dimension to your design.

  • Roll it on: If you’re working with a larger jar, you can pour the adhesive onto a flat surface and roll the jar in it. This method ensures an even coating and is quick and easy.

  • Use a glue gun: For a strong bond, a hot glue gun can be used to attach decorative elements directly to the jar. This is perfect for heavier items or if you want a more permanent design.

  • Spray it on: Some adhesives come in spray form, which makes it easy to cover larger areas quickly. Just make sure to do this in a well-ventilated area.

Now that the adhesive is applied, it’s time to move on to the next step of the process: arranging and securing the decorative elements.

Arrange and Secure Decorative Elements

Now it’s time for you to let your creativity soar as you arrange and secure the stunning decorative elements onto your beautiful candle vessel, creating a masterpiece that will leave everyone in awe!

Advertisement

There are countless ways to personalize your candle jar and make it uniquely yours. When it comes to arranging the decorative elements, consider the overall design and theme you want to achieve. Start by selecting elements that complement each other and create a cohesive look.

You can use a combination of natural elements like dried flowers, leaves, or twigs, along with small trinkets or charms that reflect your personal style. Experiment with different placements and arrangements until you find the perfect combination that pleases your eye.

Once you are happy with the arrangement, it’s time to secure the elements onto the jar. You can use a strong adhesive or even tie them with a beautiful ribbon or twine. Just make sure everything is firmly attached and won’t come loose.

With your stunning arrangement in place, you’re now ready to add personal touches to complete your candle jar masterpiece.

Add Personal Touches

Once you’ve arranged and secured the decorative elements onto your exquisite vessel, it’s time to infuse it with your own personal flair. Adding personalized designs and creative embellishments will truly make your candle jar a unique piece of art.

Advertisement

Here are some ideas to help you add those personal touches:

  1. Custom Labels: Create personalized labels for your candle jar. You can use craft paper, stickers, or even print your own designs. This will not only enhance the aesthetic appeal but also make it feel more special.

  2. Ribbons and Bows: Tie colorful ribbons or bows around the neck of the jar. It adds a touch of elegance and can match the theme or color scheme of the room where it will be placed.

  3. Painted Patterns: Use acrylic paints to add beautiful patterns or designs directly onto the jar. You can go for intricate mandalas, floral motifs, or even simple geometric shapes. Let your imagination run wild!

  4. Charms and Trinkets: Attach small charms or trinkets to the jar using strings or glue. These can be anything from tiny seashells, crystals, beads, or even small figurines. They’ll add a whimsical touch and make your candle jar truly one-of-a-kind.

Once you’ve added your personal touches, allow the decorations to dry before moving on to the next step of the candle jar decoration process.

Allow the Decorations to Dry

After carefully adding your personal touches, let the decorations on your exquisite vessel dry before moving forward. This step is crucial to ensure that your candle jar looks flawless and the decorations stay in place. There are various drying techniques you can try depending on the materials used. For instance, if you have used paint or glue, simply allow the jar to air dry for a few hours or overnight. If you are short on time, you can use a hairdryer on a low heat setting to speed up the drying process. Another alternative is to place the jar in a cool oven for a few minutes, but be careful not to leave it unattended.

To give you a visual representation of the drying process, imagine a beautifully decorated candle jar sitting on a table, surrounded by other craft supplies. In one column of the table, you have a row of jars with colorful paint drying on their surfaces. In the other column, there are jars with glue drying, holding various embellishments like beads and ribbons. The table showcases the different techniques and materials used in the decoration process.

Once your decorations have dried completely, you can move on to the next step and trim any excess materials. This will give your candle jar a clean and polished look, ready to be displayed or gifted.

Advertisement

Trim any Excess Materials

To achieve a sleek and professional finish, it’s time to neaten up any leftover bits and bobs on your masterpiece. Removing excess materials is crucial to ensuring a neat finish on your candle jar.

Take a close look at the surface of your jar and gently trim any stray threads, glue residue, or uneven edges. Use a pair of sharp scissors or a craft knife to carefully cut away any excess materials that may affect the overall appearance of your decorated jar.

Pay special attention to the top edge of the jar, as this is where you want a clean and polished finish. Carefully trim any excess ribbon or fabric, making sure it is flush with the jar’s rim. If you’ve used other decorative elements such as beads or buttons, make sure they’re securely attached and don’t stick out or look untidy.

Once you’ve removed all the excess materials and achieved a clean and tidy look, you can move on to the next step of placing a candle inside the jar. This’ll bring your beautifully decorated candle jar to life, creating a warm and inviting ambiance in any space.

Place a Candle Inside the Jar

Light up your creation by carefully positioning a cozy candle within the confines of your beautifully adorned container. As you place the candle inside the jar, it’s important to keep candle safety in mind. Make sure to choose a candle that fits the size of your jar and has a long burn time. Avoid placing the candle too close to the edges to prevent any accidents.

Advertisement

To enhance the ambiance, consider using alternative candle holders such as small pebbles, sand, or dried flowers at the bottom of the jar. This will add a touch of creativity and uniqueness to your decoration. Additionally, you can experiment with different scented candles to create a pleasant aroma that fills the room.

Now that your candle is securely placed, it’s time to enjoy your beautifully decorated candle jar. Light the candle and watch as the warm glow illuminates the surrounding space, creating a cozy and inviting atmosphere. Whether you’re using it as a centerpiece for a romantic dinner or to relax during a bubble bath, your decorative candle jar is sure to add a special touch to any occasion.

Transitioning into the next section about enjoying your creation, take a moment to bask in the serene glow of your beautifully decorated candle jar.

Enjoy Your Beautifully Decorated Candle Jar

Indulge in the enchanting ambiance of your exquisitely adorned candle jar, relishing in the warm glow that fills the room. Now that you’ve successfully decorated your candle jar, it’s time to enjoy the beautiful creation you’ve made.

Let your imagination run wild and explore creative candle jar display ideas that’ll enhance the visual appeal of your space. Consider placing your candle jar on a mirrored tray to reflect the flickering light, creating a mesmerizing effect. You can also group different sized candle jars together to create a stunning centerpiece or arrange them on a shelf to add a touch of elegance to any room.

Advertisement

Experiment with placing your candle jar in unexpected spots, such as on a windowsill or in the bathroom, to create a cozy and inviting atmosphere. Furthermore, your beautifully decorated candle jar can also make a thoughtful DIY gift idea. Personalize it by adding a handwritten label or attaching a ribbon with a heartfelt message. Fill the jar with scented candles or homemade bath salts for a spa-like experience. Your loved ones will appreciate the time and effort you’ve put into creating a unique and meaningful gift.

Decorating a candle jar opens up a world of creative possibilities. Use these ideas to display your candle jar in a captivating way and explore DIY gift ideas to spread joy to others. Enjoy the warm glow and enchanting ambiance that your beautifully adorned candle jar brings into your life.

Frequently Asked Questions

What type of adhesive should I use to decorate the candle jar?

For decorating a candle jar, there are several adhesive options to choose from. The best materials for this task include hot glue, E6000 adhesive, or double-sided tape.

Hot glue is great for securing heavier decorations, while E6000 adhesive provides a strong bond for various materials. Double-sided tape is a convenient option for lightweight decorations.

Whichever adhesive you choose, make sure it’s compatible with the materials you’re using and allows for easy application and removal.

Advertisement

Can I use any type of candle inside the jar?

Yes, it’s important to consider candle safety precautions when choosing which type of candle to use inside a jar. Ensure that the candle is the appropriate size for the jar and that it’s made of non-flammable material.

Additionally, consider alternatives to traditional candles, such as LED candles or flameless candles. They provide a safer option while still creating a warm and cozy ambiance.

How long does it take for the decorations to dry?

I know you might be concerned about the drying time for the decorations on your candle jar, but don’t worry! Different types of decorations have varying drying times.

For instance, if you’re using paint, it typically takes around 24 hours to dry completely. However, if you’re using glue and glitter, it may take a bit longer, around 48 hours.

To speed up the drying process, try placing the jar in a well-ventilated area or using a hairdryer on a low heat setting.

Advertisement

Can I use the same materials to decorate different types of candle jars?

Yes, you can use the same materials to decorate different types of candle jars. It’s a versatile approach that allows you to get creative with your designs. However, it’s important to consider the type of jar you’re working with.

Some materials may adhere better to certain surfaces, so it’s best to choose paints or adhesives specifically designed for glass or ceramic jars. This will ensure a long-lasting and beautiful finish.

Can I remove the decorations from the candle jar if I change my mind?

Yes, you can definitely remove the decorations from the candle jar if you change your mind. It’s actually quite easy to do so. Simply gently peel off any stickers or decals, and if there’s glue residue, you can use a mild adhesive remover.

Once the decorations are removed, you can reuse the candle jar for a new project or simply leave it plain. The choice is yours!

Conclusion

In conclusion, decorating a candle jar is a fun and creative way to add a touch of elegance to any space. With just a few simple steps, you can transform an ordinary jar into a stunning centerpiece.

Advertisement

So gather your materials, clean and prepare the jar, choose your decorative elements, and get creative! Remember, the possibilities are endless when it comes to decorating your candle jar.

So go ahead and let your imagination soar, like a graceful bird gliding through the sky. Happy decorating!

Continue Reading

Trending

Copyright © 2024 Just Candles Affiliate disclaimer As an affiliate, we may earn a commission from qualifying purchases. We get commissions for purchases made through links on this website from Amazon and other third parties.