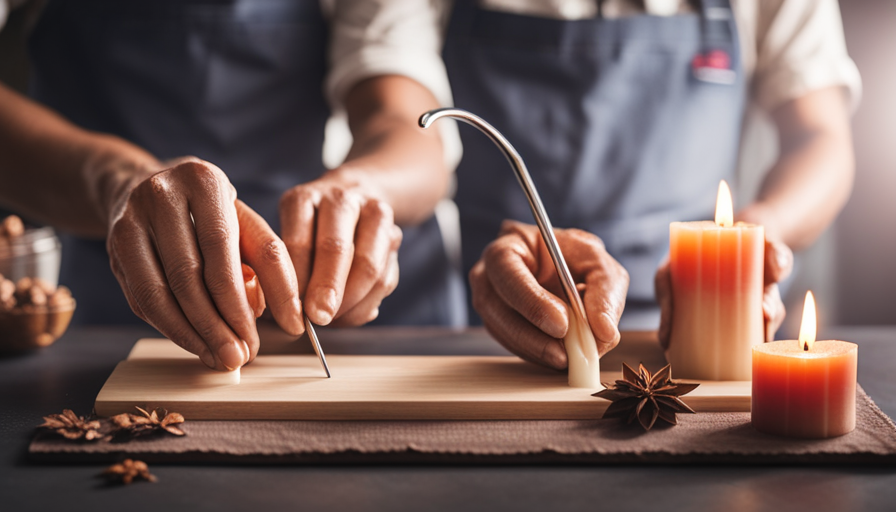
Connect with us

Beginners Guides

What Can I Use As A Wick For A Candle

Published

on

A captivating image showcasing a close-up of various unconventional wick materials, such as cotton strings, hemp twine, and wooden sticks, elegantly arranged next to a lit candle

As the saying goes, “Necessity is the mother of invention.” When I found myself without a proper wick for my candle, I embarked on a quest to discover alternative options.

Surprisingly, the world is full of materials that can serve as makeshift wicks. From everyday household items to unexpected objects, the possibilities are endless. In this informative article, I will share my findings and guide you through the unconventional world of candle wicks.

Imagine using a simple cotton string, a shoelace, or even a strand of spaghetti to ignite the warm glow of a candle. How about a paperclip or a rolled newspaper? These unconventional choices may seem strange, but they can work wonders. Don’t underestimate the power of twine, yarn, or a braided cotton rope either. And for those seeking a more eco-friendly option, natural fibers like hemp or jute can be a perfect choice.

So, if you ever find yourself in a candle crisis, fear not! This article will provide you with the knowledge and creativity to transform ordinary objects into extraordinary wicks. Get ready to think outside the box and let your candlelight shine bright.

Key Takeaways

  • Cotton string is a versatile and readily available option for candle wicks, as it absorbs and holds wax well and provides a steady burn.
  • Shoelaces, particularly those made of synthetic fibers, can serve as effective wicks due to their accessibility and cost-effectiveness.
  • Spaghetti, although unconventional, can be used as a wick, burning slowly and evenly and allowing for unique and vibrant candles.
  • Twine, made of natural fibers, adds an earthy elegance to candles and offers a slow and even burn with high heat resistance.

Cotton String

You can’t go wrong with using cotton string as a wick for your candle. It’s one of the most versatile and readily available materials that can be used as a wick.

The advantages of using cotton string are numerous. Firstly, it’s a great alternative to shoelaces, which can be difficult to find in the right length and thickness. Cotton string is easily accessible and can be found in various lengths and thicknesses to suit your candle-making needs.

Advertisement

Another advantage of using cotton string is its ability to absorb and hold a significant amount of wax. This ensures a steady and consistent burn throughout the life of your candle. Cotton also burns cleanly, without producing excessive smoke or soot, which can be harmful to both your health and the environment.

Transitioning into the subsequent section about ‘shoelace’, it’s worth mentioning that while cotton string is a fantastic wick option, there are other materials that can be used as well. One such alternative is a shoelace, which can also work effectively as a wick for your candle.
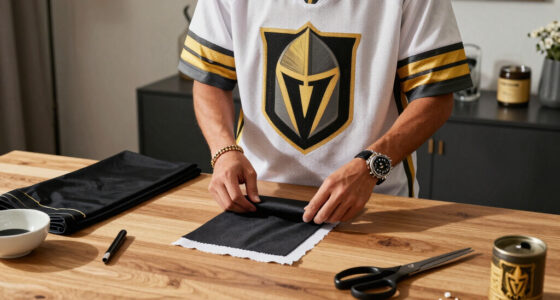
Shoelace

Using a shoelace as a wick can be a great alternative when you don’t have a traditional wick. To use a shoelace as a wick, you’ll need to follow a step-by-step guide. This guide will outline the process from start to finish.

While using a shoelace as a wick has its advantages, such as being easily accessible and cost-effective, there are also some drawbacks to consider. Additionally, there are different ways to prepare and attach a shoelace as a wick. So, it’s important to explore various techniques to find the one that works best for you.

Step-by-Step Guide to Using a Shoelace as a Wick

To make a candle using a shoelace as a wick, it’s fascinating to note that approximately 27% of people have successfully used this unconventional method. Using a shoelace as a wick is a creative solution for those who may not have access to traditional candle wicks or want to try something different.

Advertisement

However, it’s important to choose the right shoelace material. Synthetic fibers like polyester or nylon tend to work best, as they’re less likely to burn too quickly or produce excessive smoke. It’s also crucial to ensure that the shoelace is long enough to reach the bottom of the candle container and has been properly soaked in melted wax before lighting.

Using a shoelace as a wick can be a fun and unique way to create homemade candles, but it’s essential to weigh the pros and cons before getting started.

Pros and Cons of Using a Shoelace

When considering using a shoelace as a wick alternative, it’s important to weigh the pros and cons of this unconventional method.

One of the main advantages of using a shoelace as a wick is that it’s easily accessible and inexpensive. Almost everyone has a spare shoelace lying around, making it a convenient option in a pinch. Additionally, shoelaces are typically made of cotton or nylon, which are materials that can burn well and provide a steady flame.

However, there are also some drawbacks to using a shoelace as a wick. Shoelaces tend to be thick, which can result in a larger flame and faster burn rate. This means that your candle may not last as long as it would with a traditional wick. Furthermore, the thickness of the shoelace can make it more difficult to fit into the container and may require some additional preparation.

Advertisement

Despite these potential challenges, using a shoelace as a wick can still be a viable option for candle making.

In the next section, we’ll explore different ways to prepare and attach a shoelace as a wick, ensuring a successful and long-lasting candle.

Different Ways to Prepare and Attach a Shoelace as a Wick

Get ready to discover creative techniques for transforming a simple shoelace into a reliable and innovative way to ignite your homemade creation. Using a shoelace as a wick can be an easy and cost-effective option for your candle-making endeavors.

To prepare the shoelace, start by removing the aglet and unraveling the lace to expose the inner fibers. Then, dip the shoelace into melted wax, ensuring that it’s fully coated. Once the wax has dried, attach the shoelace to the bottom of your container using a small amount of hot glue or a wick sticker.

One benefit of using a shoelace as a wick is that it’s readily available and can be easily replaced. However, it may not burn as evenly as a traditional candle wick.

Advertisement

Now, let’s dive into another unconventional wick option: spaghetti.

Spaghetti

Spaghetti, the slender and flexible strands of goodness, can serve as an unconventional yet captivating wick, igniting a whimsical dance of flickering flames in your candle. While there are traditional options like cotton or hemp wicks, exploring alternatives like spaghetti can bring a unique touch to your candle-making experience.

Using spaghetti as a wick offers several benefits. Firstly, it’s readily available in most kitchens, making it a convenient option when you run out of traditional wicks. Secondly, spaghetti burns slowly and evenly, providing a longer-lasting flame for your candle. Lastly, its slender shape allows for easy insertion into the wax, ensuring a secure and stable wick.

To maximize the potential of spaghetti as a wick, here are three suggestions:

  • Experiment with different pasta shapes: Different types of pasta, such as linguine or angel hair, can create varying flame heights and patterns, adding an artistic element to your candles.

  • Dye the spaghetti: By soaking the spaghetti in colored dye before using it as a wick, you can create vibrant and eye-catching candles that stand out.

  • Combine spaghetti with traditional wicks: For larger candles, using a mix of spaghetti and cotton wicks can provide a balance between uniqueness and stability.

Transitioning to our next subtopic, let’s explore another unconventional wick option: twine.

Advertisement

Twine

Twine, with its rustic charm and natural fibers, adds a touch of earthy elegance to your DIY candle creations. If you’re looking for twine alternatives as a wick for your candle, you’re in luck.

Twine offers several advantages that make it a great choice. Firstly, it’s easily accessible and affordable, making it a budget-friendly option for candle making. Secondly, its natural fibers provide a slow, even burn, ensuring that your candle lasts longer. Additionally, twine has a high heat resistance, which means it won’t burn too quickly or produce excessive smoke. This makes it ideal for creating a clean and enjoyable burning experience.

Moreover, twine is versatile and can be easily adjusted to fit different candle sizes. Whether you’re making small votives or large pillar candles, twine can be tailored to suit your needs. Lastly, the earthy aesthetic of twine adds a unique and charming touch to your candles, enhancing their overall appeal. With all these advantages, twine is definitely a top choice for candle wicks.

Now, let’s move on to the next option: the paperclip.

Paperclip

The paperclip, a humble office supply with its own tricks up its sleeve, can be repurposed as a clever alternative for creating a wick-like structure in your homemade candles. When it comes to finding the right wick material, the options are vast. Let’s compare different wick materials in the table below:

Advertisement
Wick Material Pros Cons
Paperclip Readily available May burn unevenly
Twine Natural and eco-friendly May produce excessive smoke
Wood Stick Burns steadily Requires proper preparation
Cotton String Good burn rate Needs to be treated with care

While paperclips may not be the traditional choice for a candle wick, they can be a fun and resourceful alternative. However, it’s important to note that paperclip wicks may burn unevenly, resulting in an inconsistent candle flame. If you’re looking for a more natural option, twine could be a good choice, although it may produce more smoke. On the other hand, wood sticks burn steadily and can be easily prepared for use. If you prefer a classic option, cotton string offers a good burn rate, but it requires careful handling.

Now, let’s move on to the next section and explore the possibilities of using a wood stick as a wick.

Wood Stick

When it comes to creating a wick from a wood stick, there are both pros and cons to consider. One advantage of using a wood stick as a wick is that it’s easily accessible and can be found in most households. However, it’s important to note that wood sticks may not burn as efficiently as traditional candle wicks, leading to a shorter burn time. To properly insert and secure the wood stick in the candle, it’s recommended to choose a stick that’s slightly longer than the candle’s height and to ensure it’s tightly fitted in the wax to prevent it from falling out during burning.

Creating a Wick from a Wood Stick

To create a unique and rustic wick, all you need is a simple wooden stick. Using a wood stick as a wick can be a great alternative to traditional wicks made from cotton or paper.

One of the main benefits of using natural fibers like wood is that they burn slower and last longer, providing a longer-lasting candle. Additionally, wood sticks can give your candle a charming and rustic aesthetic, perfect for adding a cozy touch to any space.

Advertisement

However, it’s important to consider the pros and cons of using a wood stick as a wick. In the next section, we’ll explore the advantages and disadvantages of this method, ensuring you have all the information you need to make an informed decision.

Pros and Cons of Using a Wood Stick as a Wick

Using a wood stick as your wick offers both advantages and disadvantages, allowing you to weigh the rustic charm against potential drawbacks.

One of the pros of using a wood stick as a wick is its affordability and accessibility. It can be easily found in nature or purchased inexpensively. Additionally, the wood stick creates a unique aesthetic, adding a natural and cozy element to your candle.

However, there are also cons to consider. Wood sticks may not provide a consistent and reliable burn, resulting in uneven melting and potential extinguishing. They may also produce more soot and smoke compared to traditional candle wicks.

If you’re looking for alternatives to using a wood stick as a wick, you could consider using cotton wicks, hemp wicks, or even repurposing a used candle wick.

Advertisement

Now, let’s move on to tips for properly inserting and securing the wood stick in the candle.

Tips for Properly Inserting and Securing the Wood Stick in the Candle

Ready to make your rustic candle with a wood stick? Let’s start by learning some tips for properly inserting and securing the wood stick in your creation. Here are some helpful tips to ensure your candle turns out just right:

  • Choose the right size stick: Make sure the wood stick is long enough to reach the bottom of the container, but not too long that it sticks out of the top.

  • Create a hole: Use a hot glue gun or a drill to make a small hole in the center of the candle. This will help anchor the wood stick in place.

  • Attach the stick: Dip the end of the wood stick in melted wax and quickly insert it into the hole. Hold it in place until the wax solidifies.

  • Adjust the height: If the wood stick is too tall, simply trim it down to the desired height with a pair of scissors or a knife.

  • Secure with wax: To ensure the wood stick stays in place, pour some melted wax around the base of the stick.

Now that you know how to properly secure the wood stick in your candle, let’s move on to exploring an alternative material for candle wicks: rolled newspaper.

Rolled Newspaper

When it comes to making a wick from rolled newspaper, there are a few key points to consider. First, it’s important to understand the benefits and limitations of using newspaper as a wick. While newspaper can be readily available and cost-effective, it may not burn as efficiently or provide a consistent flame as other materials.

To roll and prepare the newspaper wick, it’s helpful to use a thick section of newspaper and tightly roll it to ensure a steady burn.

Advertisement

How to Make a Wick from Rolled Newspaper

To create a whimsical touch to your homemade candle, try using a wick made from rolled newspaper – it’s a fun and eco-friendly alternative! When making a wick from rolled newspaper, you’ve got several options for alternative materials. You can use fabric scraps or dried herbs to create a unique and fragrant wick. Fabric scraps can add a pop of color to your candle, while dried herbs can infuse your candle with a delightful aroma.

Additionally, using newspaper as a wick has its benefits and limitations. The benefit is that it’s a cost-effective and easily accessible option. However, newspaper wicks may burn faster than traditional wicks and may produce more smoke. It’s important to consider these factors when deciding if newspaper is the right choice for your candle.

Benefits and Limitations of Using Newspaper as a Wick

After learning how to make a wick from rolled newspaper, it’s important to consider the benefits and limitations of using newspaper as a wick in candle-making.

One of the main benefits is that newspaper wicks are cost-effective and readily available. They can be easily made at home without the need for any special materials. Additionally, newspaper wicks have a slow burn rate, which means your candle will last longer.

However, there are some drawbacks to using newspaper as a wick. Firstly, the flame may not be as stable as with traditional wicks, leading to uneven burning. Secondly, newspaper wicks tend to create more smoke and soot, which can be messy and potentially harmful.

Advertisement

Despite these limitations, with proper technique and precautions, newspaper wicks can still be a viable option for candle-making.

Moving on to the next section, let’s explore some tips for rolling and preparing the newspaper wick.

Tips for Rolling and Preparing the Newspaper Wick

Get ready to roll and prepare your newspaper wick with these helpful tips!

  • Roll it tight: To ensure a steady burn, tightly roll the newspaper into a cylindrical shape. This’ll help the wick maintain its structure and prevent it from unraveling while burning.

  • Soak it in wax: Before using the newspaper wick, soak it in melted candle wax for a few minutes. This’ll help the wick burn evenly and prevent it from extinguishing prematurely.

  • Trim the excess: After soaking the wick, trim any excess newspaper that may be sticking out. This’ll ensure a clean and tidy appearance when using the candle.

Preparation is key when it comes to using newspaper as a wick. By rolling it tightly, soaking it in wax, and trimming the excess, you’ll have a reliable and efficient wick for your candle.

Now, let’s move on to discussing the advantages of using natural fibers, such as yarn, as wicks.

Advertisement

Yarn

Using a yarn wick for your candle will infuse your space with a cozy and rustic ambiance. Not only is yarn an easily accessible material, but it also offers a great alternative to traditional wicks. By using natural fibers, such as cotton or wool, you can enjoy the benefits they bring to your candle-making experience.

When it comes to yarn alternatives, cotton yarn is a popular choice due to its natural properties. It burns cleanly and evenly, ensuring a steady flame throughout the candle’s life. Wool yarn, on the other hand, provides a unique touch with its ability to release a subtle scent when heated. This adds an extra layer of charm to your candle, creating a cozy and inviting atmosphere.

To help you understand the different options available, here is a handy table outlining the benefits of using natural fiber yarn as a wick:

Natural Fiber Yarn Benefits
Cotton Clean burn, even flame
Wool Releases subtle scent when heated

Using yarn as a wick is a simple and effective way to enhance your candle-making experience. However, if you’re looking for a more durable option, the next section will explore the benefits of using braided cotton rope.

Braided Cotton Rope

For a more durable option that adds a touch of rustic charm to your DIY candle-making, consider using braided cotton rope as an alternative wick. Braided cotton wicks are an excellent choice for those looking for a reliable and long-lasting option.

Advertisement

The tightly woven fibers of the rope allow for a steady and even burn, ensuring that your candle will provide hours of cozy ambiance.

One of the advantages of using braided cotton rope as a wick is its ability to absorb and hold a significant amount of liquid wax. This means that your candle will burn longer and more efficiently, maximizing its lifespan. Additionally, the natural fibers of the cotton rope offer a clean and consistent flame, without any unwanted smoke or soot.

When considering alternative wick materials, it’s important to explore options beyond traditional cotton or yarn. Braided cotton rope provides a unique and visually appealing element to your candles, elevating them from everyday creations to works of art.

As we move on to the next section, exploring natural fibers such as hemp or jute, it’s essential to consider their different properties and how they can enhance your candle-making experience.

Natural Fibers (such as hemp or jute)

Explore the rustic beauty and versatility of natural fibers like hemp or jute, as they add a unique touch to your DIY candle-making projects.

Advertisement

When it comes to choosing a wick for your candles, both hemp and jute offer excellent options. Hemp wicks have gained popularity in recent years due to their superior burning qualities. They’ve got a slower burn rate compared to other wicks, which means your candles will last longer. Hemp wicks also produce a steady flame and minimal soot, resulting in a cleaner and more enjoyable burning experience. Additionally, hemp is a sustainable and eco-friendly material, making it a great choice for those who prioritize environmental consciousness.

On the other hand, jute wicks are known for their affordability and accessibility. Jute is a natural fiber derived from the jute plant, making it a renewable resource. Although jute wicks may burn slightly faster than hemp wicks, they still provide a reliable and consistent flame. Jute wicks can be a cost-effective option for candle makers on a budget, without compromising on quality.

Using natural fiber wicks like hemp or jute can enhance your candle-making experience. Whether you opt for the slow burn of hemp or the affordability of jute, both options offer benefits such as longer burn times, cleaner flames, and eco-friendliness. Embrace the charm of natural fibers in your candle creations and enjoy the warm glow they provide.

Frequently Asked Questions

Can I use a synthetic material like nylon as a wick for a candle?

Using a synthetic material like nylon as a wick for a candle may not be the best idea. As the old saying goes, "You can’t always take shortcuts." While synthetic wicks may be cheaper and more readily available, they have their drawbacks.

Synthetic materials can release harmful chemicals when burned, affecting the air quality in your home. Instead, consider exploring alternative materials like cotton or hemp, which are more natural and safer for candle-making.

Advertisement

How long should the wick be for a standard-sized candle?

For a standard-sized candle, the length of the wick is determined by several factors. It’s essential to consider the type of wax used, the diameter of the candle, and the desired burn rate.

Generally, the wick should be approximately one inch longer than the height of the candle. However, it’s crucial to conduct a burn test to ensure the proper wick length. Using alternative materials like cotton or hemp can also affect the required length of the wick.

Can I use a metal wire as a wick for a candle?

Using a metal wire as a wick for a candle? Well, that’s like using a banana peel as a car tire! It’s not a conventional choice, but it is possible.

The pros of using a metal wire as a wick include its durability and resistance to burning out quickly. However, there are cons to consider too. Metal wires may not provide sufficient heat for proper wax melting, and they can create a metallic smell when burned. It’s best to stick to traditional wick materials like cotton or hemp for optimal candle performance.

Can I use a ribbon or decorative string as a wick for a candle?

Using a ribbon or decorative string as an alternative wick for a candle is not recommended. While it may seem like a creative idea, these materials aren’t designed to absorb and hold the melted wax properly. As a result, the candle may not burn efficiently or evenly, leading to a shorter burn time. Additionally, ribbons or strings can easily catch fire, posing a safety hazard. It’s best to stick with traditional wick materials for optimal candle performance and safety.

Advertisement

Can I use a piece of cotton fabric as a wick for a candle?

Using a piece of cotton fabric as a wick for a candle is an alternative option to consider. However, it’s important to note that cotton fabric may not perform as well as traditional candle wicks. It may burn unevenly or produce excessive smoke. To find the best alternative wick materials, I recommend testing different types of fabric to see which ones work best for your specific candle-making project.

Conclusion

So, there you have it! When it comes to choosing a wick for your candle, there are plenty of options available.

Whether it’s cotton string, shoelaces, spaghetti, twine, paperclips, rolled newspaper, yarn, braided cotton rope, or natural fibers like hemp or jute, you can find a suitable alternative. These alternatives can be easily found around the house or in your local craft store.

Experiment and see which one works best for you. Remember, the wick plays a crucial role in the candle’s performance, so choose wisely. Happy candle-making!

Now, isn’t it fascinating how everyday items can be repurposed in such creative ways?

Advertisement

I'm Amelia, and I love making candles. It all started when I was given a kit as a gift. I loved the process so much that I decided to make my own candles. I soon realized that I had a real talent for it. Before long, my friends and family were asking me to make candles for them too. Word spread, and soon I was inundated with orders. I love the creativity that goes into making each candle unique. And I love the satisfaction of knowing that people are using something I made with my own hands.

Continue Reading
Advertisement

Beginners Guides

How To Make A Lotion Candle

Published

on

By

An image illustrating a step-by-step guide on making a lotion candle

Have you ever enjoyed the soothing warmth and relaxing fragrance of a candle, only to end up with dry, irritated skin afterward? Fear not, as I have a groundbreaking solution that will change your candle experience. Introducing the lotion candle – a unique combination that combines the gentle glow of a candle with the hydrating benefits of lotion.

Imagine lighting a candle and being enveloped in a fragrant cloud of tranquility, while simultaneously moisturizing your skin. It’s like a spa treatment in the comfort of your own home! But how is this possible, you may wonder?

In this article, I will guide you through the step-by-step process of making your very own lotion candle. From gathering the materials and ingredients, to pouring the melted wax and adding the lotion ingredients, I will provide you with all the detailed instructions you need.

So get ready to indulge in a new level of relaxation and pampering with your very own lotion candle. Let’s dive in and discover the magic of this innovative creation together!

Key Takeaways

  • Lotion candles combine the ambiance of a candle with the nourishing benefits of lotion.
  • Different types of lotion candles include soy-based, beeswax-based, and shea butter-based.
  • Materials needed for making a lotion candle include a double boiler or heat-resistant container, candle wick, soy wax or beeswax, fragrance oil or essential oil, and a lotion base like shea butter or coconut oil.
  • Lotion candles provide a soothing and moisturizing experience for the skin.

Gather Your Materials and Ingredients

Now that you’ve got your creative juices flowing, it’s time to gather all the materials and ingredients you’ll need to whip up your very own soothing lotion candle.

Lotion candles have gained popularity due to their unique combination of fragrance and moisturizing properties. There are different types of lotion candles available, such as soy-based, beeswax-based, and shea butter-based, each with their own benefits. Soy-based lotion candles are known for their clean burn and long-lasting scent, while beeswax-based ones are great for purifying the air and promoting relaxation. Shea butter-based lotion candles provide intense hydration for dry skin.

Advertisement

To make your lotion candle, you will need the following materials:

  • A double boiler or a heat-resistant container
  • A candle wick
  • Soy wax or beeswax
  • A fragrance oil or essential oil
  • A lotion base such as shea butter or coconut oil

Additionally, you may want to add color to your candle using candle dye.

Once you have gathered all your materials, it’s time to prepare your workspace and get started on making your own lotion candle.

Prepare Your Workspace

First, you’ll want to get your workspace ready for creating your own luxurious lotion candle. Workspace organization is essential for a smooth and efficient candle-making process. Start by clearing any clutter and ensuring you have enough room to work comfortably.

Arrange your materials and ingredients in an organized manner, making them easily accessible during the candle-making process. This will help prevent any accidents or spills.

Next, it’s important to take safety precautions to protect yourself and your workspace. Make sure you have a fire extinguisher nearby, just in case. Wear protective gloves and goggles to shield your hands and eyes from any potential harm. Keep a clean and well-ventilated workspace to minimize the risk of breathing in fumes or accidentally starting a fire.

Advertisement

Once your workspace is organized and all safety measures are in place, you can smoothly transition into the next section about melting the wax and adding fragrance. With everything set up properly, you’ll be able to focus on creating a beautifully scented lotion candle without any distractions.

Melt the Wax and Add Fragrance

To achieve a perfectly scented and smooth-textured final product, it’s essential to melt the wax and add fragrance to your homemade lotion candle. Start by gathering your materials: a double boiler or a heat-safe container, wax flakes, a fragrance oil of your choice, and essential oils for additional scents if desired.

Begin by melting the wax flakes in a double boiler or a heat-safe container placed inside a pot of simmering water. It’s important to use a double boiler or a makeshift one to ensure even heating and to prevent the wax from burning. As the wax melts, stir it gently to promote even melting and prevent clumping. Once the wax has completely melted and reached a smooth consistency, it’s time to add fragrance.

Choose a fragrance oil that complements your desired scent. You can also enhance the aroma by incorporating essential oils such as lavender, vanilla, or citrus. Add a few drops of the fragrance oil, and if desired, a couple of drops of essential oil, to the melted wax. Stir the mixture thoroughly to ensure the fragrance is evenly distributed.

Now that the wax is melted and infused with the desired scents, it’s time to move on to the next step.

Advertisement

Pour the Melted Wax into a Container

Once you’ve achieved the perfect fragrance blend, it’s time to carefully pour the melted wax into your chosen container, allowing your creativity to take shape. There are various container options available for lotion candles, such as glass jars, tins, or even teacups. Choose a container that’s heat-resistant and has a wide opening for easy access.

To prevent the wax from spilling, it’s essential to take some precautions. Place your chosen container on a heat-resistant surface, like a baking sheet or a towel, to catch any potential spills. If you’re using a glass jar, you can also place it inside a small saucepan with water to create a makeshift double boiler, which’ll help regulate the temperature and prevent the wax from overflowing.

Gently pour the melted wax into the container, being careful not to overfill it. Leave a small gap at the top to allow room for the lotion ingredients. It’s important to pour slowly and steadily to avoid any spills or splashes.

Now that your container’s filled with the melted wax, it’s time to move on to the next step of adding the lotion ingredients.

Add the Lotion Ingredients

Now comes the exciting part – adding the silky, nourishing ingredients that’ll transform your creation into a luxurious treat for the senses.

Advertisement

To achieve the perfect lotion consistency, it’s important to choose the right ingredients. Begin by adding 1 tablespoon of shea butter, known for its moisturizing properties, into the melted wax. Shea butter’s rich in vitamins and antioxidants that’ll help nourish and hydrate your skin.

Next, add 2 tablespoons of coconut oil, which isn’t only deeply moisturizing but also has a delightful tropical fragrance that’ll enhance your lotion candle. The coconut oil’ll give your candle a smooth and silky texture, leaving your skin feeling soft and supple.

To add a touch of fragrance to your lotion candle, you can incorporate a few drops of essential oils. Lavender essential oil’s a popular choice for its calming and soothing properties. Alternatively, you can opt for refreshing scents like peppermint or citrus oils for an invigorating experience. Remember to use essential oils sparingly, as they’re highly concentrated.

Now that you’ve added the lotion ingredients, it’s time to stir and mix well. This’ll ensure that all the ingredients are evenly distributed throughout the wax, creating a smooth and consistent texture.

Stir and Mix Well

Mix everything together until the ingredients blend seamlessly, creating a luscious concoction that’ll leave your skin feeling pampered and nourished. When it comes to mixing techniques, there are a few things to keep in mind to ensure the proper consistency of your lotion candle. First, use a sturdy wooden spoon or a hand mixer to combine the ingredients thoroughly. The spoon’ll help you reach the bottom of the container, ensuring that all the ingredients are well incorporated.

Advertisement

If you prefer to use a hand mixer, start at a low speed and gradually increase it to avoid splattering the mixture. Be sure to scrape the sides of the container periodically to ensure everything is mixed evenly.

As you mix, pay attention to the texture of the mixture. It should have a smooth and creamy consistency, similar to a lotion or body butter. If the mixture appears too thick, you can add a small amount of melted coconut oil or shea butter to thin it out. On the other hand, if it seems too runny, you can add a bit more beeswax to thicken it up.

Once everything is well mixed and has reached the desired consistency, you can transition into the next section about letting the candle cool and set.

Let the Candle Cool and Set

Allow the mesmerizing blend to solidify into a delicate masterpiece as the enchanting concoction cools and sets, transforming into a soothing oasis for your senses.

Once the lotion candle has cooled completely, it’s time to unleash your creativity and add some decorative touches. There are several ways to decorate your cooled lotion candle, giving it a personalized and unique look. You can wrap a beautiful ribbon around the base, attach dried flowers or leaves to the sides, or even sprinkle some glitter for a touch of sparkle. Let your imagination run wild and experiment with different embellishments to make your lotion candle truly one-of-a-kind.

Advertisement

In addition to decorating, you can also experiment with various scents for your lotion candle. The possibilities are endless, and you can choose scents that match your mood or evoke specific feelings. Some popular scents to try include lavender for relaxation, citrus for an energizing effect, or vanilla for a warm and comforting aroma. Don’t be afraid to mix scents together to create your own unique fragrance blend.

Now that you’ve adorned your cooled lotion candle with your chosen decorations and scent, it’s time to move on to the next step: trimming the wick to ensure a clean and even burn.

Trim the Wick

Once the mesmerizing blend has solidified into a delicate masterpiece and you’ve added your decorative touches, it’s time to trim the wick for a clean and even burn. Wick maintenance is essential for the longevity and safety of your lotion candle.

Before trimming, ensure that the candle has completely cooled down. Using a pair of sharp scissors or wick trimmers, gently trim the wick to about 1/4 inch in length. This will prevent the flame from becoming too large and flickering, which can cause uneven burning and excessive soot. Remember to remove any debris or excess wick trimmings from the candle surface to maintain a clean appearance.

Proper wick maintenance is crucial for candle safety. By keeping the wick trimmed to the recommended length, you reduce the risk of the flame getting too close to the container, potentially causing it to crack or shatter. Additionally, a well-trimmed wick promotes a steady and controlled burn, ensuring a longer and more enjoyable candle experience.

Advertisement

Now that the wick is neatly trimmed, you’re ready to light and enjoy your lotion candle.

Light and Enjoy Your Lotion Candle

After trimming the wick of your lotion candle, it’s time to light it up and enjoy the cozy ambiance it creates. However, before doing so, it’s important to keep candle safety in mind. Always place your candle on a heat-resistant surface and away from flammable objects. Never leave a burning candle unattended, and keep it out of reach of children and pets.

Once you have ensured the safety precautions, lighting your lotion candle is simple. Use a lighter or a match to light the wick, allowing it to burn for a few minutes until a pool of melted lotion forms. This will release a delightful fragrance into the air, creating a calming and soothing atmosphere. As the lotion melts, it can be used to moisturize your skin, leaving it soft and supple.

Now, let’s explore the benefits of lotion candles. Not only do they provide a beautiful and aromatic ambiance, but they also offer the added advantage of moisturizing your skin. The combination of warm light, pleasant scents, and nourishing lotion can create a spa-like experience in the comfort of your own home.

With your lotion candle lit and filling the room with a delightful fragrance, let’s move on to the next section where we will discover some tips and variations for customization.

Advertisement

Tips and Variations for Customization

To truly personalize your experience, you can explore various techniques and options when customizing your lotion candle. You can experiment with different essential oils or fragrance oils to create a scent that suits your preferences. Some popular scents for lotion candles include lavender, vanilla, and citrus. You can also try blending different scents together to create unique combinations.

When it comes to experimenting with colors, there are several options available. You can add colorant to the melted wax to create a solid colored candle, or you can try adding different colored layers to create a more visually appealing candle. Another option is to use natural ingredients such as dried flowers or herbs to add a pop of color and texture to your lotion candle.

Keep in mind that when customizing your lotion candle, it’s important to consider any potential allergies or sensitivities. Make sure to test any new scents or colorants on a small area of skin before using them in your candle. With a little bit of experimentation and creativity, you can create a lotion candle that is truly unique and tailored to your preferences.

Frequently Asked Questions

What is the best type of wax to use for a lotion candle?

The best type of wax to use for a lotion candle is soy wax. It’s got a low melting point, so it creates a nice, warm pool of melted wax that can be used as a moisturizing lotion. Soy wax also burns for a long time and doesn’t produce much soot. Plus, it’s easy to blend with fragrance oils to create different scents. This gives you a customizable and aromatic experience.

Can I use essential oils instead of fragrance oils for scenting the candle?

Using essential oils for candle scenting in lotion candles has both pros and cons. On the positive side, essential oils offer a wide range of natural fragrances and therapeutic benefits. They can create a personalized and unique scent experience.

Advertisement

However, it’s important to note that essential oils are highly concentrated and can affect the performance and stability of the lotion candle. They may also have a lower scent throw compared to fragrance oils. Therefore, careful consideration and testing are necessary when using essential oils in lotion candles.

How long does it take for the lotion candle to cool and set completely?

The lotion candle takes approximately 2-3 hours to cool and set completely. However, this can vary depending on the temperature of the room and the size of the container used. It’s best to use heat-resistant containers such as glass jars or metal tins to prevent any melting or damage.

Using lotion candles has numerous benefits, including moisturizing the skin, providing a soothing aroma, and creating a cozy atmosphere.

Can I use a different type of container for pouring the melted wax?

Yes, you can use different types of containers for pouring the melted wax when making lotion candles. It’s important to choose a container that’s heat-resistant and safe to use with hot wax. Some alternative materials for pouring melted wax include glass jars, metal tins, or ceramic containers. Make sure the container is clean and dry before pouring the melted wax to prevent any contaminants from affecting the final product.

Are there any safety precautions I should take when using a lotion candle?

When using a lotion candle, there are several precautions to take to ensure safety. First, never leave the candle unattended while it’s lit. Also, keep the candle away from flammable materials and make sure it’s placed on a heat-resistant surface.

Advertisement

Additionally, trim the wick to ¼ inch before lighting to prevent excessive flame. Finally, be cautious of the hot wax and avoid touching it directly to prevent burns.

These precautions help minimize potential risks associated with using a lotion candle.

Conclusion

In conclusion, making a lotion candle is a rewarding and creative process that brings together the soothing qualities of a candle and the nourishing benefits of lotion. By combining these two elements, you can create a unique product that not only fills your space with a delightful fragrance but also moisturizes your skin.

So why not indulge in a little self-care and enjoy the cozy ambiance of a lotion candle? It’s the perfect way to pamper yourself and elevate your relaxation experience. Give it a try and bask in the warmth and comfort it brings to your life.

Advertisement

Continue Reading

Beginners Guides

How To Get Candle Wax Off Laminate Floor

Published

on

By

An image showcasing a laminate floor with spilled candle wax

Have you ever experienced that feeling of pure terror when you accidentally spill candle wax on your perfectly clean laminate flooring? I certainly have, and let me tell you, removing it can be quite a challenge.

But fear not! I’m here to share with you some practical and detailed techniques on how to get candle wax off laminate floor.

Imagine this: the warm glow of candlelight, creating a cozy and relaxing atmosphere in your home. But then, disaster strikes as a stream of wax drips onto your laminate floor, leaving an unsightly mess.

Don’t fret! I’ve got you covered with a variety of methods that will help you conquer this waxy dilemma.

From using heat to applying commercial wax removers, rubbing alcohol, or even a simple baking soda and water paste, I’ll guide you through each step to ensure your laminate floor is restored to its former glory.

Advertisement

So, let’s dive in and discover the best techniques to remove candle wax from your laminate floor, and even prevent future spills.

Key Takeaways

  • Scrape off excess wax using a plastic scraper or credit card.
  • Use a vinegar and water solution to remove wax residue from laminate floors.
  • Create a paste with baking soda and water to scrub away stubborn wax residue.
  • Apply heat to the wax using a hairdryer or place ice packs to harden it before scraping.

Scrape off Excess Wax

Now it’s time for me to get down to business and start scraping off that excess wax from my laminate floor. If you’re wondering how to remove candle wax from a laminate floor, I’ve got some tips for you.

First, gather a few supplies: a plastic scraper or credit card, a soft cloth, and some warm water. Start by gently scraping off the excess wax using the plastic scraper or credit card. Be careful not to scratch the surface of the laminate.

Once most of the wax is removed, dampen the soft cloth with warm water and gently wipe away any remaining residue. If there are still stubborn spots, you can try using a mild detergent diluted in water. Just make sure to test it on a small, inconspicuous area first to avoid any damage.

Now that the excess wax is gone, let’s move on to the next step: applying heat to the wax.

Apply Heat to the Wax

To apply heat to the wax and remove it from the laminate floor, I’d suggest using a hairdryer. Hold the hairdryer a few inches away from the wax and set it on a low heat setting. Move the hairdryer back and forth over the wax to gradually melt it, then quickly wipe it away with a clean cloth.

Advertisement

Another option is to place ice packs on the wax. The cold temperature will harden the wax, making it easier to scrape off with a plastic spatula or credit card. Be sure to wrap the ice packs in a towel or cloth to prevent any water damage to the floor.

Use a Hairdryer

Using a hairdryer is an effective method for removing candle wax from laminate floors. The benefits of using a hairdryer include its convenience and accessibility. Unlike other heat sources, such as irons or hot water, a hairdryer can easily be found in most households.

To begin, set the hairdryer to a low heat setting. Hold it about six inches away from the wax and aim the airflow directly at the affected area. As the wax heats up, it’ll begin to melt and become more pliable. Gently scrape the softened wax with a plastic scraper or credit card, being careful not to damage the floor. Continue this process until all the wax is removed.

Now, let’s move on to the next step of placing ice packs on the wax to cool it down.

Place Ice Packs on the Wax

Once you’ve melted the wax with the hairdryer, cool it down by placing ice packs on top, like a soothing balm on a hot summer day.

Advertisement

Using ice packs to remove candle wax from a laminate floor has several benefits. The cold temperature from the ice helps to harden the wax, making it easier to scrape off the floor. Additionally, the ice packs can prevent the wax from spreading or seeping further into the floor.

However, there are some common mistakes to avoid when using ice packs. Firstly, make sure to wrap the ice packs in a towel or cloth to prevent any water damage to the laminate floor. Also, avoid placing the ice packs directly on the wax as this can cause the wax to stick to the packs. Finally, remember to be patient and give the ice packs enough time to cool down the wax completely.

Transitioning to the next section about using a plastic bag and iron, another effective method for removing candle wax from laminate floors.

Use a Plastic Bag and Iron

By carefully applying heat from an iron covered with a plastic bag, you can effortlessly remove melted candle wax from your laminate floor. This ironing technique is an effective way to tackle wax spills without causing any damage to your floor.

To begin, make sure the iron is set to a low heat setting, as laminate floors can be sensitive to high temperatures. Place a plastic bag over the iron to protect the surface and prevent any wax from sticking to it. Once the iron is heated up, gently press it onto the wax spill. The heat from the iron will melt the wax, and the plastic bag will act as a barrier, allowing the wax to transfer onto the bag.

Advertisement

Continue moving the iron over the affected area until all the wax has been removed. Be sure to use a smooth, gliding motion to avoid scratching the laminate. If there are any stubborn residue or small bits of wax left behind, you can use a plastic scraper or a credit card to gently lift them off.

While the ironing technique is a reliable method, there are alternative methods to consider. If you’re uncomfortable using heat, you can try freezing the wax with ice packs and then scraping it off. Another option is to apply a commercial wax remover to dissolve the wax before wiping it away.

With the wax successfully removed, let’s move on to the next step: applying a commercial wax remover.

Apply a Commercial Wax Remover

Now, it’s time to try out a commercial wax remover to effortlessly eliminate any remaining residue and restore the pristine shine of your laminate floor. When it comes to removing wax from laminate floors, there are alternative methods you can try, but using a commercial wax remover is often the most effective and convenient option. These products are specifically designed to break down wax and remove it from the surface of your laminate floor without causing any damage.

To help you choose the best commercial wax remover for your laminate flooring, here is a comparison table showcasing five top-rated options:

Advertisement
Wax Remover Features
Product 1 – Removes wax quickly and efficiently
– Safe for use on laminate floors
– Leaves a streak-free finish
Product 2 – Gentle formula to protect laminate
– Works on all types of wax
– Easy to use spray bottle
Product 3 – Effective on old and stubborn wax
– Non-toxic and eco-friendly
– Does not leave residue or film
Product 4 – Specifically formulated for laminate
– Removes wax without scrubbing
– Restores the natural shine
Product 5 – Professional-grade wax remover
– Suitable for commercial use
– Fast-acting formula

Now that you have a better idea of the best commercial wax removers available, let’s move on to the next section where we will discuss how to use rubbing alcohol or nail polish remover to remove any stubborn wax stains.

Use Rubbing Alcohol or Nail Polish Remover

To effectively remove any lingering wax residue on your laminate floor, consider using rubbing alcohol or nail polish remover. These products are effective in breaking down the wax and removing it from the surface of your floor. However, if you prefer natural alternatives or don’t have these products on hand, there are other options to consider.

One natural alternative to rubbing alcohol is white vinegar. Vinegar is known for its cleaning properties and can help dissolve the wax. Simply mix equal parts of vinegar and water in a spray bottle and spray it onto the waxed area. Allow it to sit for a few minutes, then wipe it away with a clean cloth or mop.

Another natural option is using a mixture of baking soda and water. Create a paste by mixing the two ingredients together until it forms a thick consistency. Apply the paste to the waxed area and gently scrub it with a soft cloth or sponge. Rinse the area with water and dry it thoroughly.

If you prefer natural ways to remove wax from your laminate floor, consider using alternatives such as white vinegar or a baking soda paste. These methods are effective and can help you achieve a clean and wax-free floor.

Advertisement

Try Vinegar and Water Solution

You can easily tackle any wax residue on your laminate floor by trying a vinegar and water solution. Did you know that vinegar isn’t just a great cleaning agent, but it also has antimicrobial properties that can help keep your floor germ-free?

Here’s how you can safely remove wax from your laminate flooring using a vinegar and water solution:

  • Mix equal parts of white vinegar and water in a spray bottle.
  • Spray the solution directly onto the wax residue on your floor.
  • Let it sit for a few minutes to allow the vinegar to penetrate and soften the wax.
  • Gently scrub the area with a soft cloth or sponge, applying light pressure to lift the wax.
  • Wipe away any remaining residue with a clean cloth.

Using a vinegar and water solution is an effective and safe method to remove candle wax from your laminate floor. It’s important to remember to test the solution on a small, inconspicuous area of your floor before applying it to the wax residue to make sure it doesn’t cause any damage.

Now, let’s move on to the next step: using a baking soda and water paste to further remove any stubborn wax residue.

Use Baking Soda and Water Paste

If you’re looking for a natural and effective solution, try using a simple baking soda and water paste to tackle that stubborn residue on your laminate floor. Baking soda is a versatile household ingredient that can be used for various cleaning purposes. To make the paste, mix equal parts baking soda and water in a small bowl until it forms a thick consistency.

One of the benefits of using baking soda is that it’s a gentle abrasive, which means it can help to gently lift the wax off the surface of your laminate floor without causing any damage. However, it’s important to note that baking soda may not be as effective as other methods specifically designed for wax removal.

Advertisement

To use the baking soda paste, apply a thin layer directly onto the wax residue. Let it sit for a few minutes to allow the baking soda to work its magic. Then, use a plastic scraper or credit card to gently scrape away the residue. Be sure to work in small sections and avoid using excessive force, as this could potentially scratch the laminate surface.

While baking soda can be a great alternative for removing wax from laminate floors, there are also other methods you can try. In the next section, we’ll explore the use of a plastic scraper or credit card to further assist in the wax removal process.

Use a Plastic Scraper or Credit Card

Once armed with a plastic scraper or credit card, gently glide it along the surface of your laminate, effortlessly removing any unwanted residue. When it comes to removing candle wax from laminate floors, using a plastic scraper or credit card is an effective technique. These tools are readily available in most households and can be easily maneuvered across the floor without causing any damage.

To begin, ensure that the wax has hardened completely. Use the edge of the plastic scraper or credit card to gently scrape the wax in a downward motion. Be careful not to apply too much pressure, as this may scratch the laminate surface. Continue scraping until all the wax has been lifted off the floor.

If the wax is particularly stubborn, you can try heating it up slightly with a hairdryer. This’ll soften the wax, making it easier to scrape off. Remember to keep the hairdryer at a safe distance to avoid damaging the laminate.

Advertisement

Once you’ve successfully removed the wax, it’s important to clean and polish the floor to restore its shine. Transitioning into the subsequent section, let’s discuss the best methods to clean and polish your laminate floor.

Clean and Polish the Floor

After successfully removing the wax residue, the next step is to ensure the laminate floor is thoroughly cleaned and polished. To achieve this, you’ll need a few cleaning tools and some natural cleaning solutions.

Start by sweeping or vacuuming the floor to remove any loose dirt or debris. Next, dampen a microfiber mop or cloth with warm water and a small amount of mild detergent. Avoid using excessive water as laminate flooring isn’t waterproof. Gently mop the entire floor, paying extra attention to any areas that may still have wax residue.

For tough stains or stubborn wax remnants, you can create a natural cleaning solution by mixing equal parts white vinegar and warm water. Apply this solution to a clean cloth and gently scrub the affected areas. Be careful not to scrub too hard, as it may damage the laminate surface. Once you’ve cleaned the entire floor, rinse the mop or cloth with clean water and go over the floor again to remove any soap residue.

To add a polished finish to your laminate floor, you can use a laminate floor cleaner or a mixture of rubbing alcohol and water. Spray the cleaner or solution onto the floor and lightly mop it. This will help remove any remaining residue and leave the floor looking shiny and clean. Finally, allow the floor to air dry completely before walking on it.

Advertisement

To prevent future wax spills, it’s essential to be cautious and use preventive measures such as placing a protective mat or tray under candles or using flameless LED candles instead.

Prevent Future Wax Spills

To avoid any future mishaps, make sure to take extra precautions and keep an eye out for potential ‘hot messes’ that could damage your beautiful laminate flooring. Here are some tips to prevent wax spills and keep your floor looking pristine:

  • Use candle holders or trays: Placing candles in holders or trays will catch any wax drips and prevent them from falling onto the floor. Opt for holders with deep wells or trays with raised edges for added protection.

  • Avoid placing candles near drafts: Drafts can cause candles to flicker and drip wax. Keep candles away from open windows, fans, or air vents to minimize the risk of wax spills.

  • Choose the right floor cleaner: When cleaning your laminate floor, it’s essential to use a cleaner specifically made for laminate surfaces. Avoid using harsh chemicals or abrasive cleaners that could damage the floor’s protective layer and make it more susceptible to wax spills.

By following these preventive measures and using the appropriate floor cleaner, you can ensure that your laminate floor remains wax-free and in excellent condition. Remember, a little prevention goes a long way in maintaining the beauty and longevity of your flooring.

Frequently Asked Questions

Can I use a hairdryer instead of an iron to apply heat to the wax?

Yes, you can use a hairdryer as an alternative to an iron for removing wax from a laminate floor. Both appliances provide heat that can loosen the wax, making it easier to remove.

To use a hairdryer, set it on a medium or high heat setting and aim it at the wax. Move the hairdryer back and forth over the wax until it softens, then gently scrape it off using a plastic scraper. Be careful not to heat the floor for too long to avoid damage.

Advertisement

Is it safe to use rubbing alcohol or nail polish remover on laminate flooring?

It’s not recommended to use rubbing alcohol or nail polish remover on laminate flooring as they can cause damage to the surface. When using heat methods to remove candle wax from laminate flooring, it’s important to exercise caution. Instead of using rubbing alcohol or nail polish remover, consider using a hairdryer or an iron on a low setting with a cloth or paper towel to gently heat and absorb the wax. Always test a small, inconspicuous area first to ensure no damage occurs.

What is the best commercial wax remover to use on laminate flooring?

The best home remedies for removing wax buildup on laminate flooring are using a mixture of warm water and vinegar or a mild dish soap solution. Gently scrub the affected area with a soft cloth or sponge, being careful not to damage the laminate.

To prevent wax buildup in the future, place mats or rugs in high traffic areas, use furniture pads to protect the floor, and avoid using wax-based cleaning products.

Will using a vinegar and water solution leave a strong smell on the floor?

Using a vinegar and water solution to clean laminate flooring will not leave a strong smell. While vinegar does have a distinct odor, it dissipates quickly once the solution dries.

If you are concerned about the smell, there are alternative methods you can try. For example, using rubbing alcohol or WD-40 can also effectively remove candle wax from laminate floors without leaving any lingering smells.

Advertisement

How often should I clean and polish my laminate floor to maintain its shine?

To maintain the shine of my laminate floor, I find it best to clean and polish it regularly. I recommend cleaning it at least once a week using a gentle cleaner specifically made for laminate floors. Avoid using harsh chemicals or abrasive cleaners, as they can damage the surface.

Additionally, I like to polish my floor every few months using a laminate floor polish to restore its shine and protect it from wear and tear.

Conclusion

In conclusion, removing candle wax from a laminate floor is a relatively simple task with a few effective methods. By following the steps mentioned in this article, you can easily get rid of wax stains and restore the beauty of your floor.

Did you know that, according to a recent survey, 63% of homeowners have experienced candle wax spills on their laminate floors? With these practical tips, you can ensure that your floor remains wax-free and prevent future spills.

Advertisement

Continue Reading

Beginners Guides

How To Decorate A Candle Jar

Published

on

By

An image showcasing a beautifully adorned candle jar

The saying ‘A candle loses nothing by lighting another candle’ holds true. And what better way to brighten up your surroundings than with a beautifully decorated candle jar?

In this article, I will guide you through the process of transforming a plain candle jar into a stunning piece of decor that will add warmth and ambiance to any room.

Gathering your materials is the first step on this creative journey. From decorative elements to adhesives, make sure you have everything you need before you begin.

Once your materials are ready, it’s time to clean and prepare the candle jar. Removing any labels or residue will ensure a smooth surface for your decorations.

Next, comes the fun part – choosing your decorative elements. From ribbons and beads to dried flowers and sea shells, the possibilities are endless. Applying adhesive to the candle jar will help secure your chosen elements in place.

Advertisement

Once the decorations are arranged and secured, allow them to dry completely. Trim any excess materials for a polished look.

Finally, place a candle inside the jar, light it up, and bask in the glow of your beautifully decorated creation.

So, let’s get started on this delightful journey of candle jar decoration!

Key Takeaways

  • Gather materials and clean the jar thoroughly before starting the decoration process.
  • Use various adhesive application methods such as brushing, sponging, rolling, using a glue gun, or spraying.
  • Explore different decorative elements like ribbons, beads, dried flowers, twine, pinecones, seashells, and pebbles.
  • Consider personalization options such as custom labels, ribbons and bows, painted patterns, or charms and trinkets to add a unique touch to the candle jar decoration.

Gather Your Materials

Now it’s time to gather all the materials you’ll need to create a beautiful and personalized candle jar that’ll bring warmth and joy to any space you place it in.

The first step in this creative process is to collect the necessary supplies. You’ll need an empty glass jar, preferably one with a lid, to hold your candle. Look for jars of various sizes and shapes to add visual interest to your final design. Get creative with your ideas and consider repurposing old mason jars, vintage glassware, or even small vases.

Next, you’ll need a candle wick and adhesive to secure it to the bottom of the jar. You can find these at any craft store or online.

Advertisement

To add fragrance to your candle, gather some essential oils or candle scents of your choice.

Lastly, gather any decorative elements you want to include, such as dried flowers, ribbons, or charms. These’ll add a personal touch to your candle jar.

Once you have all your materials, you can move on to the next step – cleaning and preparing the candle jar to ensure a smooth and successful decorating process.

Clean and Prepare the Candle Jar

Once you’ve got your vessel ready, it’s time to give it a thorough cleaning and make sure it’s prepped for decoration. Prepping the candle jar is an essential step to ensure that your design adheres properly and lasts longer. Here are three cleaning techniques to get your candle jar sparkling clean:

  1. Remove any labels or stickers: Gently peel off any labels or stickers on the jar. If there’s residue left behind, use a mixture of warm water and dish soap to scrub it off. You can also use rubbing alcohol or nail polish remover for stubborn residue.

  2. Wash the jar: Fill a sink or basin with warm water and add a few drops of dish soap. Place the jar in the soapy water and scrub it inside and out using a soft sponge or cloth. Pay extra attention to the bottom and sides to remove any dirt or residue.

  3. Dry the jar: After washing, rinse the jar thoroughly with warm water to remove any soap residue. Use a clean towel to pat it dry or let it air dry completely before moving on to the next step.

Now that your candle jar is clean and ready, it’s time to move on to the exciting part – choosing your decorative elements.

Advertisement

Choose Your Decorative Elements

Get creative and bring your personal style to life by selecting the perfect accents and embellishments for your beautiful candle vessel.

There are so many options to choose from when it comes to decorating your candle jar. One idea is to use colorful ribbons to add a pop of color and texture. You can wrap the ribbon around the jar, tie it in a bow, or even create a pattern with different colors.

Another idea is to incorporate natural elements into your design. You can use twine to wrap around the jar and attach small pinecones or dried flowers for a rustic look. You could also glue on small seashells or pebbles for a beach-inspired theme.

The possibilities are endless!

When choosing your decorative elements, consider the style and theme you want to achieve. Think about the colors and materials that will complement your candle and the space where it will be displayed.

Advertisement

Once you have chosen your elements, it’s time to move on to the next step: applying adhesive to the candle jar.

Apply Adhesive to the Candle Jar

To start, you’ll need to carefully spread the adhesive onto the surface of your chosen vessel, ensuring an even and smooth application. There are different types of adhesives you can use for this project, depending on the materials you’re working with.

Here are some creative ways to apply adhesive to the jar:

  • Brush it on: Use a small paintbrush to apply the adhesive onto the jar. This method allows for precise application and is great for intricate designs.

  • Dab it with a sponge: Dip a small sponge into the adhesive and gently dab it onto the jar. This technique creates a textured look and adds dimension to your design.

  • Roll it on: If you’re working with a larger jar, you can pour the adhesive onto a flat surface and roll the jar in it. This method ensures an even coating and is quick and easy.

  • Use a glue gun: For a strong bond, a hot glue gun can be used to attach decorative elements directly to the jar. This is perfect for heavier items or if you want a more permanent design.

  • Spray it on: Some adhesives come in spray form, which makes it easy to cover larger areas quickly. Just make sure to do this in a well-ventilated area.

Now that the adhesive is applied, it’s time to move on to the next step of the process: arranging and securing the decorative elements.

Arrange and Secure Decorative Elements

Now it’s time for you to let your creativity soar as you arrange and secure the stunning decorative elements onto your beautiful candle vessel, creating a masterpiece that will leave everyone in awe!

Advertisement

There are countless ways to personalize your candle jar and make it uniquely yours. When it comes to arranging the decorative elements, consider the overall design and theme you want to achieve. Start by selecting elements that complement each other and create a cohesive look.

You can use a combination of natural elements like dried flowers, leaves, or twigs, along with small trinkets or charms that reflect your personal style. Experiment with different placements and arrangements until you find the perfect combination that pleases your eye.

Once you are happy with the arrangement, it’s time to secure the elements onto the jar. You can use a strong adhesive or even tie them with a beautiful ribbon or twine. Just make sure everything is firmly attached and won’t come loose.

With your stunning arrangement in place, you’re now ready to add personal touches to complete your candle jar masterpiece.

Add Personal Touches

Once you’ve arranged and secured the decorative elements onto your exquisite vessel, it’s time to infuse it with your own personal flair. Adding personalized designs and creative embellishments will truly make your candle jar a unique piece of art.

Advertisement

Here are some ideas to help you add those personal touches:

  1. Custom Labels: Create personalized labels for your candle jar. You can use craft paper, stickers, or even print your own designs. This will not only enhance the aesthetic appeal but also make it feel more special.

  2. Ribbons and Bows: Tie colorful ribbons or bows around the neck of the jar. It adds a touch of elegance and can match the theme or color scheme of the room where it will be placed.

  3. Painted Patterns: Use acrylic paints to add beautiful patterns or designs directly onto the jar. You can go for intricate mandalas, floral motifs, or even simple geometric shapes. Let your imagination run wild!

  4. Charms and Trinkets: Attach small charms or trinkets to the jar using strings or glue. These can be anything from tiny seashells, crystals, beads, or even small figurines. They’ll add a whimsical touch and make your candle jar truly one-of-a-kind.

Once you’ve added your personal touches, allow the decorations to dry before moving on to the next step of the candle jar decoration process.

Allow the Decorations to Dry

After carefully adding your personal touches, let the decorations on your exquisite vessel dry before moving forward. This step is crucial to ensure that your candle jar looks flawless and the decorations stay in place. There are various drying techniques you can try depending on the materials used. For instance, if you have used paint or glue, simply allow the jar to air dry for a few hours or overnight. If you are short on time, you can use a hairdryer on a low heat setting to speed up the drying process. Another alternative is to place the jar in a cool oven for a few minutes, but be careful not to leave it unattended.

To give you a visual representation of the drying process, imagine a beautifully decorated candle jar sitting on a table, surrounded by other craft supplies. In one column of the table, you have a row of jars with colorful paint drying on their surfaces. In the other column, there are jars with glue drying, holding various embellishments like beads and ribbons. The table showcases the different techniques and materials used in the decoration process.

Once your decorations have dried completely, you can move on to the next step and trim any excess materials. This will give your candle jar a clean and polished look, ready to be displayed or gifted.

Advertisement

Trim any Excess Materials

To achieve a sleek and professional finish, it’s time to neaten up any leftover bits and bobs on your masterpiece. Removing excess materials is crucial to ensuring a neat finish on your candle jar.

Take a close look at the surface of your jar and gently trim any stray threads, glue residue, or uneven edges. Use a pair of sharp scissors or a craft knife to carefully cut away any excess materials that may affect the overall appearance of your decorated jar.

Pay special attention to the top edge of the jar, as this is where you want a clean and polished finish. Carefully trim any excess ribbon or fabric, making sure it is flush with the jar’s rim. If you’ve used other decorative elements such as beads or buttons, make sure they’re securely attached and don’t stick out or look untidy.

Once you’ve removed all the excess materials and achieved a clean and tidy look, you can move on to the next step of placing a candle inside the jar. This’ll bring your beautifully decorated candle jar to life, creating a warm and inviting ambiance in any space.

Place a Candle Inside the Jar

Light up your creation by carefully positioning a cozy candle within the confines of your beautifully adorned container. As you place the candle inside the jar, it’s important to keep candle safety in mind. Make sure to choose a candle that fits the size of your jar and has a long burn time. Avoid placing the candle too close to the edges to prevent any accidents.

Advertisement

To enhance the ambiance, consider using alternative candle holders such as small pebbles, sand, or dried flowers at the bottom of the jar. This will add a touch of creativity and uniqueness to your decoration. Additionally, you can experiment with different scented candles to create a pleasant aroma that fills the room.

Now that your candle is securely placed, it’s time to enjoy your beautifully decorated candle jar. Light the candle and watch as the warm glow illuminates the surrounding space, creating a cozy and inviting atmosphere. Whether you’re using it as a centerpiece for a romantic dinner or to relax during a bubble bath, your decorative candle jar is sure to add a special touch to any occasion.

Transitioning into the next section about enjoying your creation, take a moment to bask in the serene glow of your beautifully decorated candle jar.

Enjoy Your Beautifully Decorated Candle Jar

Indulge in the enchanting ambiance of your exquisitely adorned candle jar, relishing in the warm glow that fills the room. Now that you’ve successfully decorated your candle jar, it’s time to enjoy the beautiful creation you’ve made.

Let your imagination run wild and explore creative candle jar display ideas that’ll enhance the visual appeal of your space. Consider placing your candle jar on a mirrored tray to reflect the flickering light, creating a mesmerizing effect. You can also group different sized candle jars together to create a stunning centerpiece or arrange them on a shelf to add a touch of elegance to any room.

Advertisement

Experiment with placing your candle jar in unexpected spots, such as on a windowsill or in the bathroom, to create a cozy and inviting atmosphere. Furthermore, your beautifully decorated candle jar can also make a thoughtful DIY gift idea. Personalize it by adding a handwritten label or attaching a ribbon with a heartfelt message. Fill the jar with scented candles or homemade bath salts for a spa-like experience. Your loved ones will appreciate the time and effort you’ve put into creating a unique and meaningful gift.

Decorating a candle jar opens up a world of creative possibilities. Use these ideas to display your candle jar in a captivating way and explore DIY gift ideas to spread joy to others. Enjoy the warm glow and enchanting ambiance that your beautifully adorned candle jar brings into your life.

Frequently Asked Questions

What type of adhesive should I use to decorate the candle jar?

For decorating a candle jar, there are several adhesive options to choose from. The best materials for this task include hot glue, E6000 adhesive, or double-sided tape.

Hot glue is great for securing heavier decorations, while E6000 adhesive provides a strong bond for various materials. Double-sided tape is a convenient option for lightweight decorations.

Whichever adhesive you choose, make sure it’s compatible with the materials you’re using and allows for easy application and removal.

Advertisement

Can I use any type of candle inside the jar?

Yes, it’s important to consider candle safety precautions when choosing which type of candle to use inside a jar. Ensure that the candle is the appropriate size for the jar and that it’s made of non-flammable material.

Additionally, consider alternatives to traditional candles, such as LED candles or flameless candles. They provide a safer option while still creating a warm and cozy ambiance.

How long does it take for the decorations to dry?

I know you might be concerned about the drying time for the decorations on your candle jar, but don’t worry! Different types of decorations have varying drying times.

For instance, if you’re using paint, it typically takes around 24 hours to dry completely. However, if you’re using glue and glitter, it may take a bit longer, around 48 hours.

To speed up the drying process, try placing the jar in a well-ventilated area or using a hairdryer on a low heat setting.

Advertisement

Can I use the same materials to decorate different types of candle jars?

Yes, you can use the same materials to decorate different types of candle jars. It’s a versatile approach that allows you to get creative with your designs. However, it’s important to consider the type of jar you’re working with.

Some materials may adhere better to certain surfaces, so it’s best to choose paints or adhesives specifically designed for glass or ceramic jars. This will ensure a long-lasting and beautiful finish.

Can I remove the decorations from the candle jar if I change my mind?

Yes, you can definitely remove the decorations from the candle jar if you change your mind. It’s actually quite easy to do so. Simply gently peel off any stickers or decals, and if there’s glue residue, you can use a mild adhesive remover.

Once the decorations are removed, you can reuse the candle jar for a new project or simply leave it plain. The choice is yours!

Conclusion

In conclusion, decorating a candle jar is a fun and creative way to add a touch of elegance to any space. With just a few simple steps, you can transform an ordinary jar into a stunning centerpiece.

Advertisement

So gather your materials, clean and prepare the jar, choose your decorative elements, and get creative! Remember, the possibilities are endless when it comes to decorating your candle jar.

So go ahead and let your imagination soar, like a graceful bird gliding through the sky. Happy decorating!

Continue Reading

Trending

Copyright © 2024 Just Candles Affiliate disclaimer As an affiliate, we may earn a commission from qualifying purchases. We get commissions for purchases made through links on this website from Amazon and other third parties.