If you are interested in making candles by hand, melting the candle wax on the stove is a highly effective method. This approach gives you precise control over the melting process, guaranteeing that your homemade candles will turn out perfectly.
In this article, I will guide you through the step-by-step process of melting a candle on the stove.
Before we dive into the details, let’s gather our supplies; a stovetop, a double boiler setup, and the perfect candle for melting. It’s crucial to choose a candle with high-quality wax that melts smoothly and evenly. Once you have everything ready, it’s time to prepare your stovetop for action.
Now comes the exciting part – setting up a double boiler to ensure gentle heat distribution throughout the melting process. This method prevents direct heat exposure and reduces the risk of scorching or burning your wax.
With everything in place, it’s time to melt that candle wax! Keep a watchful eye as you heat your chosen candle until it reaches its desired liquid state.
Once melted, carefully pour the wax into containers of your choice and allow them to cool and set completely. Don’t forget to trim those wicks before igniting your newly crafted homemade candles!
So grab your apron and let’s embark on this delightful journey of creating beautiful candles from scratch using only your trusty stove!
Key Takeaways
- Choose high-quality wax for smooth and even melting.
- Use a double boiler setup to prevent scorching or burning.
- Heat the wax on low or medium-low heat to avoid overheating.
- Pour the melted wax carefully into containers and allow it to cool and set completely.
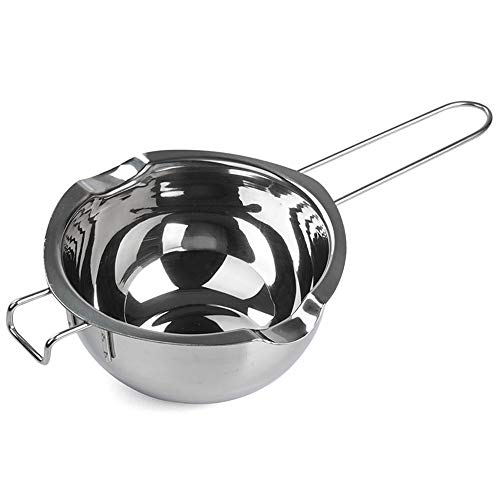
Stainless Steel Double Boiler Pot for Melting Chocolate, Candy and Candle Making (18/8 Steel, 2 Cup Capacity, 480ML)
- Material: Made of rust-resistant 18/8 stainless steel
- Capacity: 2 cups (480ml) size for small tasks
- Versatile Use: Ideal for melting butter, chocolate, candy, candles
As an affiliate, we earn on qualifying purchases.
As an affiliate, we earn on qualifying purchases.
Gather Your Supplies
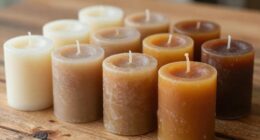
You’ll need to gather all your supplies before you can start melting the candle on the stove. Choosing the right wax is essential for a successful melt. Be sure to select a wax that’s meant for melting, such as soy or beeswax. Avoid using candles with added scents or decorations, as they can release harmful fumes when heated.
Safety precautions when melting candles should always be taken seriously. It’s important to work in a well-ventilated area to minimize exposure to any potential toxins. Wear protective gloves and goggles to protect yourself from hot wax splatters.
Additionally, make sure to use a double boiler setup when melting the candle on the stove. This means placing a heat-resistant container filled with broken pieces of candle wax into a larger pot filled with water. This method helps prevent direct heat contact and reduces the risk of overheating or burning.
Once you have gathered all your supplies and chosen the right wax, it’s time to prepare your stovetop for melting. Transitioning into this section, remember that safety is key throughout this process, so take care in setting up your work area and ensuring everything’s ready for the next steps.
Prepare Your Stovetop
To get started, it’s important to clear any clutter from the area around your stovetop, as studies have shown that a tidy workspace can increase productivity by 20%.
When melting a candle on the stove, ensuring stovetop safety is crucial. Before beginning, make sure there are no flammable materials nearby and that you have a fire extinguisher within reach. Keep children and pets away from the stove to avoid accidents.
Before placing the candle on the stovetop, clean it thoroughly. Remove any dust or debris that may be stuck to it. This step ensures a smooth melting process and helps prevent any unwanted odors or smoke.
Once your stovetop is clear and cleaned properly, turn on the heat to low or medium-low depending on your stove’s settings. It’s important not to use high heat as this can cause the wax to overheat and potentially ignite.
Remember that safety should always come first when melting candles on your stovetop. After you’ve finished melting your candle, allow it to cool completely before attempting to remove it from the stove.
Now that you’re aware of stovetop safety and how to prepare for melting a candle, let’s move onto choosing the right candle for this process.
Choose the Right Candle
When picking out the perfect candle for this method, opt for one that’s specifically designed for stovetop use, ensuring a safe and effective melting process. Here are four key factors to consider when choosing the right candle:
-
Type of Candle Wax: Different types of candle wax have different melting points. Be sure to select a candle made from wax that’s suitable for stovetop melting. Soy wax and beeswax are popular choices as they have lower melting points compared to paraffin wax.
-
Wick Size: A thicker wick will allow the heat to reach the wax more evenly, promoting a smoother melt. Look for candles with larger wicks specifically labeled for stovetop use.
-
Container Material: Consider the container in which the candle is housed. Metal or heat-resistant glass containers are ideal for stovetop melting as they can withstand higher temperatures without breaking or releasing harmful chemicals.
-
Candle Melting Techniques: Some candles may require specific melting techniques, such as using a double boiler or placing them in a heatproof dish before putting them on the stove.
By carefully selecting a suitable candle based on these criteria, you can ensure a successful and safe melting experience on your stove. Now it’s time to set up a double boiler and continue with the next steps of this process.
Set Up a Double Boiler
With a double boiler, your candle will be gently warmed and transformed into a lusciously smooth liquid, creating a heavenly aroma that fills the air.
Using a double boiler for candle making is essential to ensure safety and prevent accidents while melting wax on the stove. The process involves placing a heat-resistant container filled with wax in a larger pot filled with water. This indirect heating method prevents the wax from overheating or catching fire.
To set up a double boiler, start by filling the bottom pot halfway with water. Make sure not to overfill it as this can cause boiling water to spill over. Place the smaller pot containing the wax on top of the larger one, ensuring that it fits securely. It’s crucial to use caution during this step to avoid any mishaps or burns.
Safety precautions for melting wax on the stove include never leaving it unattended, maintaining low heat throughout the process, and keeping flammable materials away from the stove area. Additionally, always use oven mitts or gloves when handling hot pots or containers.
As we move into the next section about melting candle wax, let’s explore how to properly melt and pour your beautifully scented liquid into molds without any trouble.
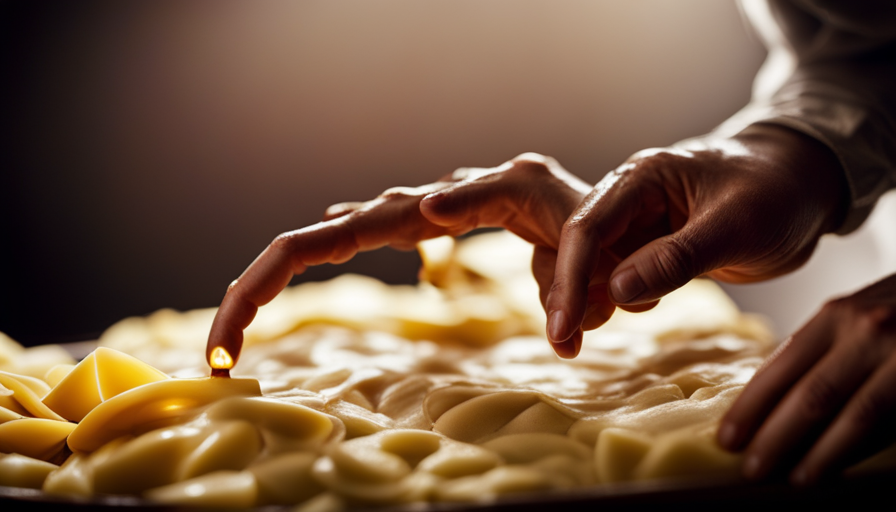
Melt the Candle Wax
Once the wax’s transformed into a lusciously smooth liquid, it’s time to pour your beautifully scented creation into molds and watch as it takes shape. To achieve this, there are a few essential melting techniques and safety precautions that you must be aware of.
Firstly, make sure you’re using a heat-resistant container or double boiler specifically designed for candle making. Place the container on the stove over low heat. Be careful not to overheat the wax, as excessive temperatures can cause discoloration or even ignite the wax.
As the wax begins to melt, gently stir it occasionally with a wooden spoon or spatula. This’ll help distribute the heat evenly and prevent any hot spots from forming. If you notice any smoke or unusual odors during the melting process, immediately remove the container from heat and allow it to cool down before continuing.
Always keep a close eye on the melting wax and never leave it unattended on the stove. Keep children and pets away from both the hot stove and melted wax to avoid accidents.
With these melting techniques and safety precautions in mind, you’re now ready to move on to adding fragrance or color (optional) to your melted wax mixture.
(Note: For step-by-step instructions on adding fragrance or color, refer to next section.)
Add Fragrance or Color (Optional)
Enhance your homemade candles with a burst of captivating fragrance or a pop of vibrant color to create a truly unique and personalized experience. Adding fragrance to your homemade candles not only fills the room with delightful scents but also provides various benefits. Fragrances can evoke emotions, uplift moods, and even help relieve stress.
Choose scents that complement the purpose of your candle, such as lavender for relaxation or citrus for an energizing effect. When selecting colors for your candles, consider the ambiance you want to create. Warm tones like reds and oranges can create a cozy atmosphere, while cool blues and greens offer a calming vibe.
To add fragrance or color to your melted wax, simply stir in essential oils or candle dyes before pouring it into containers. Begin by adding small amounts and gradually increase until you achieve the desired intensity. Remember that some fragrances may fade when heated, so it’s important to choose ones specifically designed for candle making. Similarly, opt for dyes that are heat-resistant to ensure they won’t lose their vibrancy during the melting process.
Now that your melted wax is infused with enticing scents or vibrant hues, it’s time to pour it into your chosen containers without delay.
Pour the Melted Wax into Containers
After infusing your melted wax with fragrance or color, it’s time to swiftly pour it into the containers of your choice. This step is crucial in candle making as it determines the final shape and appearance of your candles. Here are four important things to keep in mind when pouring the melted wax:
-
Temperature Control: Ensure that the wax isn’t too hot or too cold before pouring it into the containers. If it’s too hot, it can cause the containers to crack or warp, while if it’s too cold, the wax may not fill them evenly.
-
Slow and Steady: Pour the melted wax slowly and steadily into each container to avoid air bubbles and uneven distribution. A smooth and even pour will result in a professional-looking finished product.
-
Creative Candle Container Ideas: Get creative with your choice of containers! Consider using vintage teacups, mason jars, seashells, or even repurposed glass bottles for unique and eye-catching candles.
-
Experiment with Layers: To create visually appealing candles, try pouring layers of differently colored waxes into your containers. This technique adds depth and dimension to your candles.
Now that you’ve poured the melted wax into your chosen containers, it’s time to let them cool and set before moving on to the next step of the candle making process.
Let the Wax Cool and Set
While you wait for the wax to cool and set, take a moment to admire your creative container choices and imagine how stunning your finished candles will look. As the wax cools, it solidifies into a beautiful, smooth surface. This is when you can start thinking about what to do with any leftover candle wax. Don’t let it go to waste! There are several ways you can reuse it and create new candles or other crafts.
In the table below, I have listed some ideas for repurposing leftover candle wax:
| Ways to Reuse Leftover Candle Wax | Troubleshooting Common Candle Melting Problems |
|---|---|
| Make new candles | Avoid overheating the wax |
| Create scented wax melts | Prevent air bubbles in the melted wax |
| Craft colorful crayons | Eliminate lumps or impurities |
| Seal envelopes with a personalized touch | Control fragrance intensity |
When reusing candle wax, ensure that any debris or wick remnants are removed before melting it again. Also, be cautious not to mix different colored waxes together as this may result in an undesired color outcome.
As your melted candle wax sets and cools completely, it’s time to move on to the next step: trimming the wicks.
Trim the Wicks
After letting the wax cool and set, it’s important to move on to the next step: trimming the wicks. This is a crucial part of candle maintenance that many people overlook, but it can make a big difference in how your candles burn and how long they last.
-
Wick maintenance: When you trim the wick, you remove any excess burnt wick that can cause a smoky flame or uneven burning. By keeping the wick trimmed to about 1/4 inch, you ensure a clean and steady burn every time.
-
Candle safety precautions: Trimming the wicks also plays a role in candle safety. Long wicks can create larger flames that may flicker or even become dangerous if left unattended. By regularly trimming them, you reduce the risk of accidents and promote a safe environment.
-
Improving candle longevity: By maintaining properly trimmed wicks, your candles will burn more evenly and slowly, extending their lifespan significantly.
-
Consistent candle burning experience: With well-trimmed wicks, you’ll enjoy a consistent burning experience every time you light your homemade candles.
Now that we’ve discussed proper wick maintenance and candle safety precautions, we’re ready to move on to the final section – enjoying your homemade candles!
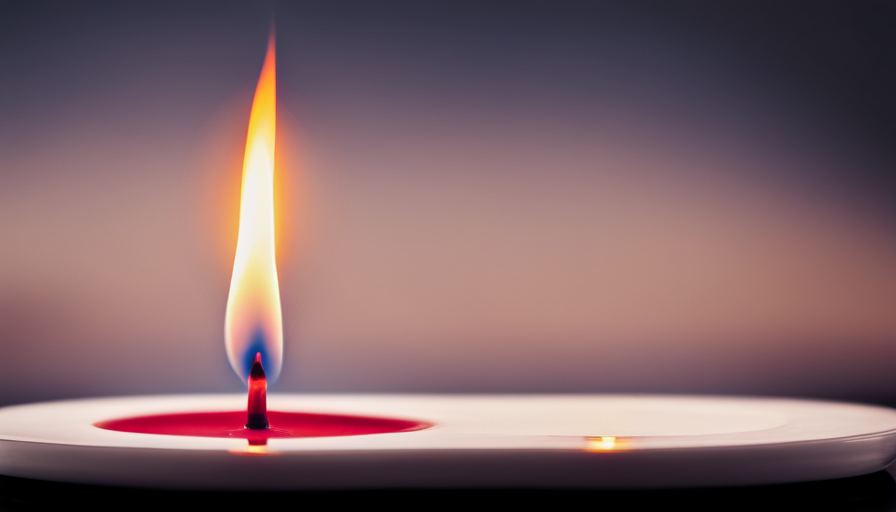
Enjoy Your Homemade Candles!
To fully savor the warmth and ambiance of your homemade candles, sit back, relax, and bask in their soft, flickering glow. Candle making is an art that allows you to express your creativity while enjoying the soothing effects of candlelight. Here are some candle making tips and tricks to enhance your experience and ensure a successful outcome.
Firstly, when it comes to decorating your homemade candles, let your imagination run wild. Get inspired by nature or explore different themes that resonate with you. You can add dried flowers or herbs into the melted wax for a delightful touch. Another creative way is to embed small trinkets or charms in the candle for a surprise element.
In order to protect yourself from potential hazards, always exercise caution when working with hot wax. Use a double boiler system to melt the wax on the stove gently. This will help maintain a safe temperature and prevent accidental fires.
Additionally, remember to trim the wicks before each use as mentioned in our previous subtopic. A properly trimmed wick will ensure an even burn and avoid excessive smoke or soot.
By following these candle making tips and tricks, you can create beautiful homemade candles that not only provide illumination but also serve as unique decorative pieces in your home. So go ahead, unleash your creativity and enjoy the magical ambiance of your own handcrafted candles!
Frequently Asked Questions
How long does it take for the candle wax to melt on the stove?
It typically takes around 10-15 minutes for candle wax to melt on the stove, depending on the type of wax used. When melting candle wax on the stove, it’s important to follow proper techniques based on different types of wax. Safety should always be a priority, so make sure you use a double boiler or a heat-resistant container and never leave it unattended. Taking these precautions will help prevent accidents and ensure successful melting of candle wax on the stove.
Can I use any type of candle for melting on the stove?
Can I use any type of candle for melting on the stove?
While it may seem tempting to use any candle, it’s important to exercise caution. Different candles are made from various materials, such as paraffin or soy wax.
It’s crucial to ensure that the candle you choose is safe for melting on the stove. Always read the label and follow the manufacturer’s instructions.
Additionally, remember to take necessary safety precautions while melting candle wax on the stove to prevent accidents and injuries.
Is it safe to leave the stove unattended while melting the candle wax?
Leaving the stove unattended while melting candle wax isn’t safe. Fire safety precautions should always be followed to prevent accidents. It’s crucial to have a fire extinguisher nearby and keep a close eye on the melting process.
To prevent wax spillage, use a double boiler or a heat-resistant container with water between it and the stove. This will ensure that the wax melts evenly without causing any damage or hazards.
How do I know if the melted wax is hot enough to pour into containers?
To accurately gauge the temperature of melted candle wax without a thermometer, there are a few methods you can use.
One way is to dip a clean spoon into the wax and then touch it lightly against your lip. If it feels comfortably warm, then it’s ready to pour.
Another method is to observe the consistency of the wax – when it becomes fluid and smooth, that usually indicates it’s at the right temperature for pouring.
It’s important to be cautious and avoid overheating the wax, as this can cause fires or burns.
Additionally, besides using a stove, you can melt candle wax using a double boiler or a microwave on low heat in short bursts.
Can I reuse the double boiler for cooking after melting the candle wax?
Reusing a double boiler for cooking after melting candle wax can be risky. It’s crucial to prioritize safety precautions. Did you know that nearly 64% of kitchen accidents are caused by improper handling of hot substances?
To avoid potential hazards, thoroughly clean the double boiler before using it for food preparation. Residual wax may contaminate your meal and cause health issues. Always exercise caution when repurposing kitchen equipment to ensure the well-being of yourself and others.
Conclusion
In conclusion, melting a candle on the stove can be a rewarding and creative experience. By following the steps outlined in this article, you can create your own homemade candles that are both beautiful and fragrant.
Remember to exercise caution when working with hot wax and always use a double boiler to prevent any accidents. So go ahead and let your creativity melt away as you embark on this delightful journey of candle making. Happy crafting!