Have you ever considered the best way to securely fasten candle wicks? No need to fret, we have the perfect solution for you!
In this guide, we will share with you our expert tips and techniques for mastering the art of sticking candle wicks down. Whether you’re a seasoned candle maker or just starting out, our step-by-step instructions will ensure your wicks stay in place, providing a perfect burn every time. No more worrying about crooked or loose wicks!
By following our simple yet effective methods, you’ll be able to confidently create beautiful, professional-looking candles. So let’s dive in and learn how to stick candle wicks down like a pro!
Key Takeaways
- Choosing the right wick size is important for proper and efficient burning.
- Measuring and trimming the wick to the correct length ensures a clean and even burn.
- Securing the wick firmly using wick stabilizers helps prevent movement or floating.
- Using a wick sticker or adhesive offers an easy and effective solution for sticking candle wicks down.

Scented Candles Set | Men Candle Set, Scented Candles for Home, Gifts for Men Aromatherapy Gift Set - 4 Pack Manly Gifts for Dad Fathers Day, Soy Candle of Leather/Smoke & Vanilla/Oak/Lavender
Gifts for Him: Scented candles tailored for men make wonderful gifts for Fathers Day, birthdays, holidays, or special...
As an affiliate, we earn on qualifying purchases.
Choose the Right Wick Size
When choosing the right wick size for our candles, we always carefully consider the burning time and diameter of the candle. Wick size selection is crucial to ensure proper and efficient burning.

If the wick is too small, it may not provide enough fuel for the flame, resulting in a weak and dim light. On the other hand, if the wick is too large, it can lead to excessive smoke, soot, and uneven burning.
Troubleshooting wick issues can be done by observing the flame while the candle is burning. If the flame is too small or flickering, it indicates that the wick size may need adjustment.
In the subsequent section, we’ll discuss how to measure and trim the wick to achieve optimal burning performance.

UDIKEFO Gifts for Dad, Fathers Day Christmas Birthday Dad Gifts from Daughter Son - Sandalwood Scented Candle
FUNNY GIFTS FOR DAD- This sandalwood candle with a humorous saying: Dad, Please Light This Candle.It is a...
As an affiliate, we earn on qualifying purchases.
Measure and Trim the Wick
Now that we’ve chosen the right wick size, it’s important to measure and trim the wick to ensure optimal burning.

Proper wick length is crucial for a clean and even burn, so grab a ruler or tape measure and measure the wick from the base to the desired height, leaving about 1/4 inch above the wax.
Once measured, use sharp scissors or wick trimmers to trim the wick to the correct length, ensuring it’s secure and ready for lighting.
Proper Wick Length
To ensure optimal burn performance, it’s important to measure and trim the wick to the appropriate length. Proper wick length is crucial for a clean and even burn, preventing common wick issues such as tunneling and excessive smoking.
Here are five key points to remember when it comes to wick maintenance:
- Measure before trimming: Use a ruler or wick trimmer to measure the wick length before trimming.
- Trim to ¼ inch: Trim the wick to approximately ¼ inch before lighting the candle.
- Avoid long wicks: Long wicks can cause uneven burning and excessive smoke.
- Trim regularly: Trim the wick after every 4 hours of burn time to maintain the ideal length.
- Watch for mushrooming: If the wick develops a mushroom-like shape, trim it to prevent soot buildup.
Securing the Wick Firmly
We measure and trim the wick to secure it firmly in place for optimal burn performance. Properly securing the wick is crucial to ensure that the candle burns evenly and efficiently. There are various wick securing methods that can be used, including the use of wick stabilizers. Wick stabilizers are small metal pieces that can be attached to the bottom of the wick to hold it in place. They help prevent the wick from moving or floating while the candle is burning.
To secure the wick firmly, measure the length of the container and trim the wick accordingly, leaving about ¼ inch above the wax. This will allow for a clean and steady burn.
Now, let’s move on to the next step of securing the wick to the bottom of the container.

Homsolver Dad Gifts from Daughter Son, Gift for Dad Who Wants Nothing, Birthday Fathers Day Christmas for Stepdad Adoptive Father, Dad's Last Nerve Sandalwood Scented Candle
Dad's Gifts from Daughter: This black cedarwood juniper and sandalwood candle with a humorous saying "Dad's last nerve...
As an affiliate, we earn on qualifying purchases.
Secure the Wick to the Bottom of the Container
To secure the wick to the bottom of the container, position it in the center and press it firmly onto the surface. This step is crucial to ensure that the wick remains in place during the candle-making process.

Here are five key tips to help you achieve a secure wick placement and strong wick adhesion:
- Clean the bottom of the container thoroughly to remove any dust or debris that could interfere with the wick adhesion.
- Use a hot glue gun to attach the metal tab of the wick to the container. Apply a small amount of hot glue to the bottom of the tab and press it firmly onto the surface.
- Alternatively, you can use a double-sided adhesive sticker to secure the wick to the container. Peel off the backing of the sticker and press the metal tab onto it, ensuring it’s centered.
- If you prefer a more natural option, you can use a small amount of melted wax to secure the wick. Dip the metal tab into the melted wax and press it onto the bottom of the container.
- Allow the adhesive or wax to fully dry and harden before proceeding with the candle-making process. This will ensure that the wick stays securely in place as the wax is poured.
Homsolver Gift for Dad, Fathers Day Christmas Birthday Dad Gifts from Daughter Son - Sandalwood Scented Candle (7OZ)
FUNNY GIFTS FOR DAD- This black cedarwood juniper & sandalwood candle with a humorous saying: Dad, Please Light...
As an affiliate, we earn on qualifying purchases.
Use a Wick Sticker or Adhesive
When it comes to sticking candle wicks down, using a wick sticker or adhesive can be a practical and effective solution. Wick stickers offer the benefit of convenience, as they’re pre-cut and easy to use.
However, if you don’t have wick stickers on hand, there are alternative adhesive options such as hot glue or double-sided tape that can also do the job.
To ensure proper application, make sure to clean the bottom of the container before sticking the wick down and press firmly to secure it in place.

Benefits of Wick Stickers
One important benefit of using wick stickers or adhesive is that they provide a secure and reliable method for keeping candle wicks in place. Wick stickers offer several advantages over alternative methods, making them the preferred choice for many candle makers. Here are five reasons why using wick stickers is beneficial:
- Easy application: Wick stickers are simple to use, allowing for quick and hassle-free attachment of wicks to the container or base of the candle.
- Heat resistance: Wick stickers are designed to withstand the heat generated by the burning candle, ensuring that the wick stays firmly in place throughout the entire burning process.
- Minimal mess: Unlike liquid adhesives or hot glue, wick stickers eliminate the need for messy cleanup, as they leave behind no residue or drips.
- Versatility: Wick stickers work well with a variety of wick sizes and materials, making them suitable for different types of candles.
- Professional finish: Using wick stickers provides a clean and polished look to your candles, enhancing their overall aesthetic appeal.
Alternative Adhesive Options
Since wick stickers offer numerous benefits for securing candle wicks, it is important to consider alternative adhesive options that provide a similarly reliable hold. While wick stickers are a popular choice, there are other adhesive options available that can secure the wick firmly in place.
One alternative adhesive option is to use a wick sticker. Wick stickers are small, double-sided adhesive discs specifically designed for candle-making. They are easy to use and provide a strong bond between the wick and the container.
Another option is to use adhesive. This can be in the form of glue dots, hot glue, or even double-sided tape. Glue dots are small dots of adhesive that can be placed on the base of the wick tab and pressed firmly onto the container. Hot glue is melted and applied to the base of the wick tab, creating a secure hold. Double-sided tape can also be used by sticking it to the base of the wick tab and pressing it onto the container.

Here is a table that compares the different alternative adhesive options:
| Adhesive Option | Pros | Cons |
|---|---|---|
| Wick Stickers | Easy to use, strong bond | May not stick well on certain surfaces |
| Glue Dots | Secure hold, easy to apply | May leave residue on the container |
| Hot Glue | Strong bond, durable | Requires a hot glue gun |
| Double-sided Tape | Easy to use, no residue | May not provide as strong of a hold |
When choosing an alternative adhesive option, it is important to consider the specific needs of your candle-making project and select an adhesive that will securely hold the wick in place.
Tips for Proper Application
To ensure a secure and effective application, we recommend following these tips when using a wick sticker or adhesive to stick candle wicks down:
- Measure the wick length: Before applying the sticker or adhesive, make sure to measure the wick length accurately. This will ensure that the wick isn’t too short or too long for your container.
- Clean the container: Clean the container thoroughly to remove any dust or debris. This will help the sticker or adhesive adhere better to the surface.
- Apply adhesive to the base of the wick: Apply a small amount of adhesive or place the wick sticker at the base of the wick. Make sure it’s centered and secure.
- Press down firmly: After applying the adhesive or sticker, press down firmly on the wick to secure it to the container. This will ensure it stays in place during the candle-making process.
- Allow it to dry: Give the adhesive or sticker enough time to dry completely before pouring the wax. This will prevent the wick from shifting or moving while the candle sets.
Apply Hot Glue to the Wick Tab
We start by applying hot glue to the wick tab, securing it firmly to the bottom of the candle. This step is crucial to ensure that the wick stays in place during the burning process.
Hot glue is a popular choice for adhering the wick tab because it provides a strong bond and dries quickly. However, if you don’t have hot glue on hand, there are alternative options you can explore.
Wick adhesive alternatives include double-sided tape, candle adhesive stickers, or even a small dab of melted wax. Regardless of the method you choose, make sure to apply it evenly and firmly to the wick tab, allowing it to fully dry or harden before proceeding to the next step.
Use a Wick Centering Device
Let’s talk about the benefits of using a wick centering device when sticking candle wicks down.
These devices help ensure that the wick stays in the center of the candle, resulting in a more even burn and preventing tunneling.

Additionally, if you don’t have a wick centering device, there are alternative methods you can try to stabilize the wick, such as using a clothespin or a pencil.
Benefits of Centering Devices
As we explore the benefits of using a wick centering device, it becomes evident that this tool plays a crucial role in ensuring the proper alignment and stability of candle wicks. Here are some advantages of using centering devices:
- Precise positioning: Wick centering tools allow for precise placement of the wick at the center of the candle, ensuring even burning and reducing the risk of uneven melting or tunneling.
- Improved burn quality: By keeping the wick centered, these devices promote a steady and consistent flame, resulting in a cleaner and more efficient burn.
- Enhanced safety: Centering devices help prevent the wick from leaning or falling over, reducing the likelihood of accidents such as flare-ups or the wick touching the sides of the container.
- Time-saving: Using a centering device saves time and effort in manually aligning the wick, allowing for more efficient candle-making processes.
- Professional finish: By using a wick centering tool, candle makers can achieve a polished and professional look for their products, enhancing their market appeal.
Alternative Wick Stabilizers
To explore alternative options for stabilizing candle wicks, we can utilize a wick centering device. Wick centering devices are designed to hold the wick in place while the candle wax sets, ensuring a straight and even burn. They come in various shapes and sizes, such as metal clips or plastic holders, and can be easily inserted into the candle container.
While traditional wick stabilizers are commonly used, DIY wick holders can be a cost-effective and creative alternative. One popular DIY option is to make wick holders using materials like paperclips or wooden skewers. Simply bend the paperclip into a U-shape or cut the skewer into smaller pieces, and then insert them into the wax to hold the wick centered.

These homemade wick stabilizers provide a practical solution for those looking for alternatives to traditional options.
Use a Wick Bar or Popsicle Stick
We can use a wick bar or popsicle stick to stick candle wicks down. Here are some key benefits of using a wick bar:
- Improved stability: A wick bar provides a stable and secure base for the wick, preventing it from moving or tilting during the candle-making process.
- Consistent positioning: With a wick bar, you can easily ensure that the wick stays in the center of the candle, resulting in a more even burn.
- Efficiency: Using a wick bar saves time and effort, as it eliminates the need for manually holding or adjusting the wick while pouring the melted wax.
- Reusable: Wick bars are typically made of durable materials like stainless steel, making them long-lasting and reusable for multiple candle-making projects.
- Versatility: Wick bars come in various sizes and shapes, allowing you to choose the one that fits your candle container or mold perfectly.
If you don’t have a wick bar, you can also use a popsicle stick as an alternative. While not as sturdy or precise as a wick bar, a popsicle stick can still provide some stability and help keep the wick in place during the pouring process. However, it’s important to note that popsicle sticks may not be as effective for larger or heavier candles.
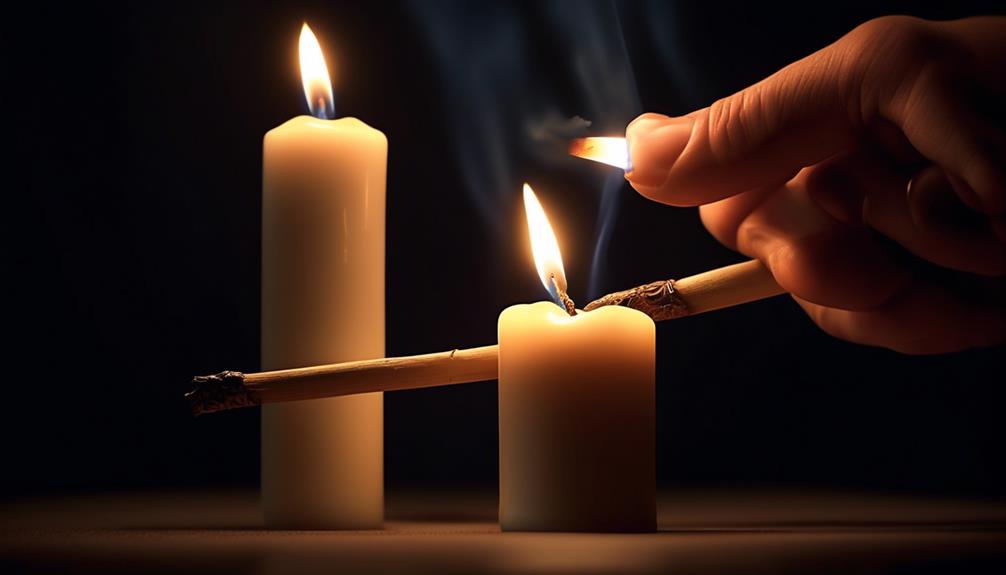
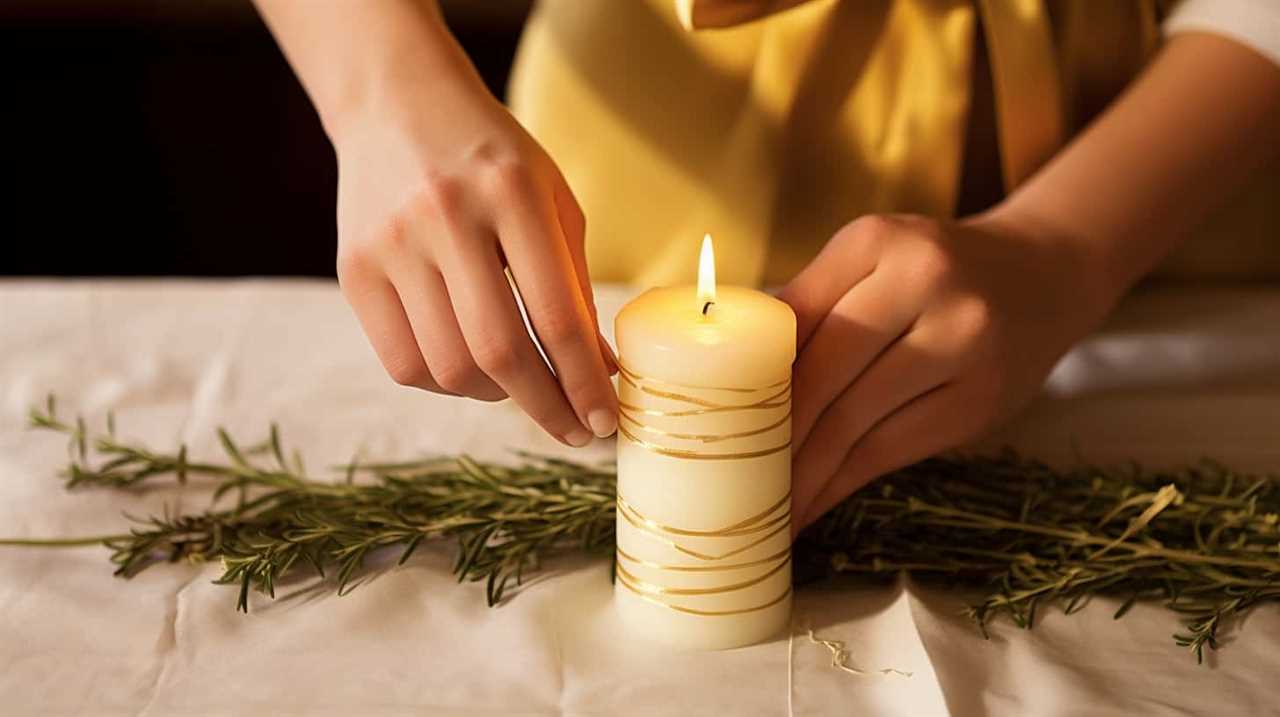
Dip the Wick in Melted Wax
To ensure proper adherence of the wick, dip it in melted wax before attaching it to the wick bar or popsicle stick.

Wick waxing is a crucial step in the candle-making process, as it helps the wick stick firmly to the chosen base. By dipping the wick in melted wax, you create a bond between the wick and the wax, ensuring that it stays in place during the pouring and burning of the candle.
To perform this wick adhesion technique, heat the wax to a liquid state and dip the wick into it, making sure to fully coat the entire length of the wick. Hold the wick above the wax for a few seconds to allow any excess wax to drip off, and then place it carefully onto the wick bar or popsicle stick.
This method guarantees a secure attachment and helps prevent the wick from moving or coming loose during the candle-making process.
Use a Wick Sustainer or Clip
When it comes to sticking candle wicks down, using a wick sustainer or clip can be incredibly beneficial. Wick sustainers help to keep the wick centered and secure in the candle, preventing it from moving or falling over.

Additionally, there are alternative methods for securing the wick, such as using a paperclip or a clothespin, which can also be effective in keeping the wick in place.
Benefits of Wick Sustainers
Using a wick sustainer or clip provides several benefits for sticking candle wicks down. These advantages of wick stickers include:
- Enhanced Stability: Wick sustainers or clips hold the wick securely in place, preventing it from moving or shifting during the candle-making process.
- Even Wax Distribution: By keeping the wick centered and straight, wick sustainers ensure that the wax melts evenly, resulting in a more uniform burn.
- Improved Safety: Wick sustainers help to prevent the wick from becoming too long, reducing the risk of the flame getting too large or causing accidents.
- Easy Wick Trimming: With a wick sustainer or clip, trimming the wick becomes effortless as it remains in place and ready for the next burn.
- Professional Finish: Using wick sustainers or clips gives your candles a polished and finished look, making them more appealing to customers or as gifts.
Alternative Wick Securing Methods
How can we effectively secure candle wicks without using a wick sustainer or clip? While wick sustainers and clips are popular choices for securing candle wicks, there are alternative techniques that can be just as effective. By using unconventional wick fastening methods, we can ensure that our candle wicks stay in place during the burning process. One method involves creating a small knot at the end of the wick and pressing it into the melted wax at the bottom of the container. Another technique is to use a small piece of tape to adhere the wick to the bottom of the container. Additionally, you can also try using a small wire or paper clip to secure the wick in place. These alternative wick securing techniques provide viable options for those who don’t have access to wick sustainers or clips.
| Alternative Wick Securing Methods | Description |
|---|---|
| Knotting | Create a small knot at the end of the wick and press it into the melted wax at the bottom of the container. |
| Tape | Use a small piece of tape to adhere the wick to the bottom of the container. |
| Wire or Paper Clip | Secure the wick in place by using a small wire or paper clip. |
Knot the Wick Around a Metal Washer
We can secure the candle wick by knotting it around a metal washer. This method provides a reliable way to keep the wick centered and prevent it from moving while the candle burns. Here are five key benefits of using a metal washer to secure the wick:

- Stability: The weight and flat surface of the washer ensure that the wick remains in place, even during the melting process.
- Easy adjustment: If the wick starts to drift off-center, you can easily reposition it by loosening the knot and sliding the washer to the desired position.
- Versatility: Metal washers come in various sizes, allowing you to choose the appropriate one that fits your candle container and wick thickness.
- Cost-effective: Metal washers are inexpensive and readily available at hardware or craft stores, making them a cost-effective alternative to other wick securing methods.
- Long-lasting: Unlike adhesive or glue, which may degrade over time, the metal washer provides a durable solution, ensuring that the wick remains secure throughout the candle’s lifespan.
Use a Wick Pin
To ensure the stability of the candle wick, we recommend using a wick pin. A wick pin is a small metal tool that can be inserted through the wick tab and into the wax, holding the wick securely in place. The main use of a wick pin is to prevent the wick from moving or floating during the candle-making process. This is especially useful when working with taller or larger candles that may require additional support.
While a wick pin is a popular choice for securing candle wicks, there are alternative methods you can consider. One alternative is using a wick sticker or adhesive to attach the wick to the bottom of the container. Another option is using a wick centering device that holds the wick in place while the wax cools and hardens. These alternatives can be effective, but it’s important to ensure that the wick is securely held in place to prevent any issues during the burning process.
Secure the Wick With a Clothespin
After using a wick pin, an alternative method to securely stick candle wicks down is by securing the wick with a clothespin. This creative wick securing method provides a simple and effective way to keep your wick in place while you pour the wax.
Here are five reasons why using a clothespin as an alternative wick holder is a great idea:

- Affordable and easily accessible
- Provides a firm grip on the wick
- Allows for precise placement of the wick in the center of the candle
- Keeps the wick straight and taut
- Can be easily adjusted or removed as needed
Once the wick is securely fastened with the clothespin, you can proceed to the next step: applying a small dab of hot wax to the wick base. This will further ensure that the wick stays in place during the candle-making process.
Apply a Small Dab of Hot Wax to the Wick Base
To further secure the wick in place, we apply a small dab of hot wax to the base of the wick. This step is crucial for maintaining wick stability and preventing it from moving or floating around while the candle burns. The hot wax acts as an adhesive, firmly attaching the wick to the container or mold.
Here is a visual representation of the wick placement process:
| Step | Instructions |
|---|---|
| 1 | Prepare the hot wax by melting it in a double boiler or a microwave-safe container. |
| 2 | Once the wax reaches a liquid state, carefully dip the base of the wick into the hot wax. |
| 3 | Gently press the wax-coated wick onto the desired spot in the container or mold, ensuring it is centered and straight. |
Remember to allow the wax to cool and harden completely before proceeding to the next step. By following these steps, you can ensure proper wick placement and enhance the overall stability of your candles.
Use a Wick Holder or Mold
We can use a wick holder or mold to ensure the proper placement of the candle wick. Here are some benefits of using a wick holder:
- Precise positioning: A wick holder allows you to position the wick exactly where you want it in the candle. This ensures an even burn and prevents the wick from leaning or floating.
- Stability: Using a wick holder keeps the wick steady during the pouring and cooling process, preventing it from moving or falling over.
- Consistency: With a wick holder, you can consistently achieve the same wick height in all your candles, resulting in a professional-looking finished product.
- Ease of use: Wick holders are simple tools that make the process of sticking down wicks much easier and more efficient.
- Versatility: Besides wick holders, there are alternative options such as wick molds that can also help you achieve proper wick placement.
Frequently Asked Questions
Can I Use a Regular Glue Stick Instead of Hot Glue to Secure the Wick Tab?
Using a regular glue stick as an alternative to hot glue for securing a wick tab has pros and cons. It may work, but it may not hold as well. There are other ways to secure a wick tab without hot glue stick.
How Long Should the Wick Be Trimmed Before Sticking It Down?
To determine the correct wick size for different types of candles, consider the diameter of your container and the type of wax being used. Troubleshoot common issues with candle wicks by trimming them to the appropriate length before sticking them down.
Is It Necessary to Use a Wick Centering Device if I’m Using a Small Container?
Using a wick centering device is not necessary for small container candle making. There are alternative methods such as using a clothespin or pencil to keep the wick centered. It’s important to follow best practices to ensure a successful candle.

Can I Use a Paper Clip Instead of a Clothespin to Secure the Wick?
Yes, a paper clip can be used as an alternative to a clothespin to secure the wick. However, there are other alternative adhesives available that may provide a more secure and long-lasting bond.
What Type of Adhesive Should I Use if I Don’t Have a Wick Sticker?
When you don’t have a wick sticker, there are alternative adhesives you can use to secure candle wicks. Here are some tips for securing candle wicks without a wick sticker.
Conclusion
To ensure your candle wicks stay in place, follow these simple steps.
- Choose the correct size wick.
- Measure and trim it accordingly.
- Secure it to the bottom of the container using a wick sticker or adhesive.
- For added stability, apply hot glue to the wick tab or use a wick pin.
- You can also use a clothespin or a small dab of hot wax to keep the wick in place.
- Remember, using a wick holder or mold can also help maintain the wick’s position.
So go ahead and create beautiful, long-lasting candles with confidence!