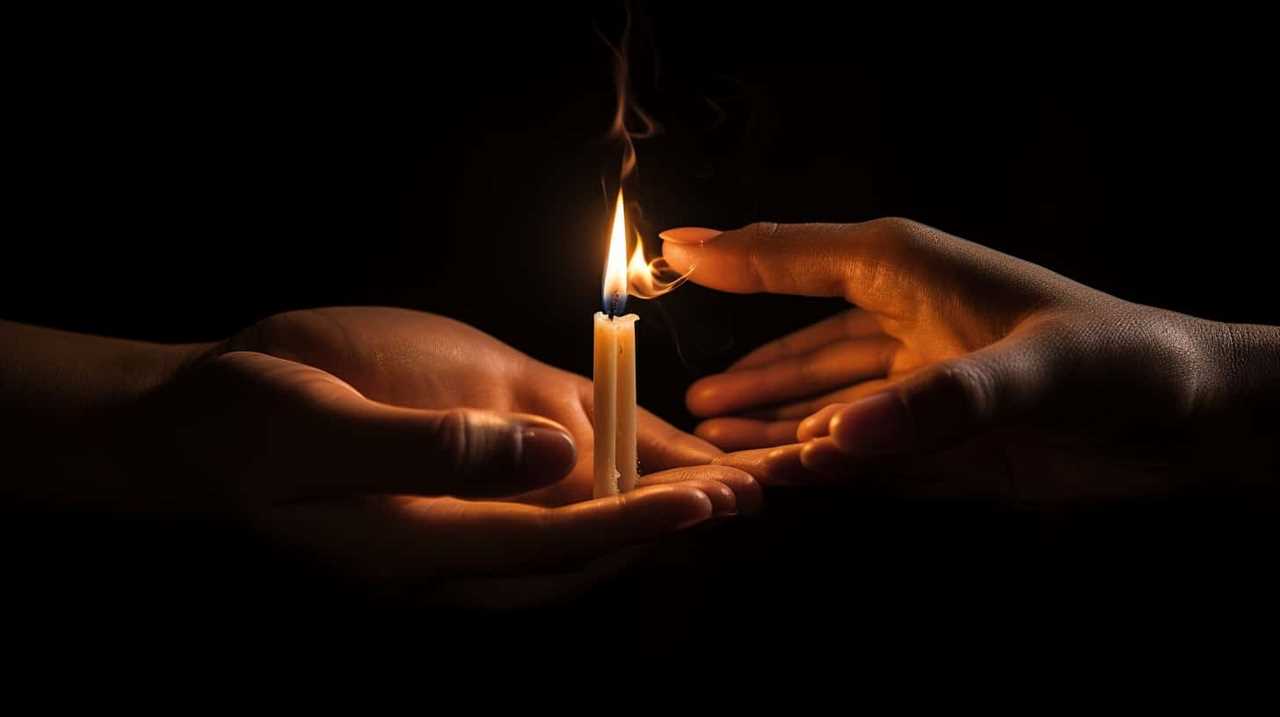
Were you aware that over 70% of people who own candles do not know that they can simple change the wick on their own?
Well, fear not! We are here to guide you through the simple and satisfying process of replacing the wick in your candle. By following our step-by-step instructions, you’ll be able to breathe new life into your favorite candles and continue enjoying their warm glow for many more hours to come.
So let’s gather our materials, prepare our workspace, and get ready to serve ourselves by learning this valuable skill. With a little bit of effort, you’ll be able to rejuvenate your candles and create a cozy atmosphere in your home.
Let’s get started!
Key Takeaways
- Gather necessary materials
- Remove the old wick
- Measure and cut a new wick
- Attach the wick to a wick holder

CandMak Candle Wick Kit – 60 Cotton Wicks with Candle Making Tools (Thick 4"+6"+8")
- Suitable for 2.4-2.8 inch containers: Fits 6cm – 7cm diameter containers
- Complete candle making kit: Includes 60 wicks, stickers, holders, tags, and tube
- Pre-tabbed wicks with natural wax coating: Ensures rigidity and easy pouring
As an affiliate, we earn on qualifying purchases.
As an affiliate, we earn on qualifying purchases.
Gather Necessary Materials
To begin, we’ll gather the necessary materials for replacing the wick in a candle. It’s important to have the right tools to ensure a successful wick replacement.
Firstly, check the type of wick holder your candle has. There are different types such as metal clips, ceramic holders, or even adhesive stickers. Make sure you have the appropriate replacement wick that matches the holder type.
Next, consider the wick replacement frequency. If you’re replacing the wick due to low flame or poor burn, it may be time to switch to a higher quality wick.
Additionally, gather scissors or wick trimmers to trim the new wick to the desired length.

Lastly, have a clean work surface and a small container to collect any debris or old wick trimmings.
With these materials at hand, we’re now ready to proceed with the wick replacement process.
Prepare Your Workspace
Now, let’s get our workspace ready for replacing the wick in the candle. It’s important to ensure that our workspace is well-organized and safe.
Here are three key steps to prepare your workspace:

- Clear the area: Start by removing any unnecessary items from your workspace. This will help you have enough space to work comfortably and reduce the risk of accidents. Keep your tools and materials neatly organized and easily accessible.
- Protect the surface: Place a protective covering, such as a plastic sheet or newspaper, on your workspace. This will prevent any wax or other materials from damaging the surface. It will also make cleanup easier once you’re finished replacing the wick.
- Gather safety equipment: Before starting the process, make sure you have the necessary safety equipment. This includes wearing protective gloves and safety goggles. These precautions will help protect your hands and eyes from any potential hazards.
Remove the Old Wick
Let’s begin by extracting the old wick from the candle. Removing the old wick is an important step in replacing it, as it ensures that the new wick will burn properly and efficiently. There are several wick removal techniques that you can use.
- Start by extinguishing the candle and allowing it to cool completely. This will ensure your safety while working with the wick.
- Gently loosen the wax around the wick using a toothpick or a small tool. Be careful not to damage the candle or push the wick deeper into the wax.
- Once the wax around the wick is loosened, carefully lift the old wick out of the candle. You can use tweezers or your fingers to do this.
Replacing the old wick with a new one has several benefits. It improves the candle’s overall burn quality, prevents smoking and soot buildup, and ensures a longer burn time. By following these wick removal techniques, you’ll be on your way to replacing the wick successfully.
Measure and Cut a New Wick
Now that we’ve removed the old wick, it’s important to measure and cut a new one to ensure a proper fit and optimal burning. The length and size of the wick will depend on the size of your candle and the desired burn time.
To begin the wick replacement process, gather the necessary materials and follow these step-by-step instructions.
Wick Length and Size
To measure and cut a new wick, we’ll need a ruler or tape measure. Follow these steps to ensure the correct length and size for your candle:
- Measure the height of your candle: Use a ruler or tape measure to measure the height of your candle from the wax to the top rim. This will determine the length of the wick needed.
- Consider the wick size: The size of the wick depends on the diameter of the candle. For smaller candles, a thinner wick is recommended, while larger candles require a thicker wick. Consult a wick size chart to choose the appropriate size.
- Cut the wick: Once you have determined the length and size, use scissors to cut the wick accordingly. Make sure to leave a little extra length for trimming later.
Wick Replacement Process
To replace the wick in a candle, we need to start by measuring and cutting a new wick. The wick replacement frequency depends on the usage of the candle, but as a general rule, it’s recommended to replace the wick every 3-4 hours of burn time or when the wick becomes too short to light.
Here are some wick maintenance tips to keep in mind:
- Use a ruler or measuring tape to measure the length of the old wick.
- Add an extra inch to the measured length to ensure the new wick is long enough.
- Cut the new wick to the desired length using sharp scissors.
- Trim the excess wick if needed, leaving about ¼ inch above the wax surface.
Now that we’ve cut the new wick, it’s time to attach it to a wick holder, which we’ll discuss in the next section.

Attach the Wick to a Wick Holder
Now let’s talk about the various types of wick holders available. These holders come in different shapes and sizes, such as clips, pins, and metal discs.
Next, we’ll explore the different methods for attaching the wick to the holder, including threading it through a hole or using adhesive.
Lastly, we’ll address the question of how often the wick and holder should be replaced to ensure the best performance of your candle.
Wick Holder Types
We attach the wick to a wick holder using an appropriate type of holder. There are different types of wick holders available, each with its own pros and cons. Here are three commonly used wick holder types:

- Tabbed Wick Holders: These holders have a metal tab attached to the bottom of the holder, making it easy to secure the wick to the holder. The tab provides stability and prevents the wick from moving around during burning. However, it may leave a small metal residue in the melted wax.
- Cored Wick Holders: These holders have a hollow tube running through the center, which holds the wick securely. The core helps the wick remain upright and prevents it from sagging. However, cored wick holders can sometimes produce a larger flame and may require additional trimming.
- Self-centering Wick Holders: These holders have a built-in mechanism that keeps the wick centered as the candle burns. They provide a consistent burn and eliminate the need for manual adjustments. However, they may not be suitable for all candle types and sizes.
Consider the pros and cons of each wick holder type to choose the one that best suits your needs.
Wick Attachment Methods
Attaching the wick to a wick holder is accomplished by threading the wick through the designated opening. This step is crucial to ensure that the wick stays in place during the burning process. There are different wick attachment techniques that you can use, depending on the type of wick holder you have. Here are some common methods:
| Method | Description |
|---|---|
| Knot | Tie a small knot at the end of the wick and thread it through the wick holder’s opening. Pull the knot tight to secure the wick in place. |
| Clip | Use a wick clip to hold the wick in place. Insert the wick into the clip and squeeze it shut. Then, attach the clip to the wick holder. |
| Stick | If your wick holder has a stick attachment, simply insert the wick into the stick and push it into the designated slot on the holder. |
When it comes to alternative wick materials, you can experiment with different options such as hemp or cotton wicks, which can offer a longer and cleaner burn. Just make sure to choose a wick that is compatible with your candle’s size and wax type.
Wick Replacement Frequency?
To determine how often we should replace the wick and attach it to a wick holder, it’s important to consider the burning time and condition of the current wick. Regular wick replacement is essential to ensure optimal performance and safety while using candles.

Here are three key factors to consider when determining the frequency of wick replacement:
- Burning time: If you notice that your candle burns slower than usual or the flame is small and weak, it may be a sign that the wick needs to be replaced. Over time, wicks can become clogged with debris, reducing their ability to draw up the wax efficiently.
- Wick condition: Inspect the wick regularly for signs of damage, such as black soot buildup, mushrooming, or disintegration. These issues can affect the quality of the burn and potentially lead to candle malfunction or accidents.
- Benefits of regular replacement: By replacing the wick regularly, you ensure a clean burn, a steady flame, and longer-lasting candles. Regular wick replacement also helps prevent excessive smoke, soot, and potential fire hazards.
Insert the Wick Holder Into the Candle
To begin, carefully insert the wick holder into the candle using a twisting motion. Make sure the wick holder is aligned properly with the center of the candle to ensure an even burn. Gently push the wick holder into the wax until it’s snugly in place. This step is crucial in ensuring that the wick stays upright and centered as the candle burns.
Take your time and be cautious not to push too hard, as this could cause the wick holder to break or damage the candle. Once the wick holder is inserted, you can move on to the next step of securing it in place.
Secure the Wick Holder in Place
We secure the wick holder in place by tightening the screw at the bottom of the candle. To ensure proper wick holder maintenance and avoid any potential accidents or mishaps, follow these steps:

- Locate the screw at the bottom of the candle. It’s usually situated in the center, directly under the wick holder.
- Use a small screwdriver to turn the screw clockwise until it’s firmly tightened. Ensure that the wick holder is secure and doesn’t wobble.
- Avoid overtightening the screw, as this could damage the wick holder or the candle itself.
If you prefer wick holder alternatives, there are a few options available. You can use metal or ceramic wick holders that come in various shapes and sizes. Additionally, some candles come with built-in wick holders, eliminating the need for separate maintenance.
Remember to always follow the manufacturer’s instructions for proper installation and maintenance of the wick holder.
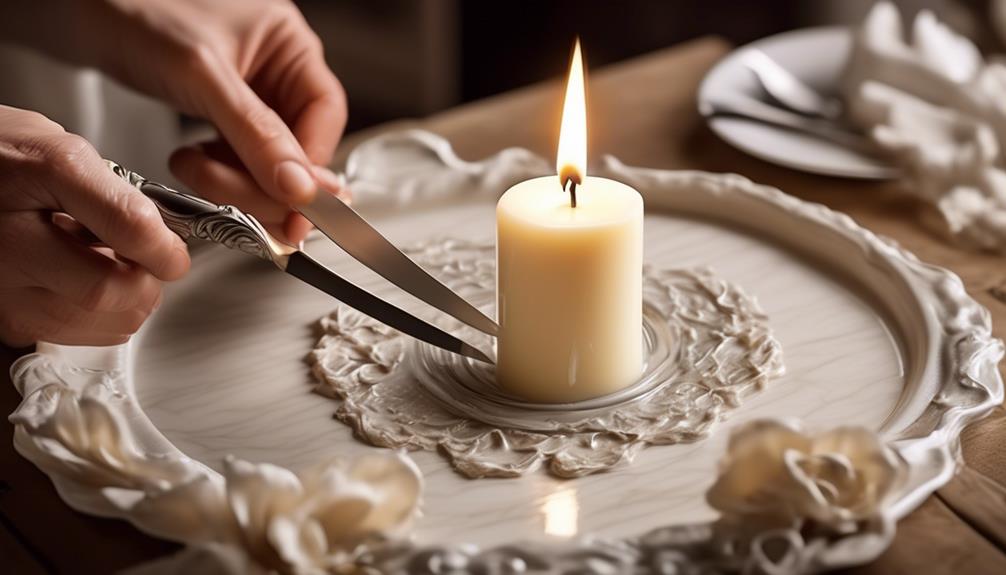
Trim the Wick to the Desired Length
After securing the wick holder in place, we can now trim the wick to the desired length. Properly trimming the wick is essential for a clean and even burn, as well as preventing excessive smoke and soot.
Here are some wick trimming techniques to ensure optimal performance of your candle:

- Use sharp scissors or a wick trimmer to cut the wick. Blunt scissors may crush the wick, affecting its functionality.
- Trim the wick to approximately 1/4 inch before lighting. This length allows for a controlled flame and reduces the risk of the wick mushrooming or creating excess smoke.
- Avoid cutting the wick too short, as this can cause the flame to struggle to stay lit or result in an uneven burn.
If you encounter any issues with wick replacement, such as difficulty securing the wick holder or a wick that consistently burns unevenly, it may be necessary to troubleshoot further or consult a professional for assistance.
Prepare the Wax for Pouring
Now, let’s get the wax ready for pouring.
Preparing the wax is an important step in candle making that ensures optimal burning and longevity. Here are three essential steps to prepare the wax:
- Melt the wax: Use a double boiler or a dedicated wax melting pot to melt the wax. Place the wax in the top container and heat it gently until it reaches the desired temperature. Stir occasionally to ensure even melting.
- Add fragrance and color: Once the wax has melted, it’s time to add fragrance oils and colorants. Carefully measure and add the desired amount of fragrance oil, stirring gently to distribute it evenly. If adding color, use liquid or dye chips and mix well until the desired shade is achieved.
- Allow the wax to cool: After adding fragrance and color, let the wax cool slightly before pouring it into the candle container. This helps prevent heat damage to the container and ensures a smooth and even pour.
Pour the Wax Into the Candle
To ensure a smooth and even pour, use a small funnel to carefully pour the melted wax into the candle container. This step is crucial in maintaining the quality of your candle.

By using a funnel, you can control the flow of the wax and prevent any spills or uneven distribution. This technique helps to ensure that the wax reaches every corner of the container, allowing for a more even burn and maximizing the wick replacement benefits.
Slowly pour the wax into the container, being mindful not to overfill it. If necessary, use a spoon to guide the wax and distribute it evenly. Once the container is filled, gently tap it on a flat surface to remove any air bubbles.
Now, it’s time to move on to the next step and allow the wax to cool and set.
Allow the Wax to Cool and Set
We let the wax cool and set after pouring it into the candle container. Allowing the wax to cool and set is an important step in the candle-making process as it ensures proper candle formation and improves candle longevity.

Here are three key steps to follow when allowing the wax to cool and set:
- Patience is key: It’s important to resist the temptation to touch or move the candle while the wax is still hot. Moving it prematurely can cause the wax to shift and result in an uneven burn.
- Troubleshoot common wick issues: While the wax is cooling, take a moment to inspect the wick. Ensure it’s centered and upright. If it has moved during the pouring process, gently reposition it to the desired location.
- Monitor the cooling process: Keep an eye on the wax as it cools. If you notice any cracks or sinkholes forming, this may indicate that the wax is cooling too quickly. To prevent this, consider using a heat-resistant container or placing the candle in a warm area to allow for a slower cooling process.
Remove the Wick Holder
Now that the wax has cooled and set, the next step in replacing the wick is to remove the wick holder.
To do this, gently grab the wick holder with a pair of tweezers or needle-nose pliers and twist it counterclockwise.
Once the wick holder is loose, carefully lift it out of the candle, ensuring not to damage the surrounding wax.

Removing the wick holder is an important step in the process as it allows for easy access to replace the wick and maintain the candle for future use.
Wick Holder Removal Techniques
First, remove all the wick holders from the candle using a small pair of pliers. Here are three techniques to help you remove the wick holder effectively:
- Grip the wick holder firmly with the pliers, making sure to hold it close to the base. Gently twist and pull upwards to remove it from the candle. If the wick holder is stubborn, you can try wiggling it slightly while pulling to loosen it.
- If the wick holder is too small or difficult to grip with pliers, you can use a pair of tweezers instead. Carefully insert the tweezers into the wick holder and apply gentle pressure to pull it out of the candle.
- In some cases, the wick holder might be stuck due to melted wax. To remove it, you can heat the bottom of the candle with a hairdryer for a few seconds to soften the wax, making it easier to remove the wick holder.
With the wick holders removed, we can now move on to exploring different wick replacement options.
Wick Replacement Options
To begin replacing the wick in the candle, let’s explore our options for removing the wick holder.
There are a few different wick replacement techniques you can try.
The first option is to carefully pry the wick holder out using a small pair of pliers or tweezers. Gently grip the holder and wiggle it back and forth until it loosens and can be pulled out.
Another option is to melt the wax around the wick holder using a hairdryer or heat gun. Once the wax is softened, use a pair of pliers or tweezers to pull the wick holder out.
If you prefer to use alternative wick materials, you can try using a cotton shoelace or even a piece of twine. Just make sure the new wick is the same length as the original one.

Wick Maintenance Tips
After carefully removing the wick holder using a pair of pliers or tweezers, we can now move on to maintaining the wick. Proper wick maintenance is important to ensure a clean and efficient burn, as well as to prevent wick mushrooming. Here are three essential tips for wick maintenance:
- Wick Cleaning: Over time, wicks can accumulate debris and soot, which can affect the quality of the flame. To clean the wick, gently brush off any loose debris using a soft brush or a cotton swab. Avoid using harsh chemicals as they may damage the wick.
- Trimming the Wick: To prevent wick mushrooming, it’s crucial to keep the wick trimmed to the recommended length. Using a wick trimmer or a pair of scissors, trim the wick to approximately 1/4 inch before each use. This will help promote a steady and even burn.
- Preventing Wick Mushrooming: Wick mushrooming occurs when the wick burns too hot, resulting in a large, distorted flame. To prevent this, make sure to follow the manufacturer’s guidelines on proper wick size and ensure that the candle isn’t placed in a drafty area.
Trim the Wick One Final Time
Once we’ve replaced the wick in the candle, it’s important to trim it one final time for optimal burning. Trimming the wick ensures that it burns evenly and reduces the risk of soot and smoke.
To trim the wick, gather the necessary tools: a pair of wick trimmers or sharp scissors. Hold the candle securely and locate the wick, which should be about ¼ inch above the wax. Using the trimmers, carefully cut off the excess wick, making sure to remove any charred or blackened portions. Dispose of the trimmed wick.
After trimming, you can light your candle and enjoy its rejuvenated glow. With proper wick maintenance, your candle will provide hours of beautiful, fragrant light.

Enjoy Your Newly Rejuvenated Candle
Now that you’ve successfully replaced the wick in your candle, it’s time to enjoy the fruits of your labor.
By utilizing the wick replacement methods we discussed, you’ve improved the performance of your candle and extended its lifespan.
Not only will you be able to continue enjoying the beautiful ambiance and soothing scents of your favorite candle, but you’ll also benefit from the cost-saving and eco-friendly aspects of rejuvenating your candle.
Wick Replacement Methods
To begin, let’s delve into the various methods we can use to replace the wick in our candle and enjoy the rejuvenated glow it will provide. Here are three step-by-step methods to replace the wick:
- Method 1: Wick Replacement Tools
- Gather the necessary tools: a wick trimmer, scissors, and a wick holder.
- Use the wick trimmer to cut the old wick as close to the base as possible.
- Attach the wick holder to the new wick and insert it into the candle, ensuring it reaches the bottom.
- Trim the excess wick, leaving about ¼ inch above the wax.
- Method 2: Troubleshooting Wick Issues
- If the wick is too short, use a toothpick to push it further into the wax.
- If the wick is too long, trim it to the desired length using scissors or a wick trimmer.
- If the wick is flickering excessively, extinguish the candle, trim the wick, and relight it.
- Method 3: Preparing the New Wick
- Soak the new wick in melted wax for 5 minutes.
- Remove the wick from the wax and let it dry for a few minutes.
- Trim the wick to the desired length and attach it to the wick holder.
- Insert the new wick into the candle, ensuring it’s centered.
Improving Candle Performance
To enhance our candle’s performance and fully enjoy the rejuvenated glow, we can implement simple techniques and strategies. By improving the fragrance and increasing the burn time, we can create a more delightful and long-lasting candle experience.
Here are some steps to improve your candle’s performance:
- Choose high-quality candles: Opt for candles made with natural ingredients and essential oils for a stronger and longer-lasting fragrance.
- Trim the wick: Before each use, trim the wick to about ¼ inch to prevent excessive soot and ensure a clean, even burn.
- Avoid drafts: Place your candle away from open windows or fans to prevent uneven burning and maximize fragrance output.
- Burn for longer periods: Allow your candle to burn for at least 2-3 hours each time to create a deep melt pool and release more fragrance.
- Store properly: Keep your candles in a cool, dry place to preserve their fragrance and quality.
Benefits of Rejuvenation
After implementing these simple techniques and strategies to improve our candle’s performance, we can now fully enjoy the benefits of rejuvenation and bask in the delightful ambiance of our newly rejuvenated candle. Rejuvenating our candle not only extends its lifespan but also enhances its overall performance, allowing us to reap the following rejuvenation benefits:
- Enhanced Scent: Through the process of rejuvenation, our candle’s fragrance is revitalized, ensuring that it fills the room with a pleasant and long-lasting aroma. We can now enjoy a more intense and captivating scent experience.
- Improved Burn Time: By rejuvenating our candle, we can ensure a more even and consistent burn, maximizing its burn time. This means that we can savor the warm glow and cozy atmosphere for a longer period, making our candle last even longer.
- Cost Savings: Rejuvenating our candle allows us to avoid the need for frequent replacements, saving us money in the long run. By implementing these rejuvenation techniques, we can extend the life of our candle and continue to enjoy its benefits for an extended period.
Frequently Asked Questions
What Are the Necessary Materials Needed to Replace a Wick in a Candle?
To replace a wick in a candle, you will need a new wick, scissors, and a candle snuffer. First, remove the old wick and trim the new one to size. Then, carefully insert the new wick into the candle.

How Do I Prepare My Workspace Before Replacing the Wick?
To prepare our workspace before replacing the wick in a candle, we need to ensure safety precautions are taken. Clear the area of any flammable materials, have a fire extinguisher nearby, and wear protective gloves.
Can I Reuse the Old Wick or Do I Need to Measure and Cut a New One?
We can’t reuse the old wick; it’s like trying to relight a burnt-out fire. To measure a new one, grab a ruler, cut it slightly longer than the old wick, and trim the excess.
How Do I Attach the New Wick to a Wick Holder?
To secure the new wick to a wick holder, start by threading the wick through the hole in the holder. Then, tie a knot at the bottom of the wick to prevent it from slipping out. Finally, trim the excess wick for a clean finish.
Is There a Specific Length I Should Trim the Wick to After It Has Been Secured in Place?
After securing the wick in place, it’s important to trim it to the recommended length. This ensures a clean and efficient burn. Use sharp scissors to trim the wick to about ¼ inch before lighting the candle.

Conclusion
In conclusion, replacing the wick in a candle is a simple and rewarding process. By following the step-by-step instructions outlined above, you can effortlessly rejuvenate your candle and enjoy its warm glow once again.
With just a little effort and the right materials, you can transform your candle into a masterpiece, bringing a cozy and inviting atmosphere to any space.
So go ahead and give it a try – you’ll be amazed at the difference it can make!