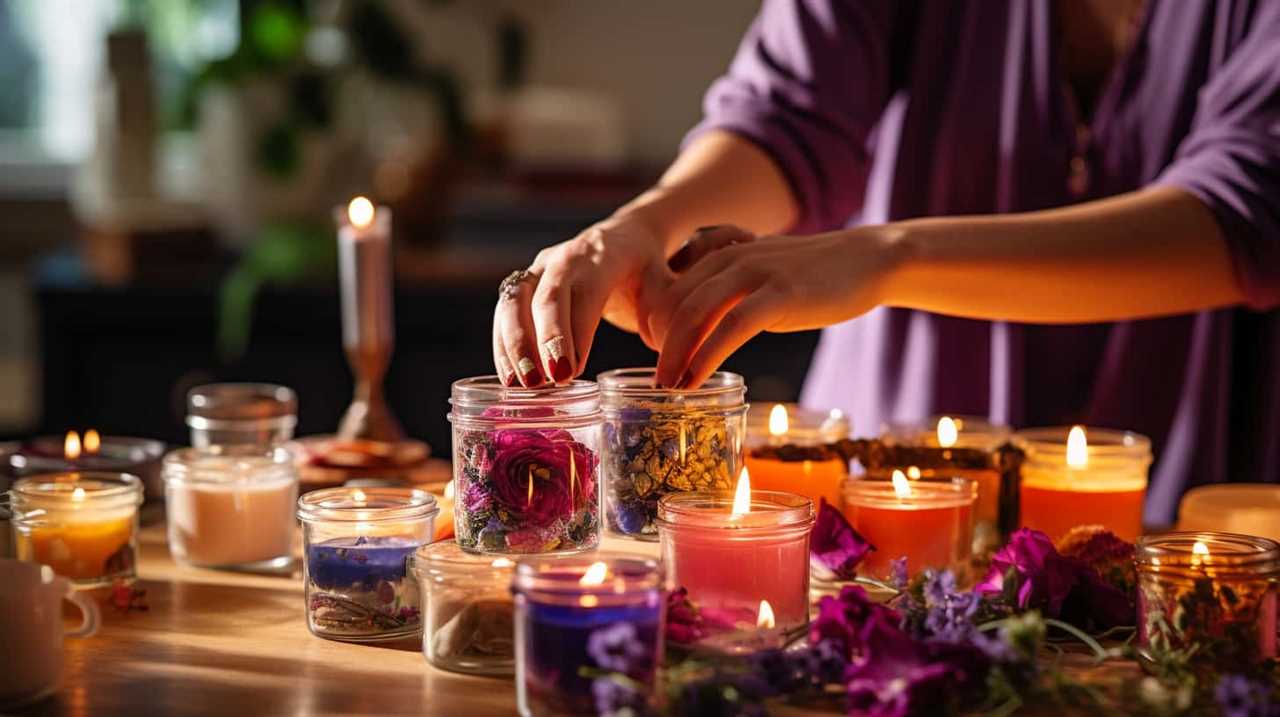
Connect with us

Candles

How to Reuse Old Candle Wax

Published

on

Ever thought about how to utilize all that remaining candle wax? Don’t worry! We have everything under control. In this tutorial, we’ll demonstrate how to repurpose used candle wax in both innovative and useful manners.

From making container candles to crafting wax sculptures, the possibilities are endless. By giving new life to your old candle wax, you’ll not only save money but also reduce waste.

So, join us as we embark on this journey of turning old wax into something beautiful and useful. Together, let’s unleash our creativity and serve others with our resourcefulness.

Let’s get started!

Advertisement

cheap candles australia

Key Takeaways

  • Reusing old candle wax is a great way to create new candles, such as container candles, floating candles, and tealight candles.
  • Tealight candles can also be upcycled into decorated tealight cups, mini succulent planters, and outdoor lanterns.
  • Old candle wax can be used to make aromatherapy wax melts, which have various benefits and can be customized with different fragrances.
  • Other uses for old candle wax include making wax sachets, wax tarts, and fire starters. Additionally, it can be used for unique projects like wax seals, wax dipped flowers, wax crayons, and wax luminaries.

Container Candles

To reuse old candle wax for container candles, we start by gathering all of our empty containers and preparing them for the new wax.

First, make sure the containers are clean and free from any residue. You can wash them with warm soapy water and dry them thoroughly.

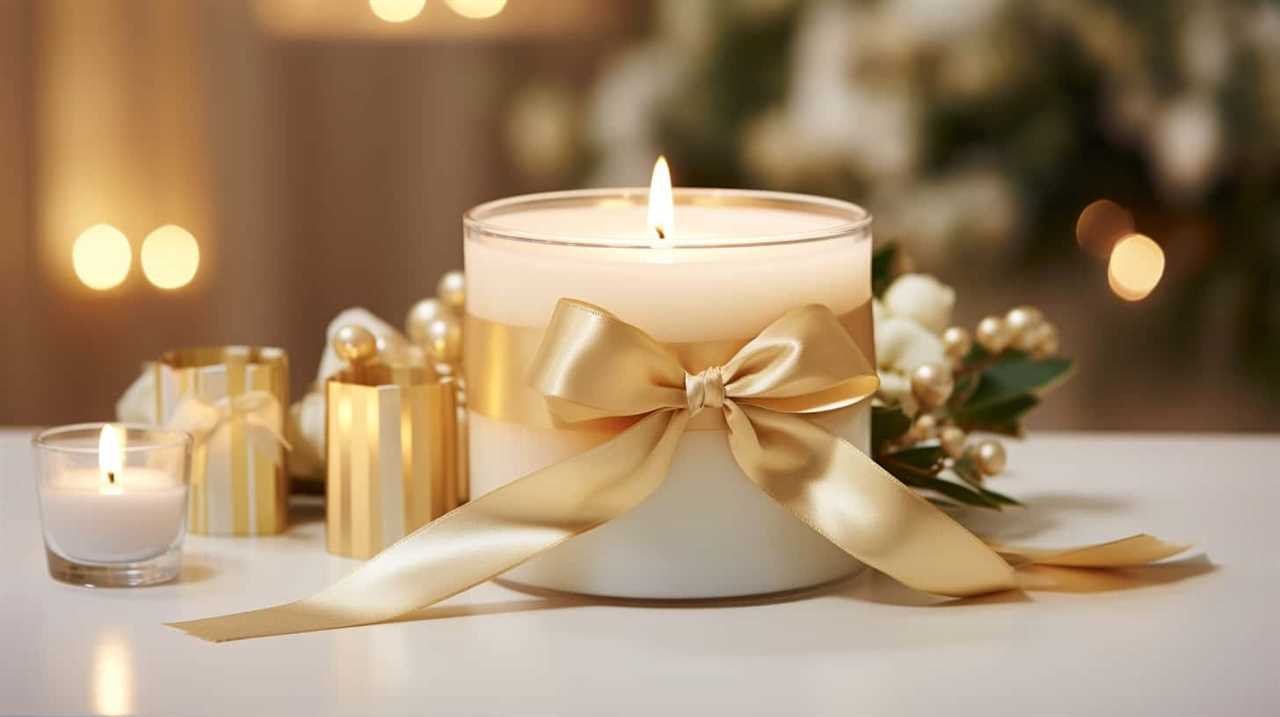
Next, consider container decorating to give your candles a personal touch. You can use ribbons, stickers, or even paint to add a decorative element to your containers. However, it’s important to prioritize candle safety. Make sure the containers are heat-resistant and won’t crack or break when the wax is poured in.

Additionally, always trim the wick to about ¼ inch before lighting the candle to prevent excessive smoke and ensure a clean burn.
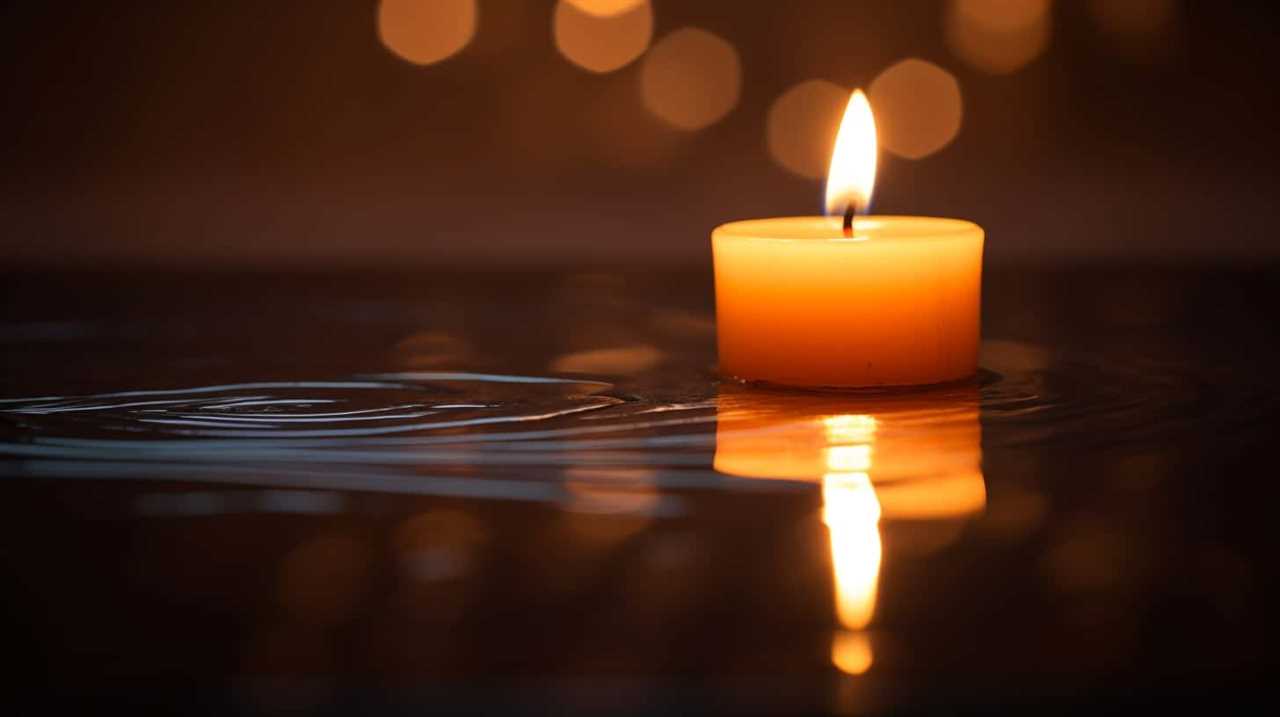
candle shack lemongrass and ginger

Floating Candles

We frequently enjoy using old candle wax to create floating candles. Floating candle decorations are a beautiful and elegant way to add ambiance to any event or space. They can be used as stunning centerpieces for weddings, parties, or even as a relaxing addition to a bath.

To make your own floating candles, simply melt down your old candle wax and pour it into heat-resistant containers. Place a small wick in the center of each container, making sure it’s long enough to reach the bottom. Allow the wax to cool and harden completely before carefully placing the floating candles in water.

Advertisement

These floating candle centerpieces will create a serene and magical atmosphere for any occasion.

Now, let’s move on to the next section where we’ll discuss tealight candles.

dusk candles careers

Tealight Candles

Let’s explore some alternative methods for disposing of old candle wax and get creative with upcycling tealight candles.

Instead of throwing away the wax, we can repurpose it into new candles or use it for other DIY projects.

Alternative Wax Disposal Methods

An efficient way to dispose of used tealight candle wax is by using a simple and effective method. Instead of throwing away the wax, consider recycling it or finding eco-friendly ways to dispose of it. Here are some alternative wax disposal methods that are both practical and resourceful:

Advertisement
Method Description Benefits
Wax Recycling Collect used tealight candle wax and take it to a local recycling center or a candle-making shop. Reduces waste and promotes sustainability.
Composting Break the wax into small pieces and add it to your compost pile. Adds carbon to the compost, improving its overall quality.
Wax Melting Place the used tealight candle wax in a heatproof container and melt it, then pour into new molds or containers. Allows you to create new candles or wax melts, extending the life of the wax.

Creative Tealight Upcycling

Exploring the endless possibilities of tealight candle upcycling opens up a world of creativity and resourcefulness. Instead of simply disposing of old tealight candles, you can transform them into beautiful and functional pieces for your home.

dusk gifts

Here are four ideas to get you started:

ecoya candles myer

  1. Upcycled Candle Holders: Remove the leftover wax from the tealight cups and clean them thoroughly. Then, get creative with your decorating skills. Paint them, wrap them in decorative paper or fabric, or even add embellishments like beads or ribbons. These upcycled candle holders can add a personalized touch to your space and make great gifts.
  2. DIY Candle Molds: If you enjoy making your own candles, repurpose the tealight cups as molds. Simply pour melted wax into the cups, add a wick, and let it cool. Once the wax has hardened, you can easily pop out the candle and enjoy your homemade creation.
  3. Mini Succulent Planters: Tealight cups are the perfect size for small succulent plants. Fill them with soil, plant a succulent, and voila! You have a cute and eco-friendly mini planter. These can be placed on windowsills, desks, or even grouped together on a shelf for a charming display.
  4. Outdoor Lanterns: To create outdoor lanterns, remove the wick and metal base from the tealight cups. Fill the cups with a mixture of sand and citronella oil to repel insects. Place a tealight candle in the center and light it up for a cozy and bug-free outdoor ambiance.

Aromatherapy Wax Melts

Let’s explore the benefits of using aromatherapy wax melts as a way to reuse old candle wax.

Not only can you customize the fragrance to suit your preferences, but wax melts also offer a safer alternative to burning candles.

With a wide range of DIY recipes available, you can easily create your own wax melts using simple ingredients and essential oils.

dusk gifts

Wax Melt Benefits

We love the benefits of using wax melts, especially when it comes to aromatherapy. Wax melts are a great way to create a soothing and relaxing atmosphere in your home.

Advertisement

Here are four reasons why wax melts are an excellent choice for aromatherapy:

  1. Long-lasting fragrance: Wax melts slowly release fragrance, providing a longer-lasting scent compared to traditional candles.
  2. Variety of scents: Wax melts come in a wide range of scents, allowing you to choose the perfect aroma to suit your mood or desired ambiance.
  3. Safe and convenient: Unlike candles, wax melts don’t require an open flame, making them safer to use. They also come in convenient packaging, making it easy to store and use as needed.
  4. Easy to customize: With wax melts, you can mix and match scents to create your own unique fragrance combinations, allowing you to personalize your aromatherapy experience.

Enjoy the benefits of aromatherapy with wax melts and create a calming environment in your home.

DIY Wax Melt Recipes

To continue our exploration of the benefits of wax melts for aromatherapy, let’s dive into some DIY wax melt recipes that you can easily make at home.

candle shack

Making your own wax melts not only allows you to customize the scents according to your preferences, but it also helps you reduce waste by reusing old candle wax.

To start, you’ll need some basic ingredients such as soy or beeswax, essential oils, and dye (optional).

To create your own homemade wax melt molds, you can use silicone molds, ice cube trays, or even muffin tins.

Advertisement

Once you have your ingredients and molds ready, simply melt the wax, mix in the essential oils and dye, pour the mixture into the molds, and let it cool and harden.

candlesticks holders

Finally, consider using DIY wax melt packaging, such as small glass jars or bags, to store and gift your homemade wax melts.

With these simple steps, you can enjoy the benefits of aromatherapy while being resourceful and creative.

Fragrance Customization Options

There are various options for customizing the fragrance of your aromatherapy wax melts. Fragrance blending allows you to create unique scents by combining different essential oils and fragrances.

Here are four ideas to get you started:

Advertisement

ecoya candles myer

  1. Experiment with ratios: Play around with different ratios of essential oils to find the perfect balance of scents. Start with a smaller amount and gradually add more until you achieve the desired fragrance.
  2. Layering scents: Create complex and multi-dimensional aromas by layering different scents. Start with a base note, like vanilla or sandalwood, then add a middle note, such as lavender or jasmine, and finish with a top note like citrus or peppermint.
  3. Adding botanicals: Enhance the fragrance of your wax melts by incorporating dried flowers, herbs, or spices. This not only adds a visual appeal but also releases subtle scents when melted.
  4. Wax potpourri: Mix your melted wax with dried flower petals, cinnamon sticks, or citrus peels to create wax potpourri. This will release a delightful fragrance when heated.

Now that you’ve learned about fragrance customization options, let’s move on to the next section about creating wax sachets.

Wax Sachets

One way to repurpose old candle wax is by creating wax sachets. Wax sachets are small fabric pouches filled with scented wax that can be placed in drawers, closets, or even cars to add a pleasant aroma.

To make wax sachets, you’ll need old candle wax, fabric squares, and essential oils. Start by melting the wax in a double boiler or a heat-safe container. Once melted, add a few drops of your favorite essential oil for fragrance customization.

Next, pour the wax into the fabric squares and fold them into small pouches, securing the edges with a ribbon or string. You can also get creative and make wax dipped flowers to add an elegant touch to your sachets. Simply dip dried flowers into the melted wax, let them dry, and attach them to the sachets.

candle shack clp tool

Wax sachets aren’t only a great way to reuse old candle wax but also a wonderful gift idea for friends and family.

Wax Tarts

Let’s talk about wax tarts, an excellent way to repurpose your old candle wax.

Advertisement

We’ll explore creative ideas for making wax tarts, giving you plenty of options to choose from.

Not only are wax tarts a practical way to reuse your old wax, but they also offer the benefit of filling your home with delightful fragrances.

diptyque

Creative Wax Tart Ideas

To create unique and fragrant wax tarts, we can repurpose old candle wax using a compound preposition. Here are some creative ideas for making wax tarts:

  1. Experiment with scents:
  • Mix different scented waxes to create your own custom fragrance.
  • Combine floral and citrus scents for a refreshing aroma.
  • Blend vanilla and cinnamon for a cozy ambiance.
  1. Add natural elements:
  • Enhance the visual appeal of your wax tarts by embedding dried flowers, herbs, or colorful spices.
  • Not only will they look beautiful, but they’ll also release subtle fragrances when melted.
  1. Get creative with shapes:
  • Use a variety of wax tart molds to create interesting shapes like flowers, animals, or geometric designs.
  • This adds a touch of whimsy to your wax tarts and makes them visually appealing.
  1. Consider packaging:
  • Package your wax tarts in eco-friendly materials such as recycled paper or biodegradable plastic.
  • Add a personalized label or decorate the packaging with ribbons or twine for a charming finishing touch.

Making Wax Tarts

We can start making wax tarts by gathering the necessary materials and equipment. To make wax tarts, you’ll need wax tart molds and wax tart packaging. The molds can be found in various shapes and sizes, such as hearts, flowers, or squares, allowing you to get creative with your designs.

Additionally, make sure to have a double boiler or a microwave-safe container for melting the wax. Once you have all the materials, simply melt your old candle wax in the double boiler or microwave, pour it into the molds, and let it cool and solidify. Once the wax tarts are ready, you can package them in attractive wax tart packaging to give them as gifts or to enjoy in your own home.

Now that we know how to make wax tarts, let’s explore the benefits of using them.

Advertisement

candlesticks trading

Benefits of Wax Tarts

Among the benefits of wax tarts, our favorite is the ability to fill our homes with delightful fragrances and create a cozy atmosphere. Wax tarts are a great alternative to candles because they offer a longer-lasting scent without the worry of an open flame.

Here are four reasons why wax tarts are a fantastic addition to any home:

  1. Wax tart storage: Unlike candles, wax tarts are small and easy to store. You can keep them in a drawer or airtight container until you’re ready to use them.
  2. Wax tart burners: Wax tarts require a wax tart burner to release their fragrance. These burners come in a variety of styles, making it easy to find one that matches your home decor.
  3. Cost-effective: Wax tarts are typically more affordable than candles, allowing you to enjoy a variety of scents without breaking the bank.
  4. Easy to change scents: With wax tarts, you can easily switch out scents by removing the old wax and adding a new tart to the burner.
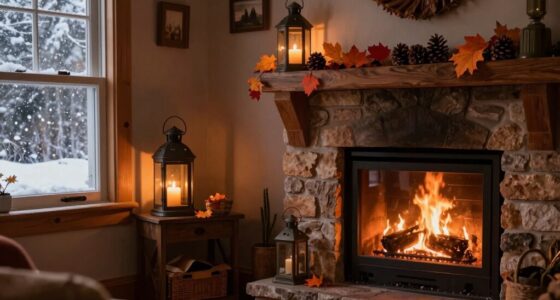
Fire Starters

Let’s kickstart the fire with some old candle wax.

When it comes to fireplace starters or camping essentials, reusing old candle wax can be a game-changer. Instead of throwing away those leftover candle stubs, why not repurpose them into fire starters?

candlelight orchestra

It’s a practical and resourceful way to make use of something that would otherwise go to waste. To create your own fire starters, simply melt down the old candle wax and pour it into small paper cups or muffin liners. Add a wick or a small piece of string in the center and let it harden.

These homemade fire starters will make starting a fire a breeze, whether you’re cozying up by the fireplace or enjoying a camping trip in the great outdoors.

Advertisement

Wax Seals

After repurposing old candle wax for fire starters, another creative use for the leftover wax is to create unique and personalized wax seals. Wax seals can add a touch of elegance and charm to letters, invitations, or gifts. Here are four simple steps to create your own wax seals:

  1. Choose your design: From initials to intricate patterns, there are countless wax seal designs to choose from. Consider the occasion and your personal style when selecting a design.
  2. Gather your tools: To create a wax seal, you’ll need a wax seal stamp, a heat source, and wax. Wax seal stamps come in various shapes and sizes, so choose one that complements your design.
  3. Melt the wax: Use a heat source, such as a candle flame or a wax melting spoon, to melt a small amount of wax. Be careful not to overheat it.
  4. Create the seal: Pour the melted wax onto your desired surface, then press the wax seal stamp firmly into the wax. Hold it for a few seconds, then gently lift the stamp to reveal your unique wax seal.

With a little creativity and the right tools, you can repurpose your old candle wax into beautiful wax seals that will impress and delight others.
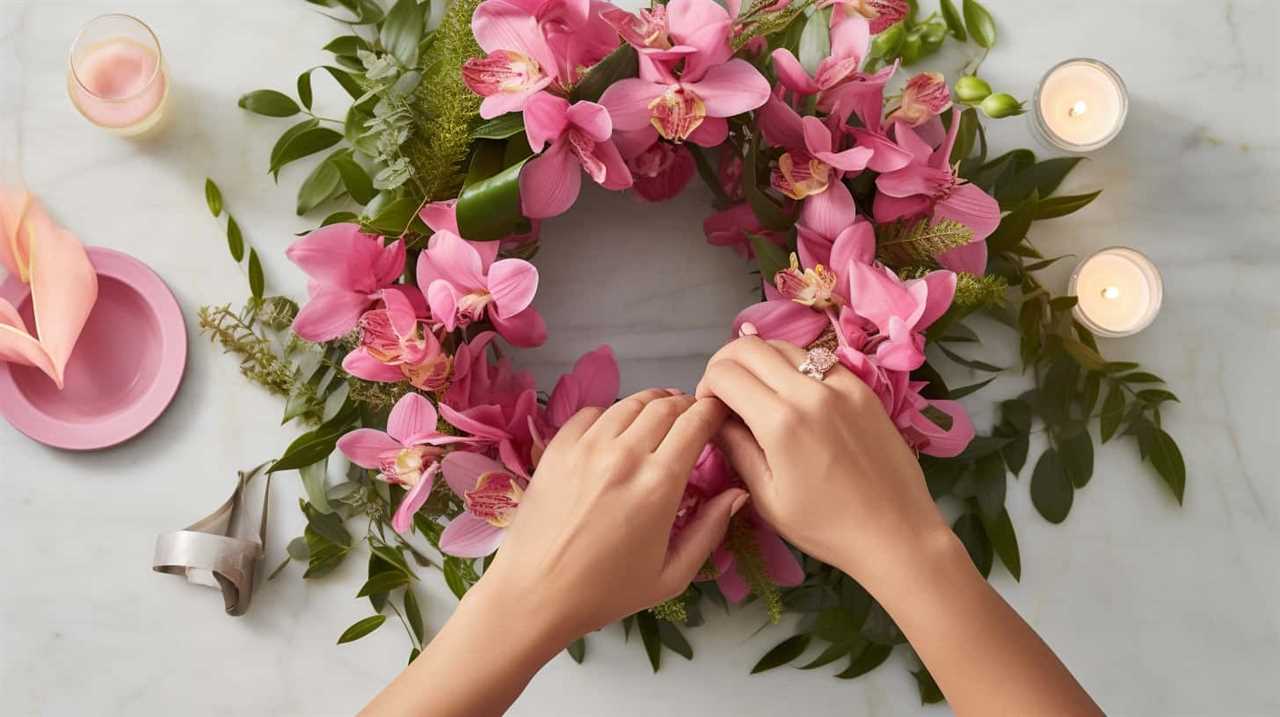
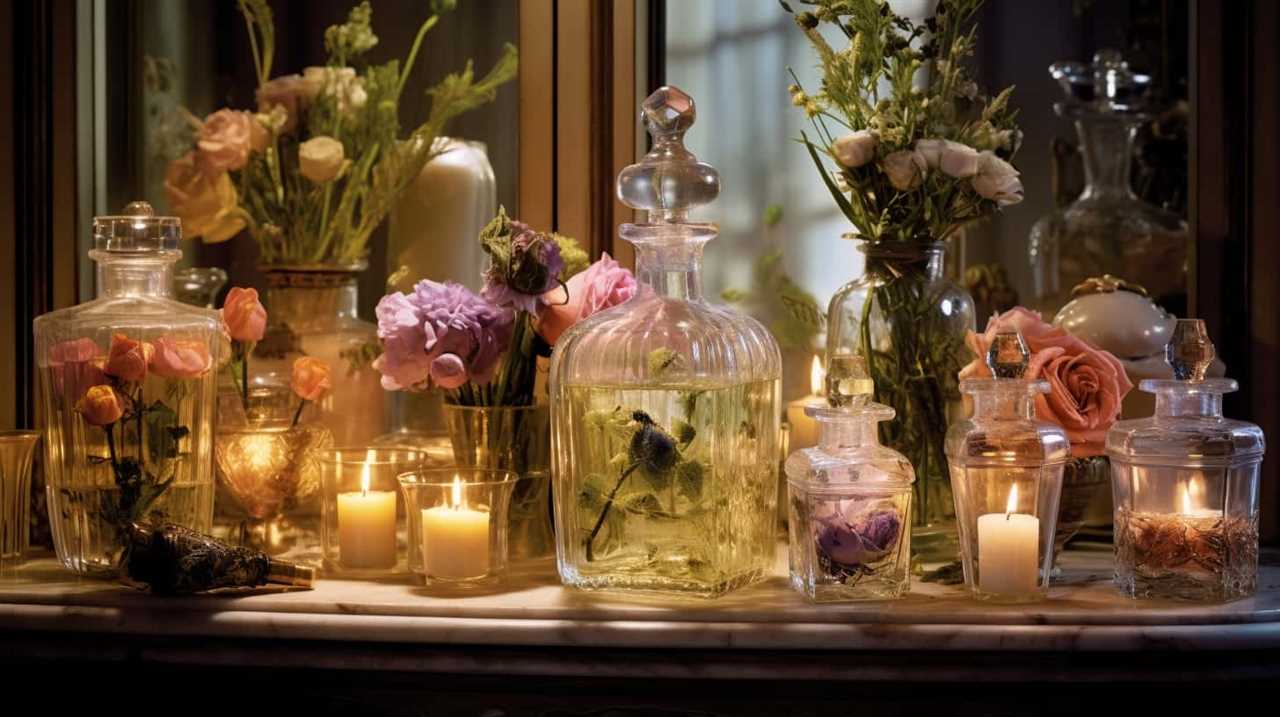
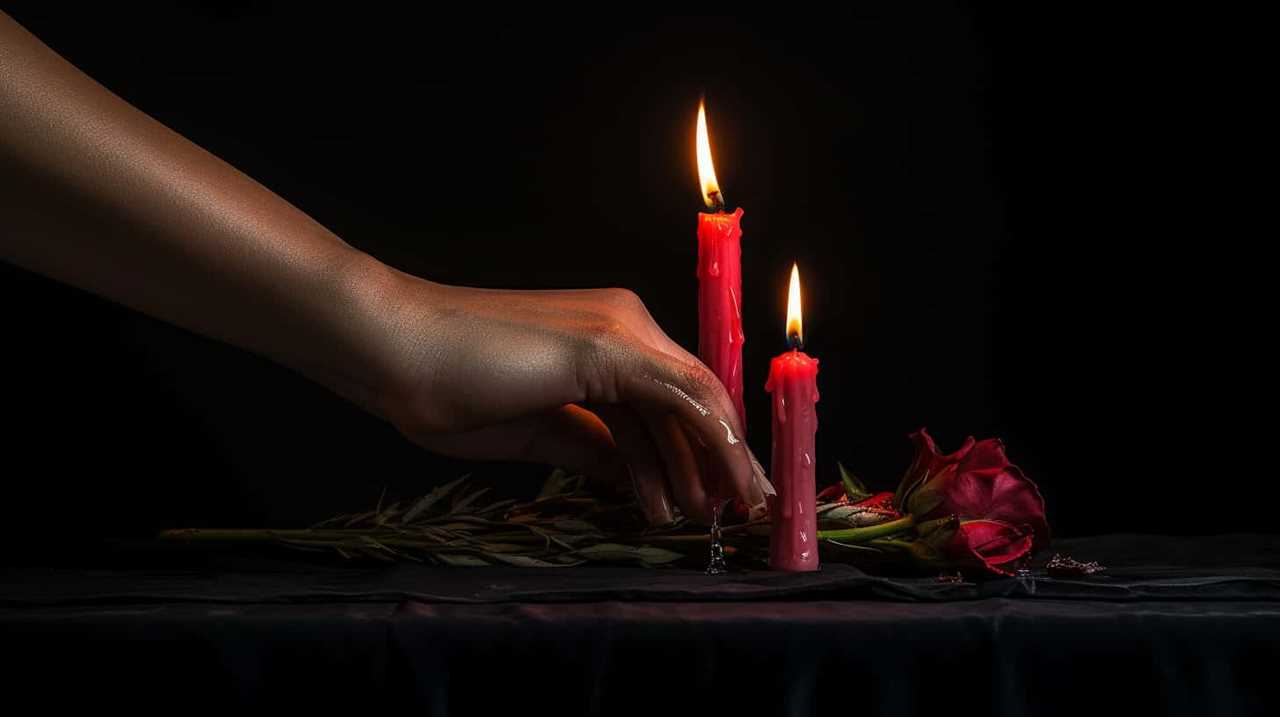
candle making near me

Wax Dipped Flowers

To further explore the creative possibilities of repurposing old candle wax, we can delve into the captivating world of wax dipped flowers.

This unique technique allows you to preserve the beauty of flowers while adding a touch of elegance and longevity to your floral arrangements.

To create wax dipped flowers, start by melting your old candle wax in a double boiler. Once the wax is melted, carefully dip the flowers into the wax, ensuring that each petal is fully coated.

Allow the wax to cool and harden before arranging the flowers in a vase or using them in crafts. You can even experiment with other items like dipped fruit or wax dipped leaves to create stunning, one-of-a-kind decorative pieces.

Advertisement

candle about us

With wax dipped flowers, you can enjoy the beauty of nature for much longer while reducing waste and making use of your old candle wax.

Wax Crayons

We can repurpose old candle wax by transforming it into wax crayons. This is a great way to reuse leftover wax and create fun art supplies for kids or even for yourself.

Here are some simple steps to make your own wax crayons:

  1. Gather old candle wax: Collect different colored candle wax scraps to create a variety of crayon colors.
  2. Melt the wax: Use a double boiler or a microwave-safe container to melt the wax. Be careful not to overheat it.
  3. Add color and fragrance: If desired, you can add non-toxic color pigments or essential oils to enhance the crayons.
  4. Pour into molds: Pour the melted wax into crayon molds or silicone ice cube trays and let it cool and harden.

Now you have your very own homemade wax crayons ready for wax crayon art or any creative project. Enjoy the process and let your imagination run wild!
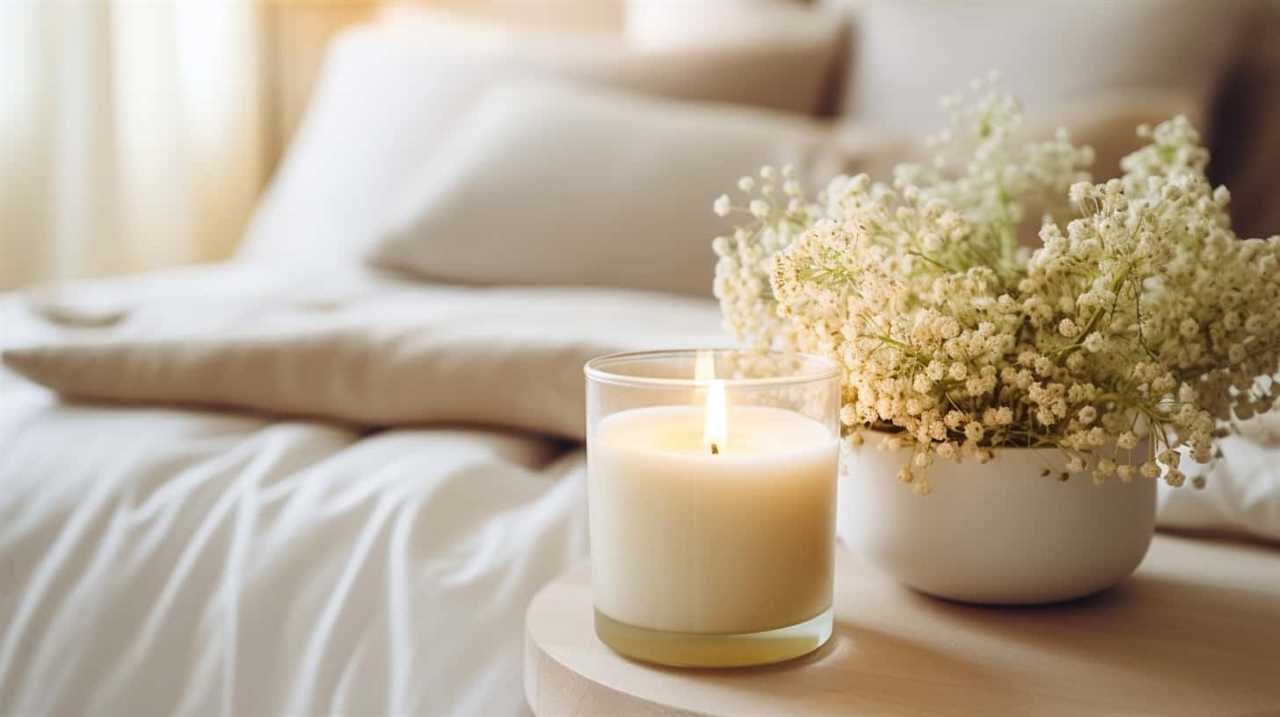
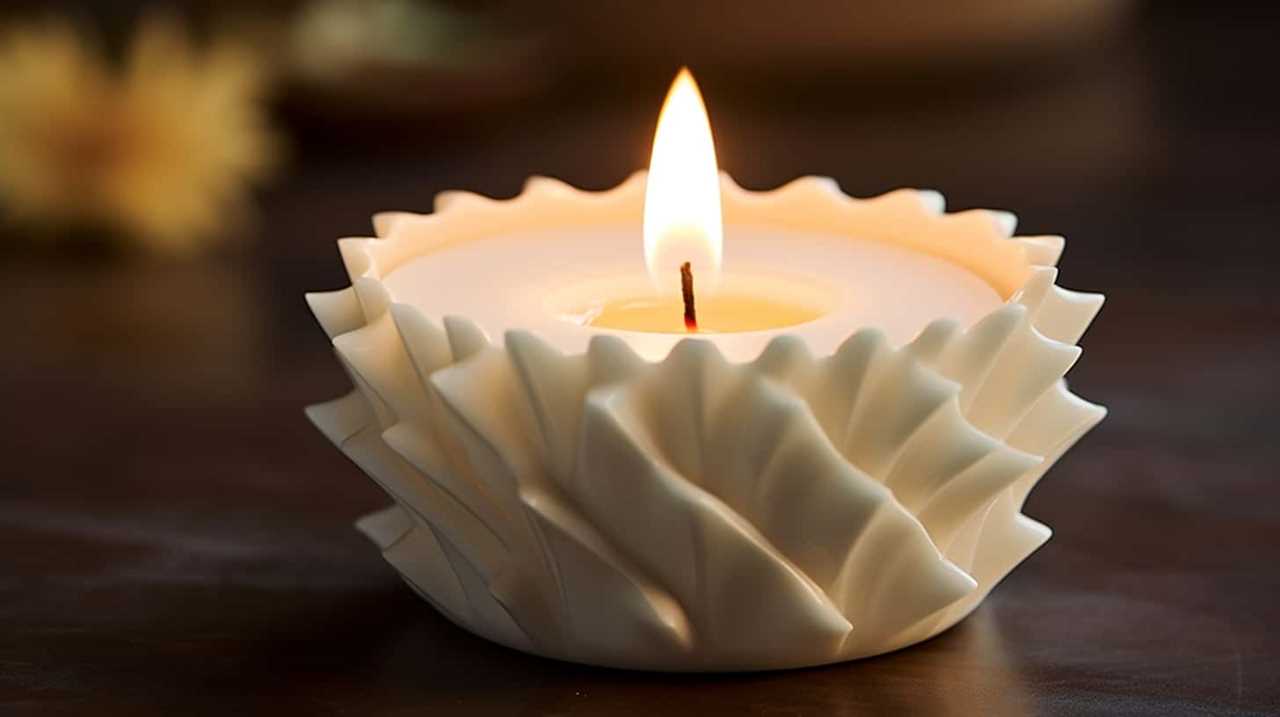
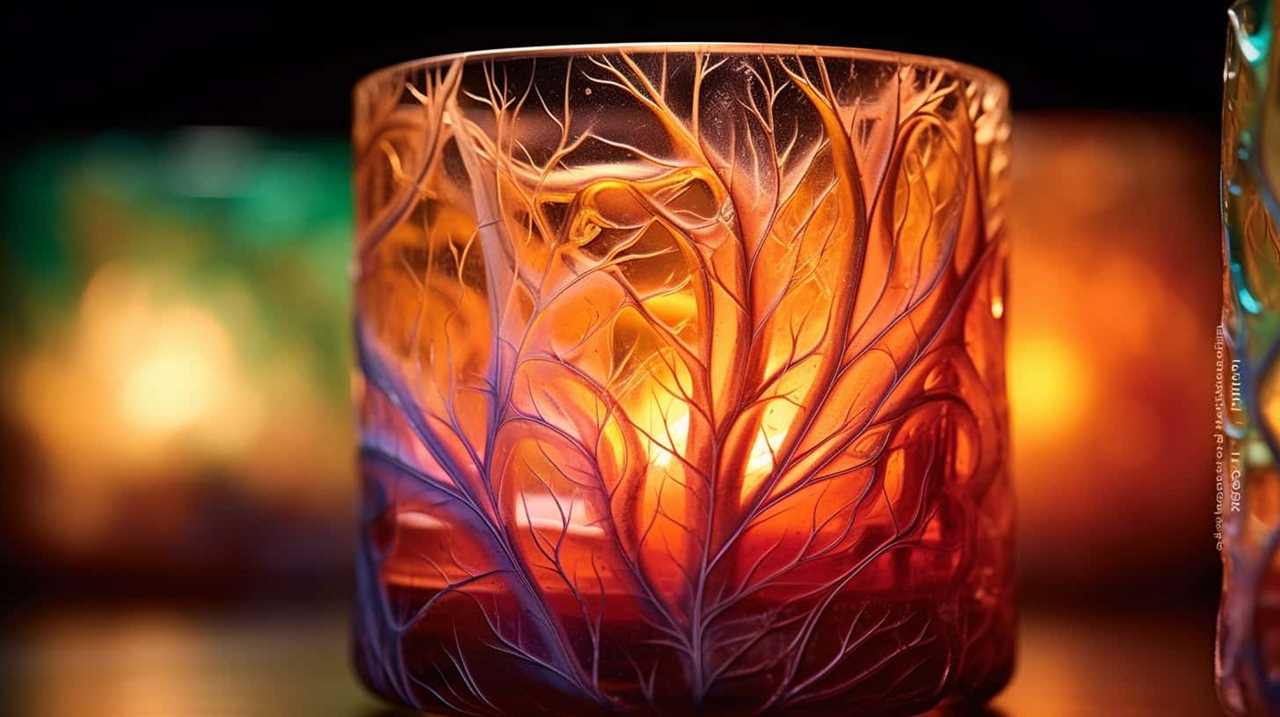
ecoya candles sale

Wax Luminaries

Once we’ve repurposed old candle wax into wax crayons, another creative use for leftover wax is to create beautiful wax luminaries. Wax luminaries are easy to make and can add a touch of warmth and charm to any space. To make wax luminaries, you’ll need a heat-resistant container, such as a glass jar or a metal tin, and some wicks.

Simply melt the old candle wax in a double boiler and pour it into the container. Place the wick in the center and let the wax cool and harden. Once the wax is solid, trim the wick and light it up for a cozy ambiance. For added fragrance, you can also incorporate DIY wax melt recipes into your wax luminaries.

Advertisement

With a few simple steps, you can transform your old candle wax into beautiful and useful wax luminaries that will brighten up any room.

Now that we’ve learned how to make wax luminaries, let’s explore another creative way to repurpose old candle wax: wax sculptures.

candlewood suites

Wax Sculptures

For creating unique and artistic pieces, wax sculptures provide an excellent way to repurpose old candle wax. Whether you’re a beginner or an experienced artist, working with wax allows you to unleash your creativity and transform discarded wax into beautiful sculptures.

Here are four steps to get started with wax carving and casting:

  1. Gather your materials: You’ll need old candle wax, a heat source like a double boiler or a wax melter, carving tools, and a mold for casting.
  2. Carve your design: Use your carving tools to shape the wax into your desired sculpture. Take your time and be patient, as wax is a malleable material that allows for intricate detailing.
  3. Prepare for casting: Once your sculpture is complete, create a mold using a silicone or plaster material. This will allow you to make multiple copies of your wax sculpture.
  4. Casting your wax sculpture: Melt down additional candle wax and pour it into the mold. Allow it to cool and solidify before removing it from the mold, revealing your finished wax sculpture.

By reusing old candle wax through wax carving and casting, you can create stunning pieces of art while also reducing waste.

Happy sculpting!

Advertisement

floral candle

Frequently Asked Questions

Can I Reuse the Wick From an Old Candle When Making Wax Melts or Wax Tarts?

When making wax melts or wax tarts, we can reuse the wick from an old candle. It’s a practical and resourceful technique that allows us to minimize waste and save money.

How Can I Remove the Remaining Scent From Old Candle Wax Before Reusing It?

Removing scent from old candle wax before reusing it can be done through a simple cleaning process. By melting the wax and straining it through a cheesecloth or coffee filter, you can effectively remove any remaining scent and prepare it for reuse.

Are There Any Safety Precautions I Should Take When Melting and Reusing Old Candle Wax?

When melting old candle wax, it’s important to take safety precautions. Use a double boiler, keep an eye on the temperature, and avoid leaving it unattended. Before reuse, clean the wax by straining out any debris.

Can I Mix Different Colored Candle Waxes Together to Create Unique Colors for My New Candles or Wax Projects?

Yes, you can mix different colored candle waxes together to create unique colors for your new candles or wax projects. It’s a great way to recycle candle wax and create eco-friendly projects.

candlelight

What Are Some Creative Ways to Decorate or Personalize My Reused Candle Wax Projects, Such as Wax Luminaries or Wax Sculptures?

We’ve discovered some amazing ways to add a personal touch to our reused candle wax projects. By exploring wax painting techniques and DIY candle molds, we’ve transformed ordinary wax into unique and beautiful creations.

Advertisement

Conclusion

In conclusion, reusing old candle wax is a practical and resourceful way to reduce waste and get creative.

Did you know that by reusing just one pound of wax, you can create up to 10 new candles?

This not only saves money but also helps to protect the environment.

jo malone candle

So, next time you have leftover candle wax, don’t throw it away – get creative and give it a new life!

Advertisement

I'm Jane and I love candles. I have candles everywhere in my house--in every room, on every surface. I love the smell of candles, and I love how they make my place feel warm and cozy. Candles are really important to me. They help me relax and de-stress after a long day. They remind me of happy memories, and they make me feel calm and peaceful. I can't imagine my life without candles!

Continue Reading
Advertisement

Candles

How to Get Candle to Burn Evenly With Foil

Published

on

By

Have you ever ignited a candle, only to discover it’s burning unevenly, creating a tunnel of unused wax? Worry not, for we bring you the solution: employ foil to ensure your candle burns evenly!

In this guide, we will share our expert tips and techniques on how to get your candle to burn evenly with the help of foil. By following our step-by-step instructions, you will be able to master this method and enjoy a perfectly even burn every time.

So, let’s dive in and discover the secrets of using foil to enhance your candle burning experience.

Key Takeaways

  • Foil helps achieve a more consistent and balanced burn throughout the entire candle.
  • Choosing the right foil thickness and finish is important for optimal burning conditions.
  • Proper preparation and application of foil can prevent uneven burning.
  • Maximizing candle performance involves trimming the wick, applying foil tightly, and keeping the candle away from drafts.

Why Use Foil for Even Candle Burning

We use foil for even candle burning because it helps us achieve a more consistent and balanced burn throughout the entire candle.

candle holders ikea

When it comes to choosing foil thickness, it’s important to consider the size and type of candle you’re working with. Thicker foil is generally better for larger or longer burning candles, as it provides more insulation and heat reflection. However, for smaller or shorter burning candles, a thinner foil can be sufficient.

Advertisement

Experimenting with foil placement is also crucial to ensure an even burn. Placing the foil directly under the candle can help distribute the heat evenly, preventing one side from burning faster than the other. Alternatively, wrapping the entire candle in foil can create a more controlled burn, allowing the wax to melt evenly.

Choosing the Right Foil for Your Candle

When selecting the appropriate foil for your candle, consider the thickness and size of the foil in relation to the candle. The foil thickness is crucial in ensuring proper heat distribution and protection for your candle. Thicker foils are more effective at insulating the candle, preventing heat from escaping too quickly and allowing for a longer, more even burn.

On the other hand, thinner foils may not provide enough insulation, resulting in uneven burning and potential damage to the candle. Additionally, different foil finishes can also affect the burn quality. Matte finishes tend to absorb and distribute heat more evenly, while glossy finishes may reflect heat and cause uneven burning.

candlelight

It’s important to choose a foil thickness and finish that best suits your candle to achieve optimal burning conditions.

Preparing Your Candle for Foil Application

To ensure a successful application of foil to your candle, there are a few key points to keep in mind.

Advertisement

First, the foil wrapping technique is crucial for achieving an even burn. By tightly wrapping the foil around the candle, you create a barrier that helps regulate the heat distribution.

Second, preparing your candle by trimming the wick and removing any debris will prevent uneven burning and maximize its overall performance.

candlestick

Foil Wrapping Technique

Proper preparation is essential for achieving optimal results when utilizing the foil wrapping technique to ensure the even burning of your candle.

Before applying the foil, it’s important to consider alternatives to traditional foil, such as aluminum baking cups or heat-resistant glass containers. These options can provide a snug fit around the candle, preventing heat from escaping and promoting even burning.

Additionally, experimenting with different wrapping techniques can also contribute to a more uniform burn. One technique involves folding the foil around the edges of the candle, creating a protective barrier that traps the heat.

Advertisement

Another technique is to wrap the foil tightly around the base of the candle, leaving the top exposed for easy lighting.

candles uk

Preventing Uneven Burning

To prevent uneven burning and prepare our candle for foil application, we’ll analyze various techniques and alternatives to ensure a consistent and efficient burn.

Maximizing candle performance is essential for achieving a longer burn time and getting the most out of your candle. Uneven burning can be caused by factors such as drafts, improper wick trimming, or uneven wax distribution.

Before applying foil wrapping, it’s important to trim the wick to a quarter of an inch to promote an even burn. Additionally, ensuring that the candle is placed on a level surface away from drafts can prevent uneven burning.

Maximizing Candle Performance

One important step in maximizing candle performance is ensuring that we’ve properly prepared the candle for foil application. To prevent wax drips and enhance the candle scent, here are five key things to consider:

Advertisement

myer

  • Trim the wick: Before applying the foil, make sure to trim the wick to about a quarter inch. This will help promote an even burn and prevent excessive smoke.
  • Clean the candle: Remove any dust or debris from the candle surface before applying the foil. This will ensure better adhesion and prevent any interference with the foil’s effectiveness.
  • Apply foil tightly: When wrapping the foil around the candle, make sure it’s snug and secure. This will help retain heat and maintain a consistent burn throughout the candle’s lifespan.
  • Keep the candle away from drafts: Drafts can disrupt the flame and cause uneven burning. Place the candle in a draft-free area to ensure optimal performance.
  • Use a candle warmer: Before lighting the candle, consider using a candle warmer to release the fragrance. This will enhance the scent and create a more enjoyable experience.

Wrapping the Candle With Foil

To wrap the candle with foil, we’ll carefully cover it using a sheet of aluminum foil. Wrapping the candle with foil offers several benefits.

Firstly, it helps to insulate the candle, ensuring that the heat is distributed evenly and preventing any hotspots that may cause uneven burning.

Secondly, it creates a barrier that traps the heat and slows down the rate of burning, allowing the candle to last longer.

Additionally, the foil can help to catch any drips or spills, protecting surfaces from damage.

candlelight concerts bristol

When wrapping the candle, make sure to cover it completely, leaving no gaps or openings. Smooth out any wrinkles or creases in the foil to ensure a snug fit.

Ensuring Proper Airflow With Foil

When using foil to ensure an even burn, it’s important to consider its impact on airflow.

Advertisement

Proper airflow is crucial for maximizing the effectiveness of the candle burn. By wrapping the candle with foil, we can create a barrier that directs the airflow towards the flame, allowing it to burn evenly and efficiently.

Foil’s Impact on Airflow

We can ensure proper airflow with foil by strategically placing it around the base of the candle. By doing so, we can control the airflow around the flame and enhance the candle’s burn. Here are five important ways in which foil impacts airflow and heat distribution:

candlelight concerts edinburgh

  • Foil acts as a barrier, preventing drafts from disturbing the flame.
  • It helps to create a more controlled environment for the candle, allowing for a steady and consistent burn.
  • Foil can redirect the flow of air, ensuring that the flame receives an adequate supply of oxygen.
  • It helps to distribute heat evenly around the candle, preventing uneven burning and wax wastage.
  • By reflecting heat back towards the candle, foil can help to increase the temperature in the immediate vicinity of the flame.

Maximizing Candle Burn

To optimize the burn of the candle, we can ensure proper airflow by strategically using foil. By using foil, we can maximize the candle flame and achieve even heat distribution. This will result in a longer-lasting and more efficient burn.

To understand how to maximize the candle burn, let’s take a look at the following table:

Technique Description
Foil tent Create a tent-like structure with foil to direct airflow towards the flame. This increases oxygen supply, making the flame burn brighter and hotter.
Foil collar Wrap a strip of foil around the base of the candle to prevent excess heat from escaping. This encourages a more even heat distribution, preventing tunneling.
Foil plate Place a sheet of foil under the candle to reflect heat upwards. This helps to evenly distribute heat throughout the candle, preventing uneven wax melting.

Lighting Your Foil-Wrapped Candle

To light our foil-wrapped candle, we’ll need a match or a lighter. Here are some important steps to follow for a successful lighting technique and fire safety precautions:

  • Make sure the foil is securely wrapped around the candle, leaving the top exposed.
  • Hold the match or lighter close to the exposed wick and ignite it.
  • Keep your hand steady and slowly bring the flame towards the wick until it catches fire.
  • Once the wick is lit, gently blow out the match or lighter and set it aside in a safe place.
  • Always double-check that there are no loose pieces of foil or flammable materials nearby before lighting the candle.

With our foil-wrapped candle now lit, we can move on to the next step of monitoring its burn with foil.

candlelight concerts bristol

Monitoring the Candle’s Burn With Foil

Now let’s talk about the benefits of using foil to monitor the burn of your candle and how it helps prevent uneven burning.

Advertisement

By wrapping the candle in foil, you create a barrier that helps retain heat and distribute it evenly, resulting in a more uniform burn.

The foil also acts as a reflective surface, allowing you to easily observe the progress of the candle’s burn and make any necessary adjustments.

Benefits of Using Foil

Our favorite benefit of using foil to monitor the candle’s burn is its ability to ensure an even and consistent melting of wax. The advantages of foil wrapping go beyond just aesthetics. Here are five reasons why using foil is beneficial when it comes to monitoring the candle’s burn:

candle shack lemongrass and ginger

  • Heat distribution: Foil helps distribute heat evenly, preventing hot spots and ensuring a uniform burn.
  • Reduced soot: By enclosing the candle in foil, it minimizes the amount of soot produced during the burning process.
  • Longer burn time: The foil acts as a barrier, slowing down the burning rate and extending the candle’s lifespan.
  • Protection from drafts: Foil wrapping shields the flame from air currents, reducing the likelihood of flickering and uneven burning.
  • Enhanced safety: Foil provides an added layer of protection, preventing accidents such as wax spills or the flame reaching the edge of the container.

By using foil to monitor the candle’s burn, you can enjoy a longer-lasting, safer, and more visually appealing candle experience.

Now let’s explore how foil can prevent uneven burning.

Preventing Uneven Burning

When using foil to monitor the candle’s burn, we can prevent uneven burning by taking a few simple steps. Maximizing candle performance and adjusting foil placement are key to achieving an even burn.

Advertisement

To ensure the best results, follow these guidelines:

candle holders uk

  1. Trim the wick: Before lighting the candle, trim the wick to about 1/4 inch. This helps prevent excessive soot and promotes an even burn.
  2. Place the foil: Position the foil around the candle, making sure it covers the top and sides. This helps trap heat and encourages even melting.
  3. Adjust foil placement: Throughout the candle’s burn, regularly check the foil to ensure it’s still snug around the candle. Adjust as needed to maintain proper heat distribution.

Adjusting Foil Placement for Even Burning

To achieve even burning, adjust the placement of the foil around the candle. Here are some troubleshooting techniques for proper foil positioning:

  • Ensure that the foil is snugly wrapped around the base of the candle. This will prevent any air gaps and allow for a more even distribution of heat.
  • If you notice the candle burning more on one side, gently rotate the foil to redistribute the heat. This will help the candle burn evenly.
  • If the flame is too small or flickering, adjust the foil to create a larger opening. This will allow for better airflow and a stronger, more consistent flame.
  • If the flame is too large or smoking excessively, adjust the foil to create a smaller opening. This will help regulate the amount of oxygen reaching the flame and prevent excessive burning.
  • Regularly monitor the candle and foil during burning. Adjust the foil as needed to maintain an even burn and avoid any potential safety hazards.

Extending the Burn Time With Foil

We can further enhance the burn time of our candle by utilizing foil. By strategically placing foil around the candle, we can improve its performance and extend its burn time. The foil acts as a heat reflector, trapping the heat and directing it towards the wax, allowing the candle to burn more slowly and evenly. To maximize the effectiveness of the foil, we need to ensure that it is wrapped tightly around the candle, leaving only a small opening for the flame. This helps to create a controlled burn and prevents excessive heat loss. By extending the burn time, we can enjoy our candle for longer periods and make the most out of its fragrance and ambiance.

To visualize the proper foil placement, refer to the table below:

Foil Placement Benefits
Around the sides of the candle Reflects heat back to the wax, promoting even burning
Underneath the candle Prevents heat loss through the bottom, extending burn time
On top of the candle Traps heat and prevents excessive evaporation of fragrance

With the foil in place, we can now move on to the next step, which is removing the foil safely from a burning candle.

candlesticks holders

Removing Foil Safely From a Burning Candle

Now that we’ve covered how to get a candle to burn evenly with foil, it’s important to discuss the safe removal of foil from a burning candle.

To avoid any fire hazards, it’s crucial to follow proper techniques when removing the foil.

Advertisement

Additionally, we’ll provide some general tips for candle burning to enhance safety and enjoyment.

Safe Foil Removal Techniques

One simple technique for safely removing foil from a burning candle is by using a pair of heat-resistant gloves. Here are some alternative methods for safe removal:

dusk candle holder

  • Use a pair of long-handled tongs to carefully lift the foil off the candle.
  • Gently blow on the foil to create a small gap between the foil and the candle, then use a non-flammable tool, like a wooden skewer, to lift the foil away.
  • Place a heat-resistant plate or tray next to the candle and carefully slide the foil onto it, ensuring the flame doesn’t come into contact with the foil.
  • If the foil is only partially covering the candle, use a pair of tweezers to carefully lift and remove the foil.
  • Consider using a candle snuffer to extinguish the flame before attempting to remove the foil.

Now that we know how to safely remove the foil, let’s move on to preventing fire hazards.

Preventing Fire Hazards

To prevent fire hazards when removing foil from a burning candle, it’s important to take proper precautions. Safety precautions should always be a priority to avoid accidents and ensure a safe environment.

When removing foil from a burning candle, wait until the flame is completely extinguished and the candle has cooled down. Using heat-resistant gloves or a pair of tongs, carefully grasp the foil and gently peel it away from the candle. Be cautious not to touch the hot wax or any exposed flame. Dispose of the foil properly, ensuring it’s fully extinguished before discarding.

By following these safety precautions, you can prevent accidents and ensure a safe candle burning experience.

Advertisement

jo malone candle

Now, let’s move on to some candle burning tips to further enhance your candle experience.

Candle Burning Tips

To ensure safe removal of foil from a burning candle, we can employ practical candle burning tips that promote an even burn. Here are some tips for safely removing foil from a burning candle:

  • Use a pair of long, heat-resistant tweezers or tongs to carefully lift and remove the foil from the candle.
  • Avoid blowing on the flame or using your bare hands to remove the foil, as this can cause accidents or burns.
  • Wait until the candle has cooled down before attempting to remove the foil.
  • Keep a fire extinguisher or a bucket of water nearby, just in case of any unexpected incidents.
  • Always supervise the candle while it’s burning and never leave it unattended.

By following these tips, you can enjoy the cozy ambiance created by your candle without compromising safety.

Remember to choose candle scents that you enjoy, as they can enhance the overall experience of relaxation and comfort.

candle & co

Reusing Foil for Future Candle Burning

We reuse foil to ensure our future candle burnings are even and efficient. Reusing foil offers several benefits.

First, it helps to distribute heat more evenly, resulting in a more consistent and balanced burn.

Advertisement

Additionally, it prevents any wax from dripping onto the surface below, protecting our furniture and keeping it clean.

Reusing foil also reduces waste and is an environmentally friendly option.

floral candle

However, if you prefer not to use foil, there are alternative methods to achieve a similar effect.

One option is to place the candle on a heat-resistant plate or coaster.

Another alternative is to use a candle snuffer to extinguish the flame, as this can help prevent uneven burning.

Advertisement

Troubleshooting Uneven Burning With Foil

Continuing our exploration of reusing foil for future candle burnings, troubleshooting uneven burning with foil can help ensure a more consistent and balanced burn. When it comes to preventing foil mishaps and achieving an even burn, here are some key tips to keep in mind:

candles shoes

  • Trim the wick: Uneven burning can be caused by a wick that’s too long. Trim the wick to around ¼ inch before lighting the candle.
  • Center the wick: Make sure the wick is centered in the candle before lighting it. This will help promote even burning.
  • Avoid drafts: Drafts can cause the flame to flicker and burn unevenly. Place your candle in a draft-free area to prevent this.
  • Rotate the candle: If you notice uneven burning, rotate the candle periodically to ensure all sides burn evenly.
  • Remove excess wax: If one side of the candle has a higher wax level, carefully remove some wax to promote a more balanced burn.

Tips and Tricks for Using Foil With Candles

Here are some helpful tips and tricks for using foil with candles to ensure an even burn. When using foil as a DIY candle accessory, it’s important to choose the right type and follow proper techniques. If you’re looking for foil alternatives, consider using a heat-resistant glass plate or a candle coaster made from ceramic or metal. These options can provide a level surface for your candle and help distribute heat evenly. Additionally, you can create your own DIY candle accessories by repurposing items like aluminum cans or small metal containers. Just make sure they are heat-resistant and stable. By using these tips and tricks, you can enhance the burning experience of your candles and enjoy a more consistent and long-lasting flame.

Tip Description
Choose the right foil Opt for heavy-duty aluminum foil that can withstand high temperatures and won’t tear easily.
Wrap the base Wrap a layer of foil around the base of your candle to catch any dripping wax and protect your surfaces.
Create a reflector Fold a piece of foil into a small triangle and place it behind the flame to reflect the heat and create a more even burn.
Use a foil tent To prevent the top of your candle from burning faster than the rest, create a tent shape with foil and place it over the candle.

Final Thoughts on Getting Even Candle Burning With Foil

To wrap up our discussion on getting even candle burning with foil, let’s reflect on the effectiveness of using this DIY candle accessory. Adjusting foil placement can help troubleshoot uneven burning and ensure a more consistent and longer-lasting burn.

Here are five key takeaways to consider:

  • Experiment with different foil sizes: Try using larger or smaller pieces of foil to see which works best for your candle.
  • Place foil under the candle: This can help distribute heat evenly and prevent tunneling.
  • Ensure foil is securely wrapped around the candle’s base: This will prevent the foil from shifting and affecting the burn.
  • Monitor the candle’s burn regularly: Keep an eye on the flame and check for any signs of uneven burning.
  • Be cautious of drafts: Avoid placing the candle in a drafty area, as this can cause uneven heat distribution.

Frequently Asked Questions

Can I Use Any Type of Foil for Wrapping My Candle?

We can use different types of foil to wrap our candles. However, it’s important to consider the pros and cons of using foil for candle burning. Let’s discuss the various options and their effectiveness.

candle brand

How Long Should I Leave the Foil on the Candle for Even Burning?

We’ve discovered the perfect technique for achieving even candle burning! By leaving the foil on for just the right amount of time, you’ll avoid residue and enjoy the benefits of using foil. Let us enlighten you!

Can I Reuse the Foil After Removing It From the Candle?

Yes, you can reuse the foil after removing it from the candle. However, there are alternative methods to achieve even burning, such as using a candle warmer or trimming the wick regularly.

Advertisement

What Should I Do if the Candle Still Burns Unevenly After Using Foil?

If the candle still burns unevenly after using foil, we should try troubleshooting techniques. Adjust the wick to ensure it’s centered and trim it to 1/4 inch. Also, ensure the candle wax pool reaches the edges by burning it for longer periods.

Are There Any Safety Precautions I Need to Take When Using Foil With Candles?

When using foil with candles, it is important to take safety precautions. Ensure the foil is securely placed and keep flammable objects away. After use, let the foil cool before disposing of it properly.

candle holders glass

Conclusion

In conclusion, using foil to achieve even candle burning is a practical and efficient method. By choosing the right foil, preparing the candle properly, and ensuring proper airflow, you can enjoy a well-burning candle.

Remember to reuse the foil for future candle burning and troubleshoot any issues that may arise.

With these tips and tricks, you’ll be able to create a soothing and balanced ambiance in your space. So go ahead, light that candle and let the foil work its magic!

Advertisement

Continue Reading

Candles

How to Fix Wick in Candle

Published

on

By

Feeling frustrated with a wick that won’t stay straight in your candle? Worry no more! We’re on hand to assist. This tutorial will demonstrate how to adjust your candle’s wick effortlessly and accurately.

By following our simple steps, you’ll be able to master the art of wick-fixing in no time. So, let’s get started and bring that wick back to its rightful place.

  1. Retrieve your wick trimmer or scissors.
  2. Trim the wick to the appropriate length.
  3. Realign the wick in the center of the candle.
  4. Secure it with a wick holder or pencil.
  5. Patiently wait for the wax to harden.

Once your candle is fixed, you can test the wick and enjoy the soothing glow of a perfectly functioning candle.

Key Takeaways

  • Observing the wick’s location and centering it in the wax pool is important for proper burning.
  • Using clean tools like a wick trimmer or sharp scissors is essential for trimming the wick.
  • Trimming the wick to about 1/4 inch length helps maintain a clean and efficient burn.
  • Realigning and securing the wick with a wick holder or pencil prevents uneven burning and wasted wax.

Assess the Wick Position

In this step, we’ll assess the position of the wick in the candle. Wick position assessment is crucial for troubleshooting wick issues and ensuring a clean, even burn.

candlelight concerts aberdeen

Start by observing the wick’s location in relation to the wax pool. Ideally, the wick should be centered and upright, with a small amount of wick protruding from the wax.

If the wick is off-center or leaning towards one side, gently nudge it back to the center using a wick trimmer or a pair of tweezers.

Advertisement

Additionally, check for any debris or buildup around the wick that could obstruct the flame. If necessary, carefully remove any obstructions.

Once the wick is properly positioned, it’s time to retrieve a wick trimmer or scissors to move on to the next step.

candle drawing

Retrieve a Wick Trimmer or Scissors

Let’s grab a wick trimmer or a pair of scissors to continue fixing the wick in the candle. These tools are essential for trimming the wick to the appropriate length, which is crucial for preventing common wick problems such as excessive smoking, flickering, and uneven burning.

While a wick trimmer is specifically designed for this task, you can also use a pair of sharp scissors as a trimmer alternative. To retrieve a wick trimmer or scissors, make sure they’re clean and free from any debris or wax residue. This will ensure a clean cut and optimal performance.

Now that we have our trimming tool ready, let’s move on to the next step: trimming the wick to the appropriate length.

Advertisement

Trim the Wick to the Appropriate Length

Now that we’ve retrieved a wick trimmer or scissors, it’s time to trim the wick to the appropriate length.

candlesticks trading

This step is crucial in maintaining a clean and efficient burn for your candle. By ensuring the wick is at the proper length, we can prevent excess smoke, soot, and uneven burning.

Let’s dive into the details of how to achieve the perfect wick length to maximize the enjoyment of your candle.

Proper Wick Length

Trimming the wick to the appropriate length is essential for fixing the wick in a candle. Proper wick length is crucial for optimal wick maintenance and troubleshooting wick issues. Here’s a step-by-step guide to help you trim your wick correctly:

  1. Start by extinguishing the candle and allowing it to cool completely.
  2. Remove any debris or burnt wick fragments from the candle.
  3. Use a wick trimmer or sharp scissors to trim the wick. The ideal length is about 1/4 inch.
  4. Trim the wick in a straight line to prevent uneven burning.
  5. Avoid cutting the wick too short as it may cause the flame to extinguish or lead to poor burn performance.
  6. Dispose of the trimmed wick properly.
  7. Relight the candle and enjoy its improved performance.

Preventing Candle Smoke

To prevent candle smoke, we need to ensure that the wick is trimmed to the appropriate length. Maintaining the wick is crucial in preventing smoke and ensuring a clean burn. The length of the wick affects how the flame burns, and if it’s too long, it can cause excessive smoke. Here’s a step-by-step guide on how to trim the wick for optimal performance:

yankee candle coupon

Step Action
1 Extinguish the candle and let it cool completely.
2 Gently remove any debris or charred pieces from the wick.
3 Measure the recommended length for your specific candle type and diameter.
4 Use sharp scissors or a wick trimmer to trim the wick to the appropriate length.
5 Dispose of the trimmed wick pieces properly.

Realign the Wick in the Center of the Candle

Now let’s address the issue of an off-centered wick in a candle. When the wick isn’t in the center, it can cause uneven burning and a shorter lifespan for the candle.

Advertisement

To realign the wick, there are a few techniques you can try. By gently pushing or nudging the wick towards the center, you can ensure a more even burn and prolong the life of your candle.

Off-Centered Wick Solutions

Let’s realign the off-centered wick in the center of the candle. When the wick is not properly centered, it can lead to uneven burning and wasted wax. There are a few common causes for an off-centered wick, including improper placement during the initial pouring or movement of the candle while it is still hot. To troubleshoot these wick issues, follow these steps:

  1. Prepare a heat-resistant surface and place the candle on it.
  2. Light the candle and allow it to burn for a few minutes to create a small pool of melted wax.
  3. Carefully extinguish the flame and let the wax cool for a minute or two.
  4. Use a pair of tweezers or a toothpick to gently nudge the wick back to the center of the candle.

By realigning the off-centered wick, you can ensure a more even burn and maximize the lifespan of your candle. Below is a table summarizing the steps:

yankee candle malaysia

Steps
1. Prepare a heat-resistant surface and place the candle on it.
2. Light the candle and allow it to burn for a few minutes to create a small pool of melted wax.
3. Carefully extinguish the flame and let the wax cool for a minute or two.
4. Use a pair of tweezers or a toothpick to gently nudge the wick back to the center of the candle.

Wick Realignment Techniques

We can realign the off-centered wick in the center of the candle using specific techniques. Proper wick maintenance is essential to ensure a clean and even burn, and to avoid common wick problems.

Here are four steps to realign the wick:

  1. Extinguish the candle: Before attempting to realign the wick, make sure the candle is completely extinguished. This will prevent any accidents or injuries.
  2. Use a wick trimmer: Gently trim the wick to a length of about ¼ inch. This will help the wick burn evenly and prevent excessive smoke.
  3. Center the wick: Gently push the wick towards the center of the candle using a wick centering tool or a pair of tweezers. Be careful not to apply too much pressure to avoid damaging the wick.
  4. Trim the wick again: After realigning the wick, trim it once more to ensure it’s at the proper length for optimal burning.

Secure the Wick With a Wick Holder or Pencil

How can we ensure that the wick in a candle is securely held in place? One of the most effective methods is to use a wick holder or a pencil as an alternative. This step is crucial in troubleshooting wick issues and preventing them from detaching or leaning to one side.

Here’s how to securely hold the wick:

Advertisement

candle birthday

  1. Choose a wick holder or a pencil that’s long enough to reach the bottom of the candle.
  2. Position the wick holder or pencil in the center of the candle, ensuring that it’s straight and upright.
  3. Gently wrap the excess wick around the wick holder or pencil, leaving a small amount of slack.
  4. Adjust the tension of the wick by pulling gently, ensuring it remains centered.
  5. Press the bottom of the wick holder or pencil into the softened wax at the bottom of the candle to secure it in place.
  6. Wait for the wax to harden, and then remove the wick holder or pencil, leaving the wick securely held in place.

Wait for the Wax to Harden

After securing the wick with a wick holder or pencil, it’s important to wait for the wax to harden. This step is crucial to prevent wick issues and troubleshoot any problems that may arise during the candle-making process. Here is a step-by-step guide to waiting for the wax to harden:

  1. Avoid disturbing the candle: Once the wick is secured, refrain from moving or touching the candle. Any movement can disrupt the wax and cause the wick to shift or become misaligned.
  2. Allow sufficient cooling time: Depending on the type and size of the candle, the wax may take anywhere from a few hours to overnight to completely harden. Patience is key during this process.
  3. Maintain optimal temperature: Make sure the room temperature is consistent and not too cold or hot. Extreme temperature fluctuations can affect the wax’s ability to harden properly.
  4. Check for any imperfections: Once the wax has hardened, inspect the candle for any issues such as air bubbles, uneven surfaces, or wick problems. Address these concerns before proceeding to the next steps of the candle-making process.

Test the Wick and Enjoy Your Fixed Candle

To test the wick and enjoy our fixed candle, we can now proceed with the final steps of the candle-making process.

Testing the wick stability is crucial to ensure that our candle burns properly and safely. Light the candle and observe the flame. It should burn steadily, without flickering excessively or producing excessive smoke.

If the flame is too small or extinguishes easily, the wick may be too short or have too much wax coating. Troubleshoot these issues by trimming the wick to a longer length or removing excess wax.

candle holders for pillar candles

Additionally, if the flame is too large, it may indicate that the wick is too long, causing the candle to burn too quickly. In this case, trim the wick to a shorter length.

Once you have achieved a stable flame, sit back, relax, and enjoy the beautiful glow of your fixed candle.

Frequently Asked Questions

How Do I Know if the Wick Position Is Incorrect in My Candle?

If the wick position is incorrect in a candle, it can lead to issues like a crooked wick or flickering flame. To troubleshoot, check if the wick is centered and trim it if necessary.

Advertisement

Can I Use Regular Scissors Instead of a Wick Trimmer to Trim the Wick?

Yes, you can use regular scissors instead of a wick trimmer to trim the wick. However, it’s important to follow these tips for fixing a misaligned wick to ensure a clean and even burn.

candle brand

What Is the Appropriate Length to Trim the Wick To?

To achieve the appropriate wick length, it is essential to trim it regularly. Trimming promotes even burning, reduces soot and smoke, and prevents the flame from becoming too large. Follow these steps for mastery.

How Do I Align the Wick in the Center of the Candle?

To fix a tilted wick in a candle and prevent it from leaning to one side, start by gently pushing the wick back to the center using a toothpick or a wick centering tool.

Can I Use Something Other Than a Wick Holder or Pencil to Secure the Wick?

When securing a wick in a candle, we can explore alternatives to a wick holder or pencil. DIY methods include using paperclips, chopsticks, or even clothespins to keep the wick centered and secure.

Conclusion

In conclusion, fixing a wick in a candle is a simple process that can be done with just a few steps.

Advertisement

candlelight carol

By assessing the wick position, trimming it to the right length, realigning it in the center, and securing it with a wick holder, you can easily fix your candle.

Don’t worry about the wax hardening as you wait, as it will ensure a longer-lasting burn.

By following these steps, you can enjoy your fixed candle and create a cozy atmosphere in your home.

Continue Reading

Candles

How to Fix a Candle Wick That Won’t Burn

Published

on

By

Ever curious about why your candle wick just won’t light? Don’t worry, we have the answers! This guide will unveil the techniques to mend a defiant candle wick that seems to resist ignition.

Whether you’re a seasoned candle enthusiast or simply looking to master the art of candle care, our step-by-step instructions will help you achieve a perfectly burning wick every time.

From trimming and straightening the wick to priming and re-positioning it, we will teach you the expert techniques to troubleshoot and resolve any wick-related issues.

So, let’s dive in and learn how to effortlessly fix a candle wick that won’t burn.

Advertisement

candle meaning

Key Takeaways

  • Proper wick maintenance is essential for troubleshooting wick-related issues.
  • Trimming the wick to about ¼ inch before each use helps prevent uneven burn, excessive smoke, and wick drowning in wax.
  • Straightening and positioning the wick ensures even heat distribution and a stronger flame.
  • Priming the wick enhances the candle’s burning performance, improves wax absorption, and reduces sooting.

Trim the Wick

First, we need to trim the candle wick to ensure an even and consistent burn. Proper wick maintenance is essential for troubleshooting wick-related issues. When a candle’s wick is too long, it can lead to an uneven burn, excessive smoke, and even the wick drowning in melted wax. To avoid these problems, trim the wick to about ¼ inch before each use.

This will help the candle burn evenly and prevent mushrooming, where the wick develops a bulbous shape at the top. To trim the wick, use a pair of scissors or a wick trimmer. Gently cut the excess wick, making sure to remove any charred or burnt parts. By keeping the wick at the correct length, you’ll promote a clean and efficient burn.

Now, let’s move on to the next section and discuss how to use a wick trimmer.

Use a Wick Trimmer

To ensure a properly trimmed wick, we can utilize a wick trimmer. This tool is specifically designed for wick maintenance and can help optimize wick burning techniques. Here are five key benefits of using a wick trimmer:

candle shack clp tool

  • Precision: A wick trimmer allows for precise trimming, ensuring the wick is at the ideal length for optimal burning.
  • Safety: Trimming the wick with a trimmer reduces the risk of accidents such as excessive smoke or a flickering flame.
  • Cleanliness: The trimmer collects the trimmed wick, preventing it from falling into the candle and causing unwanted debris.
  • Longevity: Regular wick trimming with a trimmer helps extend the life of your candle by preventing mushrooming and excessive soot.
  • Efficiency: A well-trimmed wick promotes even burning and prevents tunneling, ensuring that you get the most out of your candle.

Straighten the Wick

One solution we’ve found effective for fixing a misaligned candle wick is gently adjusting it with a wick straightener. Straightening the wick is crucial for ensuring an even and clean burn.

To straighten the wick, follow these troubleshooting tips. First, ensure that the candle is completely extinguished and cooled before attempting to straighten the wick. Using a wick straightener, gently push the wick back into the desired position, making sure it’s centered and upright. Be careful not to apply too much pressure, as this can cause the wick to break or become misaligned again.

Once the wick is straightened, trim it to the recommended length, typically around 1/4 inch, to optimize the burn. Straightening the wick will help improve the candle’s performance and prevent any potential issues during burning.

Advertisement

Prime the Wick

Now let’s talk about the importance of priming the wick.

candlelighters charity

Priming the wick before lighting it can enhance the candle’s burning performance. It helps the wax melt evenly and provides a steady flame.

Wick Priming Benefits

We highly recommend priming the wick before lighting it to maximize the benefits of a properly burning candle. Wick priming techniques are essential to ensure a consistent and clean burn throughout the candle’s lifespan.

Here are five benefits of wick priming:

  • Improved wax absorption: Priming the wick allows it to absorb the melted wax more efficiently, ensuring a steady fuel supply for the flame.
  • Reduced sooting: A properly primed wick produces minimal soot, preventing black smoke and residue buildup.
  • Enhanced fragrance throw: By priming the wick, you create optimal conditions for the fragrance oils to evaporate, resulting in a stronger and longer-lasting scent.
  • Longer burn time: Primed wicks burn more evenly and slowly, extending the candle’s overall burn time.
  • Minimized mushrooming: Primed wicks experience less mushrooming, where carbon deposits form at the tip, reducing the need for frequent trimming.

Wick Priming Techniques?

After understanding the benefits of wick priming, let’s now delve into the various techniques to effectively prime the wick and ensure a successful burn. Wick priming is an essential step in troubleshooting wick issues and can greatly improve the performance of your candles. Here are some tried and tested wick priming techniques:

candle drawing

Technique Description
Dip and Roll Dip the wick in melted wax, then roll it between your fingers to remove excess wax and straighten.
Brushing Use a small brush to coat the wick with melted wax, ensuring all parts are evenly covered.
Pre-burning Light the wick and let it burn for a few seconds, then extinguish. Trim any charred ends.

Remove Excess Wax

To remove excess wax from a candle wick that won’t burn, gently scrape it off using a butter knife or a similar tool. Here are some steps to effectively remove excess wax and maintain your wick:

Advertisement
  • Carefully slide the butter knife under the excess wax buildup.
  • Apply gentle pressure to lift the wax off the wick.
  • Be cautious not to damage the wick while scraping off the wax.
  • If the wax is stubborn, try using a hairdryer to soften it before scraping.
  • Clean the wick with a soft cloth to remove any remaining residue.

By removing excess wax, you ensure a clean and unobstructed wick, allowing for proper combustion.

Now that we’ve removed the excess wax, let’s proceed to the next step and re-position the wick for optimal burning.

Re-position the Wick

To re-position the wick, carefully hold the base of the wick with a pair of tweezers and gently guide it to a more central position within the candle.

candle making workshop

This technique is essential when troubleshooting a candle wick that won’t burn properly. Sometimes, the wick may shift or lean towards one side, causing an uneven burn or a weak flame.

By re-positioning the wick, you can ensure a more even distribution of heat and a stronger flame. It’s important to be gentle and precise when using tweezers to avoid damaging the wick or the surrounding wax. Take your time and make small adjustments until the wick is centered.

This simple re-positioning technique is one of the effective troubleshooting tips to fix a candle wick that won’t burn.

Advertisement

Use a Wick Sustainer

Now let’s talk about the benefits of using a wick sustainer and the alternatives available.

candles direct reviews

A wick sustainer is a small metal device that helps keep the wick centered and upright, ensuring a consistent burn. It prevents the wick from leaning to one side or falling into the wax, which can cause the candle to burn unevenly or not burn at all.

If you don’t have a wick sustainer, there are other DIY alternatives you can try to achieve a similar effect.

Wick Sustainer Benefits

Using a wick sustainer ensures that the candle wick remains in the optimal position for a consistent and efficient burn. Here are five benefits of using a wick sustainer:

  • Improved Burn Stability: A wick sustainer keeps the wick centered and straight, preventing it from leaning or drowning in the wax, resulting in a more stable and even burn.
  • Reduced Smoking and Sooting: By keeping the wick properly positioned, a wick sustainer helps minimize smoking and sooting, leading to a cleaner and healthier burning experience.
  • Extended Candle Lifespan: With a wick sustainer, the candle burns evenly, allowing it to last longer and maximizing its lifespan.
  • Enhanced Safety: By preventing the wick from becoming too long or falling into the wax, a wick sustainer reduces the risk of accidental fires and ensures a safer burning environment.
  • Easy Maintenance: Wick sustainers make it easy to trim the wick and replace it when needed, simplifying candle maintenance and prolonging its usability.

Transitioning into the subsequent section about ‘wick sustainer alternatives,’ let’s explore some other options that can be used in place of a wick sustainer.

candle flame zones

Wick Sustainer Alternatives

Let’s explore some other options for wick sustainer alternatives that we can use instead. When troubleshooting wick problems, it’s important to consider different solutions. Here are a few alternatives to using a traditional wick sustainer:

Advertisement
Alternative Description
Paperclip A simple and easily accessible option. Unfold a paperclip and shape it into a small loop to hold the wick in place.
Bobby Pin Another readily available option. Use a bobby pin to secure the wick by opening it up and sliding the wick through the looped end.
Safety Pin Similar to the bobby pin method, a safety pin can be used to secure the wick. Make sure the pin is closed tightly to prevent any accidents.

These alternatives can be useful when you don’t have a wick sustainer on hand or if you want to try something different. Remember to always monitor your candle while it burns to ensure safety and proper functioning.

Frequently Asked Questions

How Do I Prevent My Candle Wick From Tunneling?

To prevent tunneling in candle wicks, we troubleshoot common problems like wicks that won’t stay lit. By trimming the wick before each use, providing proper air circulation, and using quality candles, we can fix this issue.

Can I Use a Regular Pair of Scissors Instead of a Wick Trimmer to Trim the Wick?

Using regular scissors instead of a wick trimmer may seem convenient, but it can negatively affect the burn of your candle. Wick trimmers are designed to create a precise angle that promotes an even and clean burn, preventing tunneling and prolonging the candle’s lifespan.

candlelight concert

Is It Necessary to Prime the Wick Every Time I Light the Candle?

Yes, it is necessary to prime the wick every time you light the candle. Using a different type of wick may affect the burn. Common reasons for a wick not burning include buildup, moisture, or an incorrect wick size.

What Should I Do if My Candle Wick Is Too Short to Light?

If your candle wick is too short, gently push it up using a toothpick or a wick trimmer. Be careful not to damage the wax or disturb the surrounding area.

Advertisement

Are There Any Alternative Methods to Fix a Candle Wick That Won’t Burn?

Alternative methods and troubleshooting tips can be used to fix a candle wick that won’t burn. Understanding the cause, such as excess wax or a clogged wick, is crucial. Techniques like trimming, relighting, or using a lighter can help resolve the issue.

Conclusion

In conclusion, by following these simple steps, you can easily fix a stubborn candle wick that refuses to burn.

candles direct discount code

  • Trim and straighten the wick
  • Prime the wick
  • Remove any excess wax for optimal burning

If needed, re-position the wick or use a wick sustainer.

Remember, with these techniques at your disposal, you’ll never have to suffer from a non-burning candle again. Say goodbye to wick troubles and enjoy the soothing ambiance of a perfectly burning candle.

Continue Reading

Trending