Connect with us

Beginners Guides

How To Reuse Candle Wax

Published

on

An image showcasing the artistic process of turning leftover candle wax into vibrant, multi-colored crayons

You have enjoyed the comforting warmth and delightful scents of your favorite candles, but now you have leftover wax that you don’t want to throw away. Don’t worry, I am here to share with you different ways to creatively repurpose candle wax.

With just a little effort and imagination, you can give new life to this versatile material. In this article, I will share with you some tried-and-true techniques for repurposing candle wax.

From making new candles and homemade fire starters to crafting unique wax melts and waterproofing materials, there is no shortage of possibilities. You can even use candle wax in unexpected ways, such as sealing envelopes or preventing rust.

Join me on this journey of discovery as we explore the world of reusing candle wax. Get ready to unleash your creativity while also reducing waste and saving money. Let’s dive in and uncover the endless possibilities waiting for us within those leftover bits of wax!

Key Takeaways

  • Reusing candle wax can be done by melting it down and pouring it into a new mold to create new candles.
  • Another way to reuse candle wax is by making homemade fire starters by combining shredded paper or dryer lint with melted wax.
  • Candle wax can also be used to waterproof shoes, providing protection from rain and snow.
  • Making fragrant wax sachets for drawers is another creative way to reuse candle wax by using breathable fabrics and scented melted wax.
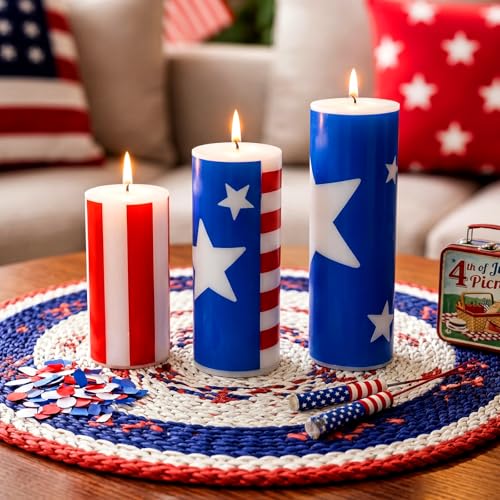
Make New Candles

If you have leftover candle wax, you can easily make new candles by melting it down and pouring it into a new mold. Candle making techniques vary, but the process generally involves melting the wax in a double boiler or a melting pot specifically designed for candle making.

Once the wax is melted, you can customize your candles by adding fragrance oils, color dyes, or even dried flowers and herbs. To create unique and personalized candles, consider experimenting with different molds. You can find an array of mold options online or at craft stores. Try using silicone molds to make beautifully shaped candles, or opt for traditional metal molds for a classic look.

Advertisement

Another way to customize your candles is by adding decorative elements such as glitter or small trinkets. Simply sprinkle them onto the melted wax before pouring it into the mold, and they’ll become embedded within the candle as it solidifies.

Creating homemade fire starters is another fantastic way to reuse candle wax. By combining shredded paper or dryer lint with melted wax and shaping it into small discs or balls, you can easily ignite fires in fireplaces or outdoor pits without hassle.

Now that we’ve covered how to make new candles from leftover wax, let’s move on to creating homemade fire starters without wasting any time!

Create Homemade Fire Starters

To make awesome homemade fire starters, all you need is some leftover melted wax from those cozy evenings by the fire. It’s a great way to repurpose candle wax and create something practical for your next outdoor adventure.

Here’s how you can do it:

Advertisement
  • Gather materials: Start by collecting empty toilet paper rolls, dryer lint, and any other flammable material you have on hand.

  • Prepare the rolls: Stuff each toilet paper roll with the dryer lint, ensuring it fills up the entire tube.

  • Melt the wax: Take your leftover candle wax and melt it in a double boiler or a microwave-safe container.

  • Dip the rolls: Carefully dip each stuffed toilet paper roll into the melted wax, making sure to coat it thoroughly. Allow them to dry and harden.

Once your homemade fire logs are ready, they will easily ignite and provide a long-lasting flame to start your campfire or fireplace. Not only are these fire starters effective, but they also help reduce waste by repurposing candle jars.

Now that you know how to create homemade fire starters, let’s move on to the next section where we’ll learn how to craft unique wax melts without wasting any precious candle wax.

Craft Unique Wax Melts

Once you’ve mastered the art of making homemade fire starters, it’s time to get creative and craft unique wax melts that will fill your home with delightful scents. Wax melts are a great way to reuse candle wax and create a warm and inviting atmosphere in your living space. To help you get started, here are some helpful tips and techniques for crafting your own wax melts.

First, let’s talk about wax sculpture techniques. When creating your wax melts, you can experiment with different shapes and designs to make them truly unique. You can use silicone molds or even try hand sculpting the wax into various shapes like flowers or animals. The possibilities are endless!

Next, it’s important to prioritize safety when melting the wax. Always melt the wax in a double boiler or a dedicated melting pot to prevent accidents. Avoid using direct heat sources like stovetops as they can pose a fire hazard. Additionally, make sure to keep an eye on the temperature of the melted wax to prevent overheating.

Advertisement

Now that you have learned some basic techniques and safety tips for crafting wax melts, you can start experimenting with different scents and colors to personalize your creations. Once you have mastered this skill, you can also explore other ways to reuse candle wax such as waterproofing items around your home.

Transition: Now that we have explored how to craft unique wax melts, let’s move on to another exciting use for leftover candle wax – waterproofing!

Use Wax for Waterproofing

Crafting unique wax melts can lead to discovering another exciting use for leftover candle wax – waterproofing! When it comes to protecting our shoes from rain and snow, using wax can be a game changer. Waterproofing shoes with wax is a simple and effective method that can extend the lifespan of your favorite footwear.

To start, gather your materials: a clean cloth or brush, a heat source like a hairdryer or heat gun, and of course, your leftover candle wax.

Begin by cleaning the surface of your shoes to remove any dirt or debris. Once they’re clean and dry, take the cloth or brush and apply a thin layer of melted wax onto the shoe’s surface. Make sure to cover all areas evenly, paying extra attention to seams and stitching.

Advertisement

After applying the first coat, use the heat source to melt the wax into the shoe’s material. This’ll help seal in the waterproofing properties of the wax. Repeat this process two more times for maximum effectiveness.

Not only does using wax for waterproofing protect your shoes from moisture damage, but it also provides added conditioning benefits for leather materials. The wax helps prevent cracking and keeps leather supple over time.

Now that you know how to waterproof your shoes using leftover candle wax, let’s move on to another creative way to reuse this versatile material – making fragrant wax sachets!

Make Wax Sachets for Fragrance

Creating your own wax sachets is a fantastic way to fill your space with heavenly scents that’ll transport you to a paradise of relaxation and bliss. Not only do scented sachets for drawers add a touch of luxury to your wardrobe, but they also keep your clothes smelling fresh and delightful.

Here’s how you can easily create these fragrant wonders:

Advertisement
  1. Choose the right fabric: Opt for breathable materials like cotton or organza that’ll allow the scent of the wax to permeate through.

  2. Prepare the wax: Melt leftover candle wax in a double boiler, being careful not to overheat it. Once melted, add a few drops of essential oil or fragrance oil to infuse the wax with your desired scent.

  3. Fill the sachets: Cut squares or rectangles from your chosen fabric and fold them in half. Sew two sides together, leaving one side open for filling. Pour the scented melted wax into each sachet, leaving some room at the top before sewing it shut.

  4. Enjoy! Place these beautiful wax-infused potpourri sachets in your drawers or hang them in closets for an enchanting burst of fragrance every time you open them.

Now that you’ve created delightful sachets, let’s move on to learning how to create decorative wax art without any additional steps needed.

Create Decorative Wax Art

Get ready to unleash your creativity and transform ordinary materials into stunning works of art with decorative wax techniques! Wax painting and wax sculpting are two popular methods that allow you to create beautiful and unique pieces using leftover candle wax.

Wax painting involves melting the candle wax and applying it onto a canvas or other suitable surface. You can use different colors of wax to create intricate designs, blend them together for a marbled effect, or even add texture by layering the wax. The possibilities are endless, and you can experiment with various tools like brushes or palette knives to achieve different effects.

For those who prefer three-dimensional artwork, wax sculpting is an excellent option. You can mold the melted wax into any shape you desire, whether it’s a figurine, a flower, or an abstract sculpture. To enhance the durability of your creation, consider adding some beeswax or paraffin to the mixture before shaping it.

To make your decorative wax art even more engaging, here’s a table showcasing some inspiring ideas:

Advertisement
Idea Materials Needed Techniques Used
Wax Collage Old magazines Collage
Wax Stained Glass Clear glass Layering
Wax Batik Fabric Hot water bath
Wax Monoprint Paper Printing
Encaustic Painting Wood panel Heat fusion

Now that you’ve learned how to create decorative wax art, let’s move on to another exciting way to reuse candle wax: sealing envelopes.

Use Wax for Sealing Envelopes

To add an elegant touch to your correspondence, why not try using wax as a sealant for your envelopes? Wax seals have a long history and can instantly elevate the look of any letter or invitation. Wax stamping is a simple yet effective way to create unique and personalized designs on your envelopes.

Firstly, you’ll need to gather the necessary materials: wax sticks in various colors, a metal spoon, a candle or wax melting pot, and a wax stamp with your desired design. Start by lighting the candle or heating the wax melting pot. Hold one end of the wax stick over the flame until it starts to melt. Once you have enough melted wax on the spoon, pour it onto the envelope where you want your seal.

Quickly press the hot spoon onto the molten wax and hold it firmly for a few seconds. This’ll transfer your chosen design onto the seal. Allow the wax to cool and harden before handling.

Using wax seals adds an element of sophistication and charm to any piece of mail.

Advertisement

Now that you’ve mastered this technique, let’s move on to making a wonderful product – homemade lip balm using leftover candle wax!

Make Wax-Based Lip Balm

Crafting your own homemade lip balm can be a fun and creative way to utilize leftover wax from candles. Not only will you be able to customize the scent and texture of your lip balm, but it’s also a great way to avoid using store-bought products that may contain harmful chemicals. Here are three reasons why making your own wax-based lip balm is worth trying:

  • DIY lip scrub: By adding some coarse sugar or coffee grounds to your melted wax mixture, you can create an exfoliating lip scrub. This will help remove dead skin cells and leave your lips feeling smooth and soft.

  • Natural lip moisturizer: Unlike commercial lip balms that often contain synthetic ingredients, using candle wax allows you to make a natural moisturizer for your lips. You can add nourishing oils like coconut oil or shea butter to provide hydration and protect your lips from dryness.

  • Customizable flavors: With homemade lip balm, you have the freedom to experiment with different flavors by adding essential oils or extracts. Whether you prefer fruity, minty, or floral scents, there’s no limit to the possibilities.

Now that you know how to make wax-based lip balm, let’s explore another practical use for leftover candle wax – preventing rust on metal surfaces.

Use Wax as a Rust Prevention

Employing wax as a protective barrier can effectively inhibit the formation of rust on various metal surfaces. Not only does it create a barrier against moisture and oxygen, but it also provides a smooth and durable coating. This makes it an excellent choice for preventing rust on items such as bicycles and outdoor furniture.

To use wax as a rust prevention method, start by cleaning the metal surface thoroughly to remove any dirt or existing rust. Once cleaned, apply a thin layer of melted candle wax using a soft cloth or brush. Make sure to cover all areas evenly, paying extra attention to crevices and hard-to-reach spots.

Advertisement

By creating this protective barrier with candle wax, you can prolong the lifespan of your bicycle and preserve the quality of your wooden furniture. The wax acts as a shield, preventing moisture from reaching the metal surface and causing corrosion.

In addition to its practical uses for rust prevention, wax can also be repurposed for creating beautiful crafts and decorations. These crafts not only add aesthetic value but also allow you to further reuse leftover candle wax in an enjoyable and creative way.

Create Wax-Based Crafts and Decorations

Get ready to unleash your creativity and transform ordinary materials into stunning works of art with the versatile and magical medium of wax. When it comes to creating wax-based crafts and decorations, the possibilities are endless.

One popular option is making wax-based jewelry. With just a few simple tools and some melted candle wax, you can create unique and personalized pieces that’ll dazzle everyone who sees them.

To make wax-based jewelry, start by melting your desired color of candle wax in a heat-proof container. Once the wax’s melted, carefully dip your chosen material, such as beads or pendants, into the liquid wax. Make sure to coat each piece evenly and allow them to dry completely before handling.

Advertisement

Another creative way to use candle wax is by dipping flowers in it. This technique not only helps preserve the beauty of fresh flowers but also gives them a unique and artistic twist. Simply melt some candle wax in a double boiler or microwave-safe container, then dip your flowers into the melted wax one at a time. Be sure to cover each petal fully for an even coating. After dipping, hang the flowers upside down until the wax has hardened.

Whether you’re making beautiful jewelry or preserving delicate blooms, using candle wax as a crafting material opens up a world of possibilities for creating stunning works of art that’ll impress everyone with their beauty and originality.

Frequently Asked Questions

What are some safety precautions to take when reusing candle wax?

When reusing candle wax, there are a few important safety precautions to keep in mind. First, never leave the melting wax unattended as it can easily catch fire. Use a double boiler or a heat-safe container to melt the wax instead of direct heat sources.

Always work in a well-ventilated area to prevent fumes from accumulating. Lastly, be cautious when handling hot wax and use protective gloves to avoid burns.

Following these tips and tricks will ensure a safe and enjoyable experience when reusing candle wax.

Advertisement

Can you reuse scented candle wax to make new candles?

Reusing scented candle wax to make new candles is a fantastic way to create personalized and fragrant home decor. It’s not only a money-saving technique but also allows you to customize the scent and style of your candles. By melting down the used wax, adding new fragrance oils or essential oils, and pouring into molds or containers, you can easily create beautiful homemade candles. These candles will fill your space with delightful aromas, giving old wax a second life!

How do you clean candle wax residue from surfaces?

To clean candle wax residue from surfaces, there are a few effective cleaning techniques you can try. First, gently scrape off as much wax as possible using a plastic card or your fingernail.

Then, place a brown paper bag or cloth over the remaining wax and apply heat with an iron on low setting until the wax transfers onto the paper.

Finally, wipe away any remaining residue with a mild dish soap solution and water. These methods will help prevent stubborn wax stains on your surfaces.

Can you mix different colors of candle wax to create unique wax art?

Yes, you can mix different colors of candle wax to create unique wax art. By melting the different colored candles together, you can achieve a marbled effect or create new colors. Start by breaking up the candles into smaller pieces and placing them in a double boiler. Once melted, stir the colors together until they blend evenly. Then pour the mixture into a mold or use it for painting on surfaces to create your own custom wax art.

Advertisement

How long does it take for melted candle wax to harden when making homemade fire starters?

When making homemade fire starters with melted candle wax, the hardening process is like watching time slow down. As the liquid wax cools and solidifies, it transforms into a sturdy, reliable fuel for your fires. The duration of this transformation depends on various factors such as the thickness of the wax layer and ambient temperature.

To make colorful homemade fire starters, consider using heat-resistant containers like metal cans or glass jars to safely melt different colors of candle wax.

Conclusion

In conclusion, reusing candle wax isn’t just practical but also fun and creative. By following the steps outlined in this article, you can make new candles, create homemade fire starters, craft unique wax melts, use wax for waterproofing, make fragrant wax sachets, seal envelopes with wax, create your own lip balm, prevent rust with wax, and even make beautiful crafts and decorations.

So why let that leftover candle wax go to waste when there are so many possibilities? As the saying goes, "waste not, want not!" So go ahead and get creative with your candle wax reuse projects!

Advertisement

I'm Amelia, and I love making candles. It all started when I was given a kit as a gift. I loved the process so much that I decided to make my own candles. I soon realized that I had a real talent for it. Before long, my friends and family were asking me to make candles for them too. Word spread, and soon I was inundated with orders. I love the creativity that goes into making each candle unique. And I love the satisfaction of knowing that people are using something I made with my own hands.

Continue Reading
Advertisement

Beginners Guides

What Was The First Individually Wrapped Penny Candy In America

Published

on

By

An image showcasing a vibrant, nostalgic candy store display

Unwrapping a small, brightly colored candy brings me back to a simpler time in the candy industry’s history. This journey transports me to a time when candies were not individually packaged, but instead displayed in bulk, attracting kids with their colorful array and enticing scents.

However, there came a day when a confectioner, fueled by innovation and a desire to preserve the freshness and integrity of his creations, introduced the world to the first individually wrapped penny candy in America. This revolutionary packaging not only protected the candy from dust and contamination but also made it more convenient for consumers to enjoy their favorite treats on the go.

Little did that confectioner know how this simple act would forever change the candy industry, transforming it into a booming business and igniting a sense of nostalgia and sentimental value that still lingers to this day.

Join me as we delve into the origins, impact, and enduring legacy of the first individually wrapped penny candy in America.

Key Takeaways

  • The first individually wrapped penny candy in America was the Tootsie Roll.
  • Individually wrapped penny candy revolutionized the way candy was packaged and sold, providing hygiene, freshness, and convenience for consumers.
  • The introduction of individually wrapped penny candy made candy more accessible and appealing to a wider range of consumers, leading to a surge in creativity and innovation in the candy industry.
  • Individually wrapped penny candy became popular among children due to its affordability and convenience, and it symbolized childhood innocence and brought joy.

The Origins of Individually Wrapped Candy

Now, let me tell you about the fascinating origins of individually wrapped candy.

In the early days of candy production in America, sweets were typically sold in bulk and lacked any form of packaging. However, as the demand for candy grew, so did the need for a more convenient and hygienic way to distribute these delectable treats.

Advertisement

The historical significance of early candy packaging can’t be overstated. It revolutionized the way candy was marketed and consumed. The first individually wrapped penny candy in America can be traced back to the late 19th century. It was an innovative solution that allowed candy to be sold in small, affordable quantities while maintaining its freshness and cleanliness.

With the introduction of individually wrapped candy, consumers no longer had to worry about the hygiene of the candy they were purchasing. It provided a sense of trust and assurance that the candy was safe to eat. This packaging also allowed for easier transportation and storage, making candy more accessible to a wider audience.

The development of individually wrapped candy paved the way for early innovations in candy packaging, which we’ll explore in the next section. But before we dive into that, let’s take a closer look at how this groundbreaking idea came to be.

Early Innovations in Candy Packaging

During the early days of candy packaging in the United States, a significant innovation was the introduction of individually encased confections, revolutionizing the way sweets were sold. This breakthrough in candy packaging allowed for easier distribution, improved hygiene, and increased shelf life.

  • Wax Paper: One of the earliest forms of candy packaging was the use of wax paper. This lightweight and flexible material provided a protective barrier for the candy, preventing it from sticking to other candies or getting contaminated.

  • Twist Wrappers: Another notable innovation was the twist wrapper, which consisted of a small piece of wax paper twisted at both ends to seal the candy. This allowed for easy unwrapping and ensured the candy’s freshness.

  • Cellophane: In the early 1900s, cellophane was introduced as a candy packaging material. Its transparent and moisture-resistant properties made it ideal for showcasing colorful candies and protecting them from humidity.

  • Foil Wrappers: Foil wrappers became popular in the mid-1900s. They provided an elegant and eye-catching packaging option, often used for premium chocolates and high-end candies.

  • Plastic Packaging: With the advent of plastic in the mid-20th century, candy packaging took another leap forward. Plastic wrappers offered improved durability, tamper resistance, and a wide range of design possibilities.

These candy packaging innovations have a historical significance as they not only improved the way candies were sold but also influenced the development of other packaged goods.

Advertisement

Now, let’s delve into the story of the first individually wrapped penny candy.

The First Individually Wrapped Penny Candy

The introduction of the individually encased penny candy was like a burst of sunshine on a cloudy day, bringing convenience and delight to candy lovers everywhere. The evolution of packaging played a crucial role in this innovation, as it allowed for the mass production and distribution of small, individually wrapped candies.

Prior to this development, candies were typically sold in bulk or in large jars, making it difficult for consumers to purchase small quantities. The individually wrapped penny candy revolutionized the way candy was packaged and sold, making it more accessible and appealing to a wider range of consumers.

The impact on consumers was significant. The individually wrapped penny candy made it easier for people to carry and enjoy their favorite treats on the go. It allowed for portion control, as consumers could now purchase a single piece of candy instead of having to buy a larger quantity. This not only made it more affordable for those with limited budgets, but also catered to the changing lifestyles of consumers who were increasingly looking for convenience in their purchases.

This shift in packaging also had a profound impact on the candy industry as a whole. It opened up new opportunities for manufacturers to create and market a wide variety of small, individually wrapped candies. It sparked a wave of innovation in candy packaging, leading to the development of different shapes, sizes, and flavors.

Advertisement

The individually wrapped penny candy became a cornerstone in the candy industry, setting the stage for future advancements and shaping the way we enjoy candy today.

Impact on the Candy Industry

Imagine the endless possibilities and sweet innovations that emerged in the candy industry after the introduction of individually encased treats. The advent of individually wrapped penny candy not only revolutionized the way we enjoy confections, but also had a profound impact on consumer behavior and the evolution of candy packaging.

To highlight the significance of this innovation, let’s take a look at a comparison table showcasing the differences between traditional bulk candy and individually wrapped penny candy:

Traditional Bulk Candy Individually Wrapped Penny Candy
Sold by weight Sold in pre-portioned packages
Prone to contamination Protected from dirt and germs
No expiration date Extended shelf life
Limited variety Expanded selection

The introduction of individually wrapped penny candy not only ensured the cleanliness and freshness of each piece, but also allowed for greater variety and convenience. Consumers no longer had to worry about contamination or the hassle of estimating the right amount of candy to purchase. This packaging innovation transformed the candy industry, leading to new marketing strategies and consumer expectations.

With the impact of individually wrapped penny candy on the candy industry established, it is important to explore its subsequent popularity and cultural significance.

Advertisement

Popularity and Cultural Significance

To further underscore the cultural significance of individually wrapped penny candy, it’s worth examining the validity of the theory that its popularity and widespread consumption played a pivotal role in shaping contemporary candy consumption habits.

Individually wrapped penny candy quickly gained popularity among children due to its affordability and convenience. With the rise of industrialization and mass production in the late 19th century, candy manufacturers saw an opportunity to market their products directly to children. They employed various marketing strategies such as colorful packaging, enticing flavors, and eye-catching advertisements to attract young consumers. This targeted approach proved to be incredibly successful, as children became avid consumers of individually wrapped penny candy.

The popularity of individually wrapped penny candy also had a profound impact on the candy industry as a whole. Manufacturers recognized the potential for profit in catering to the desires of young consumers, and this led to the development of an array of new candy products specifically designed for children. From gummy bears to lollipops, the candy industry experienced a surge in creativity and innovation, all thanks to the success of individually wrapped penny candy.

As we delve into the evolution of individually wrapped penny candy, it becomes clear that its popularity among children and the subsequent marketing strategies employed by manufacturers were instrumental in shaping the future of the candy industry and its products.

Evolution of Individually Wrapped Penny Candy

When it comes to the evolution of individually wrapped penny candy, two key aspects that have played a significant role are the introduction of new flavors and varieties, as well as modern packaging innovations.

Advertisement

Over time, candy manufacturers have constantly experimented with different flavors, pushing the boundaries of taste and catering to a wider range of preferences.

Additionally, advancements in packaging technology have allowed for more convenient and attractive ways to present and protect these delectable treats.

These factors have not only contributed to the popularity and appeal of individually wrapped penny candy but have also transformed the candy industry as a whole.

New Flavors and Varieties

With an array of new flavors and varieties hitting the market, candy lovers everywhere are in for a delightful surprise. Candy manufacturers have been quick to adapt to changing tastes and preferences, constantly introducing exciting and innovative flavors to cater to their consumers. From classic favorites like strawberry and watermelon to more adventurous options like bacon and Sriracha, there is a flavor to satisfy every craving.

In addition to new flavors, candy trends have also influenced the variety available. Sour candies, for example, have gained immense popularity in recent years, with a wide range of sour flavors now on offer. As the demand for unique and bold flavors continues to grow, candy companies are constantly pushing boundaries and coming up with new and exciting options for consumers.

Advertisement

This evolution in candy flavors sets the stage for the subsequent section about modern packaging innovations, where these tantalizing treats are showcased in visually appealing and convenient ways.

Modern Packaging Innovations

Get ready to be amazed by the modern packaging innovations that candy manufacturers have developed to showcase their delicious treats in a visually appealing and convenient way. With advancements in technology and consumer preferences, candy packaging has come a long way.

Today, candy companies utilize modern packaging techniques to not only protect the candy, but also to make it stand out on store shelves. From vibrant and eye-catching designs to unique shapes and sizes, candy packaging has become an art form in itself. Manufacturers understand that consumers are drawn to visually appealing products, and they use this knowledge to create packaging that entices customers to pick up their candy.

These modern packaging innovations have revolutionized the candy industry, making it a highly competitive market. As we delve into the next section about nostalgia and sentimental value, it’s important to recognize the impact that modern packaging has had on how we perceive and enjoy candy.

Nostalgia and Sentimental Value

Experience the rush of nostalgia and the flood of sentimental value as you indulge in the sweet simplicity of individually wrapped penny candies – a true blast from the past! These tiny treats hold a special place in our hearts, evoking nostalgic memories and creating an emotional attachment to a simpler time.

Advertisement

There is something magical about unwrapping that colorful little package and savoring the sugary goodness within. Individually wrapped penny candies were not just about the taste; they were about the experience. The crinkle of the wrapper, the anticipation of what lies inside, and the satisfaction of enjoying a small, affordable luxury all contributed to the charm of these candies. They were a symbol of childhood innocence and a source of joy for generations.

These candies were often associated with special occasions and holidays, making them even more meaningful. Whether it was a Halloween treat, a stocking stuffer, or a reward for good behavior, penny candies held a special place in our hearts. They were a small indulgence that brought happiness and excitement to our lives.

As we continue to cherish the past, we also look towards the future of individually wrapped penny candies. Will they continue to hold the same sentimental value for future generations? Only time will tell. But for now, let’s savor the memories and enjoy the sweet simplicity of these nostalgic treats.

The Future of Individually Wrapped Penny Candy

As we reminisce about the nostalgic appeal of individually wrapped penny candies, it is important to consider their future in a rapidly changing world. The future of individually wrapped penny candy lies in its ability to adapt to evolving packaging trends and innovative marketing strategies.

Packaging trends have a significant impact on consumer perception and purchase decisions. In recent years, there has been a shift towards eco-friendly and sustainable packaging options. Candy manufacturers must find ways to balance the allure of individually wrapped candies with the need for environmentally responsible packaging.

Advertisement

Furthermore, marketing strategies play a crucial role in the success of individually wrapped penny candy. With the rise of digital marketing platforms, candy companies must embrace online advertising, social media campaigns, and influencer collaborations to reach a wider audience. Additionally, personalized packaging and limited edition releases can create a sense of exclusivity and urgency among consumers.

To illustrate the potential future of individually wrapped penny candy, let’s take a look at the following table:

Packaging Trends Marketing Strategies Future of Individually Wrapped Penny Candy
Eco-friendly materials Online advertising Adapting to evolving packaging trends
Sustainable packaging Social media campaigns Embracing innovative marketing strategies
Personalized packaging Influencer collaborations Balancing nostalgia with modern appeal
Limited edition releases Exclusivity and urgency Connecting with a wider audience
Innovative designs Brand storytelling Maintaining consumer interest

As we explore the future of individually wrapped penny candy, it is fascinating to uncover fun facts and trivia that have shaped its rich history.

Fun Facts and Trivia

Discover some fascinating fun facts and trivia about the beloved nostalgic treats that have captured the hearts of many – can you guess which iconic candy was first introduced in the late 1800s? Individually wrapped penny candy holds a special place in candy history and has charmed generations with its simplicity and affordability. Here are some interesting tidbits about these delightful confections:

  • The concept of individually wrapped penny candy originated in the late 19th century, with the intention of making candy more accessible to everyone.
  • The first individually wrapped penny candy in America was the Tootsie Roll, introduced in 1896. This chewy chocolate-flavored treat became an instant hit and paved the way for many other individually wrapped candies.
  • The wrapping of penny candy not only kept it fresh, but it also allowed for easy distribution and ensured hygiene.
  • Initially, penny candy was wrapped in plain wax paper, but as demand grew, manufacturers started using colorful wrappers to make the candies more appealing.

These fun facts showcase the significance of candy packaging and its influence on the candy industry. From its humble beginnings with the Tootsie Roll, individually wrapped penny candy has become a beloved part of our sweet legacy.

Transitioning to the next section, the conclusion will explore the lasting impact and nostalgia surrounding these cherished treats.

Advertisement

Conclusion: The Sweet Legacy of Individually Wrapped Penny Candy

Imagine yourself unwrapping a delightful piece of nostalgic confectionary, savoring the sweet taste and feeling a surge of warm nostalgia as you realize the lasting impact and legacy of these individually wrapped penny candies. These treats hold a special place in the hearts of many, evoking sweet memories of childhood and simpler times.

Individually wrapped penny candy has become an iconic symbol of American culture and a beloved part of our history. For candy collectors, these individually wrapped treats are a treasure trove of nostalgia. They serve as a reminder of a bygone era when a penny could buy a small piece of happiness. Collectors eagerly seek out these candies, not only for their flavor but also for their historical significance. Each wrapper tells a story, representing a time when candy was a simple pleasure that brought joy to children and adults alike.

The legacy of individually wrapped penny candy continues to thrive today. While the pennies may have been replaced by a few cents, the concept remains the same. These candies serve as a reminder of the importance of small indulgences and the power they have to bring joy to our lives.

So next time you unwrap one of these sweet treats, take a moment to appreciate the memories they hold and the legacy they have created.

Frequently Asked Questions

What is the nutritional value of the first individually wrapped penny candy?

The nutritional value of the first individually wrapped penny candy isn’t well-documented, as it was primarily made of sugar and lacked substantial vitamins or minerals. However, its impact on the candy industry was immense.

Advertisement

The introduction of individually wrapped penny candy revolutionized the way sweets were sold, making them more accessible and convenient for consumers. This innovation paved the way for the mass production and distribution of various candies, shaping the future of the industry.

How many different flavors of penny candy were available when it was first introduced?

During its introduction, there were numerous delightful flavors of penny candy available, showcasing a plethora of palate-pleasing possibilities. From tangy taffy to luscious licorice, the options seemed endless.

These delectable treats were widely accessible, ensuring that everyone could indulge in their favorite flavor. The availability of such a diverse range of penny candy flavors added to the charm and allure of this revolutionary confectionary innovation.

What were the initial reactions of consumers to the concept of individually wrapped penny candy?

Initial consumer reactions to the concept of individually wrapped penny candy were overwhelmingly positive, leading to its widespread popularity. The convenience and hygiene offered by individually wrapped candies appealed to consumers, as it allowed them to easily carry and consume sweets without worrying about contamination.

Furthermore, the individually wrapped packaging preserved the freshness and flavor of the candies, enhancing the overall experience for consumers. This innovative concept quickly gained traction, revolutionizing the candy industry and becoming a beloved treat for people of all ages.

Advertisement

Who were the key innovators and manufacturers behind the first individually wrapped penny candy?

The key innovators and manufacturers behind the first individually wrapped penny candy were William and Robert Stoll. They were the founders of the Stollwerck Candy Company, which introduced the concept of individually wrapped penny candy in the late 19th century.

This invention revolutionized the candy industry by allowing for increased accessibility and convenience. The individually wrapped penny candy came in various flavors and had a significant impact on the average American’s consumption of sweets. Its affordable price and nutritional value also contributed to its popularity among consumers.

How did the invention of individually wrapped penny candy affect the price and accessibility of sweets for the average American?

The invention of individually wrapped penny candy had a significant impact on the price and accessibility of sweets for the average American. With the introduction of individually wrapped candies, the price of sweets became more affordable, allowing more people to indulge in their favorite treats.

This affordability contributed to a popularity increase, as more individuals were able to purchase and enjoy candies on a regular basis. As a result, the invention of individually wrapped penny candy revolutionized the candy industry and made sweets more accessible to the average American.

Conclusion

In conclusion, the history of individually wrapped penny candy in America is a sweet tale of innovation and cultural significance. From its humble origins to its impact on the candy industry, this small treat has left a big mark on our hearts and taste buds. Its popularity continues to endure, evoking fond memories and sentimental value for many.

Advertisement

As we look to the future, let’s celebrate the sweet legacy of individually wrapped penny candy, a true sugar-coated treasure that’s stood the test of time like a candy-coated time capsule.

Continue Reading

Beginners Guides

Which Candy Has The Most Sugar

Published

on

By

An image showcasing a vibrant assortment of colorful candies, each individually labeled with their respective sugar content in grams

What is the sweet dessert with the highest sugar content?

Have you ever wondered which sugary treat is the ultimate indulgence? Brace yourself for a sweet showdown as we delve into the sugar-filled world of candies.

In this article, we will explore the sugar content of popular candies such as Gummy Bears, Chocolate Bars, Sour Patch Kids, Skittles, Starburst, Reese’s Peanut Butter Cups, M&M’s, Kit Kat, and Snickers. Prepare to be amazed by the eye-opening facts that lie beneath those enticing wrappers.

I will guide you through this sugar-loaded journey, providing you with objective and evidence-based information. I’ll reveal the sugar content of each candy, considering both the serving size and the amount of sugar in each serving. Armed with this knowledge, you’ll be able to make informed decisions about your sweet indulgences.

Get ready to satisfy your curiosity and stay tuned as we uncover which candy truly reigns supreme in the realm of sugar. Let the sugar showdown begin!

Advertisement

Key Takeaways

  • Gummy bears have a high sugar content of 22 grams per serving and are made of sugar, corn syrup, and gelatin.
  • Chocolate bars such as Hershey’s, Snickers, and Kit Kat contain significant amounts of sugar and can be high in sugar and calories.
  • Sour Patch Kids are loaded with sugar and artificial ingredients, made of sugar, corn syrup, and water.
  • Skittles have 32 grams of sugar per serving and contain sugar, corn syrup, and fruit juice.

Gummy Bears

You won’t believe how much sugar is packed into those irresistible gummy bears! Gummy bear flavors vary from classic fruity options like cherry, orange, and strawberry to more exotic choices like pineapple and watermelon. However, regardless of the flavor, gummy bears all have one thing in common – a high sugar content.

These chewy treats are notorious for their sweetness, making them a favorite among candy lovers. When it comes to nutritional value, gummy bears are not exactly a healthy choice. They’re primarily made of sugar, corn syrup, and gelatin, with minimal nutritional benefits.

A single serving of gummy bears, approximately 17 pieces, contains around 22 grams of sugar. To put it into perspective, that’s almost as much sugar as a can of soda! Consuming excessive amounts of sugar can have negative effects on your health, such as weight gain, tooth decay, and an increased risk of chronic diseases like diabetes and heart disease.

It’s important to enjoy gummy bears in moderation, as part of a balanced diet. Now, let’s move on to another popular candy option – chocolate bars.

Chocolate Bars

Indulging in chocolate bars means surrendering to a delightful combination of rich cocoa and a sweet, sugary treat. However, it is important to be aware of the health effects of consuming chocolate bars. While they can be a delicious indulgence, they are also high in sugar and calories. Consuming too much sugar can lead to weight gain, tooth decay, and an increased risk of chronic diseases such as diabetes and heart disease.

When comparing different chocolate bar brands, it’s important to consider the sugar content. Some brands may have higher levels of added sugars, while others may use alternative sweeteners or have lower sugar content overall. I have created a table below to illustrate the sugar content in popular chocolate bar brands:

Advertisement
Brand Sugar Content (per serving)
Hershey’s 24g
Snickers 20g
Kit Kat 21g

As you can see, all of these chocolate bars have a significant amount of sugar. It’s important to enjoy them in moderation and make healthier choices when possible. Now, let’s move on to discussing the next candy, sour patch kids, and their sugar content.

Sour Patch Kids

Sour Patch Kids are known for their tantalizingly sour and irresistibly sweet flavor that leaves your taste buds begging for more. But how are they made? These popular candies start off as a mixture of sugar, corn syrup, and water. This mixture is heated until it reaches a high temperature, creating a thick syrupy consistency.

The syrup is then poured into molds and left to cool and harden. Once the candies have set, they are coated in a sour sugar mixture, giving them their signature tangy taste.

When it comes to health benefits, unfortunately, Sour Patch Kids don’t offer much. They’re loaded with sugar and artificial ingredients, making them a treat that should be enjoyed in moderation. However, there’s one silver lining – they’re fat-free! So if you’re watching your fat intake, indulging in a few Sour Patch Kids won’t hurt too much.

Now, let’s move on to the next candy on our list – Skittles.

Advertisement

Skittles

Taste the rainbow with Skittles, the colorful bite-sized candies that burst with fruity flavors. Skittles are a popular choice among candy lovers, but it’s important to be aware of their nutritional value and ingredients.

Each serving of Skittles, which is about 40 grams, contains 160 calories, 36 grams of carbohydrates, and 32 grams of sugar. The main ingredients in Skittles include sugar, corn syrup, hydrogenated palm kernel oil, and fruit juice. Skittles come in a variety of flavors, such as strawberry, orange, lemon, green apple, and grape. Each flavor has its unique taste, making Skittles a fun and diverse candy to enjoy. However, it’s worth noting that the sugar content varies slightly between flavors, with lemon and green apple having slightly less sugar compared to the other flavors.

Transitioning to the next section, let’s now explore another popular candy, Starburst, and see how it compares in terms of sugar content and flavors.

Starburst

If you’re curious about the sugar content and flavors of Starburst, let’s delve into the truth of a theory and explore how it compares to Skittles.

Starburst, known for its chewy texture and vibrant colors, offers a variety of flavors that are sure to satisfy any sweet tooth. From the classic strawberry and cherry to the tropical paradise of pina colada and mango melon, Starburst has something for everyone. But what sets Starburst apart is its popular flavor combinations. The tangy fusion of cherry and lime, or the refreshing blend of strawberry and lemon, create a delightful burst of taste in every bite.

Advertisement

With each Starburst candy containing approximately 2.4 grams of sugar, it falls on the higher end of the sugar spectrum compared to Skittles.

Now that we’ve explored the flavors and varieties of Starburst, let’s move on to the next candy and uncover the sugar truth of Twizzlers.

Twizzlers

Twizzlers, with its iconic red licorice ropes and chewy texture, offers a unique flavor experience that is beloved by many. When it comes to the nutritional content of Twizzlers compared to other licorice brands, it’s important to note that they are relatively low in fat and have no cholesterol. However, they do contain a significant amount of sugar. In fact, Twizzlers have about 15 grams of sugar per serving, which is more than double the amount found in other licorice brands.

To put this into perspective, let’s take a look at a comparison table:

Candy Brand Sugar Content per Serving
Twizzlers 15g
Red Vines 6g
Good & Plenty 7g
Sour Punch 10g
Licorice Allsorts 12g

As you can see, Twizzlers have the highest sugar content among these popular licorice brands.

Advertisement

Despite their high sugar content, Twizzlers can still be enjoyed in moderation. One of the best ways to indulge in Twizzlers is by incorporating them into desserts. They can be used as a topping for ice cream sundaes, chopped up and mixed into brownie batter, or even melted down and used as a drizzle over cakes. The possibilities are endless!

Moving on to the next topic, Reese’s Peanut Butter Cups offer a completely different taste sensation.

Reese’s Peanut Butter Cups

Reese’s Peanut Butter Cups, with their perfect balance of rich chocolate and creamy peanut butter, are a favorite indulgence for many. But are these delectable treats a high sugar indulgence or can they be enjoyed in moderation? Let’s explore the health impact of Reese’s peanut butter cups and discover some low sugar alternatives for those with a sweet tooth.

  1. Health impact: Reese’s peanut butter cups do contain a significant amount of sugar. One regular-sized cup contains around 10 grams of sugar, contributing to the overall daily sugar intake. Consuming excessive amounts of sugar can lead to weight gain, tooth decay, and an increased risk of chronic diseases such as diabetes and heart disease.

  2. Alternative options: For those looking for low sugar alternatives to satisfy their sweet tooth, there are several options available. Dark chocolate covered almonds, sugar-free peanut butter cups, and homemade peanut butter energy balls are some delicious alternatives that provide a sweet taste without the excessive sugar content.

Transitioning to the next section about M&M’s, it’s important to consider the sugar content and health impact of these colorful candies.

M&M’s

Moving on from Reese’s Peanut Butter Cups, let’s delve into the world of M&M’s. These small, colorful candies have been a popular treat for decades.

Advertisement

The history of M&M’s dates back to 1941, when they were created by Forrest Mars Sr. and Bruce Murrie. Originally, they were made for soldiers as a convenient and mess-free snack during World War II. Since then, M&M’s have become a household name and are enjoyed by people of all ages.

One of the reasons why M&M’s have remained so popular is the variety of flavors they offer. From the classic milk chocolate to peanut, almond, and even pretzel, there is an M&M’s flavor to suit every taste preference. In recent years, M&M’s has introduced limited edition flavors such as caramel, hazelnut spread, and mint.

Whether you prefer the original chocolatey goodness or enjoy exploring the different flavors, M&M’s continue to be a beloved candy choice.

Now, let’s move on to our next topic of discussion: Kit Kat.

Kit Kat

Surprisingly, Kit Kat bars are often considered a ‘break’ from the overwhelming sweetness of other popular candy options. While they do contain sugar, Kit Kats have a moderate amount compared to some other candies. Here are four key points about the nutritional value of Kit Kat bars:

Advertisement
  1. Sugar content: A regular-sized Kit Kat bar contains approximately 21 grams of sugar, which is significantly less compared to candies like Skittles or Starbursts.

  2. Caloric value: Each Kit Kat bar contains around 210 calories, making it a relatively low-calorie treat compared to other candy bars.

  3. Fat content: Kit Kat bars have a moderate amount of fat, with about 11 grams per serving, mostly coming from the milk chocolate coating.

  4. Popular flavors: Kit Kats are available in a variety of flavors worldwide, including milk chocolate, dark chocolate, white chocolate, and even unique flavors like green tea or strawberry.

Overall, Kit Kat bars offer a satisfying combination of crispy wafer and creamy chocolate without overwhelming sweetness.

Moving on to the next candy, Snickers, we can explore its nutritional profile and flavor variations.

Snickers

Next up, let’s take a look at Snickers bars and discover their unique nutritional profile and flavor variations. When it comes to the history of Snickers candy bar, it all started back in 1930 when Frank Mars created this delicious treat. Snickers has become one of the most popular candy bars in the world, known for its satisfying combination of nougat, caramel, peanuts, and milk chocolate.

Not only is Snickers known for its classic flavor, but it also offers a variety of delicious variations. One of the most notable is Snickers Almond, which swaps out the peanuts for crunchy almonds. There’s also Snickers Crisper, which adds a crispy rice layer to the mix. For those who prefer a lighter option, Snickers also offers Snickers Peanut Butter Squared, a peanut butter-filled delight.

When it comes to the nutritional profile of Snickers, it’s important to note that it is a high-sugar and high-calorie treat. A regular Snickers bar contains around 27 grams of sugar, which is equivalent to about 7 teaspoons. It also packs in around 250 calories per bar. While Snickers can be enjoyed as an occasional indulgence, it’s important to consume them in moderation as part of a balanced diet.

Advertisement

Snickers bars have a rich history and offer a range of delicious flavor variations. However, it’s important to be mindful of their high sugar and calorie content and enjoy them in moderation.

Frequently Asked Questions

Are there any sugar-free options available for any of these candies?

Yes, there are sugar-free alternatives available for some candies. These options are specifically designed for individuals who want to reduce their sugar intake. Consuming excessive amounts of sugar can have negative effects on health, such as weight gain and an increased risk of chronic diseases. By choosing sugar-free candies, people can enjoy a treat without the added sugar and its potential health impacts. It’s important to read labels and choose sugar-free options wisely to maintain a healthy lifestyle.

What is the average amount of sugar found in each serving of these candies?

The average sugar content in each serving of these candies varies. It’s important to note that the recommended daily sugar intake for adults is around 25 grams.

Some candies may contain higher levels of sugar compared to others. It’s always a good idea to check the nutrition labels to determine the exact amount of sugar in each serving.

Remember to consume these treats in moderation to stay within the recommended daily sugar intake.

Advertisement

Are there any health risks associated with consuming high amounts of sugar from these candies?

Consuming excessive amounts of sugar from candies can pose several health risks. Sugar consumption has been linked to obesity, diabetes, and tooth decay. It’s important to be mindful of the potential harm that high sugar intake can cause.

However, there are sugar-free options available for those who want to enjoy candies without the associated health risks. These alternatives can help satisfy sweet cravings while minimizing the negative effects of sugar on our health.

Are any of these candies made with natural sweeteners instead of refined sugar?

Some candies are made with natural sweeteners instead of refined sugar, which can provide a healthier alternative. Natural sweeteners like stevia or monk fruit extract have a lower impact on blood sugar levels compared to artificial sweeteners. Consuming excessive amounts of refined sugar can have negative effects on overall health, including increased risk of obesity, diabetes, and dental problems. Choosing candies made with natural sweeteners may be a better option for those looking to reduce their sugar intake.

Are there any differences in sugar content between the regular-sized and mini versions of these candies?

Are there any differences in sugar content between the regular-sized and mini versions of these candies? This question is important because it helps us understand the differences in nutritional value and their impact on dental health.

It’s worth noting that the sugar content may vary between the two versions due to differences in size and formulation. Analyzing the nutritional labels of both versions can provide insights into the variations in sugar content and help individuals make informed choices about their candy consumption.

Advertisement

Conclusion

After conducting a thorough analysis of various candies, it’s evident that Reese’s Peanut Butter Cups contain the most sugar. With their delectable combination of chocolate and peanut butter, these cups pack a sweet punch that’s hard to resist.

While other candies like Gummy Bears and Skittles may be sugary, none can compare to the sugar overload you’ll experience with Reese’s Peanut Butter Cups. It’s like diving into a pool of pure sweetness, where every bite is a delightful explosion of sugar.

So, if you’re looking for the ultimate sugar rush, indulge in these heavenly treats, but remember to enjoy them in moderation!

Continue Reading

Beginners Guides

What Do You Need To Freeze-Dry Candy

Published

on

By

An image showcasing a vacuum-sealed chamber filled with an assortment of colorful candies, surrounded by ultra-cold liquid nitrogen canisters, and a freeze-drying machine gently extracting moisture from the treats

Are you interested in learning about freeze-drying candy? Well, prepare yourself for an exciting adventure into the world of food science! Freeze-drying is a complex process that requires the right equipment, careful planning, and a touch of creativity. But fear not, as I am here to guide you through this amazing journey.

Picture this: your favorite candy, transformed into a crunchy, bite-sized morsel that retains its flavor and texture for ages. It’s like magic, only better! But before we dive into the nitty-gritty, let me give you a glimpse into the freeze-drying process.

First things first, you need to select the right candy. Not all sweets were created equal in the face of freeze-drying.

Then, gather your arsenal of equipment, from a freeze-dryer to packaging materials.

Now, it’s time to prepare your candy for its freeze-drying journey.

Advertisement

But hold on, we’re just scratching the surface! In this article, we’ll cover everything from loading the candy into the freeze-dryer to post-freeze-drying steps.

I’ll even share some tips and tricks for successful freeze-drying and creative ways to use your newfound freeze-dried candy.

But, my dear reader, remember: safety first! We’ll discuss essential safety precautions and considerations to ensure you embark on this candy freeze-drying endeavor with confidence.

So, get ready to dive into the world of freeze-drying, and let’s turn your favorite candy into a shelf-stable masterpiece!

Key Takeaways

  • Proper equipment, preparation, and finesse are needed for freeze-drying candy.
  • Choose solid candies without fillings or coatings for best results.
  • Cut or break candy into smaller, uniform pieces for even freezing and drying.
  • Store freeze-dried candy in airtight containers or vacuum-sealed bags for extended shelf life.

Understanding the Freeze-Drying Process

You’ll want to visualize the freeze-drying process as a magical transformation, where the candy goes from being a delightful treat to a perfectly preserved, crunchy delight. Understanding the freeze-drying process is essential to successfully freeze-drying candy.

It involves removing moisture from the candy through a process called sublimation, where water transitions directly from a solid (ice) to a gas (water vapor) without passing through the liquid phase. This is achieved by placing the candy in a vacuum chamber and subjecting it to low temperatures.

Advertisement

The benefits of freeze-drying candy are numerous. Firstly, it significantly extends the shelf life of the candy, allowing you to enjoy it for a longer period. Secondly, freeze-dried candy retains its original flavor, texture, and appearance, making it an ideal preservation method. Additionally, freeze-dried candy is lightweight and easy to transport, making it perfect for on-the-go snacking or gifting.

To successfully freeze-dry candy, it is important to select the right type of candy. Ideally, choose candies that are solid and do not contain fillings or coatings that may affect the freeze-drying process. Hard candies, gummy candies, and chocolate bars are great options. Avoid candies with high moisture content or those that will not hold their shape during the freeze-drying process.

Properly understanding the freeze-drying process and selecting the right candy will ensure a successful and delicious freeze-dried candy experience.

Selecting the Right Candy

Choose the perfect type of candy to be transformed into a lightweight, crunchy treat through the freeze-drying process. When selecting candy for freeze-drying, consider the flavors and shapes that will enhance the overall experience.

  • Choosing Candy Flavors: Experiment with a variety of candy flavors to cater to different preferences. Opt for candies that have vibrant and bold flavors, such as fruity or minty candies. These flavors tend to retain their intensity even after the freeze-drying process. Avoid candies with delicate or subtle flavors, as they may become muted or lost during freeze-drying.

  • Experimenting with Candy Shapes: Explore different candy shapes to add visual appeal and textural variety to the freeze-dried treat. Consider candies with interesting shapes that can withstand the freeze-drying process without losing their form or becoming too fragile. Think about candies like gummy bears, hard candies, or even chocolate-covered treats. These candies can retain their shape and provide a satisfying crunch after freeze-drying.

  • Enhancing Taste and Texture: To enhance the taste and texture of freeze-dried candy, consider coating the candies with a thin layer of sugar, chocolate, or other flavorings before freeze-drying. This additional layer can help preserve the candy’s flavor and add a delightful crunch.

By carefully selecting candy flavors and experimenting with various shapes, you can create a freeze-dried treat that appeals to different tastes and textures.

Advertisement

Now that you’ve chosen the perfect candy, let’s move on to gathering the necessary equipment for the freeze-drying process.

Gathering the Necessary Equipment

After carefully selecting the perfect candy to transform into a lightweight, crunchy treat, it’s time to gather all the necessary equipment for the freeze-drying process.

Understanding the process is essential to ensure a successful outcome. The first piece of equipment needed is a freeze dryer, which removes moisture from the candy while preserving its texture and flavor. A vacuum pump is also necessary to create a low-pressure environment that facilitates sublimation, the process by which water transitions directly from a solid to a gas. Additionally, a condenser is required to collect the water vapor released during sublimation and convert it back into a solid.

To protect the candy from freezer burn, airtight containers or vacuum-sealed bags should be used. Lastly, gloves and an apron are recommended to maintain hygiene and prevent contamination during the freeze-drying process.

With all the necessary equipment in hand, we can now move on to preparing the candy for freeze-drying by ensuring it is clean and properly arranged on trays.

Advertisement

Preparing the Candy for Freeze-Drying

First, I remove any packaging from the candy to ensure that only the candy itself is being freeze-dried. This eliminates the risk of the packaging melting or affecting the texture and taste of the candy during the freeze-drying process.

Next, I carefully cut or break the candy into smaller pieces. This allows for a faster and more efficient freeze-drying process, as it increases the surface area of the candy and promotes even freezing and drying.

Lastly, I ensure that the candy pieces are uniform in size to ensure consistent results and prevent any pieces from melting or becoming overly dry during the freeze-drying process.

Removing any packaging

To properly freeze-dry candy, it’s crucial to remove any packaging beforehand. This ensures that the candy is fully exposed to the freeze-drying process and allows for the removal of excess moisture. Here are two important steps to follow when removing packaging:

  • First, carefully unwrap the candy from any plastic or paper wrapping. Be gentle to avoid damaging the candy itself.

  • Next, check for any additional packaging materials such as foil or cardboard inserts. Remove these as well to ensure that only the candy is being freeze-dried.

By removing all packaging, you can ensure that the candy is fully sealed before freeze-drying. This will prevent any moisture from entering the candy during the process.

Advertisement

Once the packaging is removed, you can move on to cutting or breaking the candy into smaller pieces, which will be discussed in the next section.

Cutting or breaking the candy into smaller pieces

To ensure a successful freeze-drying process, the next step after removing any packaging is to cut or break the candy into smaller pieces. This allows for more efficient freezing and drying, as it increases the surface area exposed to the freezing methods. There are various cutting techniques that can be employed depending on the type of candy. For example, hard candies can be easily broken into smaller fragments using a mallet or hammer, while soft candies can be sliced with a sharp knife. Additionally, some candies may require special cutting tools like cookie cutters or molds to achieve desired shapes. Once the candy is properly cut, it is ready to be loaded into the freeze-dryer, where the magic of preserving its texture and flavor will take place.

Loading the Candy into the Freeze-Dryer

When loading the candy into the freeze-dryer, it’s crucial to space the candy evenly on the trays to ensure uniform drying. This will allow for consistent results and prevent any uneven areas that may result in over-drying or under-drying.

Additionally, maximizing the capacity of the machine is essential to optimize the production process and maximize efficiency. By arranging the candy in a way that utilizes the available space effectively, we can increase the quantity of candy that can be freeze-dried in each batch, ultimately saving time and resources.

Spacing the candy evenly on trays

Arrange your candy on the trays like stars in the night sky, ensuring each piece is spaced evenly for optimal freeze-drying. Proper tray arrangement and candy placement are crucial to achieve consistent results.

Advertisement

Begin by selecting trays that fit the size of your candy. Place the candies on the trays with enough space between them to allow for air circulation. Avoid overcrowding, as this can lead to uneven drying and potential sticking.

To maximize the capacity of the machine, make sure to utilize all available tray space while maintaining the recommended spacing. This will ensure efficient freeze-drying and prevent any wasted space.

By carefully spacing your candy on the trays, you will create the ideal conditions for effective freeze-drying, setting the stage for the next step: maximizing the capacity of the machine.

Maximizing the capacity of the machine

You can truly unlock the full potential of the machine by cleverly utilizing every inch of available tray space, creating a symphony of efficiency that will leave you in awe.

To maximize efficiency and optimize drying time, consider the following strategies:

Advertisement
  • Arrange the candy in a single layer on each tray, ensuring that there’s enough space between each piece for proper airflow.
  • Place smaller candies in the gaps between larger ones to minimize wasted space.
  • Use tray dividers or molds to create separate compartments for different types of candy, allowing for simultaneous drying of multiple varieties.

By implementing these techniques, you can significantly increase the capacity of the machine and improve the overall efficiency of the freeze-drying process. This will ultimately reduce the drying time and allow you to operate the freeze-dryer more effectively.

Transitioning into the subsequent section about operating the freeze-dryer, it’s important to understand the various settings and controls to achieve optimal results.

Operating the Freeze-Dryer

To operate the freeze-dryer, I begin by setting the appropriate temperature and pressure for the freeze-drying process. This involves carefully adjusting the controls to ensure that the temperature is low enough to freeze the candy and the pressure is optimal for sublimation to occur.

Once the settings are in place, I closely monitor the progress of the freeze-drying process, checking the temperature and pressure gauges regularly to make sure they remain within the desired range. This meticulous attention to detail ensures that the candy is freeze-dried efficiently and effectively.

Setting the appropriate temperature and pressure

Find the perfect balance of temperature and pressure to create the most delectable freeze-dried candy experience. Setting the appropriate temperature and pressure is crucial in optimizing the freeze drying parameters. It requires careful precision to ensure the candy is preserved and retains its taste, texture, and shape. Below is a table showcasing the recommended temperature and pressure ranges for different types of candy:

Candy Type Temperature Range (°F) Pressure Range (mTorr)
Gummy Bears 100-110 50-100
Chocolate Bars 110-120 75-125
Hard Candies 90-100 40-80

By adjusting the temperature and pressure within these ranges, you can achieve the ideal freeze-drying conditions for each candy type. This delicate balance ensures that the candy is thoroughly dried without losing its flavor or becoming too brittle. Monitoring the progress of the freeze-drying process allows you to make any necessary adjustments and ensure the candy is freeze-dried to perfection.

Advertisement

Monitoring the progress of the freeze-drying process

After setting the appropriate temperature and pressure, it’s crucial to closely monitor the progress of the freeze-drying process to ensure optimal results.

Various monitoring techniques can be employed to track the status of the candy throughout the process. One common method is visually inspecting the candy to observe any changes in appearance or texture. Additionally, weight measurements can be taken at regular intervals to determine the amount of moisture being removed. Troubleshooting tips can also be utilized during the monitoring process to address any issues that may arise, such as uneven drying or condensation.

By actively monitoring the freeze-drying process, adjustments can be made to temperature, pressure, or other parameters as needed to achieve the desired outcome.

Transitioning into the subsequent section about post-freeze-drying steps, it’s important to address the final steps required to prepare the freeze-dried candy for storage or consumption.

Post-Freeze-Drying Steps

Once the candy has been freeze-dried, it transforms into a light and airy treat that melts in your mouth. However, the post-freeze-drying steps are crucial to ensure the candy remains in its delectable state.

Advertisement

Proper storage is essential to maintain the candy’s quality and flavor. After freeze-drying, it’s important to store the candy in an airtight container to prevent moisture absorption, which can lead to rehydration and spoilage. Glass jars with tight-fitting lids or vacuum-sealed bags are excellent options for post-freeze-drying storage. These containers provide a barrier against moisture and help preserve the candy’s crisp texture and intense flavors.

Another crucial aspect of post-freeze-drying is packaging. Once the candy is fully freeze-dried and stored, it can be packaged for gifting or commercial purposes. Consider using resealable bags or individual candy wrappers for easy portioning and convenient consumption. Additionally, labeling the packaging with the candy’s name, ingredients, and expiration date is important for both consumers and regulators.

The post-freeze-drying steps involve proper storage and packaging options to maintain the candy’s quality and extend its shelf life. By using airtight containers and appropriate packaging materials, the candy can be preserved for an extended period. These steps ensure that the freeze-dried candy retains its light and airy texture while also enhancing its flavor.

Now, let’s move on to some tips and tricks for successful freeze-drying.

Tips and Tricks for Successful Freeze-Drying

To ensure successful freeze-drying, it’s essential to follow these handy tips and tricks for maximizing efficiency and troubleshooting common issues.

Advertisement

First, make sure to choose the right candy for freeze-drying. Opt for candies with low moisture content and avoid those with fillings or coatings that may not freeze-dry well.

Secondly, ensure that your freeze-dryer is properly calibrated and maintained. This includes checking the temperature and pressure settings, as well as regularly cleaning and defrosting the machine.

Thirdly, always pre-freeze your candy before placing it in the freeze-dryer. This helps to preserve the shape and texture of the candy during the drying process.

Lastly, be patient and avoid rushing the freeze-drying process. It can take several hours to days for the candy to fully dry, depending on its size and moisture content.

By following these tips and tricks, you can maximize the efficiency of your freeze-drying process and troubleshoot common issues that may arise.

Advertisement

Now, let’s move on to explore some creative ways to use freeze-dried candy in various culinary applications.

Creative Ways to Use Freeze-Dried Candy

After mastering the tips and tricks for successful freeze-drying, it’s time to explore the exciting world of creative ways to use freeze-dried candy. With its light and crispy texture, freeze-dried candy can add a unique twist to your recipes and make for delightful treats.

One creative recipe idea is to incorporate freeze-dried candy into homemade ice cream or yogurt. Simply crush the freeze-dried candy into small pieces and mix it into your base before freezing. The result is a burst of flavor and a satisfying crunch in every bite.

Another great use for freeze-dried candy is in baking. You can add it to cookies, cakes, and even bread for a surprising and delicious twist. Imagine the joy of biting into a chocolate chip cookie with freeze-dried strawberry pieces or a banana bread with crushed freeze-dried pineapple. The possibilities are endless!

If you’re looking for unique gift ideas, consider creating custom trail mix or snack mixes using freeze-dried candy. Mix it with nuts, dried fruits, and other tasty ingredients, and package it in decorative jars or bags. It’s a thoughtful and personalized gift that will surely impress.

Advertisement

Now that we’ve explored some creative ways to use freeze-dried candy, let’s move on to the next section where we will discuss safety precautions and considerations when freeze-drying candy.

Safety Precautions and Considerations

Make sure you prioritize safety when experimenting with freeze-dried candy, as there are important precautions and considerations to keep in mind. Here are four key safety measures to follow:

  1. Maintain a freezing temperature: When freeze-drying candy, it’s crucial to ensure that the temperature is consistently below freezing. This ensures that the water content in the candy freezes rapidly, allowing for efficient moisture removal during the drying process. Use a freezer or a dedicated freeze-drying machine to maintain the required low temperature.

  2. Ensure proper ventilation: Freeze-drying candy involves sublimation, where water in the candy turns directly into vapor without passing through the liquid phase. This process releases water vapor and other gases, which need to be vented out properly. Make sure you perform freeze-drying in a well-ventilated area to prevent the buildup of potentially harmful gases.

  3. Use appropriate protective gear: When handling freeze-dried candy, wear gloves to protect your hands from extreme cold temperatures. Additionally, consider wearing safety goggles to shield your eyes from any potential splatters or debris.

  4. Follow manufacturer instructions: Different freeze-drying machines may have specific safety guidelines and operating procedures. Always read and follow the manufacturer’s instructions carefully to ensure safe and effective freeze-drying of your candy.

By following these safety precautions and considerations, you can enjoy the process of freeze-drying candy while minimizing any potential risks.

Frequently Asked Questions

Can any type of candy be freeze-dried, or are there certain types that work better than others?

Some candies are more suitable for freeze-drying than others, and the process can have varying effects on taste and texture. While any type of candy can be freeze-dried, certain candies tend to fare better.

Freeze-drying can alter the taste of the candy, sometimes intensifying flavors or causing them to become more concentrated. Additionally, the texture of freeze-dried candy can be different from regular candy, resulting in a crispy or crunchy texture that some people find enjoyable.

Advertisement

How long does the freeze-drying process typically take for candy?

The freeze-drying process typically takes several hours to complete for candy. During freeze-drying, the candy is first frozen to a very low temperature. Then, through a process called sublimation, the frozen water in the candy is converted directly to vapor without going through a liquid phase. This results in the removal of water from the candy, which significantly affects its texture.

The freeze-drying process generally preserves the original taste of the candy, but it can slightly alter the texture. Freeze-dried candy can be used in various culinary applications, such as dessert toppings or in baking recipes, to provide a unique and crunchy texture.

Is it necessary to pre-freeze the candy before loading it into the freeze-dryer?

It’s highly recommended to pre-freeze the candy before loading it into the freeze-dryer. Pre-freezing the candy has several benefits. Firstly, it helps to maintain the shape and structure of the candy during the freeze-drying process. Additionally, pre-freezing helps to remove excess moisture, which aids in the preservation of the candy’s texture and flavor.

Alternatives to freeze-drying for candy preservation include traditional drying methods, such as air drying or using a food dehydrator. However, freeze-drying is often preferred for its ability to retain the candy’s original taste and appearance.

Can freeze-dried candy be stored at room temperature, or does it need to be kept in a specific environment?

Freeze-dried candy can indeed retain its original flavor and texture. Studies have shown that freeze-drying preserves up to 98% of the candy’s original flavor, compared to other preservation methods. The process involves freezing the candy and then placing it in a vacuum chamber to remove the moisture.

Advertisement

This ensures that the candy stays crispy and delicious, even when stored at room temperature. The benefits of freeze-drying candy include extended shelf life, lightweight packaging, and the preservation of nutritional value.

Are there any special considerations or precautions to take when freeze-drying candy with fillings or coatings?

Special considerations when freeze-drying candy with fillings or coatings include ensuring that the fillings or coatings are compatible with the freeze-drying process. Some fillings may become too runny or lose their texture during freeze-drying, while certain coatings may become brittle or discolored.

Potential challenges in freeze-drying candy with different textures involve maintaining the integrity of the candy’s structure and preventing the formation of ice crystals. Properly addressing these considerations and challenges is crucial to achieving successful freeze-dried candy with intact fillings and coatings.

Conclusion

In conclusion, freeze-drying candy isn’t for the faint of heart. It requires meticulous preparation, a keen eye for detail, and a strong stomach for scientific processes. As you embark on this journey, be prepared to enter a world of freezing temperatures, precise measurements, and delicate handling.

The freeze-drying process is like a dance, where each step must be executed flawlessly to achieve the desired result. So, strap on your lab coat, grab your goggles, and get ready to take candy to a whole new level of preservation.

Advertisement

Happy freeze-drying!

Continue Reading

Trending

Copyright © 2024 Just Candles Affiliate disclaimer As an affiliate, we may earn a commission from qualifying purchases. We get commissions for purchases made through links on this website from Amazon and other third parties.