Have you ever found yourself in a scenario where your beloved candle is nearly burned out? You’re reluctant to say goodbye to the calming glow it provides, but buying a new one feels unnecessary and wasteful.
Well, fear not! I am here to share with you the art of candle refilling. Yes, my friends, refilling a candle is like giving it a second chance at life, preserving its beauty and fragrance for countless hours of enjoyment. With just a few simple steps and some basic supplies, you can transform your depleted candle into a rejuvenated masterpiece.
In this article, I will guide you through the process of refilling a candle, from preparing the container to adding your desired fragrance. So, let’s dive in and discover the joy of giving new life to your favorite candles!
Key Takeaways
- Candle refilling allows for the preservation of beauty and fragrance in burned-down candles.
- Safety precautions, such as a well-ventilated area and not leaving melting wax unattended, are important during the candle refilling process.
- Personalizing candles with fragrance or essential oils can create unique scents.
- Proper wick assessment, replacement, and trimming are essential for an even burn and maximum scent throw.

Vtopmart 25 PCS Clear Plastic Drawer Organizers Set, 4-Size Versatile Bathroom and Vanity Drawer Organizer Trays, Storage Bins for Makeup, Bedroom, Kitchen Gadgets Utensils and Office
- Versatile Drawer Organizer Set: Fits various home drawers and spaces
- Includes 25 Bins in 4 Sizes: Customizable storage options for different items
- Non-Slip and Durable Design: Silicone pads prevent slipping, sturdy plastic construction
As an affiliate, we earn on qualifying purchases.
Gather Your Supplies
Now, you’ll want to grab all of your supplies, like the melted wax, wick, and any essential oils or scents you want to add, creating a colorful and aromatic display on your workspace.
When it comes to refilling a candle, having the right supplies is key. First, gather all the materials you need to melt the wax. You can use a double boiler or a microwave-safe container. If you don’t have a dedicated candle melting pot, no worries! You can repurpose old pots or jars that are heat-resistant. Just make sure they’re clean and dry before using them for melting the wax.
Next, gather the wick and any additional scents or essential oils you want to add to your candle. This is where you can get creative and experiment with different fragrances. Adding a few drops of lavender or vanilla oil can create a soothing and relaxing atmosphere. Don’t be afraid to mix and match scents to create your own unique blend.
Once you have all your supplies ready, it’s time to prepare the candle container.
Prepare the Candle Container
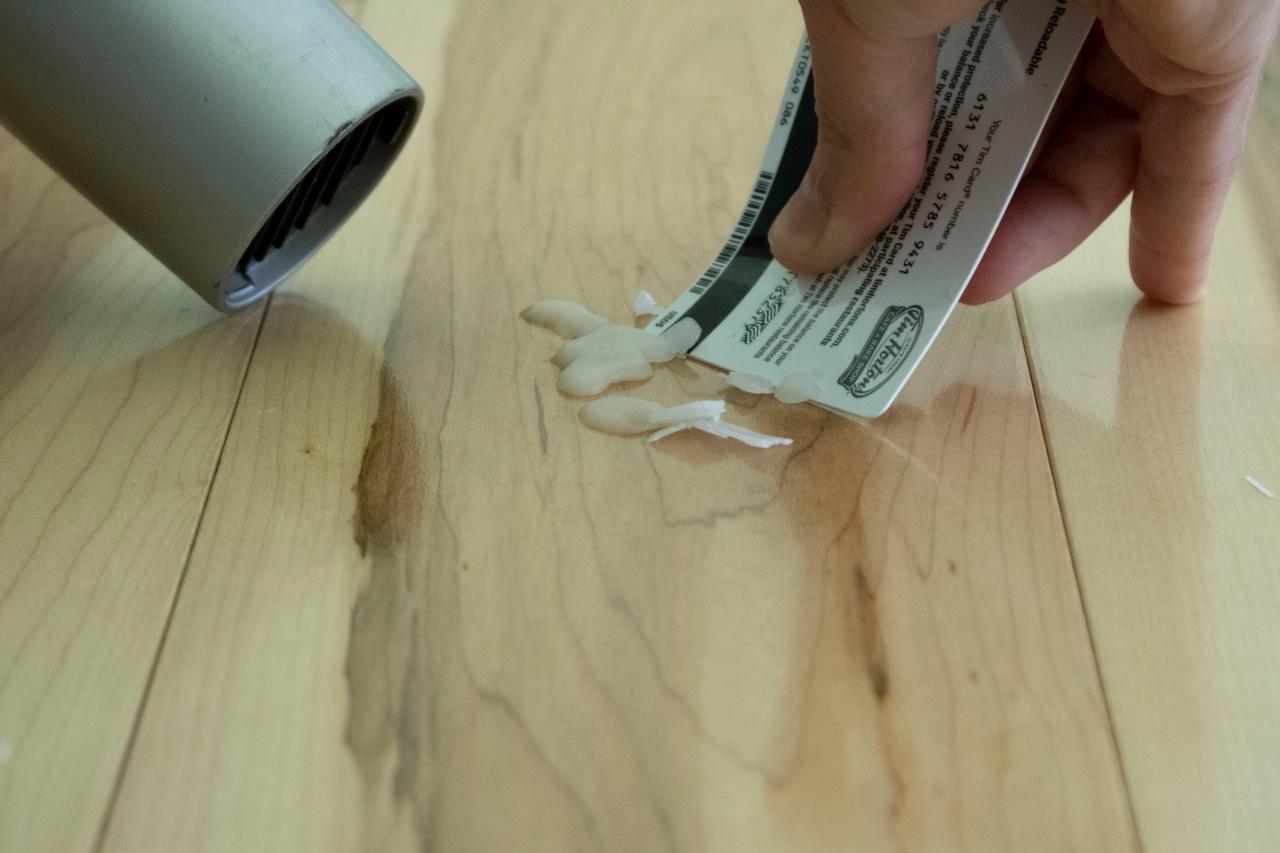
First, make sure the container is clean and free from any wax residue or debris. This step is crucial for creating a fresh and long-lasting candle. Start by washing the container with warm soapy water and scrub away any stubborn wax remnants. Rinse it thoroughly and let it air dry completely.
Once the container is clean, it’s time to prepare it for the refill. Take a moment to assess the condition of the wick. If it’s damaged or burned out, it’s best to replace it with a new one. Choosing the right wick is essential for a successful candle refill. Consider the size and shape of the container to determine the appropriate wick thickness. A thicker wick is needed for larger containers, while a thinner one works well for smaller ones. Additionally, the type of wax you’ll be using can also influence the choice of wick.
Now that the candle container is prepped and the wick selected, it’s time to move on to the next step: melting the wax.
Melt the Wax
As the wax begins to transform into a golden pool of liquid, the enchanting aroma of the future candle fills the air. It’s a magical moment that signifies progress in the candle refilling process.
However, before we dive into the next steps, let’s take a moment to discuss some alternative methods and safety precautions.
-
Alternative Methods: If you don’t have access to a double boiler, you can use a microwave-safe container to melt the wax. Just make sure to heat it in short intervals, stirring frequently to prevent overheating. Another option is the oven method, where you place the candle jar in a preheated oven until the wax melts completely.
-
Safety Precautions: Always remember to work in a well-ventilated area and keep a fire extinguisher nearby. Never leave melting wax unattended, as it can easily catch fire. Additionally, be cautious with the temperature of the wax, as it can cause burns if mishandled.
Now that we’ve covered some alternative methods and safety precautions, let’s move on to the next step: adding fragrance or essential oils (optional). This step allows you to personalize your candle and create a unique scent that suits your preferences.
Add Fragrance or Essential Oils (Optional)
Enhance the enchanting experience by infusing your creation with your favorite fragrance or essential oils. Adding a delightful scent to your candle not only enhances the ambiance but also brings a personal touch to your space. Fragrance blending techniques allow you to create unique and customized scents that suit your preferences.
You can experiment with different combinations of essential oils to create a signature fragrance that’ll fill your home with a pleasant aroma. Using essential oils in candles offers numerous benefits. They not only provide a natural and non-toxic alternative to synthetic fragrances but also have therapeutic properties. Lavender essential oil, for example, can promote relaxation and sleep, while citrus oils like lemon and orange can uplift your mood and invigorate your senses.
By incorporating essential oils into your candle, you can create a soothing and calming atmosphere or an energizing and refreshing one. To add fragrance or essential oils to your melted wax, simply pour a few drops into the wax and stir gently to distribute the scent evenly. Be mindful not to add too much, as it can overpower the fragrance. Once you’ve blended the oils into the wax, you can proceed to the next step of pouring the melted wax into the container.
Pour the Melted Wax into the Container
Now it’s time to carefully pour the melted wax into your chosen container, ensuring that you fill it up to the desired level for your perfect candle. As you pour the wax, make sure to do it slowly and steadily to avoid any spills or splashes. You can use a funnel to help guide the wax into the container if needed.
To make this step more interesting, let’s explore some creative ideas for recycling candle wax and alternative ways to repurpose melted candle wax. Instead of throwing away the excess wax, consider making wax melts for your wax warmer. Simply pour the melted wax into a mold and let it harden. Once hardened, pop them out and place them in your wax warmer for a delightful fragrance throughout your home.
Another option is to use the leftover wax to create fire starters for camping or bonfires. Simply melt the wax and pour it over dryer lint or shredded paper in a muffin tin. Once the wax hardens, you’ll have a convenient and effective fire starter.
With these ideas in mind, let your imagination run wild and find unique ways to repurpose your melted candle wax. Now that the wax is poured, it’s time to move on to the next step of inserting the wick.
| Idea 1 | Idea 2 | Idea 3 | Idea 4 | Idea 5 |
|---|---|---|---|---|
| Wax melts for wax warmer | Fire starters for camping | Homemade lip balm | Wax crayons | Waterproofing matches |
Insert the Wick
To insert the wick, simply thread it through the metal tab and secure it in the center of the container. Wick placement is crucial, as it ensures an even burn and maximizes the scent throw of your candle. Make sure the wick is long enough to reach the bottom of the container, but leave about half an inch of excess wick above the wax. This will allow for easy lighting and trimming later on.
If you encounter any issues with the wick, don’t panic! Troubleshooting wick issues is a normal part of candle making. If the wick is too short, carefully remove it from the container and replace it with a longer wick. If the wick is too long, you can trim it to the desired length using scissors or a wick trimmer.
Once the wick is securely in place, you can move on to the next step. Allow the wax to cool and solidify, which usually takes a few hours depending on the size of the container. During this time, it’s important to avoid moving or disturbing the candle to ensure an even cooling process. Once the wax has completely solidified, you can trim the wick to about a quarter of an inch before lighting your freshly refilled candle.
Now that the wick’s in place, it’s time to allow the wax to cool and solidify, creating a beautiful and aromatic candle ready to be enjoyed.
Allow the Wax to Cool and Solidify
Once you’ve inserted the wick, sit back and let the wax cool and solidify, giving you a delightful and aromatic finished product to savor. The cooling process is a crucial step in the candle refill process as it ensures that the wax hardens properly, allowing the candle to burn evenly and efficiently.
As the wax cools, it undergoes a transformation from a liquid to a solid state, creating a stable foundation for the wick to burn. It’s important to be patient during this phase, as rushing the process can result in an uneven burn or a weak fragrance throw.
As the wax cools, you may notice slight changes in its appearance. It will start to lose its glossy sheen and become more opaque, indicating that it is solidifying. This transformation is a good sign that your candle refill is progressing as it should. Depending on the size of the candle and the type of wax used, the cooling process can take anywhere from a few hours to overnight.
It’s best to let the candle sit undisturbed during this time to ensure a smooth and even finish.
Once the wax has completely cooled and solidified, it’s time to move on to the next step: trimming the wick. Trimming the wick is important for maintaining a clean burn and preventing excessive smoke.
Trim the Wick
After the wax has cooled and solidified, it’s time for you to trim the wick to ensure a clean burn and prevent excessive smoke. Wick trimming is an essential step in candle maintenance and can greatly enhance your candle burning experience.
Here are some wick trimming techniques that you can use:
- Trim the wick to about 1/4 inch before lighting the candle. This helps to control the flame height and ensures a steady burn.
- Use sharp scissors or a wick trimmer to cut the wick. Avoid using your fingers as this can cause the wick to become misshapen.
- Remove any debris or charred bits from the wick before trimming. This helps to maintain a clean flame and prevents soot from forming on the container.
- Trim the wick every time before lighting the candle, especially if it has been burning for a long time. This prevents mushrooming and ensures a cleaner and longer-lasting burn.
Regularly trimming the wick has several benefits. It helps to prevent excessive smoke and soot, ensures a steady flame, and prolongs the life of your candle. By maintaining a well-trimmed wick, you can enjoy a clean and beautiful burn every time you light your refilled candle.
Now that you have trimmed the wick, it’s time to enjoy your refilled candle and bask in its warm and comforting glow.
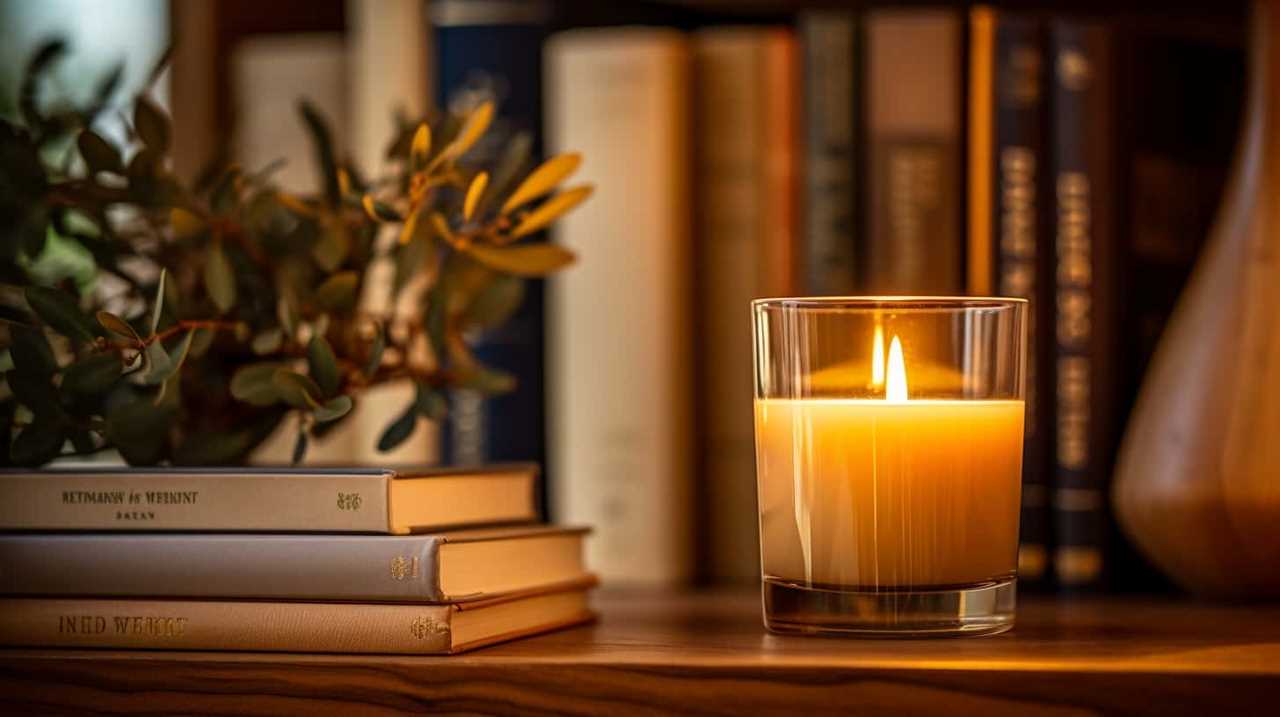
Enjoy Your Refilled Candle
Indulge in the cozy ambiance and embrace the soothing glow of your revitalized candle. After refilling your candle, it’s time to enjoy the beauty it brings to your space. Not only does a candle provide a warm and inviting atmosphere, but it also adds a touch of elegance to any room. So, sit back, relax, and let the calming fragrance fill the air.
To enhance the decorative aspect of your candle, consider adding a few personal touches. You can adorn the container with ribbons, dried flowers, or even colorful gemstones. Get creative and let your imagination run wild! Just remember to keep safety in mind when decorating your candle. Ensure that any embellishments you choose are non-flammable and won’t interfere with the flame.
Speaking of safety, it’s crucial to follow a few guidelines to ensure a worry-free experience. Always trim the wick to 1/4 inch before lighting your candle. This will prevent excessive soot and ensure a clean burn. Additionally, never leave a burning candle unattended and keep it away from flammable materials.
As you enjoy the cozy glow of your refilled candle, it’s important to know how to maintain and extend its life. In the next section, I’ll share some valuable tips to help you get the most out of your candles without compromising safety or quality.
Tips for Maintaining and Extending the Life of Your Candles
Now that you’ve successfully refilled your candle and you’re ready to enjoy its warm glow again, it’s important to know how to properly care for your candles to ensure their longevity.
Candle care is essential to maintain a clean, even burn and prevent common issues like candle tunneling.
To prevent candle tunneling, which is when the wax burns down the center, leaving a tunnel-like hole, there are a few simple tips to follow. First, always trim the wick to about 1/4 inch before lighting your candle. This’ll help create a steady and even burn, preventing the wax from pooling in the center.
Additionally, make sure to burn the candle for at least two hours during the first lighting to allow the entire top layer of wax to melt and prevent tunneling.
Another important aspect of candle care is to keep the candle away from drafts and flammable objects. Drafts can cause an uneven burn and increase the risk of accidents. Also, be sure to place your candle on a heat-resistant surface and never leave it unattended.
By following these simple tips for maintaining and extending the life of your candles, you can enjoy their warm, inviting ambiance for many hours to come. So go ahead, light that beautifully refilled candle and bask in its flickering glow.
Frequently Asked Questions
How do I remove the leftover wax from my candle container before refilling it?
To remove leftover wax from your candle container, there are a few proper techniques you can try. First, place the container in the freezer for a couple of hours. This will make the wax shrink and become easier to remove.
Then, use a butter knife or a spoon to gently pry the wax out.
Another creative way to repurpose the leftover wax is to make new candles by melting it down and adding a new wick.
Can I use any type of wax to refill my candle, or is there a specific kind I should use?
When it comes to refilling a candle, it’s important to choose the right wax for the job. While you could use any type of wax, there are specific kinds that work best. Two popular options are soy wax and beeswax.
Soy wax is known for its clean burn and eco-friendly nature, while beeswax offers a longer burn time and a natural, sweet aroma. Each has its pros and cons, so it’s worth considering your preferences and needs before making a decision.
What is the best way to measure the amount of wax needed to refill my candle?
To ensure the perfect amount of wax for your candle refill, there are a few wax measuring techniques, tips, and tricks to consider.
Firstly, weigh your empty container and subtract its weight from the desired amount of wax. This will give you the exact quantity needed.
Alternatively, you can use water displacement by filling your container with water and measuring the displaced amount.
Remember, while alternative materials can be used for candle refills, it’s crucial to choose ones that are safe and compatible with the original candle.
Are there any safety precautions I should take when melting the wax?
When it comes to melting wax for candle refills, safety should always be the top priority. To prevent any accidents or spills, there are a few precautions you should take.
First, make sure to use a double boiler or a dedicated wax melter to melt the wax evenly and avoid any direct flame.
Second, never leave the melting wax unattended.
Lastly, keep a fire extinguisher nearby, just in case. Remember, a little caution goes a long way in creating a safe and enjoyable candle-making experience.
Can I reuse the old wick from my candle, or do I need to purchase a new one for refilling?
To answer your question, when refilling a candle, it’s generally recommended to purchase a new wick rather than reusing the old one. This ensures better burning and helps maintain the quality of the candle. New wicks are designed to provide a clean and even burn, while old wicks may have become damaged or clogged with residue. Investing in a new wick will guarantee a safer and more enjoyable candle experience.
Conclusion
In conclusion, refilling a candle is a simple and rewarding process that allows you to extend the life of your favorite scents. By following the steps outlined in this article, you can easily create a new candle using the leftover wax from your old ones.
Did you know that by refilling your candles, you can save money and reduce waste? According to a study, the average American household throws away around 25 pounds of candle wax each year. By refilling your candles, you can help reduce this waste and create a more sustainable lifestyle.
So go ahead, give it a try and enjoy the long-lasting beauty and fragrance of your refilled candles.