Did you know that candy made from cornflakes has been a beloved treat for many years? Indeed! This delightful sweet combines the gooey sweetness of marshmallows with the satisfying crunch of cornflakes. The result is a snack that brings back memories of the past and is incredibly delicious.
In this article, I will guide you through the process of making your own cornflake candy, step by step. From gathering the ingredients to shaping the candy and adding optional toppings, I will provide detailed instructions and explanations to ensure that you have a clear understanding of each stage.
I will also use descriptive language to paint a vivid picture of the final product, making your mouth water in anticipation. So, grab your apron and get ready to embark on a sweet and crunchy adventure as we make homemade cornflake candy together!
Key Takeaways
- Cornflake candy is a classic treat that combines marshmallows and cornflakes for a sweet and crunchy texture.
- There are various ways to customize cornflake candy by using different types of cornflakes, sweeteners, and mix-ins like chocolate chips or nuts.
- Proper melting techniques and mixing are important for creating a gooey and evenly coated mixture.
- Decorations and toppings like melted chocolate, sprinkles, or crushed nuts can be added for visual appeal and extra flavor.

Vtopmart 25 PCS Clear Plastic Drawer Organizers Set, 4-Size Versatile Bathroom and Vanity Drawer Organizer Trays, Storage Bins for Makeup, Bedroom, Kitchen Gadgets Utensils and Office
- Versatile Drawer Organizer Set: Fits various home drawers and spaces
- Includes 25 Bins in 4 Sizes: Customizable storage options for different items
- Non-Slip and Durable Design: Silicone pads prevent slipping, sturdy plastic construction
As an affiliate, we earn on qualifying purchases.
Gather Your Ingredients
Now that you’ve got your sweet tooth ready, let’s gather all the ingredients you’ll need to make this irresistible cornflake candy!
When it comes to choosing the perfect cornflakes for this recipe, you have a few options. Traditional cornflakes will give the candy a classic taste and texture, while honey-flavored cornflakes will add a hint of sweetness. You can also experiment with different shapes and sizes, such as frosted flakes or cornflake crumbs, to add a unique twist to your candy.
Next, let’s talk sweeteners. While the recipe traditionally calls for corn syrup, you can easily substitute it with alternative sweeteners. For a healthier option, try using honey or maple syrup. These natural sweeteners will give your candy a rich and distinct flavor. If you’re looking for a vegan alternative, agave nectar or brown rice syrup can work just as well.
Now that we’ve covered the different types of cornflakes and alternative sweeteners, it’s time to move on to the next step: melting the butter and marshmallows.
Melt the Butter and Marshmallows
After melting the butter and marshmallows together, you’ll be left with a gooey mixture perfect for shaping into bite-sized treats. This step is crucial in creating the foundation for your cornflake candy. The melted butter adds richness and depth of flavor, while the marshmallows provide the necessary stickiness to hold everything together.
To ensure a smooth and even melting process, there are a few tips to keep in mind. First, use a medium heat setting on your stove or microwave to prevent scorching. Stir the mixture constantly to distribute the heat and prevent any clumps from forming. Additionally, cutting the butter into smaller pieces before melting will help it melt more evenly.
Now, let’s talk about the exciting part – different variations of cornflake candy! You can customize your treats by adding different mix-ins like chocolate chips, nuts, or dried fruit. These additions will add extra texture and flavor to your cornflake candy. Whether you prefer a classic version or want to experiment with unique combinations, the possibilities are endless.
Next, we’ll move on to the next step: adding the cornflakes.
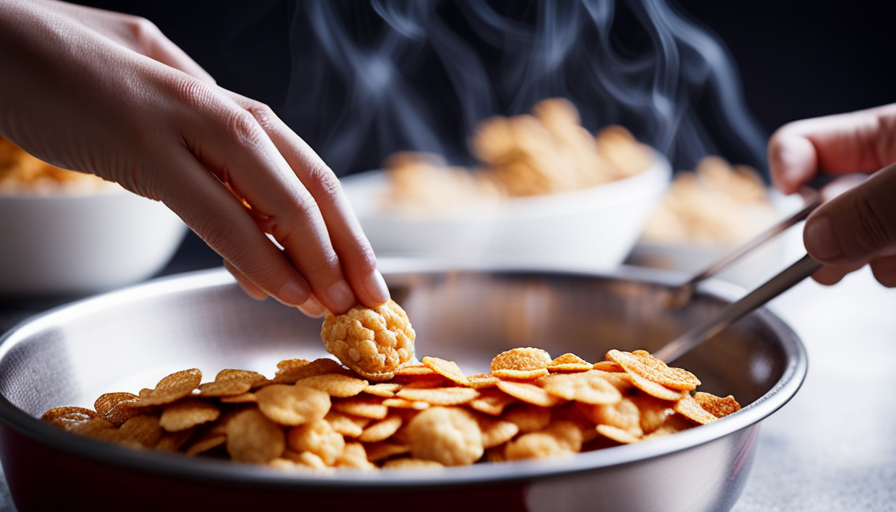
Add the Cornflakes
Once the butter and marshmallows have been melted together to create a delectably gooey mixture, it’s time to incorporate the cornflakes into the mix. The addition of cornflakes is what gives this candy its signature crunchy texture. You can also experiment with using alternative cereals, such as rice krispies or crushed graham crackers, to add a unique twist to the recipe.
To incorporate the cornflakes, pour them into the melted butter and marshmallow mixture. Gently fold the cornflakes into the mixture, making sure that each flake is well coated. The cornflakes should be evenly distributed throughout the mixture, ensuring that every bite of the candy has a satisfying crunch.
As you combine the cornflakes with the gooey mixture, you’ll notice the texture changing from sticky to crispy. The cornflakes provide a delightful contrast to the soft marshmallows, creating a perfect balance of textures in each bite.
Now that the cornflakes have been added, it’s time to move on to the next step: mixing until well coated.
Mix Until Well Coated
To ensure a deliciously crunchy coating on your cereal-based treat, you’ll want to mix the melted marshmallow and butter mixture with the cornflakes until they’re well coated throughout. Imagine taking a bite of this sweet and crispy delight, with each flake perfectly coated in the gooey goodness – it’s like enjoying a bowl of your favorite breakfast cereal, but with an irresistible twist!
When it comes to mixing techniques for other types of candies, there are a few key things to keep in mind. Firstly, it’s important to use a gentle folding motion to incorporate the ingredients together. This helps to prevent overmixing, which can result in a tough or chewy texture. Additionally, for candies that require a smoother consistency, such as fudge or caramels, you may need to use a whisk or electric mixer to ensure all the ingredients are fully blended.
As for different ways to coat snacks with ingredients, the possibilities are endless! For a savory option, you could try coating pretzels with melted cheese or herbs and spices. If you’re looking for a sweet treat, you could dip strawberries in chocolate or roll balls of cookie dough in sprinkles. The key is to make sure the coating adheres well to the snack and adds an extra layer of flavor and texture.
Now that the cornflakes are well coated with the marshmallow and butter mixture, it’s time to shape the candy into bite-sized treats.
Shape the Candy
Now that the marshmallow and butter mixture has coated the crunchy flakes, it’s time to shape these delectable treats into bite-sized delights that’ll have your taste buds dancing with delight.
There are several different ways to shape the cornflake candy, allowing you to get creative with your presentation. One option is to use a spoon or your hands to form small balls. You can also flatten the mixture and use cookie cutters to create fun shapes like hearts or stars. Another idea is to press the mixture into a baking dish and cut it into squares or rectangles.
Once you’ve shaped the cornflake candy, it’s time to add a touch of decoration. You can drizzle melted chocolate over the top for a decadent twist. Sprinkles, colored sugar, or crushed nuts can also be sprinkled on top to add texture and visual appeal. Get creative and experiment with different combinations to make your cornflake candy truly unique.
Before moving on to the next step, let the candy cool and set. This’ll ensure that it holds its shape and is easy to handle.
Let it Cool and Set
As you patiently wait for the marshmallow and butter mixture to cool and set, a sweet anticipation begins to fill the air, whispering promises of delectable bite-sized delights that’ll soon be yours to enjoy. The cooling process is crucial, as it allows the cornflake candy to solidify and maintain its shape.
While you wait, take this time to prepare your creative decorations and think about serving suggestions that’ll elevate this simple treat to a whole new level.
To make your cornflake candy truly eye-catching, consider adding colorful sprinkles, edible glitter, or even drizzling melted chocolate on top. These additions not only enhance the visual appeal but also add an extra layer of flavor and texture. Imagine biting into a crunchy cornflake candy, adorned with the shimmer of sprinkles and the rich taste of chocolate. It’s a treat that’s as delightful to look at as it is to eat.
When it comes to serving, think outside the box. Arrange the cornflake candies on a platter, or place them in cupcake liners for a fun and portable display. You can also stack them on a decorative cake stand or place them in a mason jar tied with a ribbon for a charming homemade gift.
As the cornflake candy cools and sets, your mind may wander to the optional step of adding toppings or mix-ins. But before we delve into that, let’s first focus on letting the candy reach its desired texture and firmness.
Optional: Add Toppings or Mix-ins
While you’re patiently waiting for the cornflake candy to cool and set, you can let your imagination run wild with ideas for adding toppings or mix-ins to take this treat to the next level. Get ready to elevate the flavor and texture of your cornflake candy with creative and delicious combinations.
For those with a sweet tooth, consider drizzling melted chocolate over the top of your cornflake candy. The smooth, velvety chocolate will add a decadent touch to the crunchy sweetness of the cornflakes. Alternatively, you can sprinkle some colorful sprinkles or crushed nuts on top for an extra burst of flavor and visual appeal.
If you’re looking for healthier options, try incorporating dried fruits like cranberries or raisins into the mix. These sweet and chewy fruits will add a burst of natural sweetness and a pleasant contrast to the crispy cornflakes. Another great option is to mix in some toasted coconut flakes for a tropical twist that’ll transport your taste buds to a sandy beach.
As you experiment with these topping and mix-in ideas, remember to always consider the balance of flavors and textures. The key is to enhance the cornflake candy without overpowering it.
Now that you’ve added your desired toppings or mix-ins, it’s time to move on to the final step: storing and serving your delicious cornflake candy.
Store and Serve
After adding the finishing touches to your delightful creation, it’s time to give your cornflake candy the royal treatment by storing it in an airtight container fit for a crown. Proper storage is essential to maintain the freshness and crunchiness of this delectable treat. Here are some storage tips to ensure your cornflake candy stays at its best:
-
Store in an airtight container: This will help prevent moisture from seeping in and making the cornflakes lose their crispness.
-
Keep in a cool, dry place: Avoid exposing your cornflake candy to heat or humidity, as these can cause the candy to become sticky or soggy.
-
Do not refrigerate: Refrigeration can make the cornflakes lose their crunch, so it’s best to keep them at room temperature.
When it’s time to serve your cornflake candy, get ready to wow your guests with this irresistible treat. Here are some serving suggestions to make it even more delightful:
-
Cut into bite-sized pieces: This allows for easy and mess-free snacking.
-
Serve with a hot beverage: The combination of sweet cornflake candy and a warm drink like hot chocolate or coffee is simply divine.
-
Use as a topping: Crumble the cornflake candy over ice cream or yogurt for an extra crunchy and sweet twist.
Now that your cornflake candy is stored and ready to be served, let’s move on to the exciting world of variations and flavor ideas.
Variations and Flavor Ideas
Get ready to unleash your creativity and take your taste buds on a wild ride with a variety of mouthwatering twists and flavor combinations for your cornflake confection. The possibilities are endless when it comes to variations and flavor ideas for cornflake candy. You can experiment with different types of sweeteners to create a unique taste profile. For a classic and nostalgic flavor, try using honey or maple syrup. If you prefer a healthier option, agave nectar or stevia can be used as alternatives. To add an extra kick of flavor, consider incorporating spices like cinnamon or nutmeg into the mixture.
To make your cornflake candy even more visually appealing, get creative with the decorations. You can dip the candy in melted chocolate and sprinkle it with crushed nuts or colorful sprinkles. Another fun idea is to drizzle melted caramel or white chocolate over the top. For a festive touch, use food coloring to dye the candy in different shades. You can also add dried fruits or mini marshmallows to the mixture for added texture and flavor.
With so many possibilities, making cornflake candy is truly a chance to let your imagination run wild. Experiment with different sweeteners and get creative with your decorations to create a unique and delicious treat. Enjoy your homemade cornflake candy and get ready to indulge in its sweet and crunchy goodness.
Next, we will explore different ways to enjoy and share your homemade cornflake candy.
Enjoy Your Homemade Cornflake Candy
Indulge in the delightful creation you’ve whipped up and savor the scrumptiousness of your homemade cornflake treat. As you take a bite, the crispy cornflakes coated in a sweet, sticky mixture will bring a burst of flavor to your taste buds.
Here’s how you can customize your cornflake candy to make it even more delectable:
-
Add a sprinkle of sea salt: Enhance the sweet and savory combination by sprinkling a pinch of sea salt over the top of your cornflake candy. This’ll create a tantalizing contrast that’ll keep you coming back for more.
-
Drizzle with chocolate: Melt some chocolate and drizzle it over the cornflake candy for a luxurious touch. The smooth, velvety chocolate’ll add richness and depth to the already irresistible treat.
-
Mix in dried fruits and nuts: For added texture and flavor, toss in a handful of dried fruits like cranberries or apricots, along with some chopped nuts like almonds or pecans. This’ll give your cornflake candy a delightful crunch and a burst of fruity goodness.
-
Sprinkle with colorful sprinkles: If you’re looking to add a pop of color and fun to your cornflake candy, sprinkle it with some colorful sprinkles. This’ll make your treat visually appealing and bring a smile to anyone who indulges in it.
Now that you’ve personalized your cornflake candy, it’s important to know how to store and preserve it properly. Here are a few tips to keep it fresh and tasty:
-
Store in an airtight container: Transfer your cornflake candy to an airtight container to prevent it from becoming stale. This’ll help maintain its crispy texture and delicious flavor.
-
Keep in a cool, dry place: Store your cornflake candy in a cool, dry place, away from direct sunlight and moisture. Excessive heat and humidity can cause the candy to become sticky or lose its crunchiness.
-
Enjoy within a week: While your cornflake candy can last for a few weeks, it’s best enjoyed within the first week for optimal taste and texture.
Now that you have all the tips and tricks, go ahead and enjoy your homemade cornflake candy. Whether you’re sharing it with loved ones or savoring it all for yourself, this delightful treat is sure to bring joy and satisfaction.
Frequently Asked Questions
Can I use margarine instead of butter in this recipe?
Yes, you can use margarine instead of butter in this recipe. However, keep in mind that margarine has a slightly different taste compared to butter. It might affect the overall flavor of the cornflake candy. Additionally, margarine has a higher water content, which could potentially alter the texture of the candy. If you decide to use margarine, make sure to adjust the measurements accordingly and be aware of these potential effects on taste and texture.
How long does it take for the candy to cool and set?
Once you’ve finished making the delicious cornflake candy, the next step is to let it cool and set. The cooling time is crucial for the candy to firm up and hold its shape.
Depending on the temperature and humidity, it usually takes around 30 minutes to an hour for the candy to cool completely. During this time, the melted ingredients solidify, creating a delectable treat with a satisfying crunch.
So, be patient and resist the temptation to dig in right away!
Can I use mini marshmallows instead of regular marshmallows?
Yes, you can definitely use mini marshmallows as an alternative to regular marshmallows in cornflake candy. They’ll still melt and provide a gooey texture to the candy.
Additionally, if you’re looking for alternative cereal options, you could try using rice cereal or crushed pretzels for a different twist. The mini marshmallows will add a delightful sweetness to the candy, making it even more delicious.
Can I substitute cornflakes with another type of cereal?
Can I substitute cornflakes with another type of cereal? Absolutely!
While cornflakes are traditionally used to make cornflake candy, there are plenty of variations you can try with different cereals.
For a crunchy twist, you could use rice cereal or even crushed pretzels.
If you prefer a sweeter option, try using honey nut cereal or cinnamon toast cereal.
The possibilities are endless, so feel free to experiment and find the perfect cereal for your taste buds.
How long can I store the cornflake candy before it goes bad?
The shelf life of cornflake candy depends on proper storage. If stored in an airtight container at room temperature, it can last for up to two weeks.
However, for longer storage, it’s recommended to refrigerate the candy, which can extend its shelf life to about a month.
Proper storage is crucial to maintain the candy’s freshness and prevent it from going bad.
Conclusion
I hope you enjoyed this step-by-step guide on how to make delicious cornflake candy! It’s truly a treat that’ll bring back childhood memories and satisfy your sweet tooth. So go ahead and gather those ingredients, melt the butter and marshmallows, and mix in those crunchy cornflakes. Shape it into bite-sized pieces and feel free to get creative with toppings or mix-ins.
Once it’s all done, store it properly and enjoy the satisfaction of creating your own homemade candy. Happy cooking, and may your cornflake candy be as sweet as a summer breeze!