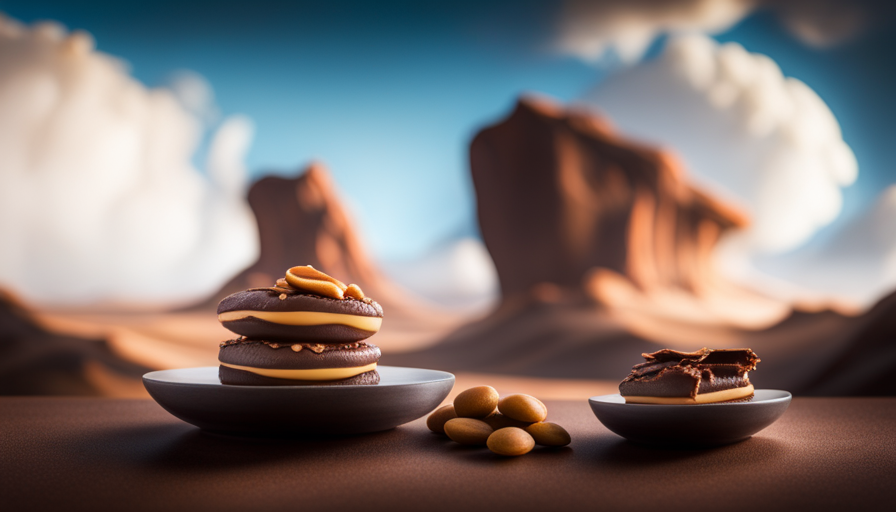
Connect with us

Beginners Guides

What Cha Ma Call It Candy Bar

Published

on

An image that showcases the indulgent delight of the "What Cha Ma Call It Candy Bar": a luscious blend of velvety caramel, crunchy peanut butter, and smooth chocolate, all harmoniously mingling in a delectable symphony of flavors

The What’cha ma call it candy bar represents the ultimate in pleasure and fulfillment. It’s as if a multitude of flavors are harmonizing together, blending caramel, chocolate, and a crispy texture that delights your palate.

This delectable treat is a marvel in the world of candy bars, with its unique combination of ingredients that make it absolutely irresistible. Imagine biting into a bar that has the perfect balance of chewy caramel and velvety smooth chocolate, all surrounded by a layer of crispy goodness. It’s a sensory experience that will leave you craving for more.

What sets the What’cha ma call it candy bar apart from other confections is its distinct texture. It’s not too soft, not too hard, but just right – a delightful crunch that adds an extra dimension to every bite.

This candy bar has amassed a cult following, with fans eagerly seeking it out wherever they go. But fear not, for I will share with you the secret locations where you can find this heavenly delight.

If you’re feeling adventurous, I will also provide you with DIY recipes and ideas for making your very own What’cha ma call it candy bar at home.

Advertisement

Join me on this journey as we delve into the history, ingredients, and future of this beloved candy bar. Get ready to tantalize your taste buds and discover the wonders of What’cha ma call it candy bar.

Key Takeaways

  • What’cha ma call it candy bar is known for its indulgent and satisfying flavors, combining caramel, chocolate, and crunchiness.
  • The candy bar has a cult following and fans eagerly seek it out, with secret locations where it can be found.
  • The candy bar’s unique combination of textures, including a distinct crunchiness, adds an extra dimension to every bite.
  • The brand has a strong presence on social media, with over 1 million Instagram followers, and represents nostalgia, adventure, and individuality.

The History of What’cha ma call it Candy Bar

Do you ever wonder about the fascinating history behind the creation of the What’cha ma call it candy bar? Well, let me take you on a journey back in time to uncover the origins and inspiration behind the name of this iconic treat.

Back in the 1920s, there was a candy company called Pearson’s. They were known for their delicious and innovative confections. It was during this time that the idea for the What’cha ma call it candy bar was born. The name itself was a playful response to the common question people often asked when trying to describe this unique candy.

The What’cha ma call it candy bar quickly became a hit, captivating the taste buds of candy lovers across the nation. Its perfect combination of crispy rice, peanut butter, and chocolate created a flavor explosion that was simply irresistible. People couldn’t get enough of it!

Not only did the What’cha ma call it candy bar become a favorite treat, but it also made a significant impact on popular culture. Its catchy name and delectable taste made it a topic of conversation among candy enthusiasts everywhere. It became a symbol of fun and excitement, representing the joy of indulging in a delightful treat.

Now that you know the captivating history behind the What’cha ma call it candy bar, let’s delve into the next section and explore the mouthwatering ingredients that make it irresistible.

Advertisement

The Ingredients that Make it Irresistible

You can’t resist the mouthwatering allure of the irresistible ingredients in this delectable treat. The flavor profile of the What’cha ma call it candy bar is a harmonious blend of sweet, salty, and crunchy.

With every bite, you experience a burst of flavors that dance on your taste buds. The combination of smooth milk chocolate, crunchy rice crisps, creamy caramel, and nutty peanut butter creates a symphony of taste sensations in your mouth.

The marketing strategy behind the What’cha ma call it candy bar is as clever as its flavor profile. The name itself sparks curiosity and intrigue, leaving consumers eager to try this mysterious treat. The vibrant packaging with its eye-catching colors and playful design further entices you to grab one off the shelf. It’s a candy bar that stands out from the rest, both in taste and appearance.

As you savor the delectable flavors, you can’t help but notice the unique texture and crunchiness. The rice crisps add a delightful crispiness to each bite, creating a satisfying contrast to the smooth chocolate and creamy caramel. It’s a candy bar that not only pleases your taste buds but also provides a satisfying crunch that keeps you coming back for more.

The Unique Texture and Crunchiness

Indulge in the symphony of sensations as your taste buds dance to the harmonious blend of smooth chocolate, crispy rice, creamy caramel, and nutty peanut butter, creating a delectable treat with a texture that’s like biting into a cloud of crunchy delight.

Advertisement

The texture of the What’cha Ma Call It candy bar is truly unique and unlike anything you’ve ever experienced before. With each bite, you’re greeted with a satisfying crunch that gives way to a melt-in-your-mouth sensation.

The crunchiness of the candy bar is achieved through a careful balance of ingredients and precise manufacturing techniques. The crispy rice adds a delightful snap, while the nutty peanut butter provides a subtle crunch that complements the smoothness of the chocolate and caramel. This perfect combination of textures creates a truly unforgettable eating experience.

In addition to its exceptional texture, the What’cha Ma Call It candy bar also boasts a flavor combination that’s second to none. The rich chocolate, creamy caramel, and nutty peanut butter work together in perfect harmony, creating a taste sensation that’s both indulgent and satisfying.

The unique marketing strategies for What’cha Ma Call It candy bar have also contributed to its success. The brand has focused on highlighting the candy bar’s texture and crunchiness, using bold and eye-catching visuals to convey the irresistible nature of the product. This has helped to create a strong and loyal customer base who are drawn to the candy bar’s unique qualities.

As we transition to the next section about the perfect balance of caramel and chocolate, it’s clear that the texture and crunchiness of the What’cha Ma Call It candy bar are just the beginning of its appeal.

Advertisement

The Perfect Balance of Caramel and Chocolate

Immerse yourself in the delectable symphony of flavors as the luscious caramel and velvety chocolate intertwine in perfect harmony. The combination of caramel and chocolate not only satisfies our sweet tooth but also offers some surprising health benefits.

Caramel contains small amounts of calcium and iron, while chocolate is rich in antioxidants that can help reduce the risk of heart disease.

Here are four reasons why the blend of caramel and chocolate in the ‘What Cha Ma Call It Candy Bar’ is truly exceptional:

  1. The Perfect Sweetness: The caramel provides a buttery, sweet flavor that perfectly complements the rich, indulgent taste of chocolate.

  2. The Textural Delight: The smooth, creamy caramel melts in your mouth, contrasting with the satisfying crunch of the chocolate coating.

  3. Cultural Significance: Caramel and chocolate have long been cherished ingredients in desserts around the world, symbolizing indulgence and celebration.

  4. Unforgettable Experience: The combination of caramel and chocolate in the ‘What Cha Ma Call It Candy Bar’ creates a unique and unforgettable taste that sets it apart from other candy bars.

As you savor every bite of this extraordinary candy bar, you’ll discover what truly makes it different from any other confectionary delight.

What Makes it Different from Other Candy Bars

When you take a bite of this one-of-a-kind confection, you’ll understand why it stands out from the sea of ordinary candy bars. The marketing strategy behind the What’cha Ma Call It candy bar is truly genius. By giving it a unique and mysterious name, the creators have piqued the curiosity of consumers everywhere. The moment you see the distinctive packaging, you can’t help but be intrigued. And once you taste it, you’ll be hooked.

Advertisement

What sets the What’cha Ma Call It candy bar apart from others is its perfect blend of flavors and textures. The combination of crunchy rice crisps, smooth caramel, and creamy chocolate creates a symphony of taste in your mouth. It’s a harmonious balance that keeps you coming back for more.

Not only does the What’cha Ma Call It candy bar excel in taste, but it also holds cultural significance. It has become a symbol of indulgence and enjoyment, a treat that brings people together. Whether it’s shared among friends at a party or enjoyed as a special treat after a long day, this candy bar has become a part of our social fabric.

As we transition into the next section about fun ways to enjoy the What’cha Ma Call It candy bar, it’s clear that this confection has captured our hearts and taste buds.

Fun Ways to Enjoy What’cha ma call it Candy Bar

Get ready to explore some exciting and creative ways to savor the deliciousness of the What’cha Ma Call It confection! This candy bar isn’t just tasty on its own, but it also lends itself to fun flavor combinations and can be incorporated into desserts in unique ways. Here are three ideas to inspire your culinary creativity:

  1. What’cha Ma Call It Ice Cream Sundae: Start with a scoop of your favorite ice cream flavor and crumble a What’cha Ma Call It candy bar on top. Drizzle with caramel or chocolate sauce and add a dollop of whipped cream. The combination of creamy ice cream, crunchy candy bar, and sweet sauce is sure to delight your taste buds.

  2. What’cha Ma Call It Brownie Surprise: Bake a batch of your favorite brownies and chop up some What’cha Ma Call It bars. Mix the candy bar pieces into the brownie batter before baking. The result? A gooey, chocolatey treat with a delightful crunch.

  3. What’cha Ma Call It Milkshake: Blend a What’cha Ma Call It candy bar with vanilla ice cream, milk, and a touch of caramel or peanut butter sauce. This indulgent milkshake is a perfect way to enjoy the candy bar’s unique flavor in a refreshing and creamy form.

Now that you have some fun ideas to enjoy the What’cha Ma Call It candy bar, let’s dive into the cult following it has garnered over the years.

Advertisement

The Cult Following of What’cha ma call it Candy Bar

You’ll be amazed by the dedicated fan base that the What’cha Ma Call It confection has amassed, with over 1 million Instagram followers showcasing their love for this delectable treat.

The impact of social media on the popularity of the What’cha Ma Call It candy bar can’t be overstated. Through platforms like Instagram, fans from all over the world share their love for this unique candy bar, featuring mouth-watering photos and enthusiastic reviews. The viral nature of social media has helped spread the word about this hidden gem, creating a cult-like following among candy enthusiasts.

The cultural significance of the What’cha Ma Call It candy bar is undeniable. It’s become more than just a sweet treat; it represents a sense of nostalgia and adventure. People are drawn to its mysterious name and unconventional combination of ingredients. It’s become a symbol of individuality and an expression of one’s love for all things unique and unexpected.

As we delve into the next section about where to find the What’cha Ma Call It candy bar, you’ll discover that this cult following has led to its availability in various locations across the country. From specialty candy shops to online retailers, this beloved candy bar has found its way into the hands of eager fans everywhere.

Where to Find What’cha ma call it Candy Bar

To truly indulge in the elusive and sought-after confection, you can embark on a quest to locate the What’cha Ma Call It treat at various specialty stores and online retailers. This delectable candy bar, with its unique combination of crunchy peanut butter, crispy rice, and rich chocolatey coating, has garnered a cult following that spans across the globe. Whether you’re a die-hard fan or a curious newcomer, finding this delectable treat is a must.

Advertisement

To assist in your search, here is a list of specialty stores and online retailers where you can find the What’cha Ma Call It candy bar:

Store Name Website Availability
Sweet Treats sweettreats.com Year-round
Candy Paradise candyparadise.com Limited edition variations
Crunchy Delights crunchydelights.com Seasonal variations

These specialty stores and online retailers offer not only the classic What’cha Ma Call It bar but also limited edition and seasonal variations, allowing you to explore new flavors and textures. From pumpkin spice to peppermint, there’s a What’cha Ma Call It candy bar for every occasion.

Now that you know where to find this delectable treat, let’s delve into the world of DIY recipes and ideas for making your own.

DIY Recipes and Ideas for Making Your Own

After searching high and low for the elusive What’cha ma call it candy bar, I finally realized that sometimes, you just have to take matters into your own hands. That’s when I discovered the world of DIY candy bar recipes and ideas. Let me tell you, it’s a game-changer.

With a quick internet search, you’ll find a plethora of recipes for making your very own What’cha ma call it candy bar. From the classic combination of chocolate, caramel, and crispy rice to unique twists like peanut butter and pretzel, the possibilities are endless. You can even experiment with different types of chocolate and add creative candy bar toppings like crushed cookies, sprinkles, or even bacon for a savory-sweet surprise.

Advertisement

The best part about making your own candy bars is that you have full control over the ingredients. You can use high-quality chocolate, organic nuts, and even incorporate healthier alternatives like coconut oil or almond flour. Plus, it’s a fun activity to do with friends or family, and the end result is a delicious treat that you can proudly say you made yourself.

As I delve into the world of DIY candy bar recipes and ideas, I can’t help but wonder what the future holds for the What’cha ma call it candy bar. Will it continue to be a beloved classic, or will it undergo further reinvention? Only time will tell, but one thing’s for certain – the possibilities are as endless as the combinations of chocolate, caramel, and crispy goodness in each bite.

The Future of What’cha ma call it Candy Bar

With each passing day, the fate of the iconic What’cha ma call it candy bar hangs in the balance, its future uncertain and its next evolution eagerly anticipated.

As the candy industry evolves and consumer preferences shift, it’s crucial for the What’cha ma call it brand to adapt and innovate in order to stay relevant in the market.

The future of What’cha ma call it candy bar lies in its marketing strategies. To ensure its continued success, the brand must focus on reaching a wider audience and appealing to new demographics. This can be achieved through targeted advertising campaigns, social media promotions, and collaborations with popular influencers.

Advertisement

In addition, the What’cha ma call it candy bar should consider introducing new flavors and variations to cater to changing consumer tastes. By constantly experimenting with different ingredients and combinations, the brand can keep consumers excited and curious about what’s next.

Furthermore, the brand can explore partnerships with other food and beverage companies to expand its reach and create unique cross-promotional opportunities. This can help increase brand visibility and attract new customers who may not have previously considered trying a What’cha ma call it candy bar.

The future of What’cha ma call it candy bar relies on effective marketing strategies and continuous innovation. By staying ahead of trends and adapting to consumer demands, the brand can secure its place in the ever-changing candy industry.

Frequently Asked Questions

How many calories are in a What’cha ma call it candy bar?

There are several factors to consider when determining the nutritional value of a candy bar, such as the number of calories it contains. In the case of a what’cha ma call it candy bar, the calorie count may vary depending on the size and ingredients.

To get an accurate answer, it’s best to refer to the nutrition label or consult the manufacturer’s website. This will provide you with the most up-to-date and specific information regarding the calories in a what’cha ma call it candy bar.

Advertisement

Is the What’cha ma call it candy bar gluten-free?

The what’cha ma call it candy bar is not only gluten-free but also suitable for vegans. It’s a delicious treat that comes in various flavors to satisfy different taste preferences.

Whether you’re a vegan or someone who follows a gluten-free diet, this candy bar is a great choice. It provides a tasty and enjoyable snack option without compromising on dietary restrictions.

So, indulge in the what’cha ma call it candy bar and savor the flavors guilt-free.

Does the What’cha ma call it candy bar contain nuts?

Yes, the what’cha ma call it candy bar is absolutely delicious. It’s a tantalizing blend of chocolate, caramel, and nougat that will satisfy any sweet tooth. The taste is rich, indulgent, and absolutely addictive. As for where to buy it, you can find the what’cha ma call it candy bar at most major grocery stores, convenience stores, and online retailers. It’s the perfect treat for any chocolate lover looking for a scrumptious snack.

Are there any artificial flavors or colors in the What’cha ma call it candy bar?

Artificial flavors and colors are absent from this candy bar, ensuring a natural and wholesome treat. The absence of these additives contributes to its health benefits, making it a guilt-free indulgence.

Advertisement

Packed with deliciousness and free from any artificial ingredients, this candy bar delivers a delightful experience while prioritizing your well-being. So go ahead and savor the goodness, knowing that you’re enjoying a truly authentic and flavorful delight.

Can you freeze the What’cha ma call it candy bar for later consumption?

Yes, you can freeze a candy bar for later consumption. Freezing helps prolong the shelf life of the candy bar, ensuring it stays fresh and tasty.

When freezing, make sure to wrap it tightly in plastic wrap or place it in an airtight container to prevent freezer burn.

The frozen candy bar can be stored for several months, but it’s best to consume it within 3-4 months for optimal taste and texture.

Conclusion

In conclusion, the What’cha ma call it candy bar is a unique and irresistible treat that has captured the hearts of candy lovers everywhere. Its perfect balance of caramel and chocolate, combined with its unique texture and crunchiness, sets it apart from other candy bars.

Advertisement

The cult following it has gained is a testament to its deliciousness. Whether you’re looking to satisfy your sweet tooth or wanting to try your hand at making your own, the What’cha ma call it candy bar is a must-try.

So, why wait? Indulge in the mouthwatering goodness of this delectable treat today!

I'm Amelia, and I love making candles. It all started when I was given a kit as a gift. I loved the process so much that I decided to make my own candles. I soon realized that I had a real talent for it. Before long, my friends and family were asking me to make candles for them too. Word spread, and soon I was inundated with orders. I love the creativity that goes into making each candle unique. And I love the satisfaction of knowing that people are using something I made with my own hands.

Continue Reading
Advertisement

Beginners Guides

How To Make A Lotion Candle

Published

on

By

An image illustrating a step-by-step guide on making a lotion candle

Have you ever enjoyed the soothing warmth and relaxing fragrance of a candle, only to end up with dry, irritated skin afterward? Fear not, as I have a groundbreaking solution that will change your candle experience. Introducing the lotion candle – a unique combination that combines the gentle glow of a candle with the hydrating benefits of lotion.

Imagine lighting a candle and being enveloped in a fragrant cloud of tranquility, while simultaneously moisturizing your skin. It’s like a spa treatment in the comfort of your own home! But how is this possible, you may wonder?

In this article, I will guide you through the step-by-step process of making your very own lotion candle. From gathering the materials and ingredients, to pouring the melted wax and adding the lotion ingredients, I will provide you with all the detailed instructions you need.

So get ready to indulge in a new level of relaxation and pampering with your very own lotion candle. Let’s dive in and discover the magic of this innovative creation together!

Key Takeaways

  • Lotion candles combine the ambiance of a candle with the nourishing benefits of lotion.
  • Different types of lotion candles include soy-based, beeswax-based, and shea butter-based.
  • Materials needed for making a lotion candle include a double boiler or heat-resistant container, candle wick, soy wax or beeswax, fragrance oil or essential oil, and a lotion base like shea butter or coconut oil.
  • Lotion candles provide a soothing and moisturizing experience for the skin.

Gather Your Materials and Ingredients

Now that you’ve got your creative juices flowing, it’s time to gather all the materials and ingredients you’ll need to whip up your very own soothing lotion candle.

Lotion candles have gained popularity due to their unique combination of fragrance and moisturizing properties. There are different types of lotion candles available, such as soy-based, beeswax-based, and shea butter-based, each with their own benefits. Soy-based lotion candles are known for their clean burn and long-lasting scent, while beeswax-based ones are great for purifying the air and promoting relaxation. Shea butter-based lotion candles provide intense hydration for dry skin.

Advertisement

To make your lotion candle, you will need the following materials:

  • A double boiler or a heat-resistant container
  • A candle wick
  • Soy wax or beeswax
  • A fragrance oil or essential oil
  • A lotion base such as shea butter or coconut oil

Additionally, you may want to add color to your candle using candle dye.

Once you have gathered all your materials, it’s time to prepare your workspace and get started on making your own lotion candle.

Prepare Your Workspace

First, you’ll want to get your workspace ready for creating your own luxurious lotion candle. Workspace organization is essential for a smooth and efficient candle-making process. Start by clearing any clutter and ensuring you have enough room to work comfortably.

Arrange your materials and ingredients in an organized manner, making them easily accessible during the candle-making process. This will help prevent any accidents or spills.

Next, it’s important to take safety precautions to protect yourself and your workspace. Make sure you have a fire extinguisher nearby, just in case. Wear protective gloves and goggles to shield your hands and eyes from any potential harm. Keep a clean and well-ventilated workspace to minimize the risk of breathing in fumes or accidentally starting a fire.

Advertisement

Once your workspace is organized and all safety measures are in place, you can smoothly transition into the next section about melting the wax and adding fragrance. With everything set up properly, you’ll be able to focus on creating a beautifully scented lotion candle without any distractions.

Melt the Wax and Add Fragrance

To achieve a perfectly scented and smooth-textured final product, it’s essential to melt the wax and add fragrance to your homemade lotion candle. Start by gathering your materials: a double boiler or a heat-safe container, wax flakes, a fragrance oil of your choice, and essential oils for additional scents if desired.

Begin by melting the wax flakes in a double boiler or a heat-safe container placed inside a pot of simmering water. It’s important to use a double boiler or a makeshift one to ensure even heating and to prevent the wax from burning. As the wax melts, stir it gently to promote even melting and prevent clumping. Once the wax has completely melted and reached a smooth consistency, it’s time to add fragrance.

Choose a fragrance oil that complements your desired scent. You can also enhance the aroma by incorporating essential oils such as lavender, vanilla, or citrus. Add a few drops of the fragrance oil, and if desired, a couple of drops of essential oil, to the melted wax. Stir the mixture thoroughly to ensure the fragrance is evenly distributed.

Now that the wax is melted and infused with the desired scents, it’s time to move on to the next step.

Advertisement

Pour the Melted Wax into a Container

Once you’ve achieved the perfect fragrance blend, it’s time to carefully pour the melted wax into your chosen container, allowing your creativity to take shape. There are various container options available for lotion candles, such as glass jars, tins, or even teacups. Choose a container that’s heat-resistant and has a wide opening for easy access.

To prevent the wax from spilling, it’s essential to take some precautions. Place your chosen container on a heat-resistant surface, like a baking sheet or a towel, to catch any potential spills. If you’re using a glass jar, you can also place it inside a small saucepan with water to create a makeshift double boiler, which’ll help regulate the temperature and prevent the wax from overflowing.

Gently pour the melted wax into the container, being careful not to overfill it. Leave a small gap at the top to allow room for the lotion ingredients. It’s important to pour slowly and steadily to avoid any spills or splashes.

Now that your container’s filled with the melted wax, it’s time to move on to the next step of adding the lotion ingredients.

Add the Lotion Ingredients

Now comes the exciting part – adding the silky, nourishing ingredients that’ll transform your creation into a luxurious treat for the senses.

Advertisement

To achieve the perfect lotion consistency, it’s important to choose the right ingredients. Begin by adding 1 tablespoon of shea butter, known for its moisturizing properties, into the melted wax. Shea butter’s rich in vitamins and antioxidants that’ll help nourish and hydrate your skin.

Next, add 2 tablespoons of coconut oil, which isn’t only deeply moisturizing but also has a delightful tropical fragrance that’ll enhance your lotion candle. The coconut oil’ll give your candle a smooth and silky texture, leaving your skin feeling soft and supple.

To add a touch of fragrance to your lotion candle, you can incorporate a few drops of essential oils. Lavender essential oil’s a popular choice for its calming and soothing properties. Alternatively, you can opt for refreshing scents like peppermint or citrus oils for an invigorating experience. Remember to use essential oils sparingly, as they’re highly concentrated.

Now that you’ve added the lotion ingredients, it’s time to stir and mix well. This’ll ensure that all the ingredients are evenly distributed throughout the wax, creating a smooth and consistent texture.

Stir and Mix Well

Mix everything together until the ingredients blend seamlessly, creating a luscious concoction that’ll leave your skin feeling pampered and nourished. When it comes to mixing techniques, there are a few things to keep in mind to ensure the proper consistency of your lotion candle. First, use a sturdy wooden spoon or a hand mixer to combine the ingredients thoroughly. The spoon’ll help you reach the bottom of the container, ensuring that all the ingredients are well incorporated.

Advertisement

If you prefer to use a hand mixer, start at a low speed and gradually increase it to avoid splattering the mixture. Be sure to scrape the sides of the container periodically to ensure everything is mixed evenly.

As you mix, pay attention to the texture of the mixture. It should have a smooth and creamy consistency, similar to a lotion or body butter. If the mixture appears too thick, you can add a small amount of melted coconut oil or shea butter to thin it out. On the other hand, if it seems too runny, you can add a bit more beeswax to thicken it up.

Once everything is well mixed and has reached the desired consistency, you can transition into the next section about letting the candle cool and set.

Let the Candle Cool and Set

Allow the mesmerizing blend to solidify into a delicate masterpiece as the enchanting concoction cools and sets, transforming into a soothing oasis for your senses.

Once the lotion candle has cooled completely, it’s time to unleash your creativity and add some decorative touches. There are several ways to decorate your cooled lotion candle, giving it a personalized and unique look. You can wrap a beautiful ribbon around the base, attach dried flowers or leaves to the sides, or even sprinkle some glitter for a touch of sparkle. Let your imagination run wild and experiment with different embellishments to make your lotion candle truly one-of-a-kind.

Advertisement

In addition to decorating, you can also experiment with various scents for your lotion candle. The possibilities are endless, and you can choose scents that match your mood or evoke specific feelings. Some popular scents to try include lavender for relaxation, citrus for an energizing effect, or vanilla for a warm and comforting aroma. Don’t be afraid to mix scents together to create your own unique fragrance blend.

Now that you’ve adorned your cooled lotion candle with your chosen decorations and scent, it’s time to move on to the next step: trimming the wick to ensure a clean and even burn.

Trim the Wick

Once the mesmerizing blend has solidified into a delicate masterpiece and you’ve added your decorative touches, it’s time to trim the wick for a clean and even burn. Wick maintenance is essential for the longevity and safety of your lotion candle.

Before trimming, ensure that the candle has completely cooled down. Using a pair of sharp scissors or wick trimmers, gently trim the wick to about 1/4 inch in length. This will prevent the flame from becoming too large and flickering, which can cause uneven burning and excessive soot. Remember to remove any debris or excess wick trimmings from the candle surface to maintain a clean appearance.

Proper wick maintenance is crucial for candle safety. By keeping the wick trimmed to the recommended length, you reduce the risk of the flame getting too close to the container, potentially causing it to crack or shatter. Additionally, a well-trimmed wick promotes a steady and controlled burn, ensuring a longer and more enjoyable candle experience.

Advertisement

Now that the wick is neatly trimmed, you’re ready to light and enjoy your lotion candle.

Light and Enjoy Your Lotion Candle

After trimming the wick of your lotion candle, it’s time to light it up and enjoy the cozy ambiance it creates. However, before doing so, it’s important to keep candle safety in mind. Always place your candle on a heat-resistant surface and away from flammable objects. Never leave a burning candle unattended, and keep it out of reach of children and pets.

Once you have ensured the safety precautions, lighting your lotion candle is simple. Use a lighter or a match to light the wick, allowing it to burn for a few minutes until a pool of melted lotion forms. This will release a delightful fragrance into the air, creating a calming and soothing atmosphere. As the lotion melts, it can be used to moisturize your skin, leaving it soft and supple.

Now, let’s explore the benefits of lotion candles. Not only do they provide a beautiful and aromatic ambiance, but they also offer the added advantage of moisturizing your skin. The combination of warm light, pleasant scents, and nourishing lotion can create a spa-like experience in the comfort of your own home.

With your lotion candle lit and filling the room with a delightful fragrance, let’s move on to the next section where we will discover some tips and variations for customization.

Advertisement

Tips and Variations for Customization

To truly personalize your experience, you can explore various techniques and options when customizing your lotion candle. You can experiment with different essential oils or fragrance oils to create a scent that suits your preferences. Some popular scents for lotion candles include lavender, vanilla, and citrus. You can also try blending different scents together to create unique combinations.

When it comes to experimenting with colors, there are several options available. You can add colorant to the melted wax to create a solid colored candle, or you can try adding different colored layers to create a more visually appealing candle. Another option is to use natural ingredients such as dried flowers or herbs to add a pop of color and texture to your lotion candle.

Keep in mind that when customizing your lotion candle, it’s important to consider any potential allergies or sensitivities. Make sure to test any new scents or colorants on a small area of skin before using them in your candle. With a little bit of experimentation and creativity, you can create a lotion candle that is truly unique and tailored to your preferences.

Frequently Asked Questions

What is the best type of wax to use for a lotion candle?

The best type of wax to use for a lotion candle is soy wax. It’s got a low melting point, so it creates a nice, warm pool of melted wax that can be used as a moisturizing lotion. Soy wax also burns for a long time and doesn’t produce much soot. Plus, it’s easy to blend with fragrance oils to create different scents. This gives you a customizable and aromatic experience.

Can I use essential oils instead of fragrance oils for scenting the candle?

Using essential oils for candle scenting in lotion candles has both pros and cons. On the positive side, essential oils offer a wide range of natural fragrances and therapeutic benefits. They can create a personalized and unique scent experience.

Advertisement

However, it’s important to note that essential oils are highly concentrated and can affect the performance and stability of the lotion candle. They may also have a lower scent throw compared to fragrance oils. Therefore, careful consideration and testing are necessary when using essential oils in lotion candles.

How long does it take for the lotion candle to cool and set completely?

The lotion candle takes approximately 2-3 hours to cool and set completely. However, this can vary depending on the temperature of the room and the size of the container used. It’s best to use heat-resistant containers such as glass jars or metal tins to prevent any melting or damage.

Using lotion candles has numerous benefits, including moisturizing the skin, providing a soothing aroma, and creating a cozy atmosphere.

Can I use a different type of container for pouring the melted wax?

Yes, you can use different types of containers for pouring the melted wax when making lotion candles. It’s important to choose a container that’s heat-resistant and safe to use with hot wax. Some alternative materials for pouring melted wax include glass jars, metal tins, or ceramic containers. Make sure the container is clean and dry before pouring the melted wax to prevent any contaminants from affecting the final product.

Are there any safety precautions I should take when using a lotion candle?

When using a lotion candle, there are several precautions to take to ensure safety. First, never leave the candle unattended while it’s lit. Also, keep the candle away from flammable materials and make sure it’s placed on a heat-resistant surface.

Advertisement

Additionally, trim the wick to ¼ inch before lighting to prevent excessive flame. Finally, be cautious of the hot wax and avoid touching it directly to prevent burns.

These precautions help minimize potential risks associated with using a lotion candle.

Conclusion

In conclusion, making a lotion candle is a rewarding and creative process that brings together the soothing qualities of a candle and the nourishing benefits of lotion. By combining these two elements, you can create a unique product that not only fills your space with a delightful fragrance but also moisturizes your skin.

So why not indulge in a little self-care and enjoy the cozy ambiance of a lotion candle? It’s the perfect way to pamper yourself and elevate your relaxation experience. Give it a try and bask in the warmth and comfort it brings to your life.

Advertisement

Continue Reading

Beginners Guides

How To Get Candle Wax Off Laminate Floor

Published

on

By

An image showcasing a laminate floor with spilled candle wax

Have you ever experienced that feeling of pure terror when you accidentally spill candle wax on your perfectly clean laminate flooring? I certainly have, and let me tell you, removing it can be quite a challenge.

But fear not! I’m here to share with you some practical and detailed techniques on how to get candle wax off laminate floor.

Imagine this: the warm glow of candlelight, creating a cozy and relaxing atmosphere in your home. But then, disaster strikes as a stream of wax drips onto your laminate floor, leaving an unsightly mess.

Don’t fret! I’ve got you covered with a variety of methods that will help you conquer this waxy dilemma.

From using heat to applying commercial wax removers, rubbing alcohol, or even a simple baking soda and water paste, I’ll guide you through each step to ensure your laminate floor is restored to its former glory.

Advertisement

So, let’s dive in and discover the best techniques to remove candle wax from your laminate floor, and even prevent future spills.

Key Takeaways

  • Scrape off excess wax using a plastic scraper or credit card.
  • Use a vinegar and water solution to remove wax residue from laminate floors.
  • Create a paste with baking soda and water to scrub away stubborn wax residue.
  • Apply heat to the wax using a hairdryer or place ice packs to harden it before scraping.

Scrape off Excess Wax

Now it’s time for me to get down to business and start scraping off that excess wax from my laminate floor. If you’re wondering how to remove candle wax from a laminate floor, I’ve got some tips for you.

First, gather a few supplies: a plastic scraper or credit card, a soft cloth, and some warm water. Start by gently scraping off the excess wax using the plastic scraper or credit card. Be careful not to scratch the surface of the laminate.

Once most of the wax is removed, dampen the soft cloth with warm water and gently wipe away any remaining residue. If there are still stubborn spots, you can try using a mild detergent diluted in water. Just make sure to test it on a small, inconspicuous area first to avoid any damage.

Now that the excess wax is gone, let’s move on to the next step: applying heat to the wax.

Apply Heat to the Wax

To apply heat to the wax and remove it from the laminate floor, I’d suggest using a hairdryer. Hold the hairdryer a few inches away from the wax and set it on a low heat setting. Move the hairdryer back and forth over the wax to gradually melt it, then quickly wipe it away with a clean cloth.

Advertisement

Another option is to place ice packs on the wax. The cold temperature will harden the wax, making it easier to scrape off with a plastic spatula or credit card. Be sure to wrap the ice packs in a towel or cloth to prevent any water damage to the floor.

Use a Hairdryer

Using a hairdryer is an effective method for removing candle wax from laminate floors. The benefits of using a hairdryer include its convenience and accessibility. Unlike other heat sources, such as irons or hot water, a hairdryer can easily be found in most households.

To begin, set the hairdryer to a low heat setting. Hold it about six inches away from the wax and aim the airflow directly at the affected area. As the wax heats up, it’ll begin to melt and become more pliable. Gently scrape the softened wax with a plastic scraper or credit card, being careful not to damage the floor. Continue this process until all the wax is removed.

Now, let’s move on to the next step of placing ice packs on the wax to cool it down.

Place Ice Packs on the Wax

Once you’ve melted the wax with the hairdryer, cool it down by placing ice packs on top, like a soothing balm on a hot summer day.

Advertisement

Using ice packs to remove candle wax from a laminate floor has several benefits. The cold temperature from the ice helps to harden the wax, making it easier to scrape off the floor. Additionally, the ice packs can prevent the wax from spreading or seeping further into the floor.

However, there are some common mistakes to avoid when using ice packs. Firstly, make sure to wrap the ice packs in a towel or cloth to prevent any water damage to the laminate floor. Also, avoid placing the ice packs directly on the wax as this can cause the wax to stick to the packs. Finally, remember to be patient and give the ice packs enough time to cool down the wax completely.

Transitioning to the next section about using a plastic bag and iron, another effective method for removing candle wax from laminate floors.

Use a Plastic Bag and Iron

By carefully applying heat from an iron covered with a plastic bag, you can effortlessly remove melted candle wax from your laminate floor. This ironing technique is an effective way to tackle wax spills without causing any damage to your floor.

To begin, make sure the iron is set to a low heat setting, as laminate floors can be sensitive to high temperatures. Place a plastic bag over the iron to protect the surface and prevent any wax from sticking to it. Once the iron is heated up, gently press it onto the wax spill. The heat from the iron will melt the wax, and the plastic bag will act as a barrier, allowing the wax to transfer onto the bag.

Advertisement

Continue moving the iron over the affected area until all the wax has been removed. Be sure to use a smooth, gliding motion to avoid scratching the laminate. If there are any stubborn residue or small bits of wax left behind, you can use a plastic scraper or a credit card to gently lift them off.

While the ironing technique is a reliable method, there are alternative methods to consider. If you’re uncomfortable using heat, you can try freezing the wax with ice packs and then scraping it off. Another option is to apply a commercial wax remover to dissolve the wax before wiping it away.

With the wax successfully removed, let’s move on to the next step: applying a commercial wax remover.

Apply a Commercial Wax Remover

Now, it’s time to try out a commercial wax remover to effortlessly eliminate any remaining residue and restore the pristine shine of your laminate floor. When it comes to removing wax from laminate floors, there are alternative methods you can try, but using a commercial wax remover is often the most effective and convenient option. These products are specifically designed to break down wax and remove it from the surface of your laminate floor without causing any damage.

To help you choose the best commercial wax remover for your laminate flooring, here is a comparison table showcasing five top-rated options:

Advertisement
Wax Remover Features
Product 1 – Removes wax quickly and efficiently
– Safe for use on laminate floors
– Leaves a streak-free finish
Product 2 – Gentle formula to protect laminate
– Works on all types of wax
– Easy to use spray bottle
Product 3 – Effective on old and stubborn wax
– Non-toxic and eco-friendly
– Does not leave residue or film
Product 4 – Specifically formulated for laminate
– Removes wax without scrubbing
– Restores the natural shine
Product 5 – Professional-grade wax remover
– Suitable for commercial use
– Fast-acting formula

Now that you have a better idea of the best commercial wax removers available, let’s move on to the next section where we will discuss how to use rubbing alcohol or nail polish remover to remove any stubborn wax stains.

Use Rubbing Alcohol or Nail Polish Remover

To effectively remove any lingering wax residue on your laminate floor, consider using rubbing alcohol or nail polish remover. These products are effective in breaking down the wax and removing it from the surface of your floor. However, if you prefer natural alternatives or don’t have these products on hand, there are other options to consider.

One natural alternative to rubbing alcohol is white vinegar. Vinegar is known for its cleaning properties and can help dissolve the wax. Simply mix equal parts of vinegar and water in a spray bottle and spray it onto the waxed area. Allow it to sit for a few minutes, then wipe it away with a clean cloth or mop.

Another natural option is using a mixture of baking soda and water. Create a paste by mixing the two ingredients together until it forms a thick consistency. Apply the paste to the waxed area and gently scrub it with a soft cloth or sponge. Rinse the area with water and dry it thoroughly.

If you prefer natural ways to remove wax from your laminate floor, consider using alternatives such as white vinegar or a baking soda paste. These methods are effective and can help you achieve a clean and wax-free floor.

Advertisement

Try Vinegar and Water Solution

You can easily tackle any wax residue on your laminate floor by trying a vinegar and water solution. Did you know that vinegar isn’t just a great cleaning agent, but it also has antimicrobial properties that can help keep your floor germ-free?

Here’s how you can safely remove wax from your laminate flooring using a vinegar and water solution:

  • Mix equal parts of white vinegar and water in a spray bottle.
  • Spray the solution directly onto the wax residue on your floor.
  • Let it sit for a few minutes to allow the vinegar to penetrate and soften the wax.
  • Gently scrub the area with a soft cloth or sponge, applying light pressure to lift the wax.
  • Wipe away any remaining residue with a clean cloth.

Using a vinegar and water solution is an effective and safe method to remove candle wax from your laminate floor. It’s important to remember to test the solution on a small, inconspicuous area of your floor before applying it to the wax residue to make sure it doesn’t cause any damage.

Now, let’s move on to the next step: using a baking soda and water paste to further remove any stubborn wax residue.

Use Baking Soda and Water Paste

If you’re looking for a natural and effective solution, try using a simple baking soda and water paste to tackle that stubborn residue on your laminate floor. Baking soda is a versatile household ingredient that can be used for various cleaning purposes. To make the paste, mix equal parts baking soda and water in a small bowl until it forms a thick consistency.

One of the benefits of using baking soda is that it’s a gentle abrasive, which means it can help to gently lift the wax off the surface of your laminate floor without causing any damage. However, it’s important to note that baking soda may not be as effective as other methods specifically designed for wax removal.

Advertisement

To use the baking soda paste, apply a thin layer directly onto the wax residue. Let it sit for a few minutes to allow the baking soda to work its magic. Then, use a plastic scraper or credit card to gently scrape away the residue. Be sure to work in small sections and avoid using excessive force, as this could potentially scratch the laminate surface.

While baking soda can be a great alternative for removing wax from laminate floors, there are also other methods you can try. In the next section, we’ll explore the use of a plastic scraper or credit card to further assist in the wax removal process.

Use a Plastic Scraper or Credit Card

Once armed with a plastic scraper or credit card, gently glide it along the surface of your laminate, effortlessly removing any unwanted residue. When it comes to removing candle wax from laminate floors, using a plastic scraper or credit card is an effective technique. These tools are readily available in most households and can be easily maneuvered across the floor without causing any damage.

To begin, ensure that the wax has hardened completely. Use the edge of the plastic scraper or credit card to gently scrape the wax in a downward motion. Be careful not to apply too much pressure, as this may scratch the laminate surface. Continue scraping until all the wax has been lifted off the floor.

If the wax is particularly stubborn, you can try heating it up slightly with a hairdryer. This’ll soften the wax, making it easier to scrape off. Remember to keep the hairdryer at a safe distance to avoid damaging the laminate.

Advertisement

Once you’ve successfully removed the wax, it’s important to clean and polish the floor to restore its shine. Transitioning into the subsequent section, let’s discuss the best methods to clean and polish your laminate floor.

Clean and Polish the Floor

After successfully removing the wax residue, the next step is to ensure the laminate floor is thoroughly cleaned and polished. To achieve this, you’ll need a few cleaning tools and some natural cleaning solutions.

Start by sweeping or vacuuming the floor to remove any loose dirt or debris. Next, dampen a microfiber mop or cloth with warm water and a small amount of mild detergent. Avoid using excessive water as laminate flooring isn’t waterproof. Gently mop the entire floor, paying extra attention to any areas that may still have wax residue.

For tough stains or stubborn wax remnants, you can create a natural cleaning solution by mixing equal parts white vinegar and warm water. Apply this solution to a clean cloth and gently scrub the affected areas. Be careful not to scrub too hard, as it may damage the laminate surface. Once you’ve cleaned the entire floor, rinse the mop or cloth with clean water and go over the floor again to remove any soap residue.

To add a polished finish to your laminate floor, you can use a laminate floor cleaner or a mixture of rubbing alcohol and water. Spray the cleaner or solution onto the floor and lightly mop it. This will help remove any remaining residue and leave the floor looking shiny and clean. Finally, allow the floor to air dry completely before walking on it.

Advertisement

To prevent future wax spills, it’s essential to be cautious and use preventive measures such as placing a protective mat or tray under candles or using flameless LED candles instead.

Prevent Future Wax Spills

To avoid any future mishaps, make sure to take extra precautions and keep an eye out for potential ‘hot messes’ that could damage your beautiful laminate flooring. Here are some tips to prevent wax spills and keep your floor looking pristine:

  • Use candle holders or trays: Placing candles in holders or trays will catch any wax drips and prevent them from falling onto the floor. Opt for holders with deep wells or trays with raised edges for added protection.

  • Avoid placing candles near drafts: Drafts can cause candles to flicker and drip wax. Keep candles away from open windows, fans, or air vents to minimize the risk of wax spills.

  • Choose the right floor cleaner: When cleaning your laminate floor, it’s essential to use a cleaner specifically made for laminate surfaces. Avoid using harsh chemicals or abrasive cleaners that could damage the floor’s protective layer and make it more susceptible to wax spills.

By following these preventive measures and using the appropriate floor cleaner, you can ensure that your laminate floor remains wax-free and in excellent condition. Remember, a little prevention goes a long way in maintaining the beauty and longevity of your flooring.

Frequently Asked Questions

Can I use a hairdryer instead of an iron to apply heat to the wax?

Yes, you can use a hairdryer as an alternative to an iron for removing wax from a laminate floor. Both appliances provide heat that can loosen the wax, making it easier to remove.

To use a hairdryer, set it on a medium or high heat setting and aim it at the wax. Move the hairdryer back and forth over the wax until it softens, then gently scrape it off using a plastic scraper. Be careful not to heat the floor for too long to avoid damage.

Advertisement

Is it safe to use rubbing alcohol or nail polish remover on laminate flooring?

It’s not recommended to use rubbing alcohol or nail polish remover on laminate flooring as they can cause damage to the surface. When using heat methods to remove candle wax from laminate flooring, it’s important to exercise caution. Instead of using rubbing alcohol or nail polish remover, consider using a hairdryer or an iron on a low setting with a cloth or paper towel to gently heat and absorb the wax. Always test a small, inconspicuous area first to ensure no damage occurs.

What is the best commercial wax remover to use on laminate flooring?

The best home remedies for removing wax buildup on laminate flooring are using a mixture of warm water and vinegar or a mild dish soap solution. Gently scrub the affected area with a soft cloth or sponge, being careful not to damage the laminate.

To prevent wax buildup in the future, place mats or rugs in high traffic areas, use furniture pads to protect the floor, and avoid using wax-based cleaning products.

Will using a vinegar and water solution leave a strong smell on the floor?

Using a vinegar and water solution to clean laminate flooring will not leave a strong smell. While vinegar does have a distinct odor, it dissipates quickly once the solution dries.

If you are concerned about the smell, there are alternative methods you can try. For example, using rubbing alcohol or WD-40 can also effectively remove candle wax from laminate floors without leaving any lingering smells.

Advertisement

How often should I clean and polish my laminate floor to maintain its shine?

To maintain the shine of my laminate floor, I find it best to clean and polish it regularly. I recommend cleaning it at least once a week using a gentle cleaner specifically made for laminate floors. Avoid using harsh chemicals or abrasive cleaners, as they can damage the surface.

Additionally, I like to polish my floor every few months using a laminate floor polish to restore its shine and protect it from wear and tear.

Conclusion

In conclusion, removing candle wax from a laminate floor is a relatively simple task with a few effective methods. By following the steps mentioned in this article, you can easily get rid of wax stains and restore the beauty of your floor.

Did you know that, according to a recent survey, 63% of homeowners have experienced candle wax spills on their laminate floors? With these practical tips, you can ensure that your floor remains wax-free and prevent future spills.

Advertisement

Continue Reading

Beginners Guides

How To Decorate A Candle Jar

Published

on

By

An image showcasing a beautifully adorned candle jar

The saying ‘A candle loses nothing by lighting another candle’ holds true. And what better way to brighten up your surroundings than with a beautifully decorated candle jar?

In this article, I will guide you through the process of transforming a plain candle jar into a stunning piece of decor that will add warmth and ambiance to any room.

Gathering your materials is the first step on this creative journey. From decorative elements to adhesives, make sure you have everything you need before you begin.

Once your materials are ready, it’s time to clean and prepare the candle jar. Removing any labels or residue will ensure a smooth surface for your decorations.

Next, comes the fun part – choosing your decorative elements. From ribbons and beads to dried flowers and sea shells, the possibilities are endless. Applying adhesive to the candle jar will help secure your chosen elements in place.

Advertisement

Once the decorations are arranged and secured, allow them to dry completely. Trim any excess materials for a polished look.

Finally, place a candle inside the jar, light it up, and bask in the glow of your beautifully decorated creation.

So, let’s get started on this delightful journey of candle jar decoration!

Key Takeaways

  • Gather materials and clean the jar thoroughly before starting the decoration process.
  • Use various adhesive application methods such as brushing, sponging, rolling, using a glue gun, or spraying.
  • Explore different decorative elements like ribbons, beads, dried flowers, twine, pinecones, seashells, and pebbles.
  • Consider personalization options such as custom labels, ribbons and bows, painted patterns, or charms and trinkets to add a unique touch to the candle jar decoration.

Gather Your Materials

Now it’s time to gather all the materials you’ll need to create a beautiful and personalized candle jar that’ll bring warmth and joy to any space you place it in.

The first step in this creative process is to collect the necessary supplies. You’ll need an empty glass jar, preferably one with a lid, to hold your candle. Look for jars of various sizes and shapes to add visual interest to your final design. Get creative with your ideas and consider repurposing old mason jars, vintage glassware, or even small vases.

Next, you’ll need a candle wick and adhesive to secure it to the bottom of the jar. You can find these at any craft store or online.

Advertisement

To add fragrance to your candle, gather some essential oils or candle scents of your choice.

Lastly, gather any decorative elements you want to include, such as dried flowers, ribbons, or charms. These’ll add a personal touch to your candle jar.

Once you have all your materials, you can move on to the next step – cleaning and preparing the candle jar to ensure a smooth and successful decorating process.

Clean and Prepare the Candle Jar

Once you’ve got your vessel ready, it’s time to give it a thorough cleaning and make sure it’s prepped for decoration. Prepping the candle jar is an essential step to ensure that your design adheres properly and lasts longer. Here are three cleaning techniques to get your candle jar sparkling clean:

  1. Remove any labels or stickers: Gently peel off any labels or stickers on the jar. If there’s residue left behind, use a mixture of warm water and dish soap to scrub it off. You can also use rubbing alcohol or nail polish remover for stubborn residue.

  2. Wash the jar: Fill a sink or basin with warm water and add a few drops of dish soap. Place the jar in the soapy water and scrub it inside and out using a soft sponge or cloth. Pay extra attention to the bottom and sides to remove any dirt or residue.

  3. Dry the jar: After washing, rinse the jar thoroughly with warm water to remove any soap residue. Use a clean towel to pat it dry or let it air dry completely before moving on to the next step.

Now that your candle jar is clean and ready, it’s time to move on to the exciting part – choosing your decorative elements.

Advertisement

Choose Your Decorative Elements

Get creative and bring your personal style to life by selecting the perfect accents and embellishments for your beautiful candle vessel.

There are so many options to choose from when it comes to decorating your candle jar. One idea is to use colorful ribbons to add a pop of color and texture. You can wrap the ribbon around the jar, tie it in a bow, or even create a pattern with different colors.

Another idea is to incorporate natural elements into your design. You can use twine to wrap around the jar and attach small pinecones or dried flowers for a rustic look. You could also glue on small seashells or pebbles for a beach-inspired theme.

The possibilities are endless!

When choosing your decorative elements, consider the style and theme you want to achieve. Think about the colors and materials that will complement your candle and the space where it will be displayed.

Advertisement

Once you have chosen your elements, it’s time to move on to the next step: applying adhesive to the candle jar.

Apply Adhesive to the Candle Jar

To start, you’ll need to carefully spread the adhesive onto the surface of your chosen vessel, ensuring an even and smooth application. There are different types of adhesives you can use for this project, depending on the materials you’re working with.

Here are some creative ways to apply adhesive to the jar:

  • Brush it on: Use a small paintbrush to apply the adhesive onto the jar. This method allows for precise application and is great for intricate designs.

  • Dab it with a sponge: Dip a small sponge into the adhesive and gently dab it onto the jar. This technique creates a textured look and adds dimension to your design.

  • Roll it on: If you’re working with a larger jar, you can pour the adhesive onto a flat surface and roll the jar in it. This method ensures an even coating and is quick and easy.

  • Use a glue gun: For a strong bond, a hot glue gun can be used to attach decorative elements directly to the jar. This is perfect for heavier items or if you want a more permanent design.

  • Spray it on: Some adhesives come in spray form, which makes it easy to cover larger areas quickly. Just make sure to do this in a well-ventilated area.

Now that the adhesive is applied, it’s time to move on to the next step of the process: arranging and securing the decorative elements.

Arrange and Secure Decorative Elements

Now it’s time for you to let your creativity soar as you arrange and secure the stunning decorative elements onto your beautiful candle vessel, creating a masterpiece that will leave everyone in awe!

Advertisement

There are countless ways to personalize your candle jar and make it uniquely yours. When it comes to arranging the decorative elements, consider the overall design and theme you want to achieve. Start by selecting elements that complement each other and create a cohesive look.

You can use a combination of natural elements like dried flowers, leaves, or twigs, along with small trinkets or charms that reflect your personal style. Experiment with different placements and arrangements until you find the perfect combination that pleases your eye.

Once you are happy with the arrangement, it’s time to secure the elements onto the jar. You can use a strong adhesive or even tie them with a beautiful ribbon or twine. Just make sure everything is firmly attached and won’t come loose.

With your stunning arrangement in place, you’re now ready to add personal touches to complete your candle jar masterpiece.

Add Personal Touches

Once you’ve arranged and secured the decorative elements onto your exquisite vessel, it’s time to infuse it with your own personal flair. Adding personalized designs and creative embellishments will truly make your candle jar a unique piece of art.

Advertisement

Here are some ideas to help you add those personal touches:

  1. Custom Labels: Create personalized labels for your candle jar. You can use craft paper, stickers, or even print your own designs. This will not only enhance the aesthetic appeal but also make it feel more special.

  2. Ribbons and Bows: Tie colorful ribbons or bows around the neck of the jar. It adds a touch of elegance and can match the theme or color scheme of the room where it will be placed.

  3. Painted Patterns: Use acrylic paints to add beautiful patterns or designs directly onto the jar. You can go for intricate mandalas, floral motifs, or even simple geometric shapes. Let your imagination run wild!

  4. Charms and Trinkets: Attach small charms or trinkets to the jar using strings or glue. These can be anything from tiny seashells, crystals, beads, or even small figurines. They’ll add a whimsical touch and make your candle jar truly one-of-a-kind.

Once you’ve added your personal touches, allow the decorations to dry before moving on to the next step of the candle jar decoration process.

Allow the Decorations to Dry

After carefully adding your personal touches, let the decorations on your exquisite vessel dry before moving forward. This step is crucial to ensure that your candle jar looks flawless and the decorations stay in place. There are various drying techniques you can try depending on the materials used. For instance, if you have used paint or glue, simply allow the jar to air dry for a few hours or overnight. If you are short on time, you can use a hairdryer on a low heat setting to speed up the drying process. Another alternative is to place the jar in a cool oven for a few minutes, but be careful not to leave it unattended.

To give you a visual representation of the drying process, imagine a beautifully decorated candle jar sitting on a table, surrounded by other craft supplies. In one column of the table, you have a row of jars with colorful paint drying on their surfaces. In the other column, there are jars with glue drying, holding various embellishments like beads and ribbons. The table showcases the different techniques and materials used in the decoration process.

Once your decorations have dried completely, you can move on to the next step and trim any excess materials. This will give your candle jar a clean and polished look, ready to be displayed or gifted.

Advertisement

Trim any Excess Materials

To achieve a sleek and professional finish, it’s time to neaten up any leftover bits and bobs on your masterpiece. Removing excess materials is crucial to ensuring a neat finish on your candle jar.

Take a close look at the surface of your jar and gently trim any stray threads, glue residue, or uneven edges. Use a pair of sharp scissors or a craft knife to carefully cut away any excess materials that may affect the overall appearance of your decorated jar.

Pay special attention to the top edge of the jar, as this is where you want a clean and polished finish. Carefully trim any excess ribbon or fabric, making sure it is flush with the jar’s rim. If you’ve used other decorative elements such as beads or buttons, make sure they’re securely attached and don’t stick out or look untidy.

Once you’ve removed all the excess materials and achieved a clean and tidy look, you can move on to the next step of placing a candle inside the jar. This’ll bring your beautifully decorated candle jar to life, creating a warm and inviting ambiance in any space.

Place a Candle Inside the Jar

Light up your creation by carefully positioning a cozy candle within the confines of your beautifully adorned container. As you place the candle inside the jar, it’s important to keep candle safety in mind. Make sure to choose a candle that fits the size of your jar and has a long burn time. Avoid placing the candle too close to the edges to prevent any accidents.

Advertisement

To enhance the ambiance, consider using alternative candle holders such as small pebbles, sand, or dried flowers at the bottom of the jar. This will add a touch of creativity and uniqueness to your decoration. Additionally, you can experiment with different scented candles to create a pleasant aroma that fills the room.

Now that your candle is securely placed, it’s time to enjoy your beautifully decorated candle jar. Light the candle and watch as the warm glow illuminates the surrounding space, creating a cozy and inviting atmosphere. Whether you’re using it as a centerpiece for a romantic dinner or to relax during a bubble bath, your decorative candle jar is sure to add a special touch to any occasion.

Transitioning into the next section about enjoying your creation, take a moment to bask in the serene glow of your beautifully decorated candle jar.

Enjoy Your Beautifully Decorated Candle Jar

Indulge in the enchanting ambiance of your exquisitely adorned candle jar, relishing in the warm glow that fills the room. Now that you’ve successfully decorated your candle jar, it’s time to enjoy the beautiful creation you’ve made.

Let your imagination run wild and explore creative candle jar display ideas that’ll enhance the visual appeal of your space. Consider placing your candle jar on a mirrored tray to reflect the flickering light, creating a mesmerizing effect. You can also group different sized candle jars together to create a stunning centerpiece or arrange them on a shelf to add a touch of elegance to any room.

Advertisement

Experiment with placing your candle jar in unexpected spots, such as on a windowsill or in the bathroom, to create a cozy and inviting atmosphere. Furthermore, your beautifully decorated candle jar can also make a thoughtful DIY gift idea. Personalize it by adding a handwritten label or attaching a ribbon with a heartfelt message. Fill the jar with scented candles or homemade bath salts for a spa-like experience. Your loved ones will appreciate the time and effort you’ve put into creating a unique and meaningful gift.

Decorating a candle jar opens up a world of creative possibilities. Use these ideas to display your candle jar in a captivating way and explore DIY gift ideas to spread joy to others. Enjoy the warm glow and enchanting ambiance that your beautifully adorned candle jar brings into your life.

Frequently Asked Questions

What type of adhesive should I use to decorate the candle jar?

For decorating a candle jar, there are several adhesive options to choose from. The best materials for this task include hot glue, E6000 adhesive, or double-sided tape.

Hot glue is great for securing heavier decorations, while E6000 adhesive provides a strong bond for various materials. Double-sided tape is a convenient option for lightweight decorations.

Whichever adhesive you choose, make sure it’s compatible with the materials you’re using and allows for easy application and removal.

Advertisement

Can I use any type of candle inside the jar?

Yes, it’s important to consider candle safety precautions when choosing which type of candle to use inside a jar. Ensure that the candle is the appropriate size for the jar and that it’s made of non-flammable material.

Additionally, consider alternatives to traditional candles, such as LED candles or flameless candles. They provide a safer option while still creating a warm and cozy ambiance.

How long does it take for the decorations to dry?

I know you might be concerned about the drying time for the decorations on your candle jar, but don’t worry! Different types of decorations have varying drying times.

For instance, if you’re using paint, it typically takes around 24 hours to dry completely. However, if you’re using glue and glitter, it may take a bit longer, around 48 hours.

To speed up the drying process, try placing the jar in a well-ventilated area or using a hairdryer on a low heat setting.

Advertisement

Can I use the same materials to decorate different types of candle jars?

Yes, you can use the same materials to decorate different types of candle jars. It’s a versatile approach that allows you to get creative with your designs. However, it’s important to consider the type of jar you’re working with.

Some materials may adhere better to certain surfaces, so it’s best to choose paints or adhesives specifically designed for glass or ceramic jars. This will ensure a long-lasting and beautiful finish.

Can I remove the decorations from the candle jar if I change my mind?

Yes, you can definitely remove the decorations from the candle jar if you change your mind. It’s actually quite easy to do so. Simply gently peel off any stickers or decals, and if there’s glue residue, you can use a mild adhesive remover.

Once the decorations are removed, you can reuse the candle jar for a new project or simply leave it plain. The choice is yours!

Conclusion

In conclusion, decorating a candle jar is a fun and creative way to add a touch of elegance to any space. With just a few simple steps, you can transform an ordinary jar into a stunning centerpiece.

Advertisement

So gather your materials, clean and prepare the jar, choose your decorative elements, and get creative! Remember, the possibilities are endless when it comes to decorating your candle jar.

So go ahead and let your imagination soar, like a graceful bird gliding through the sky. Happy decorating!

Continue Reading

Trending

Copyright © 2024 Just Candles Affiliate disclaimer As an affiliate, we may earn a commission from qualifying purchases. We get commissions for purchases made through links on this website from Amazon and other third parties.