Beginners Guides
How To Light Wood Wick Candle

So, you want to light a wood wick candle, huh? Well, my friend, you’ve come to the right place. Lighting a wood wick candle is no ordinary task. It requires finesse, skill, and a touch of elegance.
But fear not, for I am here to guide you through this mystical process. Gather your supplies, prepare the wick, and get ready to embark on a journey of sensory delight. With my precise instructions, you’ll learn how to create the perfect ambiance in your home with the flicker of a wooden flame.
But remember, safety is of utmost importance. I’ll show you how to monitor the burn and extinguish the candle like a pro. And when the time comes to clean up, don’t worry, I’ve got you covered.
So, my candle enthusiast, let’s dive into the world of wood wick candles and discover the magic they hold. Get ready to ignite your senses and bask in the warm glow that only a wood wick candle can provide.
Key Takeaways
- Prepare the wood wick by trimming it to 1/4 inch and applying melted wax to the exposed end.
- Use a long-reach lighter, matches, or small piece of kindling to ignite the wood wick.
- Trim the wood wick to 1/4 inch for a steady and controlled burn.
- Position the wood wick in the center of the candle for even distribution of heat.
Gather Your Supplies
First, gather all of your supplies and lay them out on a clean, flat surface, creating a visual array of fragrant wax, wooden wicks, and decorative containers.
Having all the necessary materials within reach will ensure a smooth and enjoyable candle-making experience. Start by preparing the wick, which is a crucial step in achieving a successful burn. Trim the wooden wick to around 1/4 inch, making sure it’s straight and even. This’ll promote a clean and consistent flame.
Next, prime the wick by applying a small amount of melted wax to the exposed end. This’ll help the wick catch fire more easily when lit.
When it comes to lighting techniques, you’ve got a few options. You can use a long-reach lighter or matches to ignite the wick. Alternatively, you can light a separate small piece of kindling or a wooden stick and use that to light the wick. Whichever method you choose, make sure to hold the flame to the wick for a few seconds to ensure it catches.
With the wick properly prepared and lit, you’re now ready to move on to the next step of creating your wood wick candle.
Prep the Wick
To prep the wick for lighting a wood wick candle, there are two key points to keep in mind. First, it’s important to trim the wick to the right length before lighting it. This ensures a clean and even burn, preventing any excess smoke or soot.
Secondly, positioning the wick properly is crucial for an optimal burn. Placing it in the center of the candle allows for a consistent flame and an even distribution of heat.
Trim the Wick
When trimming the wood wick, you’ll notice that a properly trimmed wick increases the candle’s burn time by 30%. Wick maintenance is an important aspect of candle safety and ensuring a clean, efficient burn.
To begin, gather a pair of wick trimmers or sharp scissors. Take caution not to cut the wick too short, as this can cause the flame to become too small or extinguish itself. Aim to trim the wick to about 1/4 inch in length, allowing for a steady and controlled burn. This length prevents excessive flickering and minimizes the production of soot.
After trimming, always remove any debris or excess wick from the candle to maintain a clean burn. With the wick properly trimmed, we can now move on to positioning it for optimal burn performance.
Position the Wick
Positioning the wick correctly ensures a beautiful, even burn that will fill the room with a warm, inviting glow. When it comes to wood wick candles, proper wick positioning is crucial. To achieve the best results, there are a few techniques you can use.
Firstly, make sure the wick is centered in the candle. This will help prevent uneven burning and tunneling. Additionally, ensure that the wick isn’t too close to the edge of the container, as this can cause the wax to burn too quickly and create a weak flame.
If you’re experiencing issues with the wick, such as it not staying lit or producing a small flame, try troubleshooting the wick placement by gently pushing it closer to the center.
By mastering these wick positioning techniques, you’ll be well on your way to creating a perfect wood wick candle.
Now, let’s move on to preparing the candle for lighting.
Prepare the Candle
Before lighting a wood wick candle, it’s important to prepare the candle properly. First, remove any packaging or labels that may be attached to the candle. This will ensure a clean and unobstructed burn.
Next, place the candle on a heat-resistant surface, such as a ceramic or glass plate, to protect the underlying surface from heat damage.
Taking these steps will ensure a safe and enjoyable candle burning experience.
Remove any Packaging
Unwrap and untangle the packaging surrounding your wood wick candle. The packaging may vary depending on the brand, but it’s usually a simple cardboard box or plastic wrap. Carefully remove any stickers or labels on the candle jar, making sure no residue is left behind.
Next, check the wick type of your candle. Wood wicks are unique and provide a warm and crackling ambiance while burning. They’re typically made from natural wood, like cherry or birch, and add a touch of rustic charm to your space.
Additionally, take a moment to appreciate the wonderful fragrance of your candle. Whether it’s a soothing lavender scent or a cozy vanilla aroma, the fragrance is an important aspect of the overall experience.
With the packaging removed and the wick type and fragrance noted, you’re ready to place the candle on a heat-resistant surface for a safe and enjoyable burn.
Place the Candle on a Heat-Resistant Surface
Once you’ve removed all the packaging, make sure to set your candle on a heat-resistant surface to ensure a safe and enjoyable burn.
Here are some safety precautions to keep in mind:
- Place the candle on a sturdy, flat surface that can withstand high temperatures.
- Avoid placing the candle near flammable materials or in a drafty area.
- Ensure that the heat-resistant surface is free from any obstructions that could potentially catch fire.
- Keep the candle away from children and pets to prevent accidents.
By placing your candle on a heat-resistant surface, you can relax and enjoy the cozy ambiance without worrying about any safety hazards.
Now, let’s move on to the next step of lighting the wick.
Light the Wick
To successfully light a wood wick candle, it’s important to have a long-handled lighter or matches on hand. This ensures that you can reach the wick without burning your fingers. Once you have your tool of choice, simply hold the flame to the wick until it catches fire. Be patient and make sure the flame is steady before moving on to enjoy the cozy ambiance of your wood wick candle.
Use a Long-Handled Lighter or Matches
Grab a long-handled lighter or matches to easily ignite the wood wick of your candle. Using a candle snuffer or a long-handled lighter is crucial for reaching the wick without risking burns.
When it comes to lighting techniques for different types of wicks, it’s important to note that wood wicks require a bit more patience. Begin by holding the flame of the lighter or match to the very edge of the wick, allowing it to catch fire slowly. It may take a few tries, but be patient and persistent.
Once the flame has taken hold, carefully remove the lighter or matches and let the wick burn steadily. This will ensure a clean and even burn throughout the lifespan of your wood wick candle.
Transitioning into the next section, let’s move on to how to properly hold the flame to the wick.
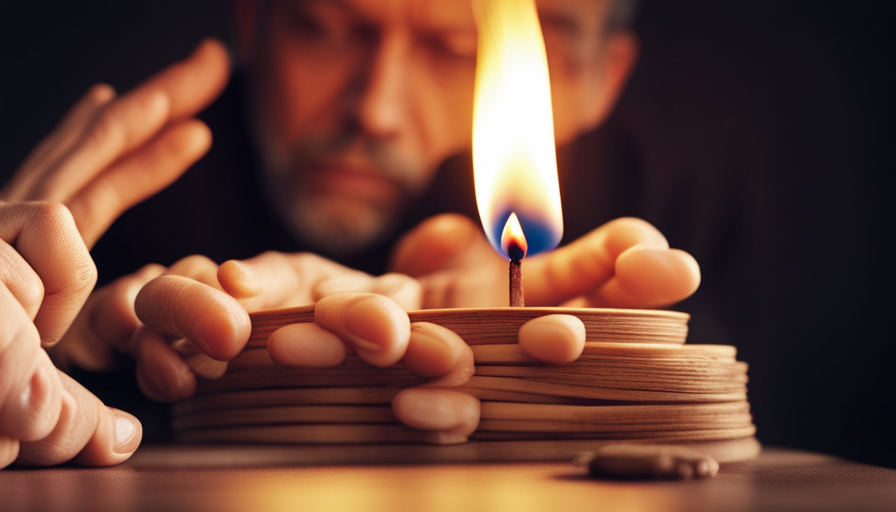
Hold the Flame to the Wick
When you’re ready to ignite your candle, all you need to do is hold the flame to the wick and watch as the magic unfolds.
Before lighting the candle, it’s important to ensure that the wick is properly maintained. Trim it to around 1/4 inch before each use to prevent excessive smoke and soot.
Once you have a well-maintained wick, you can use a long-handled lighter or matches to ignite the candle. Gently bring the flame close to the wick, allowing it to catch fire. Be cautious not to hold the flame too close, as it may cause the wick to burn too quickly.
In case you don’t have a long-handled lighter or matches, there are alternative lighting methods such as using a lit piece of spaghetti or a small piece of paper.
After igniting the candle, you can then move on to the next step of monitoring the burn.
Monitor the Burn
Keep an eye on the burn to ensure your wood wick candle is flickering beautifully and creating a cozy atmosphere. Monitoring the burn time is crucial to ensure the candle’s longevity and safety. Controlling the flame height is equally important to prevent any potential hazards.
Here are three key points to consider:
-
Watch the clock: Monitor the burn time and never leave the candle unattended for long periods. It’s recommended to burn the candle for no more than 4 hours at a time to prevent overheating and uneven burning.
-
Maintain the ideal flame: Keep an eye on the flame height and make sure it’s around 1/4 inch. If the flame grows too high, gently blow it out and trim the wick to the appropriate length before relighting. This helps to maintain a steady burn and prevent excess soot or smoke.
-
Create an even wax pool: To ensure an even burn, allow the wax to melt and pool across the entire surface of the candle during each burning session. This helps to avoid tunneling, where the wax burns unevenly and leaves wasted wax along the edges.
By monitoring the burn time and controlling the flame height, you can enjoy a longer-lasting wood wick candle that fills your space with a warm glow and delightful fragrance.
Now, let’s explore how to troubleshoot common issues that may arise during the burning process.
Troubleshoot Common Issues
To shed light on potential obstacles, let’s unravel the tangled threads of common issues that may arise when dancing with the flickering flame of your beloved wooden wick masterpiece.
When it comes to troubleshooting tips for wood wick candles, a few common mistakes can be easily rectified. One common issue is a weak flame, which can be caused by a wick that’s too long or has too much wax buildup. Trimming the wick to a quarter of an inch and clearing away any excess wax can help resolve this problem.
Another issue is tunneling, where the wax burns unevenly and leaves a tunnel in the center. This can be remedied by allowing the candle to burn long enough for the entire surface to melt, ensuring an even burn.
Additionally, if you notice excessive smoke or soot, it may be due to a wick that’s too long or a drafty environment. Shortening the wick and moving the candle away from drafts can help alleviate this issue.
With these troubleshooting tips in mind, you can now enjoy the ambiance that your wood wick candle brings to your space. The gentle crackling of the flame combined with the warm glow creates a cozy and inviting atmosphere.
Enjoy the Ambiance
Immerse yourself in the soothing atmosphere created by the crackling flame and warm glow of your beloved wooden wick masterpiece. As you enjoy the ambiance of your wood wick candle, it’s important to remember the importance of candle maintenance.
Regularly trimming the wick to 1/4 inch will ensure a steady and even burn, prolonging the life of your candle. Additionally, keeping the candle free from debris and dust will help maintain its appearance and prevent any unwanted smoke.
Choosing the right candle fragrance is another crucial aspect of creating a delightful ambiance. Whether you prefer the calming scent of lavender or the invigorating aroma of citrus, selecting a fragrance that aligns with your mood and preferences can enhance the overall experience. Experimenting with different scents can add variety to your candle collection and help create the perfect atmosphere for any occasion.
To continue enjoying the soothing ambiance of your wood wick candle, it’s essential to practice safety measures. These measures include keeping the candle away from flammable materials, never leaving it unattended, and placing it on a heat-resistant surface. By following these precautions, you can ensure a safe and enjoyable experience every time you light your wood wick candle.
Practice Safety Measures
Ensure a worry-free experience by remembering to place your beloved wooden flame masterpiece on a sturdy, heat-resistant surface, away from anything flammable. Fire safety is of utmost importance when it comes to enjoying the ambiance of a wood wick candle. To keep your surroundings safe, follow these safety measures:
-
Keep a safe distance: Maintain at least a 12-inch clearance between the candle and any flammable objects. This ensures that the flame won’t accidentally ignite anything nearby.
-
Never leave unattended: Always keep an eye on your candle and never leave it burning unattended. This helps prevent any accidents that may occur in your absence.
-
Trim the wick: Before lighting your candle, trim the wooden wick to 1/4 inch. This helps control the size of the flame and prevent excessive soot or smoke.
By practicing these fire safety measures and maintaining your wood wick candle, you can enjoy its cozy glow without any worries. Candle maintenance is crucial for a safe and long-lasting experience. In the next section, we will discuss how to properly extinguish the candle, ensuring its longevity and safety.
Extinguish the Candle
When it’s time to put out the flame, make sure to follow these simple steps for a safe and hassle-free experience. Safety is paramount when dealing with open flames, so it’s important to prevent accidents by extinguishing the wood wick candle correctly.
The first method is to use a snuffer. Gently place the snuffer over the flame, allowing it to suffocate. This method prevents any hot wax from splattering and reduces the risk of accidentally burning yourself.
Another alternative method is to use a metal spoon. Simply press the back of the spoon against the burning wick until it is fully submerged in the melted wax. This cuts off the oxygen supply, extinguishing the flame.
Always remember to wait until the candle has completely cooled before attempting to move it or dispose of any remaining wax.
Now that you know how to safely extinguish your wood wick candle, let’s move on to the next section about ‘clean up’.
Clean Up
After extinguishing the flame, it’s important to clean up the remaining wax and residue left behind by the candle.
Did you know that approximately 80% of candle wax can be recycled or repurposed into new candles or other wax products?
Cleaning up after using a wood wick candle is relatively simple, but it’s essential to do it correctly to ensure the longevity of your candle and a clean burning experience for future uses.
To start the cleaning process, wait until the wax has completely cooled and hardened. Gently scrape off any excess wax using a plastic scraper or a butter knife. Be careful not to scrape too aggressively, as this could scratch the surface of your candle holder.
Next, use a paper towel or a clean cloth to wipe away any remaining wax residue. If there are stubborn spots, you can use a small amount of rubbing alcohol on a cloth to gently remove them.
Once the wax residue is removed, it’s important to clean the entire candle holder thoroughly. Fill a sink or a basin with warm water and a mild dish soap. Gently wash the holder, inside and out, using a soft sponge or a cloth. Rinse it well and dry it completely before using it again.
By following these cleaning tips and removing wax residue properly, you can ensure that your wood wick candle remains in good condition and provides you with many hours of cozy and aromatic enjoyment.
Frequently Asked Questions
How long should I let the wood wick soak before lighting it?
I recommend soaking the wood wick for at least 30 minutes before lighting it. This allows the wick to absorb enough wax to provide a steady and even burn. Soaking the wood wick also helps to prevent tunneling and ensures a longer burn time.
Wood wick candles offer several benefits, such as a cozy crackling sound and a longer-lasting burn compared to traditional cotton wicks.
Can I use any type of candle wax with a wood wick?
Yes, you can use different types of candle wax with a wood wick. Unlike traditional cotton wicks, wood wicks offer a unique and cozy ambiance to your candles. The crackling sound they make when lit adds a touch of warmth and comfort.
Additionally, wood wicks have the benefit of providing a longer burn time and a more even distribution of heat. So, whether you prefer soy, beeswax, or paraffin wax, a wood wick will enhance your candle experience.
What are some tips for preventing tunneling when burning a wood wick candle?
To prevent tunneling in wood wick candles and maximize burn time, there are a few tips I can offer.
First, ensure that the candle is allowed to burn long enough during each use, so that the entire top layer of wax melts evenly.
Trim the wick to around 1/4 inch before each burn to maintain a steady flame and prevent excessive heat.
Finally, avoid placing the candle in a drafty area to ensure an even burn.
How often should I trim the wood wick to maintain a clean burn?
To maintain a clean burn with a wood wick candle, it’s important to trim the wick regularly. The frequency of trimming depends on the size of the candle and how often it’s burned. As a general rule of thumb, trim the wood wick to about 1/4 inch before each use. This helps prevent excessive flame height and ensures a steady, even burn. By following this trimming routine, you can enjoy a clean and efficient burn every time.
Can I reuse the container of a wood wick candle once it has burned down?
Yes, you can definitely reuse the container of a wood wick candle once it’s burned down. There are many alternative uses for burned wood wick candles. You can clean out the container and use it to store small items like jewelry or office supplies. You can also repurpose it as a small planter for succulents or herbs. The possibilities are endless, so get creative and give your old candle containers a new life!
Conclusion
In conclusion, lighting a wood wick candle is a simple yet captivating process that adds a touch of warmth and tranquility to any space. By following these steps and practicing safety measures, you can create a mesmerizing ambiance that invites relaxation and peace.
So, why not indulge in the soothing flicker of a wood wick candle and let its gentle glow transport you to a world of serenity? After all, there’s something magical about the dance of flames that captures our hearts and ignites our senses.
I’m Amelia, and I love making candles. It all started when I was given a kit as a gift. I loved the process so much that I decided to make my own candles.
I soon realized that I had a real talent for it. Before long, my friends and family were asking me to make candles for them too. Word spread, and soon I was inundated with orders.
I love the creativity that goes into making each candle unique. And I love the satisfaction of knowing that people are using something I made with my own hands.
Beginners Guides
How To Find Charmander Candy

As I walked through the bustling streets of my town, a familiar warmth radiated from my pocket. It was my trusty Pokémon companion, Charmander, nestled safely within its Pokéball.
But as much as I cherished my fiery friend, I couldn’t help but yearn for more of that precious Charmander candy. It was the key to unlocking Charizard’s true potential, after all.
So, I embarked on a quest, determined to find a way to obtain more of this elusive treat. Little did I know, my journey would lead me through a world of adventure, strategy, and camaraderie.
From exploring nest locations to participating in community day events, hatching eggs to completing research tasks, I discovered a multitude of ways to find Charmander candy.
Join me as I share my knowledge and strategies, so that you too can unleash the full power of your Charmander and conquer the world of Pokémon Go.
Key Takeaways
- Charmander candy can be acquired through various methods such as walking with Charmander, exploring nest locations, and regularly visiting potential nest locations.
- Participating in community day events, special events focused on hatching eggs, and completing research tasks can also yield Charmander candy.
- Utilizing Pinap Berries when catching Charmander, converting rare candies into Charmander candy, and utilizing the buddy system can help in obtaining more candy.
- Purchasing Charmander candy with in-game currency is another option, with different bundles and limited-time offers providing discounted or increased rates.
Explore Nest Locations
To find Charmander candy, you’ll want to explore Charmander habitats and find Charmander nests. These locations are where Charmanders are known to gather in large numbers, providing an excellent opportunity for you to collect their candy and power up your Charmander.
When exploring these nest locations, it’s important to be strategic and analytical. Look for areas with a high concentration of Fire-type Pokémon, as Charmanders tend to gravitate towards these spots. Parks, nature reserves, and urban areas with plenty of open space are great places to start your search.
Once you’ve identified a potential nest location, visit it regularly to maximize your chances of finding Charmanders. Keep in mind that nests can change every couple of weeks, so it’s crucial to stay updated on the latest information. Online communities and Pokémon Go forums are valuable resources for finding reliable nest reports.
By exploring these nest locations, you’ll not only gather Charmander candy but also have the opportunity to encounter and capture more Charmanders to expand your collection. Participating in community day events is another effective way to increase your Charmander candy count and potentially catch a shiny Charmander. These events often feature increased Charmander spawns and bonus candy rewards, making them a valuable opportunity for any Pokémon trainer.
So get out there and start exploring those Charmander habitats!
Participate in Community Day Events
During Community Day events, it’s crucial to actively engage to maximize your chances of obtaining Charmander candy. One of the best ways to do this is by exploring parks, as they often serve as hotspots for Pokemon spawns during these special events. Parks are known for their abundance of PokeStops and Gyms, making them ideal locations to catch Charmander and accumulate candy.
By walking around and exploring different areas within the park, you increase your chances of encountering more Charmander and earning candy.
Additionally, attending special events organized during Community Day is another strategic move to find Charmander candy. These events often bring together a large number of Pokemon Go players, creating a vibrant and competitive atmosphere. Not only do you have the opportunity to meet fellow trainers and share tips, but special event spawns also increase your chances of encountering Charmander and obtaining candy.
By actively participating in Community Day events, exploring parks, and attending special events, you significantly enhance your chances of finding Charmander candy.
Once you have mastered these techniques, you can move on to the next step of your journey: hatching eggs and further expanding your Charmander candy collection.
Hatch Eggs
Hatching eggs is like opening a surprise gift box filled with potential Pokémon companions. It’s an exciting way to find Charmander candy and add new Pokémon to your collection.
To maximize your chances of hatching Charmander eggs, there are a few strategies you can employ.
-
Explore parks: Parks are great places to find eggs, especially during events like Community Day. They often have a higher spawn rate for Pokémon, including Charmander. So, make sure to visit parks in your area and take advantage of the increased chances of finding Charmander eggs.
-
Use incubators: Incubators are essential tools for hatching eggs. Make sure to have multiple incubators running simultaneously to increase your chances of finding Charmander eggs. You can obtain incubators from PokéStops or purchase them from the in-game shop.
-
Prioritize 10km eggs: Charmander eggs are more likely to be found in 10km eggs. Focus on hatching these eggs to increase your chances of obtaining Charmander candy.
-
Participate in events: Keep an eye out for special events that focus on hatching eggs. These events often have increased chances of hatching specific Pokémon, including Charmander.
By following these strategies, you’ll have a better chance of finding Charmander candy through hatching eggs.
Now, let’s move on to the next step: completing research tasks.
Complete Research Tasks
Engage in various research tasks to uncover hidden rewards and unlock new possibilities in your Pokémon journey. In Pokémon GO, completing research tasks is a great way to not only earn experience points and stardust but also to obtain valuable Charmander candy.
By completing special research tasks, you can explore research rewards that may include encounters with rare Pokémon, such as Charmander. These tasks often require you to catch a certain number of Pokémon, win battles, or visit specific Pokéstops.
As you complete these tasks, you will earn progress towards completing the research and receive rewards along the way. These rewards can include items like Pokéballs, berries, and even rare candies. By completing more research tasks, you increase your chances of encountering Charmander and obtaining its candy. It’s a strategic approach that requires dedication and persistence, but the rewards are well worth it.
Once you have accumulated enough Charmander candy, you can use it to power up your Charmander or evolve it into its stronger forms, Charmeleon and Charizard. This will make your Charmander even more powerful in battles and increase its overall stats.
Now that you understand the importance of completing research tasks to obtain Charmander candy, let’s move on to the next section: trading with other players. This method allows you to acquire Charmander candy in a different way, offering even more opportunities to strengthen your Pokémon team.
Trade with Other Players
When it comes to trading with other players to obtain Charmander candy, there are a few key points to consider.
The first key point is to find trainers who have Charmander to trade. This can be done by networking with other players in your community or by participating in local Pokémon GO events.
Another important strategy is to utilize lucky trades, which guarantee better individual values (IVs) for the traded Pokémon. This can greatly improve the overall strength and potential of the Charmander you receive.
Lastly, it is essential to negotiate fair trades for Charmander candy, ensuring both parties benefit from the exchange. This involves discussing and agreeing upon the number of candies to be traded, as well as the quality of the Charmander being traded.
Find Trainers with Charmander to Trade
To get your hands on some Charmander candy, try seeking out fellow trainers who have Charmander to trade with you. Finding trainers with Charmander can be a strategic move in your quest to evolve and power up your Charmander. Negotiating trades with these trainers can be beneficial as it allows you to obtain extra Charmander candy without having to catch more Charmander yourself. Not only does trading provide you with candy, but it also gives you the opportunity to potentially obtain a high IV Charmander that can be stronger in battles. By connecting with other trainers and making trades, you can expand your collection and boost your chances of finding a Charmander with better IVs. Utilizing lucky trades for better IVs is the next step in your journey towards evolving a powerful Charizard.
Utilize Lucky Trades for Better IVs
Make the most of your trades by utilizing lucky trades, which can give you the chance to obtain high IV Charmander and evolve a powerful Charizard.
Lucky trades are a valuable trading strategy in Pokémon Go that can greatly increase your chances of getting a Charmander with excellent Individual Values (IVs). Here are three ways to maximize lucky trades for better IVs:
-
Trade with friends: Trade with friends who have Charmander to increase the likelihood of getting lucky trades. The more trades you do, the higher the chance of getting lucky Pokémon.
-
Trade low IV Charmander: If you have low IV Charmander, trade them with friends to increase the odds of receiving a lucky Charmander with better IVs.
-
Trade recently caught Pokémon: Pokémon that have been caught within the last 30 days have a higher chance of becoming lucky when traded.
By utilizing these trading strategies, you can increase your chances of obtaining high IV Charmander and evolving a powerful Charizard. Now, let’s move on to the next section and learn how to negotiate fair trades for Charmander candy.
Negotiate Fair Trades for Charmander Candy
If you think you can just walk into a trade and expect to get all the Charmander candy you want, you’re in for a fiery surprise. Negotiating fair trades for Charmander candy requires a strategic approach and knowledge of trading etiquette.
First and foremost, it’s important to establish a fair value for the candy you’re seeking. Consider the rarity of Charmander and the potential IVs of the Pokémon being traded. Be respectful and open to compromise during negotiations, as finding a mutually beneficial trade is key.
Additionally, timing can play a crucial role in negotiations. Keep an eye on events or community days that may increase the availability of Charmander candy, as this can impact the value of your trades.
By employing these negotiating tactics and adhering to trading etiquette, you’ll be well on your way to accumulating the Charmander candy you desire.
Now, let’s explore another effective method to obtain more candy: using Pinap berries.
Use Pinap Berries
Boost your chances of collecting Charmander candy by using Pinap Berries, which will double the candy you receive when catching Charmander! Here are four key strategies to maximize your use of Pinap Berries:
-
Explore habitats: Charmander can be found in various habitats, such as parks and residential areas. By exploring different locations, you increase your chances of encountering Charmander and utilizing Pinap Berries to their fullest potential.
-
Use rare candies: If you’re lucky enough to have rare candies, consider using them on Charmander. Rare candies can be converted into Charmander candy, allowing you to quickly evolve your Charmander or power up your Charizard.
-
Time your throws: When using a Pinap Berry, it’s crucial to time your throws accurately. Wait for Charmander to attack or move in a predictable pattern before throwing your Pokéball. This increases your chances of successfully catching Charmander and obtaining double candy.
-
Stock up on Pinap Berries: Make sure to have a sufficient supply of Pinap Berries before embarking on your Charmander-catching journey. You don’t want to run out of these valuable berries when you encounter a high-level or shiny Charmander.
By incorporating these strategies, you’ll be able to make the most out of your Pinap Berries and gather a significant amount of Charmander candy.
To further enhance your candy collection, let’s explore how you can utilize the buddy system.
Utilize Buddy System
To maximize your progress, you can utilize the buddy system. This system allows you to collect additional rewards and level up faster by walking with a Pokémon companion. Not only does this strategy help you accumulate Charmander candy, but it also encourages physical activity and exploration.
To make the most of the buddy system, it’s essential to choose Charmander as your buddy. By doing so, every few kilometers walked, you’ll receive a Charmander candy. This means that the more you walk, the more candy you’ll earn, bringing you closer to evolving your Charmander into a powerful Charizard. However, it’s important to note that the distance required to earn candy may vary for different Pokémon species. Therefore, it’s crucial to research strategies and find out the specific walking distance required for Charmander candy.
When utilizing the buddy system, exploring parks and other areas with a higher spawn rate for Charmander can significantly increase your chances of finding this elusive Pokémon. By combining the buddy system with strategic location selection, you can maximize your Charmander candy collection.
Now, let’s move on to the next section and discuss how to transfer unwanted Pokémon without losing any progress.
Transfer Unwanted Pokémon
Now that we’ve learned how to utilize the Buddy System to earn Charmander candy, let’s discuss another effective strategy: transferring unwanted Pokémon. This method allows trainers to clear space in their inventory while also earning additional candy for their beloved Charmander.
By transferring unwanted Pokémon, you not only make room for new captures, but you also receive one candy for each transfer. This can be a great way to accumulate Charmander candy quickly.
To maximize your candy collection, consider exploring trading options with other trainers. Trading Pokémon can provide you with extra candy for the Pokémon you receive in return. Additionally, attending Pokémon Go events can be a fruitful opportunity to meet other trainers and potentially trade for Charmander candy.
Incorporating an unordered 4 item bullet list:
- Trade Pokémon to receive extra Charmander candy
- Attend Pokémon Go events to meet other trainers and explore trading options
- Transfer unwanted Pokémon to clear inventory space and earn candy
- Accumulate Charmander candy quickly by utilizing this strategy
By following these strategies, you can amass a significant amount of Charmander candy to power up your fiery companion. Now, let’s move on to the next section and learn how to participate in raid battles.
Participate in Raid Battles
When it comes to gaining Charmander candy, one effective strategy is to join Charmander raids. These raids guarantee you candy for successfully completing the battle, making it a reliable way to stock up on this valuable resource.
Additionally, coordinating with other trainers to participate in raid battles can greatly increase your chances of success, as you can pool your resources and strategies together.
Lastly, utilizing remote raid passes can provide accessibility to raid battles that may be far away or difficult to reach, allowing you to participate in raids from the comfort of your own home.
By implementing these tactics, you can efficiently gather Charmander candy and strengthen your team.
Join Charmander Raids for Guaranteed Candy
By participating in Charmander raids, trainers can ensure that they receive candy to help strengthen their Charmander. Exploring alternative methods is crucial to finding Charmander candy. One effective alternative is to use rare candies, which can be converted into Charmander candy. Rare candies are a valuable resource that can be obtained from completing raid battles and other special events. They can be a quick way to obtain Charmander candy without having to rely solely on finding Charmander raids. However, joining Charmander raids is still the most reliable method to obtain guaranteed candy. By participating in these raids, trainers have the opportunity to capture Charmander and earn candy as a reward. This method ensures a steady supply of candy to power up and evolve Charmander. To maximize your chances of finding Charmander raids, it is advisable to coordinate with other trainers for raid battles. This will increase the number of raids you can participate in and increase your chances of obtaining candy for your Charmander.
Coordinate with Other Trainers for Raid Battles
Teaming up with fellow trainers during raid battles can greatly enhance your chances of scoring valuable resources, such as rare candies, to strengthen your Charmander. When coordinating with friends, organizing raid groups becomes crucial for success.
Here are four strategic steps to effectively coordinate with other trainers:
-
Communication: Establish a reliable means of communication, such as a group chat or messaging app, to coordinate raid timings and locations.
-
Role Assignment: Assign roles to each trainer, ensuring a balanced team with different Pokémon types and movesets.
-
Time Management: Plan raids in advance, considering everyone’s schedules, to maximize participation and increase the chances of success.
-
Raid Etiquette: Encourage trainers to be respectful and cooperative during raids, helping each other out and sharing tips and strategies.
By coordinating with other trainers, you can optimize your raid battles and increase your chances of obtaining Charmander candy.
Now, let’s explore how to utilize remote raid passes for accessibility.
Utilize Remote Raid Passes for Accessibility
Utilizing remote raid passes allows trainers to conveniently participate in raid battles from the comfort of their own homes, expanding accessibility and creating opportunities to connect with fellow trainers from all around the world.
Participating remotely in raid battles is especially beneficial for trainers who may face accessibility challenges, such as those with mobility issues or those who live in rural areas with limited raid opportunities. Remote raid passes enable these trainers to join raids without the need to physically travel to a specific location, leveling the playing field and ensuring everyone has an equal chance to catch rare Pokémon like Charmander.
By embracing this feature, trainers can overcome geographical limitations and engage in raid battles with trainers from diverse backgrounds.
Now, let’s explore how to purchase Charmander candy and further enhance our Pokémon’s power.
Purchase Charmander Candy
When it comes to purchasing Charmander candy, one option is to utilize in-game currency. By spending coins or other in-game currency, players can acquire candy to power up their Charmander.
However, it’s important to evaluate the value of purchasing candy in relation to other in-game resources and upgrades. Additionally, players should consider limited-time offers and events, as these may provide opportunities to acquire Charmander candy at a discounted or increased rate.
Utilize In-Game Currency for Candy
To get more Charmander candy, you can make use of the in-game currency by purchasing items that can help you collect candy faster. This strategy is particularly useful if you’re looking to maximize your candy collection without spending real money.
By budgeting your in-game currency wisely, you can prioritize purchasing items that offer the most candy rewards. Additionally, you can explore alternative methods such as participating in in-game events or completing certain tasks to earn extra currency.
It’s important to evaluate the value of purchasing candy through in-game currency, as it may not always be the most efficient or cost-effective option. By considering the benefits and drawbacks of each method, you can make informed decisions on how to best acquire Charmander candy.
Evaluate the Value of Purchasing Candy
When it comes to utilizing in-game currency for Charmander candy, it’s important to evaluate the effectiveness and compare the cost. As a seasoned Pokemon trainer, I always consider the value of purchasing candy before making any decisions. To help you make informed choices, let’s take a closer look at the table below:
Candy Purchase Option | Cost (in-game currency) | Candy Amount |
---|---|---|
Regular Candy Bundle | 100 coins | 10 |
Mega Candy Bundle | 200 coins | 25 |
Special Event Bundle | 300 coins | 50 |
Limited-Time Offer | 150 coins | 15 |
Daily Candy Deal | 50 coins | 5 |
By evaluating the effectiveness and comparing the cost of these options, you can make the most of your in-game currency. Now, let’s move on to the next section where we’ll consider limited-time offers and events, which can provide even more opportunities to obtain Charmander candy.
Consider Limited-Time Offers and Events
Limited-time offers and events can be like hidden treasure chests, filled with rare opportunities to boost your progress in the game. These limited-time promotions can provide you with exclusive rewards and bonuses, including extra Charmander candy. By keeping an eye out for these events, you can maximize your chances of finding Charmander candy and leveling up your Charmander faster.
Here are two ways limited-time offers and events can benefit you:
-
Increased Charmander spawns: During special events, Charmander spawns may be increased, making it easier for you to encounter and catch them. This means more chances to obtain Charmander candy.
-
Event rewards: Limited-time events often offer special rewards for participating, such as bonus candy for catching a certain number of Charmander or completing specific tasks. These event rewards can significantly boost your Charmander candy count and accelerate your progress.
By taking advantage of limited-time offers and events, you can make the most of your gameplay and find Charmander candy more efficiently.
Frequently Asked Questions
Can I find Charmander candy by evolving Charmander into Charmeleon or Charizard?
No, you can’t find Charmander candy by evolving Charmander into Charmeleon or Charizard. Charmander candy can only be obtained by catching Charmander in the wild, hatching it from eggs, or as rewards from certain in-game activities.
Evolution requirements for other Pokémon differ, as they require specific candy and sometimes additional items. Candies play a crucial role in Pokémon battles and stats, as they’re used to power up and evolve Pokémon, improving their strength and abilities.
How many Charmander candy do I need to evolve Charmander into Charizard?
To evolve Charmander into Charizard, you’ll need a total of 125 Charmander candies. Obtaining these candies can be done through various methods. One efficient way is to catch as many Charmanders as possible during gameplay.
Additionally, you can transfer duplicate Charmanders to Professor Willow in exchange for candies. Participating in Raids and hatching Charmander eggs are also effective strategies for maximizing candy drops.
Are there any special events or promotions that offer extra Charmander candy?
There are indeed special events and promotions that offer extra Charmander candy. These events are a golden opportunity for trainers like me to stock up on this precious candy.
By participating in these events, I can collect more Charmander candy and speed up the evolution process. Additionally, I can strategically farm Charmander candy by catching more Charmander, hatching eggs, and transferring duplicate Pokémon.
With these methods, I can ensure a steady supply of candy to evolve my Charmander into a powerful Charizard.
Can I find Charmander candy in specific biomes or habitats?
Charmander candy drop rates vary in different biomes. Some biomes, like fire and mountain biomes, have a higher chance of spawning Charmander, increasing the odds of finding its candy.
Additionally, while searching for Charmander candy, there’s a potential to find rare candies, which can be used on any Pokémon. This makes the search for Charmander candy even more valuable, as it can lead to rare candy discoveries.
Can I receive Charmander candy as a reward for completing specific in-game tasks or achievements?
Yes, you can definitely receive Charmander candy as a reward for completing specific tasks or achievements in the game. It’s like finding a hidden treasure!
Just like in other Pokémon games, these rewards can be earned by completing challenging quests, participating in events, or reaching certain milestones. To maximize your candy collection, I recommend focusing on tasks that specifically mention Charmander or fire-type Pokémon. Keep an eye out for special events that offer increased candy rewards as well.
Happy hunting!
Conclusion
In conclusion, finding Charmander candy in Pokémon Go requires a combination of strategies and dedication.
By exploring nest locations and participating in community day events, players can increase their chances of encountering Charmander and obtaining candy.
Additionally, hatching eggs, completing research tasks, and trading with other players can provide opportunities to earn candy.
Utilizing the buddy system and participating in raid battles can also yield candy rewards.
For those who’re eager to speed up the process, purchasing Charmander candy is an option.
So go out there and catch ’em all, trainers, and let the fire in your heart guide you to success!
I’m Amelia, and I love making candles. It all started when I was given a kit as a gift. I loved the process so much that I decided to make my own candles.
I soon realized that I had a real talent for it. Before long, my friends and family were asking me to make candles for them too. Word spread, and soon I was inundated with orders.
I love the creativity that goes into making each candle unique. And I love the satisfaction of knowing that people are using something I made with my own hands.
Beginners Guides
How To Get Candle Wax Out Of A Blanket

Have you ever experienced the frustration of spilling candle wax on your favorite blanket? It’s as if time stands still as the molten wax seeps into the delicate fabric, leaving an unsightly stain behind.
But fear not, for I have discovered a magical technique that will restore your blanket to its former glory. Think of it as a dance, a delicate ballet between wax and fabric.
First, we must assess the damage, determining the extent of the wax infiltration. Then, we freeze the wax, transforming it into a solid state that can be easily scraped away.
Next, we apply heat to the remaining wax, coaxing it out of the fibers with gentle persuasion. As the wax surrenders, we blot it away, revealing a clean and wax-free surface.
Finally, we launder the blanket, ensuring no residue remains.
Follow these steps, my friends, and you will once again enjoy the warmth and comfort of your beloved blanket, free from the clutches of candle wax.
Key Takeaways
- Freezing the wax before removing it makes it easier to scrape off.
- Applying heat to the remaining wax and blotting it away helps to remove any residue.
- Different cleaning solutions can be used depending on the fabric of the blanket.
- Inspecting the blanket under bright light after cleaning helps to ensure that all traces of wax are removed.
Assess the Damage
Now, take a moment to carefully assess the extent of the damage to your blanket. Assessing the damage is crucial in determining the best course of action to remove the candle wax effectively.
Start by examining the affected area and identifying how much wax has seeped into the fabric. Is it a small spot or has it spread over a larger area? This will help you gauge the intensity of the stain and choose the appropriate method to tackle it.
While assessing the damage, it’s also important to consider the cause of the wax spill. Identifying the factors that led to the accident will help you prevent future wax spills. Was it a gust of wind that knocked the candle over? Or perhaps the candle was too close to the edge of the table? By addressing these issues, you can avoid similar mishaps in the future and protect your blanket from further damage.
Now that you have assessed the damage and learned from the experience, let’s move on to the next step: freezing the wax. This method is effective in solidifying the wax, making it easier to remove from the blanket.
Freeze the Wax
First, you’ll want to chill the wax in order to easily remove it from your cozy blanket. Freezing the wax is a simple and effective method to prevent any further damage. Here are four steps to freeze the wax and make it easier to remove:
-
Find a flat surface: Lay your blanket on a sturdy and flat surface to ensure that the wax is evenly distributed.
-
Place the blanket in the freezer: Fold or roll the blanket and place it in a plastic bag to protect it from moisture. Then, carefully place it in the freezer.
-
Freeze for a few hours: Leave the blanket in the freezer for at least two to three hours to allow the wax to harden completely.
-
Alternative methods: If you don’t have access to a freezer or need a quicker solution, you can use ice cubes or an ice pack. Simply place them directly on the wax spill and wait for it to harden.
Once the wax is frozen, it’s time to move on to the next step and scrape off the frozen wax without causing any damage to your beloved blanket.
Scrape off the Frozen Wax
To easily remove the frozen wax from your cozy blanket, start by gently scraping off the hardened wax using a dull knife or the edge of a credit card. Be careful not to apply too much pressure, as you don’t want to damage the fabric. Work from the outer edges of the wax towards the center, lifting it off in small pieces. If any stubborn bits remain, try using a soft-bristled brush to gently scrub the area.
Now, let’s talk about how to prevent candle wax spills in the first place. Always place your candles on a stable surface, away from any flammable materials. Use candle holders or trays to catch any wax that may drip. If you enjoy burning scented candles, consider using wax melts or electric warmers instead, as they eliminate the risk of spills altogether.
It’s also worth mentioning that the method I just described can be used to remove wax from other fabrics as well, such as clothing or upholstery. Just remember to be gentle and patient during the scraping process to avoid causing any damage.
Next, we’ll move on to applying heat to the remaining wax to completely remove it from your blanket.
Apply Heat to the Remaining Wax
If you thought scraping off the frozen wax was satisfying, wait until you feel the warm, soothing heat effortlessly melt away the remaining stubborn residue on your cozy blanket. To remove the remaining wax, we can employ the use of heat. Using a hairdryer, iron, or heat gun, apply heat to the remaining wax to melt it. Be sure to adjust the heat settings to a low or medium temperature to avoid damaging the fabric.
Here is a helpful table to guide you on the appropriate settings for each method:
Method | Heat Setting |
---|---|
Hairdryer | Low to Medium |
Iron | Low to Medium |
Heat Gun | Low |
Once the wax begins to melt, gently blot it with a paper towel or cloth. The heat will cause the wax to liquefy, allowing it to be easily absorbed by the absorbent material. It’s important to avoid rubbing or scrubbing the wax, as this may push it deeper into the fabric fibers.
Now that we’ve successfully removed the wax, let’s move on to the next step: blotting the wax stain with a cleaning solution.
Blot the Wax Stain
Now, let’s gently blot away the remnants of the wax stain, revealing the pristine beauty of your beloved blanket.
After applying heat to the remaining wax and allowing it to solidify, it’s time to assess the stain. Carefully examine the affected area to determine the extent of the wax residue. If the stain is minimal, you may be able to remove it completely with a simple blotting technique.
To begin the blotting process, take a clean white cloth or paper towel and gently press it onto the stained area. Avoid rubbing or scrubbing, as this can spread the wax further and potentially damage the fabric. Instead, focus on applying light pressure to absorb as much of the wax as possible.
As you blot, you may notice that the cloth absorbs the wax, leaving the stain visibly reduced.
If there is still some discoloration present, don’t worry. In the next section, we will treat the stain with a cleaning solution to eliminate any remaining residue.
By following these steps, you can restore your blanket to its former glory and remove any trace of the candle wax.
Treat the Stain with a Cleaning Solution
After blotting the wax stain, it’s time to move on to the next step: treating the stain with a cleaning solution. This is a crucial part of the process as it helps to break down the wax and remove any remaining residue from the fabric.
When choosing a cleaning solution, it’s important to consider the type of fabric you’re dealing with. For delicate fabrics, such as silk or wool, it’s best to opt for a gentle solution like rubbing alcohol or a mild detergent mixed with water. For more durable fabrics like cotton or polyester, you can use a stronger solution like vinegar or a stain remover specifically designed for removing wax stains.
If you prefer alternative methods, there are a few options to explore. One popular method is using heat to melt the wax and absorb it with a paper towel or brown paper bag. Another method involves freezing the wax by placing ice cubes on top of it, then scraping it off gently with a dull knife.
Now that you have treated the stain, it’s time to move on to the next step: laundering the blanket.
Launder the Blanket
To properly clean your blanket, you’ll need to prepare for laundering it by checking the care instructions and gathering the necessary supplies. Start by reading the label on your blanket to determine if it can be washed in a machine or if it requires hand washing. Once you’ve confirmed the appropriate method, gather your detergent, stain remover, and any other laundry products you may need.
Now, let’s dive into some laundering tips to ensure the best results. First, make sure to use the appropriate water temperature for your blanket. Hot water can set stains and shrink fabrics, so it’s best to use warm or cold water. Second, consider pre-soaking your blanket in a mixture of water and detergent to help loosen any remaining wax. Third, avoid using fabric softener as it can make the stain more difficult to remove. Finally, check the blanket after laundering to ensure the stain is completely gone before drying.
To inspect the blanket for residual wax, carefully examine the fabric under good lighting. Look for any remaining stains or areas that still feel waxy to the touch.
Inspect the Blanket for Residual Wax
Once you’ve finished laundering your blanket, give it a close examination under bright light to detect any lingering traces of wax. Assessing the damage is crucial before proceeding to the next step. To help you determine the extent of the wax residue, here is a handy table that outlines different scenarios and appropriate cleaning solutions:
Scenario | Description | Cleaning Solution |
---|---|---|
Small Wax Stains | Tiny spots of wax on the surface | Rubbing alcohol or ice cube method |
Medium Wax Stains | Larger patches of wax | Heat and blotting method |
Large Wax Stains | Extensive wax coverage | Iron and brown paper bag method |
Embedded Wax | Wax deeply embedded in the fibers | Freezing and scraping method |
By using this table, you can easily identify the best approach for your specific situation. Once you have successfully removed the wax, you can move on to the next step and repeat the process if necessary. This ensures that your blanket is completely free of any wax residue, allowing you to enjoy its warmth and coziness once again.
Repeat the Process if Necessary
After inspecting the blanket for any residual wax, it’s time to move on to the next step: repeating the process if necessary.
Sometimes, removing candle wax from a blanket can be a stubborn task, especially if the wax has seeped deep into the fabric fibers. But don’t worry, there are alternative methods you can try to ensure your blanket becomes completely wax-free.
One effective method is to place a clean brown paper bag or a paper towel on top of the remaining wax. Then, gently iron over it on a low heat setting. The heat from the iron will cause the wax to melt and transfer onto the paper, effectively removing it from the blanket. Remember to change the paper or towel as needed to avoid spreading the wax.
If there are still traces of wax after attempting this method, you can try using a commercial wax remover or even rubbing alcohol. Apply a small amount to a clean cloth and gently dab at the wax until it lifts away.
Once the wax is completely removed, it’s time to move on to the next section about enjoying your clean and wax-free blanket!
Enjoy Your Clean and Wax-Free Blanket!
Now that your blanket is completely free of any lingering wax, you can cozy up and enjoy its clean and fresh embrace. But before you do, here are some helpful tips for preventing candle wax spills in the future.
- Always use a stable and heat-resistant candle holder to prevent accidents.
- Trim the wick to a quarter of an inch before lighting the candle to ensure a controlled and even burn.
- Keep the candle away from drafts and flammable objects to avoid any mishaps.
In case you encounter another wax stain on your fabric, here are a few alternative methods for removing it.
- Place a brown paper bag or a cloth over the wax stain and gently iron over it. The heat will melt the wax, and the paper or cloth will absorb it.
- Freeze the fabric with the wax stain in the freezer for a couple of hours. Once frozen, scrape off the hardened wax with a butter knife or a credit card.
- Apply a small amount of rubbing alcohol or stain remover to a clean cloth and blot the wax stain until it lifts off the fabric.
By following these preventive tips and alternative methods, you can avoid future wax spills and easily remove any stains, ensuring your blanket remains wax-free and cozy for years to come.
Frequently Asked Questions
How long should I freeze the wax before attempting to scrape it off?
Freezing the wax before attempting to scrape it off is a great method for removing candle wax from fabric. I recommend letting it freeze for at least 2 hours. This helps the wax harden and become brittle, making it easier to remove.
Once frozen, gently scrape the wax off using a dull knife or credit card. Be careful not to damage the fabric. Remember the old saying, "Patience’s a virtue" when dealing with getting wax out of blankets.
What type of cleaning solution is recommended for treating the wax stain?
I recommend using a cleaning solution specifically designed for removing wax stains. Look for products that contain solvents like isopropyl alcohol or acetone, as these can effectively break down the wax.
Alternatively, you can try using a mixture of dish soap and warm water. Apply the solution to the stained area and gently scrub with a soft cloth. Rinse with clean water and allow the blanket to air dry.
Can I use a hairdryer to apply heat to the remaining wax?
Using a hairdryer for wax removal can be an effective method. The heat from the hairdryer helps to melt the wax, making it easier to remove. However, there are some cons to consider. The heat can potentially damage delicate fabrics or cause the wax to spread further. If you prefer to avoid heat, there are alternative methods available. One option is to place the blanket in the freezer, which will harden the wax and make it easier to scrape off. Another option is to use a hot iron with a paper towel to absorb the melted wax.
Is it safe to launder the blanket in a washing machine after treating the wax stain?
Laundering a wax-stained blanket in a washing machine can pose potential risks. The heat from the machine may cause the wax to melt further and spread, potentially damaging the fabric and other items in the load. To avoid this, it’s recommended to remove the wax before washing.
An alternative method is to place a brown paper bag or parchment paper over the wax stain and gently iron over it. The heat will melt the wax, which will then be absorbed by the paper.
How can I prevent wax from dripping onto my blanket in the future?
To prevent wax stains from ruining your blanket, try this nifty trick. Instead of using a hairdryer, which can sometimes cause more damage, opt for placing a layer of parchment paper on top of the blanket before lighting your candle. This will catch any drips and prevent them from seeping into the fabric.
It’s a simple yet effective solution that will keep your blanket wax-free and cozy for years to come.
Conclusion
After following these steps, I was amazed at how easily and effectively I was able to remove the candle wax from my blanket. The freezing and scraping technique worked wonders, and applying heat helped to get rid of any leftover residue.
With a thorough laundering, my blanket was left looking clean and wax-free. I couldn’t believe the transformation! So if you find yourself in a similar situation, don’t panic. Just follow these steps and you’ll be able to enjoy your clean and wax-free blanket in no time.
I’m Amelia, and I love making candles. It all started when I was given a kit as a gift. I loved the process so much that I decided to make my own candles.
I soon realized that I had a real talent for it. Before long, my friends and family were asking me to make candles for them too. Word spread, and soon I was inundated with orders.
I love the creativity that goes into making each candle unique. And I love the satisfaction of knowing that people are using something I made with my own hands.
Beginners Guides
How To Get Candle Wax Off A Tablecloth

Have you ever experienced the frustration of spilling candle wax on your favorite tablecloth? I know I have, and let me tell you, it can be a real headache to remove. But fear not! I’m here to share with you a foolproof method to get that stubborn wax off your tablecloth and restore it to its former glory.
In this article, I will guide you through a step-by-step process that is both practical and effective. We’ll begin by assessing the damage and then move on to scraping off the excess wax.
Next, we’ll apply heat to loosen the remaining residue and blot it away. After that, we’ll wash the tablecloth, rinse, and dry it to ensure a thorough cleaning.
But our work doesn’t stop there! We’ll also cover how to iron the tablecloth to remove any residual stains and finish off with tips on how to store it properly.
By the end of this article, you’ll have all the knowledge and tools you need to confidently tackle any candle wax mishaps and keep your tablecloths looking their best. So let’s get started and say goodbye to those pesky wax stains!
Key Takeaways
- Prevention techniques such as using candle holders or trays, flameless candles, and protective barriers can help avoid wax spillage on tablecloths.
- Scraping off excess wax with a butter knife or credit card, and applying ice to harden the wax before scraping can help remove spilled wax without damaging the fabric.
- Applying heat with an iron and brown paper bag, or using a hair dryer, can help melt and remove remaining wax residue.
- For stubborn stains, using a mixture of dishwashing liquid and warm water, or alternative methods like white vinegar, hydrogen peroxide, or stain removers can be effective in treating the stains.
Assess the Damage
Before attempting to remove the candle wax from the tablecloth, it’s important to carefully assess the extent of the damage caused by the wax spillage. Assessing the damage will give you a better understanding of the necessary steps to take for effective removal.
Start by examining the affected area to determine the size and depth of the wax stain. Look for any discoloration or residue left behind. Next, check the fabric for any signs of heat damage, such as scorch marks or melted fibers. This will help you determine the appropriate treatment method.
Once you have assessed the damage, it’s time to consider prevention techniques for future incidents. To avoid wax spills, always use candle holders or trays to catch any drips. Consider using flameless candles as a safer alternative. If you enjoy the ambiance of real candles, make sure to trim the wick before lighting to prevent excessive dripping. Placing a protective barrier, such as aluminum foil or a heat-resistant mat, underneath the candle can also help to contain any potential spills.
Now that you have assessed the damage and learned prevention techniques, it’s time to move on to the next step: scraping off excess wax.
Scrape off Excess Wax
When it comes to scraping off excess wax from a tablecloth, there are a couple of key points to keep in mind. First, you can use a butter knife or a credit card as a handy tool to gently scrape off the hardened wax. It’s important to be careful and avoid applying too much pressure to prevent damaging the fabric.
Additionally, applying ice to harden the wax before scraping can make the process easier and more effective. By following these practical tips, you can successfully remove excess wax from your tablecloth without much hassle.
Use a Butter Knife or Credit Card
To remove candle wax from a tablecloth, gently slide a butter knife or credit card under the hardened wax, carefully lifting it off the fabric. Here are some scraping techniques and alternative tools to consider:
- Angle the knife or card to avoid damaging the fabric.
- Apply light pressure while using a scraping motion to remove the wax.
- If the wax is particularly stubborn, try using a plastic scraper or the edge of a spoon instead.
By using these techniques and tools, you can effectively scrape off the excess wax without causing any further damage to the tablecloth. Once you’ve successfully removed the wax, the next step is to apply ice to harden any remaining residue. This’ll make it easier to remove in the subsequent section.
Apply Ice to Harden the Wax
Now, you can simply chill the stubborn residue with ice to make it a breeze to remove. When candle wax drips onto your tablecloth, it can leave behind unsightly stains. However, by applying ice to the wax, you can easily harden it and make it easier to remove.
Start by placing a few ice cubes in a plastic bag and sealing it. Next, gently press the bag of ice onto the wax stain for a few minutes. The cold temperature will cause the wax to harden and become brittle. Once the wax is hardened, use a butter knife or credit card to scrape it off the tablecloth. Be careful not to damage the fabric.
With this method, you can remove wax stains effectively and prevent future spills.
Now, let’s move on to the next step: applying heat to further remove any remaining residue.
Apply Heat
To remove candle wax from a tablecloth, applying heat can be an effective method. One way to do this is by using an iron and a brown paper bag. Simply place the brown paper bag over the wax and run a hot iron over it. The heat will cause the wax to melt and transfer onto the paper bag, leaving your tablecloth clean and wax-free.
Another option is to use a hair dryer. Set the hair dryer to a high heat setting and direct the airflow onto the wax. As the wax heats up, it’ll start to melt and can be easily wiped away with a cloth.
Use an Iron and Brown Paper Bag
First, grab an iron and a brown paper bag – it’s time to make that stubborn candle wax disappear from your tablecloth. Using an iron is one of the most effective and common techniques for removing wax.
Start by preheating the iron to a low or medium setting, making sure it doesn’t get too hot and damage the fabric. Place the brown paper bag over the wax stain and gently iron over it. The heat will melt the wax, and the paper bag will absorb it. Move the bag around as you go, ensuring that you’re not spreading the wax further. This method works well for most fabrics, but always test it on a small, inconspicuous area first.
Now, let’s move on to the next method – using a hair dryer to remove candle wax without any ironing involved.
Use a Hair Dryer
Ready to tackle that pesky candle wax on your tablecloth? Let’s try a different method – grab a hair dryer and say goodbye to the wax in no time! Using a hair dryer is a great alternative to an iron and can effectively remove the wax stain.
Here are two hair dryer techniques you can try:
-
Heat and Scrape: Set your hair dryer to its highest heat setting and aim it at the wax stain. As the wax begins to melt, use a plastic scraper or a credit card to gently scrape off the softened wax.
-
Blot with Paper Towels: Place a few layers of paper towels over the wax stain. Set your hair dryer to a medium heat setting and hover it over the paper towels. The heat will cause the wax to melt and transfer onto the paper towels, effectively removing the stain.
Now that the wax is gone, let’s move on to the next step – blotting the wax stain without spreading it further.
Blot the Wax Stain
Next, gently press a white cloth or paper towel onto the wax stain to soak up as much of the wax as possible. Assessing the effectiveness of this method is important, as it will determine if additional steps are necessary. If the wax is still visible after blotting, you may need to try alternative methods to completely remove the stain.
To give you a visual representation of different techniques, here is a table that compares various methods for removing candle wax from a tablecloth:
Method | Materials Needed | Steps |
---|---|---|
Hair Dryer | Hair dryer, white cloth or paper towel | 1. Set the hair dryer to low heat and hold it a few inches away from the wax stain. 2. Gently heat the wax until it starts to soften. 3. Blot the wax with a cloth or paper towel. 4. Repeat if necessary. |
Freezing | Ice cubes, plastic bag | 1. Place ice cubes in a plastic bag. 2. Apply the bag to the wax stain and let it sit for a few minutes. 3. Once the wax hardens, gently scrape it off with a butter knife. 4. If any residue remains, use a stain remover and launder the tablecloth as usual. |
After successfully removing as much wax as possible by blotting, the next step is to wash the tablecloth.
Wash the Tablecloth
After blotting the wax stain from the tablecloth, the next step is to wash the tablecloth to remove any remaining residue. Washing the tablecloth may seem like a simple task, but it’s important to use the right washing techniques and stain removal methods to ensure that the candle wax is completely gone.
First, check the care instructions on the tablecloth to determine if it can be machine washed or if it needs to be hand washed. If it can be machine washed, set the washing machine to a gentle cycle with cold water. Add a mild detergent to the machine and let it agitate for a few minutes to make sure that the detergent is evenly distributed.
If the tablecloth needs to be hand washed, fill a basin or sink with cold water and add a small amount of mild detergent. Gently agitate the water to create suds, then place the tablecloth in the water and let it soak for about 15 minutes.
After the tablecloth has soaked, gently rub the fabric together to remove any remaining wax residue. Rinse the tablecloth thoroughly with cold water to remove all traces of detergent.
Transitioning into the subsequent section about treating stubborn stains, it’s important to address any lingering wax stains that may still be visible on the tablecloth.
Treat Stubborn Stains
To tackle those stubborn stains on the tablecloth, it’s time to pull out some tricks from my stain-fighting arsenal. When it comes to removing tough stains, there are alternative stain removal methods that can effectively restore your tablecloth to its former glory. Let me share some practical tips and tricks to help you get rid of those pesky candle wax stains.
First, place a few ice cubes in a plastic bag and apply it to the wax. This will harden the wax and make it easier to remove. Once the wax is hardened, gently scrape it off with a dull knife or spoon. Be careful not to damage the fabric.
Next, if there is any residual wax, cover the stained area with a clean white cloth or paper towel. Then, using a warm iron, press down on the cloth or paper towel. The heat from the iron will help transfer the remaining wax onto the cloth or paper towel.
If there are still some stubborn stains left, mix equal parts dishwashing liquid and warm water. Apply the mixture to the stain and gently rub it in. Let it sit for a few minutes, then rinse with cold water.
Now that you’ve successfully treated the stubborn stains, it’s time to move on to the next step: rinse and dry the tablecloth.
Rinse and Dry
To properly rinse and dry a tablecloth after removing stubborn stains like candle wax, start by rinsing the affected area with cold water. Cold water helps to solidify any remaining wax and makes it easier to remove.
After rinsing, allow the tablecloth to air dry or tumble dry on a low heat setting. Make sure the tablecloth is completely dry before storing or using it again to prevent any moisture-related damage.
Rinse with Cold Water
First, rinse the candle wax off the tablecloth with cold water. This is one of the most effective methods for removing wax stains. The cold water helps to harden the wax, making it easier to scrape off. To do this, simply hold the stained area under a running cold water tap.
Make sure the water is cold, as hot water can actually melt the wax and make the stain worse. Gently rub the stained area with your fingers or a soft cloth to loosen the wax. If the stain persists, you can try using a cleaning solution specifically designed for removing wax stains.
After rinsing, it’s important to air dry or tumble dry the tablecloth to ensure that all remaining wax and moisture is removed.
Air Dry or Tumble Dry
Let your lovely linen lay out to dry in the air or tumble dry gently to ensure it’s free of any remaining moisture or remnants of the waxy mess.
After rinsing the tablecloth with cold water, it’s important to choose the right drying method. Air drying is a natural and gentle option that allows the tablecloth to dry at its own pace. It helps prevent any potential damage from high heat and preserves the quality of the fabric.
On the other hand, tumble drying with low heat can speed up the drying process, especially if you’re in a hurry. However, it’s essential to use a low heat setting to avoid shrinking or damaging the tablecloth.
Once the tablecloth is dry, it’s time to move on to the next step: ironing out any remaining wax residue.
Iron the Tablecloth
Gently press the warm iron onto the tablecloth, allowing the heat to melt and lift the candle wax. When it comes to removing candle wax from a tablecloth, ironing can be an effective technique. The heat from the iron helps to soften the wax, making it easier to remove.
To start, set your iron to a low or medium heat setting, ensuring that it’s warm but not too hot. Place a clean white cloth or paper towel over the wax stain to protect the iron and tablecloth. Then, carefully glide the iron over the cloth, using gentle pressure. As the wax heats up, it will begin to transfer onto the white cloth, leaving your tablecloth clean and wax-free.
If you don’t have an iron or prefer not to use one, there are alternative heat sources that can be used. For example, you can use a hairdryer on a low heat setting to gently warm the wax, allowing it to soften and become easier to remove. Another option is to place the tablecloth in the freezer for a few hours, which will harden the wax and make it easier to scrape off.
After ironing the tablecloth, it’s important to check for any residual stains that may be left behind. In the next section, we’ll discuss how to effectively remove these stains and restore your tablecloth to its original condition.
Check for Residual Stains
Now that the tablecloth’s ironed and the wax’s been removed, it’s time to inspect for any lingering stains. Here are four effective stain treatments to help you remove any residual stains:
-
Dish soap: Mix a small amount of dish soap with warm water and gently blot the stain with a clean cloth. Rinse with cold water and repeat if necessary.
-
White vinegar: Create a solution of equal parts white vinegar and water. Dab the stained area with the solution using a cloth or sponge. Rinse with cold water and repeat if needed.
-
Hydrogen peroxide: Apply a small amount of hydrogen peroxide directly to the stain and let it sit for a few minutes. Blot the area with a clean cloth and rinse with cold water.
-
Stain remover: Use a commercial stain remover according to the manufacturer’s instructions. Apply it to the stain, let it sit for the recommended time, and then launder the tablecloth as usual.
By following these effective stain treatments, you can ensure that your tablecloth’s free from any residual stains. Once the stains are gone, it’s important to store the tablecloth properly to prevent any future damage or staining.
Store Properly
When it comes to storing a tablecloth, there are two key points that are essential: folding neatly or rolling and storing in a clean, dry place.
To ensure that your tablecloth remains in pristine condition, it’s important to fold it neatly or roll it up tightly to prevent creases and wrinkles.
Additionally, storing it in a clean, dry place will protect it from dust, moisture, and potential stains.
By following these simple steps, you can prolong the lifespan of your tablecloth and have it ready for the next special occasion.
Fold Neatly or Roll
To achieve a tidier appearance, neatly fold or roll the tablecloth to remove any traces of candle wax. Here are three simple techniques for folding or rolling your tablecloth:
-
The Basic Fold: Start by folding the tablecloth in half lengthwise, then fold it in half again. Next, fold it in thirds widthwise. This technique is great for keeping the tablecloth compact and easy to store.
-
The Roll: Lay the tablecloth flat and roll it tightly from one end to the other. This method is perfect for preventing any creases or wrinkles in the fabric.
-
The Fancy Fold: For a more sophisticated look, try folding the tablecloth into a triangle. Fold it in half diagonally, then fold the pointed end towards the straight edge. Repeat this fold until you achieve the desired size.
Once your tablecloth is neatly folded or rolled, it’s ready to be stored in a clean, dry place.
Store in a Clean, Dry Place
Make sure you carefully store your tablecloth in a clean, dry place to maintain its pristine appearance. Proper storage is essential for preserving the quality of your tablecloth and preventing future stains. To help you in this process, I have compiled a table with three cleaning techniques that can effectively remove candle wax from a tablecloth:
Cleaning Technique | Materials Needed | Instructions |
---|---|---|
Freezing | Ice cubes, plastic bag | Place ice cubes in a plastic bag and gently rub over the wax until it hardens. Scrape off the hardened wax with a dull knife. |
Heat and absorb | Brown paper bag, iron | Place a brown paper bag over the wax and run a warm iron over it. The wax will melt and be absorbed by the bag. |
Dishwashing liquid | Warm water, dish soap | Mix warm water with dish soap and gently dab the mixture onto the wax stain. Blot with a clean cloth until the wax is lifted. |
By following these cleaning techniques and storing your tablecloth properly, you can maintain its pristine appearance and prevent future stains.
Frequently Asked Questions
Can I use a hairdryer to apply heat to the wax stain?
Yes, you can use a hairdryer to apply heat to the wax stain on your tablecloth. However, it’s important to prioritize hairdryer safety. Make sure to keep the hairdryer on a low heat setting and maintain a safe distance from the tablecloth to prevent any damage. If you’re concerned about using a hairdryer, there are alternative heat sources you can consider, such as using an iron on a low heat setting with a protective cloth.
Is it safe to use a knife or any sharp object to scrape off the excess wax?
Using a knife or any sharp object to scrape off excess wax is not recommended because it can damage the fabric and leave behind permanent marks. Instead, consider using a hairdryer or a hot iron to remove wax stains. Both methods involve applying heat to the wax, which will cause it to melt and become easier to remove.
Another option is to place a paper towel or brown paper bag over the wax and iron over it on a low setting. This will help transfer the melted wax onto the paper, leaving your tablecloth clean.
What type of heat source should I use to apply heat to the wax stain?
Using a hairdryer as a heat source is like a gentle breeze melting away the stubborn wax stain. It’s both safe and effective. Simply set the hairdryer to a low heat setting and hold it a few inches away from the wax.
As for using a hot iron, precautions should be taken. Place a thin cloth or paper towel over the wax stain to protect the tablecloth, then gently press the iron on top. Be careful not to leave the iron in one spot for too long to avoid damaging the fabric.
Can I use any type of cloth to blot the wax stain?
You can use different types of fabrics to blot a wax stain, such as cotton or microfiber cloths. These fabrics are absorbent and can effectively lift the wax from the tablecloth.
Alternatively, you can try other methods to remove wax stains from tablecloths, such as freezing the wax and scraping it off, or using an iron and paper bag to melt and absorb the wax. These methods are practical and can help restore your tablecloth to its original condition.
How long should I let the tablecloth air dry before ironing it?
Before ironing the tablecloth, it’s important to ensure that the candle wax has been safely removed from the fabric. To do this, you can use a few methods.
One effective method is to place a brown paper bag or a clean cloth over the wax stain and gently iron over it on a low heat setting. The heat will melt the wax, which will then be absorbed by the paper bag or cloth. Repeat this process until the wax is completely gone.
Conclusion
So there you have it, a step-by-step guide on how to get candle wax off a tablecloth. With a little patience and the right techniques, you can easily restore your tablecloth to its former glory.
Just like removing candle wax, sometimes we encounter obstacles in life that seem impossible to overcome. But with perseverance and the right tools, we can overcome any challenge.
Remember, just like the wax on the tablecloth, the obstacles we face are temporary, and we have the power to clean them up and move forward.
I’m Amelia, and I love making candles. It all started when I was given a kit as a gift. I loved the process so much that I decided to make my own candles.
I soon realized that I had a real talent for it. Before long, my friends and family were asking me to make candles for them too. Word spread, and soon I was inundated with orders.
I love the creativity that goes into making each candle unique. And I love the satisfaction of knowing that people are using something I made with my own hands.