Connect with us

Beginners Guides

How to Burn a Candle Evenly

Published

on

how to burn a candle evenly

If you’re curious about achieving an even burn for your candle, you’ve landed in the perfect spot. To guarantee a uniform burn throughout your candle’s life, there are several important guidelines to follow. These recommendations are crucial to ensure even burning, particularly for candles that feature more than one wick.

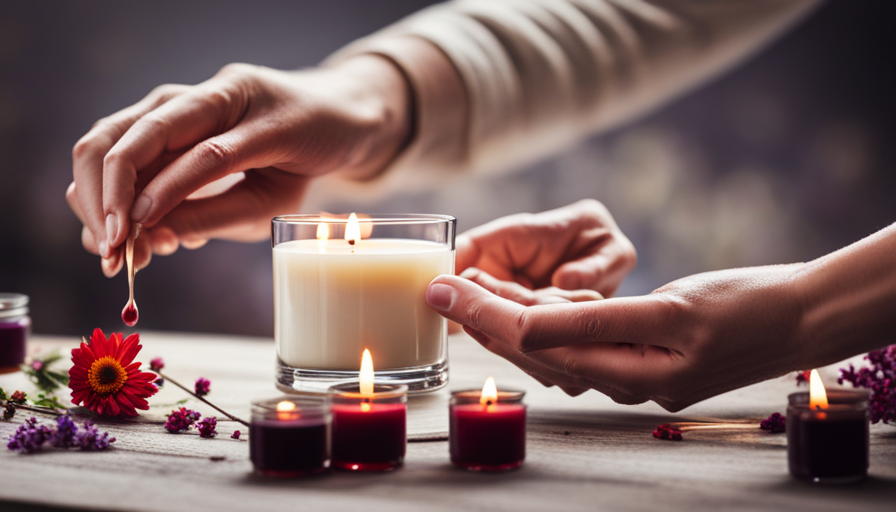
Before lighting a candle, trim the wick.

To avoid excessive smoke, it is important to trim the candle’s wick before lighting it. It is best to use a wick that is a quarter of an inch or less. The flame may become too big if the wick is longer than that. This will cause the candle to not burn evenly.

A well-trimmed candle will produce a clean flame. Untrimmed wicks will cause a smoke alarm and make the candle smell smoky. It is also possible to burn a candle that has built up too much carbon, which will create a smoky odor.

Trim the wick to ensure that your candle burns evenly. This will improve the overall quality of the burn and prolong the life of the candle. A long wick can interfere with the process of gas and wax transformation, creating an uneven flame. Excessive soot can also cause problems.

To burn a candle more evenly, make sure the wick is between three and five millimeters long. This can be done with a pair of scissors. Trimming the wick will extend the life of your candle 2 to 3 times. Before you use your candle for the first time, make sure you do this.

Candles can be dangerous so they should not be used in drafty areas. Drafts will cause the flame to be uneven and may even extinguish it completely. Also, be sure to allow the candle to cool for two hours before lighting it again. A candle should also not be burned more than four hours without rest. If you want to keep the candle burning for more than four hours, remove it from its container and let it cool. It will burn too fast and leave behind soot and smoke if it is not taken care of.

Trimming the wick before burning a candle is a simple process that can save you a great deal of trouble in the long run. You can trim the wick with a pair of scissors or nail clippers before lighting it. To remove any debris, clean the wick after trimming it. After the wick has been cleaned it is time for the candle to be lit. To ensure an even burn, make sure to leave a half-inch of wax in the jar.

Trim the wick before burning a pillar candle

If you want to burn your pillar candle evenly, you must trim the wick before lighting it. The wick should be approximately 1/4 inch longer than your candle’s diameter. The wick is the portion of the candle that extends above the wax pool. This will prevent the wick from becoming tunnel-shaped and causing flame spikes.

A pillar candle should be burned within a quarter inch of its edge in order to burn evenly. Be sure to burn the candle slowly, and avoid burning it for too long. The wick can become too dry if it is burned for too long. Also, make sure that the wax pool is free of debris, as it can clog the wick. Check the candle periodically to see if the wick is dripping or is burning too fast.

Scrape the melted wax off a pillar candle using a paper towel or cotton ball. To ensure even burning, make sure the wick is not below the melt pool. You should also put the pillar candle in a holder that is cupped to hug the edges. This way, the wick won’t tunnel and will be able to burn evenly.

If your pillar candle is too short, trim the wick before you light it. This will ensure an even burn with fewer soots. Using nail clippers can help you with this. As a general rule, the wick should be about the width of your little finger. For the first burn, make sure to burn the candle for two to three hours. This will maximize the fragrance throw and prevent the candle from “tunneling” in the middle.

Also, make sure to burn your candle in an even spot away from windows and drafts. An uneven burn can cause dangerous conditions. The wick should be approximately half an inch in length if you want your candle burn evenly. Your candle will overheat and tunnel if it is too long. The wick will also be more likely to float.

I'm Amelia, and I love making candles. It all started when I was given a kit as a gift. I loved the process so much that I decided to make my own candles. I soon realized that I had a real talent for it. Before long, my friends and family were asking me to make candles for them too. Word spread, and soon I was inundated with orders. I love the creativity that goes into making each candle unique. And I love the satisfaction of knowing that people are using something I made with my own hands.

Continue Reading

Beginners Guides

How To Remove Wax From Candle Stick

Published

on

By

An image depicting a step-by-step guide on removing wax from a candlestick

Much like a moth is irresistibly attracted to the gentle and shimmering light of candles, I find myself captivated by their soothing and magical radiance. Although, candles can leave behind a challenging layer of wax buildup on candlesticks over time. The thought of eliminating this wax accumulation might appear overwhelming, but don’t worry! You can easily bring your candlestick back to its original shine with some easy-to-follow steps.

Firstly, assess the wax buildup on your candlestick. Is it thick or thin? This will determine the best method for removal.

Next, freeze the candlestick by placing it in the freezer for a couple of hours. Once frozen solid, carefully scrape off the hardened wax using a plastic scraper or credit card.

To remove any residual wax, apply heat using a hairdryer on low setting or place the candlestick in warm water until the remaining wax softens. Wipe away the softened wax with a cloth soaked in warm water.

After cleaning off all traces of wax, polish and buff your candlestick to bring back its shine.

Finally, apply a protective wax coating to prevent future build-up and store it properly to maintain its beauty.

With these techniques at your disposal, you can bid farewell to unwanted wax on your beloved candlesticks and enjoy their radiant glow once more!

Key Takeaways

  • Freezing the candlestick before removing wax can make it easier to scrape off.
  • Applying heat with a hairdryer or warm water can help soften and remove residual wax.
  • Regularly cleaning candle holders and trimming candle wicks can prevent wax buildup.
  • Applying a protective wax coating and storing candlesticks properly can help maintain their beauty and prevent future buildup.

Assess the Wax Buildup

Now, take a close look at your candlestick and assess the wax buildup that’s accumulated over time. You’ll be amazed at how much of a difference removing it’ll make in restoring the beauty of your candlestick.

Assessing wax buildup is essential before proceeding with any troubleshooting wax removal techniques. Start by examining the candlestick from different angles and inspecting every crevice where wax may have dripped or pooled. Note the thickness and extent of the wax buildup, as this’ll determine which method you should use for removal. Look out for any discoloration or damage caused by the hardened wax.

Next, identify any areas where the wax might be stuck more firmly, such as cracks or intricate designs. These areas may require additional attention during the removal process to ensure thorough cleaning without causing any harm to the candlestick itself.

Once you’ve assessed the wax buildup, you can move on to freezing the candlestick using an appropriate method. Freezing will help harden the wax, making it easier to remove later on.

Freeze the Candlestick

First, you’ll want to chill your candle holder in the freezer. Freezing the candlestick is a simple yet effective method to remove wax buildup. Not only does it make the wax brittle and easier to remove, but it also has other alternative uses that come in handy.

Before proceeding with this technique, it’s important to take safety precautions. Ensure that there are no flammable materials nearby and handle the frozen candlestick with care to avoid any injuries.

To freeze the candlestick, place it securely in a plastic bag or wrap it tightly with plastic wrap to prevent any contact with food items in your freezer. Leave it inside for at least two hours or until the wax is completely frozen solid.

Freezing not only helps remove excess wax from your candle holder but also provides an opportunity for repurposing old candles or creating new ones. Once the candlestick is frozen, you can easily scrape off the frozen wax using a dull knife or your fingernail without damaging the surface of your holder.

With the frozen wax removed, you can now move on to the next step of scraping off any remaining residue from your candle holder.

Scrape off the Frozen Wax

To effectively remove the frozen wax, gently scrape it off using a dull knife or your fingernail.

Here are four scraping techniques you can try using common household items:

  1. Use a credit card: Slide the edge of a credit card under the wax and slowly lift it away from the surface of the candlestick.

  2. Employ a plastic spatula: Similar to the credit card method, insert a plastic spatula under the frozen wax and carefully pry it off.

  3. Utilize a spoon: Hold a metal spoon upside down and heat its bowl with hot water for a few seconds. Press the warm spoon against the wax, causing it to soften and stick to the metal. Then, gently scrape off the softened wax.

  4. Try adhesive tape: Wrap a piece of adhesive tape around your finger with the sticky side facing outward. Press it onto the wax and peel it away in one swift motion, pulling up as much wax as possible.

By employing these scraping techniques using household items, you can effectively remove most of the frozen wax from your candlestick.

Transitioning into our next section about using heat to remove residual wax…

Use Heat to Remove Residual Wax

Next, you’ll want to unleash the fiery power of heat to liberate every last stubborn vestige of that waxy intruder clinging to your beloved candle holder. Using a hairdryer is an effective method for melting the wax away. Hold the hairdryer about 6 inches away from the wax and set it on high heat. As you apply the heat, you will notice the wax starting to melt and become liquid again. Be careful not to hold the hairdryer too close or for too long, as it can cause damage to certain materials.

If there are still remnants of wax left after using the hairdryer, another option is to use boiling water to dissolve the residual wax. Fill a bowl or sink with enough boiling water to submerge your candlestick holder. Carefully place your candlestick holder into the boiling water and let it sit for a few minutes. The hot water will soften and dissolve any remaining wax.

Once you have successfully removed all traces of wax using heat, it’s time to move on to the next step: wiping with a cloth and warm water.

Wipe with a Cloth and Warm Water

After using heat to eliminate all remnants of wax, I proceed to gently wipe the candle holder with a soft cloth soaked in warm water. This method is an effective way to remove any remaining residue and restore the candlestick’s original appearance. The warmth of the water helps soften the wax, making it easier to wipe away without causing any damage to the surface.

When wiping, it’s important to use a soft cloth to avoid scratching or damaging the candle holder. I recommend using a microfiber cloth as it’s gentle yet effective in removing dirt and grime. Begin by dipping the cloth into warm water and wringing out any excess moisture. Then, carefully wipe down the entire surface of the candlestick, paying special attention to areas where wax may have accumulated.

In addition to removing existing wax, this method also helps prevent future buildup. By regularly wiping down your candle holders with warm water, you can keep them clean and free from residue. This will not only maintain their aesthetic appeal but also ensure that they function properly when you need them for future use.

Now that we’ve successfully removed residual wax using warm water, let’s move on to discussing alternative methods such as using vinegar or rubbing alcohol for stubborn stains without causing any damage or discoloration.

Use Vinegar or Rubbing Alcohol for Stubborn Stains

If you’re dealing with stubborn stains on your candle holder, try using vinegar or rubbing alcohol as an effective solution.

For example, imagine you have a beautiful glass candle holder that has accumulated tough, dried-on wax residue over time. Vinegar and rubbing alcohol are both natural alternatives for removing wax stains from various surfaces.

To begin, gather a soft cloth or sponge and soak it in either vinegar or rubbing alcohol. Gently rub the stained area with the cloth in a circular motion. The acidity of the vinegar or the solvent properties of rubbing alcohol will help dissolve the wax and lift it away from the surface. Be sure to apply enough pressure to remove all traces of wax without damaging the material of your candle holder.

Additionally, preventing wax buildup on candlesticks can help avoid future stubborn stains. Trim your candles’ wicks regularly to prevent excess dripping and ensure even burning. Placing a small dish beneath your candle can also catch any melting wax before it reaches your holder.

By utilizing vinegar or rubbing alcohol as cleaning agents for stubborn wax stains and implementing preventative measures, you can maintain the pristine appearance of your candle holders effortlessly. Once you’ve successfully removed all traces of wax residue, transition into polishing and buffing your candlestick for that extra shine without leaving any streaks behind.

Polish and Buff the Candlestick

After successfully removing stubborn stains with vinegar or rubbing alcohol, the next step in restoring the beauty of your candlestick is to polish and buff it. To achieve a high shine on your candlestick, you’ll need the proper tools. A soft cloth or microfiber cloth is ideal for polishing as it won’t scratch the surface. You’ll also need a metal polish specifically designed for the type of material your candlestick is made of, such as brass or silver.

Begin by applying a small amount of metal polish onto the cloth and gently rub it onto the surface of the candlestick in circular motions. Be sure to cover all areas evenly. Pay special attention to any intricate details or crevices where wax residue may still be present.

Once you’ve applied the metal polish, use another clean section of the cloth to buff and shine your candlestick. Apply some pressure while buffing to bring out that beautiful luster.

By following these techniques and using appropriate tools, you can achieve a high shine on your candlestick, restoring its original elegance and charm. This’ll set a perfect foundation for the final step: applying a protective wax coating that’ll further enhance its appearance and preserve its beauty for years to come.

Apply a Protective Wax Coating

To preserve the radiant shine of your newly polished candlestick, it’s time to apply a protective wax coating that’ll ensure its lasting beauty. A wax coating doesn’t just add an extra layer of protection but also enhances the overall appearance of the candlestick.

Here are three alternatives to consider for a protective wax coating:

  1. Beeswax: Known for its natural properties, beeswax offers excellent protection against dust and moisture. It creates a smooth and glossy finish, enhancing the visual appeal of your candlestick.

  2. Carnauba Wax: Derived from palm leaves, carnauba wax is renowned for its durability and high melting point. This makes it ideal for withstanding heat produced by burning candles while providing long-lasting protection.

  3. Microcrystalline Wax: This synthetic wax is commonly used in conservation work due to its excellent resistance to temperature changes and aging. It forms a strong barrier against dirt and pollutants, ensuring your candlestick retains its luster for years to come.

Applying a protective wax coating has several benefits including preventing dust accumulation, repelling moisture, and reducing tarnish or oxidation on the surface of your candlestick. By doing so, you’ll maintain its original shine and prolong its lifespan.

Now that we’ve protected our candlestick with a reliable wax coating, let’s move on to learn how we can store it properly to prevent future buildup without compromising its aesthetics or quality.

Store Properly to Prevent Future Buildup

Make sure you store your candlestick in a clean and dry area to prevent future buildup and maintain its pristine condition. Preventive measures are essential in ensuring that no more wax residue accumulates on the surface. Proper storage techniques can greatly help in achieving this goal.

Firstly, make sure to remove any excess wax from the candlestick before storing it. You can do this by gently scraping off the remaining wax using a plastic scraper or a dull knife.

Next, wrap the candlestick in a soft cloth or tissue paper to protect it from dust and moisture. Place it in a sturdy box or container with a lid to further shield it from potential damage.

Additionally, keep the candlestick away from direct sunlight or extreme temperatures as these can cause the wax to melt and stick onto other surfaces.

By following these proper storage techniques, you can ensure that your candlestick remains free of wax residue for future use.

Now let’s explore some alternative methods and tips for removing any existing wax residue without causing any damage to the candlestick itself…

Alternative Methods and Tips for Removing Wax Residue

Looking for other ways to get rid of leftover wax on your candlestick? Let’s explore some alternative methods and handy tips that won’t damage your precious candle accessory.

When it comes to candlestick maintenance, natural wax removal methods are a great option. Here are three sub-lists with different emotions evoked:

  • Efficiency: One effective method is placing the candlestick in the freezer for a couple of hours. The cold temperature causes the wax to contract, making it easier to chip away with a butter knife or your fingernail.

  • Gentleness: Another gentle approach is using hot water. Fill a bowl with warm water and place the candlestick inside, allowing the residual wax to soften. Once soft, gently scrape off the wax using a plastic card or your fingers.

  • Eco-friendly: For those who prefer eco-friendly solutions, try using vinegar or lemon juice. Soak a cloth in either liquid and apply it directly to the wax residue. The acid in these substances helps dissolve the wax without causing any harm.

By utilizing these alternative methods and following these handy tips, you can effectively remove wax from your candlestick without causing any damage or scratches. Remember to always be cautious when handling sharp objects and hot water. Happy cleaning!

Frequently Asked Questions

Can I use a hairdryer instead of freezing the candlestick to remove wax?

Using a hairdryer as an alternative to freezing the candlestick can be a viable option for removing wax. By applying gentle heat from the hairdryer, the wax will melt and become easier to remove without the need for freezing. However, it’s essential to exercise caution and avoid direct contact with the flame or overheating the candlestick. Remember, safety should always come first when dealing with any kind of heat source near flammable objects.

How long should I freeze the candlestick before attempting to scrape off the wax?

Before attempting to scrape off the wax, I’d recommend freezing the candlestick for at least two hours. This allows the wax to harden and become easier to remove. Once frozen, you can use scraping techniques such as using a butter knife or credit card to gently scrape off the wax.

Alternatively, you can try alternative methods like using a hairdryer to melt the wax and then wiping it away with a cloth.

What type of cloth should I use to wipe off the residual wax with warm water?

When it comes to wiping off residual wax with warm water, I suggest using a soft, lint-free cloth. The right cloth can make all the difference in effectively removing the wax without causing any damage or leaving behind any fibers.

Microfiber cloths or old cotton t-shirts work well for this task. Alternatively, you can try using rubbing alcohol or a commercial wax remover for stubborn residue.

Can I use a different type of cleaning solution instead of vinegar or rubbing alcohol for stubborn stains?

For stubborn stains, there are alternative cleaning solutions that can be effective. While vinegar and rubbing alcohol are commonly used, other options include baking soda paste or dish soap mixed with warm water.

Baking soda paste can be made by combining baking soda with a small amount of water to form a thick consistency. Apply the paste to the stain and let it sit for a few minutes before scrubbing with a cloth.

Dish soap mixed with warm water can also be effective in breaking down stubborn stains.

How often should I apply a protective wax coating to the candlestick to prevent future wax buildup?

To prevent future wax buildup on my candlestick, I should regularly apply a protective wax coating. There are alternative options available, such as beeswax or paraffin wax. The frequency of applying the protective wax depends on how often I use the candlestick and how quickly wax accumulates. It’s recommended to apply a new coat every few months or whenever I notice a significant amount of wax buildup occurring.

Conclusion

As I wiped away the last remnants of wax from my candlestick, a sense of accomplishment washed over me. It was more than just removing wax; it was a symbol of renewal and transformation. The process may have been meticulous, but every step was worth it to restore the candlestick’s beauty.

Now, as it sits proudly on display, it serves as a reminder that with patience and care, we can overcome any obstacle. So go forth and conquer those stubborn wax stains, for in doing so, you’ll unleash your own inner strength and resilience.

Continue Reading

Beginners Guides

How To Remove Wax From A Tablecloth

Published

on

By

An image that depicts a close-up view of a tablecloth with spilled wax

Have you ever encountered the mishap of dripping candle wax over your beloved tablecloth? It resembles observing a stream of liquid lava glide over an untouched terrain. However, worry not, for I am here to lead you through the method of eliminating that persistent wax stain and bringing your tablecloth back to its original splendor.

In this article, I will show you step-by-step how to tackle this waxy dilemma. We’ll start by assessing the damage and determining the best course of action. Then, armed with a scraper and some heat, we’ll remove as much excess wax as possible.

Next, we’ll employ a powerful cleaning solution to blot away any remaining residue.

But what about those pesky stains that just won’t budge? Don’t worry – we have a plan for those too. We’ll target them with some extra TLC until they surrender their hold on your beautiful tablecloth.

So gather up your supplies and let’s get started! With a little patience and determination, you’ll soon be marveling at your clean and flawless tablecloth once again.

Key Takeaways

  • Different fabrics require different cleaning methods for removing wax stains.
  • Heat can be applied to melt and remove wax from a tablecloth.
  • A cleaning solution appropriate for the fabric type should be used to blot the wax stain.
  • Rubbing or scrubbing the stain should be avoided to minimize potential damage to the fabric.

Assess the Damage

Take a close look at the tablecloth and assess the damage caused by the wax spill. This step is crucial in determining the best course of action to restore its pristine condition.

Start by examining the affected area to see how deeply the wax has penetrated into the fabric. Look for any discoloration, hardening, or residue left behind. It’s also important to determine the type of fabric your tablecloth is made of, as different materials require different cleaning methods.

If you notice that the wax has only superficially coated the surface of the tablecloth, with no signs of staining or residue, you’re in luck! You can proceed directly to scraping off excess wax without causing further damage.

On the other hand, if you observe deep penetration or if your tablecloth is made of delicate fabric like silk or lace, extra care will be needed during removal.

Transitioning into scraping off excess wax: Once you have assessed the damage and determined your fabric type, it’s time to move on to removing any excess wax from your tablecloth.

Scrape off Excess Wax

To remove excess wax from a tablecloth, I first grab a dull knife or credit card and gently scrape off as much wax as possible. It’s important to be cautious while doing this so as not to damage the fabric.

Afterwards, I use either a vacuum cleaner or lint roller to effectively remove any loose wax particles that may still remain on the tablecloth.

Use a dull knife or credit card to gently scrape off as much wax as possible

Start by gently using a dull knife or credit card to scrape off as much wax as you can, just like peeling away layers of an onion to reveal its true beauty. Here’s how:

  1. Angle the knife or card at the edge of the wax stain and apply light pressure, moving in a back-and-forth motion.nn2. Be careful not to press too hard, as this may damage the fabric underneath.nn3. Gradually work your way towards the center of the stain, removing thin strips of wax with each scrape.nn4. If necessary, use your fingers to pick off any remaining small bits.

This method is a vacuum cleaner alternative that allows you to physically remove most of the wax without leaving residue behind. However, be careful not to damage the fabric while doing so.

Now, let’s move on to the next section about being careful not to damage the fabric.

Be careful not to damage the fabric

Be mindful of the delicate fabric underneath, ensuring that you don’t harm its intricate design while gently scraping off the wax residue. Assess fabric damage before attempting to remove the wax. Examine the fabric closely for any signs of discoloration or tears caused by the scraping process. If you notice any damage, it’s best to stop and consider alternative methods to avoid further harm.

To prevent fabric damage, use a dull knife or credit card with a gentle touch and be cautious not to apply too much pressure. Once you have successfully removed as much wax as possible without damaging the fabric, transition into using a vacuum cleaner or lint roller to remove loose wax particles.

Use a vacuum cleaner or lint roller to remove loose wax particles

Once you’ve finished scraping off the wax residue, grab a trusty vacuum cleaner or lint roller to easily whisk away any loose particles. Here’s how these tools can help you effectively remove wax from your tablecloth:

  1. Vacuum cleaner: Gently run the vacuum cleaner over the wax-stained area, using a brush attachment if available. The suction power will pull up any remaining loose wax particles.

  2. Lint roller: Roll the sticky adhesive surface of the lint roller over the affected area in short strokes. The sticky tape will pick up small bits of wax that might be stuck to the fabric.

  3. Repeat as necessary: Continue using either tool until all visible loose wax is removed from the tablecloth.

  4. Inspect and reapply if needed: After cleaning, inspect the cloth closely for any remaining wax residue before proceeding to apply heat.

With these methods, you can ensure a thorough removal of loose wax particles before moving on to applying heat for further stain removal.

Apply Heat

To begin tackling the wax stain on your tablecloth, gently warm it with a hairdryer, melting the wax away like snow under a warm sun. Applying heat is an effective method to loosen and remove wax from fabric.

The heat will cause the wax to melt, making it easier to lift off the tablecloth. If you don’t have a hairdryer, there are alternative methods you can try. You can place a clean cloth over the wax spot and iron over it on a low heat setting. The heat will transfer from the iron to the cloth, melting the wax and transferring it onto the clean cloth.

Another option is to use hot water by placing a towel underneath the tablecloth and pouring boiling water directly onto the affected area. This will help dissolve and remove any remaining residue.

Now that you’ve applied heat to remove most of the wax from your tablecloth, it’s time to move on to blotting with a cleaning solution.

Blot with a Cleaning Solution

To remove wax from a tablecloth, I suggest applying a small amount of an appropriate cleaning solution to a clean cloth. Gently blot the wax stain, starting from the outer edges and working towards the center. Avoid rubbing or scrubbing, as this can push the stain deeper into the fabric.

Apply a small amount of an appropriate cleaning solution to a clean cloth

Gently dab a cloth soaked in the cleaning solution onto the wax stain, allowing it to work its magic on your tablecloth. Choose a cleaning solution that’s appropriate for the type of fabric your tablecloth is made of. For example, if you have a cotton or polyester tablecloth, use a mild dish soap mixed with warm water. If you’re dealing with a delicate fabric like silk or satin, opt for an enzyme-based cleaner designed for removing stains. Be careful not to over-saturate the cloth with the solution, as this could spread the wax further into the fabric.

Once you’ve applied the cleaning solution to the cloth, gently blot the wax stain working from the outer edges toward the center. This method helps prevent spreading and ensures that all traces of wax are effectively lifted from your tablecloth.

Blot the wax stain gently, working from the outer edges toward the center

After applying a small amount of an appropriate cleaning solution to a clean cloth, it’s time to tackle the wax stain on your tablecloth. To begin, gently blot the stain, starting from the outer edges and working your way toward the center. This method helps prevent spreading and pushing the wax deeper into the fabric. As you continue blotting, you may notice that some of the wax transfers onto the cloth. Don’t worry, this is a good sign!

However, if there is still residue left after blotting, you can move on to applying heat to further remove it. Use an iron set on low heat and place a clean cloth over the stain. Gently press down for a few seconds at a time until all traces of wax are lifted from your tablecloth.

Remember to avoid rubbing or scrubbing as this may push the stain deeper into the fabric.

Next section: ‘Avoid rubbing or scrubbing, as this may push the stain deeper into the fabric.’

Avoid rubbing or scrubbing, as this may push the stain deeper into the fabric

Rubbing or scrubbing the stain on your tablecloth is like trying to move a mountain with a toothpick. It’s important to avoid these actions, as they can actually make the situation worse by pushing the wax deeper into the fabric. Instead, try using a gentler approach to remove the wax and minimize any potential damage.

Here are some tips to consider:

  • Assessing damage: Before proceeding, take a closer look at the tablecloth to evaluate how deeply the wax has penetrated.

  • Applying heat: Use a hairdryer on low heat or an iron on low setting with a paper towel over the wax stain. The heat will help melt and lift the wax from the cloth.

  • Scraping gently: After applying heat, use a plastic scraper or credit card edge to carefully scrape off any remaining residue.

  • Blotting with absorbent material: Place an absorbent material like brown paper bags or clean white towels under and over the stained area, then press down firmly to blot up any melted wax.

  • Repeating if necessary: If there’s still some residue left after following these steps, don’t worry! You can repeat them until you achieve desired results.

By following these techniques, you can effectively remove wax from your tablecloth without causing further harm. Now let’s move on to rinsing and repeating for even better results.

Rinse and Repeat

To effectively remove wax from a tablecloth, you’ll want to repeat the rinsing process until all traces of wax have vanished.

Start by assessing the damage: check if there are any remaining stains or residue on the fabric. If so, proceed with caution and continue rinsing.

Begin by holding the tablecloth under cold running water, allowing it to flow directly onto the affected area. The cold temperature will help solidify the wax, making it easier to remove. Gently rub the fabric together to loosen any stubborn bits of wax.

Next, inspect the cloth for any remaining stains. If you notice discoloration or lingering marks, repeat the rinsing process using a mild detergent or stain remover specifically designed for delicate fabrics. This will target and eliminate any leftover stains while preserving the integrity of your tablecloth.

After thoroughly rinsing and assessing for any residual wax or stains, transition into laundering the tablecloth. By following these steps diligently and repeating as necessary, you can ensure that your tablecloth is restored to its original condition without any remnants of wax or unsightly marks.

Launder the Tablecloth

When laundering a tablecloth, it’s important to first check the care instructions for the appropriate washing method. I typically use a mild detergent and cold water to wash my tablecloth, as this helps preserve its color and fabric.

After washing, I make sure to follow the care instructions for drying or air-drying the tablecloth to ensure it maintains its shape and quality.

Check the care instructions on the tablecloth for the appropriate washing method

First things first, take a moment to actually read the care instructions on that fancy tablecloth of yours before you dive into any cleaning methods. The washing instructions provided will guide you in choosing the appropriate method for removing wax stains. Some tablecloths may require special care, such as dry cleaning or hand washing, while others can be safely laundered in the washing machine. If the care instructions specify machine washable, you have alternative cleaning methods available as well.

For instance, freezing the wax and scraping it off with a blunt knife can be effective. Once you’ve checked the care instructions and determined the suitable method, proceed to wash the tablecloth using a mild detergent and cold water to further eliminate any remaining wax residue without damaging the fabric.

Wash the tablecloth using a mild detergent and cold water

Before you start tackling the wax stains on your beautiful tablecloth, it’s time to give it a gentle wash. Use a mild detergent and cold water to remove any dirt or debris that may be on the fabric before addressing the wax.

Assess the damage by checking if any wax residue remains after washing. If there are still visible stains, proceed with caution. Applying heat can set the stain permanently. Instead, consider trying an alternative method like freezing the affected area and gently scraping off the hardened wax.

Once you have successfully removed all traces of wax, follow the care instructions for drying or air-drying the tablecloth. This will ensure its longevity and maintain its quality without causing any further damage or shrinkage.

Follow the care instructions for drying or air-drying the tablecloth

After washing the tablecloth, it’s important to follow the care instructions for drying or air-drying to ensure its longevity and maintain its quality.

For example, my friend once accidentally put her delicate lace tablecloth in the dryer and ended up shrinking it significantly.

To assess any damage caused by the wax, carefully inspect the tablecloth for any discoloration or residue.

If there are remaining wax stains, avoid applying heat directly as it can set the stain further into the fabric. Instead, use a clean cloth or paper towel to gently blot away any excess wax.

Then, place a brown paper bag or several layers of absorbent paper towels over the stained area and apply gentle heat with an iron on low setting. This will help lift the wax from the tablecloth fibers.

Finally, transition into treating stubborn stains by addressing any remaining discoloration or residue left behind by the wax without repeating ‘step’.

Treat Stubborn Stains

To effectively treat stubborn stains on your tablecloth, gently scrape off any excess wax using a dull knife or spoon. Be careful not to damage the fabric while doing this.

Once you’ve removed as much wax as possible, place a few layers of absorbent paper towels or white cloth over the stained area. Set your iron to the lowest heat setting and gently press it onto the paper towels or cloth. The heat will cause the remaining wax to melt and transfer onto the absorbent material.

Continue moving the paper towels or cloth around until no more wax is being transferred.

If there are still traces of stain left after using this method, you can try applying a mixture of dish soap and warm water directly on the affected area. Gently scrub with a soft brush or sponge in circular motions, working from the outside inwards. Rinse thoroughly with cold water to remove any soap residue.

Inspect the tablecloth after treating stubborn stains and repeat these steps if necessary. It’s important to ensure that all traces of wax and stain are completely gone before proceeding with further cleaning methods.

Inspect and Repeat if necessary

Take a close look at the tablecloth and give it another go if you still spot any stubborn stains. Sometimes, even after treating the stains, there might be remnants of wax left behind. In this case, it’s important to repeat the process to ensure complete removal.

Start by scraping off any excess wax using a butter knife or credit card. Then, place a clean white cloth or paper towel over the stained area and apply gentle heat with an iron on low setting. The heat will help melt the remaining wax and transfer it onto the cloth or paper towel.

Once you’ve repeated this process, inspect the tablecloth again for any remaining stains. If you notice any, don’t worry! There are still prevention measures that can be taken before moving on to the next step of ironing and storing. For future protection against wax spills, consider using a tablecloth made from stain-resistant fabric or coating your existing tablecloth with a fabric protector spray.

Now that you’ve inspected and repeated if necessary, it’s time to move on to the next section about ironing and storing your tablecloth without writing ‘step’.

Iron and Store

To iron the tablecloth, I recommend using a low heat setting to avoid damaging the fabric. Start from one end and move the iron in smooth, gentle strokes to remove any wrinkles.

Once you’ve finished ironing, fold the tablecloth neatly and store it in a cool, dry place to prevent any moisture or damage. For added protection, consider using a protective cover or wrapping the tablecloth in acid-free tissue paper to keep it safe from dust and potential stains.

Iron the tablecloth on a low heat setting to remove any wrinkles

Gently press the iron on a low heat setting to smooth out any wrinkles in the tablecloth. This will ensure that the tablecloth looks presentable and ready for use. Here are three steps you can follow to effectively remove wax from your tablecloth:

  1. Assessing damage: Before ironing, check the tablecloth for any remaining wax residue or stains. If there are still visible wax particles, proceed to the next step.

  2. Vacuuming wax particles: Use a vacuum cleaner with a brush attachment to gently remove any loose wax particles from the fabric. Be careful not to apply too much pressure as this may push the wax further into the fibers.

  3. Ironing on low heat: Once you’ve assessed and vacuumed the tablecloth, place it on an ironing board and gently press the iron over any remaining wrinkles or wax stains. The low heat setting will gradually melt away any residual wax without damaging the fabric.

After ensuring that all wrinkles and wax residues have been removed, it’s time to fold the tablecloth neatly and store it in a cool, dry place for future use.

Fold the tablecloth neatly and store it in a cool, dry place

Once you’ve finished with it, make sure to fold the tablecloth neatly and store it in a cool, dry place to preserve its quality for future use. Did you know that properly storing your tablecloth can extend its lifespan by up to 50%?

Before storing, assess the damage on the tablecloth caused by the wax spill. If there are any remaining stains, refer back to previous subtopics for tips on how to remove them effectively. When folding, take care not to trap any excess wax between layers as this can cause further damage.

A cool and dry storage area is crucial to prevent mold or mildew growth on the fabric. Consider using a protective cover or wrapping the tablecloth in acid-free tissue paper for added protection against dust and moisture during storage transition into the subsequent section about ‘consider using a protective cover or wrapping the tablecloth in acid-free tissue paper’.

Consider using a protective cover or wrapping the tablecloth in acid-free tissue paper

Consider protecting your tablecloth by using a cover or wrapping it in acid-free tissue paper to ensure its longevity and preserve its beauty. Here are three reasons why this method is beneficial:

  1. Shield from dust and dirt: A protective cover acts as a barrier, preventing dust particles and dirt from settling on the tablecloth. This helps keep it clean and reduces the need for frequent washing.

  2. Protection against spills and stains: A cover provides an extra layer of defense against accidental spills or stains that may occur during storage or transportation. It can help minimize damage and make cleaning easier.

  3. Acid-free tissue alternatives: If you prefer not to use a cover, consider wrapping the tablecloth in acid-free tissue paper instead. Acid-free tissue is gentle on delicate fabrics, preventing discoloration or deterioration over time.

By taking these precautions, you can ensure that your tablecloth remains in pristine condition until its next use.

Now, let’s move on to how you can enjoy your clean tablecloth without any worries.

Enjoy your clean tablecloth

Now that your tablecloth’s free from wax, you can fully appreciate its pristine beauty. Cleaning techniques play a crucial role in maintaining the cleanliness of your tablecloth. One effective method to remove wax involves placing a brown paper bag or clean cloth over the affected area and applying heat with an iron on a low setting. The heat transfers the melted wax onto the paper or cloth, leaving your tablecloth spotless.

Another option is freezing the wax by placing ice cubes in a plastic bag and gently rubbing it over the stain until it hardens. Then, scrape off the frozen wax using a butter knife or credit card.

Prevention tips are also essential to keep your tablecloth wax-free for longer periods. Consider using candles with drip-less technology or utilizing candle holders with built-in catch trays to prevent any spills onto your precious fabric. Additionally, avoid placing hot objects directly on the tablecloth and always handle candles with care to prevent accidents.

By following these cleaning techniques and prevention tips, you can ensure that your tablecloth remains beautiful and free from any pesky wax stains.

Frequently Asked Questions

Can I use a hairdryer instead of an iron to apply heat to the wax?

Yes, you can use a hairdryer instead of an iron to apply heat to the wax. Both tools effectively melt the wax, making it easier to remove from a tablecloth. However, using a hairdryer may have benefits over an iron. It allows for more control and reduces the risk of burning or damaging the fabric. Simply direct the hot air onto the wax until it melts, then blot it away with a paper towel or cloth.

Is it safe to use bleach on the tablecloth to remove any remaining stains?

Using bleach on a tablecloth can be risky and may cause damage or discoloration. Instead, consider alternative stain removal methods that don’t involve bleach. For example, you can try using a mixture of dish soap and warm water to gently blot the stain.

Alternatively, you can use hydrogen peroxide or white vinegar as natural stain removers. These methods are safer for your tablecloth and still effective in removing stubborn stains.

Can I use a paper towel instead of a clean cloth to blot the cleaning solution?

Using a paper towel for blotting the cleaning solution has both pros and cons. The advantage is that it’s easily accessible and disposable, making clean-up convenient. However, paper towels may not be as absorbent as a clean cloth, which could make it less effective in removing the wax. Additionally, using a paper towel might leave behind lint or fibers on the tablecloth. It’s important to weigh these factors when deciding which material to use for blotting the cleaning solution.

How long should I let the cleaning solution sit on the wax before blotting?

I wouldn’t recommend letting the cleaning solution sit on the wax for too long, as it may cause damage to the fabric. The amount of time you should let it sit can vary depending on the type of fabric. For delicate fabrics, it’s best to avoid leaving the cleaning solution for more than a couple of minutes.

However, for sturdier fabrics, you can leave it for up to 10-15 minutes before blotting. It’s always a good idea to test a small inconspicuous area first before proceeding with the entire stain removal process.

Is it necessary to repeat the rinsing process multiple times, or is once enough?

It may seem like one rinse should be enough, but repeating the rinsing process can actually enhance the effectiveness of removing wax from a tablecloth.

By rinsing multiple times, you ensure that all traces of wax are thoroughly removed, leaving your tablecloth clean and free from any residue. This extra step guarantees a more successful outcome in restoring your tablecloth to its original condition.

Conclusion

After following these simple steps, my tablecloth is now wax-free and ready to be used again. I carefully assessed the damage, scraped off the excess wax, and applied heat to melt away any remaining residue.

With a cleaning solution and some blotting, I was able to remove stubborn stains as well. After rinsing and repeating the process if necessary, I ironed the tablecloth to ensure it looked crisp and stored it away for future use.

I can now enjoy my clean and fresh-smelling tablecloth once again.

Continue Reading

Beginners Guides

How To Remove Wax From A Tablecloth

Published

on

By

An image capturing the step-by-step process of removing wax from a tablecloth: a gentle hand lifting a chilled bag of ice, a focused hand scraping off hardened wax, and a clean, pristine tablecloth emerging beneath

Were you aware that around 10 million tablecloths get spoiled annually because of wax drippings? Ensure that your beloved tablecloth doesn’t end up as just another number!

In this article, I will share a step-by-step guide on how to effectively remove wax from a tablecloth, so you can enjoy your meals without any waxy residue. With just a few simple supplies and some easy-to-follow techniques, you’ll be able to restore your tablecloth to its former glory in no time.

From freezing and scraping off excess wax to using an iron and stain remover, I’ll cover all the necessary steps for a successful wax removal process. So, grab those supplies and let’s get started on transforming your waxy mess into a fresh and clean tablecloth once again!

Key Takeaways

  • Hot water can be used to soften wax for easier removal.
  • Rubbing alcohol is effective in removing color stains from colored wax.
  • Scraping off excess wax using a dull knife or plastic scraper is recommended.
  • Alternative methods such as using a warm iron and paper towel or freezing the tablecloth can also be used to remove wax.

Gather Necessary Supplies

Now that you’ve gathered all the necessary supplies, it’s time to tackle that pesky wax stain on your tablecloth.

Using hot water is an effective way to remove wax from a tablecloth. Start by filling a sink or basin with hot water, making sure it’s not too hot to handle. Place the stained area of the tablecloth into the water and let it soak for about 15 minutes. The heat from the water will help soften the wax, making it easier to remove.

After soaking, gently rub the stained area between your fingers to loosen any remaining wax. Be careful not to scrub too hard as this can damage the fabric.

If there are color stains left behind from colored wax, dampen a clean cloth with rubbing alcohol and dab at the stain until it fades away.

Once you’ve removed as much of the wax and color stains as possible, transition into scraping off any excess wax without using ‘step’.

Scrape off Excess Wax

First, gently scrape off any extra wax from the surface using a scraping technique. To do this, I recommend using a dull knife or plastic scraper to avoid damaging the tablecloth. Be careful not to press too hard as you scrape, as this could push the wax deeper into the fabric.

If there are still remnants of wax on the tablecloth after scraping, don’t worry! There are alternative methods you can try. One option is to place a brown paper bag or plain white paper towel over the remaining wax and run a warm iron over it. The heat will cause the wax to melt and transfer onto the paper.

Another method involves freezing the tablecloth. Simply put it in a plastic bag and place it in your freezer for a few hours until the wax hardens. Once frozen, you can then gently scrape off the hardened wax with ease.

Now that we’ve removed any excess wax from the tablecloth using our scraping technique and discussed alternative methods, let’s move on to freezing the tablecloth to further tackle any remaining residue without damaging it further.

Freeze the Tablecloth

To tackle any remaining residue, an effective method is to freeze the tablecloth. This turns the wax into solid chunks that can be easily scraped off. Freezing the tablecloth helps harden the wax, making it less sticky and easier to remove.

To do this, place the tablecloth in a plastic bag and put it in your freezer for a few hours or until the wax freezes completely.

Once frozen, remove the tablecloth from the freezer and let it thaw at room temperature for about 10 minutes. This thawing process will soften the fabric slightly, making it more pliable and easier to work with.

Alternatively, you can use other methods to freeze the wax on your tablecloth. For example, you can apply ice cubes directly on top of the wax or use a pack of frozen peas or vegetables as a makeshift cold compress.

After freezing and thawing your tablecloth, proceed to remove frozen wax with a knife by gently scraping off the solid chunks. Be careful not to damage or tear the fabric while doing so.

Remove Frozen Wax with a Knife

After freezing and thawing, you can easily scrape off the solid chunks of frozen wax from the tablecloth using a knife. However, if you’d rather remove wax without freezing, there are alternative methods available.

One option is to place a brown paper bag or parchment paper over the wax stain and use a warm iron on top. The heat will melt the wax, which will be absorbed by the paper. Remember to keep the iron on low heat and move it constantly to avoid damaging the fabric.

Another method involves placing an ice pack or ice cubes in a plastic bag and gently rubbing it over the wax until it hardens. Once hardened, you can scrape off as much wax as possible with a butter knife or credit card. To remove any residue left behind, cover it with a clean cloth and use an iron on low heat to transfer the remaining wax onto the cloth.

By following these alternative methods of removing wax from your tablecloth, you can achieve excellent results without having to freeze it first. Now, let’s transition into discussing how to use an iron and paper towels for further cleaning.

Use an Iron and Paper Towels

For a quick and effective solution, you can easily save your cherished tablecloth by using an iron and paper towels. Here’s how:

  1. Place the wax-stained area of the tablecloth between two layers of paper towels.

  2. Set your iron to a low heat setting without steam.

  3. Gently press the iron onto the paper towel-covered wax stain for a few seconds.

  • As the heat from the iron melts the wax, it will transfer onto the paper towels, leaving your tablecloth clean and wax-free.

  • This method is safe to use on most fabric types, but always test it on a small, inconspicuous area first.

If you don’t have an iron or prefer alternative methods, try using a hairdryer or freezing the wax with ice cubes before scraping it off with a spoon or knife.

By following this simple ironing technique or exploring alternative methods like freezing, you can effectively remove stubborn wax stains from your tablecloth. Now let’s move on to applying heat and pressure to completely eliminate any remaining residue without damaging the fabric.

Apply Heat and Pressure to the Stain

Applying heat and pressure can effectively eliminate any remaining residue, leaving your tablecloth looking as good as new. To begin, place a clean white paper towel or brown paper bag over the wax stain. Then, set your iron to a low heat setting without steam and carefully glide it over the paper towel or bag. As you apply heat, the wax will start to melt and transfer onto the paper towel or bag. Be sure to continuously move the iron to prevent scorching or burning the fabric.

For faster results, you can use a hairdryer instead of an iron. Simply set it on medium heat and hold it about six inches away from the stained area. Move the hairdryer in circular motions over the wax until it melts and transfers onto a paper towel or bag placed beneath it.

Once all of the wax has been removed from your tablecloth using heat and pressure, proceed to blotting with a clean cloth to absorb any remaining residue. This will help ensure that no trace of wax is left behind.

With this method, applying heat and pressure directly on the stain will effectively remove any lingering wax from your tablecloth. Now let’s move on to blotting with a clean cloth for further cleaning.

Blot with a Clean Cloth

Gently press the clean cloth onto the stained area, absorbing any remaining residue and leaving behind a fresh, clean surface. This step is crucial in removing wax from a tablecloth effectively. By blotting the stain with a clean cloth, you’re able to lift off any excess wax that may still be present on the fabric. Make sure to apply gentle pressure while blotting to avoid spreading the wax further.

When it comes to cleaning tips and household hacks, this method’s a lifesaver. It’s simple yet effective in getting rid of stubborn wax stains. The heat and pressure applied earlier would’ve melted most of the wax, but some residue might remain. Blotting with a clean cloth helps to remove these remnants and prevents them from setting into the fabric permanently.

Once you’ve completed this step, it’s time to move on to treating any remaining stain with a stain remover. This’ll help tackle any discoloration or leftover wax that couldn’t be completely removed by blotting alone. With these cleaning tips and household hacks, your tablecloth’ll soon be back to its pristine condition, ready for your next gathering or special occasion.

Treat Remaining Stain with Stain Remover

Now comes the fun part – let’s unleash the stain remover and watch that stubborn mark magically disappear! Here are some discussion ideas to help you choose the best stain remover for your tablecloth:

  1. Alternative stain removal methods: If you prefer a natural approach, consider using vinegar or lemon juice as a homemade stain remover. These ingredients can effectively break down wax stains without damaging the fabric.

  2. Common mistakes to avoid when using stain remover: First, always test the product on a small, inconspicuous area of the tablecloth to ensure it doesn’t cause any discoloration or damage. Second, avoid rubbing the stain vigorously, as this can push it deeper into the fabric fibers and make it more difficult to remove. Instead, gently blot or dab at it.

Once you’ve chosen and applied the appropriate stain remover following these suggestions, you’ll notice that most of the wax residue has disappeared. However, there may still be a faint stain remaining that will require further treatment before washing the tablecloth.

Wash the Tablecloth

After treating the remaining stain, it’s time to give the tablecloth a refreshing wash. To ensure a successful clean, it’s crucial to select the right detergent for washing your tablecloth. Look for a gentle detergent that’s suitable for delicate fabrics, as some tablecloths may be more sensitive than others. Avoid using harsh chemicals that could damage or discolor your cloth.

When washing the tablecloth, follow the care instructions provided by the manufacturer. Use cold water and set your machine on a gentle cycle to prevent any further damage. If possible, separate colored and white tablecloths to avoid color bleeding.

Once the wash cycle is complete, resist the temptation to use a dryer. Instead, air dry your tablecloth by laying it flat on a clean surface or hanging it up outside if weather permits. This’ll help preserve its fabric quality and prevent shrinkage or distortion.

By properly washing and air drying your tablecloth, you can enjoy a wax-free surface that’s ready for future use without any lingering residue or stains.

Enjoy a Wax-Free Tablecloth

To fully appreciate your spotless tablecloth, you’ll love the feeling of a smooth and clean surface. Here are some alternative methods for removing wax from a tablecloth:

  1. Freezing Method: Place the wax-stained tablecloth in the freezer for a couple of hours until the wax hardens. Once it’s hardened, gently scrape off the wax using a butter knife or credit card.

  2. Ironing Method: Lay a brown paper bag or cloth over the wax stain and apply low heat with an iron. As you iron, the heat will melt the wax, which’ll then be absorbed by the paper or cloth.

  3. Boiling Water Method: Fill a basin or sink with boiling water and lay the tablecloth flat on top of it. Allow the water to soak through, softening and loosening up the wax. Then, carefully peel off any remaining residue.

In addition to these removal methods, here are some tips for preventing wax stains on tablecloths:

  • Use dripless candles or battery-operated candles instead of traditional ones.
  • Place a protective layer such as aluminum foil or parchment paper underneath candles to catch any potential drips.
  • Consider using candleholders or votives that can contain any potential spills.

By following these techniques and taking preventive measures, you can enjoy your tablecloth without worrying about unwanted wax stains.

Frequently Asked Questions

Can I use a hairdryer instead of an iron to remove the wax from the tablecloth?

Yes, using a blow dryer is an effective alternative method for removing wax from a tablecloth. By applying heat to the wax, it’ll melt and become easier to remove. Simply place a paper towel or cloth over the wax, then use the blow dryer on high heat to warm up the area. Once the wax has softened, gently scrape it off with a spoon or dull knife. Be careful not to damage the fabric while doing so.

Is it safe to use a stain remover on all types of tablecloth fabric?

It’s not safe to use a stain remover on all types of tablecloth fabric. Different fabrics have different requirements for cleaning and some may be damaged by certain stain removers. It’s important to check the care instructions for your specific tablecloth fabric before using any stain removal method. If you’re unsure, it’s best to test a small, inconspicuous area first or consider alternative methods like freezing the wax and gently scraping it off with a butter knife.

How long should I freeze the tablecloth before attempting to remove the wax?

To freeze a tablecloth before removing wax, I recommend leaving it in the freezer for at least 30 minutes. Freezing helps harden the wax, making it easier to remove.

However, if you’re looking for an alternative to freezing, try placing ice cubes on top of the wax to cool and solidify it. Then gently scrape off the hardened wax using a dull knife or credit card.

Remember to always test any method on a small inconspicuous area first.

Can I use a plastic scraper instead of a knife to remove the frozen wax?

Yes, a plastic scraper can be used as an alternative to a knife for removing frozen wax from a tablecloth. It’s safer and less likely to damage the fabric. Additionally, there are other alternative methods for removing frozen wax. For example, you can use heat from an iron or place a paper towel over the wax and apply hot water with an iron. These methods help soften the wax, making it easier to scrape off with a plastic scraper or blot with a paper towel.

What should I do if the stain remover doesn’t completely remove the wax stain?

If the stain remover doesn’t fully remove the wax stain, there are a few options you can try. Firstly, you can attempt using alternative stain removers like vinegar or rubbing alcohol to break down the remaining residue. If that still doesn’t work, you may need to consider seeking professional cleaning services for more advanced techniques. They have the expertise and specialized tools to tackle stubborn stains effectively.

Conclusion

So there you have it, a simple and effective way to remove wax from your tablecloth. By following these steps, you can ensure that your tablecloth stays clean and free of any stubborn stains.

Remember, where there’s a will, there’s a way! So don’t let a little bit of wax ruin your favorite tablecloth. With just a few supplies and some patience, you’ll have that wax-free tablecloth in no time.

Now go forth and enjoy your spotless dining experience!

Continue Reading

Trending