Connect with us

Beginners Guides

Candle That Changes Color When Lit

Published

on

An image that showcases a mesmerizing candle, radiating a soft glow, enveloped in a translucent glass jar

Were you aware that for millennia, candles have served the purpose of generating an atmosphere and establishing the mood?

But what if I told you that there is a candle that can do more than just provide soft lighting? Imagine a candle that changes color when lit, adding a mesmerizing and magical touch to any space.

This innovative candle not only creates a warm and inviting atmosphere but also brings a unique visual experience to your home decor. With different color modes and effects, you can customize the ambiance to suit your mood and occasion. Whether you’re looking for a calming blue hue or a vibrant red glow, this color-changing candle has got you covered.

In this article, we will explore the science behind this fascinating candle, how it works, and even some DIY projects and gift ideas to incorporate this enchanting creation into your life.

Get ready to embrace the magic of color-changing candles!

Advertisement

Key Takeaways

  • The color change in a candle that changes color when lit is a result of a chemical reaction happening inside the candle.
  • Different chemical compounds in the wax absorb and emit light at different wavelengths, causing the color change.
  • Color-changing candles offer versatility and can be easily switched between different colors for different occasions or moods.
  • Safety precautions, such as proper candle placement and monitoring candle usage, are important when using color-changing candles.
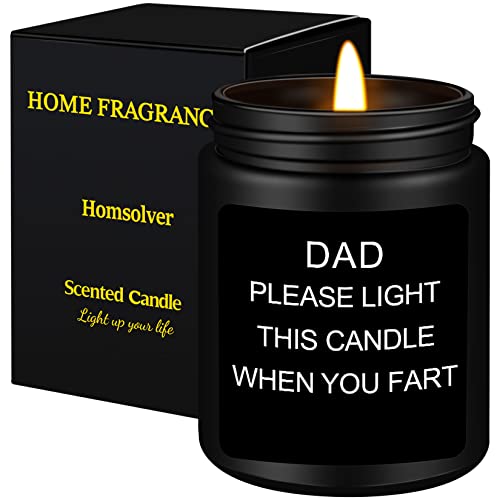
The Science Behind the Color Change

The candle’s color changes when it’s lit due to a chemical reaction happening inside. This phenomenon is a result of the candle chemistry and the physics of color change.

When the flame touches the wick, the heat causes the wax to melt. As the wax melts, it is drawn up the wick through capillary action. At the same time, the heat energy from the flame excites the atoms in the wax, causing them to vibrate and emit light.

The color of the light emitted depends on the chemical composition of the wax. For example, a candle made with beeswax produces a warm, golden glow, while a candle made with paraffin wax emits a whitish light. The color change occurs because different chemical compounds in the wax absorb and emit light at different wavelengths.

This intricate interplay of chemical reactions and physical processes is what gives a candle its unique ability to change color when lit.

Now, let’s delve into the inner workings of the candle and explore how it achieves this mesmerizing transformation.
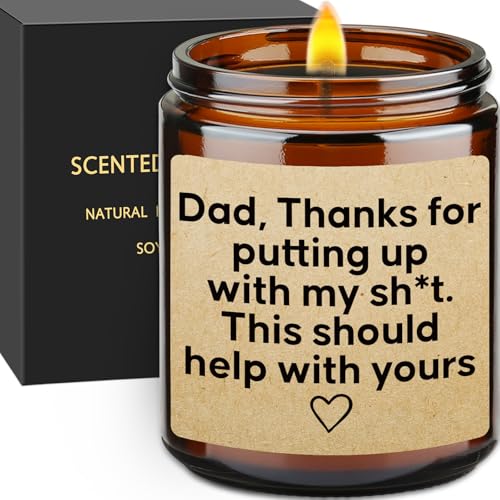
How Does the Candle Work?

When you light this enchanting candle, you’ll be amazed at how its hues transform like a mesmerizing kaleidoscope. The technology used in this candle is truly remarkable. Here’s how it works:

Advertisement
  1. Temperature-sensitive pigments: The candle is embedded with special pigments that change color based on temperature. These pigments are designed to react to the heat generated by the flame, causing the candle to change color.

  2. Heat distribution: The candle is engineered to distribute heat evenly, ensuring that the color change is consistent throughout the entire candle. This ensures a visually pleasing and captivating experience.

  3. Safety features: The candle is equipped with safety mechanisms to prevent overheating and potential hazards. These features ensure that the candle remains safe to use and enjoy.

  4. Long-lasting effect: The color change in this candle is long-lasting, providing hours of mesmerizing ambiance. Whether you’re using it for relaxation, decoration, or a special occasion, the color-changing feature adds an extra touch of magic.

The benefits of color-changing candles are numerous. They create an enchanting atmosphere, making them perfect for romantic evenings or calming spaces. Additionally, they can serve as a unique decorative element, adding a pop of color to any setting.

As we delve into the next section about different color modes and effects, you’ll discover even more ways to enhance your experience with this captivating candle.

Different Color Modes and Effects

Smooth color transitions, flickering flames, and multi-color options are key features of the different color modes and effects of the candle.

The smooth color transitions allow for a seamless and gradual change in color, creating a mesmerizing and captivating visual experience.

The flickering flames mimic the natural movement of a real candle, adding a sense of authenticity and ambiance.

Advertisement

Additionally, the multi-color options provide a wide range of choices, allowing users to customize the candle’s appearance to suit their preferences and create different moods.

Smooth Color Transitions

Contractions emphasize the color transitions on the candle when it’s lit. The smooth color transitions play a crucial role in creating a calming ambiance. The candle seamlessly transitions from one color to another, creating an enchanting visual experience.

This effect is achieved through advanced LED technology that allows for the smooth blending of colors. The candle gradually shifts from one hue to another, providing a soothing and tranquil atmosphere. The smooth color transitions add an element of sophistication to the candle, making it an ideal choice for relaxation and meditation purposes.

As the colors seamlessly merge, they add a touch of elegance and beauty to any space. These smooth transitions are just the beginning, as the candle also features flickering flames that further enhance the enchanting effect.

Flickering Flames

The flickering flames of the candle create a mesmerizing and cozy atmosphere. This effect is achieved by using a specialized mechanism that controls the intensity and frequency of the flickering. The mechanism is designed to mimic the natural movement of a real flame, providing a realistic and captivating experience.

Advertisement

To ensure fire safety, it’s important to place the candle in a suitable location. Keep the candle away from flammable materials such as curtains, paper, or plastic. Make sure there’s enough space around the candle to prevent accidental contact with other objects. Additionally, it’s recommended to place the candle on a stable and heat-resistant surface to avoid any potential hazards.

Now, let’s explore the exciting options of multi-color candles that can further enhance the ambiance.

Multi-Color Options

Imagine being surrounded by a dazzling array of vibrant hues, as the flickering flames dance and illuminate the room. With multi-color options, color-changing candles bring a whole new level of enchantment to any space.

These candles offer a wide range of colors to choose from, allowing you to create the perfect ambiance for any occasion. Whether you want to set a romantic tone with soft, warm colors or add a lively touch with vibrant, energetic hues, the possibilities are endless.

The benefits of color-changing candles go beyond aesthetics. They can help create a calming atmosphere, promote relaxation, and even improve focus. With just a flick of a switch, you can transform the mood of any room.

Advertisement

As we delve into the next section on setting the mood with color-changing candles, we explore the various ways these candles can enhance your environment.

Setting the Mood with Color-Changing Candles

Set the perfect mood with a color-changing candle that adds a mesmerizing glow to any space. A color-changing candle offers a range of benefits that can enhance the ambiance of any room. Here are three reasons why you should consider using a color-changing candle:

  1. Color therapy: A color-changing candle allows you to customize the ambiance according to your mood. For instance, warm colors like red and orange can create a cozy and intimate atmosphere, while cool colors like blue and green can promote relaxation and calmness.

  2. Versatility: With a color-changing candle, you can easily switch between different colors to suit different occasions or moods. Whether you’re hosting a romantic dinner or having a relaxing bath, you can effortlessly create the desired ambiance with just a touch of a button.

  3. Visual appeal: The mesmerizing glow of a color-changing candle adds a touch of elegance and sophistication to any space. It creates a captivating visual display that can enhance the overall aesthetic of your room.

By incorporating a color-changing candle into your space, you can effortlessly create the perfect atmosphere for any occasion.

Now, let’s explore how to choose the right color-changing candle for your needs.

Choosing the Right Color-Changing Candle

After discussing the benefits of setting the mood with color-changing candles, let’s now delve into the process of choosing the right brand for your needs. Color-changing candles offer a unique and captivating experience, as they add an extra element of excitement and ambiance to any space.

Advertisement

When selecting a color-changing candle, it’s important to consider the benefits they provide. These candles can enhance relaxation and create a soothing atmosphere, making them perfect for meditation or a cozy evening at home. Additionally, color-changing candles can be used for therapeutic purposes, as different colors have been known to evoke specific emotions and aid in stress reduction.

When it comes to choosing the best color-changing candle brands, there are several reputable options available. One popular brand is Lumabase, known for their high-quality candles with vibrant color transformations. Another well-regarded brand is LED Lytes, which offers a range of color-changing candles that are long-lasting and safe for use. Additionally, Flameless Candles provides a wide selection of color-changing options, ensuring you can find the perfect candle to suit your preferences.

Now that we have explored the benefits and brands of color-changing candles, let’s move on to the next section, where I’ll provide you with valuable tips for safely using these captivating candles.

Tips for Safely Using Color-Changing Candles

When using color-changing candles, it’s crucial to take fire safety precautions to ensure a safe environment. This includes keeping flammable materials away from the candle and never leaving it unattended.

Proper candle placement is essential. Candles should be placed on a stable surface and away from drafts or anything that could easily catch fire.

Advertisement

Lastly, it’s important to continuously monitor the candle usage. Make sure it’s not burning too close to its base or that the flame is not too high, which could lead to a potential fire hazard.

Fire Safety Precautions

Make sure you’re mindful of fire safety precautions when using a candle that changes color when you light it. Fire safety tips are essential in preventing candle accidents.

First and foremost, never leave a burning candle unattended. Always extinguish the candle before leaving the room or going to bed.

Keep flammable objects, such as curtains or paper, at least one foot away from the candle. It’s also crucial to place the candle on a stable and heat-resistant surface to prevent it from tipping over.

Avoid placing the candle in drafty areas, as this can cause uneven burning and increase the risk of accidents.

Advertisement

Lastly, ensure that the candle is out of reach of children and pets. By following these fire safety precautions, you can enjoy your color-changing candle without worry.

Now, let’s move on to the importance of proper candle placement.

Proper Candle Placement

When it comes to fire safety precautions, proper candle placement is crucial. Placing candles in the wrong location can increase the risk of accidents and fires. To ensure candle safety, follow these guidelines:

  1. Keep candles at least 12 inches away from anything flammable, such as curtains or furniture.

  2. Place candles on a sturdy and heat-resistant surface to prevent tipping or melting.

  3. Avoid placing candles in high traffic areas where they can be easily knocked over.

By following these candle placement rules, you can minimize the risk of accidents and enjoy the calming ambiance of a lit candle safely.

However, proper placement is only one aspect of candle safety. The next section will discuss the importance of monitoring candle usage to further prevent any fire hazards.

Advertisement

Monitoring Candle Usage

To ensure your safety and prevent any potential fire hazards, it’s essential to keep a close eye on how long you’ve been burning your candles. Monitoring candle usage is crucial not only for maximizing the lifespan of the candle but also for maintaining a safe environment. By tracking the duration of each burn, you can prevent the wax from overheating and reduce the risk of accidents. To help you monitor your candle usage effectively, I have created a simple table below:

Candle Name Burn Time Remaining Time
Lavender 4 hours 6 hours
Vanilla 3 hours 7 hours
Citrus 2 hours 8 hours

By regularly checking the burn time and remaining time, you can ensure that you are not leaving the candle unattended for too long. Now that we have covered monitoring candle usage, let’s explore how incorporating color-changing candles in home decor can add a touch of uniqueness and ambiance to any room.

Incorporating Color-Changing Candles in Home Decor

Integrating color-changing candles into home decor adds a touch of elegance and modernity. These innovative candles have the ability to transform the ambiance of any indoor or outdoor space with their mesmerizing color transitions.

Here are three ways to incorporate color-changing candles into your home decor:

  1. Outdoor Spaces: Take your outdoor gatherings to the next level by placing color-changing candles around your patio or garden. The vibrant hues emitted by these candles will create a captivating atmosphere, perfect for entertaining guests or enjoying a peaceful evening under the stars.

  2. Special Occasions: Make your celebrations even more memorable by using color-changing candles as part of your decor. Whether it’s a birthday party, romantic dinner, or holiday gathering, these candles will provide a stunning visual display that will impress your guests and create a festive ambiance.

  3. DIY Color-Changing Candle Projects: Want to add a personal touch to your color-changing candles? Explore various DIY projects that allow you to customize the design and color patterns of your candles. From using different wax colors to adding unique embellishments, the possibilities are endless for creating one-of-a-kind candles that fit your style and preferences.

Transitioning into the subsequent section about DIY color-changing candle projects, let’s delve into the exciting world of creating your own personalized candles that change colors.

Advertisement

DIY Color-Changing Candle Projects

Let’s dive into the enchanting world of DIY color-changing candle projects, where you can unleash your creativity and craft mesmerizing personalized creations that will illuminate your space with captivating hues. DIY candle making is a fun and rewarding activity that allows you to experiment with different colors, scents, and designs. However, when working with color-changing candles, it is important to follow some candle safety precautions to ensure a safe and enjoyable experience.

To get started, gather the necessary materials such as candle wax, color-changing pigments, fragrance oils, wicks, and containers. Begin by melting the wax and adding the desired color-changing pigment. You can choose from a wide range of pigments that transform the candle’s color when lit, creating a magical effect. Once the wax has cooled slightly, add your chosen fragrance oil for a delightful scent.

Next, carefully pour the wax into your chosen containers, ensuring that the wick is centered. Allow the candles to cool and solidify completely before trimming the wick and testing their color-changing properties. It’s important to note that color-changing candles may require a longer burn time to fully exhibit their transformative capabilities.

These DIY color-changing candle projects make for wonderful gifts that are both beautiful and unique. Transitioning into the subsequent section about ‘color-changing candle gift ideas,’ you can explore creative ways to share the enchantment of color-changing candles with your loved ones.

Color-Changing Candle Gift Ideas

As we explored various DIY color-changing candle projects in the previous subtopic, let’s now move on to the exciting world of color-changing candle gift ideas. When it comes to gift-giving, a color-changing candle can be a unique and mesmerizing choice. Not only does it provide a beautiful ambiance, but it also adds an element of surprise and wonder.

Advertisement

Imagine presenting your loved ones with a color-changing candle as a gift. As they light it up, the room transforms into a captivating display of vibrant hues. It becomes an instant conversation starter and a centerpiece of attention.

Here are three incredible gift ideas incorporating color-changing candles:

  • Color-changing candle party decorations: Create a stunning atmosphere for any celebration with color-changing candles placed strategically around the venue. Watch as the colors dance and flicker, immersing everyone in a magical experience.

  • Color-changing candle for relaxation: Treat someone special to a moment of tranquility with a color-changing candle designed specifically for relaxation. The soothing colors will enhance their meditation or relaxation practices, creating a serene and calming environment.

  • Color-changing candle gift set: Curate a thoughtful gift set featuring a selection of color-changing candles in different sizes and scents. This versatile gift is perfect for any occasion and allows the recipient to enjoy the beauty and enchantment of color-changing candles in various settings.

Now, with these enticing gift ideas in mind, let’s move on to the next section and embrace the magic of color-changing candles.

Embracing the Magic of Color-Changing Candles

Immerse yourself in the enchanting world of color-changing candles and experience the captivating magic of their transformation.

Color-changing candles have become a popular trend, captivating the senses with their mesmerizing hues. The psychology of color-changing candles is intriguing, as different colors can evoke various emotions and moods. For example, warm colors like red and orange are often associated with energy and passion, while cool colors like blue and green can create a sense of calm and tranquility.

Advertisement

The history of color-changing candle technology dates back to ancient times when candles were used for practical purposes such as lighting and religious ceremonies. However, it wasn’t until recent years that the concept of color-changing candles truly took off. With advancements in LED technology, candles can now change color with the simple flick of a switch or the lighting of a wick. These modern marvels often use a combination of LED lights and special dyes or pigments to create the illusion of changing colors.

Embracing the magic of color-changing candles adds a touch of whimsy and wonder to any space. Whether used for relaxation, meditation, or as a decorative accent, these candles create a visually stunning and captivating ambiance.

So why not indulge in the enchantment and experience the transformative power of color-changing candles for yourself?

Frequently Asked Questions

How long does the color change last when the candle is lit?

The duration of color change when the candle is lit depends on several factors. These factors include the type of color-changing material used in the candle, the quality of the material, and the temperature at which the candle is burning.

The color change can last anywhere from a few minutes to several hours, depending on these factors. It’s important to note that the specific duration may vary between different candles and their respective color-changing mechanisms.

Advertisement

Can color-changing candles be used outdoors?

Color-changing candles can indeed be used outdoors for outdoor lighting or as an alternative source of illumination. These candles are designed to change color when lit, providing a visually engaging experience.

They can create a unique ambiance for outdoor gatherings or events. With their ability to change colors, these candles add an element of surprise and creativity to any outdoor setting.

Their versatility makes them a popular choice for outdoor decoration and lighting purposes.

Are color-changing candles safe to use around children and pets?

Color-changing candles are generally safe to use around children and pets, as long as proper safety precautions are taken. It is important to keep the candles out of reach of children and away from flammable materials. Additionally, it’s recommended to never leave a burning candle unattended. If you have concerns about using color-changing candles around children and pets, there are alternative options such as LED candles or flameless candles that can provide a similar effect without the risk of an open flame.

Can I control the color change of the candle using a remote control?

Yes, the color change of the candle can be controlled using a remote control. This innovative feature allows users to easily switch between different colors without having to physically touch the candle.

Advertisement

Additionally, the remote control functionality provides convenience and flexibility for changing the color at a desired time or from a distance. The color change duration can also be adjusted according to personal preference, allowing for a customizable and enjoyable experience.

What type of batteries are required for color-changing candles?

The color-changing candles require two AAA batteries for operation. These batteries provide sufficient power to activate the LED lights inside the candle, which are responsible for the color change. The lifespan of the color change depends on the quality of the batteries used. Higher quality batteries may last longer, ensuring a prolonged and enjoyable experience with the candle’s color-changing feature.

Conclusion

In conclusion, color-changing candles are a fascinating addition to any home decor. They offer a unique and enchanting experience by creating different moods and atmospheres. Did you know that studies have shown that the use of color in our environment can significantly impact our emotions and well-being? By incorporating color-changing candles into your space, you can harness the power of color to enhance your mood and create a sense of magic in your home.

So why not embrace the beauty and wonder of color-changing candles and let them illuminate your life?

Advertisement

I'm Amelia, and I love making candles. It all started when I was given a kit as a gift. I loved the process so much that I decided to make my own candles. I soon realized that I had a real talent for it. Before long, my friends and family were asking me to make candles for them too. Word spread, and soon I was inundated with orders. I love the creativity that goes into making each candle unique. And I love the satisfaction of knowing that people are using something I made with my own hands.

Continue Reading
Advertisement

Beginners Guides

How To Make A Lotion Candle

Published

on

By

An image illustrating a step-by-step guide on making a lotion candle

Have you ever enjoyed the soothing warmth and relaxing fragrance of a candle, only to end up with dry, irritated skin afterward? Fear not, as I have a groundbreaking solution that will change your candle experience. Introducing the lotion candle – a unique combination that combines the gentle glow of a candle with the hydrating benefits of lotion.

Imagine lighting a candle and being enveloped in a fragrant cloud of tranquility, while simultaneously moisturizing your skin. It’s like a spa treatment in the comfort of your own home! But how is this possible, you may wonder?

In this article, I will guide you through the step-by-step process of making your very own lotion candle. From gathering the materials and ingredients, to pouring the melted wax and adding the lotion ingredients, I will provide you with all the detailed instructions you need.

So get ready to indulge in a new level of relaxation and pampering with your very own lotion candle. Let’s dive in and discover the magic of this innovative creation together!

Key Takeaways

  • Lotion candles combine the ambiance of a candle with the nourishing benefits of lotion.
  • Different types of lotion candles include soy-based, beeswax-based, and shea butter-based.
  • Materials needed for making a lotion candle include a double boiler or heat-resistant container, candle wick, soy wax or beeswax, fragrance oil or essential oil, and a lotion base like shea butter or coconut oil.
  • Lotion candles provide a soothing and moisturizing experience for the skin.

Gather Your Materials and Ingredients

Now that you’ve got your creative juices flowing, it’s time to gather all the materials and ingredients you’ll need to whip up your very own soothing lotion candle.

Lotion candles have gained popularity due to their unique combination of fragrance and moisturizing properties. There are different types of lotion candles available, such as soy-based, beeswax-based, and shea butter-based, each with their own benefits. Soy-based lotion candles are known for their clean burn and long-lasting scent, while beeswax-based ones are great for purifying the air and promoting relaxation. Shea butter-based lotion candles provide intense hydration for dry skin.

Advertisement

To make your lotion candle, you will need the following materials:

  • A double boiler or a heat-resistant container
  • A candle wick
  • Soy wax or beeswax
  • A fragrance oil or essential oil
  • A lotion base such as shea butter or coconut oil

Additionally, you may want to add color to your candle using candle dye.

Once you have gathered all your materials, it’s time to prepare your workspace and get started on making your own lotion candle.

Prepare Your Workspace

First, you’ll want to get your workspace ready for creating your own luxurious lotion candle. Workspace organization is essential for a smooth and efficient candle-making process. Start by clearing any clutter and ensuring you have enough room to work comfortably.

Arrange your materials and ingredients in an organized manner, making them easily accessible during the candle-making process. This will help prevent any accidents or spills.

Next, it’s important to take safety precautions to protect yourself and your workspace. Make sure you have a fire extinguisher nearby, just in case. Wear protective gloves and goggles to shield your hands and eyes from any potential harm. Keep a clean and well-ventilated workspace to minimize the risk of breathing in fumes or accidentally starting a fire.

Advertisement

Once your workspace is organized and all safety measures are in place, you can smoothly transition into the next section about melting the wax and adding fragrance. With everything set up properly, you’ll be able to focus on creating a beautifully scented lotion candle without any distractions.

Melt the Wax and Add Fragrance

To achieve a perfectly scented and smooth-textured final product, it’s essential to melt the wax and add fragrance to your homemade lotion candle. Start by gathering your materials: a double boiler or a heat-safe container, wax flakes, a fragrance oil of your choice, and essential oils for additional scents if desired.

Begin by melting the wax flakes in a double boiler or a heat-safe container placed inside a pot of simmering water. It’s important to use a double boiler or a makeshift one to ensure even heating and to prevent the wax from burning. As the wax melts, stir it gently to promote even melting and prevent clumping. Once the wax has completely melted and reached a smooth consistency, it’s time to add fragrance.

Choose a fragrance oil that complements your desired scent. You can also enhance the aroma by incorporating essential oils such as lavender, vanilla, or citrus. Add a few drops of the fragrance oil, and if desired, a couple of drops of essential oil, to the melted wax. Stir the mixture thoroughly to ensure the fragrance is evenly distributed.

Now that the wax is melted and infused with the desired scents, it’s time to move on to the next step.

Advertisement

Pour the Melted Wax into a Container

Once you’ve achieved the perfect fragrance blend, it’s time to carefully pour the melted wax into your chosen container, allowing your creativity to take shape. There are various container options available for lotion candles, such as glass jars, tins, or even teacups. Choose a container that’s heat-resistant and has a wide opening for easy access.

To prevent the wax from spilling, it’s essential to take some precautions. Place your chosen container on a heat-resistant surface, like a baking sheet or a towel, to catch any potential spills. If you’re using a glass jar, you can also place it inside a small saucepan with water to create a makeshift double boiler, which’ll help regulate the temperature and prevent the wax from overflowing.

Gently pour the melted wax into the container, being careful not to overfill it. Leave a small gap at the top to allow room for the lotion ingredients. It’s important to pour slowly and steadily to avoid any spills or splashes.

Now that your container’s filled with the melted wax, it’s time to move on to the next step of adding the lotion ingredients.

Add the Lotion Ingredients

Now comes the exciting part – adding the silky, nourishing ingredients that’ll transform your creation into a luxurious treat for the senses.

Advertisement

To achieve the perfect lotion consistency, it’s important to choose the right ingredients. Begin by adding 1 tablespoon of shea butter, known for its moisturizing properties, into the melted wax. Shea butter’s rich in vitamins and antioxidants that’ll help nourish and hydrate your skin.

Next, add 2 tablespoons of coconut oil, which isn’t only deeply moisturizing but also has a delightful tropical fragrance that’ll enhance your lotion candle. The coconut oil’ll give your candle a smooth and silky texture, leaving your skin feeling soft and supple.

To add a touch of fragrance to your lotion candle, you can incorporate a few drops of essential oils. Lavender essential oil’s a popular choice for its calming and soothing properties. Alternatively, you can opt for refreshing scents like peppermint or citrus oils for an invigorating experience. Remember to use essential oils sparingly, as they’re highly concentrated.

Now that you’ve added the lotion ingredients, it’s time to stir and mix well. This’ll ensure that all the ingredients are evenly distributed throughout the wax, creating a smooth and consistent texture.

Stir and Mix Well

Mix everything together until the ingredients blend seamlessly, creating a luscious concoction that’ll leave your skin feeling pampered and nourished. When it comes to mixing techniques, there are a few things to keep in mind to ensure the proper consistency of your lotion candle. First, use a sturdy wooden spoon or a hand mixer to combine the ingredients thoroughly. The spoon’ll help you reach the bottom of the container, ensuring that all the ingredients are well incorporated.

Advertisement

If you prefer to use a hand mixer, start at a low speed and gradually increase it to avoid splattering the mixture. Be sure to scrape the sides of the container periodically to ensure everything is mixed evenly.

As you mix, pay attention to the texture of the mixture. It should have a smooth and creamy consistency, similar to a lotion or body butter. If the mixture appears too thick, you can add a small amount of melted coconut oil or shea butter to thin it out. On the other hand, if it seems too runny, you can add a bit more beeswax to thicken it up.

Once everything is well mixed and has reached the desired consistency, you can transition into the next section about letting the candle cool and set.

Let the Candle Cool and Set

Allow the mesmerizing blend to solidify into a delicate masterpiece as the enchanting concoction cools and sets, transforming into a soothing oasis for your senses.

Once the lotion candle has cooled completely, it’s time to unleash your creativity and add some decorative touches. There are several ways to decorate your cooled lotion candle, giving it a personalized and unique look. You can wrap a beautiful ribbon around the base, attach dried flowers or leaves to the sides, or even sprinkle some glitter for a touch of sparkle. Let your imagination run wild and experiment with different embellishments to make your lotion candle truly one-of-a-kind.

Advertisement

In addition to decorating, you can also experiment with various scents for your lotion candle. The possibilities are endless, and you can choose scents that match your mood or evoke specific feelings. Some popular scents to try include lavender for relaxation, citrus for an energizing effect, or vanilla for a warm and comforting aroma. Don’t be afraid to mix scents together to create your own unique fragrance blend.

Now that you’ve adorned your cooled lotion candle with your chosen decorations and scent, it’s time to move on to the next step: trimming the wick to ensure a clean and even burn.

Trim the Wick

Once the mesmerizing blend has solidified into a delicate masterpiece and you’ve added your decorative touches, it’s time to trim the wick for a clean and even burn. Wick maintenance is essential for the longevity and safety of your lotion candle.

Before trimming, ensure that the candle has completely cooled down. Using a pair of sharp scissors or wick trimmers, gently trim the wick to about 1/4 inch in length. This will prevent the flame from becoming too large and flickering, which can cause uneven burning and excessive soot. Remember to remove any debris or excess wick trimmings from the candle surface to maintain a clean appearance.

Proper wick maintenance is crucial for candle safety. By keeping the wick trimmed to the recommended length, you reduce the risk of the flame getting too close to the container, potentially causing it to crack or shatter. Additionally, a well-trimmed wick promotes a steady and controlled burn, ensuring a longer and more enjoyable candle experience.

Advertisement

Now that the wick is neatly trimmed, you’re ready to light and enjoy your lotion candle.

Light and Enjoy Your Lotion Candle

After trimming the wick of your lotion candle, it’s time to light it up and enjoy the cozy ambiance it creates. However, before doing so, it’s important to keep candle safety in mind. Always place your candle on a heat-resistant surface and away from flammable objects. Never leave a burning candle unattended, and keep it out of reach of children and pets.

Once you have ensured the safety precautions, lighting your lotion candle is simple. Use a lighter or a match to light the wick, allowing it to burn for a few minutes until a pool of melted lotion forms. This will release a delightful fragrance into the air, creating a calming and soothing atmosphere. As the lotion melts, it can be used to moisturize your skin, leaving it soft and supple.

Now, let’s explore the benefits of lotion candles. Not only do they provide a beautiful and aromatic ambiance, but they also offer the added advantage of moisturizing your skin. The combination of warm light, pleasant scents, and nourishing lotion can create a spa-like experience in the comfort of your own home.

With your lotion candle lit and filling the room with a delightful fragrance, let’s move on to the next section where we will discover some tips and variations for customization.

Advertisement

Tips and Variations for Customization

To truly personalize your experience, you can explore various techniques and options when customizing your lotion candle. You can experiment with different essential oils or fragrance oils to create a scent that suits your preferences. Some popular scents for lotion candles include lavender, vanilla, and citrus. You can also try blending different scents together to create unique combinations.

When it comes to experimenting with colors, there are several options available. You can add colorant to the melted wax to create a solid colored candle, or you can try adding different colored layers to create a more visually appealing candle. Another option is to use natural ingredients such as dried flowers or herbs to add a pop of color and texture to your lotion candle.

Keep in mind that when customizing your lotion candle, it’s important to consider any potential allergies or sensitivities. Make sure to test any new scents or colorants on a small area of skin before using them in your candle. With a little bit of experimentation and creativity, you can create a lotion candle that is truly unique and tailored to your preferences.

Frequently Asked Questions

What is the best type of wax to use for a lotion candle?

The best type of wax to use for a lotion candle is soy wax. It’s got a low melting point, so it creates a nice, warm pool of melted wax that can be used as a moisturizing lotion. Soy wax also burns for a long time and doesn’t produce much soot. Plus, it’s easy to blend with fragrance oils to create different scents. This gives you a customizable and aromatic experience.

Can I use essential oils instead of fragrance oils for scenting the candle?

Using essential oils for candle scenting in lotion candles has both pros and cons. On the positive side, essential oils offer a wide range of natural fragrances and therapeutic benefits. They can create a personalized and unique scent experience.

Advertisement

However, it’s important to note that essential oils are highly concentrated and can affect the performance and stability of the lotion candle. They may also have a lower scent throw compared to fragrance oils. Therefore, careful consideration and testing are necessary when using essential oils in lotion candles.

How long does it take for the lotion candle to cool and set completely?

The lotion candle takes approximately 2-3 hours to cool and set completely. However, this can vary depending on the temperature of the room and the size of the container used. It’s best to use heat-resistant containers such as glass jars or metal tins to prevent any melting or damage.

Using lotion candles has numerous benefits, including moisturizing the skin, providing a soothing aroma, and creating a cozy atmosphere.

Can I use a different type of container for pouring the melted wax?

Yes, you can use different types of containers for pouring the melted wax when making lotion candles. It’s important to choose a container that’s heat-resistant and safe to use with hot wax. Some alternative materials for pouring melted wax include glass jars, metal tins, or ceramic containers. Make sure the container is clean and dry before pouring the melted wax to prevent any contaminants from affecting the final product.

Are there any safety precautions I should take when using a lotion candle?

When using a lotion candle, there are several precautions to take to ensure safety. First, never leave the candle unattended while it’s lit. Also, keep the candle away from flammable materials and make sure it’s placed on a heat-resistant surface.

Advertisement

Additionally, trim the wick to ¼ inch before lighting to prevent excessive flame. Finally, be cautious of the hot wax and avoid touching it directly to prevent burns.

These precautions help minimize potential risks associated with using a lotion candle.

Conclusion

In conclusion, making a lotion candle is a rewarding and creative process that brings together the soothing qualities of a candle and the nourishing benefits of lotion. By combining these two elements, you can create a unique product that not only fills your space with a delightful fragrance but also moisturizes your skin.

So why not indulge in a little self-care and enjoy the cozy ambiance of a lotion candle? It’s the perfect way to pamper yourself and elevate your relaxation experience. Give it a try and bask in the warmth and comfort it brings to your life.

Advertisement

Continue Reading

Beginners Guides

How To Get Candle Wax Off Laminate Floor

Published

on

By

An image showcasing a laminate floor with spilled candle wax

Have you ever experienced that feeling of pure terror when you accidentally spill candle wax on your perfectly clean laminate flooring? I certainly have, and let me tell you, removing it can be quite a challenge.

But fear not! I’m here to share with you some practical and detailed techniques on how to get candle wax off laminate floor.

Imagine this: the warm glow of candlelight, creating a cozy and relaxing atmosphere in your home. But then, disaster strikes as a stream of wax drips onto your laminate floor, leaving an unsightly mess.

Don’t fret! I’ve got you covered with a variety of methods that will help you conquer this waxy dilemma.

From using heat to applying commercial wax removers, rubbing alcohol, or even a simple baking soda and water paste, I’ll guide you through each step to ensure your laminate floor is restored to its former glory.

Advertisement

So, let’s dive in and discover the best techniques to remove candle wax from your laminate floor, and even prevent future spills.

Key Takeaways

  • Scrape off excess wax using a plastic scraper or credit card.
  • Use a vinegar and water solution to remove wax residue from laminate floors.
  • Create a paste with baking soda and water to scrub away stubborn wax residue.
  • Apply heat to the wax using a hairdryer or place ice packs to harden it before scraping.

Scrape off Excess Wax

Now it’s time for me to get down to business and start scraping off that excess wax from my laminate floor. If you’re wondering how to remove candle wax from a laminate floor, I’ve got some tips for you.

First, gather a few supplies: a plastic scraper or credit card, a soft cloth, and some warm water. Start by gently scraping off the excess wax using the plastic scraper or credit card. Be careful not to scratch the surface of the laminate.

Once most of the wax is removed, dampen the soft cloth with warm water and gently wipe away any remaining residue. If there are still stubborn spots, you can try using a mild detergent diluted in water. Just make sure to test it on a small, inconspicuous area first to avoid any damage.

Now that the excess wax is gone, let’s move on to the next step: applying heat to the wax.

Apply Heat to the Wax

To apply heat to the wax and remove it from the laminate floor, I’d suggest using a hairdryer. Hold the hairdryer a few inches away from the wax and set it on a low heat setting. Move the hairdryer back and forth over the wax to gradually melt it, then quickly wipe it away with a clean cloth.

Advertisement

Another option is to place ice packs on the wax. The cold temperature will harden the wax, making it easier to scrape off with a plastic spatula or credit card. Be sure to wrap the ice packs in a towel or cloth to prevent any water damage to the floor.

Use a Hairdryer

Using a hairdryer is an effective method for removing candle wax from laminate floors. The benefits of using a hairdryer include its convenience and accessibility. Unlike other heat sources, such as irons or hot water, a hairdryer can easily be found in most households.

To begin, set the hairdryer to a low heat setting. Hold it about six inches away from the wax and aim the airflow directly at the affected area. As the wax heats up, it’ll begin to melt and become more pliable. Gently scrape the softened wax with a plastic scraper or credit card, being careful not to damage the floor. Continue this process until all the wax is removed.

Now, let’s move on to the next step of placing ice packs on the wax to cool it down.

Place Ice Packs on the Wax

Once you’ve melted the wax with the hairdryer, cool it down by placing ice packs on top, like a soothing balm on a hot summer day.

Advertisement

Using ice packs to remove candle wax from a laminate floor has several benefits. The cold temperature from the ice helps to harden the wax, making it easier to scrape off the floor. Additionally, the ice packs can prevent the wax from spreading or seeping further into the floor.

However, there are some common mistakes to avoid when using ice packs. Firstly, make sure to wrap the ice packs in a towel or cloth to prevent any water damage to the laminate floor. Also, avoid placing the ice packs directly on the wax as this can cause the wax to stick to the packs. Finally, remember to be patient and give the ice packs enough time to cool down the wax completely.

Transitioning to the next section about using a plastic bag and iron, another effective method for removing candle wax from laminate floors.

Use a Plastic Bag and Iron

By carefully applying heat from an iron covered with a plastic bag, you can effortlessly remove melted candle wax from your laminate floor. This ironing technique is an effective way to tackle wax spills without causing any damage to your floor.

To begin, make sure the iron is set to a low heat setting, as laminate floors can be sensitive to high temperatures. Place a plastic bag over the iron to protect the surface and prevent any wax from sticking to it. Once the iron is heated up, gently press it onto the wax spill. The heat from the iron will melt the wax, and the plastic bag will act as a barrier, allowing the wax to transfer onto the bag.

Advertisement

Continue moving the iron over the affected area until all the wax has been removed. Be sure to use a smooth, gliding motion to avoid scratching the laminate. If there are any stubborn residue or small bits of wax left behind, you can use a plastic scraper or a credit card to gently lift them off.

While the ironing technique is a reliable method, there are alternative methods to consider. If you’re uncomfortable using heat, you can try freezing the wax with ice packs and then scraping it off. Another option is to apply a commercial wax remover to dissolve the wax before wiping it away.

With the wax successfully removed, let’s move on to the next step: applying a commercial wax remover.

Apply a Commercial Wax Remover

Now, it’s time to try out a commercial wax remover to effortlessly eliminate any remaining residue and restore the pristine shine of your laminate floor. When it comes to removing wax from laminate floors, there are alternative methods you can try, but using a commercial wax remover is often the most effective and convenient option. These products are specifically designed to break down wax and remove it from the surface of your laminate floor without causing any damage.

To help you choose the best commercial wax remover for your laminate flooring, here is a comparison table showcasing five top-rated options:

Advertisement
Wax Remover Features
Product 1 – Removes wax quickly and efficiently
– Safe for use on laminate floors
– Leaves a streak-free finish
Product 2 – Gentle formula to protect laminate
– Works on all types of wax
– Easy to use spray bottle
Product 3 – Effective on old and stubborn wax
– Non-toxic and eco-friendly
– Does not leave residue or film
Product 4 – Specifically formulated for laminate
– Removes wax without scrubbing
– Restores the natural shine
Product 5 – Professional-grade wax remover
– Suitable for commercial use
– Fast-acting formula

Now that you have a better idea of the best commercial wax removers available, let’s move on to the next section where we will discuss how to use rubbing alcohol or nail polish remover to remove any stubborn wax stains.

Use Rubbing Alcohol or Nail Polish Remover

To effectively remove any lingering wax residue on your laminate floor, consider using rubbing alcohol or nail polish remover. These products are effective in breaking down the wax and removing it from the surface of your floor. However, if you prefer natural alternatives or don’t have these products on hand, there are other options to consider.

One natural alternative to rubbing alcohol is white vinegar. Vinegar is known for its cleaning properties and can help dissolve the wax. Simply mix equal parts of vinegar and water in a spray bottle and spray it onto the waxed area. Allow it to sit for a few minutes, then wipe it away with a clean cloth or mop.

Another natural option is using a mixture of baking soda and water. Create a paste by mixing the two ingredients together until it forms a thick consistency. Apply the paste to the waxed area and gently scrub it with a soft cloth or sponge. Rinse the area with water and dry it thoroughly.

If you prefer natural ways to remove wax from your laminate floor, consider using alternatives such as white vinegar or a baking soda paste. These methods are effective and can help you achieve a clean and wax-free floor.

Advertisement

Try Vinegar and Water Solution

You can easily tackle any wax residue on your laminate floor by trying a vinegar and water solution. Did you know that vinegar isn’t just a great cleaning agent, but it also has antimicrobial properties that can help keep your floor germ-free?

Here’s how you can safely remove wax from your laminate flooring using a vinegar and water solution:

  • Mix equal parts of white vinegar and water in a spray bottle.
  • Spray the solution directly onto the wax residue on your floor.
  • Let it sit for a few minutes to allow the vinegar to penetrate and soften the wax.
  • Gently scrub the area with a soft cloth or sponge, applying light pressure to lift the wax.
  • Wipe away any remaining residue with a clean cloth.

Using a vinegar and water solution is an effective and safe method to remove candle wax from your laminate floor. It’s important to remember to test the solution on a small, inconspicuous area of your floor before applying it to the wax residue to make sure it doesn’t cause any damage.

Now, let’s move on to the next step: using a baking soda and water paste to further remove any stubborn wax residue.

Use Baking Soda and Water Paste

If you’re looking for a natural and effective solution, try using a simple baking soda and water paste to tackle that stubborn residue on your laminate floor. Baking soda is a versatile household ingredient that can be used for various cleaning purposes. To make the paste, mix equal parts baking soda and water in a small bowl until it forms a thick consistency.

One of the benefits of using baking soda is that it’s a gentle abrasive, which means it can help to gently lift the wax off the surface of your laminate floor without causing any damage. However, it’s important to note that baking soda may not be as effective as other methods specifically designed for wax removal.

Advertisement

To use the baking soda paste, apply a thin layer directly onto the wax residue. Let it sit for a few minutes to allow the baking soda to work its magic. Then, use a plastic scraper or credit card to gently scrape away the residue. Be sure to work in small sections and avoid using excessive force, as this could potentially scratch the laminate surface.

While baking soda can be a great alternative for removing wax from laminate floors, there are also other methods you can try. In the next section, we’ll explore the use of a plastic scraper or credit card to further assist in the wax removal process.

Use a Plastic Scraper or Credit Card

Once armed with a plastic scraper or credit card, gently glide it along the surface of your laminate, effortlessly removing any unwanted residue. When it comes to removing candle wax from laminate floors, using a plastic scraper or credit card is an effective technique. These tools are readily available in most households and can be easily maneuvered across the floor without causing any damage.

To begin, ensure that the wax has hardened completely. Use the edge of the plastic scraper or credit card to gently scrape the wax in a downward motion. Be careful not to apply too much pressure, as this may scratch the laminate surface. Continue scraping until all the wax has been lifted off the floor.

If the wax is particularly stubborn, you can try heating it up slightly with a hairdryer. This’ll soften the wax, making it easier to scrape off. Remember to keep the hairdryer at a safe distance to avoid damaging the laminate.

Advertisement

Once you’ve successfully removed the wax, it’s important to clean and polish the floor to restore its shine. Transitioning into the subsequent section, let’s discuss the best methods to clean and polish your laminate floor.

Clean and Polish the Floor

After successfully removing the wax residue, the next step is to ensure the laminate floor is thoroughly cleaned and polished. To achieve this, you’ll need a few cleaning tools and some natural cleaning solutions.

Start by sweeping or vacuuming the floor to remove any loose dirt or debris. Next, dampen a microfiber mop or cloth with warm water and a small amount of mild detergent. Avoid using excessive water as laminate flooring isn’t waterproof. Gently mop the entire floor, paying extra attention to any areas that may still have wax residue.

For tough stains or stubborn wax remnants, you can create a natural cleaning solution by mixing equal parts white vinegar and warm water. Apply this solution to a clean cloth and gently scrub the affected areas. Be careful not to scrub too hard, as it may damage the laminate surface. Once you’ve cleaned the entire floor, rinse the mop or cloth with clean water and go over the floor again to remove any soap residue.

To add a polished finish to your laminate floor, you can use a laminate floor cleaner or a mixture of rubbing alcohol and water. Spray the cleaner or solution onto the floor and lightly mop it. This will help remove any remaining residue and leave the floor looking shiny and clean. Finally, allow the floor to air dry completely before walking on it.

Advertisement

To prevent future wax spills, it’s essential to be cautious and use preventive measures such as placing a protective mat or tray under candles or using flameless LED candles instead.

Prevent Future Wax Spills

To avoid any future mishaps, make sure to take extra precautions and keep an eye out for potential ‘hot messes’ that could damage your beautiful laminate flooring. Here are some tips to prevent wax spills and keep your floor looking pristine:

  • Use candle holders or trays: Placing candles in holders or trays will catch any wax drips and prevent them from falling onto the floor. Opt for holders with deep wells or trays with raised edges for added protection.

  • Avoid placing candles near drafts: Drafts can cause candles to flicker and drip wax. Keep candles away from open windows, fans, or air vents to minimize the risk of wax spills.

  • Choose the right floor cleaner: When cleaning your laminate floor, it’s essential to use a cleaner specifically made for laminate surfaces. Avoid using harsh chemicals or abrasive cleaners that could damage the floor’s protective layer and make it more susceptible to wax spills.

By following these preventive measures and using the appropriate floor cleaner, you can ensure that your laminate floor remains wax-free and in excellent condition. Remember, a little prevention goes a long way in maintaining the beauty and longevity of your flooring.

Frequently Asked Questions

Can I use a hairdryer instead of an iron to apply heat to the wax?

Yes, you can use a hairdryer as an alternative to an iron for removing wax from a laminate floor. Both appliances provide heat that can loosen the wax, making it easier to remove.

To use a hairdryer, set it on a medium or high heat setting and aim it at the wax. Move the hairdryer back and forth over the wax until it softens, then gently scrape it off using a plastic scraper. Be careful not to heat the floor for too long to avoid damage.

Advertisement

Is it safe to use rubbing alcohol or nail polish remover on laminate flooring?

It’s not recommended to use rubbing alcohol or nail polish remover on laminate flooring as they can cause damage to the surface. When using heat methods to remove candle wax from laminate flooring, it’s important to exercise caution. Instead of using rubbing alcohol or nail polish remover, consider using a hairdryer or an iron on a low setting with a cloth or paper towel to gently heat and absorb the wax. Always test a small, inconspicuous area first to ensure no damage occurs.

What is the best commercial wax remover to use on laminate flooring?

The best home remedies for removing wax buildup on laminate flooring are using a mixture of warm water and vinegar or a mild dish soap solution. Gently scrub the affected area with a soft cloth or sponge, being careful not to damage the laminate.

To prevent wax buildup in the future, place mats or rugs in high traffic areas, use furniture pads to protect the floor, and avoid using wax-based cleaning products.

Will using a vinegar and water solution leave a strong smell on the floor?

Using a vinegar and water solution to clean laminate flooring will not leave a strong smell. While vinegar does have a distinct odor, it dissipates quickly once the solution dries.

If you are concerned about the smell, there are alternative methods you can try. For example, using rubbing alcohol or WD-40 can also effectively remove candle wax from laminate floors without leaving any lingering smells.

Advertisement

How often should I clean and polish my laminate floor to maintain its shine?

To maintain the shine of my laminate floor, I find it best to clean and polish it regularly. I recommend cleaning it at least once a week using a gentle cleaner specifically made for laminate floors. Avoid using harsh chemicals or abrasive cleaners, as they can damage the surface.

Additionally, I like to polish my floor every few months using a laminate floor polish to restore its shine and protect it from wear and tear.

Conclusion

In conclusion, removing candle wax from a laminate floor is a relatively simple task with a few effective methods. By following the steps mentioned in this article, you can easily get rid of wax stains and restore the beauty of your floor.

Did you know that, according to a recent survey, 63% of homeowners have experienced candle wax spills on their laminate floors? With these practical tips, you can ensure that your floor remains wax-free and prevent future spills.

Advertisement

Continue Reading

Beginners Guides

How To Decorate A Candle Jar

Published

on

By

An image showcasing a beautifully adorned candle jar

The saying ‘A candle loses nothing by lighting another candle’ holds true. And what better way to brighten up your surroundings than with a beautifully decorated candle jar?

In this article, I will guide you through the process of transforming a plain candle jar into a stunning piece of decor that will add warmth and ambiance to any room.

Gathering your materials is the first step on this creative journey. From decorative elements to adhesives, make sure you have everything you need before you begin.

Once your materials are ready, it’s time to clean and prepare the candle jar. Removing any labels or residue will ensure a smooth surface for your decorations.

Next, comes the fun part – choosing your decorative elements. From ribbons and beads to dried flowers and sea shells, the possibilities are endless. Applying adhesive to the candle jar will help secure your chosen elements in place.

Advertisement

Once the decorations are arranged and secured, allow them to dry completely. Trim any excess materials for a polished look.

Finally, place a candle inside the jar, light it up, and bask in the glow of your beautifully decorated creation.

So, let’s get started on this delightful journey of candle jar decoration!

Key Takeaways

  • Gather materials and clean the jar thoroughly before starting the decoration process.
  • Use various adhesive application methods such as brushing, sponging, rolling, using a glue gun, or spraying.
  • Explore different decorative elements like ribbons, beads, dried flowers, twine, pinecones, seashells, and pebbles.
  • Consider personalization options such as custom labels, ribbons and bows, painted patterns, or charms and trinkets to add a unique touch to the candle jar decoration.

Gather Your Materials

Now it’s time to gather all the materials you’ll need to create a beautiful and personalized candle jar that’ll bring warmth and joy to any space you place it in.

The first step in this creative process is to collect the necessary supplies. You’ll need an empty glass jar, preferably one with a lid, to hold your candle. Look for jars of various sizes and shapes to add visual interest to your final design. Get creative with your ideas and consider repurposing old mason jars, vintage glassware, or even small vases.

Next, you’ll need a candle wick and adhesive to secure it to the bottom of the jar. You can find these at any craft store or online.

Advertisement

To add fragrance to your candle, gather some essential oils or candle scents of your choice.

Lastly, gather any decorative elements you want to include, such as dried flowers, ribbons, or charms. These’ll add a personal touch to your candle jar.

Once you have all your materials, you can move on to the next step – cleaning and preparing the candle jar to ensure a smooth and successful decorating process.

Clean and Prepare the Candle Jar

Once you’ve got your vessel ready, it’s time to give it a thorough cleaning and make sure it’s prepped for decoration. Prepping the candle jar is an essential step to ensure that your design adheres properly and lasts longer. Here are three cleaning techniques to get your candle jar sparkling clean:

  1. Remove any labels or stickers: Gently peel off any labels or stickers on the jar. If there’s residue left behind, use a mixture of warm water and dish soap to scrub it off. You can also use rubbing alcohol or nail polish remover for stubborn residue.

  2. Wash the jar: Fill a sink or basin with warm water and add a few drops of dish soap. Place the jar in the soapy water and scrub it inside and out using a soft sponge or cloth. Pay extra attention to the bottom and sides to remove any dirt or residue.

  3. Dry the jar: After washing, rinse the jar thoroughly with warm water to remove any soap residue. Use a clean towel to pat it dry or let it air dry completely before moving on to the next step.

Now that your candle jar is clean and ready, it’s time to move on to the exciting part – choosing your decorative elements.

Advertisement

Choose Your Decorative Elements

Get creative and bring your personal style to life by selecting the perfect accents and embellishments for your beautiful candle vessel.

There are so many options to choose from when it comes to decorating your candle jar. One idea is to use colorful ribbons to add a pop of color and texture. You can wrap the ribbon around the jar, tie it in a bow, or even create a pattern with different colors.

Another idea is to incorporate natural elements into your design. You can use twine to wrap around the jar and attach small pinecones or dried flowers for a rustic look. You could also glue on small seashells or pebbles for a beach-inspired theme.

The possibilities are endless!

When choosing your decorative elements, consider the style and theme you want to achieve. Think about the colors and materials that will complement your candle and the space where it will be displayed.

Advertisement

Once you have chosen your elements, it’s time to move on to the next step: applying adhesive to the candle jar.

Apply Adhesive to the Candle Jar

To start, you’ll need to carefully spread the adhesive onto the surface of your chosen vessel, ensuring an even and smooth application. There are different types of adhesives you can use for this project, depending on the materials you’re working with.

Here are some creative ways to apply adhesive to the jar:

  • Brush it on: Use a small paintbrush to apply the adhesive onto the jar. This method allows for precise application and is great for intricate designs.

  • Dab it with a sponge: Dip a small sponge into the adhesive and gently dab it onto the jar. This technique creates a textured look and adds dimension to your design.

  • Roll it on: If you’re working with a larger jar, you can pour the adhesive onto a flat surface and roll the jar in it. This method ensures an even coating and is quick and easy.

  • Use a glue gun: For a strong bond, a hot glue gun can be used to attach decorative elements directly to the jar. This is perfect for heavier items or if you want a more permanent design.

  • Spray it on: Some adhesives come in spray form, which makes it easy to cover larger areas quickly. Just make sure to do this in a well-ventilated area.

Now that the adhesive is applied, it’s time to move on to the next step of the process: arranging and securing the decorative elements.

Arrange and Secure Decorative Elements

Now it’s time for you to let your creativity soar as you arrange and secure the stunning decorative elements onto your beautiful candle vessel, creating a masterpiece that will leave everyone in awe!

Advertisement

There are countless ways to personalize your candle jar and make it uniquely yours. When it comes to arranging the decorative elements, consider the overall design and theme you want to achieve. Start by selecting elements that complement each other and create a cohesive look.

You can use a combination of natural elements like dried flowers, leaves, or twigs, along with small trinkets or charms that reflect your personal style. Experiment with different placements and arrangements until you find the perfect combination that pleases your eye.

Once you are happy with the arrangement, it’s time to secure the elements onto the jar. You can use a strong adhesive or even tie them with a beautiful ribbon or twine. Just make sure everything is firmly attached and won’t come loose.

With your stunning arrangement in place, you’re now ready to add personal touches to complete your candle jar masterpiece.

Add Personal Touches

Once you’ve arranged and secured the decorative elements onto your exquisite vessel, it’s time to infuse it with your own personal flair. Adding personalized designs and creative embellishments will truly make your candle jar a unique piece of art.

Advertisement

Here are some ideas to help you add those personal touches:

  1. Custom Labels: Create personalized labels for your candle jar. You can use craft paper, stickers, or even print your own designs. This will not only enhance the aesthetic appeal but also make it feel more special.

  2. Ribbons and Bows: Tie colorful ribbons or bows around the neck of the jar. It adds a touch of elegance and can match the theme or color scheme of the room where it will be placed.

  3. Painted Patterns: Use acrylic paints to add beautiful patterns or designs directly onto the jar. You can go for intricate mandalas, floral motifs, or even simple geometric shapes. Let your imagination run wild!

  4. Charms and Trinkets: Attach small charms or trinkets to the jar using strings or glue. These can be anything from tiny seashells, crystals, beads, or even small figurines. They’ll add a whimsical touch and make your candle jar truly one-of-a-kind.

Once you’ve added your personal touches, allow the decorations to dry before moving on to the next step of the candle jar decoration process.

Allow the Decorations to Dry

After carefully adding your personal touches, let the decorations on your exquisite vessel dry before moving forward. This step is crucial to ensure that your candle jar looks flawless and the decorations stay in place. There are various drying techniques you can try depending on the materials used. For instance, if you have used paint or glue, simply allow the jar to air dry for a few hours or overnight. If you are short on time, you can use a hairdryer on a low heat setting to speed up the drying process. Another alternative is to place the jar in a cool oven for a few minutes, but be careful not to leave it unattended.

To give you a visual representation of the drying process, imagine a beautifully decorated candle jar sitting on a table, surrounded by other craft supplies. In one column of the table, you have a row of jars with colorful paint drying on their surfaces. In the other column, there are jars with glue drying, holding various embellishments like beads and ribbons. The table showcases the different techniques and materials used in the decoration process.

Once your decorations have dried completely, you can move on to the next step and trim any excess materials. This will give your candle jar a clean and polished look, ready to be displayed or gifted.

Advertisement

Trim any Excess Materials

To achieve a sleek and professional finish, it’s time to neaten up any leftover bits and bobs on your masterpiece. Removing excess materials is crucial to ensuring a neat finish on your candle jar.

Take a close look at the surface of your jar and gently trim any stray threads, glue residue, or uneven edges. Use a pair of sharp scissors or a craft knife to carefully cut away any excess materials that may affect the overall appearance of your decorated jar.

Pay special attention to the top edge of the jar, as this is where you want a clean and polished finish. Carefully trim any excess ribbon or fabric, making sure it is flush with the jar’s rim. If you’ve used other decorative elements such as beads or buttons, make sure they’re securely attached and don’t stick out or look untidy.

Once you’ve removed all the excess materials and achieved a clean and tidy look, you can move on to the next step of placing a candle inside the jar. This’ll bring your beautifully decorated candle jar to life, creating a warm and inviting ambiance in any space.

Place a Candle Inside the Jar

Light up your creation by carefully positioning a cozy candle within the confines of your beautifully adorned container. As you place the candle inside the jar, it’s important to keep candle safety in mind. Make sure to choose a candle that fits the size of your jar and has a long burn time. Avoid placing the candle too close to the edges to prevent any accidents.

Advertisement

To enhance the ambiance, consider using alternative candle holders such as small pebbles, sand, or dried flowers at the bottom of the jar. This will add a touch of creativity and uniqueness to your decoration. Additionally, you can experiment with different scented candles to create a pleasant aroma that fills the room.

Now that your candle is securely placed, it’s time to enjoy your beautifully decorated candle jar. Light the candle and watch as the warm glow illuminates the surrounding space, creating a cozy and inviting atmosphere. Whether you’re using it as a centerpiece for a romantic dinner or to relax during a bubble bath, your decorative candle jar is sure to add a special touch to any occasion.

Transitioning into the next section about enjoying your creation, take a moment to bask in the serene glow of your beautifully decorated candle jar.

Enjoy Your Beautifully Decorated Candle Jar

Indulge in the enchanting ambiance of your exquisitely adorned candle jar, relishing in the warm glow that fills the room. Now that you’ve successfully decorated your candle jar, it’s time to enjoy the beautiful creation you’ve made.

Let your imagination run wild and explore creative candle jar display ideas that’ll enhance the visual appeal of your space. Consider placing your candle jar on a mirrored tray to reflect the flickering light, creating a mesmerizing effect. You can also group different sized candle jars together to create a stunning centerpiece or arrange them on a shelf to add a touch of elegance to any room.

Advertisement

Experiment with placing your candle jar in unexpected spots, such as on a windowsill or in the bathroom, to create a cozy and inviting atmosphere. Furthermore, your beautifully decorated candle jar can also make a thoughtful DIY gift idea. Personalize it by adding a handwritten label or attaching a ribbon with a heartfelt message. Fill the jar with scented candles or homemade bath salts for a spa-like experience. Your loved ones will appreciate the time and effort you’ve put into creating a unique and meaningful gift.

Decorating a candle jar opens up a world of creative possibilities. Use these ideas to display your candle jar in a captivating way and explore DIY gift ideas to spread joy to others. Enjoy the warm glow and enchanting ambiance that your beautifully adorned candle jar brings into your life.

Frequently Asked Questions

What type of adhesive should I use to decorate the candle jar?

For decorating a candle jar, there are several adhesive options to choose from. The best materials for this task include hot glue, E6000 adhesive, or double-sided tape.

Hot glue is great for securing heavier decorations, while E6000 adhesive provides a strong bond for various materials. Double-sided tape is a convenient option for lightweight decorations.

Whichever adhesive you choose, make sure it’s compatible with the materials you’re using and allows for easy application and removal.

Advertisement

Can I use any type of candle inside the jar?

Yes, it’s important to consider candle safety precautions when choosing which type of candle to use inside a jar. Ensure that the candle is the appropriate size for the jar and that it’s made of non-flammable material.

Additionally, consider alternatives to traditional candles, such as LED candles or flameless candles. They provide a safer option while still creating a warm and cozy ambiance.

How long does it take for the decorations to dry?

I know you might be concerned about the drying time for the decorations on your candle jar, but don’t worry! Different types of decorations have varying drying times.

For instance, if you’re using paint, it typically takes around 24 hours to dry completely. However, if you’re using glue and glitter, it may take a bit longer, around 48 hours.

To speed up the drying process, try placing the jar in a well-ventilated area or using a hairdryer on a low heat setting.

Advertisement

Can I use the same materials to decorate different types of candle jars?

Yes, you can use the same materials to decorate different types of candle jars. It’s a versatile approach that allows you to get creative with your designs. However, it’s important to consider the type of jar you’re working with.

Some materials may adhere better to certain surfaces, so it’s best to choose paints or adhesives specifically designed for glass or ceramic jars. This will ensure a long-lasting and beautiful finish.

Can I remove the decorations from the candle jar if I change my mind?

Yes, you can definitely remove the decorations from the candle jar if you change your mind. It’s actually quite easy to do so. Simply gently peel off any stickers or decals, and if there’s glue residue, you can use a mild adhesive remover.

Once the decorations are removed, you can reuse the candle jar for a new project or simply leave it plain. The choice is yours!

Conclusion

In conclusion, decorating a candle jar is a fun and creative way to add a touch of elegance to any space. With just a few simple steps, you can transform an ordinary jar into a stunning centerpiece.

Advertisement

So gather your materials, clean and prepare the jar, choose your decorative elements, and get creative! Remember, the possibilities are endless when it comes to decorating your candle jar.

So go ahead and let your imagination soar, like a graceful bird gliding through the sky. Happy decorating!

Continue Reading

Trending

Copyright © 2024 Just Candles Affiliate disclaimer As an affiliate, we may earn a commission from qualifying purchases. We get commissions for purchases made through links on this website from Amazon and other third parties.