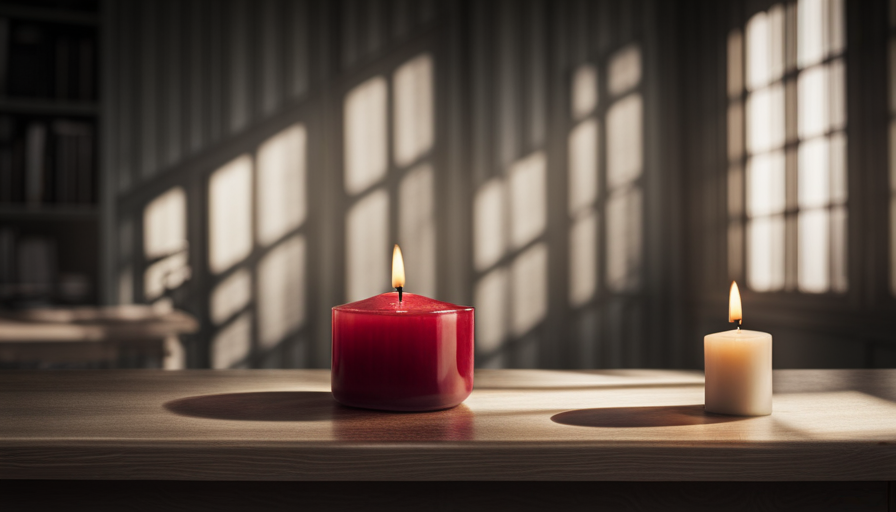
Connect with us

Beginners Guides

What To Do With Extra Candle Wax

Published

on

An image showcasing a rustic wooden tray adorned with vibrant layers of melted candle wax, artfully arranged in various colors and textures

As I look at the shimmering light of a candle, it brings to mind the captivating play of luminosity and heat it adds to a room. However, as the candle diminishes, it leaves behind a tiny puddle of wax, which appears to be overlooked. Worry not, though, for this melted treasure is ripe with limitless potential!

In this article, I will guide you through the myriad of ways to transform that extra candle wax into something extraordinary. From creating new candles and delightful wax melts to crafting DIY fire starters and enchanting wax seal letters, the options are as vast as the imagination.

Engage your little ones with wondrous wax crafts, or utilize wax for furniture and wood care, rust prevention, and even beauty and self-care. With a little knowledge and a touch of creativity, that leftover wax will no longer go to waste.

So, join me on this journey of discovery as we unlock the hidden potential of candle wax, turning remnants into works of art and practical wonders. Let’s embark on this wax-filled adventure together!

Key Takeaways

  • Candle wax can be repurposed into new candles, wax melts, DIY fire starters, and wax seal letters.
  • Wax melts are a flameless alternative to candles and can be made using leftover candle wax.
  • DIY fire starters can be made using candle wax, cardboard egg cartons, and dryer lint.
  • Wax seal stamps can be used to create unique designs and explore different colors.

Make New Candles

If you’re feeling crafty, you can repurpose that extra candle wax and transform it into beautiful new candles. Candle making techniques are easy to learn, and you’ll be amazed at the results you can achieve by repurposing old candles.

To start, gather your leftover wax and remove any wicks or debris. If the wax has hardened, simply heat it in a double boiler until it becomes liquid again.

Advertisement

Next, choose a container for your new candle. It could be a glass jar, a tin can, or even a teacup. Place a wick in the center of the container and secure it with a dab of hot glue.

Slowly pour the melted wax into the container, making sure to leave enough space at the top for the wax to expand when it solidifies. Let the candle cool and harden overnight.

The next day, trim the wick to a quarter of an inch and light up your beautiful new candle.

Now, onto the next section about creating wax melts, a great alternative to candles.

Create Wax Melts

To get creative and make your space smell amazing, consider crafting your own wax melts using leftover candle wax. Wax melts are a fantastic alternative to traditional candles because they provide a flameless way to enjoy beautiful scents throughout your home. Not only are they easy to make, but they also offer several benefits.

Advertisement

Here are four wax melt recipes you can try:

  • Lavender Dreams: Mix lavender essential oil with dried lavender buds for a calming and soothing scent.

  • Citrus Burst: Combine orange, lemon, and grapefruit essential oils for a refreshing and uplifting aroma.

  • Cozy Vanilla: Blend vanilla extract and cinnamon oil for a warm and inviting fragrance.

  • Fresh Linen: Use a combination of clean cotton and fresh linen scents for a crisp and revitalizing smell.

Using wax melts has several advantages. They last longer than traditional candles, as the scent is released slowly over time. Additionally, they’re safer to use since there’s no open flame. Wax melts are also versatile, as you can mix and match scents to create your own unique combinations.

Now, let’s transition to the next section about DIY fire starters.

DIY Fire Starters

Get creative and ignite your fire easily with DIY fire starters that you can easily make at home! When it comes to repurposing candle wax, making fire starters is a great option. Not only does it save you money, but it also helps reduce waste.

DIY fire starters are simple to make and can be used for camping trips, bonfires, or even just starting a cozy fire in your fireplace. To make DIY fire starters, you’ll need some candle wax, cardboard egg cartons, dryer lint, and a double boiler.

Advertisement

Start by melting the candle wax in the double boiler until it becomes a liquid. While the wax is melting, fill each compartment of the egg carton with dryer lint. Once the wax is melted, carefully pour it over the dryer lint, making sure to saturate it completely. Allow the wax to cool and harden before cutting the fire starters into individual sections.

When it’s time to start a fire, simply place one of these DIY fire starters under your kindling and light it. The wax will act as a fuel, helping to ignite the fire quickly and easily. So, next time you have leftover candle wax, consider making these DIY fire starters to make starting your fires a breeze.

Now, let’s move on to another creative use for candle wax: wax seal letters and envelopes.

Wax Seal Letters and Envelopes

I absolutely love using wax seals on my letters and invitations. It adds such a personal touch and makes the recipient feel special.

By using a wax seal stamp, I can create unique designs and explore different colors to match the theme or mood of the occasion. It’s a small detail that can make a big impact on the overall presentation of my correspondence.

Advertisement

Use a wax seal stamp

Imagine adding a touch of elegance to your letters or invitations by using a wax seal stamp on the envelope, creating a beautiful and personalized finishing touch. A wax seal stamp is a versatile tool that can be used in various creative ways.

Here are two sub-lists to give you some ideas:

  1. Creative uses of a wax seal stamp:

    • Use different colored wax to match the theme or mood of your event.
    • Experiment with different stamp designs to reflect your personal style or the occasion.
  2. How to use a wax seal stamp effectively:

    • Heat the wax until it melts and drips onto the envelope.
    • Press the stamp firmly into the melted wax and hold it for a few seconds to ensure a clean impression.

Adding a wax seal stamp to your invitations or letters allows you to add a personal touch and elevate the overall presentation. It’s a small detail that can make a big impact, leaving a lasting impression on your recipients.

Add a personal touch to invitations or letters

Enhance the charm of your invitations or letters by adding a personal touch with a wax seal stamp. By using a wax seal stamp, you can create personalized stationery that will impress your recipients. The process is simple yet adds a touch of elegance to any correspondence. First, choose a wax color that complements your stationery. Then, melt the wax and carefully pour it onto the desired area. Next, press the wax seal stamp firmly into the molten wax and hold for a few seconds. As the wax cools and hardens, it forms a beautifully embossed design that adds a unique and sophisticated touch. For an extra special touch, consider adding wax dipped flowers to your invitations or letters. This delicate detail will surely impress your recipients and make your correspondence stand out.

To further elevate your creations, explore different colors and designs for your wax seal stamps.

Explore different colors and designs

Discover the vast array of vibrant colors and intricate designs available for your wax seal stamps, like a kaleidoscope of possibilities that’ll bring your correspondence to life.

Advertisement

When it comes to exploring different colors, you can find wax in almost every shade imaginable, from bold and bright to soft and pastel.

Additionally, there are various techniques you can experiment with to create unique designs on your wax seals. Try swirling different colors together for a marbled effect or using a toothpick to create intricate patterns.

Furthermore, don’t limit yourself to just plain wax. You can also find scented wax in different fragrances, adding an extra sensory element to your invitations or letters.

With so many options to choose from, the possibilities are endless.

Transitioning into the next section about wax crafts for kids, let’s now explore some fun and creative activities that children can enjoy with leftover candle wax.

Advertisement

Wax Crafts for Kids

When it comes to wax crafts for kids, there are so many fun and creative options to explore.

One idea is to make crayons using melted wax, which allows children to customize their own colors and shapes.

Another fun activity is creating homemade playdough by mixing melted wax with flour and other ingredients.

Lastly, using wax to seal homemade cards or artwork adds a special touch and allows kids to showcase their creativity.

These crafts not only provide hours of entertainment, but also help children develop their fine motor skills and artistic abilities.

Advertisement

Make crayons with melted wax

Transform your leftover candle wax into vibrant and creative crayons by melting them down. It’s a fun and easy way to repurpose your old candles and create something new for your kids to enjoy. Here are four reasons why making crayons with melted wax is a fantastic idea:

  • It’s a great way to teach your kids about recycling and reusing materials.
  • The melted wax creates unique and colorful crayons that your kids will love using.
  • You can customize the colors by mixing different candle wax colors together.
  • Making crayons with melted wax is a simple and enjoyable craft activity that you can do together with your kids.

Now, let’s transition into the next section where we’ll explore how to create homemade playdough using common household ingredients.

Create homemade playdough

Craft your own homemade playdough using basic pantry ingredients, and watch as your little ones mold their imaginations into tangible masterpieces. Making playdough at home isn’t just a fun and creative activity, but it also lets you repurpose leftover candle wax from your homemade scented candles.

Begin by gathering 1 cup of flour, 1/2 cup of salt, 2 tablespoons of cream of tartar, 1 tablespoon of vegetable oil, and 1 cup of water. In a saucepan, combine these ingredients over medium heat, stirring continuously until the mixture forms a dough-like consistency. Remove from heat and let it cool before kneading it with your hands.

To enhance sensory play activities, consider adding essential oils or food coloring to the dough. Once your playdough is ready, you can transition into the subsequent section about using wax to seal homemade cards or artwork.

Use wax to seal homemade cards or artwork

After making homemade playdough with leftover candle wax, another creative use for excess wax is to use it to seal homemade cards or artwork. This is a perfect way to add a personalized touch to your creations and make them stand out.

Advertisement

By applying a thin layer of melted wax to the surface of your cards or artwork, you not only create a beautiful and unique seal, but also provide a protective layer that helps preserve the contents. Additionally, if you have an interest in jewelry making or candle making, you can repurpose the wax for these hobbies as well. It can be melted down and used as a component in making jewelry or as a base for new candles.

The possibilities are endless when it comes to finding creative uses for leftover wax.

Next, we will explore how wax can be used to preserve outdoor items.

Wax Preservation for Outdoor Items

To keep your outdoor items protected and looking their best, simply use leftover candle wax as a preservative. Not only is this a cost-effective solution, but it also helps extend the lifespan of your outdoor equipment.

One way to utilize the wax is by using it to preserve outdoor candle holders. Apply a thin layer of melted wax to the inside of the holder, allowing it to harden. This will create a protective barrier against moisture and enhance the durability of the holder.

Advertisement

Additionally, you can use candle wax to preserve garden tools. Before storing them away, clean the tools thoroughly and rub a layer of melted wax on the metal parts. This will prevent rust from forming and keep the tools in top condition.

By utilizing leftover candle wax, you can protect your outdoor items and ensure they last longer.

Now, let’s explore how to use wax for furniture and wood care.

Wax for Furniture and Wood Care

After learning about wax preservation for outdoor items, let’s now explore the use of candle wax for furniture and wood care. As a passionate DIY enthusiast, I have discovered that candle wax can be a versatile tool for maintaining the beauty and longevity of wooden items in our homes.

Firstly, wax can be used to care for leather furniture. Applying a thin layer of melted wax and gently buffing it with a soft cloth can help moisturize the leather, preventing it from drying out and cracking. This technique also adds a subtle sheen to the surface, enhancing its appearance.

Advertisement

Additionally, candle wax can be beneficial for guitar maintenance. Applying a small amount of wax to the fretboard can help condition and protect the wood, keeping it in optimal condition for playing. This simple step can extend the life of your guitar and improve its overall performance.

To further illustrate the versatility of candle wax, let’s take a look at the following table:

Wood Care Leather Care
Revives dull wood Moisturizes leather
Protects from UV rays Adds a subtle sheen
Fills in small cracks Prevents cracking
Enhances natural grain Improves appearance

Now that we’ve explored wax for furniture and wood care, let’s transition into the subsequent section about ‘wax for sewing and crafts’ where we can discover even more exciting uses for candle wax.

Wax for Sewing and Crafts

In the world of sewing and crafts, wax has countless applications that can transform your projects into works of art. When it comes to candle making, using extra candle wax can be a great way to create unique and personalized candles. Simply melt down the wax and pour it into molds of your choice. You can even add colors and fragrances to create candles that match your sewing projects perfectly.

But wax isn’t just for candle making. It can also be a useful tool in sewing projects. Applying a thin layer of wax to the thread can help prevent tangles and make sewing smoother. This is especially helpful when working with delicate fabrics or when hand-sewing intricate designs. The wax acts as a lubricant, allowing the thread to glide through the fabric with ease.

Advertisement

As you dive into the world of wax for sewing and crafts, you’ll find that its versatility knows no bounds. From creating beautiful candles to enhancing your sewing projects, wax can truly elevate your creations.

But don’t stop here! In the next section, we’ll explore another exciting use for wax: rust prevention.

Wax for Rust Prevention

Little did you know, wax can actually be a secret weapon in the battle against rust. When it comes to rust prevention, wax offers an alternative solution that’s both effective and affordable.

By applying a layer of wax on metal surfaces, you create a protective barrier that seals out moisture and prevents oxidation, which is the main cause of rust.

Here are three ways you can use wax for rust prevention:

Advertisement
  1. Wax coating: Apply a thin layer of wax on metal tools, outdoor furniture, or even car parts to protect them from rust. The wax forms a barrier that prevents moisture from reaching the metal surface and causing corrosion.

  2. Wax dipping: For smaller items like screws, bolts, or nails, you can dip them in melted wax to create a protective coating. This method is especially useful for items that’re prone to rusting due to exposure to water or humid conditions.

  3. Wax spray: Another option is to use a wax spray, which allows you to easily apply a thin and even coat of wax on metal surfaces. This method is convenient for larger objects or hard-to-reach areas.

By utilizing wax for rust prevention, you can prolong the lifespan of your metal objects and save money on replacement costs.

Now, let’s transition into the subsequent section about ‘wax for beauty and self-care’ to explore more alternative uses for this versatile material.

Wax for Beauty and Self-Care

After learning about the benefits of using wax for rust prevention, I’m excited to share another fascinating use for extra candle wax: beauty and self-care. Yes, you read that right! Wax can actually be quite beneficial for your skincare routine and hair removal needs.

When it comes to skincare, wax can provide a protective barrier for your skin, locking in moisture and preventing dryness. It can also help soothe and heal minor skin irritations, making it ideal for post-shaving or waxing treatments. Additionally, wax can act as an exfoliant, gently removing dead skin cells and leaving your skin feeling smooth and rejuvenated.

In terms of hair removal, waxing is a popular method that many people swear by. By applying warm wax to the desired area and then quickly removing it, unwanted hair is pulled out from the root, resulting in longer-lasting smoothness compared to shaving. Waxing with candle wax can be a more affordable and accessible option, especially if you have leftover wax from candles.

Advertisement

So, the next time you find yourself with extra candle wax, consider incorporating it into your beauty and self-care routine. Your skin will thank you for it!

Frequently Asked Questions

Can I use colored candle wax to make new candles?

Yes, you can definitely reuse colored candle wax to make new candles and create beautiful decorative pieces. By melting down the colored wax, you can pour it into molds or jars to form unique and vibrant candles.

This allows you to repurpose the wax and create stunning candles that can be used as home decor or gifts. Reusing colored wax adds a touch of creativity and personalization to your candle-making process.

How can I safely remove wax from fabric or carpet?

To safely remove wax from fabric or carpet, there are a few techniques you can try.

First, place a few ice cubes in a plastic bag and apply it to the wax until it hardens. Once it’s hardened, gently scrape off as much wax as possible with a dull knife or credit card.

Advertisement

Next, cover the remaining wax with a clean cloth or paper towel, and use a warm iron to melt the wax. The cloth will absorb the melted wax, preventing it from staining the fabric.

Repeat if necessary, and then wash the fabric as usual.

Can I use candle wax to seal homemade jam jars?

Using candle wax to seal homemade jam jars is a creative and practical idea. It not only adds a charming touch to your jars but also serves as a natural adhesive. Candle wax can create a tight seal, preventing air and bacteria from entering the jar and spoiling your delicious homemade jam.

This technique is an excellent way to repurpose candle wax for DIY crafts and ensure the freshness of your homemade preserves.

What are some creative ways to use leftover candle wax?

Repurposing candle wax can be a fun and creative way to make scented wax melts. These wax melts can be used in wax warmers, providing a lovely aroma throughout your home. To make them, simply melt down your leftover candle wax and add your desired fragrance oils. Pour the melted wax into silicone molds and allow it to cool and harden.

Advertisement

Once solid, these wax melts can be easily popped out and used whenever you want to freshen up your living space.

Can candle wax be used to waterproof outdoor shoes or boots?

Yes, candle wax can be used to waterproof outdoor shoes or boots, particularly leather ones. The wax creates a protective barrier that helps repel water and prevent it from seeping into the material.

To waterproof your shoes or boots, simply melt the candle wax and apply it evenly to the surface using a cloth or brush. This alternative use for candle wax is a cost-effective way to keep your leather footwear dry and in good condition.

Conclusion

In conclusion, there are countless ways to repurpose extra candle wax and make the most out of it. You can create new candles and wax melts or use it for DIY fire starters and wax seals. The possibilities are endless. Whether you’re looking to entertain your kids with fun wax crafts or care for your furniture and wood, candle wax has multiple uses. It can even be utilized for sewing and crafts, rust prevention, and beauty and self-care routines. So don’t let that extra wax go to waste – get creative and make it work for you! Remember, there’s more than one way to skin a cat.

Advertisement

I'm Amelia, and I love making candles. It all started when I was given a kit as a gift. I loved the process so much that I decided to make my own candles. I soon realized that I had a real talent for it. Before long, my friends and family were asking me to make candles for them too. Word spread, and soon I was inundated with orders. I love the creativity that goes into making each candle unique. And I love the satisfaction of knowing that people are using something I made with my own hands.

Continue Reading
Advertisement

Beginners Guides

How To Use Scented Candle

Published

on

By

An image showcasing a serene living room with soft lighting

Were you aware that fragranced candles have risen to popularity as a method to improve our homes, with their sales surpassing $3 billion each year? If you share my curiosity, you might be pondering the best ways to utilize these scent-filled marvels. Search no more! In this article, I’m going to show you how to master the art of employing scented candles to provide an all-encompassing sensory experience.

First and foremost, it’s important to choose the right scent for your desired ambiance. Whether you want to create a relaxing atmosphere or add a touch of romance, selecting the perfect fragrance is key.

Once you’ve found your ideal scent, consider the purpose of your candle. Are you looking to unwind after a long day or create a welcoming environment for guests?

Placement is also crucial when it comes to optimizing your scented candle experience. Finding the perfect spot will ensure that the fragrance spreads throughout the room evenly. Before lighting the candle, remember to trim the wick to prevent any unwanted smoke or soot.

By following these simple tips, you’ll be well on your way to transforming your living space into a haven of delightful aromas.

Advertisement

So, let’s dive in and discover the art of using scented candles to create a truly immersive experience.

Key Takeaways

  • Scented candles can enhance living spaces and create a cozy atmosphere.
  • They can be used for aromatherapy and enhance self-care routines.
  • Proper burning techniques and wick maintenance are essential for maximizing lifespan and enjoyment.
  • It is important to practice candle safety and experiment with layering scents to enhance the candle experience.

Choose the Right Scent

When choosing the right scent for your scented candle, it’s essential to envision the atmosphere you want to create in your space. Different scent options can evoke various moods and emotions.

For a calming and relaxing ambiance, consider scents like lavender, chamomile, or vanilla. These fragrances have been proven to reduce stress and promote better sleep.

If you’re looking to uplift your spirits and create an energizing environment, opt for scents like citrus, peppermint, or eucalyptus. They can help improve focus and boost your mood.

Additionally, scented candles offer various benefits. They can mask unpleasant odors, making your space more pleasant. They also provide a warm glow and create a cozy atmosphere. Moreover, scented candles can be used for aromatherapy purposes, promoting relaxation and well-being.

When determining the purpose of your candle, consider whether you want to create a serene environment for meditation or a romantic ambiance for a special evening.

Advertisement

Transitioning into the subsequent section, let’s explore how to determine the purpose of your candle without further ado.

Determine the Purpose of Your Candle

Although one may think that scented candles are merely decorative, they actually serve a greater purpose. Understanding fragrance notes and how they can impact our mood and well-being is essential when determining the purpose of your candle. Different scents have distinct effects on our emotions and can be incorporated into our self-care routines.

To begin, it’s important to understand the concept of fragrance notes. Fragrances are typically composed of three layers: top notes, middle notes, and base notes. Top notes are the initial scent you smell when lighting the candle, while middle notes develop as the candle burns, and base notes are the lingering scent left behind. By understanding these notes, you can choose a candle that aligns with the mood or atmosphere you are trying to create.

Incorporating scented candles into your self-care routine can be a comforting and soothing experience. The flickering flame, combined with the calming aroma, can create a tranquil atmosphere that helps to relax the mind and body. Whether you use candles during meditation, yoga, or simply to unwind after a long day, they can enhance your overall well-being.

Finding the perfect placement for your scented candle is crucial in maximizing its benefits. The location of your candle can influence the way the fragrance disperses throughout the room. Placing it near a window or in a central area can help evenly distribute the scent. Additionally, consider placing candles in areas where you spend a significant amount of time, such as your bedroom or living room.

Advertisement

Transitioning into the next section, finding the perfect placement for your scented candle is just the first step in creating a serene and inviting atmosphere.

Find the Perfect Placement

To create a cozy and inviting atmosphere, it’s all about finding the perfect spot for your favorite scented candle.

The ideal candle placement for relaxation depends on the purpose you have in mind. If you’re looking to unwind after a long day, consider placing the candle in your bedroom or bathroom, where you can enjoy its soothing fragrance while taking a bath or reading a book before bedtime.

For a cozy living room ambiance, position the candle on a coffee table or a mantelpiece, where its warm glow can enhance the overall atmosphere.

Creating a cozy atmosphere with scented candles involves more than just placing them randomly around your home. It’s about strategically positioning them in areas where you spend the most time and where you want to create a sense of calm and tranquility.

Advertisement

So, find the perfect spot for your scented candle and let its fragrance transport you to a place of relaxation and serenity.

Speaking of relaxation, another important step is to trim the wick before lighting, which ensures a clean and even burn.

Trim the Wick Before Lighting

Before lighting, make sure to trim the wick for a clean and even burn. Wick maintenance is an essential step in using scented candles effectively. When the wick is too long, it can result in a larger flame, producing more soot and causing the candle to burn unevenly.

To trim the wick, use a pair of scissors or a wick trimmer and cut it to about ¼ inch. This length is ideal for a controlled flame and ensures that the candle burns evenly.

When it comes to lighting techniques, it’s important to approach it with care. Hold the flame source, whether it’s a match or a lighter, close to the base of the wick and tilt it slightly to ignite the wick. Avoid placing the flame directly on the wick as it can cause the candle to burn too quickly or create a large flame.

Advertisement

By following proper wick maintenance and lighting techniques, you can maximize the lifespan and enjoyment of your scented candle. Now that you have trimmed the wick, it’s time to move on to the next step: burning the candle for the right amount of time. This ensures that the fragrance is released evenly and that you get the most out of your scented candle experience.

Burn the Candle for the Right Amount of Time

Make sure you give your candle enough time to burn properly, allowing the fragrance to fill the room and create a delightful atmosphere. Proper burning techniques and candle maintenance are essential to get the most out of your scented candle. Here are some tips to help you achieve the perfect burn:

Burning Technique Candle Maintenance
Keep the flame away from drafts and flammable objects. Trim the wick to ¼ inch before each use.
Let the candle burn until the entire top layer is melted. Avoid burning for more than 4 hours at a time.
Use a snuffer or gently blow out the flame to extinguish. Store candles in a cool, dry place away from sunlight.
Rotate the candle periodically for an even burn. Clean the container after each use to remove soot and residue.

By following these burning techniques and maintaining your candle properly, you can ensure a longer and more enjoyable experience. Now that you know how to burn a scented candle correctly, it’s essential to practice candle safety. Remember to never leave a burning candle unattended and keep it out of reach of children and pets.

Practice Candle Safety

After learning about the importance of burning scented candles for the right amount of time, let’s now discuss the crucial aspect of practicing candle safety.

Candle maintenance and preventing accidents go hand in hand when it comes to enjoying scented candles without any mishaps.

Advertisement

To ensure candle safety, it’s essential to keep the wick trimmed to about ¼ inch before lighting it. This helps prevent excessive flame height and reduces the risk of the candle flickering or smoking.

Additionally, always place the candle on a stable and heat-resistant surface, away from flammable objects and out of reach of children and pets.

Never leave a burning candle unattended, and make sure to extinguish it before leaving the room or going to bed.

Remember to keep the candle’s container clean from any debris or matches, as this can interfere with the flame and potentially cause accidents.

It’s also advisable to avoid burning candles near drafts, as these can cause uneven burning and increased fire risk.

Advertisement

By following these candle safety guidelines and maintaining your scented candles properly, you can enjoy their fragrant ambiance without worrying about accidents or mishaps.

Now, let’s move on to the next topic and explore how to experiment with layering scents.

Experiment with Layering Scents

To truly elevate your sensory experience, try experimenting with layering different fragrances. By combining scents, you can create unique and personalized aromas that will fill your space with delightful smells. Here are some scent combinations and layering techniques to get you started:

Scents Layering Techniques
Vanilla + Lavender Alternating layers
Citrus + Mint Blending
Sandalwood + Patchouli Stacking
Rose + Jasmine Mixing
Eucalyptus + Peppermint Contrast

To create a layered scent, simply light two or more scented candles at the same time. You can experiment with different combinations and techniques to find the perfect balance of fragrances. Alternating layers involves lighting one candle for a while, then extinguishing it and lighting another. Blending involves lighting multiple candles together to create a harmonious scent. Stacking involves placing candles on different levels or heights to allow the scents to mingle. Mixing involves combining two or more melted candle wax to create a new fragrance. Contrast involves lighting candles with contrasting scents to create a unique and dynamic aroma experience.

By layering scents, you can create a multi-dimensional olfactory experience that will enhance your candle burning ritual. Once you have mastered the art of scent layering, you can move on to the next section about using candle accessories for an enhanced experience.

Advertisement

Use Candle Accessories for Enhanced Experience

Enhance your candle experience by incorporating accessories that elevate the ambiance and aroma in your space, even if you think they might be unnecessary.

Candle accessories can help enhance the fragrance and create a more enjoyable atmosphere. One popular accessory is a candle warmer, which gently heats the candle from below, releasing the scent without the need for an open flame. This is especially useful if you have small children or pets around.

Another accessory to consider is a candle snuffer, which not only extinguishes the flame safely but also prevents any smoke or soot from escaping and affecting the fragrance.

Additionally, using a candle tray or coaster can help protect your surfaces from any drips or spills, while also adding a decorative touch to your candle display.

To further enhance the fragrance, you can also try using candle toppers or shades. These accessories sit on top of the candle and help distribute the scent more evenly throughout the room. Some candle toppers even come with built-in fans that actively circulate the fragrance.

Advertisement

If you prefer a more subtle scent, you can use a candle diffuser, which works similarly to an essential oil diffuser. It disperses the scent into the air using heat or a fan, creating a long-lasting and consistent fragrance experience.

Now that you know how to enhance your candle experience with accessories, let’s explore how you can repurpose your candle jars without wasting a single drop of wax.

Repurpose Your Candle Jars

Transform your candle jars into stylish and functional pieces by repurposing them in creative ways. Don’t just throw away those beautiful jars once your candle has burned down. Instead, let’s explore some repurpose ideas and discover the creative uses for your empty candle jars.

To give you some inspiration, here is a table showcasing five unique ways to repurpose your candle jars:

Repurpose Idea Creative Use
Storage Store small items like jewelry or office supplies.
Planter Plant small succulents or herbs for a touch of greenery.
Makeup brush holder Keep your makeup brushes organized and easily accessible.
Candle holder Place tea lights or small votive candles for a cozy ambiance.
Bathroom organizer Store cotton balls, cotton swabs, or bath salts neatly.

By repurposing your candle jars, you not only reduce waste but also add a touch of creativity to your living space. It’s amazing how a simple jar can be transformed into something stylish and functional.

Advertisement

Now that you have some repurpose ideas, let’s move on to the next section about how to properly store your candles, ensuring they last longer and maintain their scent.

Properly Store Your Candles

Properly store your candles to preserve their fragrance and extend their lifespan. Here are some tips on how to store your candles correctly:

  • Keep your candles in a cool, dry place away from direct sunlight. High temperatures can cause them to melt or warp, while sunlight can fade their colors and weaken their fragrance. A closet or a drawer is an ideal storage spot.

  • Always store your candles upright to prevent bending or leaning. Use a candle holder or a box specifically designed for candle storage to keep them organized and protected.

  • Keep your candles away from drafts or strong air currents. These can cause uneven burning or excessive soot. A still, stable environment will help your candles burn more evenly and efficiently.

  • Avoid storing your candles near other scented products or strong odors. Candles can absorb nearby fragrances, which may alter their intended scent. Keep them separate to maintain their original fragrance.

By following these candle storage tips, you can prevent damage and ensure that your scented candles retain their beautiful fragrance and burn smoothly every time you light them.

Frequently Asked Questions

How do I clean the soot residue left by a scented candle?

To clean the soot residue left by a scented candle, I recommend using a few effective cleaning techniques. First, gently wipe off the loose soot with a dry cloth.

Then, mix warm water and mild dish soap to create a cleaning solution. Dampen a clean cloth with the solution and carefully scrub the affected area.

Advertisement

Rinse with clean water and dry thoroughly.

To prevent soot buildup in the future, trim the candle wick to 1/4 inch before each use.

Can scented candles be used in outdoor spaces?

Using scented candles in outdoor spaces can create a captivating ambiance that awakens your senses and transports you to a tranquil oasis. However, it’s important to consider outdoor candle alternatives like citronella torches or LED candles to prevent fire hazards and protect the environment.

Indoors, scented candles offer numerous benefits, such as creating a cozy atmosphere, masking unpleasant odors, and promoting relaxation. Just remember to always follow safety guidelines and enjoy the delightful fragrances responsibly.

Are scented candles safe to use around pets?

Scented candles can pose potential dangers to pets, as their fragrance oils and other additives can be toxic when ingested or inhaled. It’s important to keep them out of reach and never leave them unattended.

Advertisement

To ensure your pet’s safety, consider using alternative options like unscented candles or electric diffusers. These provide a pleasant aroma without the risk of harm. Always prioritize your pet’s well-being when using any scented products in your home.

Can I mix different scents of candles together?

Yes, you can mix different scents of candles together to create a unique fragrance. Combining fragrances can be a fun and creative way to personalize your space. However, it’s important to note that not all scents complement each other well. Some combinations may clash and result in an unpleasant smell. It’s best to experiment with small amounts of each scent before committing to a larger mixture.

How long should I wait before relighting a scented candle after extinguishing it?

After extinguishing a scented candle, it’s important to let it cool down completely before relighting it. This typically takes about 2 hours, but it may vary depending on the size of the candle.

To properly extinguish a scented candle, use a candle snuffer or gently blow it out. Avoid using water or blowing too hard as this can cause hot wax to splatter. Safety precautions should always be taken when handling candles.

Conclusion

In conclusion, using scented candles can truly transform your space and create a relaxing ambiance. By choosing the right scent and considering the purpose of your candle, you can enhance your mood and create a soothing atmosphere.

Advertisement

Placing the candle in the perfect location and trimming the wick before lighting will ensure a clean and even burn. Don’t be afraid to experiment with layering scents and using accessories for an enhanced experience.

And remember, when it comes to repurposing your candle jars and properly storing your candles, the possibilities are endless. So go ahead, light up your favorite scented candle and let the coincidence of relaxation and tranquility fill your senses.

Continue Reading

Beginners Guides

How To Remove Candle Wax From A Wooden Table

Published

on

By

An image that illustrates the step-by-step process of removing candle wax from a wooden table: a close-up shot of a warm iron gently melting the wax, followed by a hand delicately wiping away the residue with a soft cloth

Ever found yourself in a situation where wax found its way onto your lovely wooden table? Fear not, I’m here to help! In this article, you’ll be walked through a detailed process on how to get candle wax off a wooden table. By employing a handful of straightforward methods and some elementary materials, your table will be back to its original state before you know it!

First, we’ll assess the damage and gather all the necessary supplies. Then, we’ll freeze the wax to make it easier to remove. Using a scraper, we’ll gently scrape off the frozen wax. To get rid of any residue, we’ll apply heat and wipe it away. After that, it’s time to clean and polish the surface for a shiny finish.

If your table has deep stains, don’t worry – I’ll show you how to sand and refinish it. And to prevent future wax stains, I’ll share some useful tips. Lastly, for those stubborn stains, I’ll provide alternative methods that you can try.

Get ready to say goodbye to that pesky wax and enjoy your wax-free wooden table once again! Let’s get started!

Key Takeaways

  • Freezing the wax makes it easier to remove
  • Applying heat helps to remove any residue
  • Cleaning and polishing the surface gives a shiny finish
  • Sanding and refinishing may be necessary for deep stains

Assess the Damage and Gather Supplies

Now, you’re going to want to take a good look at the damage and grab all the supplies you need. Assessing the damage is crucial before proceeding with any repairs.

Examine the wooden table carefully to determine the extent of the wax spill and any resulting scratches. This will help you plan the appropriate course of action.

Advertisement

Next, gather the necessary supplies to effectively remove the wax and restore the natural shine of your table. To repair any scratches, you’ll need a fine-grit sandpaper or a wood filler, depending on the severity of the damage.

If the scratches are superficial, gently sand them using a fine-grit sandpaper. For deeper scratches, apply a wood filler that matches the color of your table. Allow it to dry completely before sanding it smooth.

In addition to repairing scratches, you’ll also need supplies to remove the candle wax. Start by freezing the wax using a plastic bag filled with ice cubes. Once the wax has hardened, carefully scrape it off using a plastic scraper or a credit card. Be cautious not to scratch the surface of the table while doing this.

By assessing the damage and gathering the necessary supplies, you’re now ready to move on to the next step of removing the candle wax from your wooden table.

Freeze the Wax

First, take a moment to embrace the chilling secret that’ll unravel the stubborn substance clinging to your cherished wooden surface. Freezing the wax is an effective method to remove it without causing any damage. Here are four easy steps to freeze the wax and make it easier to remove:

Advertisement
  • Using Ice Cubes: Place a few ice cubes in a plastic bag or a cloth and gently rub it over the wax. The cold temperature will harden the wax, making it easier to scrape off.

  • Using a Hairdryer: Alternatively, you can use a hairdryer on its lowest setting to melt the wax slightly. Once it softens, quickly place a plastic bag or a cloth over it and freeze it with ice cubes. This’ll help solidify the wax for easier removal.

  • Repeat if Necessary: If the wax isn’t completely frozen, repeat the process until it hardens enough to scrape off.

  • Patience is Key: Let the wax freeze for at least 30 minutes. This’ll ensure it becomes solid and brittle, making it easier to remove.

With the wax now frozen and brittle, it’s time to move on to the next step of scraping off the frozen wax.

[Transition to the next section: ‘Scrape off the Frozen Wax’]

Scrape off the Frozen Wax

Once the frozen wax has hardened, it’s time to skillfully chip away at the stubborn substance clinging to your cherished surface. To successfully remove the frozen wax, you’ll need to employ effective scraping techniques and consider alternative tools.

When it comes to scraping off the frozen wax, it’s important to be cautious and gentle to avoid damaging the wooden table. Start by using a plastic scraper or an old credit card to carefully scrape off as much wax as possible. Hold the scraper at a slight angle and apply even pressure to gradually lift the wax from the surface. Be patient and take your time to ensure you don’t scratch or gouge the wood.

For tougher wax residues, you can try using a soft cloth or a sponge dampened with warm water. Gently rub the cloth or sponge over the remaining wax, applying light pressure. The warmth and moisture will help soften the wax, making it easier to remove.

Advertisement

Incorporating different scraping techniques and alternative tools can be helpful in tackling stubborn wax. Experiment with different angles and strokes to find what works best for your specific situation. Remember to always test any scraping tool on a small, inconspicuous area of the table first to ensure it doesn’t cause damage.

With the frozen wax effectively scraped away, it’s time to move on to the next step: applying heat to remove any remaining residue.

Apply Heat to Remove Residue

To easily get rid of the pesky leftover residue, you’ll want to crank up the heat and watch it vanish like magic! Applying heat is a highly effective method for removing candle wax from a wooden table. Here’s how you can do it:

  1. Use a hairdryer: Set your hairdryer to a low or medium heat setting. Hold it a few inches away from the wax residue and aim the hot air directly at the spot. Move the hairdryer around in a circular motion to evenly distribute the heat. As the wax heats up, it’ll start to melt and become more pliable.

  2. Wipe away the residue: Grab a clean cloth or paper towel and gently wipe away the melted wax. Be careful not to apply too much pressure or scrub too forcefully, as this could damage the wood surface. Repeat the process if there’s still some residue remaining.

Once you’ve successfully removed the wax residue, you can move on to the next step of cleaning and polishing the surface.

Clean and Polish the Surface

Now it’s time to give your wooden table a sparkling shine by cleaning and polishing its surface.

Advertisement

To achieve the best results, it’s important to use proper polishing techniques and natural cleaning solutions. Start by dusting off any loose dirt or debris from the table with a soft cloth.

Next, dampen a clean cloth with a mixture of equal parts vinegar and water. Gently wipe the entire surface of the table, making sure to remove any sticky residue left behind by the candle wax. Vinegar works as a natural cleaning solution that effectively cuts through grease and grime without damaging the wood.

Once you have cleaned the surface, it’s time to polish it to perfection. Apply a small amount of olive oil or beeswax to a clean cloth and rub it onto the wooden table in circular motions. This will not only give the table a beautiful shine but also help to protect the wood.

Transitioning into the next section, it’s important to note that while cleaning and polishing can remove most of the wax residue, some stubborn stains may require the use of a wax remover solution.

Use a Wax Remover Solution

If you’re looking to tackle stubborn stains on your cherished piece of furniture, you’ll be pleased to know that a wax remover solution can effectively eliminate those blemishes in no time. Did you know that according to a recent study, using a wax remover solution can significantly improve the appearance of wood surfaces by up to 90%? It’s a remarkable solution that can restore the beauty of your wooden table.

Advertisement

To give you a better idea of how a wax remover solution works, let’s take a look at a comparison between using this solution and alternative methods:

Method Effectiveness Ease of Use Cost
Wax Remover Solution High Easy Affordable
Vinegar and Water Medium Moderate Inexpensive
Heat and Scraping Low Difficult Free

As you can see, a wax remover solution offers the best combination of effectiveness, ease of use, and affordability. It’s a reliable choice for removing candle wax stains from your wooden table.

Using a wax remover solution is also a great way to prevent stains in the future. By regularly cleaning your wooden table with this solution, you can create a protective barrier that repels wax and other substances.

Now that you know how to use a wax remover solution, let’s move on to the next step of the process: sanding and refinishing if necessary.

Sand and Refinish if Necessary

Next, you’ll want to give your beloved piece of furniture a fresh new look by sanding and refinishing it if needed. When it comes to refinishing options, there are a few routes you can take depending on the extent of the damage. If the wax has penetrated deeply into the wood or if there are deep scratches or gouges, you may need to completely strip the old finish and start from scratch. However, if the wax has only left a light residue on the surface, a simple sanding and refinishing should do the trick.

Advertisement

To begin, you’ll need to gather a few supplies. A medium-grit sandpaper will help to remove any wax residue and smooth out the surface. Start by sanding in the direction of the wood grain, using long, even strokes. Be sure to sand evenly and lightly, as you don’t want to remove too much of the wood’s natural beauty.

Once you’ve achieved a smooth surface, wipe away any dust with a clean cloth. Now, you can choose the right finish for your wooden table. Whether it’s a stain, varnish, or paint, make sure to follow the manufacturer’s instructions for application. Allow the finish to dry completely before using your table again.

In the next section, we’ll discuss how to prevent future wax stains and keep your wooden table looking its best.

Prevent Future Wax Stains

To ensure your treasured piece of furniture remains pristine, it’s crucial to take preventative measures against future wax stains. One way to prevent future spills is by using protective mats. Place a heat-resistant mat or a tablecloth on the surface of your wooden table before lighting any candles. This will provide a barrier between the candle and the wood, preventing any wax from seeping into the surface.

Additionally, consider using candle holders or trays with raised edges to catch any drips or spills. These accessories can help contain any wax and prevent it from spreading onto your table.

Advertisement

Another preventive measure is to always trim the wick of your candles before lighting them. Long wicks tend to produce more soot and can create a mess on your table. By keeping the wick short, you can minimize the risk of wax stains.

Additionally, avoid placing candles near any drafts or vents, as the airflow can cause the flame to flicker and produce more wax drips.

By following these preventive measures, you can significantly reduce the chances of future wax stains on your wooden table. However, if stubborn stains do occur, there are alternative methods you can try to remove them.

Alternative Methods for Stubborn Stains

You can try out different techniques to tackle those stubborn stains that may have formed on your beloved wooden table. When it comes to removing stubborn candle wax stains, there are several DIY stain removal techniques you can try before resorting to harsh chemicals. Natural remedies can be a great option as they are gentle on wooden surfaces and can effectively remove stubborn stains. Here are a few alternative methods you can use:

  1. Ice Method: Place ice cubes in a plastic bag and gently rub it over the wax stain until it hardens. Scrape off the hardened wax with a plastic card or your fingernail, being careful not to scratch the wood.

  2. Heat Method: Place a clean cloth over the wax stain and use a warm iron on top of the cloth. The heat will melt the wax, which will then be absorbed by the cloth.

  3. Vinegar Solution: Mix equal parts of white vinegar and water in a spray bottle. Spray the solution directly onto the stain and let it sit for a few minutes. Wipe it off with a clean cloth.

  4. Baking Soda Paste: Make a paste by mixing baking soda with water. Apply the paste to the stain and gently scrub it with a soft cloth. Rinse off with water and wipe dry.

  5. Lemon Juice: Squeeze fresh lemon juice onto the stain and let it sit for a few minutes. Wipe it off with a damp cloth.

By using these natural remedies for stubborn stains, you can effectively remove candle wax from your wooden table without causing any damage. Enjoy your wax-free wooden table!

Advertisement

Enjoy Your Wax-Free Wooden Table!

After successfully eliminating those stubborn stains, revel in the beauty of your smooth and spotless wooden surface. Now that you’ve removed the candle wax from your wooden table, it’s important to take steps to protect it and prevent future wax mishaps.

There are several effective wax removal techniques that can be used to keep your wooden table looking its best. One method is to gently scrape off any remaining wax using a plastic scraper or credit card. Be careful not to scratch the surface of the wood. Next, apply a small amount of mineral spirits or rubbing alcohol to a clean cloth and gently rub the area to remove any residue. Wipe the table clean with a dry cloth.

To protect your wooden table from future wax spills, consider using a tablecloth or placemat when burning candles. This’ll help to catch any drips or spills before they reach the table surface. Additionally, you can apply a thin layer of furniture wax or polish to the table to create a protective barrier. Be sure to follow the manufacturer’s instructions when applying any products to your wooden table.

By following these wax removal techniques and taking steps to protect your wooden table, you can enjoy a wax-free surface that’ll continue to shine for years to come.

Frequently Asked Questions

Can I use a hairdryer instead of applying heat to remove the wax residue?

Using a hairdryer to remove candle wax from a wooden table is not recommended. While it may soften the wax, it can also cause the wax to spread and further penetrate the wood. Instead, consider alternative methods for removing wax stains from a wooden table without using heat.

Advertisement

One effective method is to place a plastic bag filled with ice over the wax, allowing it to harden. Then, gently scrape it off with a plastic scraper.

Is it safe to use a wax remover solution on all types of wooden tables?

Using a wax remover solution can be effective in removing wax residue from wooden tables. However, it’s important to consider the potential damage it may cause. Some wax removers contain harsh chemicals that can strip the finish or discolor the wood. To ensure safety, it’s recommended to test the solution on a small, inconspicuous area of the table first. If there’s no adverse reaction, proceed with caution, following the instructions provided by the manufacturer.

How long should I freeze the wax before scraping it off?

Freezing the wax before scraping it off is a highly effective method to remove candle wax from a wooden table. It’s important to note that the duration of freezing depends on the thickness of the wax layer.

On average, leaving it in the freezer for 30-60 minutes should suffice. However, it’s crucial to be cautious while scraping off the wax, as excessive force or using sharp objects can damage the wood. Always opt for gentle methods to avoid any potential risks.

Can I use a regular household cleaner to clean and polish the wooden table after removing the wax?

Yes, you can use furniture polish to clean and polish a wooden table after removing candle wax. It’s important to choose a polish specifically designed for wooden surfaces to ensure proper care.

Advertisement

Additionally, lemon juice can be used as a natural alternative to a regular household cleaner for cleaning and polishing a wooden table after removing wax. Its acidic properties help remove stains and bring out the natural shine of the wood.

Are there any alternative methods for removing wax stains from a wooden table besides freezing and applying heat?

When it comes to removing wax stains from a wooden table, there are several alternative methods that can be effective besides freezing or applying heat.

Natural remedies can be a great option. One method is to mix equal parts vinegar and water, then gently rub the solution onto the wax stain using a soft cloth.

Another option is to create a paste using baking soda and water, applying it to the stain and allowing it to sit for a few minutes before wiping it away.

Conclusion

As I stand here, my trusty supplies by my side, I survey the once wax-stained wooden table. With determination, I freeze the wax, carefully scrape it away, and apply heat to banish any residue.

Advertisement

A final clean and polish leaves the surface gleaming. If needed, I sand and refinish, restoring the table’s former glory. I vow to prevent future wax stains, armed with knowledge and the will to protect.

As I gaze upon the wax-free table, a sense of accomplishment fills my heart. The battle is won, and the table stands as a symbol of my triumph over wax.

Continue Reading

Beginners Guides

How To Burn A Candle With No Wick

Published

on

By

An image of a glass jar filled with melted wax, gently glowing with a flickering flame

Were you aware that the typical American goes through about 6.6 pounds of candles annually?

Candles have become an essential part of our lives, creating a cozy and inviting atmosphere in our homes.

But what if you could enjoy the warm glow and delightful scents of a candle without a wick?

In this article, I will guide you through the process of creating and burning a candle with no wick, allowing you to experience the beauty of candlelight in a unique way.

From gathering your materials to pouring the wax and adding fragrance or color, I will provide you with detailed instructions to help you create your very own wickless candle.

Advertisement

So, let’s dive in and discover the joy of burning a candle without a wick!

Key Takeaways

  • Wickless candles eliminate the worry of an open flame and provide a safer alternative for burning candles.
  • Wickless candles offer versatility in colors and scents, enhancing home decor and providing a sensory experience.
  • Wickless candles do not produce soot or smoke, keeping furniture and walls clean.
  • Wickless candles can be used for meditation, creating a serene and peaceful atmosphere to enhance well-being.

Gather Your Materials

Now, it’s time to gather all the materials you’ll need to create a candle with no wick – it’s like embarking on a colorful and aromatic treasure hunt!

When choosing alternative wick options, you have a variety of possibilities to explore. One option is to use a wooden wick, which not only adds a rustic touch to your candle but also provides a crackling sound reminiscent of a cozy fireplace.

Another alternative is a cotton string, which can be soaked in wax and then used as a makeshift wick. This option requires a bit more experimentation to find the right thickness and length for your candle.

To troubleshoot common wickless candle issues, keep in mind that the absence of a wick may result in uneven burning or a lack of fragrance diffusion. To ensure even burning, make sure to place the candle in a draft-free area and rotate it occasionally. To enhance fragrance diffusion, consider adding scented oils or herbs directly into the wax mixture before pouring it into the container.

Now that you have gathered your materials and learned about choosing alternative wick options and troubleshooting common wickless candle issues, it’s time to move on to the next step – choosing the right container.

Advertisement

Choose the Right Container

First, you’ll want to select the perfect vessel for your flameless illuminator, ensuring it complements your decor and personal style. Did you know that candles in glass containers account for 29% of candle sales in the United States? Glass containers aren’t just aesthetically pleasing, but they also provide functionality by allowing the candle’s glow to illuminate the surroundings.

If you prefer a rustic or earthy feel, consider using a ceramic or terracotta container. These materials don’t just add a touch of natural beauty, but they also provide insulation, making sure the container doesn’t get too hot.

When choosing the right container, you can also repurpose household items. Mason jars, teacups, or even empty wine bottles can make unique and eye-catching candle holders. Get creative and think outside the box!

To add a touch of elegance to your candle, consider using a decorative container. Crystal or cut glass containers can create a stunning visual effect when the candle’s lit.

Now that you’ve chosen the perfect container, it’s time to prepare the wax and get your flameless candle ready for use.

Advertisement

Prepare the Wax

To ensure a smooth and even glow, let’s begin by melting the wax in a double boiler. Choosing the right wax is essential for a successful candle without a wick. There are various types of waxes available, such as beeswax, soy wax, and paraffin wax. Each has its own unique qualities, so it’s important to consider factors like burn time, scent throw, and environmental impact when making your selection.

Before you start melting the wax, it’s crucial to take safety precautions. Always work in a well-ventilated area and wear heat-resistant gloves to protect your hands. Keep a fire extinguisher nearby and never leave the melting wax unattended.

Once you’ve chosen the wax and taken safety measures, it’s time to prepare it for your candle. Start by breaking the wax into smaller pieces to ensure even melting. Place the wax in a heat-resistant container and then place that container in a larger pot filled with water. Heat the double boiler on low heat and allow the wax to melt slowly. Stir occasionally to promote even melting.

When the wax has completely melted, you can transition to the next step of adding fragrance or essential oils, if desired. This step will enhance the ambiance and personalize your candle to your liking.

Add Fragrance or Essential Oils (Optional)

Enhance the aroma and create a personalized touch by adding your favorite fragrance or essential oils to the melted wax. This step is optional but can greatly enhance the overall experience of burning your candle. Not only do fragrances add a pleasant scent to the room, but they can also have various benefits for your well-being.

Advertisement
  • Fragrance benefits: Adding fragrances to your candle can create a relaxing and calming atmosphere. Scents like lavender and chamomile can promote better sleep, while citrusy scents like lemon and orange can uplift your mood and increase focus. Experiment with different fragrances to find the perfect one for your desired ambiance.

  • Essential oil blends: Creating your own essential oil blend can add a personal touch to your candle. You can mix different oils to create unique aromas and reap the benefits of multiple scents. For example, combining lavender, bergamot, and ylang-ylang can create a soothing blend that promotes relaxation.

Now that you’ve added fragrance or essential oils to the melted wax, the next step is to add color (optional).

Add Color (Optional)

Now, let’s jazz up your creation by adding a pop of color to your masterpiece! Coloring techniques can bring a whole new dimension to your candle, making it visually appealing and unique.

There are various ways to add color to your candle without a wick. One option is to use liquid candle dyes, which are specially formulated to mix well with wax. These dyes come in a wide range of colors, allowing you to create any shade you desire. Simply add a few drops of the dye to the melted wax and stir it well to ensure even distribution.

Another alternative is to use wax crayons or oil-based colored pencils. Shave small amounts of the crayon or pencil into the melted wax and stir until the color is evenly dispersed. This method gives you more control over the intensity of the color and allows for easy blending of shades.

If you’re feeling creative, you can also try layering different colored wax. Pour a layer of one color, let it cool and solidify, then pour another layer of a different color on top. Repeat this process until you achieve the desired effect.

Advertisement

Now that your candle is beautifully colored, it’s time to move on to the next step: melting the wax.

Melt the Wax

Get ready to heat things up as you melt the wax for your vibrant creation! Melting the wax is a crucial step in making a wickless candle, and there are various techniques you can use to achieve the perfect consistency. Here are four wax melting techniques that’ll help you create a beautiful, long-lasting candle:

  1. Double Boiler Method: Fill a larger pot with water and place a smaller heat-resistant container inside. Add chunks of wax to the smaller container and heat the water on medium heat. The indirect heat will melt the wax slowly and evenly.

  2. Microwave Method: Cut the wax into small pieces and place them in a microwave-safe container. Heat the wax in short intervals, stirring in between, until it’s completely melted. Be careful not to overheat the wax, as it can become too hot and unsafe.

  3. Oven Method: Preheat your oven to a low temperature (around 200°F) and place the wax in an oven-safe container. Let it melt slowly in the oven, checking on it regularly to ensure it doesn’t overheat.

  4. Electric Wax Melter: If you’ve got an electric wax melter, simply place the wax in the melter and let it melt according to the manufacturer’s instructions.

By using one of these wax melting techniques, you can ensure that your candle will burn smoothly and evenly without a wick. Once the wax’s melted, it’s time to pour it into the container and continue the candle-making process.

Pour the Wax into the Container

Start by carefully pouring the melted wax into your chosen container, allowing it to fill up and take shape. When pouring the wax, it’s important to use proper techniques to ensure an even distribution and avoid any spills or drips.

One technique is to pour the wax slowly and steadily, starting from the center of the container and moving outward in a circular motion. This helps to prevent any air bubbles from forming and ensures that the wax fills every corner of the container. Another technique is to tilt the container slightly while pouring, allowing the wax to flow smoothly and evenly.

Advertisement

As you pour the wax, keep in mind that you have the freedom to experiment with alternative wick options. While traditional candles rely on a wick to burn, you can get creative and use unconventional materials such as wooden sticks, cotton strings, or even dried flowers as a makeshift wick. Just make sure that the material you choose is suitable for burning and can withstand the heat of the wax.

Once you have poured the wax into the container, set it aside and let the wax cool and set. This will take some time, so be patient. As the wax cools, it will solidify and take the shape of the container. This is an exciting moment, as you’ll start to see your candle come to life.

So, let the wax cool and set, and get ready for the next step in creating your wickless candle.

Let the Wax Cool and Set

Allow the wax to cool and harden, transforming into a solid form that mirrors the contours of the container, like a frozen moment in time. The cooling process is crucial in achieving the proper setting for your candle. As the wax cools, it undergoes a physical transformation, transitioning from a liquid state to a solid one. This cooling period is essential because it allows the wax to solidify evenly, preventing any cracks or uneven surfaces from forming.

To emphasize the importance of the cooling process, let’s take a closer look at the table below:

Advertisement
Temperature Time Required Result
100°F – 125°F 2-4 hours Soft wax, prone to melting
125°F – 150°F 4-6 hours Firm wax, but still pliable
150°F – 175°F 6-8 hours Solid and stable wax

As the wax cools, it gradually becomes more solid and stable. This ensures that your candle will burn evenly and last longer. Waiting for the wax to cool completely is crucial for a successful candle-burning experience.

Now that the wax has cooled and set, it’s time to move on to the next step—trimming the wax as needed. This step ensures that your candle is in optimal condition for burning.

Trim the Wax as Needed

To maintain the quality of your candle, you’ll want to regularly trim the wax to ensure a clean and even burn. Trimming the wax is an essential step in the candle-burning process, as it helps prevent any excess wax from accumulating and causing an uneven burn. Additionally, trimming the wax allows for better control over the flame height, reducing the risk of soot and smoke.

When it comes to trimming the wax, there are a few techniques you can employ. One popular method is to use a sharp knife or a candle wick trimmer to carefully remove any excess wax. Start by gently cutting away the top layer of wax, being careful not to cut too deep and damage the candle. Continue to trim the wax as needed, always ensuring that the remaining wax is level and even.

For those looking for alternative wick options, there are a few choices available. Some people opt for using wooden wicks, which not only provide a unique crackling sound but also have a longer burn time. Others choose to use cotton or hemp wicks, which are eco-friendly and offer a clean burn.

Advertisement

By regularly trimming the wax and exploring alternative wick options, you can enjoy your wickless candle to its fullest potential. Whether you prefer a traditional flame or a more unique option, taking care of your candle will ensure a long-lasting and enjoyable experience.

Enjoy Your Wickless Candle

Indulge in the ambiance of your wickless candle and immerse yourself in its mesmerizing glow and captivating fragrance.

Wickless candles are not only a stylish addition to your home decor, but they also provide numerous benefits, especially in the realm of meditation. Let me share with you why wickless candles are a must-have for creating a serene and peaceful atmosphere.

Wickless candles for meditation: The absence of a wick eliminates the worry of an open flame, allowing you to fully focus on your meditation practice. The soft, flickering light of a wickless candle creates a calming effect, aiding in relaxation and deepening your meditation experience.

Benefits of using wickless candles in home decor: Wickless candles are a versatile option for enhancing your home decor. With a wide range of colors and scents available, you can easily match them to any room’s theme or mood. Moreover, unlike traditional candles, wickless candles don’t produce soot or smoke, keeping your furniture and walls clean and free from residue.

Advertisement

Immerse yourself in the tranquility of a wickless candle and let it transport you to a state of blissful serenity. Whether you’re meditating, unwinding after a long day, or simply enjoying the warm glow, these candles offer a sensory experience like no other.

Embrace the benefits they bring to your home decor and elevate your well-being with the enchanting allure of wickless candles.

Frequently Asked Questions

Can I use any type of container to make a wickless candle?

Yes, you can use a variety of containers to make a wickless candle. When it comes to container options, the possibilities are endless. From mason jars to teacups, you can get creative and choose a container that suits your style and preferences.

Additionally, you can explore alternative materials like coconut shells or seashells to add a unique touch to your wickless candle. The key is to experiment and find what works best for you!

How long does it take for the wax to cool and set?

If the wax doesn’t cool and set properly, it can affect the overall quality and performance of the candle. To speed up the cooling process, you can place the candle in a cool room or even in the refrigerator. However, it’s important to note that the cooling time can vary depending on the size and type of wax used.

Advertisement

It’s best to follow the instructions provided by the wax manufacturer to ensure proper cooling and setting.

What is the best type of wax to use for wickless candles?

When it comes to wickless candles, the best choice for wax is soy wax. Not only does it provide a delightful fragrance, but it also offers numerous benefits. Soy wax is known for its clean burn, long-lasting scent, and eco-friendly nature.

It has a lower melting point, allowing the fragrance to disperse more effectively. Additionally, soy wax is biodegradable and derived from renewable resources, making it a sustainable option for the environmentally conscious candle lover.

Can I use food coloring to add color to my wickless candle?

Yes, you can definitely use food coloring alternatives to add vibrant colors to your wickless candle! Instead of traditional food coloring, you can use natural dyes like beet juice or turmeric powder for a more eco-friendly option. Get creative with your wickless candle designs by experimenting with different color combinations and patterns.

The possibilities are endless! Express your passion for unique and personalized candles by incorporating these food coloring alternatives into your creations.

Advertisement

Are there any safety precautions I should take when making and using a wickless candle?

When it comes to making and using wickless candles, safety precautions are crucial. Always ensure you have a heat-resistant container and use a reliable heat source like a candle warmer.

Keep the candle out of reach of children and pets, and never leave it unattended.

The benefits of wickless candles are numerous – they eliminate the risk of fire hazards, create a cleaner and longer-lasting burn, and provide a safer alternative for those with allergies or sensitivities.

Conclusion

In conclusion, creating a wickless candle is a fun and creative way to enjoy the warm glow and delightful fragrance of a candle without the need for a wick. By following the step-by-step process outlined in this article, you can easily make your own wickless candle at home.

Imagine coming home after a long day, lighting your wickless candle, and instantly being transported to a tranquil spa-like atmosphere, all without worrying about an open flame.

Advertisement

So go ahead, unleash your creativity and start making your own wickless candles today!

Continue Reading

Trending