
Have you ever wanted to create your own candles but were unsure of where to start? Let me shed some light on the process for you.
In this article, I will guide you through the step-by-step process of putting wicks in candle molds. With just a few simple materials and a little bit of patience, you’ll be on your way to crafting beautiful homemade candles in no time.
Firstly, it’s important to gather all the necessary materials, such as candle molds, wicks, and wax. Once you have everything ready, you’ll need to prepare your candle mold by cleaning and greasing it.
Next, measure and cut the wick to the desired length, ensuring it’s long enough to reach the bottom of the mold.
After that, it’s time to attach the wick to the bottom of the mold using a wick sticker or some melted wax. Make sure to secure the wick in place, so it doesn’t move during the pouring process.
Once the wick is secure, you’ll need to center it in the mold to ensure an even burn.
Now comes the waiting game. Allow the candle to harden completely before attempting to remove it from the mold. This can take several hours or even overnight, so be patient.
Once the candle is hardened, trim the wick to about ¼ inch and you’re ready to light up your homemade creation.
Creating your own candles can be a rewarding and relaxing hobby. So why not give it a try? Follow these simple steps, and you’ll be amazed at the beautiful candles you can create right in the comfort of your own home.
Key Takeaways
- Measure and cut the wick to the desired length before attaching it to the bottom of the candle mold.
- Use wick stickers or melted wax to secure the wick to the mold, ensuring it is centered for an even burn.
- Consider alternative wick materials, such as wooden or eco-friendly wicks, for a unique touch in your candle making.
- Properly trim the wick to about ¼ inch before lighting the candle to ensure a clean and efficient burn.

Vtopmart 25 PCS Clear Plastic Drawer Organizers Set, 4-Size Versatile Bathroom and Vanity Drawer Organizer Trays, Storage Bins for Makeup, Bedroom, Kitchen Gadgets Utensils and Office
- Versatile Drawer Organizer Set: Fits various home drawers and spaces
- Includes 25 Bins in 4 Sizes: Customizable storage options for different items
- Non-Slip and Durable Design: Silicone pads prevent slipping, sturdy plastic construction
As an affiliate, we earn on qualifying purchases.
Gather Your Materials
Get ready to create beautiful candles by gathering all the necessary materials!
The first step in making candles is choosing the right candle fragrance. Fragrance adds a delightful scent to your candles, creating a pleasant ambiance in any room. There are various options available, from floral and fruity scents to warm and cozy aromas. Consider the mood you want to create and select a fragrance that complements it perfectly.
Next, it’s important to find alternative materials for candle making. If you don’t have specific candle-making supplies, don’t worry! You can still create stunning candles using everyday items. For example, instead of traditional candle wicks, you can use cotton string or even wooden skewers. Just make sure they’re long enough to reach the bottom of your candle mold. Additionally, if you don’t have a specialized candle mold, you can repurpose containers like mason jars or teacups.
Now that you’ve chosen the perfect fragrance and gathered your alternative materials, it’s time to prepare your candle mold. Transitioning into the next section, make sure your chosen mold is clean and dry. Preparing the mold properly ensures that your candles will set correctly and have a professional finish. So, let’s move on to preparing the candle mold and getting ready to pour in the wax!
Prepare Your Candle Mold
Once your chosen vessel is ready, it’s time to prepare the stage for your luminous creation.
Preparing candle molds is an important step in ensuring that your candle turns out just the way you want it. Start by cleaning your mold thoroughly to remove any dust or debris that may have accumulated. This will help ensure a smooth finish on your candle.
Next, choose the right wick for your candle. Consider the size and shape of your mold, as well as the type of wax you’ll be using. A wick that’s too small may not burn properly, while a wick that’s too large may produce too much heat. Take your time to research and find the perfect wick for your candle.
Once you’ve prepared your mold and chosen the right wick, you can move on to the next step of the process: measuring and cutting the wick. This’ll ensure that your wick is the perfect length for your candle and will burn evenly.
Measure and Cut the Wick
To ensure a perfect burn, you’ll want to carefully measure and cut your wick, making sure it’s the ideal length for your luminous creation.
When it comes to wick types, there are a few options to consider. Cotton wicks are the most common and work well for most candles. They come in various thicknesses, so choose one that matches the diameter of your mold. For a more eco-friendly option, you can opt for a hemp wick, which is biodegradable and sustainable.
Now, let’s move on to the wick length. The general rule of thumb is to cut the wick about 1 inch longer than the height of your candle mold. This extra length allows for trimming later on. However, if you’re using a deep mold or want a longer burning time, you may want to cut the wick slightly longer.
Once you have your wick cut to the desired length, it’s time to attach it to the bottom of the mold.
Next, we’ll discuss how to attach the wick to the bottom of the mold.
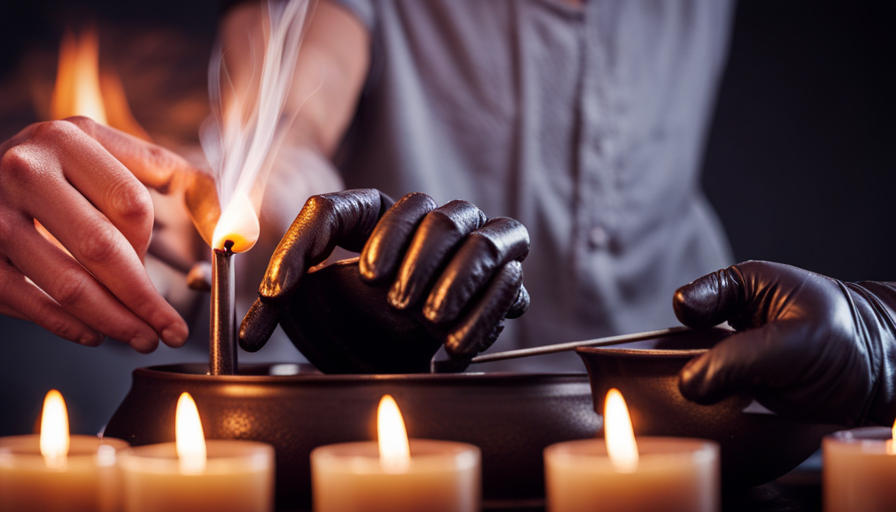
Attach the Wick to the Bottom of the Mold
Attach the wick securely at the base of your chosen container, ensuring it’s firmly in place and ready to bring your candle to life.
To attach the wick to the mold, you have a few options depending on the type of mold you’re using. One common method is to use a wick sticker or adhesive tab. These stickers have a sticky side that you can attach to the bottom of the wick and then press firmly onto the mold. Make sure the sticker is centered and aligned with the mold’s bottom.
Another option is to use a wick bar or wick holder. These are metal or plastic devices with holes to hold the wick in place. Simply push the wick through the hole and adjust its position so that it’s centered in the mold.
Once the wick is securely attached, you can move on to the next step of securing the wick in place by using a wick holder or by tying the top of the wick around a pencil or dowel rod. This’ll ensure that the wick stays in place while you pour the melted wax into the mold.
Secure the Wick in Place
Make sure the wick is firmly fastened in its designated spot, as if its life depended on it.
Proper wick placement is crucial for ensuring that your candle burns evenly and efficiently. To secure the wick in place, start by using a wick holder or a pencil to keep it centered in the mold. This will prevent the wick from shifting or leaning to one side during the pouring process.
Next, use a small amount of melted wax to adhere the wick tab to the bottom of the mold. Make sure to press it down firmly to ensure stability.
Once the wick is securely attached, you can proceed with pouring the wax into the mold. Gently pour the melted wax into the mold, making sure to fill it to the desired level. Be careful not to disturb the wick while pouring.
Allow the wax to cool and solidify completely before moving or removing the candle from the mold.
Now that the wick is securely in place and the wax has been poured, you’re ready to move on to the next step of the candle making process.
Pour the Wax into the Mold
Carefully pour the melted wax into the mold, watching as it fills the container to create the foundation of your beautiful handcrafted creation. It’s important to choose the right wick size for your candle mold to ensure it burns properly. The size of the wick will depend on the diameter of the mold and the type of wax you’re using.
If the wick is too small, the candle may not burn evenly, and if it’s too large, the flame could become too large and cause the wax to melt too quickly.
In addition to traditional cotton wicks, there are alternative wick materials available that you can consider. Some options include wooden wicks, which can create a crackling sound reminiscent of a fireplace, or eco-friendly wicks made from hemp or other natural fibers. These alternative wick materials can add a unique touch to your candle and enhance the overall sensory experience.
Once the wax is poured into the mold, the next step is to center the wick in the mold. This will ensure that the wick burns evenly and the candle maintains its shape as it solidifies.
Center the Wick in the Mold
After pouring the melted wax into the mold, it’s time to ensure the wick is perfectly centered, allowing for an even burn and a beautifully formed candle. Wick placement is crucial in creating a high-quality candle, and there are various techniques to achieve proper wick centering.
To help you understand the importance of wick centering, let’s explore a 3 column and 5 row table:
| Technique | Description | Benefits |
|---|---|---|
| Pinning | Using a small pin, insert it through the wick’s metal tab and press it firmly into the bottom of the mold. This holds the wick in place, ensuring it remains centered during the pouring process. | Ensures the wick stays in position, preventing it from moving or leaning off-center. |
| Wick stickies | These adhesive tabs are placed on the bottom of the wick’s metal tab and firmly pressed onto the mold’s base. They provide stability and keep the wick centered while the wax is poured. | Provides a secure hold, preventing the wick from shifting or floating once the wax is added. |
| Wick centering devices | These tools are designed specifically to hold the wick in place during the pouring process. They usually consist of metal or plastic rods that sit on top of the mold, guiding the wick to the center. | Ensures precise and consistent wick placement, resulting in a perfectly centered candle. |
| Wick bars | These metal bars, placed across the top of the mold, hold the wick in place and keep it centered during pouring. They are adjustable and can be moved to accommodate different mold sizes. | Offers flexibility and stability, allowing for easy adjustment and ensuring the wick remains centered throughout the candle-making process. |
By utilizing these wick centering techniques, you can achieve professional-looking candles with even burns. Once the wick is properly centered, it’s time to let the candle harden, allowing the wax to solidify and form its final shape.
Let the Candle Harden
Once the melted wax has been poured into the mold and the wick has been properly centered, it’s time to allow the candle to harden. This will give the wax the opportunity to solidify and take on its final shape.
During the candle curing process, it’s important to let the candle harden undisturbed for a specific duration. This will allow the wax to cool evenly and prevent any deformities or imperfections from forming. To ensure a successful curing process, consider the following:
-
Patience: Resist the temptation to check on the candle too soon. Rushing can lead to uneven cooling and potential cracking or sinking in the center.
-
Ideal Temperature: Keep the candle in a cool, dry place away from direct sunlight or drafts. Extreme temperatures can cause the wax to expand or contract, resulting in an uneven surface.
-
Troubleshooting: If you notice any issues such as air bubbles, uneven surfaces, or cracks, try adjusting the curing conditions. For example, you can try lowering the temperature or increasing the curing time.
As the candle hardens and takes shape, it’s important to prepare for the next step: trimming the wick. This will ensure a clean and efficient burn for your candle.
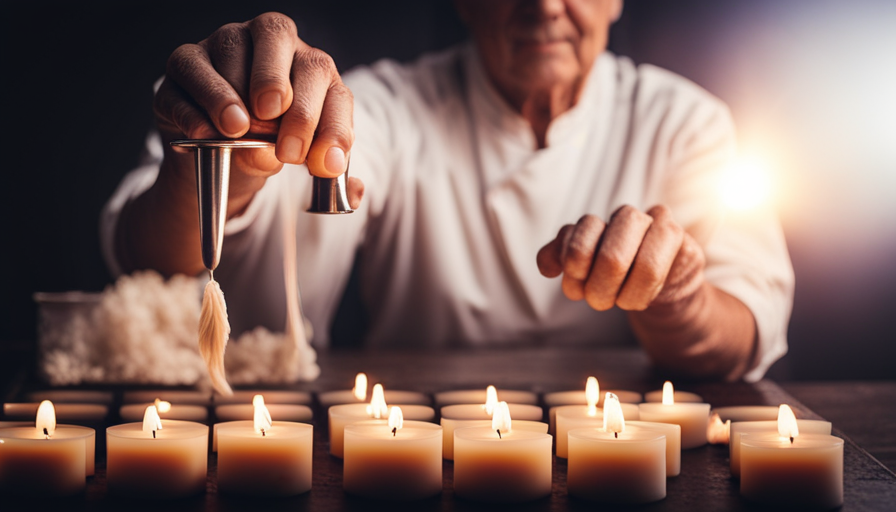
Trim the Wick
To ensure a clean and efficient burn, you’ll want to trim the wick of your candle. Proper wick trimming techniques are essential to maintain a consistent flame height and prevent any soot buildup. When trimming the wick, it is important to use sharp scissors or a wick trimmer to achieve a clean cut. Remove any excess wick that is longer than ¼ inch to prevent the flame from becoming too large and creating smoke.
Here are some key points to keep in mind while trimming the wick:
| Wick Trimming Tips | Benefits |
|---|---|
| Trim to ¼ inch | Reduces soot and smoke |
| Trim before lighting | Promotes even burning |
| Remove debris | Prevents potential hazards |
By following these wick trimming techniques, you can enjoy a longer-lasting candle with a more consistent burn.
It’s worth noting that some candle enthusiasts explore alternative wick attachments, such as wooden wicks or self-trimming wicks. These options can provide unique aesthetics and additional benefits like a crackling sound or reduced maintenance. However, it’s important to research and understand the specific requirements and instructions for these alternative wick types before using them in your homemade candles.
Now that you have learned how to trim the wick, let’s move on to the next section and discover how to enjoy your homemade candle to the fullest.
Enjoy Your Homemade Candle
Get ready to fully enjoy your homemade candle by creating a cozy ambiance, unwinding, and relishing in the soothing fragrance. After successfully creating your candle and allowing it to set, it’s time to add the finishing touches and make it truly yours.
Choosing the right fragrance is essential to creating the perfect atmosphere. Consider the mood you want to set and the purpose of your candle. For a relaxing evening, lavender or chamomile scents are ideal, while citrus or vanilla fragrances can uplift and energize a space. Experiment with different combinations to find your favorite.
Now that you’ve chosen the fragrance, it’s time to decorate your homemade candle. Personalizing your creation adds a unique touch and makes it even more special. You can start by tying a small ribbon or twine around the base of the wick, adding a decorative charm or bead for an extra flair. Another option is to paint or draw on the outside of the candle using non-toxic paint or markers. Get creative and let your imagination run wild. Just remember to keep any decorations away from the flame.
By following these tips for choosing the right fragrance and decorating your homemade candle, you’ll create a beautiful and personalized creation that enhances any space. Sit back, relax, and let the cozy ambiance and soothing fragrance transport you to a state of total bliss.
Frequently Asked Questions
How do I choose the right type of wick for my candle mold?
Choosing the right wick for your candle mold is crucial for a successful burn. Candle wick sizing and compatibility are key factors to consider.
To start, determine the diameter of your mold and match it to the appropriate wick size. Consider the type of wax you’ll be using, as different waxes require different wick types. Also, think about the desired burn time and fragrance load.
Doing thorough research and testing will help you find the perfect wick for your candle mold.
What is the recommended length for the wick in relation to the size of the candle mold?
The recommended wick length for a candle mold depends on its size. As a general rule, the wick should be about one inch longer than the height of the mold. This allows for a proper burn and prevents tunneling.
For example, if you have a 4-inch tall mold, a 5-inch wick would be suitable. It’s important to choose the right wick size for candle molds to ensure a successful and even burn.
Can I use any type of wax for my homemade candle?
Choosing the right wax for your homemade candle is crucial for a successful burn. As a beginner, it’s important to consider the various candle wax options available.
Some popular choices include soy wax, beeswax, and paraffin wax. Each wax has its own unique characteristics and melting points, so it’s essential to research and select the wax that best suits your needs.
Experimenting with different waxes will help you determine which one gives you the desired results for your homemade candles.
How long should I wait for the candle to harden before trimming the wick?
When it comes to trimming the wick of your candle, it’s crucial to exercise patience. Rushing this step can lead to an uneven burn and wasted wax. It’s important to wait until the candle has fully hardened before trimming the wick.
This allows the wax to set properly, ensuring a clean and even burn. Proper wick placement in candle molds is also essential for achieving this desired result.
Here are some tips to help you achieve a clean and even burn with your candle wicks.
Are there any safety precautions I should be aware of when working with candle molds and wicks?
When working with candle molds and wicks, it’s crucial to prioritize candle mold safety and take necessary precautions.
First, ensure that your work area is clean and free of flammable materials.
Use heat-resistant gloves to handle hot wax and molds.
Keep a fire extinguisher nearby in case of emergencies.
Additionally, always follow the manufacturer’s instructions for the specific candle mold and wick you’re using to ensure optimal safety.
Conclusion
Creating your own homemade candles can be a delightful and rewarding experience. Like a flickering flame dancing with life, the process of putting wicks in candle molds requires attention to detail and precision.
By gathering the necessary materials, preparing the mold, and carefully attaching and securing the wick, you can ensure a successful outcome. Just like a master craftsman, you can enjoy the satisfaction of creating a beautiful candle that will fill your space with warmth and light.
So, let your creativity shine and embark on this captivating journey of candle making.