
When making candles, placing a wick into the candle mold is like planting a seed in fertile soil. This essential step sets the foundation for producing a candle that is both visually appealing and functional.
In this guide, we will show you how to master this art with ease. We’ll gather our materials, prepare the mold, measure and cut the wick, and secure it snugly in place.
Then, we’ll pour the melted wax into the mold, allowing it to cool and solidify. Finally, we’ll trim the wick to ensure a clean burn.
By the end, you’ll have the knowledge and confidence to create candles that radiate warmth and charm. So let’s dive in and learn how to put a wick in a candle mold!
Key Takeaways
- Choose the appropriate wick size based on the candle diameter and consult with an expert or refer to wick size charts.
- Clean the mold thoroughly before use to ensure the final appearance and quality of the candle are not affected.
- Secure the wick in the mold properly by using a wick tab, threading it through the hole, and wrapping the excess wick around a pencil or skewer.
- Pay attention to the temperature of the melted wax and pour it carefully and steadily into the mold, ensuring the wick is centered and securely positioned.

Vtopmart 25 PCS Clear Plastic Drawer Organizers Set, 4-Size Versatile Bathroom and Vanity Drawer Organizer Trays, Storage Bins for Makeup, Bedroom, Kitchen Gadgets Utensils and Office
- Versatile Drawer Organizer Set: Fits various home drawers and spaces
- Includes 25 Bins in 4 Sizes: Customizable storage options for different items
- Non-Slip and Durable Design: Silicone pads prevent slipping, sturdy plastic construction
As an affiliate, we earn on qualifying purchases.
Gather Your Materials
To begin, we’ll gather all of the necessary materials for putting a wick in a candle mold.
The first step is to choose the right type of wick for your candle. There are several options available, such as cotton wicks, wooden wicks, and braided wicks. Consider the size and type of your candle to determine the appropriate wick.
Wick sizing is crucial for a successful burn. You can find wick size charts online or consult with a candle-making expert to ensure you select the right wick diameter.
Additionally, gather other essential materials like wick sustainers, wick stickers, and scissors.

Having all the necessary materials ready before starting will make the process smoother and more efficient.
Prepare Your Candle Mold
After gathering all the necessary materials, we can now prepare the candle mold. To ensure a successful candle-making process, it’s important to properly prepare the mold before pouring the wax. Here are three important steps to follow:
- Clean the mold: Before use, make sure to clean the candle mold thoroughly. Any residue or dirt can affect the final appearance and quality of the candle.
- Select the appropriate wick size: The wick size should be based on the diameter of the candle mold. A wick that’s too thin may not burn properly, while a wick that’s too thick can cause the candle to burn too quickly.
- Center the wick: To ensure an even burn, it’s essential to place the wick in the center of the mold. Use a wick centering device or a simple pencil to keep the wick straight and centered.
Now that the candle mold is prepared, we can move on to the next step: measuring and cutting the wick.
Measure and Cut the Wick
We need to measure and cut the wick before placing it in the candle mold. To ensure the wick fits properly in the mold, we must determine the appropriate wick size and position it correctly. The size of the wick is crucial in achieving an even burn and preventing tunneling. Here is a helpful table that shows the recommended wick sizes for different candle diameters:

| Candle Diameter (inches) | Wick Size (inches) |
|---|---|
| 2 | 6-8 |
| 3 | 8-10 |
| 4 | 10-12 |
| 5 | 12-14 |
Once you have determined the correct wick size, cut it to the desired length, leaving an extra inch for securing it in the mold. Now that we have measured and cut the wick, we are ready to move on to the next step of securing it in the mold.
[Transition sentence: Now that we have measured and cut the wick, let’s move on to securing it in the mold.]Secure the Wick in the Mold
Now let’s secure the wick in the mold. Proper wick placement and securing are crucial for a successful candle-making process. Here’s what you need to do:
- Start by placing a wick tab at the bottom center of the mold. This will act as an anchor for the wick.
- Thread the wick through the hole in the wick tab, ensuring that it’s centered and straight.
- Use a pencil or skewer to wrap the excess wick around it, securing it in place and preventing it from falling into the melted wax.
By following these steps, you ensure that the wick stays in place throughout the pouring and cooling process.

Now that the wick is securely positioned, we can move on to the next step: pouring the melted wax into the mold.
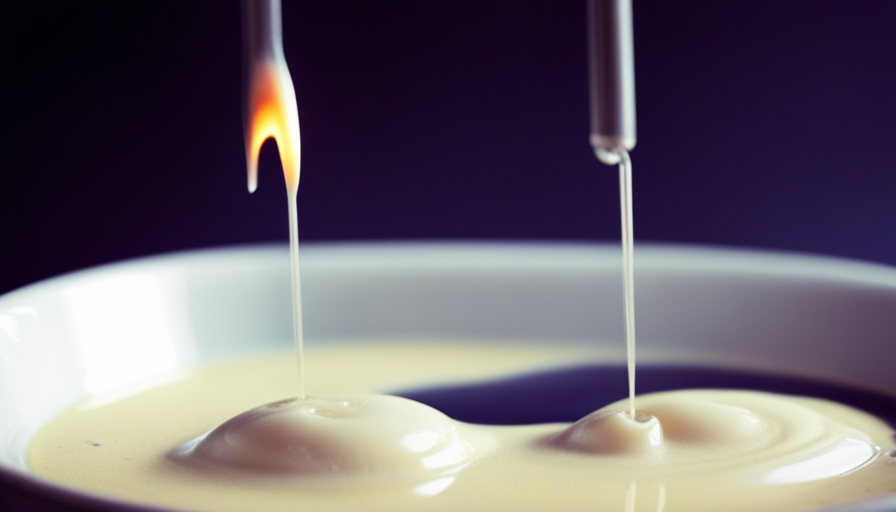
Pour the Melted Wax Into the Mold
Now that we’ve successfully secured the wick in the mold, it’s time to move on to pouring the melted wax into the mold.
There are a few key points to consider when doing this.
First, we need to ensure that we place the wick in the center of the mold and secure it in place so that it doesn’t move during the pouring process.

Second, it’s important to pay attention to the temperature of the wax. It should be melted to the proper temperature to ensure optimal results.
Lastly, the material of the mold itself should be taken into consideration, as different materials may require different techniques for pouring the wax.
Wick Placement Techniques
To properly position the wick, one can pour the melted wax into the candle mold using specific techniques. This ensures that the wick is centered and the correct length for a successful candle. Here are some techniques to consider:
- Preparation: Before pouring the wax, make sure the wick is securely attached to the bottom of the mold. Use a wick holder or adhesive to keep it in place.
- Slow and Controlled: Pour the melted wax slowly and in a controlled manner. This allows the wax to evenly distribute around the wick, preventing any air bubbles or uneven burning.
- Wick Straightening: As the wax begins to set, gently straighten the wick if it starts to lean or bend. This will help ensure a straight and upright wick once the candle is fully set.
Proper Wax Temperature
How can we ensure that the melted wax is poured into the mold at the proper temperature? Achieving the correct wax temperature is crucial for a successful candle-making process.
To begin, it’s important to melt the wax at the appropriate temperature according to the type of wax being used. Different waxes have different melting points, so referring to the manufacturer’s instructions is essential.
Once the wax is melted, it should be cooled to the recommended pouring temperature, typically between 180°F and 200°F (82°C and 93°C). This ensures that the wax will solidify properly and evenly in the mold.
Additionally, maintaining the proper temperature throughout the pouring process is crucial for wick placement. If the wax is too hot, the wick may sink or shift, resulting in an off-centered wick. On the other hand, if the wax is too cool, the wick may not adhere properly to the bottom of the mold.
Mold Material Considerations
Once the melted wax has reached the recommended pouring temperature, we carefully pour it into the candle mold, taking into consideration the material of the mold. The choice of mold material can affect the overall quality and appearance of the finished candle.

Here are some important considerations when selecting the mold material:
- Silicone molds: These are flexible and easy to release the finished candle from. They’re also durable and can withstand high temperatures, making them suitable for various candle-making techniques.
- Metal molds: These provide excellent heat conduction, resulting in faster and more even cooling of the candle. They’re ideal for creating pillar candles with intricate designs.
- Glass molds: These allow for easy monitoring of the candle’s progress as it solidifies. They’re commonly used for container candles.
In addition to mold material considerations, it’s crucial to select the appropriate wick size for the candle. A wick that’s too small may result in a weak flame, while a wick that’s too large can cause excessive smoke and uneven burning. Proper wick size selection ensures optimal performance and burn time for the candle.
Allow the Candle to Cool and Trim the Wick
We let the candle cool and then trim the wick. After the candle has solidified and cooled down completely, it’s time to trim the wick to ensure a clean and efficient burn. Trimming the wick is an essential step in candle-making, as it helps prevent excessive smoking and mushrooming, while also promoting an even and steady flame.
To trim the wick, you’ll need a pair of sharp scissors or wick trimmers. Hold the candle securely and trim the wick to a length of about ¼ inch. It’s important to measure the wick length accurately, as a wick that’s too long can cause the candle to burn unevenly or even produce black soot.

Frequently Asked Questions
How Long Does It Take for the Candle to Cool and Harden Completely?
To prevent cracks in a cooling candle and speed up the process, it’s important to let the candle cool and harden completely. This can take several hours, depending on the size and composition of the candle.
Can I Use Any Type of Wax to Make a Candle?
Can we use any wax for candle making? Choosing the right wax is crucial for successful candle making. Different types of wax have different melting points and properties. Common mistakes to avoid include using the wrong wax and not considering the fragrance load capacity.
How Do I Know if the Wick Is Secure Enough in the Mold?
When placing the wick in a candle mold, it’s important to ensure a secure fit. We’ll share tips for proper placement and troubleshoot common issues to help you achieve a perfectly positioned wick.
Can I Use a Different Type of Container Instead of a Candle Mold?
We can explore alternative candle containers if you’re not using a candle mold. Different containers have pros and cons, such as heat resistance and ease of use. Let’s delve into the options to find the best fit for your candle-making needs.

What Should I Do if the Wick Is Too Short After Cutting?
If the wick is too short after cutting, we recommend using a wick holder or adding a wick tab to extend its length. Troubleshooting common candle mold issues is essential for achieving mastery in candle making.
Conclusion
In conclusion, by following these steps, you can easily put a wick in a candle mold.
With the precision of a surgeon and the care of an artist, you can create beautiful candles that will light up any room.
So gather your materials, prepare your mold, measure and cut the wick, secure it in the mold, pour in the melted wax, and let your creativity shine.

Happy candle making!