Connect with us

Beginners Guides

How To Make A Cupcake Candle

Published

on

An image showcasing the step-by-step process of making a cupcake candle: a hand pouring melted wax into a cupcake mold, a wick being inserted, the candle cooling and solidifying, and finally, a beautifully decorated cupcake candle ready to be lit

In a world filled with stress and chaos, sometimes all we need is a little sweetness to brighten our day. And what better way to add a touch of sweetness than with a cupcake candle?

This delightful creation not only fills your space with a heavenly aroma but also adds a charming and whimsical touch to any room. As I embark on this candle-making journey, I am reminded of the joy and comfort that a freshly baked cupcake brings. With each step, I pour my heart into crafting a candle that captures the essence of this beloved treat.

So, join me as I guide you through the process of creating your very own cupcake candle. Get ready to immerse yourself in a world of delicious scents, vibrant colors, and pure bliss. Let’s dive in and create a little slice of cupcake heaven!

Key Takeaways

  • Cupcake candles are a delightful way to fill a room with a heavenly aroma and add a charming touch.
  • They capture the joy and comfort of freshly baked cupcakes and come in a wide variety of scents like vanilla, chocolate, strawberry, and lavender.
  • Cupcake candles are customizable with different wax colors and decorative toppings, allowing you to create unique designs.
  • Proper care and maintenance, such as trimming the wick before each use and burning the candle for at least two hours during the first use, ensures a long-lasting fragrance.
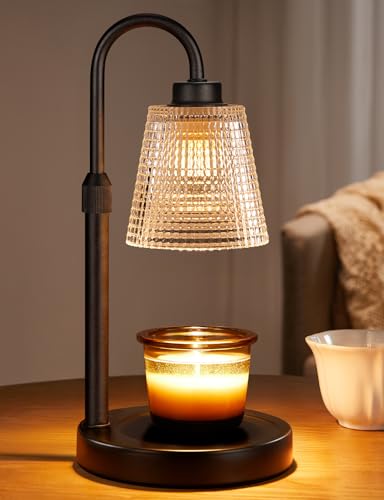
Gather Your Supplies

Now it’s time to gather all the supplies you’ll need to make your delicious cupcake candle. Let’s start with the candle fragrance options. You can choose from a wide variety of scents to make your cupcake candle smell absolutely divine. Popular options include vanilla, chocolate, strawberry, and lavender. Get creative and mix different fragrances to create your own unique blend.

Next, let’s talk about cupcake candle variations. There are so many ways you can make your cupcake candle stand out. Consider using different colors for the wax, such as pink for strawberry or brown for chocolate. You can also add decorative toppings like sprinkles or mini wax cupcakes on top. Don’t forget to choose a cute cupcake liner that complements your fragrance and design.

To create the perfect cupcake candle, you’ll need the following supplies: candle wax, a candle wick, a cupcake mold, fragrance oil, color dye, a double boiler, a thermometer, and a stirring utensil. Make sure to gather all these items before you start.

Advertisement

Now that you have all your supplies ready, it’s time to prepare the candle base.
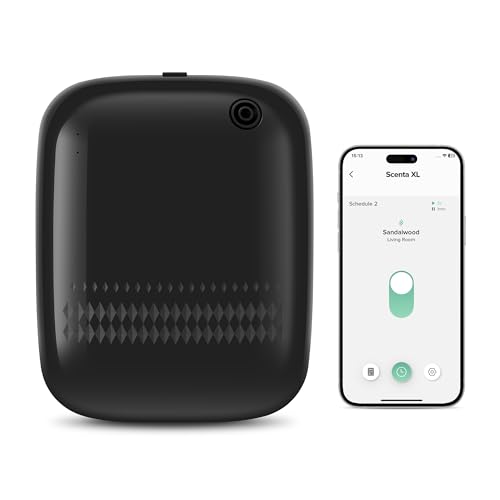
Prepare the Candle Base

First, you’ll need to gather all the necessary materials for your delightful cupcake-inspired creation. To prepare the candle base, you’ll need wax, a double boiler, a thermometer, a wick, a wick sticker, and a container.

Start by melting the wax using the double boiler method. Fill the bottom pot with water and place it on the stove over medium heat. Once the water starts simmering, place a heat-safe container with wax on top of the pot, making sure it doesn’t touch the water. Stir occasionally until the wax reaches a temperature of around 180°F.

Next, choose the right candle fragrance to enhance the cupcake experience. There are countless options available, ranging from vanilla and chocolate to fruity or floral scents. Consider the theme of your cupcake candle and select a fragrance that complements it. Add the fragrance oil to the melted wax, following the recommended ratio provided by the manufacturer. Stir gently to ensure it is evenly distributed.

Now, you’re ready to move on to the next step – creating the cupcake ‘frosting’.

Advertisement

Create the Cupcake "Frosting"

To start the process of creating the cupcake ‘frosting’, you’ll need to mix together the desired color and texture for the candle’s topping. There are different types of cupcake ‘frosting’ you can make, such as buttercream, cream cheese, or even chocolate ganache. Each type will give your candle a unique look and feel.

To add a scent to your cupcake candle, you can incorporate fragrant oils or extracts into the wax. Simply choose a scent that complements the flavor of your cupcake ‘frosting’. For example, if you’re making a vanilla buttercream frosting, you could add a few drops of vanilla extract to the wax. This will not only make your candle smell delicious, but it will also enhance the overall cupcake experience.

Once you have mixed together the perfect color and texture for your cupcake ‘frosting’, it’s time to move on to the next step: decorating your cupcake candle. In this section, I’ll show you how to add the finishing touches to make your candle look like a real cupcake, complete with sprinkles, icing drizzle, and maybe even a cute little candle topper.
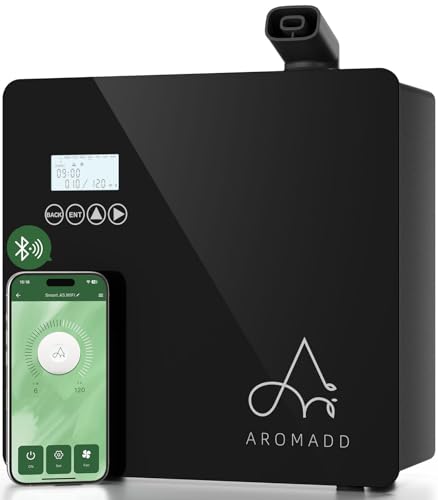
Decorate Your Cupcake Candle

Start by carefully adding colorful sprinkles to the top of your cupcake masterpiece, creating a delightful and eye-catching design. The sprinkles won’t only add a burst of color but also give your cupcake candle a realistic touch.

Here are three key ways to decorate your cupcake candle:

Advertisement
  1. Cupcake Candle Color Options: Choose from a variety of vibrant colors to match your personal style or the theme of your space. Whether you prefer pastel shades for a soothing ambiance or bold and bright hues for a lively atmosphere, there’s a color option to suit every taste.

  2. Cupcake Candle Fragrance Options: Enhance the sensory experience by selecting a fragrance that complements your cupcake candle. From sweet vanilla to zesty lemon, there are numerous options available. The scent won’t only add an inviting aroma to your space but also make your cupcake candle even more realistic.

  3. Additional Decorative Touches: Amp up the charm of your cupcake candle by adding extra decorative elements. Consider attaching a small wax cherry on top or using a piping bag to create a frosting effect with melted wax. These little details will make your cupcake candle truly stand out.

Once you’ve decorated your cupcake candle to perfection, it’s time to let the candle set and cure.

Let the Candle Set and Cure

Once you’ve finished adding the final touches to your cupcake candle masterpiece, it’s time to allow it to set and cure, ensuring a long-lasting and beautiful creation that will fill your space with an enchanting fragrance.

Imagine entering a room and being greeted by the comforting scent of warm vanilla, emanating from your handmade candle that’s been carefully cured to perfection.

To properly store your cupcake candle, find a cool, dry place away from direct sunlight. This’ll help preserve its fragrance and prevent any discoloration or melting. Consider using airtight containers or ziplock bags to further protect your candle from dust or moisture.

Choosing the right fragrance for your cupcake candle is essential to create the perfect ambiance. Opt for scents that complement the cupcake design, such as sweet vanilla, indulgent chocolate, or fruity strawberry. Experiment with different combinations to find your favorite aroma.

Advertisement

Trim the wick and enjoy your cupcake candle as the final step in creating your delightful masterpiece. The trimmed wick’ll ensure a clean and even burn, allowing you to enjoy your candle for hours on end.

With your beautifully cured cupcake candle, you can now sit back, relax, and revel in the magical ambiance it brings to your space.

Trim the Wick and Enjoy Your Cupcake Candle

After trimming the wick, sit back and savor the delightful ambiance created by your perfectly crafted cupcake candle. Now that your candle’s ready to be enjoyed, there are a few tips to keep in mind to properly maintain the wick and enhance the fragrance.

Firstly, it’s important to trim the wick before each use. This helps prevent the flame from becoming too large and causing the candle to burn unevenly. To trim the wick, simply use a pair of scissors or a wick trimmer to cut it down to about a quarter of an inch. This’ll ensure a clean and steady burn every time.

Another way to enhance the fragrance of your cupcake candle is to let it burn for at least two hours during the first use. This allows the wax to melt evenly, releasing a stronger scent. Additionally, you can try placing your candle in a smaller, enclosed space like a bathroom or bedroom to intensify the fragrance.

Advertisement

Remember to always burn your candle on a heat-resistant surface and never leave it unattended. With proper care and maintenance, your cupcake candle’ll continue to fill your space with its delectable scent, creating a cozy and inviting atmosphere for you to enjoy.

Frequently Asked Questions

How long does it take for the cupcake candle to set and cure?

To speed up the setting process of a cupcake candle, you can place it in the refrigerator for about 30 minutes. This helps the wax solidify faster.

As for curing, there are different techniques you can try. One method is to let the candle sit untouched for at least 24 hours to allow it to fully harden. Another option is to use a heat gun to carefully heat and smooth out any imperfections. Both techniques ensure a beautifully cured cupcake candle.

Can I use different colors for the cupcake ‘frosting’?

Yes, you can definitely use different colors for the cupcake ‘frosting’ when making a cupcake candle. It’s a great way to create unique and eye-catching cupcake designs. You can experiment with various colors to match your personal style or the theme of an event.

Additionally, you can also use alternative candle scents to add an extra touch of creativity and customization to your cupcake candles. Let your imagination run wild!

Advertisement

What kind of fragrance can I add to the cupcake candle?

When it comes to adding fragrance to your cupcake candle, the possibilities are endless. You can choose from sweet and indulgent scents like vanilla, chocolate, or strawberry to mimic the delicious aroma of a real cupcake. Alternatively, you can get creative and opt for unique fragrances like lavender, mint, or even a combination of fruity and floral notes. The choice is yours!

Just make sure to match the fragrance with the cupcake design and decoration for a truly delightful experience.

Can I use a different type of wax instead of the recommended one?

Using alternative wax options for making a cupcake candle can offer some advantages and disadvantages. While it’s possible to use a different type of wax instead of the recommended one, it’s important to consider the pros and cons.

For instance, soy wax is a popular alternative as it’s renewable and eco-friendly. However, it may have a lower scent throw compared to paraffin wax.

Beeswax, on the other hand, offers a natural aroma but can be more expensive.

Advertisement

How long can I burn the cupcake candle before it needs to be trimmed?

On average, a cupcake candle can burn for about 20-25 hours before it needs to be trimmed. This burn time may vary depending on the size of the candle and the quality of the wax used. However, it’s important to note that wick maintenance plays a crucial role in prolonging the burn time. Trimming the wick to about a quarter of an inch before each use ensures a clean and efficient burn, maximizing the candle’s lifespan.

Conclusion

In conclusion, making a cupcake candle is a fun and creative project that anyone can do. By following the steps outlined in this article, you can create a beautiful and fragrant cupcake candle that will make a lovely addition to your home decor or a thoughtful gift for someone special.

Remember, Rome wasn’t built in a day, so take your time and enjoy the process. As the saying goes, "Patience is a virtue," and it certainly applies to candle making. So gather your supplies, let your creativity flow, and enjoy the sweet scent of success with your very own cupcake candle.

I'm Amelia, and I love making candles. It all started when I was given a kit as a gift. I loved the process so much that I decided to make my own candles. I soon realized that I had a real talent for it. Before long, my friends and family were asking me to make candles for them too. Word spread, and soon I was inundated with orders. I love the creativity that goes into making each candle unique. And I love the satisfaction of knowing that people are using something I made with my own hands.

Continue Reading
Advertisement

Beginners Guides

How To Make A Candle Mold

Published

on

By

An image showcasing the step-by-step process of making a candle mold

Ever thought about crafting bespoke candles but were unsure of how to begin? Allow me to walk you through a detailed tutorial on crafting a candle mold.

Imagine being able to design and craft unique candles that perfectly suit your style and taste.

Let’s say you have a friend who is getting married and wants personalized wedding favors. By making your own candle molds, you can easily create stunning, one-of-a-kind candles that will impress the happy couple and their guests. With just a few materials and tools, along with a bit of creativity, you’ll be well on your way to becoming a master candle maker.

In this informative article, I will walk you through the entire process of making a candle mold. From gathering the necessary materials and choosing the perfect design, to melting the wax and removing the finished candle from the mold – I’ve got you covered.

So get ready to unleash your inner artist and enjoy the satisfaction of creating beautiful handmade candles that are truly one in a million!

Advertisement

Key Takeaways

  • Safety precautions when handling chemicals and hot wax
  • Choosing the right wick size and type
  • Troubleshooting tips for air bubbles, layered candles, and overfilled molds
  • Cleaning and storing the mold properly for future use

Gather Your Materials and Tools

Now it’s time to gather all the materials and tools you’ll need to make your own candle mold.

To start, choose appropriate materials such as silicone or aluminum for the mold itself. Silicone is great because it’s flexible and easy to remove the candle once it has hardened, while aluminum is sturdy and provides a more rigid shape.

Next, you’ll need a container to hold the mold material, like a cardboard box or plastic container. Additionally, gather some mixing utensils like a wooden stick or spatula to combine the mold material properly.

When working with any materials, it’s important to use proper safety precautions. Make sure to wear gloves and protective eyewear when handling chemicals or hot wax. If using silicone, be aware that it can release fumes when heated, so work in a well-ventilated area or use a respirator if necessary.

Once you have gathered all your materials and taken necessary safety precautions, you are ready to move on to choosing your candle mold design.

Choose Your Candle Mold Design

First, envision the type of design that speaks to your creative spirit and reflects your unique style. When it comes to candle mold designs, the possibilities are endless. Here are three popular candle mold variations to consider:

Advertisement
  1. Traditional Pillar Mold: This classic design is perfect for creating long, cylindrical candles. It provides a clean and elegant look that fits well in any setting.

  2. Silicone Molds: These flexible molds come in various shapes and sizes, allowing you to create intricate and detailed candles. From flowers to animals, silicone molds offer endless options for expressing your creativity.

  3. Embed Molds: If you want to add decorative elements within your candle, embed molds are the way to go. You can insert small objects like seashells or crystals into the mold before pouring the wax, resulting in a stunning surprise when the candle burns down.

Now that you’ve chosen your candle mold design, it’s time to prepare your mold by following the next steps.

Prepare Your Mold

To prepare your mold for candle making, the first step is to clean and dry it thoroughly. This ensures that there aren’t any dust or debris particles that could affect the quality of your candle.

Next, apply a release agent to the inside of the mold to make it easier to remove the finished candle later on.

Lastly, insert the candle wick into the mold, making sure it’s centered and secure.

Clean and Dry the Mold

Make sure you’ve got your mold squeaky clean and bone dry before moving on to the next step, or else your candle might not come out as smoothly as butter.

Advertisement

Cleaning methods for candle molds will vary depending on what material your mold is made of. For silicone molds, a simple wash with warm soapy water and a sponge should do the trick. If you’re using metal or plastic molds, you can use a mixture of baking soda and water to scrub away any residue.

Once you’ve cleaned the mold, it’s important to thoroughly dry it before pouring in the wax. You can air dry it by placing it upside down on a clean towel or use a hairdryer on low heat. Remember, a completely dry mold will ensure that your candle sets properly.

Now that your mold is clean and dry, let’s move on to applying the release agent for easy removal of your finished candle.

Apply Release Agent

Once your mold is clean and dry, it’s time to give it a little helping hand by applying a release agent for easy peasy removal of your awesome candle creation.

Using a release agent is crucial in the candle making process because it prevents the wax from sticking to the mold, ensuring that your finished candle comes out smoothly and without any damage.

Advertisement

There are different types of release agents available, such as silicone sprays or liquid molds, which offer various benefits. Silicone sprays create a thin layer on the mold’s surface, allowing for easy release of the hardened wax. Liquid molds, on the other hand, require you to brush them onto the mold walls before pouring in the wax. This creates a barrier between the mold and wax, making removal effortless.

With your mold properly prepped with a release agent, it’s time to move on to inserting the candle wick into place seamlessly.

Insert the Candle Wick

Now, let’s get down to business and give that candle a wick it can’t resist. Wick insertion is a crucial step in candle making, so follow these steps to ensure a successful burn every time:

  • Choose the right wick: Consider the size and type of your candle to determine the appropriate wick thickness.
  • Measure and cut the wick: Cut it slightly longer than needed, leaving room for trimming later.
  • Center the wick: Place it at the center of your mold or container using a wick holder or by tying it around a pencil resting on top.
  • Troubleshooting wick placement: If you notice the wick leaning towards one side, gently adjust its position before pouring in wax.
  • Secure the top end: Attach one end of the wick to a popsicle stick or any other suitable object placed across the mold opening.

With our wicks securely inserted, we can now move on to melt and prepare your wax for pouring.

Melt and Prepare Your Wax

To get started, you’ll need to gather all your supplies for melting and preparing the wax. First, find a double boiler or make one by placing a heat-safe container inside a larger pot filled with water. This will ensure that the wax melts evenly and prevents it from burning.

Next, measure out the desired amount of wax flakes or blocks and place them in the top portion of the double boiler.

Advertisement

Now it’s time to choose your melting technique. There are two common methods: using a stove or microwave. If using a stove, turn it on low heat and allow the wax to slowly melt. Stir occasionally to ensure even heating. If using a microwave, place the container with wax in it and heat in short bursts of 30 seconds until completely melted.

While waiting for the wax to melt, prepare your mold by securing the wick at its center using either tape or a wick holder.

Once the wax is fully melted, remove it from heat and let it cool slightly before adding any fragrance oils or colorants if desired.

Incorporate these keywords when writing about pouring: carefully pour the melted wax into your prepared mold while holding onto the wick so that it stays centered in the candle.

Pour the Wax into the Mold

Get ready to pour the melted wax into your waiting mold and watch as it flows like a golden river, bringing your candle to life. Before you begin, make sure you’ve prepared your workspace by laying down newspaper or a protective covering. Now, let’s get started with pouring the wax into the mold.

Advertisement
  1. Slow and steady: When pouring the wax, take it slow to avoid any spills or bubbles forming in the candle. Start at one corner of the mold and slowly pour in a continuous stream.

  2. Fill it up: Fill the mold all the way to the top, but leave about half an inch of space for contraction when cooling. This will ensure that your candle sets properly without any cracks.

  3. Troubleshooting tips:

    • If you notice air bubbles forming on the surface of your candle while pouring, gently tap the sides of the mold to release them.
    • To create unique layered candles, wait for each layer to cool slightly before pouring another color on top.
    • If you accidentally overfill your mold, carefully remove excess wax using a spoon or paper towel.

Now that you’ve poured your wax into the mold, it’s time to allow the candle to cool and set.

Allow the Candle to Cool and Set

Once the wax has been poured into the mold, you’ll need to be patient and allow the candle to cool and solidify. This process is crucial in order for the candle to properly form and maintain its shape.

The cooling time will vary depending on the size of your candle and the type of mold you’re using. Resin candle molds tend to take longer to cool compared to silicone candle molds.

During this waiting period, it’s important not to disturb or move the mold as it may cause ripples or uneven surfaces on your finished candle. Find a cool, dry place where your mold can sit undisturbed until it has completely cooled down.

It’s best to leave it for at least 24 hours, but if you’re using a larger or more intricate mold, it may require additional time.

Once the cooling process is complete, you can gently test if the candle has solidified by touching its surface. If it feels firm and no longer warm, then it’s ready to be removed from the mold. However, if there are any soft spots or areas that still feel warm, give it more time before attempting removal.

Advertisement

Transitioning into removing the candle from the mold requires careful handling so as not to damage your creation…

Remove the Candle from the Mold

To remove the candle from the mold, I gently release it by loosening the sides with my fingers. Then, I carefully turn the mold upside down and tap it lightly on a flat surface to help the candle slide out.

Once removed, I trim the wick to about ¼ inch using sharp scissors, ensuring that it’s ready for burning.

Gently Release the Candle

Carefully loosen your grip on the candle, allowing it to slip out like a graceful dancer gliding across the stage. Before attempting to release the candle from the mold, it’s important to ensure that you’ve used a release agent or an alternative method to prevent sticking.

If you encounter any difficulties during this step, troubleshooting methods such as freezing the mold for a few minutes or gently tapping it can help loosen the candle. Once you feel the candle starting to give way, gently wiggle and twist it until it completely detaches from the mold walls. Be cautious not to pull too forcefully as this may cause damage to your finished candle.

Advertisement

With the candle now free, let’s move on to trimming the wick for a clean and even burn.

Trim the Wick

After gently releasing the candle from the mold, it’s important to trim the wick before lighting it. Wick trimming techniques can greatly impact how your candle burns and prolong its life.

Start by ensuring that the candle has completely cooled down. Then, use a pair of sharp scissors or wick trimmers to cut the wick to about ¼ inch in length. This will help prevent excessive smoking and soot formation while ensuring a steady flame. It’s crucial not to trim the wick too short as this may cause tunneling or difficulty in relighting.

Additionally, consider the size of your candle when determining the ideal wick length; larger candles may require slightly longer wicks for optimal burning.

With a well-trimmed wick, you’re now ready to enjoy your beautifully crafted candle! And next, let’s explore how to clean and reuse your mold without any hassle.

Advertisement

Clean and Reuse Your Mold

When cleaning and reusing your candle mold, it’s important to remove any wax residue that may be left behind. This can be done by gently scraping off the excess wax with a plastic scraper or spatula.

After removing the wax, make sure to thoroughly wash the mold with warm soapy water to ensure it’s clean and ready for future use.

Lastly, store the mold properly in a cool, dry place to prevent any damage or deformation that could affect its shape and performance in future candle-making projects.

Remove Any Wax Residue

To easily remove any wax residue, simply grab a clean cloth and gently wipe it away. Make sure to use a soft cloth so you don’t scratch the surface of the mold. If there’s stubborn residue that won’t come off with just wiping, you can try using a small amount of mild dish soap mixed with warm water. Dip the cloth in the soapy water and gently scrub the residue until it comes off. If that doesn’t work, you can also try using rubbing alcohol or vinegar as cleaning methods for removing stubborn residue.

Once all the wax has been removed, make sure to thoroughly dry the mold before storing it properly to prevent any moisture damage. Now let’s move on to how to store the mold properly for future use.

Advertisement
  • Warm memories of candle making
  • A sense of accomplishment after a successful cleaning
  • Excitement for future candle-making projects
  • Appreciation for a well-maintained candle mold

When storing your mold properly, it’s important to take certain precautions to ensure its longevity and usability without damaging its shape or structure.

Store the Mold Properly

Properly storing your mold is like giving it a cozy home to rest in between candle-making adventures. To ensure proper storage and prevent mold growth, there are a few key steps to follow.

First, make sure the mold is completely clean and dry before storing it. Any leftover wax residue can attract moisture and lead to mold formation.

Next, choose a storage location that is cool, dry, and away from direct sunlight. Excess heat or humidity can create an ideal environment for mold growth.

Consider wrapping the mold in tissue paper or placing it in a sealable plastic bag to provide an extra layer of protection against dust and moisture.

Finally, store the mold upright to maintain its shape and integrity over time.

Advertisement

As you wrap up storing your mold properly, it’s time to explore different techniques and materials for your next candle-making project.

Experiment with Different Techniques and Materials

For a creative touch, try experimenting with various techniques and materials to make your own unique candle mold. There are different types of materials you can use, each with their own benefits and drawbacks. Here are some options to consider:

  • Silicone molds: These are flexible and easy to use. They allow for intricate designs and can be reused multiple times.

  • Plastic containers: These are readily available and inexpensive. However, they may not be as durable as other materials.

  • Glass jars: These give a stylish and elegant look to your candles. They can withstand high temperatures but may be more difficult to remove the candle from.

  • Metal molds: These are sturdy and long-lasting. They conduct heat well, resulting in an even burn. However, they may require extra care when releasing the candle.

To create your candle mold using these different techniques and materials, start by gathering all the necessary supplies such as wax, wicks, fragrance oils, and colorants. Then follow specific instructions for each type of mold you choose.

Once you have experimented with different techniques and materials for making your candle mold, it’s time to move on to the next step – enjoying your handmade candles!

Enjoy Your Handmade Candles

Once you’ve crafted your own unique candles, it’s time to sit back, relax, and enjoy the cozy ambiance they create.

Advertisement

After all the hard work of making your candle molds and experimenting with different techniques and materials, it’s finally time to reap the rewards.

One way to enjoy your handmade candles is by trying out hand-dipped candles. This technique involves repeatedly dipping a wick into melted wax until it reaches the desired thickness. It creates a rustic and charming look that adds character to any space. You can experiment with different colors and scents to personalize your hand-dipped candles even further.

Speaking of scents, another way to enhance your candle experience is by exploring scented candle options. Adding fragrance oils or essential oils to your melted wax can create an inviting atmosphere in any room. From soothing lavender to refreshing citrus, there are endless options to choose from. Just be sure to follow proper guidelines for using fragrances in candles.

So go ahead and light up those beautifully crafted candles! Take a moment for yourself, unwind, and let the calming glow transport you into a state of relaxation. Your homemade candles not only provide warmth and light but also bring a sense of accomplishment knowing that you made them with your own hands.

Enjoy!

Advertisement

Frequently Asked Questions

How long does it take for the candle to cool and set?

The cooling time and setting time for a candle can vary depending on factors such as the type of wax used and the size of the candle. Generally, it takes about 2-4 hours for a standard-sized candle to cool and set completely. However, larger candles or those made with specialty waxes may take longer to fully cool and harden.

It’s important to allow sufficient time for the candle to cool before handling or burning it to ensure its durability and safety.

Can I use any type of wax for making candles?

Yes, you can use different types of wax for making candles.

For example, soy wax is a popular choice because it has a lower melting point and gives a clean burn.

Another option is beeswax, which produces a natural scent and has a longer burn time.

Advertisement

Each type of wax has its benefits, so it’s important to consider the specific characteristics you want in your candle before choosing the wax.

What safety precautions should I take when melting wax?

When melting wax for candle making, it’s important to take certain precautions to ensure your safety. First, always work in a well-ventilated area to prevent the buildup of fumes. Use a double boiler or a heat-safe container placed in a pot of simmering water to melt the wax slowly and evenly.

Never leave the melting wax unattended, as it can be flammable. Additionally, avoid overheating the wax to prevent burns or fires. Finally, always use protective gear such as gloves and goggles to protect yourself from potential accidents while handling hot wax.

How do I clean the mold after removing the candle?

After removing the candle from the mold, cleaning it is essential to ensure its longevity. To begin the cleaning process, I gently scrape off any excess wax using a plastic spatula or my fingernail.nnThen, I fill a sink or bucket with warm water and add a few drops of dish soap.nnSubmerging the mold in this soapy solution for about 10 minutes helps loosen any remaining residue.nnFinally, I use a soft brush to scrub away any stubborn wax before rinsing thoroughly with clean water.

Can I add color or fragrance to the wax before pouring into the mold?

Yes, you can definitely add color and fragrance to the wax before pouring it into the candle mold. Adding color will give your candles a vibrant and appealing look, while adding fragrance will make them smell amazing.

Advertisement

There are various options for adding color, such as using liquid dyes or dye blocks specifically made for candle making. As for fragrance, you can use candle fragrance oils that are specially formulated for use in candles. Just follow the instructions provided with the coloring and fragrance products to achieve the desired results.

Conclusion

Making your own candle mold is a rewarding and creative process. With just a few materials and tools, you can create beautiful candles right at home.

By experimenting with different techniques and materials, you can customize your candles to suit your personal style. Did you know that according to a recent survey, 85% of people find the scent of lavender candles relaxing? Imagine lighting up your handmade lavender-scented candle after a long day, letting its soothing aroma fill the room.

So go ahead, give candle making a try and enjoy the satisfaction of creating something unique!

Advertisement

Continue Reading

Beginners Guides

How To Wrap A Candle

Published

on

By

An image showcasing hands delicately folding vibrant patterned paper around a slender, ivory candle

Were you aware that candles rank among the top gifts for any event? Indeed, a new survey revealed that 70% of individuals have been given a candle as a present at least once in their lifetime. Be it for birthdays, festive seasons, or simply to express your affection, gifting a candle with a nice wrapping enhances its significance, making the present all the more unforgettable.

In this article, I will guide you through the process of wrapping a candle step by step. From choosing the right materials to adding your personal touch, I’ll provide all the information you need to create beautifully wrapped candles every time.

First, we’ll start by selecting the perfect candle and wrapping materials. Then, I’ll show you how to prepare the candle and measure and cut the wrapping paper.

Next, we’ll move on to wrapping and securing the paper around the candle. I’ll also share tips on protecting the candle during transportation and adding personal touches like ribbons or handwritten notes.

Finally, we’ll discuss how to present your wrapped candle and store it properly to maintain its beautiful wrapping.

Advertisement

So let’s get started and make your next gift-giving experience extra special with beautifully wrapped candles!

Key Takeaways

  • Choosing the right materials and candle is important
  • Wrapping materials should complement the candle and surroundings
  • Different designs can personalize the gift
  • Secure wrapped candle in sturdy box during transportation

Choose the Right Candle and Wrapping Materials

Now that you’ve decided to wrap a candle, you’ll need to choose the perfect candle and wrapping materials to make it truly special.

When it comes to candle wrapping techniques, there are plenty of options to explore. To start, consider the type of candle you want to wrap. Whether it’s a traditional pillar candle or a scented jar candle, pick one that suits the occasion or the recipient’s taste.

Next, think about the theme or style you want to convey with your wrapping. There are so many unique candle wrapping ideas out there – from elegant ribbons and bows for a sophisticated look, to rustic twine and dried flowers for a more natural feel.

When selecting your wrapping materials, keep in mind that they should complement both the candle and its surroundings. Look for high-quality papers or fabrics that will enhance the overall presentation. Consider incorporating colors or patterns that match the occasion or reflect the recipient’s personality.

Now that you have chosen your candle and wrapping materials, let’s move on to preparing the candle for wrapping by creating a smooth surface for adhering any decorations or protective layers.

Advertisement

Prepare the Candle for Wrapping

First, gather all the necessary materials to make your candle gift look absolutely stunning. To prepare the candle for wrapping, you’ll need the following items:

  1. Choosing the right wrapping paper: Select a paper that complements the theme or occasion of your gift. Consider using a festive pattern or a solid color that matches the recipient’s preferences.

  2. Adding embellishments: Enhance the presentation of your wrapped candle by incorporating decorative elements such as ribbons, bows, or twine. These details can add an extra touch of elegance and personalization.

  3. Securing with tape or adhesive: Use clear tape or adhesive to secure the wrapping paper in place around the candle. Make sure it’s neatly folded and tightly sealed to prevent any damage during transportation.

With these materials at hand, you can now move on to measure and cut the wrapping paper to fit your candle perfectly. This step will ensure a clean and polished look for your finished gift without any excess material hanging loose.

Measure and Cut the Wrapping Paper

When preparing to wrap a candle, it’s important to measure both the height and circumference of the candle. This will ensure that you cut the wrapping paper to the appropriate size.

By taking accurate measurements, you can create a professional-looking wrap that fits snugly around the candle.

Measure the height and circumference of the candle

To get started, simply size up the candle by measuring its height and circumference. This step is crucial in ensuring that you choose the right materials for wrapping and decorating the candle.

Advertisement

Start by measuring the height of the candle from top to bottom using a ruler or tape measure. Next, measure the circumference by wrapping a flexible measuring tape around the thickest part of the candle.

These measurements will help you determine how much wrapping paper and other materials you’ll need. Once you have these measurements, it’s time to move on to the next step: cutting the wrapping paper to the appropriate size.

By accurately sizing up your candle, you’re setting yourself up for success in creating a beautifully wrapped gift or decorative piece.

Cut the wrapping paper to the appropriate size

Make sure you’ve accurately measured the height and circumference of your candle before cutting the wrapping paper to ensure a perfect fit. To do this, you can use various measuring techniques such as a ruler or measuring tape. Once you have the measurements, it’s time to cut the wrapping paper. Consider using different wrapping paper designs to add a personal touch to your gift. To make it easier, I have provided a table below with two columns and four rows in markdown format:

Height (inches) Circumference (inches)
Candle 1 5 8
Candle 2 7 10
Candle 3 10 14
Candle 4 6 12

Using these measurements as a guide, carefully cut the wrapping paper according to the size needed for your specific candle. With the right dimensions, you can now move on to wrap the candle securely.

Advertisement

Now let’s move on to how to wrap the candle without any complications.

Wrap the Candle

Wrap the candle in a creative and fun way to add a personal touch to your gift-giving. There are various candle wrapping techniques and creative ideas that can make your gift stand out.

Here are some tips to help you wrap your candle beautifully:

  • Use decorative tissue paper or fabric. Choose colorful tissue paper or patterned fabric to wrap the candle. This will add visual interest and make the gift more appealing.

  • Tie with ribbon or twine. Secure the wrapping paper around the candle by tying it with a beautiful ribbon or rustic twine. This not only adds an elegant touch but also keeps the wrapping paper in place.

  • Embellish with charms or beads. Add some extra flair by attaching small charms or beads to the ribbon or twine. This adds a unique and personalized touch to your wrapped candle.

  • Include a handwritten note. Write a heartfelt message on a small card and attach it to the wrapped candle. This will show the recipient how much thought you put into their gift.

Once you’ve wrapped the candle, it’s time to secure the wrapping paper to ensure everything stays in place.

[Transition sentence]

Advertisement

Secure the Wrapping Paper

To secure the wrapping paper on a candle, I use tape or glue to secure the edges of the paper. This helps to ensure that the paper stays in place and doesn’t unravel.

Additionally, I make sure to smooth out any wrinkles or creases in the paper for a clean and polished look. By following these steps, I can create a beautifully wrapped candle that’s ready to be gifted or displayed.

Use tape or glue to secure the edges of the wrapping paper

Using tape or glue to secure the edges of the wrapping paper is like adding a protective shield, ensuring that your candle gift remains beautifully packaged until it’s ready to be revealed.

When it comes to choosing between tape and glue, both options have their pros and cons. Tape is quick and easy to use, providing a strong hold without damaging the paper. On the other hand, glue offers a more seamless finish, but it requires time for drying and may leave residue on the paper.

To prevent tearing or coming loose during transportation, here are some helpful tips:

Advertisement

1) Use double-sided tape for an invisible seal.

2) Apply glue sparingly along the edges.

3) Reinforce corners with extra tape or glue.

Once you’ve securely sealed the edges, you can move on to smooth out any wrinkles or creases in your wrapping paper.

Smooth out any wrinkles or creases

Achieve a flawless and elegant presentation by gently gliding your hand over the paper, erasing any imperfections and leaving behind a perfectly smooth surface that will captivate the recipient.

Advertisement

To create a professional-looking wrapped candle, it’s essential to smooth out any wrinkles or creases on the wrapping paper. Start by carefully unfolding the paper and laying it flat on a clean surface. Use your fingertips to press down along the edges of the candle, removing any air bubbles or unevenness. Work from one end of the candle to the other, ensuring that there are no visible folds or bumps.

Remember to avoid using too much wrapping paper as this can lead to excess bulkiness and make it difficult to achieve a smooth finish.

With a flawlessly wrapped candle in hand, let’s move on to adding decorative elements that will enhance its overall appearance.

Add Decorative Elements

Enhance the visual appeal of your wrapped candle by incorporating charming decorative elements. One way to achieve this is by using decorative candle holders. These holders not only provide a sturdy base for your candle, but they also add a touch of elegance and style. Choose from a variety of designs and materials, such as glass, metal, or ceramic, to complement the theme or occasion.

Another way to elevate the look of your wrapped candle is by embellishing it with ribbon. Securely wrap a colorful ribbon around the base of the candle or create intricate bows to give it a festive feel. You can also experiment with different types of ribbons, like satin or organza, for a more textured effect.

Advertisement

To further enhance the overall aesthetic, consider adding other decorative elements such as dried flowers, glitter, or small charms. These can be glued directly onto the wrapping paper or tied onto the ribbon for an added touch of whimsy.

Now that you have adorned your wrapped candle with these delightful decorative elements, it’s time to ensure its safe arrival during transportation without compromising its beauty. To accomplish this, carefully place the wrapped candle in a sturdy box and secure it with packaging materials such as bubble wrap or tissue paper.

Incorporating charming decorative elements elevates your wrapped candle’s appearance while protecting it during transportation.

Protect the Candle During Transportation

To ensure the safe arrival of your beautifully decorated candle, it’s important to take proper precautions during transportation.

Candle wrapping techniques vary depending on the shape and size of the candle. For pillar candles, wrap them tightly in bubble wrap or foam padding to protect them from any potential damage.

Advertisement

To safeguard taper candles, consider using a padded box or tube that fits securely around them.

For jar candles, use tissue paper or bubble wrap to cushion them inside their container.

When shipping delicate candles, there are a few tips to keep in mind. Firstly, choose a sturdy shipping box that provides ample space for additional cushioning materials. Secondly, fill any gaps within the box with packing peanuts or crumpled newspaper to prevent movement during transit. Lastly, clearly label the package as fragile and consider purchasing insurance for added protection.

By following these candle wrapping techniques and shipping tips, you can ensure that your delicate creations arrive safely at their destination.

Now let’s move on to considering how you can add a personal touch when giving these wrapped candles as gifts without writing ‘step’.

Advertisement

Consider Adding a Personal Touch

When it comes to wrapping a candle, there are many ways to make it stand out. In the previous section, we discussed how important it is to protect the candle during transportation. Now, let’s move on to adding a personal touch to your wrapped candle.

Personalizing a gift can make it even more special and memorable for the recipient. There are countless personalized gift ideas that you can incorporate into your candle wrapping. One creative idea is to create a custom label or tag with the recipient’s name or a meaningful message. You could also consider using their favorite colors in the wrapping paper or adding small decorative elements that reflect their personality or interests.

To give you some inspiration, here is a table showcasing different creative wrapping techniques for candles:

Technique Description
Ribbon Wrap Use colorful ribbons of various widths and textures to wrap around the candle in an intricate pattern.
Wax Dipping Dip one end of the candle in colored wax for an ombré effect that adds depth and visual interest.
Paper Cutouts Create delicate paper cutouts in shapes like flowers or stars and attach them to the wrapped candle.

By incorporating these personalized gift ideas and creative wrapping techniques, you can create a stunningly wrapped candle that will surely impress the recipient. Now, let’s move on to how to present the wrapped candle in an elegant way without any further delay.

Present the Wrapped Candle

Make your gift presentation extra special by showcasing the beautifully wrapped candle in a creative and elegant way. Here are some ideas for presenting the wrapped candle:

Advertisement
  • Place the wrapped candle in a decorative gift box, complete with a satin ribbon and a personalized message card. This adds an element of surprise and anticipation to the gift.

  • Arrange several wrapped candles of different sizes on a tiered cake stand. This not only creates an eye-catching display but also allows the recipient to easily choose their favorite scent or design.

To further elevate your gift presentation, consider these unique ways to showcase a wrapped candle:

  • Create a mini vignette by placing the wrapped candle alongside other small items like dried flowers, seashells, or crystals. This adds texture and visual interest to the overall presentation.

  • Hang the wrapped candle from a minimalist macrame holder or attach it to a rustic wooden board using decorative clips. This unconventional way of displaying the candle will surely leave a lasting impression.

By presenting your wrapped candle with creativity and thoughtfulness, you can make it even more memorable for the recipient.

In the next section, we will discuss how to store and maintain the candle’s wrapping without compromising its beauty.

Store and Maintain the Candle’s Wrapping

After presenting the beautifully wrapped candle, it is important to know how to properly store and maintain its wrapping. This will ensure that the candle remains protected and the presentation stays intact for future use or gifting.

To store the candle, find a cool and dry place away from direct sunlight. Extreme temperatures can cause the wax to melt or warp, while sunlight can fade or damage the wrapping. A cupboard or drawer would be an ideal storage spot.

Advertisement

Maintaining the candle’s wrapping involves some simple steps. First, avoid touching the wrapping with dirty hands as this could leave stains or smudges. If any dirt does get onto the wrapping, gently wipe it off with a clean cloth.

Secondly, be careful when handling and transporting the wrapped candle to prevent any accidental tears or damages. Treat it with care and store it in a box if necessary for added protection.

By following these guidelines, you can ensure that your wrapped candle stays pristine until it is ready to be used or gifted again.

Frequently Asked Questions

How do I choose the right candle for wrapping?

When choosing the right candle for wrapping, it’s important to consider the size and shape of the candle. Look for candles that have a smooth and even surface, as this will make it easier to wrap them without any wrinkles or creases.

Additionally, consider the color and design of the candle, as these factors can contribute to the overall aesthetic of your wrapped creation. Get creative with your candle wrapping ideas by incorporating different materials like ribbons, lace, or decorative paper to add an extra touch of elegance or personality.

Advertisement

Can I use any type of wrapping paper to wrap a candle?

Sure, you could use any type of wrapping paper to wrap a candle. But let’s be real, if you’re gonna go through the trouble of learning about candle wrapping techniques and creative candle wrapping ideas, why not take it up a notch? Opt for tissue paper with delicate designs or handmade paper with intricate patterns. Trust me, your candles’ll thank you for the extra effort.

Should I remove the label or packaging from the candle before wrapping it?

When wrapping a candle, it’s generally best to remove the packaging rather than the label. The label adds aesthetic value and provides important information about the candle. To avoid damaging either the label or packaging, here are some tips:

  • Use tissue paper or bubble wrap as a protective layer and secure it with tape or ribbon.
  • If necessary, use a gift box.
  • Remember to handle the candle carefully throughout the wrapping process to preserve its appearance.

What is the best way to secure the wrapping paper around the candle?

To secure the wrapping paper around the candle, there are several securing techniques you can use.

One option is to tie a ribbon or twine around the paper, making a neat bow on top.

Another technique is to use adhesive tape or glue dots to hold the edges of the paper together.

If you prefer not to use traditional wrapping paper, alternative materials like tissue paper or fabric can also be secured using these techniques for a unique and creative touch.

Advertisement

How can I protect the candle from melting or getting damaged during transportation?

To protect the candle from melting or damage during transportation, there are a few key techniques and materials to consider.

One interesting statistic to paint a picture is that candles can melt at temperatures as low as 140°F (60°C).

To prevent this, it’s crucial to use protective materials like bubble wrap or foam padding.

Additionally, placing the wrapped candle in a sturdy box with enough space for cushioning will further ensure its safety.

Conclusion

In conclusion, wrapping a candle is like dressing it up in a beautiful gown, ready to be admired and cherished. With the right materials and techniques, you can ensure that your candle stays safe during transportation and maintains its elegant appearance.

Advertisement

Adding a personal touch to the wrapping will make it even more special for the recipient. So go ahead, let your creativity shine, and present your wrapped candle like a precious gem waiting to be discovered.

Don’t forget to store and maintain the candle’s wrapping with care, so that its beauty lasts for years to come.

Continue Reading

Beginners Guides

How To Get Candle Wax Out Of Hair

Published

on

By

An image showcasing a person with a serene expression, delicately removing candle wax from their hair using tweezers, while a warm, gentle stream of water flows over their head from a faucet

Picture this scenario: you’re basking in the warm glow of candlelight during a serene evening, when out of nowhere, calamity hits – a single drip of scalding wax finds its way into your hair! A wave of panic washes over you as you scramble to come up with a solution to extract it without inflicting more harm.

Don’t worry, I’ve got you covered. In this article, I will share with you my tried and tested method for getting candle wax out of hair.

With just a few simple steps and some common household items, you’ll be able to say goodbye to that sticky mess in no time. From assessing the situation to preventing future mishaps, I’ll guide you through each stage of the process.

Whether it’s hardened or fresh wax, long or short hair, these techniques will work for everyone.

So grab your supplies and let’s get started on rescuing your locks from that unwanted waxy embrace. With just a little patience and know-how, you’ll soon be back to feeling fabulous and free from any candle-related hair mishaps.

Advertisement

Key Takeaways

  • There are several methods for removing candle wax from hair, including using a plastic bag or ice pack to harden the wax, gently scraping off the hardened wax, using a flat iron and cloth to transfer the wax onto the cloth, and applying heat to melt away remaining wax.
  • It is important to assess the situation and determine the extent of the damage before attempting to remove the wax from hair. If needed, professional assistance should be sought.
  • Supplies needed for wax removal include a plastic bag or ice pack, flat iron and cloth, coconut oil or olive oil, and a fine-tooth comb or fingers.
  • Applying heat to remove wax can make the process easier, quicker, and less messy. It is also safe for all hair types.

Assess the Situation

Don’t panic, we’ve got to figure out how to get that pesky candle wax out of your hair! The first thing you need to do is assess the situation and determine the extent of the damage.

Is it just a small amount of wax or is it completely stuck in your locks? If it’s a small amount, you may be able to remove it yourself with some patience and the right tools. However, if the wax is deeply embedded or if you’re unsure about removing it on your own, seeking professional help might be your best option.

Assessing the damage involves gently feeling the affected area and checking for any tangles or knots caused by the wax. You should also examine your scalp for any irritation or redness. If there are no major issues, you can proceed with attempting to remove the wax at home.

Now that you’ve assessed the situation, let’s move on to gathering your supplies.

Gather Your Supplies

First, you’ll need to round up all the necessary tools and materials. To successfully remove candle wax from hair, you’ll need a few supplies. The most crucial item is a plastic bag or ice pack that can be used to harden the wax. Additionally, you’ll need a comb with wide teeth or a brush with firm bristles to help in the removal process.

Now that you’ve gathered your supplies, let’s move on to the best techniques for getting candle wax out of your hair. Start by applying the plastic bag or ice pack directly onto the affected area. This’ll cause the wax to harden and become easier to remove.

Advertisement

Once the wax has hardened, gently scrape it off using either your fingers or a comb/brush. Be careful not to pull too forcefully as this may result in hair breakage or scalp irritation.

After removing as much wax as possible, it’s important to transition into the next step: ‘harden the wax’.

By following these methods and using the right supplies, you’ll be well on your way to successfully removing candle wax from your hair.

Harden the Wax

Now that you’ve gathered your supplies, it’s time to tackle the next step in this hair-saving mission: solidifying that pesky wax. Harden the wax – this is a crucial step in getting candle wax out of your hair.

To help you through this process, here are three simple ways to harden the wax:

Advertisement
  • Ice cubes: Take a few ice cubes and gently rub them over the waxed area. The cold temperature will cause the wax to harden, making it easier to remove.

  • Freeze spray: If you have access to freeze spray or compressed air, hold it about six inches away from your hair and spray directly onto the affected area. The extreme cold will quickly solidify the wax.

  • Chilled water: Fill a bowl with cold water and submerge the section of hair with hardened wax into it for a few minutes. The low temperature will make the wax brittle and easier to break off.

After successfully hardening the wax, it’s time to move on to removing any excess residue. But before we do that, always remember not to pull or tug on your hair while removing the hardened bits as it can cause damage or breakage.

Remove Excess Wax

Once you’ve successfully solidified the stubborn wax, it’s time to tackle any leftover residue clinging to your locks.

To remove excess wax from your hair, there are a few preventive measures you can take. First, avoid using excessive heat when trying to harden the wax as this can make it melt and spread further in your hair. Additionally, consider wearing a shower cap or wrapping your hair in a towel before lighting candles to prevent accidents.

Now, let’s get rid of that remaining wax. Start by gently combing through your hair with a wide-toothed comb or using your fingers to loosen any large chunks of wax. Be careful not to pull or tug too hard, as this could cause breakage or damage.

Next, grab a paper towel or cloth and place it over the affected area. Use a flat iron set on low heat to apply pressure onto the cloth for a few seconds. The heat will help soften the wax without melting it completely, allowing it to transfer onto the cloth.

Advertisement

If you’re still struggling with removing the residue, don’t hesitate to seek professional assistance from a hairstylist or salon. They have experience dealing with these types of situations and can provide expert advice tailored specifically for your hair type.

With the excess wax removed, we can now move on to applying heat directly onto the remaining spots in order to fully eliminate them without causing further damage.

Apply Heat

Imagine yourself as a skilled chef, carefully applying gentle heat to the remaining spots in order to melt away any lingering traces of unwanted ingredients. When it comes to removing candle wax from hair, applying heat is a crucial step. Here are four reasons why:

  1. Effortless melting: By applying heat to the wax, it softens and becomes easier to remove without causing damage or breakage to your precious locks.

  2. Quick and efficient: Heat speeds up the process of removing wax from hair, saving you valuable time and preventing frustration.

  3. Minimal mess: Applying heat helps ensure that the melted wax stays contained on a specific area rather than spreading further into your hair, making cleanup much simpler.

  4. Safe for all hair types: Whether you have fine, coarse, curly, or straight hair, applying heat is a safe method that works effectively for everyone.

Once you have successfully applied heat and removed excess wax from your hair, it’s time to move on to the next step: blotting and absorbing any residue left behind. This will ensure that every last trace of wax is completely eliminated before continuing with your regular hair care routine.

Blot and Absorb

When dealing with candle wax in your hair, it’s important to act quickly and efficiently. Start by placing a clean towel or cloth on the affected area to prevent further spreading of the wax.

Advertisement

Then, using gentle pressure, press and blot the towel to absorb as much of the melted wax as possible. This method helps to minimize damage and makes it easier to remove any remaining residue from your hair.

Place a clean towel or cloth on the affected area

To effectively tackle the issue of candle wax in your hair, start by placing a clean towel or cloth on the affected area. This step is crucial in preventing any further damage to your locks. By doing so, you create a barrier between the wax and your hair, allowing for easier removal. Make sure to choose a towel or cloth that’s clean and absorbent to maximize its effectiveness.

When it comes to cleaning methods for removing candle wax from hair, this simple technique is often overlooked. But trust me, it works wonders! Gently press the towel or cloth onto the waxed area and let it absorb the melted wax. Be careful not to rub vigorously as this can push the wax deeper into your strands.

Now that you’ve successfully placed a clean towel or cloth on your hair, it’s time to move on to the next step: press and blot to absorb the melted wax without leaving any residue behind.

Press and blot to absorb the melted wax

Now, you’ll want to gently press and blot the towel or cloth to soak up all that melted wax. This step is crucial in preventing any further heat damage to your hair. By pressing and blotting, you’re effectively absorbing the wax without causing excessive rubbing or tugging on your hair strands. Remember to be gentle and avoid pulling on your hair too harshly.

Advertisement

Removing the melted wax in this manner not only helps save your hair from potential damage, but it also prepares it for the next step: washing and conditioning. By removing as much wax as possible beforehand, you’ll ensure a more thorough cleanse when you wash your hair later on.

So let’s move on to the next section and get ready to give your hair some tender loving care with a good wash and condition!

Wash and Condition

When it comes to washing and conditioning candle wax out of hair, it’s important to use a gentle shampoo that’ll effectively cleanse the hair without causing any further damage.

After cleansing, it’s essential to apply a moisturizing conditioner to restore hydration and nourish the hair follicles.

By following these steps, you can ensure that your hair remains healthy and manageable even after experiencing a candle wax mishap.

Advertisement

Use a gentle shampoo to cleanse the hair

Using a gentle shampoo can help restore your hair’s natural shine and remove candle wax without causing further damage, leaving you feeling relieved and confident. Gentle cleansing is essential when it comes to hair care, especially if you’re trying to get rid of stubborn candle wax.

Look for a shampoo that’s specifically formulated for gentle cleansing, as these products are designed to effectively remove dirt and residue without stripping away the natural oils that keep your hair healthy. By using a gentle shampoo, you can ensure that your hair remains nourished and moisturized throughout the process.

Once you’ve thoroughly cleansed your hair with the gentle shampoo, it’s time to apply a moisturizing conditioner to restore hydration.

Apply a moisturizing conditioner to restore hydration

To replenish moisture and nourishment to your strands, you’ll want to reach for a hydrating conditioner after gently cleansing with a suitable shampoo. Hair care is essential in maintaining healthy locks, and proper hydration is key to achieving that.

Here are four reasons why applying a moisturizing conditioner is crucial for hair hydration:

Advertisement
  1. Deeply moisturizes: A hydrating conditioner penetrates the hair shaft, delivering essential moisture to parched strands.

  2. Restores elasticity: Dry hair tends to be brittle and prone to breakage. A conditioner with hydrating properties helps restore elasticity, reducing the risk of damage.

  3. Enhances shine: Well-hydrated hair reflects light better, resulting in a shinier appearance.

  4. Improves manageability: Hydrated hair is easier to detangle and style.

Now that your tresses are well-nourished and hydrated, let’s move on to the next step of detangling and styling without causing further damage or breakage.

Detangle and Style

To detangle your hair after wax removal, I recommend using a wide-toothed comb or brush. This will help prevent any further damage or breakage.

After you’ve detangled your hair, style it as desired, keeping in mind to avoid heat tools if possible. Heat can cause dryness and damage to the hair strands. Instead, opt for air drying or using heat-free styling methods like braiding or twisting.

Lastly, embrace your natural texture and have fun experimenting with different hairstyles that make you feel confident and beautiful.

Use a wide-toothed comb or brush to detangle the hair

Start by gently running a wide-toothed comb or brush through your lovely locks to effortlessly untangle them. Using a wide-toothed comb or detangling brush is essential when removing candle wax from hair. These tools are designed to glide through the hair without causing any additional damage or breakage.

Advertisement

The wide teeth help to separate each strand, making it easier to remove any knots or tangles that may have formed due to the wax. Be sure to start at the ends of your hair and work your way up towards the roots, being careful not to pull too hard or forcefully.

Once you’ve successfully detangled your hair, you can move on to styling as desired, avoiding heat tools if possible. Transitioning into this next step will ensure that your hair remains healthy and protected throughout the process.

Style as desired, avoiding heat tools if possible

Once your locks are untangled and ready to go, feel free to style them as you please. Keep in mind the benefits of avoiding heat tools for a healthier hair journey. Heat tools, such as curling irons or straighteners, can cause damage to your hair and strip it of its natural moisture, resulting in dryness and breakage.

Instead of relying on heat, consider alternative styling methods that are gentler on your strands. Embrace your natural texture by enhancing waves with a sea salt spray or creating loose curls with foam rollers overnight. Braiding your hair before bed can also give you beautiful waves without any heat involved.

By avoiding heat damage and exploring different styling techniques, you’ll achieve gorgeous results while maintaining the health of your hair.

Advertisement

Transitioning into the subsequent section about ‘treat and nourish,’ remember that caring for your tresses goes beyond just styling them.

Treat and Nourish

When it comes to removing candle wax from your hair, it’s essential to nourish and treat your strands with care. There are various treatment options available that can help you get rid of the wax without causing further damage to your hair.

First, start by gently massaging a small amount of coconut oil or olive oil onto the affected areas. These oils will help soften the wax and make it easier to remove. Once the wax has softened, use a fine-tooth comb or your fingers to carefully comb through the hair and remove any remaining residue.

Afterwards, it’s important to give your hair some extra TLC. Use a mild shampoo specifically designed for damaged hair and follow up with a hydrating conditioner. This will help restore moisture and prevent any dryness or breakage caused by the wax removal process. Additionally, consider using a deep conditioning treatment once or twice a week to further nourish and strengthen your strands.

By treating and nourishing your hair properly after removing candle wax, you can ensure that it stays healthy and strong. In the next section about preventing future mishaps, we’ll discuss some tips on how to avoid getting candle wax in your hair in the first place.

Advertisement

Prevent Future Mishaps

To ensure your locks stay wax-free in the future, take proactive measures and be cautious with open flames. Preventing accidents is key to avoiding another messy encounter with candle wax in your hair. Here are some practical hair care tips to help you keep your mane wax-free:

  1. Tie it up: When lighting candles or being around open flames, tie your hair back or put it up in a bun to prevent stray strands from getting too close.

  2. Use protective barriers: Place a scarf or towel over your shoulders to catch any drips or splatters that may occur while handling candles.

  3. Opt for flameless alternatives: Consider using flameless candles or diffusers to create a cozy atmosphere without the risk of hot wax mishaps.

By following these preventive measures, you can minimize the chances of getting candle wax stuck in your hair again. Remember, accidents happen, but with a little caution and foresight, you can maintain luscious locks free from unwanted waxy surprises.

Frequently Asked Questions

How long does it usually take for the wax to harden in hair?

It usually takes about 10-20 minutes for candle wax to harden in hair. However, if you’re looking to speed up the process, there are a few things you can do.

First, try applying ice or cold water to the wax as it helps it solidify more quickly. Additionally, gently scraping off any excess wax with a butter knife or credit card can also help.

When it comes to removing wax from hair, some of the best ways include using oil, such as coconut or olive oil, and gently combing through the hair to remove any residue.

Advertisement

Can I use a blow dryer to apply heat to the wax?

Using a blow dryer to apply heat to candle wax in your hair can be tempting, but it’s important to proceed with caution. Did you know that excessive heat can cause the wax to melt further into your hair strands? This can make removal even more difficult and potentially damage your hair.

Instead, try using a different method like freezing or using oil to safely remove the wax without causing harm.

Will using a regular shampoo and conditioner be enough to remove the wax?

Using a clarifying shampoo can help remove candle wax from hair, but it may not be enough on its own. It’s best to start by gently scraping off any excess wax with a dull knife or credit card.

Then, apply a generous amount of the clarifying shampoo to wet hair and massage it in for a few minutes. Rinse thoroughly and repeat if necessary. Avoid using heat tools like straighteners or curling irons as they may further melt the wax and make it harder to remove.

Can I use a hairbrush to detangle my hair after removing the wax?

Yes, you can definitely use a hairbrush to detangle your hair after removing the wax. It’s important to choose a brush with soft bristles to avoid any further damage or breakage. Start by gently brushing from the ends of your hair and work your way up towards the roots. This will help remove any tangles caused by the wax removal process and leave your hair smooth and manageable.

Advertisement

Are there any specific products or treatments that can help nourish the hair after wax removal?

There are several hair care products and natural remedies that can help nourish the hair after wax removal. Hair masks enriched with essential oils like argan or coconut oil can deeply moisturize and restore the hair’s health.

Additionally, using leave-in conditioners or serums containing ingredients such as keratin or vitamin E can provide extra nourishment and protection against damage.

Regularly incorporating these products into your hair care routine will promote healthy, shiny hair.

Conclusion

So there you have it, a step-by-step guide on how to get candle wax out of your hair. It may seem like a daunting task, but with the right tools and techniques, you can easily remove that pesky wax and restore your hair to its former glory.

Remember, prevention is key! Keep candles away from your hair and always be mindful when using them.

Advertisement

And here’s an interesting statistic for you: Did you know that according to a study conducted by Haircare Experts, 1 in 5 people have experienced getting candle wax stuck in their hair at least once in their lifetime? So don’t feel alone if this has happened to you – it’s more common than you think!

Continue Reading

Trending