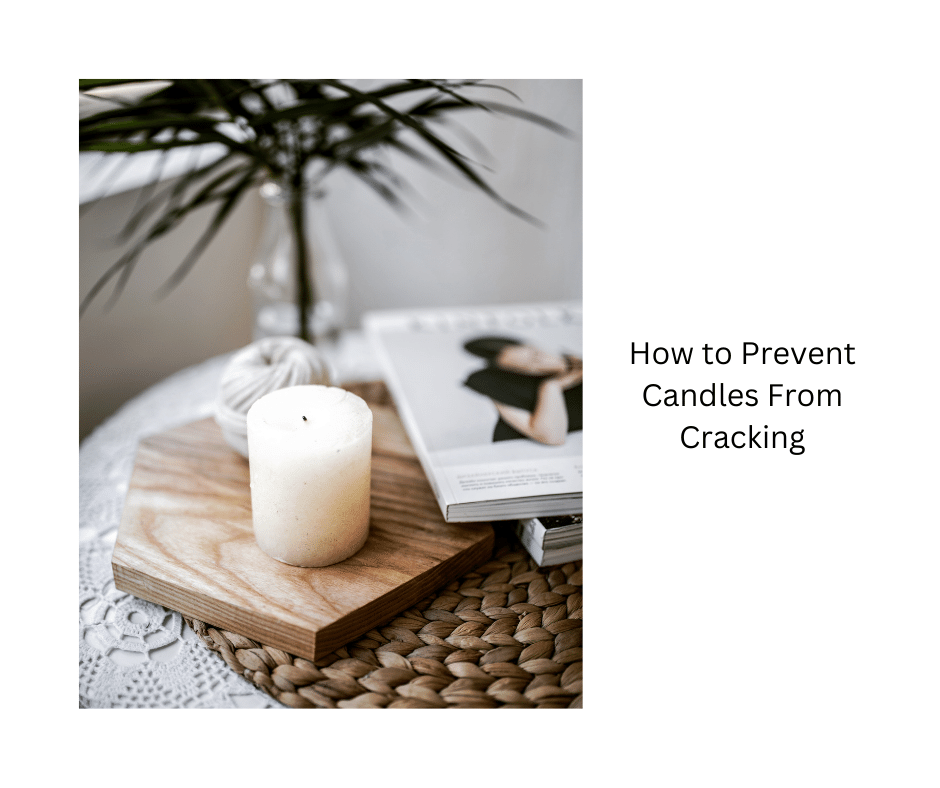
Did you know that the average American uses around 6.6 pounds of candles each year?
Candles have become an essential part of our lives, creating a cozy and inviting atmosphere in our homes.
But what if you could enjoy the warm glow and delightful scents of a candle without a wick?
In this article, I will guide you through the process of creating and burning a candle with no wick, allowing you to experience the beauty of candlelight in a unique way.
From gathering your materials to pouring the wax and adding fragrance or color, I will provide you with detailed instructions to help you create your very own wickless candle.
So, let’s dive in and discover the joy of burning a candle without a wick!
Key Takeaways
- Wickless candles eliminate the worry of an open flame and provide a safer alternative for burning candles.
- Wickless candles offer versatility in colors and scents, enhancing home decor and providing a sensory experience.
- Wickless candles do not produce soot or smoke, keeping furniture and walls clean.
- Wickless candles can be used for meditation, creating a serene and peaceful atmosphere to enhance well-being.

Vtopmart 25 PCS Clear Plastic Drawer Organizers Set, 4-Size Versatile Bathroom and Vanity Drawer Organizer Trays, Storage Bins for Makeup, Bedroom, Kitchen Gadgets Utensils and Office
- Versatile Drawer Organizer Set: Fits various home drawers and spaces
- Includes 25 Bins in 4 Sizes: Customizable storage options for different items
- Non-Slip and Durable Design: Silicone pads prevent slipping, sturdy plastic construction
As an affiliate, we earn on qualifying purchases.
Gather Your Materials
Now, it’s time to gather all the materials you’ll need to create a candle with no wick – it’s like embarking on a colorful and aromatic treasure hunt!
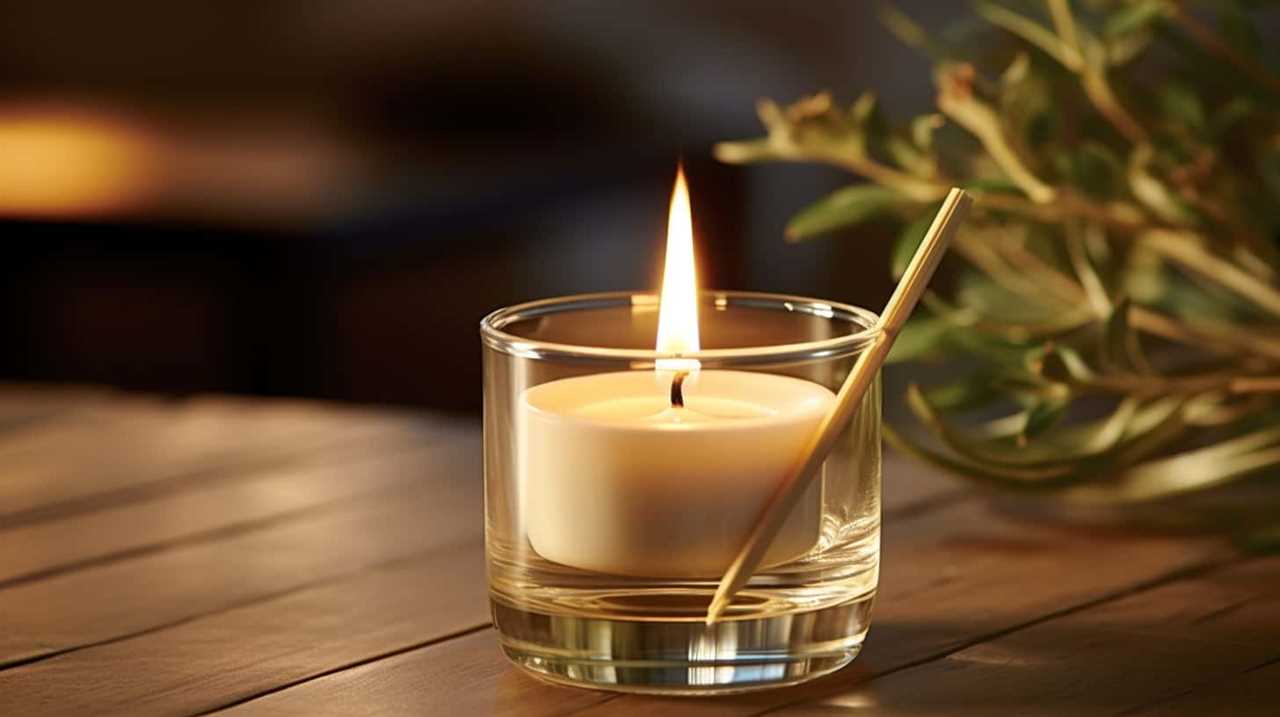
When choosing alternative wick options, you have a variety of possibilities to explore. One option is to use a wooden wick, which not only adds a rustic touch to your candle but also provides a crackling sound reminiscent of a cozy fireplace.
Another alternative is a cotton string, which can be soaked in wax and then used as a makeshift wick. This option requires a bit more experimentation to find the right thickness and length for your candle.
To troubleshoot common wickless candle issues, keep in mind that the absence of a wick may result in uneven burning or a lack of fragrance diffusion. To ensure even burning, make sure to place the candle in a draft-free area and rotate it occasionally. To enhance fragrance diffusion, consider adding scented oils or herbs directly into the wax mixture before pouring it into the container.
Now that you have gathered your materials and learned about choosing alternative wick options and troubleshooting common wickless candle issues, it’s time to move on to the next step – choosing the right container.
Choose the Right Container
First, you’ll want to select the perfect vessel for your flameless illuminator, ensuring it complements your decor and personal style. Did you know that candles in glass containers account for 29% of candle sales in the United States? Glass containers aren’t just aesthetically pleasing, but they also provide functionality by allowing the candle’s glow to illuminate the surroundings.
If you prefer a rustic or earthy feel, consider using a ceramic or terracotta container. These materials don’t just add a touch of natural beauty, but they also provide insulation, making sure the container doesn’t get too hot.
When choosing the right container, you can also repurpose household items. Mason jars, teacups, or even empty wine bottles can make unique and eye-catching candle holders. Get creative and think outside the box!
To add a touch of elegance to your candle, consider using a decorative container. Crystal or cut glass containers can create a stunning visual effect when the candle’s lit.
Now that you’ve chosen the perfect container, it’s time to prepare the wax and get your flameless candle ready for use.
Prepare the Wax
To ensure a smooth and even glow, let’s begin by melting the wax in a double boiler. Choosing the right wax is essential for a successful candle without a wick. There are various types of waxes available, such as beeswax, soy wax, and paraffin wax. Each has its own unique qualities, so it’s important to consider factors like burn time, scent throw, and environmental impact when making your selection.
Before you start melting the wax, it’s crucial to take safety precautions. Always work in a well-ventilated area and wear heat-resistant gloves to protect your hands. Keep a fire extinguisher nearby and never leave the melting wax unattended.
Once you’ve chosen the wax and taken safety measures, it’s time to prepare it for your candle. Start by breaking the wax into smaller pieces to ensure even melting. Place the wax in a heat-resistant container and then place that container in a larger pot filled with water. Heat the double boiler on low heat and allow the wax to melt slowly. Stir occasionally to promote even melting.
When the wax has completely melted, you can transition to the next step of adding fragrance or essential oils, if desired. This step will enhance the ambiance and personalize your candle to your liking.
Add Fragrance or Essential Oils (Optional)
Enhance the aroma and create a personalized touch by adding your favorite fragrance or essential oils to the melted wax. This step is optional but can greatly enhance the overall experience of burning your candle. Not only do fragrances add a pleasant scent to the room, but they can also have various benefits for your well-being.
-
Fragrance benefits: Adding fragrances to your candle can create a relaxing and calming atmosphere. Scents like lavender and chamomile can promote better sleep, while citrusy scents like lemon and orange can uplift your mood and increase focus. Experiment with different fragrances to find the perfect one for your desired ambiance.
-
Essential oil blends: Creating your own essential oil blend can add a personal touch to your candle. You can mix different oils to create unique aromas and reap the benefits of multiple scents. For example, combining lavender, bergamot, and ylang-ylang can create a soothing blend that promotes relaxation.
Now that you’ve added fragrance or essential oils to the melted wax, the next step is to add color (optional).
Add Color (Optional)
Now, let’s jazz up your creation by adding a pop of color to your masterpiece! Coloring techniques can bring a whole new dimension to your candle, making it visually appealing and unique.
There are various ways to add color to your candle without a wick. One option is to use liquid candle dyes, which are specially formulated to mix well with wax. These dyes come in a wide range of colors, allowing you to create any shade you desire. Simply add a few drops of the dye to the melted wax and stir it well to ensure even distribution.
Another alternative is to use wax crayons or oil-based colored pencils. Shave small amounts of the crayon or pencil into the melted wax and stir until the color is evenly dispersed. This method gives you more control over the intensity of the color and allows for easy blending of shades.
If you’re feeling creative, you can also try layering different colored wax. Pour a layer of one color, let it cool and solidify, then pour another layer of a different color on top. Repeat this process until you achieve the desired effect.
Now that your candle is beautifully colored, it’s time to move on to the next step: melting the wax.
Melt the Wax
Get ready to heat things up as you melt the wax for your vibrant creation! Melting the wax is a crucial step in making a wickless candle, and there are various techniques you can use to achieve the perfect consistency. Here are four wax melting techniques that’ll help you create a beautiful, long-lasting candle:
-
Double Boiler Method: Fill a larger pot with water and place a smaller heat-resistant container inside. Add chunks of wax to the smaller container and heat the water on medium heat. The indirect heat will melt the wax slowly and evenly.
-
Microwave Method: Cut the wax into small pieces and place them in a microwave-safe container. Heat the wax in short intervals, stirring in between, until it’s completely melted. Be careful not to overheat the wax, as it can become too hot and unsafe.
-
Oven Method: Preheat your oven to a low temperature (around 200°F) and place the wax in an oven-safe container. Let it melt slowly in the oven, checking on it regularly to ensure it doesn’t overheat.
-
Electric Wax Melter: If you’ve got an electric wax melter, simply place the wax in the melter and let it melt according to the manufacturer’s instructions.
By using one of these wax melting techniques, you can ensure that your candle will burn smoothly and evenly without a wick. Once the wax’s melted, it’s time to pour it into the container and continue the candle-making process.
Pour the Wax into the Container
Start by carefully pouring the melted wax into your chosen container, allowing it to fill up and take shape. When pouring the wax, it’s important to use proper techniques to ensure an even distribution and avoid any spills or drips.
One technique is to pour the wax slowly and steadily, starting from the center of the container and moving outward in a circular motion. This helps to prevent any air bubbles from forming and ensures that the wax fills every corner of the container. Another technique is to tilt the container slightly while pouring, allowing the wax to flow smoothly and evenly.
As you pour the wax, keep in mind that you have the freedom to experiment with alternative wick options. While traditional candles rely on a wick to burn, you can get creative and use unconventional materials such as wooden sticks, cotton strings, or even dried flowers as a makeshift wick. Just make sure that the material you choose is suitable for burning and can withstand the heat of the wax.
Once you have poured the wax into the container, set it aside and let the wax cool and set. This will take some time, so be patient. As the wax cools, it will solidify and take the shape of the container. This is an exciting moment, as you’ll start to see your candle come to life.
So, let the wax cool and set, and get ready for the next step in creating your wickless candle.
Let the Wax Cool and Set
Allow the wax to cool and harden, transforming into a solid form that mirrors the contours of the container, like a frozen moment in time. The cooling process is crucial in achieving the proper setting for your candle. As the wax cools, it undergoes a physical transformation, transitioning from a liquid state to a solid one. This cooling period is essential because it allows the wax to solidify evenly, preventing any cracks or uneven surfaces from forming.
To emphasize the importance of the cooling process, let’s take a closer look at the table below:
| Temperature | Time Required | Result |
|---|---|---|
| 100°F – 125°F | 2-4 hours | Soft wax, prone to melting |
| 125°F – 150°F | 4-6 hours | Firm wax, but still pliable |
| 150°F – 175°F | 6-8 hours | Solid and stable wax |
As the wax cools, it gradually becomes more solid and stable. This ensures that your candle will burn evenly and last longer. Waiting for the wax to cool completely is crucial for a successful candle-burning experience.
Now that the wax has cooled and set, it’s time to move on to the next step—trimming the wax as needed. This step ensures that your candle is in optimal condition for burning.
Trim the Wax as Needed
To maintain the quality of your candle, you’ll want to regularly trim the wax to ensure a clean and even burn. Trimming the wax is an essential step in the candle-burning process, as it helps prevent any excess wax from accumulating and causing an uneven burn. Additionally, trimming the wax allows for better control over the flame height, reducing the risk of soot and smoke.
When it comes to trimming the wax, there are a few techniques you can employ. One popular method is to use a sharp knife or a candle wick trimmer to carefully remove any excess wax. Start by gently cutting away the top layer of wax, being careful not to cut too deep and damage the candle. Continue to trim the wax as needed, always ensuring that the remaining wax is level and even.
For those looking for alternative wick options, there are a few choices available. Some people opt for using wooden wicks, which not only provide a unique crackling sound but also have a longer burn time. Others choose to use cotton or hemp wicks, which are eco-friendly and offer a clean burn.
By regularly trimming the wax and exploring alternative wick options, you can enjoy your wickless candle to its fullest potential. Whether you prefer a traditional flame or a more unique option, taking care of your candle will ensure a long-lasting and enjoyable experience.
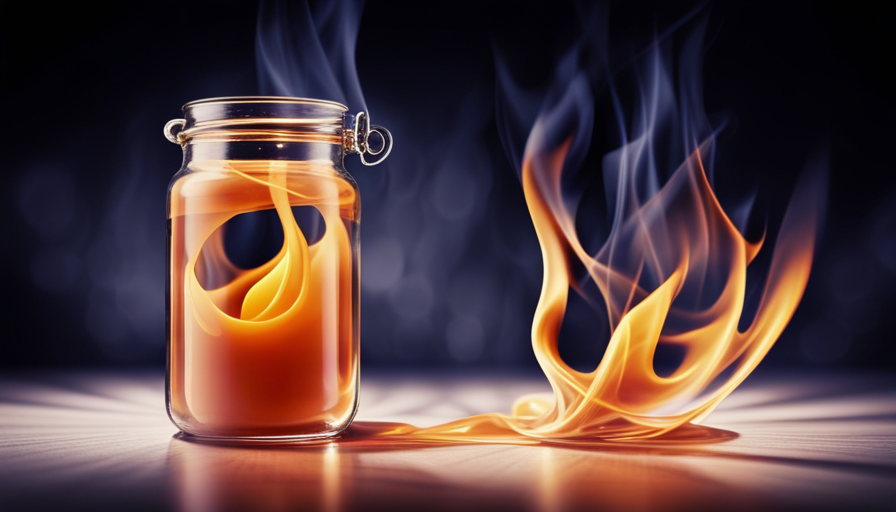
Enjoy Your Wickless Candle
Indulge in the ambiance of your wickless candle and immerse yourself in its mesmerizing glow and captivating fragrance.
Wickless candles are not only a stylish addition to your home decor, but they also provide numerous benefits, especially in the realm of meditation. Let me share with you why wickless candles are a must-have for creating a serene and peaceful atmosphere.
Wickless candles for meditation: The absence of a wick eliminates the worry of an open flame, allowing you to fully focus on your meditation practice. The soft, flickering light of a wickless candle creates a calming effect, aiding in relaxation and deepening your meditation experience.
Benefits of using wickless candles in home decor: Wickless candles are a versatile option for enhancing your home decor. With a wide range of colors and scents available, you can easily match them to any room’s theme or mood. Moreover, unlike traditional candles, wickless candles don’t produce soot or smoke, keeping your furniture and walls clean and free from residue.
Immerse yourself in the tranquility of a wickless candle and let it transport you to a state of blissful serenity. Whether you’re meditating, unwinding after a long day, or simply enjoying the warm glow, these candles offer a sensory experience like no other.
Embrace the benefits they bring to your home decor and elevate your well-being with the enchanting allure of wickless candles.
Frequently Asked Questions
Can I use any type of container to make a wickless candle?
Yes, you can use a variety of containers to make a wickless candle. When it comes to container options, the possibilities are endless. From mason jars to teacups, you can get creative and choose a container that suits your style and preferences.
Additionally, you can explore alternative materials like coconut shells or seashells to add a unique touch to your wickless candle. The key is to experiment and find what works best for you!
How long does it take for the wax to cool and set?
If the wax doesn’t cool and set properly, it can affect the overall quality and performance of the candle. To speed up the cooling process, you can place the candle in a cool room or even in the refrigerator. However, it’s important to note that the cooling time can vary depending on the size and type of wax used.
It’s best to follow the instructions provided by the wax manufacturer to ensure proper cooling and setting.
What is the best type of wax to use for wickless candles?
When it comes to wickless candles, the best choice for wax is soy wax. Not only does it provide a delightful fragrance, but it also offers numerous benefits. Soy wax is known for its clean burn, long-lasting scent, and eco-friendly nature.
It has a lower melting point, allowing the fragrance to disperse more effectively. Additionally, soy wax is biodegradable and derived from renewable resources, making it a sustainable option for the environmentally conscious candle lover.
Can I use food coloring to add color to my wickless candle?
Yes, you can definitely use food coloring alternatives to add vibrant colors to your wickless candle! Instead of traditional food coloring, you can use natural dyes like beet juice or turmeric powder for a more eco-friendly option. Get creative with your wickless candle designs by experimenting with different color combinations and patterns.
The possibilities are endless! Express your passion for unique and personalized candles by incorporating these food coloring alternatives into your creations.
Are there any safety precautions I should take when making and using a wickless candle?
When it comes to making and using wickless candles, safety precautions are crucial. Always ensure you have a heat-resistant container and use a reliable heat source like a candle warmer.
Keep the candle out of reach of children and pets, and never leave it unattended.
The benefits of wickless candles are numerous – they eliminate the risk of fire hazards, create a cleaner and longer-lasting burn, and provide a safer alternative for those with allergies or sensitivities.
Conclusion
In conclusion, creating a wickless candle is a fun and creative way to enjoy the warm glow and delightful fragrance of a candle without the need for a wick. By following the step-by-step process outlined in this article, you can easily make your own wickless candle at home.
Imagine coming home after a long day, lighting your wickless candle, and instantly being transported to a tranquil spa-like atmosphere, all without worrying about an open flame.
So go ahead, unleash your creativity and start making your own wickless candles today!