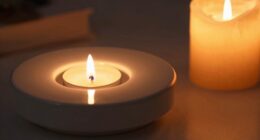
Connect with us

Candles

What Are Candle Melts

Published

on

Are you familiar with the phrase, ‘Less is more’? This perfectly encapsulates the essence of candle melts. We, as aficionados of candles, are excited to guide you through the delightful universe of candle melts.

Candle melts are small wax squares that are designed to be melted in a warmer, releasing a delightful fragrance throughout your space. They are made with love and care, using high-quality ingredients to ensure a long-lasting and enjoyable scent experience.

In this guide, we will explore everything you need to know about candle melts, from how they are made to the benefits of using them. So, let’s dive in and discover the enchanting world of candle melts together!

Key Takeaways

  • Candle melts are a popular alternative to traditional candles, used in wax warmers or oil burners.
  • They are made by melting wax, adding fragrance oils or essential oils, and pouring into molds.
  • Candle melts are safer than traditional candles as they have no open flame, making them a convenient and versatile option.
  • They offer a longer-lasting fragrance compared to candles and can be easily customized by choosing different scents.

Definition of Candle Melts

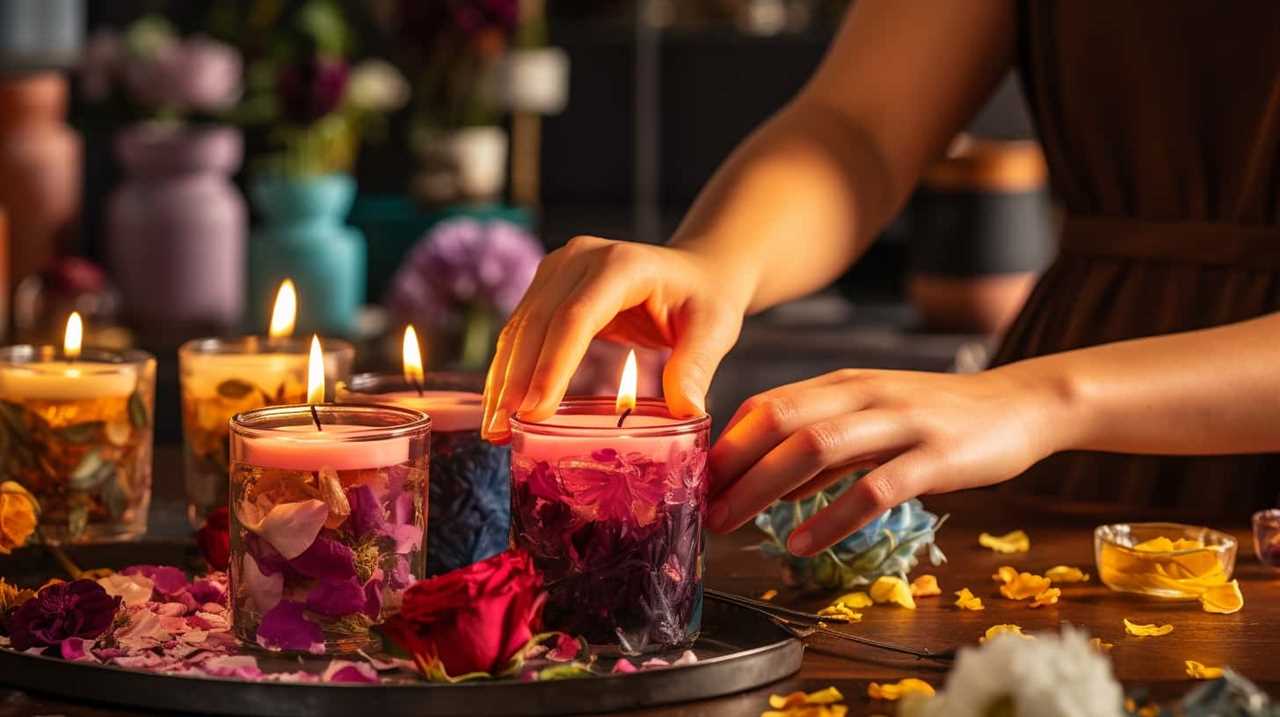
Candle melts are small, scented wax pieces that we melt to release fragrance into the air. They’re a popular alternative to traditional candles and are commonly used in wax warmers or oil burners.

candlelight

Making candle melts is a fairly simple process that involves melting the wax, adding fragrance oils or essential oils, and pouring the mixture into molds to harden.

Advertisement

The history of candle melts can be traced back to ancient civilizations, where people would use various materials to create scented wax melts for aromatherapy and relaxation purposes.

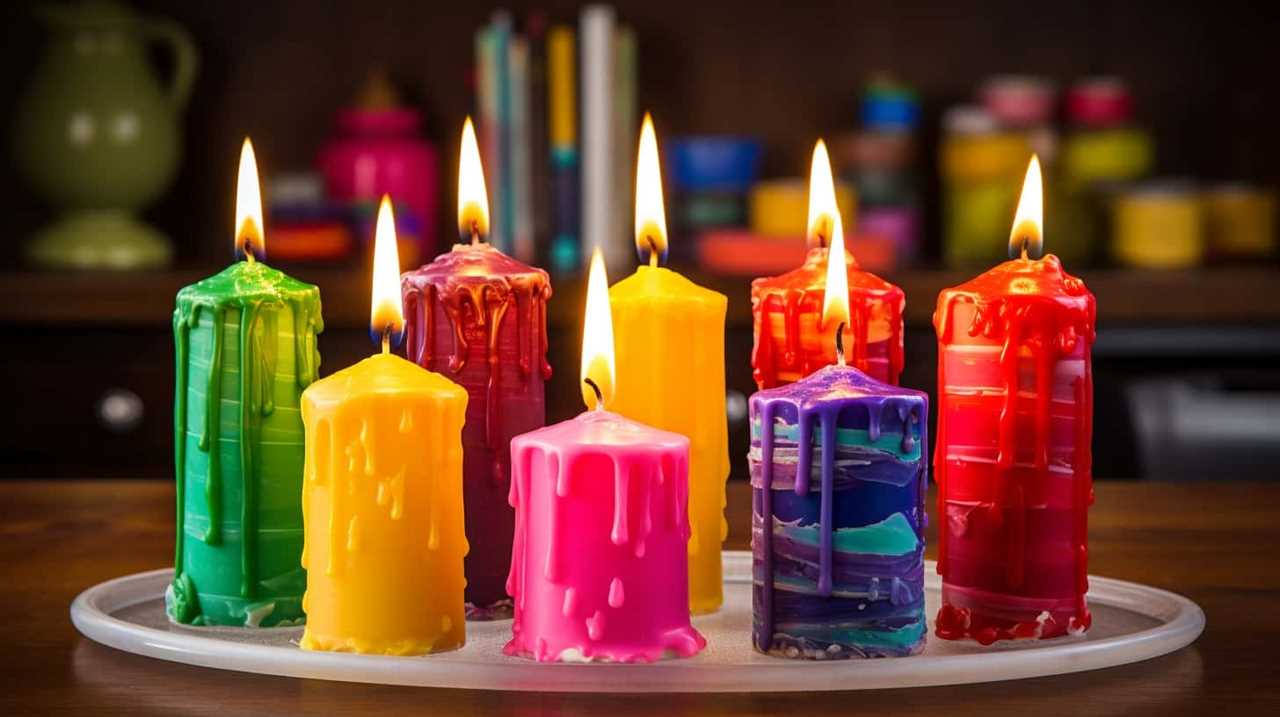
Today, candle melts come in a wide variety of shapes, colors, and scents, allowing individuals to create a personalized and inviting atmosphere in their homes.

Whether you choose to buy candle melts or make them yourself, they’re a delightful way to fill your space with beautiful fragrances.

candlestick

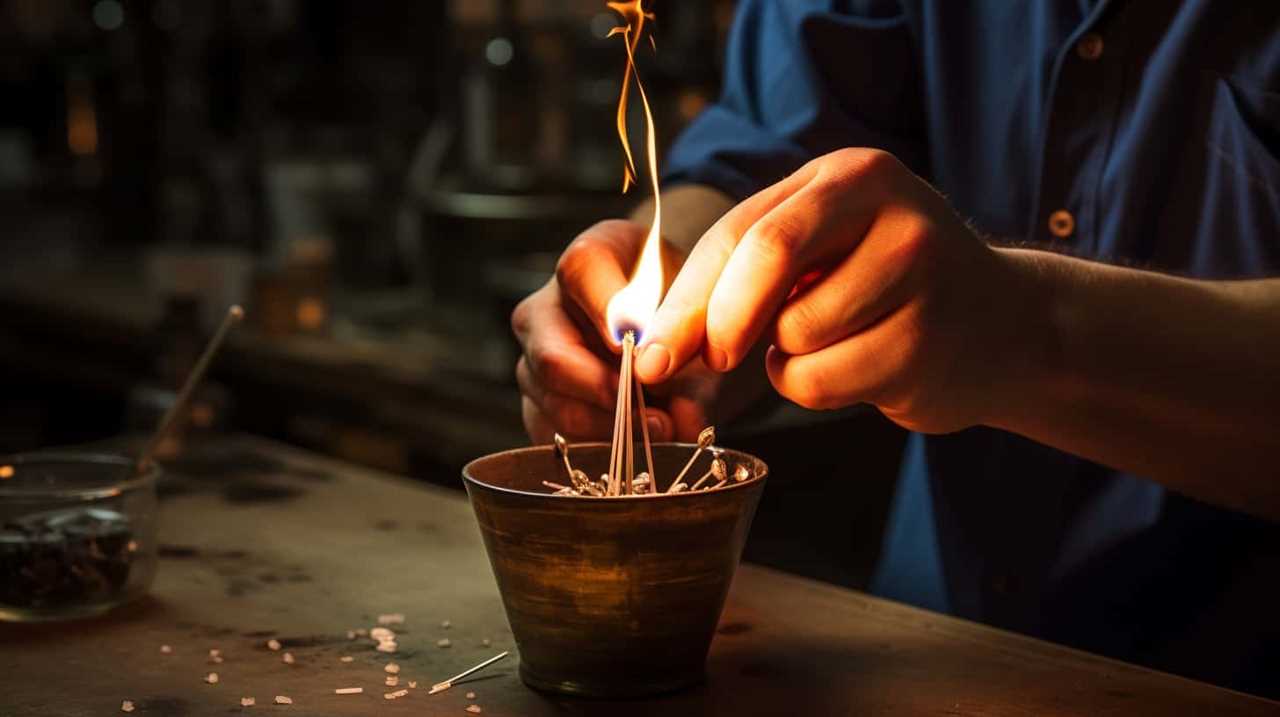
How Candle Melts Are Made

To create candle melts, we start by melting wax and adding fragrance oils or essential oils.

The process begins with selecting the desired type of wax, such as soy wax or paraffin wax, which will determine the quality and burn time of the melts.

Advertisement

The wax is then carefully melted in a double boiler or a melting pot specifically designed for candle making.

Once the wax reaches the desired temperature, fragrance oils or essential oils are added to infuse the melts with delightful scents.

candlesticks stamford

The mixture is then poured into molds or clamshells and left to cool and solidify.

The resulting candle melts can be easily popped out of the molds and used in wax warmers, releasing their aromatic fragrance without the need for a flame.

The benefits of using candle melts include long-lasting scents, easy clean-up, and the ability to mix and match different fragrances to create your own unique scent combinations.

Advertisement

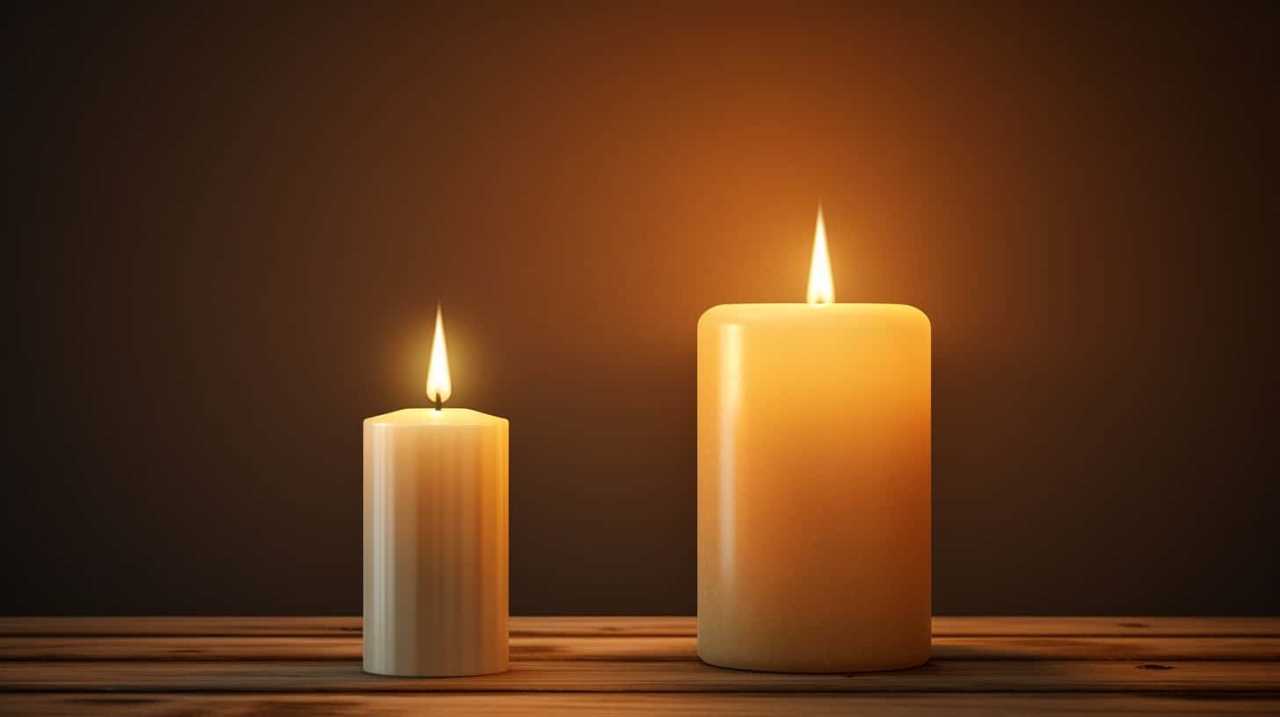
The Difference Between Candle Melts and Candles

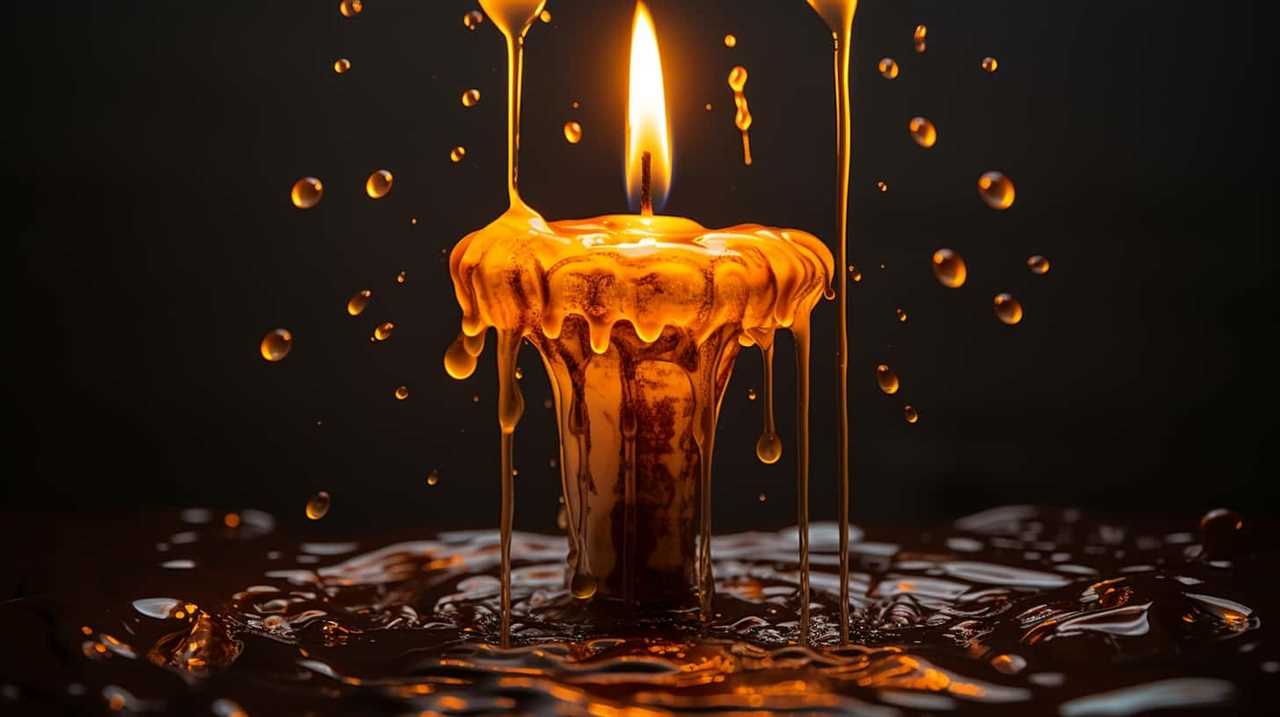
When comparing candle melts and candles, one noticeable difference lies in their method of releasing fragrance. While candles release fragrance through the burning of a wick, candle melts, also known as wax tarts, are designed to be melted in a warmer or a wax melt burner.

candlesticks forex

Here are three key differences between candle melts and candles:

  • Method of use: Candle melts are melted using a heat source, such as a tea light or an electric warmer, which allows the wax to release its fragrance without the need for a burning wick. Candles, on the other hand, require the wick to be lit for the fragrance to be released.
  • Safety: Wax melts provide a safer alternative to traditional candles as they eliminate the risk of an open flame. This makes them ideal for homes with children or pets.
  • Longer lasting: Candle melts tend to last longer than candles as they slowly release their fragrance over time. This means that you can enjoy the aroma for a longer period without needing to replace the melts.

Benefits of Using Candle Melts

Using candle melts enhances our fragrance experience by providing a convenient and efficient way to enjoy a long-lasting aroma. There are several benefits of using candle melts.

Firstly, they’re safer than traditional candles as there’s no open flame involved. This makes them perfect for households with children or pets.

Additionally, candle melts are highly versatile and can be used in different ways to melt them. You can use a wax warmer, which uses a small light bulb or a heating element to melt the wax. Alternatively, you can use a tea light burner, where the heat from the tea light candle melts the wax. These different methods allow you to choose the most convenient option for your needs.

dusk candles review

As we explore the benefits of using candle melts, it’s important to understand the types of wax used in candle melts.

Advertisement

Types of Wax Used in Candle Melts

When it comes to candle melts, the type of wax used plays a crucial role in their performance and benefits.

Two popular options are soy and paraffin wax. Soy wax is derived from soybean oil and is known for its clean burn and eco-friendly nature, while paraffin wax is derived from petroleum and offers a longer-lasting scent throw.

Additionally, beeswax is a natural alternative that not only produces a warm, soothing glow but also has air-purifying properties.

jo malone candle

There are also alternative wax options available, such as coconut wax and palm wax, that cater to different preferences and needs.

Soy Vs. Paraffin

How do soy and paraffin differ as types of wax used in candle melts?

Advertisement

When it comes to candle melts, the choice of wax is crucial. Soy and paraffin are two common types of wax used in candle melts, each with its own distinct advantages.

Here are three key differences between soy and paraffin wax:

candlelight orchestra

  • Source: Soy wax is made from soybean oil, a renewable and sustainable resource, while paraffin wax is derived from petroleum, a non-renewable resource.
  • Burn Time: Soy wax tends to have a longer burn time compared to paraffin wax, meaning that candle melts made from soy wax will last longer.
  • Clean Burning: Soy wax is known for its clean-burning properties, producing little to no soot or harmful emissions, while paraffin wax may release toxins into the air when burned.

Choosing between soy and paraffin wax ultimately depends on your preference for sustainability, burn time, and air quality.

Beeswax Benefits

Beeswax offers unique benefits as a type of wax used in candle melts. When compared to soy wax, beeswax burns longer and emits a warm, natural fragrance that’s soothing and relaxing. Beeswax is also known for its health benefits. It purifies the air by releasing negative ions that help remove pollutants and allergens.

Additionally, beeswax candles produce a subtle, natural honey scent that can uplift your mood and create a cozy atmosphere. The natural color of beeswax, ranging from pale yellow to deep amber, adds a touch of elegance to any space. With its long burn time, pleasant fragrance, and air-purifying properties, beeswax is a popular choice for candle melts.

However, if you prefer alternative wax options, there are other types to consider.

Advertisement

candlestick patterns

Alternative Wax Options

For candle melts, there are various alternative wax options available to choose from. These alternative options not only provide different fragrance options but also have different environmental impacts.

Here are three sub-lists that will help you understand the different types of wax used in candle melts:

  1. Soy Wax:
  • Made from soybean oil, a renewable resource.
  • Burns cleaner and longer than traditional paraffin wax.
  • Provides a natural, subtle fragrance that’s perfect for those who prefer a milder scent.
  1. Coconut Wax:
  • Made from the meat of coconuts, a sustainable resource.
  • Has a lower melting point, resulting in a slower burn time.
  • Offers a creamy texture and a tropical fragrance that’s both relaxing and refreshing.
  1. Palm Wax:
  • Derived from palm oil, which is abundant and easily renewable.
  • Produces a beautiful crystalline appearance when solidified.
  • Provides a clean, bright flame and a delightful scent that fills the room.
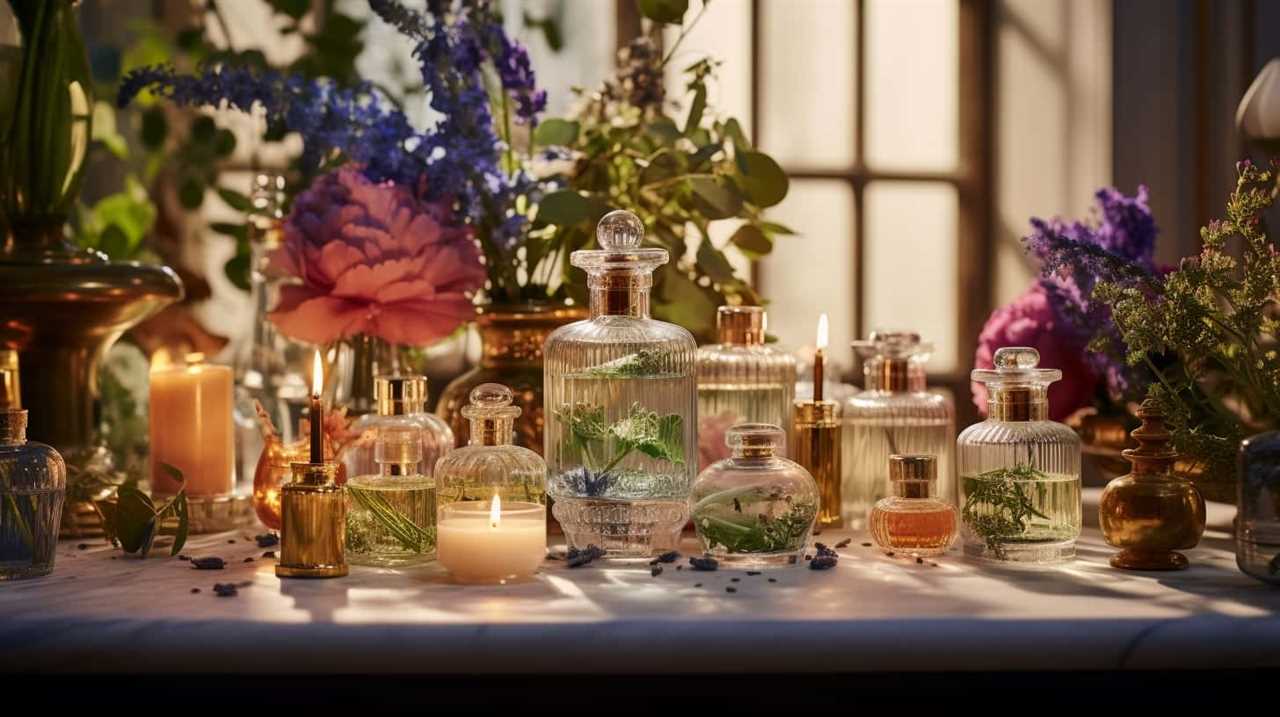
We love using candle melts because they fill our homes with delightful fragrances. When it comes to popular fragrance choices, there are so many options to choose from.

One of the most popular fragrances is vanilla, which has a warm and comforting scent that creates a cozy atmosphere. Another popular choice is lavender, known for its calming and soothing properties. For those who prefer a fresh and clean scent, citrus fragrances like lemon or grapefruit are excellent choices.

candle making near me

Benefits of using fragrances in candle melts go beyond just the pleasant smell. Certain scents can help to uplift our mood, relieve stress, or improve focus.

Transitioning into the next section about how to use candle melts, let’s explore the different methods of melting and enjoying these fragrant goodies.

Advertisement

How to Use Candle Melts

Now that we know what candle melts are and the popular fragrances available, let’s move on to how to use them.

There are various melting techniques for candle melts, such as using a wax warmer or a tea light burner. These methods ensure that the wax melts evenly and releases its fragrance effectively.

candlelight concerts

Additionally, using candle melts offers benefits like longer burn time and the ability to mix and match scents for a personalized aroma experience.

Melting Techniques for Melts

To properly enjoy candle melts, it’s essential to master the various techniques for melting them. Here are some melting techniques to help you make the most out of your candle melts:

  • Use a wax warmer: Place your candle melt in the dish of a wax warmer and turn it on. As the heat warms up the dish, the melt will gradually liquefy, releasing its delightful fragrance into the air.
  • Double boiler method: Fill a saucepan with water and place a heat-resistant bowl on top. Place your candle melt in the bowl and heat the water on low. The indirect heat will slowly melt the melt without overheating it.
  • Tea light method: Use a heat-resistant container, such as a tart burner or a small dish, and place your melt inside. Light a tea light candle underneath and let the heat slowly melt the melt.

Mastering these melting techniques will ensure that you get the most out of your candle melts, enjoying their soothing scents and creating a relaxing ambiance in your space.

Now, let’s explore the benefits of using melts.

Advertisement

candle making workshop

Benefits of Using Melts

Using melts offers several benefits, enhancing our overall candle experience.

One of the main benefits is the variety of fragrance options available. With candle melts, we can choose from a wide range of scents, allowing us to create the perfect ambiance in our homes. Whether we want a relaxing, lavender-scented atmosphere or a fresh, citrusy vibe, melts provide us with endless possibilities.

Additionally, melts are known for their long-lasting fragrance. Unlike traditional candles, which may lose their scent after a few hours, melts continue to release their fragrance for extended periods of time. This means that we can enjoy the pleasant aroma throughout the day, enhancing the ambiance of our homes.

Different Ways to Melt Candle Melts

We enjoy melting candle melts in various ways. When it comes to melting candle melts, there are different methods you can try to achieve the best results. Here are three popular methods to help you enjoy your candle melts:

jo malone candle

  • Using a wax warmer: This is a classic method where you place the candle melts in a wax warmer and let the heat slowly melt them, releasing their fragrance into the air. It’s a simple and convenient option that allows for easy cleanup.
  • Using a tea light burner: If you prefer a more traditional approach, using a tea light burner is a great choice. Simply place the candle melts in the dish on top of the burner and light the tea light candle underneath. The heat from the flame will melt the melts and fill your space with their delightful aroma.
  • Using an electric melter: Electric melters are another popular option. These devices use a heating element to melt the candle melts, providing a safe and hassle-free experience. Just plug it in, add your melts, and enjoy the fragrance that fills the room.

How Long Do Candle Melts Last

Candle melts typically last for a certain amount of time before they are fully melted and the fragrance is released. The melting time of candle melts can vary depending on factors such as the size of the melt and the type of wax used. To give you an idea, here is a table showcasing the approximate melting times of different candle melts:

Candle Melt Size Melting Time
Small (1 oz) 4-6 hours
Medium (2 oz) 6-8 hours
Large (3 oz) 8-10 hours
Extra Large (4 oz) 10-12 hours

It’s important to note that these times are approximate and can vary. To ensure maximum fragrance and longevity, it is recommended to store your candle melts in a cool, dry place away from direct sunlight. Proper storage will help preserve the fragrance and prevent premature melting.

Advertisement

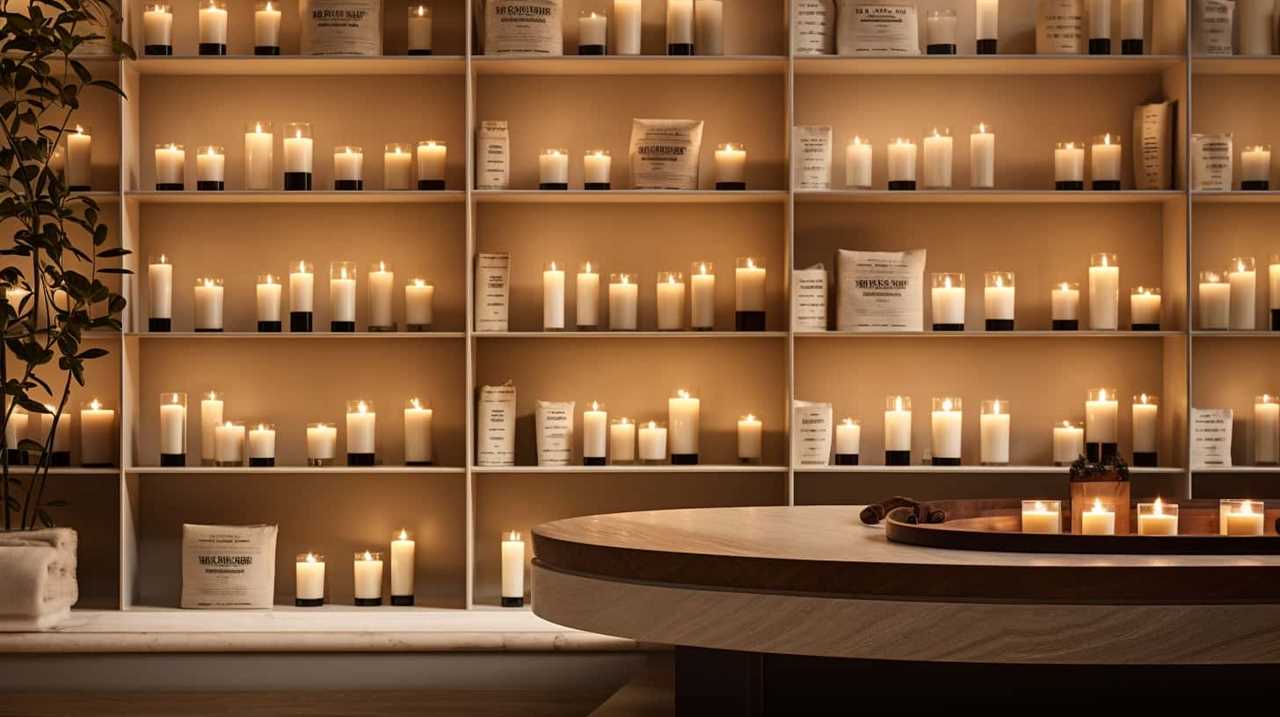
Where to Buy Candle Melts

When it comes to buying candle melts, there are two main options to consider: online or in-store.

Online shopping offers convenience and a wide selection of choices, allowing you to browse through different brands and scents from the comfort of your own home.

dusk catalogue 2017

On the other hand, shopping in-store gives you the opportunity to see and smell the candle melts in person before making a purchase.

Price and availability may vary between online and in-store options, so it’s worth considering both options to find the best deal and the most convenient shopping experience.

Online Vs. In-Store

I love shopping for candle melts both online and in-store because it allows us to explore a wide variety of scents and brands.

Advertisement

When it comes to online shopping, there are several advantages to consider. First, you can browse through numerous online stores from the comfort of your own home, making it convenient and time-saving. Additionally, many websites offer customer reviews, which can help you make informed purchasing decisions. Reading about other customers’ experiences with a specific scent or brand can give you valuable insights.

candle making workshop

On the other hand, shopping in-store offers a unique sensory experience. You can smell the different scents firsthand and even talk to knowledgeable store staff for recommendations.

Transitioning into the next section about price and availability, it’s important to compare prices and check for any exclusive offers or discounts available both online and in-store.

Price and Availability

After exploring the advantages of online and in-store shopping, it’s time to delve into the price and availability of candle melts. When it comes to purchasing candle melts, there are various options available, both online and in physical stores. To help you make an informed decision, we have prepared a price comparison table below:

Store Price Range (per pack) Seasonal Availability
Store A $5 – $8 Yes
Store B $7 – $10 No
Store C $6 – $9 Yes

As you can see, the price of candle melts varies across different stores. Additionally, some stores may offer seasonal scents that are only available during specific times of the year. It’s important to consider both the price and seasonal availability when choosing where to purchase your candle melts. By comparing prices and checking for seasonal releases, you can find the best deals and enjoy a wide variety of scents throughout the year.

Advertisement

candle homewares

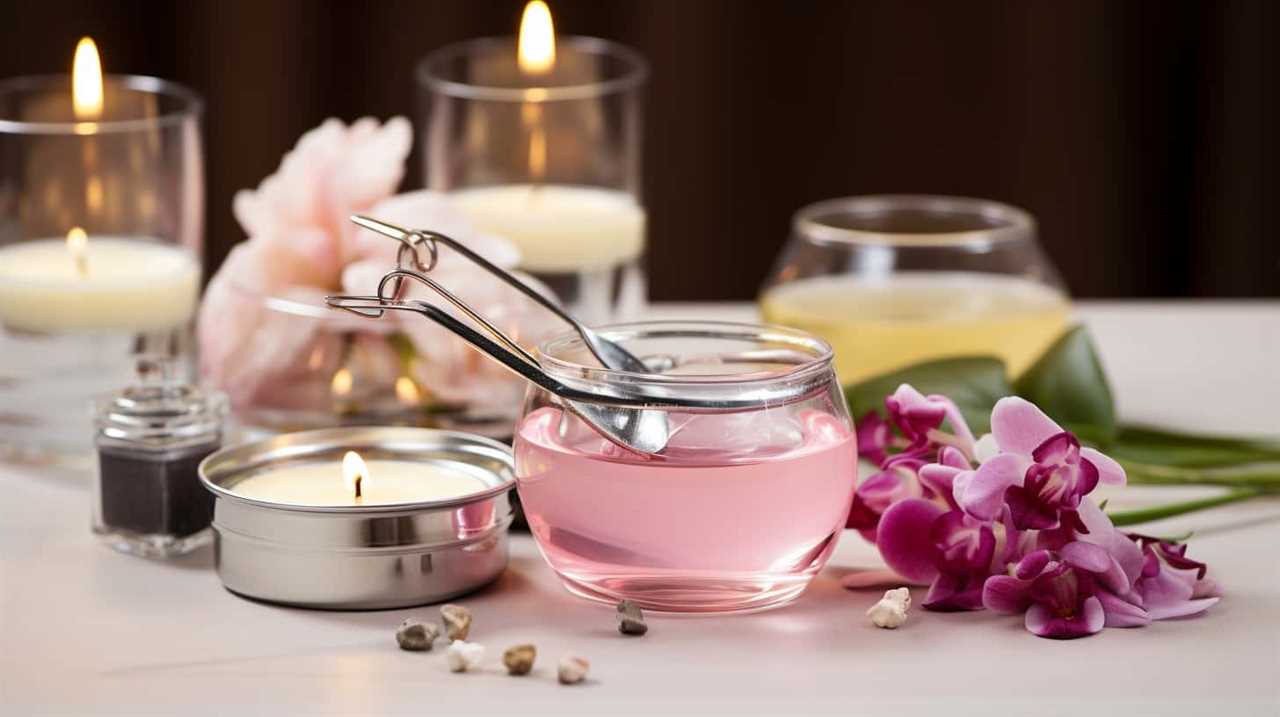
DIY Candle Melts: Making Your Own

To create our own DIY candle melts, we can start by gathering the necessary materials and following a simple step-by-step process. Making scented melts at home has many benefits, such as being able to customize the fragrance and knowing exactly what ingredients are used. Here’s how you can make your own homemade melts:

  1. Gather the materials:
  • Wax (such as soy wax or beeswax)
  • Fragrance oil or essential oil
  • Wax melt molds or silicone mold
  • Double boiler or microwave-safe container
  • Stirring utensil
  1. Melt the wax:
  • If using a double boiler, fill the bottom pot with water and place it on the stove over low heat. Place the wax in the top pot and heat it slowly until melted.
  • If using a microwave-safe container, heat the wax in short intervals, stirring in between, until fully melted.
  1. Add fragrance:
  • Once the wax is melted, remove it from the heat source and stir in the desired amount of fragrance oil or essential oil. Be sure to follow the recommended usage guidelines for the specific oil you’re using.

Safety Tips When Using Candle Melts

When using candle melts, it’s important to prioritize safety to ensure a pleasant and worry-free experience. To ensure your safety, there are a few candle melt safety precautions you should keep in mind.

First, always place your candle melts on a heat-resistant surface, away from flammable materials. This will prevent any accidents or fires.

Additionally, never leave your candle melts unattended while they’re melting, as this can also pose a fire risk.

candle making set

Another common misconception about candle melts is that they don’t produce any soot or smoke. While they may produce less compared to traditional candles, it’s still important to keep the room well-ventilated.

By following these safety tips, you can enjoy the cozy ambiance of candle melts without any worries.

Advertisement

Now, let’s move on to the conclusion: why candle melts are worth trying.

Conclusion: Why Candle Melts Are Worth Trying

So, let’s explore why candle melts are a worthwhile addition to your home decor.

candle picture

Candle melts have become increasingly popular in recent years, and for good reason. Here are a few advantages of using candle melts:

  • Long-lasting fragrance: Candle melts are known for their strong and long-lasting scents. Unlike traditional candles that burn out quickly, candle melts slowly release fragrance for hours, filling your home with inviting aromas.
  • Safety: Candle melts eliminate the risk of an open flame. With no need for a wick, there’s no danger of fire or accidents. This makes them a safer option, especially if you have children or pets.
  • Versatility: Candle melts come in a wide variety of scents and designs, allowing you to choose the perfect match for your style and preferences. You can easily switch between different scents to create the desired ambiance in any room.

By incorporating candle melts into your home decor, you can enjoy the benefits of a long-lasting fragrance, enhanced safety, and the ability to customize the scent to suit your mood.

Give candle melts a try and elevate the atmosphere of your living space.

Frequently Asked Questions

Are Candle Melts the Same as Wax Melts?

Candle melts are not the same as wax melts. Candle melts are small, scented pieces of wax that are melted using a candle warmer. They offer the benefits of using wax melts instead of traditional candles, such as longer-lasting fragrance and no open flame.

Advertisement

yankee candle coupon

Can I Use Candle Melts in an Oil Burner?

Yes, you can use candle melts in an oil burner. The benefits of using them include a longer-lasting fragrance and a safer alternative to open flames. To maximize scent throw, break the melts into smaller pieces and experiment with different heat settings.

How Often Should I Change Candle Melts?

To properly care for candle melts, it’s important to change them regularly. Different scents can be used to create a pleasant atmosphere. We recommend changing candle melts every 10-20 hours of burn time for optimal fragrance.

Can I Mix Different Fragrances of Candle Melts Together?

Mixing different fragrances of candle melts together can be a fun and creative way to customize your scent experience. However, it’s important to consider that certain combinations may not blend well and could result in an unpleasant aroma.

Are Candle Melts Safe to Use Around Pets?

When using candle melts around pets, there are potential risks to consider. Alternatives such as flameless wax warmers or essential oil diffusers can create a pet-friendly atmosphere without the worry of harm.

candlewood suites

Conclusion

In conclusion, candle melts are like little drops of joy that fill our homes with enchanting scents and warm, flickering light. They’re a delightful alternative to traditional candles, offering a longer-lasting and more controlled fragrance experience.

Advertisement

Whether you choose to purchase candle melts or indulge in the art of making your own, these little wonders are definitely worth trying. So go ahead, let the gentle glow and captivating aromas of candle melts transport you to a world of tranquility and bliss.

I'm Jane and I love candles. I have candles everywhere in my house--in every room, on every surface. I love the smell of candles, and I love how they make my place feel warm and cozy. Candles are really important to me. They help me relax and de-stress after a long day. They remind me of happy memories, and they make me feel calm and peaceful. I can't imagine my life without candles!

Continue Reading
Advertisement

Candles

How to Get Candle Wicks to Stay in Place

Published

on

By

Tired of your candle wicks wandering off like a group of escaping hot air balloons? Worry no more, because we have the perfect guide to ensure those troublesome wicks remain in place!

In this tutorial, we will share with you our expert tips and tricks for achieving wick mastery. From choosing the right size to using specialized adhesive, we’ve got you covered. No more frustration or wasted candles!

With our techniques, you’ll be able to keep those wicks in place like a pro. So, grab your supplies and get ready to become a candle wick wizard!

Let’s dive in and learn how to secure those wicks once and for all.

Advertisement

candlelighters charity

Key Takeaways

  • Choosing the right wick size is crucial for a steady flame and proper burning.
  • Wick stickers or alternative adhesive options can securely hold the wick in place during the candle-making process.
  • Wick tabs provide stability to the wick and prevent it from moving while the candle is burning.
  • Pre-waxing the wick and using wick placement techniques ensure proper adhesion and centering of the wick in the candle.

Choose the Right Wick Size

To choose the right wick size, we conducted experiments to determine the optimal size for different types of candles. Wick size selection is crucial for ensuring that your candles burn evenly and efficiently. Here are the steps to follow:

  1. Consider the diameter of your candle. A general rule of thumb is to choose a wick that’s approximately one-third of the diameter.
  2. Test different wick sizes. Start with a smaller size and gradually increase until you find the one that provides a steady flame without excessive smoke or soot.
  3. Pay attention to the type of wax used. Different waxes have different burn characteristics, so adjust the wick size accordingly.
  4. Trim the wick regularly. Wick trimming techniques help maintain a clean and efficient burn. Trim the wick to about 1/4 inch before each use to prevent excessive flickering and mushrooming.

Use a Wick Sticker or Adhesive

Let’s talk about using a wick sticker or adhesive to keep candle wicks in place.

Wick stickers are a convenient option as they’re specifically designed to secure wicks to the bottom of candle containers. They’re easy to use and provide a strong hold.

Alternatively, you can also use hot glue or double-sided tape as adhesive options, ensuring that the wick is securely attached to the container.

candlesticks hotel stamford

Wick Sticker Benefits

While using a wick sticker or adhesive to secure candle wicks in place, we can ensure their stability throughout the burning process. Wick stickers offer several benefits that make them a popular choice among candle makers:

  • Easy to use: Wick stickers are simple to apply and require no additional tools or equipment.
  • Minimal mess: Unlike liquid adhesives, wick stickers eliminate the risk of spills or drips.
  • Versatility: Wick stickers can be used with various types of wicks, including cotton, wood, or metal.

By using a wick sticker, you can effortlessly center and secure your candle wick, ensuring a consistent and even burn.

However, if you prefer alternative adhesive options, there are other choices available that can also provide excellent results. Let’s explore these alternatives in the next section.

Alternative Adhesive Options

For our candle-making needs, we’ve found alternative adhesive options that work just as effectively as using a wick sticker or adhesive.

Advertisement

floral candle

These options provide a secure way to tie the wick in place, ensuring it stays in position while the candle is being made.

One alternative adhesive option is using a hot glue gun. Simply apply a small amount of hot glue to the bottom of the metal sustainer and press the wick firmly into the glue until it sets.

Another option is using double-sided tape. Cut a small piece of tape and stick one side to the bottom of the sustainer, then press the wick onto the tape. Make sure the tape is strong enough to hold the wick securely.

These alternative adhesive options offer a reliable and convenient way to keep your wick in place during the candle-making process.

candle price

Secure the Wick With a Wick Tab

Now let’s talk about securing the wick with a wick tab. Wick tabs offer several benefits, such as providing stability to the wick and preventing it from moving around while the candle is burning.

Advertisement

To ensure the wick stays in place, there are a few techniques you can use, such as bending the tab at a right angle and pressing it firmly onto the bottom of the container.

Additionally, proper wick placement is crucial, so make sure to position the tab in the center of the container for optimal burning.

Wick Tab Benefits

To secure the wick in place, we recommend using a wick tab. Wick tabs are small metal or plastic devices that attach to the bottom of the wick and hold it securely in the candle. Here are some benefits of using wick tabs:

candles direct discount code

  • Easy application: Wick tabs are simple to use and can be easily attached to the wick by crimping them with pliers.
  • Stability: Wick tabs provide stability to the wick, preventing it from moving or leaning to one side during the candle making process.
  • Heat resistance: Wick tabs are designed to withstand the heat generated by the burning candle, ensuring that the wick stays in place throughout the entire burn.

By using wick tabs, you can ensure that your wicks remain secure and centered in your candles.

Now, let’s move on to the next section where we’ll discuss some techniques for achieving wick stability.

Wick Stability Techniques

To achieve wick stability and ensure that your wicks stay in place, we recommend securing the wick with a wick tab. Wick tabs are small metal discs with a hole in the center that can be easily attached to the base of the wick. Here are the steps to follow for this wick stability technique:

Advertisement
  1. Prepare your wick tab by inserting the wick through the hole in the center.
  2. Place the wick tab at the base of the container or mold where you plan to pour your candle wax.
  3. Make sure the wick tab is centered and flat against the bottom of the container or mold.
  4. Carefully pour the melted wax into the container, making sure not to disturb the wick tab.
  5. Allow the wax to cool and solidify completely before trimming the wick and lighting your candle.

Wick Placement Tips

After securing the wick with a wick tab, we can now discuss some useful tips for proper wick placement. Achieving the right wick placement is crucial to ensure a steady and even burn for your candle. Here are some wick placement techniques and wick stability methods that you can use:

ecoya hand cream set

  • Positioning the wick: Place the wick at the center of the container, ensuring it’s straight and not touching the sides.
  • Trimming the wick: Trim the wick to a quarter of an inch before lighting it to prevent excessive smoke and flickering.
  • Testing the placement: Before pouring the melted wax, test the wick placement by securing it with a wick holder or centering device to maintain its position.

By following these wick placement techniques and stability methods, you can ensure that your candle burns evenly and efficiently.

Now, let’s move on to the next step: using a wick holder or centering device.

Use a Wick Holder or Centering Device

We recommend using a wick holder or centering device to ensure the candle wick stays in place. These tools offer several benefits when it comes to candle making.

Firstly, they help to keep the wick centered, which ensures an even burn and prevents tunneling.

jo malone candle

Secondly, they provide stability to the wick, preventing it from moving around or leaning to one side. This is especially important when pouring hot wax into the container.

There are different types of wick holders available, such as metal wick holders and plastic wick centering devices. Metal wick holders are inserted into the wick hole and hold the wick upright, while plastic wick centering devices sit on top of the container and hold the wick in place.

Advertisement

Choose the type that best suits your needs and ensure a hassle-free candle making process.

Dip the Wick in Melted Wax Before Placing

To ensure the candle wick stays in place, it’s important to dip it in melted wax before placing it.

candlelight

This step is crucial for pre-waxing the wick, which helps in securing its position.

Pre-Waxing for Secure Placement

Before placing the wick, dip it in melted wax for secure placement. Pre-waxing the wick offers several benefits that ensure a stable and long-lasting candle. Here’s how to pre-wax your wick:

  • Prepare a small container with melted wax, such as leftover wax from previous candles or soy wax flakes.
  • Hold the wick by the metal tab or use a clothespin to keep it steady.
  • Gently dip the wick into the melted wax, making sure to fully coat the entire length.
  • Remove the wick from the wax, allowing any excess to drip off.
  • Lay the pre-waxed wick on a non-stick surface or parchment paper to dry completely.

Once dry, the wick will have a thin layer of wax that helps it adhere to the candle container. Proceed with placing the wick in the center of the container, ensuring it’s straight and taut. Pour the melted wax into the container, allowing it to cool and solidify around the pre-waxed wick.

Wick Adhesion Technique

To ensure the proper adhesion of the wick, dip it in melted wax before placing it in the candle. This technique is crucial for keeping the wick in place and preventing it from moving or falling out while the candle is burning. The melted wax acts as an adhesive, securing the wick firmly in the center of the candle.

Advertisement

candlelight inn

While there are alternative methods for wick adhesion, such as using glue dots or wick stickers, dipping the wick in melted wax is the preferred technique for achieving optimal results. Not only does it provide a strong bond between the wick and the candle, but it also ensures that the wick remains straight and centered throughout the burning process.

Proper wick placement is of utmost importance in candle making. It ensures an even and clean burn, as well as preventing any potential safety hazards. By taking the time to dip the wick in melted wax before placing it in the candle, you’re ensuring that your candles will burn beautifully and safely.

Tie the Wick to a Pencil or Skewer

We secure the candle wick in place by attaching it to a pencil or skewer using a tight knot. This method provides an alternative to using adhesive and ensures that the wick remains in place during the candle-making process.

Here’s a step-by-step guide on how to tie the wick to a pencil or skewer:

candles direct ireland

  • First, gather the necessary materials: a pencil or skewer, a candle wick, and a pair of scissors.
  • Cut the candle wick to the desired length, leaving a few extra inches for tying.
  • Take one end of the wick and wrap it tightly around the pencil or skewer, creating a loop.
  • Cross the loose end of the wick over the loop and thread it through, pulling it tightly to secure the knot.
  • Repeat this process for the other end of the wick, ensuring that both knots are tight and secure.

Create a Wick Hole in the Candle Mold

To create a wick hole in the candle mold, start by marking the desired location with a small dot using a pencil or marker. This will serve as a guide for where the wick will be inserted. The wick hole should be strategically placed to ensure proper burning and secure placement of the wick.

To help you visualize the process, here’s a table that outlines the steps for creating a wick hole in the candle mold:

Advertisement
Step Action
1 Mark the desired location for the wick hole using a pencil or marker.
2 Use a small sharp object, like a nail or awl, to create a pilot hole at the marked spot.
3 Gradually widen the hole by rotating the sharp object in a circular motion, applying gentle pressure.
4 Continue enlarging the hole until it is wide enough to accommodate the wick securely.

Once you have created the wick hole, you can proceed to the next step of securing the wick placement by twisting it around a metal clip.

Now, let’s move on to the next section and learn how to twist the wick around a metal clip.

candle shack

Twist the Wick Around a Metal Clip

To ensure the stability of the candle wick, one effective method is to twist it around a metal clip. This technique provides a secure anchor point that prevents the wick from moving or falling out of place during the candle-making process.

Metal Clip for Stability

Using a metal clip for stability, twisting the wick around it ensures that it stays in place. This technique is an effective way to prevent the wick from moving or floating as the candle burns.

Here are some key steps to follow when using a metal clip for wick stability:

Advertisement
  • Choose a metal clip that’s the right size for your candle wick. It should be sturdy enough to hold the weight of the wick without bending or breaking.
  • Place the metal clip at the base of the wick, where it meets the wax. Make sure it’s secure and tightly wrapped around the wick.
  • Gently press the metal clip into the wax to anchor it in place. This will help keep the wick centered as the candle burns.

Wick Twisting Technique

How can we effectively use the wick twisting technique to keep the candle wick in place? The wick twisting technique involves twisting the wick around a metal clip to secure it in place. This method offers several benefits, including increased stability and reduced risk of the wick moving or falling out of place during the candle-making process.

yankee candle

To use this technique, follow these steps:

  1. Start by attaching a metal clip to the bottom of the wick.
  2. Hold the metal clip and wick together and twist them in a clockwise direction.
  3. Continue twisting until the wick is securely wrapped around the metal clip.
  4. Once twisted, insert the metal clip into the bottom of the candle container or mold.
  5. Ensure that the wick is centered and straight before pouring the melted wax.

While the wick twisting technique is effective, there are alternative methods to keep the wick in place, such as using wick stickers or adhesive tape. However, the wick twisting technique provides a more secure and durable hold for the wick.

To further anchor the wick, you can also use a wick pin or needle, which will be discussed in the next section.

Use a Wick Pin or Needle to Anchor the Wick

We found that utilizing a wick pin or needle effectively secures the candle wick in place. This technique offers several benefits:

dusk meditation candle

  • Easy to use: Simply insert the wick pin or needle through the wick’s metal base and press it into the candle’s wax to anchor the wick securely.
  • Ensures stability: The wick pin or needle creates a solid anchor point for the wick, preventing it from moving or shifting during the candle-making process.
  • Allows for precise positioning: With the wick pin or needle, you have full control over the placement of the wick, ensuring it stays centered and upright in the candle.

To use this technique, start by attaching the wick to the wick pin or needle. Then, gently press the pin or needle into the candle wax, making sure it goes deep enough to hold the wick securely. Finally, pour the melted wax into the container and let it cool and solidify.

The wick will remain in place, ready for a beautiful, stable burn.

Use a Hot Glue Gun to Fix the Wick in Place

To ensure the candle wick stays in place, we can utilize a hot glue gun. This method provides a secure and long-lasting bond between the wick and the container. Here are some step-by-step instructions for using a hot glue gun to fix the wick in place:

Advertisement
  1. Begin by preparing the hot glue gun and the candle container.
  2. Once the glue gun is heated and ready, apply a small amount of hot glue to the base of the wick tab.
  3. Quickly press the wick tab onto the bottom center of the container.
  4. Hold the wick in place for a few seconds until the hot glue sets.
  5. Ensure that the wick is centered and straight before the glue fully hardens.
  6. Once the hot glue has completely dried and hardened, you can trim the wick to the desired length.

While hot glue is a popular adhesive option for securing wicks, it’s important to note that there are alternative adhesive options available. Some candle makers prefer using adhesive dots or double-sided tape for wick placement. These alternatives can also provide a strong bond and prevent the wick from moving during the candle-making process. Experiment with different adhesive options to find the one that works best for you.

myer

Attach the Wick to a Metal Base

To attach the wick to a metal base, we can simply slide the wick through the pre-drilled hole and secure it with a small metal clip. This method is one of the most effective wick attachment methods, ensuring that the wick stays in place while the candle burns.

Here are the steps to attach the wick to a metal base:

  • Slide the wick through the pre-drilled hole in the metal base.
  • Pull the wick tight to ensure it’s secure.
  • Attach a small metal clip to the end of the wick, pressing it firmly against the metal base.

Use a Wick Sustainer or Sustainer Clip

To ensure the wick stays securely in place, a wick sustainer or sustainer clip can be utilized. These small metal devices play a crucial role in keeping the wick centered and stable during the candle-making process.

Using a wick sustainer offers several benefits. Firstly, it eliminates the need for wick stickers, which can sometimes be unreliable and fail to hold the wick in place. Secondly, it provides a sturdy base for the wick, preventing it from moving or falling into the melted wax.

myer

To use a wick sustainer, simply slide it onto the wick and press it firmly against the bottom of the container. Make sure it’s centered before pouring the wax. This simple step ensures a successful and well-positioned wick, resulting in a beautifully burning candle.

Wrap the Wick Around a Metal Washer

We use a small metal washer to securely wrap the wick and keep it in place during the candle-making process. This technique is an effective way to ensure that the wick remains centered and straight as the candle cools and solidifies.

Advertisement

Here are some steps to follow when using a metal washer for wick wrapping:

  • Choose a metal washer that fits the size of your wick.
  • Slide the washer onto the wick, positioning it about an inch above the bottom.
  • Gently fold the wick over the washer, creating a loop.
  • Press the looped wick against the washer to secure it in place.

While metal washers are commonly used for this purpose, there are alternative options available such as using a wick tab or a wick sustainer clip. These alternatives can provide similar results and allow for different wick wrapping techniques.

candlelight concerts by fever

To further secure the wick, you can use a rubber band or string to hold the washer and wick tightly together. This will prevent any movement or displacement during the candle-making process.

Secure the Wick With a Rubber Band or String

Securing the wick with a rubber band or string ensures that it remains in place throughout the candle-making process. To effectively secure the wick, follow these simple steps:

  1. Place the container on a flat and stable surface.
  2. Attach one end of the wick to the bottom center of the container using a small dot of hot glue.
  3. Stretch the wick taut across the container, making sure it’s centered.
  4. Wrap a rubber band or tie a string tightly around the top of the container, securing the wick in place.

By using this technique, you can prevent the wick from shifting or floating when pouring the melted wax. Remember to trim the wick to the desired length before lighting the candle.

Wick placement techniques, such as securing the wick with a rubber band or string, are crucial to achieving a successful and stable candle-making experience.

candlesticks trading

Frequently Asked Questions

Can I Use a Wick Sticker or Adhesive Instead of a Wick Tab to Secure the Wick?

We can use a wick sticker as an alternative to a wick tab or an adhesive substitute. It helps secure the wick in place, ensuring a steady burn. Applying the sticker correctly is crucial for optimal results.

Advertisement

Is It Necessary to Dip the Wick in Melted Wax Before Placing It in the Candle?

To prevent candle wicks from moving, there are alternative methods to secure them. One method is to dip the wick in melted wax before placing it in the candle. This helps to anchor the wick in place.

Can I Use a Wick Pin or Needle to Anchor the Wick Instead of a Wick Holder or Centering Device?

Yes, you can use a wick pin or needle as an alternative wick anchoring method. Simply insert the pin through the wick and into the candle, ensuring it’s secure. This technique provides stability and prevents the wick from moving while the candle burns.

What Are the Benefits of Using a Wick Sustainer or Sustainer Clip?

When it comes to keeping candle wicks in place, using wick sustainers or sustainer clips has numerous benefits. They provide stability, prevent wick movement, ensure even burning, and make it easier to trim the wick. To choose the right wick sustainer, consider the size and type of your candle.

yankee candle uk

Are There Any Alternative Methods to Secure the Wick, Such as Using a Hot Glue Gun or a Rubber Band?

Using alternative materials for securing candle wicks, we can explore different methods for keeping them in place. One option is using a hot glue gun to adhere the wick to the container, while another is using a rubber band to hold it in position.

Conclusion

So there you have it, a simple and straightforward guide to keeping your candle wicks in place.
Who’d have thought that securing a wick could be so easy?
With just a few simple steps, you can ensure that your candles burn evenly and beautifully every time.

Advertisement

So go ahead, light up your favorite scented candle and enjoy the irony of how something as small as a wick can make a big difference in your candle-making journey.

Continue Reading

Candles

How to Get Wax Out of Ceramic Candle Holder

Published

on

By

Ever thought if there exists an infallible method for removing wax from a ceramic candle holder? Guess what – there absolutely does!

In this guide, we will show you how to effectively remove wax from your ceramic candle holder, leaving it clean and beautiful. With just a few simple steps and some common household items, you’ll be able to master the art of wax removal.

No more worrying about unsightly wax residue ruining the look of your candle holder. So let’s dive in and learn the secrets to keeping your ceramic candle holders wax-free!

Key Takeaways

  • The wax can be scraped off with a butter knife or spoon, or softened with a hairdryer or heat gun.
  • Freezing the candle holder can make the wax brittle and easier to remove.
  • Scrape off the hardened wax with a plastic scraper or butter knife, and use rubbing alcohol to remove any remaining residue.
  • Heating the holder with a hairdryer, hot water, or a heat gun can also soften the wax for easier removal.

Gather Necessary Supplies

To begin, we’ll gather the necessary supplies by using alternative cleaning methods. This won’t only help us remove wax from the ceramic candle holder effectively, but also prevent any wax stains on other surfaces. Here is a step-by-step guide on what you’ll need:

candles direct voucher code

  1. A butter knife or a spoon: This will be used to scrape off the excess wax from the ceramic surface gently.
  2. A hairdryer or a heat gun: Applying heat to the wax will soften it, making it easier to remove. Be cautious not to overheat the ceramic.
  3. A clean cloth or paper towels: These will be used to absorb the melted wax as you remove it from the ceramic.
  4. Rubbing alcohol or a mild detergent: This will help to clean any remaining wax residue and ensure a thorough cleaning.

Freeze the Candle Holder

Now let’s move on to freezing the candle holder to further facilitate the removal of wax. Freezing the candle holder is an effective method that utilizes the power of extreme cold to harden the wax, making it easier to remove.

Here are the steps to freeze the candle holder:

Advertisement
  1. Place the candle holder in a sealable plastic bag to prevent any moisture from entering.
  2. Put the bagged candle holder in the freezer and leave it for at least two hours or until the wax becomes brittle.
  3. Once the wax is frozen, take out the candle holder from the freezer.
  4. Use a plastic scraper or your fingers to gently pry off the frozen wax from the ceramic surface.
  5. If there are any stubborn remnants, you can repeat the freezing process or try alternative cleaning methods such as using a hairdryer or warm water.

Scrape off the Hardened Wax

Now that we’ve frozen the wax in the ceramic candle holder, it’s time to scrape off the hardened wax. This step is crucial in removing any residue left behind and restoring the holder to its original state.

Heating the Holder

We heat the ceramic candle holder to easily scrape off the hardened wax. Heating the holder helps to soften the wax, making it easier to remove without damaging the ceramic. Here are some methods you can use to heat the holder:

bath and body works candle day

  • Use a hairdryer: Set the hairdryer to a low heat setting and aim it at the wax. Move the hairdryer around to evenly distribute the heat and melt the wax.
  • Place the holder in hot water: Fill a bowl or sink with hot water and submerge the candle holder. Leave it for a few minutes until the wax softens.
  • Use a heat gun: If you have a heat gun, you can direct the hot air onto the wax. Be cautious and hold the heat gun at a safe distance to avoid overheating the ceramic.

Remember to exercise caution when using heat to avoid potential risks of burns or damage to the ceramic.

Once the wax has softened, you can proceed to the next step of freezing the wax.

Freezing the Wax

To scrape off the hardened wax, we can freeze the wax in the ceramic candle holder. Freezing the wax will cause it to contract and become brittle, making it easier to remove.

Here’s how you can do it:

candlesticks hotel stamford

  1. Place the ceramic candle holder in the freezer for about 1-2 hours, or until the wax is completely frozen.
  2. Once the wax is frozen, take out the candle holder and gently tap it on a hard surface. This will help loosen the hardened wax.
  3. Use a plastic scraper or a butter knife to carefully scrape off the frozen wax. Be gentle to avoid scratching the ceramic surface.
  4. If there’s any remaining wax residue, you can use a cloth soaked in rubbing alcohol to wipe it off. The alcohol will dissolve the wax and make it easier to remove.
  5. Once you have removed all the melted wax and residue, the ceramic candle holder should be clean and ready to use again.

Now that we’ve successfully removed the hardened wax, let’s move on to the next step: using boiling water.

Use Boiling Water?

For this step, we’ll use a small amount of boiling water to help scrape off the hardened wax from the ceramic candle holder. Here’s how to do it:

Advertisement
  • Boil a small pot of water.
  • Carefully pour the boiling water into a heat-resistant container.
  • Place the ceramic candle holder in the container, ensuring that the hardened wax is fully submerged.
  • Let the candle holder sit in the boiling water for a few minutes to soften the wax.
  • Using a non-abrasive sponge or cloth, gently scrape off the softened wax from the ceramic surface.
  • Be cautious not to scratch or damage the ceramic material.
  • If the wax hardens again while scraping, pour more boiling water over the affected area.
  • Continue scraping until all the wax is removed.
  • Once the wax is gone, wash the ceramic holder with warm soapy water and dry thoroughly.

Use Hot Water to Remove Remaining Wax

To effectively remove any remaining wax, start by pouring hot water into the ceramic candle holder. The hot water will help to melt the wax and make it easier to remove. Make sure the water is hot, but not boiling, as boiling water can damage the ceramic. Fill the holder with enough hot water to cover the remaining wax.

Let the water sit in the holder for a few minutes to allow the heat to penetrate the wax. Then, use a soft cloth or sponge to wipe away the wax. If there are stubborn wax residue, you can gently scrape it off using a plastic scraper or your fingernail. Be careful not to scratch the ceramic surface.

candle holders glass

Once the wax is removed, proceed to the next section to apply heat to loosen any stubborn wax that may still be stuck in the holder.

Apply Heat to Loosen Stubborn Wax

Now let’s move on to applying heat to loosen stubborn wax in your ceramic candle holder.

This step is crucial for easy removal of the wax. By melting the wax with heat, it becomes more pliable and easier to manipulate.

With the use of heat, you’ll be able to effectively loosen the wax from the ceramic surface, making the removal process much simpler.

Advertisement

dusk catalogue 2017

Heat for Easy Removal

We can easily loosen stubborn wax by applying heat to the ceramic candle holder. Here’s how you can do it:

  1. Use a hairdryer: Set the hairdryer to the highest heat setting and direct the hot air onto the wax. Move the hairdryer in a back-and-forth motion to evenly distribute the heat.
  2. Boiling water method: Fill a pot with water and bring it to a boil. Carefully hold the ceramic candle holder over the pot, allowing the steam to heat the wax. Once the wax begins to soften, use a cloth or paper towel to wipe it away.
  3. Oven method: Preheat your oven to a low temperature, around 150-200 degrees Fahrenheit. Place the ceramic candle holder on a baking sheet and place it in the oven for a few minutes. Check on the wax periodically, and once it starts to melt, carefully remove it using a cloth or paper towel.

Melting Wax With Heat

We can easily loosen stubborn wax by applying heat to the ceramic candle holder. There are various heating techniques and alternative methods that can be used to achieve this.

One effective method is using a hairdryer. Simply set the hairdryer to a medium heat setting and aim it at the wax. Move the hairdryer around in a circular motion to evenly distribute the heat. As the wax begins to melt, use a paper towel or cloth to gently wipe away the softened wax.

Another alternative method is to place the candle holder in a preheated oven at a low temperature, around 150-200 degrees Fahrenheit, for a few minutes. This will cause the wax to melt and become easier to remove.

candlelight concerts london

Using heat to loosen wax is a convenient and efficient way to clean ceramic candle holders.

Now that we’ve discussed melting wax with heat, let’s move on to the next section, which will focus on another method of loosening wax using heat.

Advertisement

Loosening Wax Using Heat

To continue the process of removing wax from a ceramic candle holder, we can employ the method of applying heat to loosen stubborn wax. Here are two effective ways to do this:

  • Using a hairdryer:
  • Set the hairdryer to a medium or high heat setting.
  • Hold the hairdryer about 6 inches away from the wax.
  • Direct the hot air towards the wax, moving the hairdryer in a circular motion.
  • The heat will melt the wax, causing it to become soft and pliable.
  • Use a paper towel or cloth to wipe away the loosened wax.
  • Using a candle warmer:
  • Place the ceramic candle holder on a candle warmer.
  • Turn on the warmer and allow it to heat up.
  • As the warmer heats up, the wax will begin to melt and loosen.
  • Once the wax is soft, carefully lift it off the ceramic surface.
  • Use a paper towel or cloth to clean any residual wax.

Use a Solvent or Cleaning Solution

To effectively remove wax from a ceramic candle holder, it is essential to regularly and carefully utilize a solvent or cleaning solution. While heat can loosen the wax, using a solvent or cleaning solution will help dissolve and remove any remaining residue. There are several cleaning techniques and alternative solutions that you can use to effectively clean your ceramic candle holder.

dusk candles careers

One option is to use rubbing alcohol or isopropyl alcohol as a solvent. Simply soak a cloth or cotton ball in the alcohol and gently wipe the wax away. Another alternative solution is using a mixture of warm water and dish soap. Create a soapy solution and use a sponge or cloth to scrub the wax gently. Lastly, you can also try using a commercial wax remover specifically designed for ceramic surfaces.

Here is a table highlighting these cleaning techniques and alternative solutions:

Cleaning Technique Alternative Solution
Rubbing alcohol Warm water and dish soap
Isopropyl alcohol Commercial wax remover
Warm water and dish soap

Scrub Gently With a Soft Brush

We frequently scrub gently with a soft brush to effectively remove any remaining wax from the ceramic candle holder. Here are some soft brush techniques to help you with this process:

  • Select a soft-bristled brush: Look for a brush specifically designed for delicate surfaces, such as ceramics. The bristles should be firm enough to remove the wax but soft enough to avoid scratching the ceramic.
  • Use gentle, circular motions: Dip the brush in warm, soapy water and apply it to the wax residue on the candle holder. Scrub the area using small, circular motions. This will help loosen the wax without causing any damage.
  • Try alternative cleaning methods: If the soft brush technique doesn’t completely remove the wax, you can try other methods. For instance, you can place the candle holder in the freezer for a few hours to harden the wax, making it easier to scrape off. Alternatively, you can use a hairdryer to melt the wax and then wipe it away with a cloth.

Rinse and Dry the Candle Holder

After scrubbing the ceramic candle holder, we rinse it with clean water and dry it thoroughly. Rinsing is an important step to remove any remaining residue or cleaning solution from the holder. We recommend using warm water for rinsing, as it can help to melt away any remaining wax and make it easier to remove. However, be careful not to use hot water, as it can cause the ceramic to crack or break.

candlelight concert

Alternatively, you can also try freezing the candle holder for a few minutes before rinsing. The extreme cold can cause the wax to become brittle, making it easier to remove.

Advertisement

Once the holder is rinsed, it’s crucial to dry it thoroughly to prevent any water spots or damage. Use a soft, clean cloth to gently pat the holder dry, ensuring that all moisture is removed.

Polish and Restore the Shine

Once we’ve rinsed and dried the ceramic candle holder, we can proceed to polish it and restore its shine. To achieve a glossy finish, follow these steps:

  1. Apply a small amount of ceramic cleaner onto a soft, lint-free cloth.
  2. Gently rub the cloth in circular motions over the entire surface of the candle holder.
  3. Pay extra attention to any areas that still have residue or wax remnants.
  • For stubborn residue, use a soft-bristled brush to scrub gently.
  • Be careful not to scratch or damage the ceramic.
  1. Once the residue is removed, wipe the candle holder with a clean, dry cloth.
  2. To further enhance the shine, apply a thin layer of ceramic wax or polish.
  3. Buff the surface using a clean cloth until it shines.
  4. Repeat the process as needed to maintain the candle holder’s restored shine.

Prevent Future Wax Spills

To prevent future wax spills, place a heat-resistant coaster or tray underneath the ceramic candle holder. This simple step will catch any drips or spills, protecting your surfaces from damage and making cleanup much easier. Here’s a table that highlights the benefits of using a heat-resistant coaster or tray:

yankee candle

Wax spill prevention with a heat-resistant coaster or tray
Benefits
1. Prevents wax from dripping onto surfaces
2. Protects surfaces from heat damage
3. Makes cleanup quick and easy
4. Ensures the longevity of your ceramic candle holder

Frequently Asked Questions

Can I Use a Hairdryer Instead of Hot Water to Remove Remaining Wax?

Yes, you can use a hairdryer instead of hot water to remove remaining wax. It’s a great alternative for those who prefer not to use water. Here’s a step-by-step guide on how to do it properly.

What Type of Solvent or Cleaning Solution Should I Use?

To remove wax from a ceramic candle holder, there are several solvent options available. Alternatively, you can try alternative cleaning methods that involve heat or freezing to loosen the wax.

Can I Use a Metal Scraper to Remove the Hardened Wax?

Using a metal scraper to remove hardened wax from a ceramic candle holder is not recommended, as it may scratch or damage the surface. Instead, we suggest using a plastic scraper or exploring alternative methods for removing wax.

Advertisement

Should I Be Worried About Damaging the Ceramic Candle Holder While Scraping off the Wax?

When scraping off hardened wax, we should be careful not to damage the ceramic candle holder. Instead, try placing the holder in the freezer to harden the wax, then gently tap it to release.

candle salad

How Often Should I Polish and Restore the Shine of the Candle Holder?

When it comes to maintaining the shine of your ceramic candle holder, it’s important to polish it regularly. Depending on usage, it’s recommended to polish and restore the shine every few months. Alternatively, you can try using other methods such as vinegar or baking soda.

Conclusion

Now that you know how to remove wax from a ceramic candle holder, you can say goodbye to those stubborn stains. With a few simple steps and common household items, you can easily restore your candle holder’s shine and prevent future wax spills.

So next time you accidentally spill wax, don’t fret – just follow these steps and your ceramic candle holder will be good as new!

Advertisement

Continue Reading

Candles

How to Get Wax off a Candle Holder

Published

on

By

So, you find yourself in possession of a charming candlestick holder, but fate has thrown you a curveball, leaving wax scattered all over it. Worry not, for we have arrived to impart to you the revered wisdom needed to master the art of wax removal.

In this guide, we will reveal the secrets to liberating your candle holder from the clutches of unwanted wax. With our step-by-step instructions, you will learn how to tackle this sticky situation with finesse and precision. No more shall you suffer the indignity of a wax-covered candle holder.

Prepare yourself, dear reader, for we are about to embark on a journey of wax removal wizardry. Let us begin!

Key Takeaways

  • The freezing method can be used to remove wax from a candle holder by freezing the holder and then using techniques to remove the chilled wax.
  • Preventing wax residue can be done by using alternative cleaning methods and techniques, as well as taking preventive measures.
  • The hot water method involves using hot water to melt the wax and remove it from the candle holder, with a cold water alternative also available.
  • To prevent future wax buildup, it is important to take preventive measures and use proper cleaning techniques and methods.

Gather Necessary Supplies

First, we’ll gather the necessary supplies to remove wax from a candle holder. When it comes to preparing for this task, there are a few tips that can help ensure success. Safety precautions are also essential to keep in mind throughout the process.

candlestick patterns

To begin, you’ll need a few items: a freezer bag, a butter knife or a spoon, a cloth or paper towel, and rubbing alcohol or dish soap. The freezer bag will be used to freeze the candle holder and make the wax easier to remove. The butter knife or spoon will help in loosening the wax from the holder. The cloth or paper towel will be used to wipe away any residue. Lastly, the rubbing alcohol or dish soap will aid in cleaning the candle holder after the wax has been removed.

Advertisement

When gathering the supplies, it’s important to ensure that you have a clean and well-ventilated workspace. It’s also advisable to wear gloves to protect your hands from any potential accidents. Additionally, make sure to read and follow the instructions on any cleaning products being used.

Freeze the Candle Holder

Now let’s move on to the next step in removing wax from a candle holder – freezing the candle holder.

Freezing the candle holder is an effective technique to solidify the wax, making it easier to remove.

candle salad

In this section, we’ll explore various chilled wax removal techniques, discuss ways to prevent wax residue, and provide alternative cleaning methods for those who may not have access to a freezer.

Chilled Wax Removal Techniques

One of our most effective techniques for removing wax from a candle holder is by freezing it. Freezing the candle holder causes the wax to harden and shrink, making it easier to remove.

Advertisement

To use this method, place the candle holder in a plastic bag and then place it in the freezer for about two hours.

Once the wax is frozen, take the candle holder out of the freezer and gently tap it on a hard surface. The frozen wax should break and fall off the holder.

ecoya candles myer

If there are any remaining stubborn wax residues, you can use a plastic scraper or a credit card to gently scrape them off. Remember to be careful not to scratch the surface of the holder.

This technique is a great alternative to using household items such as paper towels or hot water, as it provides a quick and efficient way to remove wax from your candle holder.

Preventing Wax Residue

To prevent wax residue on a candle holder, it’s helpful to regularly freeze it. Freezing the candle holder can help solidify any melted wax, making it easier to remove and preventing it from leaving stains or drips. Here are three simple steps to follow:

Advertisement
  1. Clean the candle holder: Before freezing, make sure the candle holder is clean and free of any wax residue. Use a soft cloth or paper towel to wipe away any excess wax.
  2. Place the candle holder in the freezer: Carefully place the candle holder in the freezer, making sure it’s stable and won’t tip over. Leave it in the freezer for a few hours or overnight to allow the wax to harden.
  3. Remove the candle holder from the freezer: Once the wax is completely frozen, take the candle holder out of the freezer. Use a butter knife or your fingers to gently pry off the wax. Be careful not to scratch or damage the holder.

Alternative Cleaning Methods

We can easily remove wax from a candle holder by freezing it. Freezing the candle holder is a simple and effective alternative cleaning method that can help to remove stubborn wax residue.

candle in the wind

To freeze the candle holder, place it in the freezer for a few hours or overnight, allowing the wax to harden and become brittle. Once the wax is frozen, gently tap the candle holder against a hard surface, such as a countertop or table, to dislodge the wax. Alternatively, you can use a butter knife or a credit card to scrape off the frozen wax. This method is especially useful for removing wax from glass or metal candle holders.

It’s important to note that freezing may not be suitable for all types of candle holders, so it’s always a good idea to test a small area first. For those seeking natural wax removers and alternative cleaning solutions, freezing is a cost-effective and chemical-free option that can help restore the beauty of your candle holders.

Use Hot Water to Melt the Wax

Now let’s talk about an alternative method using hot water to remove wax from a candle holder.

This method is a great option if you don’t want to freeze your candle holder or if freezing didn’t completely remove the wax.

candle making set

To begin, fill a sink or basin with hot water and carefully place the candle holder in it, making sure it’s fully submerged.

Advertisement

The heat will melt the wax, allowing it to easily detach from the holder.

Additionally, using hot water can help prevent future wax buildup, keeping your candle holders looking clean and polished.

Cold Water Alternative

In this method, we use hot water to melt the wax and remove it from the candle holder. However, if you don’t have access to hot water, there’s an alternative method that you can try using cold water. Here’s how:

candlelighters

  1. Fill a sink or basin with cold water.
  2. Place the candle holder in the water, ensuring that the wax-covered area is fully submerged.
  3. Leave the candle holder in the water for a few minutes to allow the wax to harden.
  4. Once the wax has hardened, use a butter knife or a similar blunt object to gently scrape off the wax from the surface of the candle holder.
  5. Rinse the candle holder with warm water to remove any remaining wax residue.

Preventing Future Wax Buildup

To minimize future wax buildup on your candle holder, regular use of hot water to melt the wax is recommended. This simple and effective method prevents wax stains and makes it easier to remove candle residue. Here’s how to do it:

  1. Fill a heat-resistant bowl or sink with hot water, making sure it’s not boiling to avoid damaging the candle holder.
  2. Carefully place the candle holder in the hot water, ensuring it’s fully submerged.
  3. Leave it for a few minutes, allowing the heat to melt the wax.
  4. Use a soft cloth or sponge to wipe away the melted wax.
  5. Rinse the candle holder with warm water and dry it thoroughly.

Scrape off the Wax With a Spoon or Knife

We can easily remove the wax from a candle holder by using a spoon or knife to scrape it off. Here are three scraping techniques that can effectively remove stubborn wax from your candle holder:

  1. Scrape gently: Using a spoon or a dull knife, gently scrape the wax off the surface of the candle holder. Be careful not to scratch or damage the holder.
  2. Apply heat: If the wax is difficult to remove, use a hairdryer or a heat gun to soften it. Hold the heat source a few inches away from the wax and move it back and forth until the wax becomes pliable.
  3. Scrape again: Once the wax has softened, use the spoon or knife to scrape off the remaining wax. Continue scraping until all the wax has been removed.

By using these scraping techniques and heat removal methods, you can effectively remove the wax from your candle holder.

Now, let’s move on to the next step: using a hairdryer to melt the remaining wax.

candlelight concerts bristol

Use a Hairdryer to Melt the Remaining Wax

After gently scraping off the wax from the candle holder, the next step is to use a hairdryer to melt the remaining wax. Before using the hairdryer, it’s important to take some safety precautions.

Advertisement

First, ensure that the hairdryer is set on the lowest heat setting to avoid damaging the candle holder or causing any accidents. Keep the hairdryer at a safe distance from the candle holder to prevent any burns or melting of other materials nearby.

Hold the hairdryer about 6 inches away from the wax and move it in a circular motion to evenly distribute the heat. As the wax melts, use a paper towel or cloth to wipe away the liquid wax. Be careful not to touch the hot wax or the hairdryer directly.

If you don’t have a hairdryer, there are alternative methods for removing wax residue. One method is to place the candle holder in the freezer for a couple of hours. The cold temperature will cause the wax to harden, making it easier to scrape off with a spoon or knife.

candle holders for pillar candles

Another option is to pour boiling water over the wax. The hot water will melt the wax, allowing you to wipe it away with a cloth or paper towel. However, be cautious when handling boiling water to avoid burns.

Clean the Candle Holder With Hot Soapy Water

Cleaning the candle holder with hot soapy water involves scrubbing away any remaining residue and grime. Here are three key factors to consider when using hot soapy water to clean your candle holder:

Advertisement
  1. Hot water vs. cold water for cleaning:
    Hot water is more effective in dissolving wax and removing stubborn stains. The heat helps to soften the wax, making it easier to scrub off. Cold water, on the other hand, may not provide enough heat to melt the wax effectively.
  2. Soap vs. vinegar for removing wax:
    Soap is a great option for cleaning candle holders as it can break down the wax and remove any greasy residue. Vinegar, although effective for general cleaning, may not be as effective in removing wax. Stick with a mild dish soap or a specialized candle holder cleaning solution for best results.
  3. Scrubbing technique:
    Use a soft sponge or cloth to gently scrub the candle holder in circular motions. Pay extra attention to any stubborn wax spots. Rinse with hot water and dry thoroughly to prevent any water spots or residue.

Polish and Restore the Candle Holder’s Shine

To restore the candle holder’s shine, there are a few options to consider.

Firstly, if you have a specialized metal cleaner on hand, you can gently polish the candle holder using a soft cloth and the cleaner.

dusk candles review

If you don’t have a metal cleaner, you can create a paste using a mixture of baking soda and water. Apply the paste to the candle holder and gently rub it in a circular motion with the soft cloth.

Another alternative is to use vinegar or lemon juice. These acidic substances can help remove tarnish and restore shine. Simply dampen the cloth with vinegar or lemon juice and gently rub the candle holder.

After polishing, it is important to rinse and dry the candle holder thoroughly to prevent any residue or moisture from affecting its shine.

Frequently Asked Questions

Can I Use a Different Tool Instead of a Spoon or Knife to Scrape off the Wax From the Candle Holder?

Yes, we can use a heat gun instead of a spoon or knife to scrape off the wax from the candle holder. Additionally, vinegar can be used to remove any remaining wax residue.

Advertisement

Candle

Is It Safe to Use Hot Water on All Types of Candle Holders?

Using hot water on delicate candle holders requires safety precautions. Certain types of candle holders, such as those made of fragile materials, may be at risk of damage. It’s important to assess the material before attempting any cleaning method.

How Long Should I Freeze the Candle Holder for Before Attempting to Remove the Wax?

How long is too long to freeze a candle holder? Are there any risks to leaving a candle holder in the freezer for too long? We need to determine the optimal freezing time for wax removal without damaging the holder.

Are There Any Alternative Methods to Remove Wax From a Candle Holder?

There are indeed alternative methods to remove wax from a candle holder. One option is to use cleaning solutions specifically designed for wax removal. These solutions can effectively dissolve the wax, making the cleaning process much easier.

What Type of Soap Should I Use to Clean the Candle Holder With Hot Soapy Water?

For cleaning candle holders with hot soapy water, the best types of soap to use are mild dish soap or gentle hand soap. Ensure the water is hot, create a soapy solution, and scrub the holder gently to remove any wax residue.

candlestick patterns

Conclusion

In conclusion, with just a few simple steps, you can easily remove wax from a candle holder and restore its shine. By freezing the holder, using hot water and a hairdryer, and cleaning with hot soapy water, you’ll have a clean and polished candle holder in no time.

Advertisement

Symbolically, this process represents the ability to let go of old layers and embrace the beauty that lies beneath, just like a candle holder shining bright.

Continue Reading

Trending