
To get the most out of your candle warmer, just place your wax melt or jar candle on the warmer’s plate or in its dish, and then either switch on the warmer or light the tealight underneath. The soft heat will slowly melt the wax, spreading a lovely scent around your room.
But, hold on, there's more to uncover about maximizing the benefits of this cozy method that goes beyond just scent.
Key Takeaways
- Tealight candle warmers use the heat from a lit candle to melt scented wax.
- Lamp or lantern warmers provide a stronger scent without the risks of an open flame.
- Plate warmers melt jar candles evenly and efficiently for maximum fragrance release.
- Follow safety instructions, never leave a burning candle unattended, and keep away from flammable items.

RIZOOCE 250 Anniversary USA Merchandise - 4th of July Patriotic Candles Gifts for Men Women, Independence Day Gifts for Fathers Day, Patriotic Decorations for Table
UNITED STATES 250TH ANNIVERSARY TRIBUTE: Celebrate the nation's Semiquincentennial with our exclusive American birthday candle. Centered around the...
As an affiliate, we earn on qualifying purchases.
Tealight Candle Warmers
To properly use a tealight candle warmer, simply place a tealight candle in the designated compartment and light it to start warming your favorite scented wax melts. These warmers are typically designed to work with the heat generated by the tealight candle to melt the scented wax placed in the top compartment. The heat emitted from the candle causes the wax to gradually melt, releasing its pleasant aroma into the air.
When using a tealight candle warmer, it's essential to ensure that the tealight candle is positioned securely in its holder to prevent any accidents. As the candle burns, the heat rises and warms the wax above. The top layer of the wax will slowly liquefy, releasing the fragrance. Remember to never leave a burning candle unattended, and always place the warmer on a heat-resistant surface.
Tealight candle warmers are a convenient and safe way to enjoy the aroma of scented candles without the need for an open flame like traditional candles. By harnessing the heat from the candle, these warmers provide a subtle and consistent scent throughout your space.
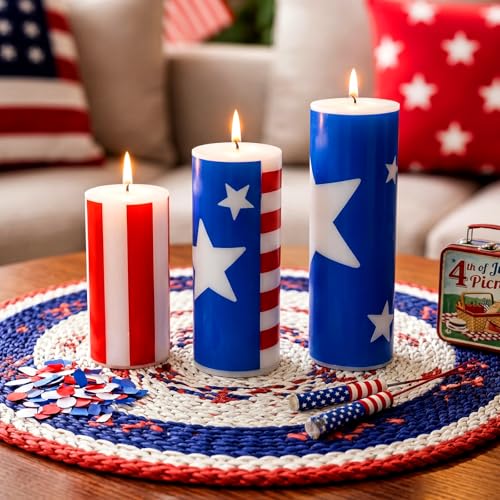
MTLEE 3 Pcs 4th of July Patriotic Candles Blue White Red Pillar Candles Flag American Stripe Home Decorations for 250th Anniversary Veterans Memorial Day Holiday Festival Table, 3 Size
4Th of July Candles Set: you will receive a set of patriotic themed candles, suitable for various occasions;...
As an affiliate, we earn on qualifying purchases.
Lamp or Lantern Warmer Style
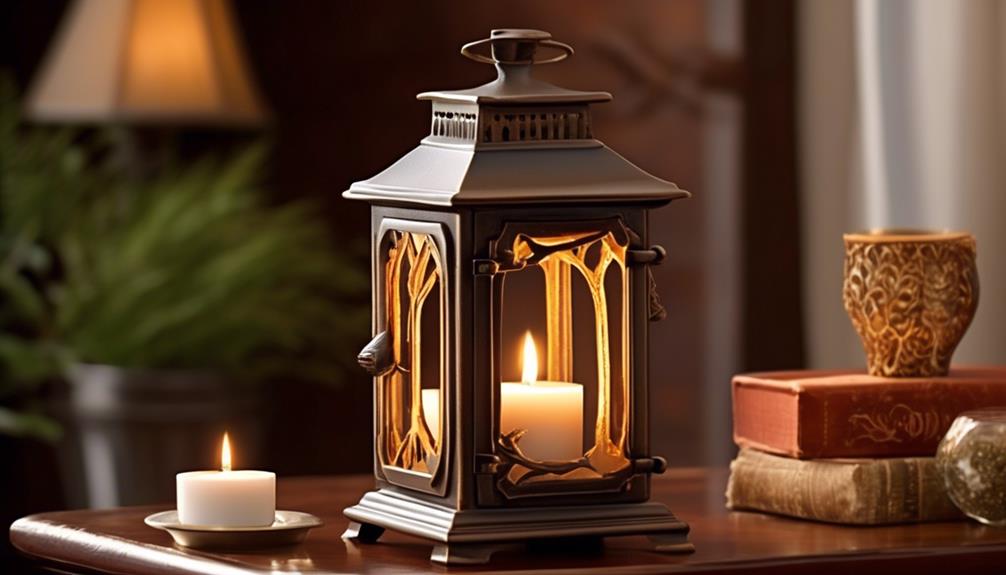
Opt for a lamp or lantern candle warmer style to elevate your wax melting experience with the gentle heat of a halogen light bulb. These types of candle warmers provide a safe and efficient way to enjoy your favorite scents without the need for an open flame. The heat source from the bulb carefully melts the wax, releasing the fragrance oils into the air for a delightful aroma throughout your space.
Lamp or Lantern Warmer Style:
| Features | Benefits |
|---|---|
| Uses halogen light bulb | Provides gentle heat for wax melting |
| Emits stronger scent | Creates a cleaner and more robust fragrance |
| Simulates burning candle | Enhances ambiance without the flame risks |
| Requires discarding wax | Ensures optimal scent release |
| Safer alternative | Offers a secure way to enjoy scented candles |
Choose a lamp or lantern candle warmer to enhance the atmosphere in your home with the captivating scents of your favorite wax melts. Enjoy the benefits of a cleaner and more potent aroma while ensuring safety and convenience in your wax melting experience.

Simply Said, INC American Flag Candle, Strawberry Scented 11 oz Premium Soy Wax, Hand Poured in USA, CDL1543
American flag decor: Colorful ceramic jar candle features an American flag made of flowers. This two wick, 11...
As an affiliate, we earn on qualifying purchases.
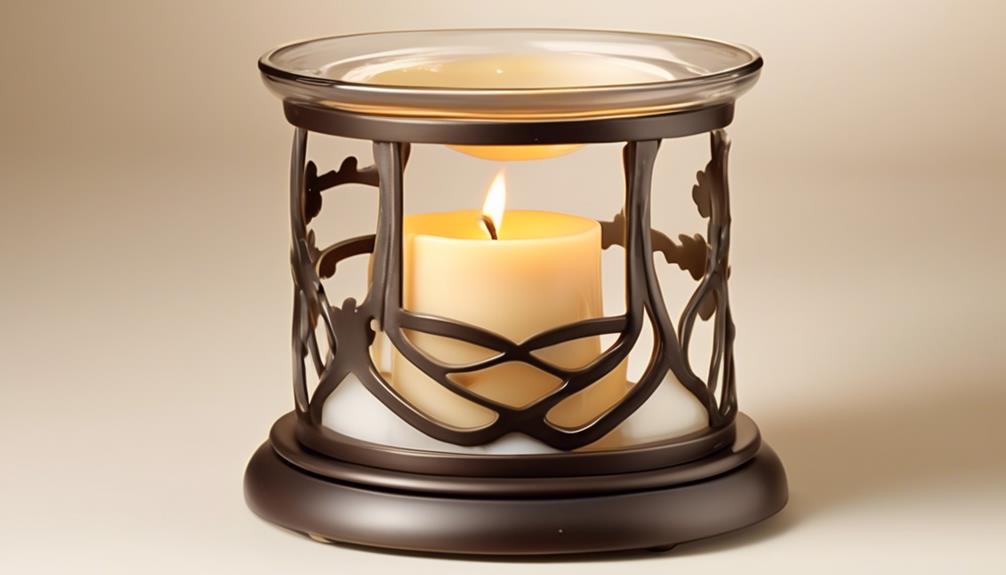
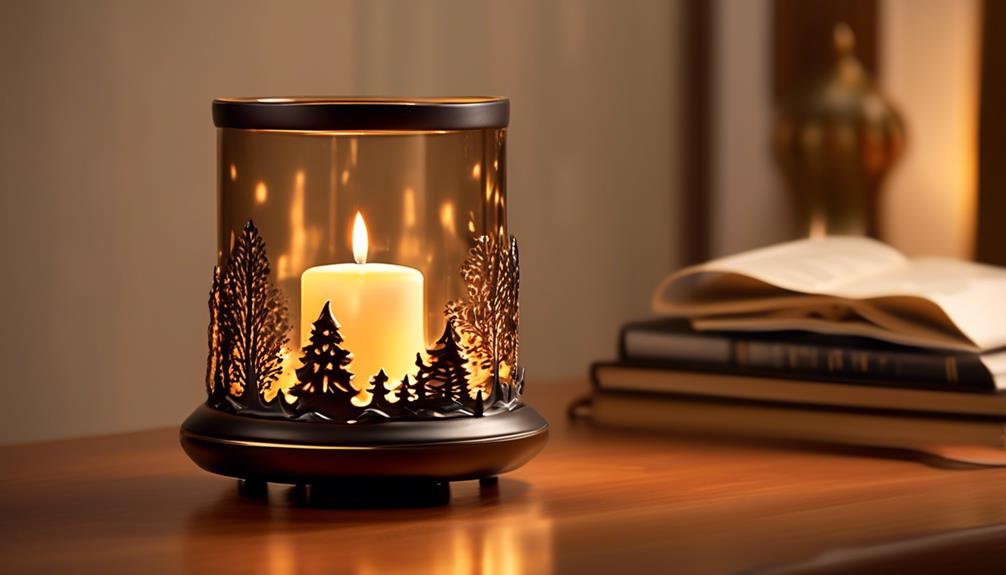
Plate Warmer Style
Consider using a plate warmer style for your jar candles, designed to melt the entire candle jar evenly and efficiently. Plate candle warmers work by heating up a plate that warms the jar from the bottom up, turning the candle wax into a liquid. This method ensures that all the wax in the jar melts uniformly, preventing the wax from spilling in layers.
To maximize the effectiveness of plate warmers, it's best to use smaller candles that can fully melt in the jar. With a plate warmer, the melted wax will mix together, allowing the candle to burn off its fragrance evenly. These warmers often use a halogen light bulb to generate heat, making them energy-efficient and effective in making scented wax candles last longer.
Plate warmers are a convenient and safe way to enjoy your favorite scented candles while ensuring that every drop of wax is utilized.

ONEIHOMM 4th of July Patriotic Candles with Remote Control, 2 Pack
【American Flag Candles Specification】Size:0.79"D x 0.79"W x 6.5"H ,You will receive 2 X red white and blue candles...
As an affiliate, we earn on qualifying purchases.
How to Burn Candles With Warmer
Place your candle warmer on a flat, heat-resistant surface for safe and effective use. When burning candles with a candle warmer, follow these steps:
- Choose the Right Candle: Select a candle made from soy wax or another type of wax suitable for candle warmers.
- Prepare the Candle: Place a portion of the candle or a wax melt in the dish or tray of the candle warmer.
- Heat and Enjoy: Turn on the candle warmer to allow the low boiling heat to melt the wax slowly and release the fragrance. Sit back and relish the delightful scent without the need for an open flame.
Using a candle warmer to burn candles is a great way to enjoy the aroma of your favorite candles safely and conveniently. Remember to never leave a burning candle unattended and to always place the candle jar on the warmer before turning it on.
Candle Warmer Safety and Usage Tips
After mastering the art of burning candles with a warmer, it's crucial to understand essential safety and usage tips to ensure a worry-free experience.
When using candle warmers, prioritize safety by following the manufacturer's instructions. Place the device on a stable, heat-resistant surface, ensuring it's away from flammable items. Never leave the candle warmer unattended while in use to avoid accidents.
Position the warmer in a safe space, away from open flames and out of reach of children or pets. Remember to keep the cord and the warmer dry to prevent electrical hazards. Allow the melted wax to cool before handling it to prevent burns.
Frequently Asked Questions
How Do You Use Candle Warmers?
To use candle warmers, follow these steps:
- Place the candle warmer on a stable surface.
- Plug it in.
- Add a wax melt or small candle piece to the dish.
- Turn it on and let the wax melt for fragrance.
- Always supervise and never leave the candle warmer unattended.
- When you're finished, turn it off.
- Let it cool down.
- Remove the melted wax.
- Enjoy the delightful scent!
How Long Can You Leave a Candle on a Candle Warmer?
You can leave a candle on a candle warmer for up to 3-4 hours at a time. After that, it's best to turn off the warmer and let the candle cool before using it again.
Keeping a candle on the warmer for too long can reduce its fragrance and lifespan. Remember to follow safety guidelines similar to burning a candle with an open flame to avoid any potential risks.
Always check the manufacturer's instructions for specific recommendations on candle warmer usage and safety.
Is It Better to Burn a Candle or Use a Warmer?
Is it better to burn a candle or use a warmer?
Candle warmers offer a safer alternative, eliminating fire and smoke risks while prolonging the scent's lifespan with slower release.
They come in various types like tealight, lamp, or plate warmers, each serving different purposes.
Following manufacturer's guidelines ensures safe usage.
Do You Put Water in a Candle Warmer?
You don't put water in a candle warmer. Candle warmers are specifically designed to melt wax, not water. Adding water to a candle warmer can cause damage to the device.
The heat generated by the candle warmer is enough to melt the wax and release the fragrance. To use a candle warmer, simply place the wax melt or candle on the warmer and turn it on to enjoy the delightful scent without any water involved.
Conclusion
In conclusion, using a candle warmer is like creating a cozy sanctuary in your home.
The gentle heat releases the comforting fragrance of your favorite candles, filling the air with warmth and relaxation.
It's a simple yet effective way to elevate your space and set the mood for any occasion.
So next time you want to unwind after a long day, just plug in your candle warmer and let the soothing scents transport you to a place of peace and tranquility.