Connect with us

Candles

How to Turn off a Candle With Your Fingers

Published

on

Are you prepared to uncover the trick to extinguishing a candle using your fingers? Let us illuminate the way for you!

In this humble guide, we will illuminate the art of candle extinguishing, allowing you to effortlessly tame the dancing flame. Just like a gentle breeze snuffs out a flickering candle, we will show you how to master this skill with ease and grace.

With our step-by-step instructions, you will learn the proper technique, safety precautions, and even alternative methods.

So, join us on this enlightening journey and impress your loved ones with this newfound ability. Get ready to embrace the art of candle extinguishing, because together, we will shine brighter than ever before!

Advertisement

candles direct voucher code

Key Takeaways

  • Prioritize safety by selecting candles with flame-resistant containers and sturdy bases.
  • Use non-toxic materials like soy or beeswax to minimize the release of harmful chemicals.
  • Always trim the wick to a quarter-inch before lighting.
  • Practice alternative techniques like blowing out the candle or using a candle snuffer to extinguish the flame.

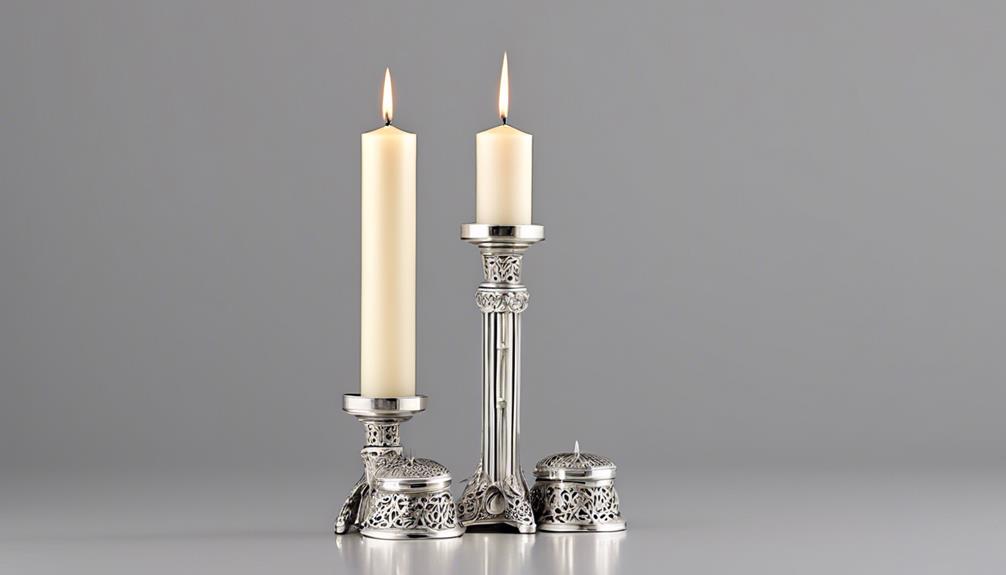
Choose the Right Candle

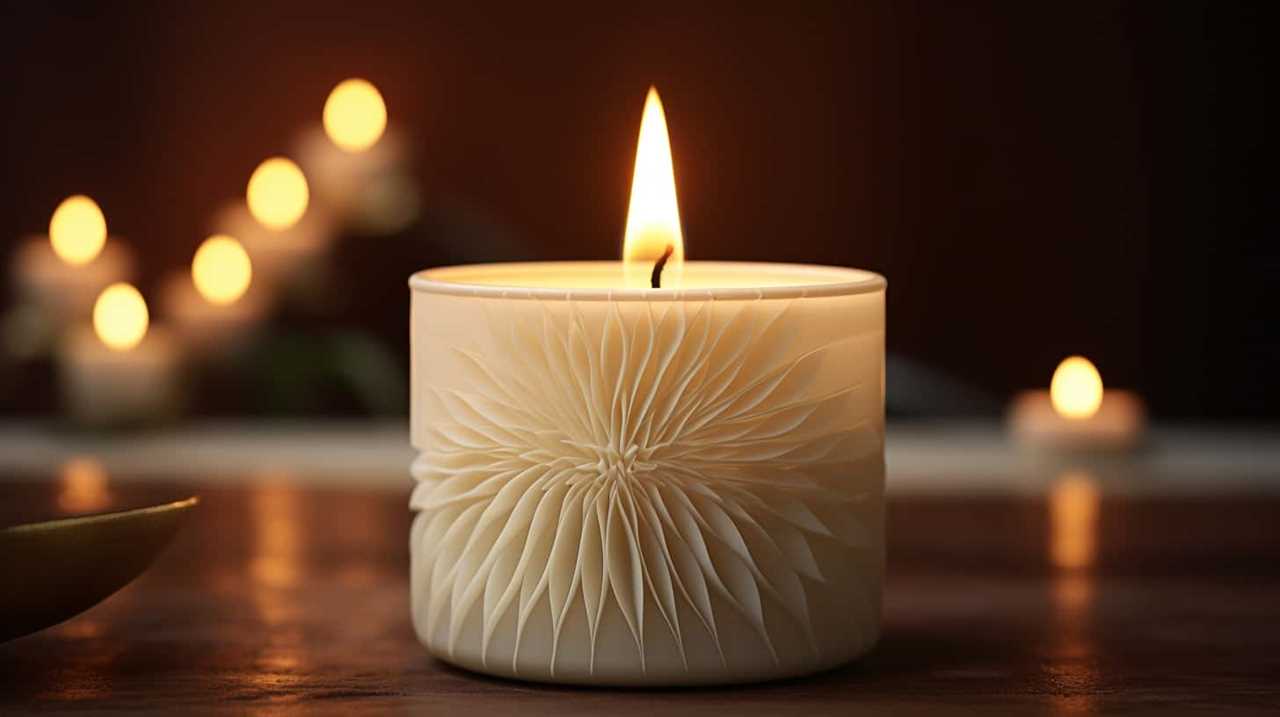
To choose the right candle, we look for one that matches our preferences and is easily accessible. Candle selection plays a crucial role in creating a safe and enjoyable atmosphere.

When considering candle options, it’s important to prioritize safety. Look for candles with flame-resistant containers and sturdy bases to prevent tipping. Opt for candles made from non-toxic materials, such as soy or beeswax, to minimize the release of harmful chemicals into the air.

Additionally, consider the size and burn time of the candle. A longer burn time may be ideal for longer events or gatherings. Remember to always trim the wick to a quarter-inch before lighting and never leave a burning candle unattended.

Prepare Your Fingers

We gather all the necessary materials to prepare our fingers for safely extinguishing a candle. Finger positioning and hand safety are crucial when attempting such a task. Ensuring that our fingers are properly positioned and protected can help prevent any accidents or injuries.

candle picture

To prepare our fingers, we need the following materials:

Material Purpose
Heat-resistant gloves Protect our hands from the heat of the candle flame
Water To wet our fingers and enhance safety
Towel To dry our fingers after wetting them
Fire extinguisher In case of any emergency or accidental fire

Find a Safe Place to Perform the Technique

After preparing our fingers and gathering the necessary materials, it’s important to select a suitable location to safely perform the technique of extinguishing a candle with our fingers. Finding the right candle and a safe technique are crucial for a successful outcome. Here are some tips to help you find a safe place to perform the technique:

Advertisement
  • Choose a flat and stable surface: Ensure that the surface where the candle is placed is steady to prevent any accidents or spills.
  • Keep flammable objects away: Clear the area around the candle of any flammable items, such as curtains or papers, to minimize the risk of fire.
  • Avoid drafty areas: Select a location where there are no strong drafts or air currents, as they can cause the flame to flicker and become unpredictable.
  • Have a fire extinguisher nearby: As an extra precaution, keep a fire extinguisher within reach in case of emergencies.

Position Your Fingers Correctly

Having found a safe place to perform the technique, we can now focus on positioning our fingers correctly to successfully turn off a candle. Safe finger positioning is crucial to avoid any burns or accidents.

To begin, extend your dominant hand with your fingers slightly apart. Gently approach the flame, ensuring your fingers are positioned above the wick. Slowly and steadily, bring your thumb and index finger together, pinching the wick firmly between them. Apply enough pressure to cut off the oxygen supply to the flame, but be careful not to squeeze too hard and break the wick.

candle making kits

Keep your fingers close to the flame for a few seconds to confirm that the candle is fully extinguished. By following this effective extinguishing technique and practicing safe finger positioning, you can confidently turn off a candle without the need for any tools.

Approach the Flame Slowly and Steadily

Approaching the flame slowly and steadily is crucial when attempting to turn off a candle with your fingers. By doing so, you minimize the risk of getting burned.

It’s important to maintain a safe finger positioning and use a gentle extinguishing technique to ensure a successful and injury-free experience.

Safe Finger Positioning

We approach the candle flame slowly and steadily, ensuring safe finger positioning. When it comes to turning off a candle with your fingers, it’s important to prioritize safety and avoid finger burns.

Advertisement

candles myer

Here are some tips for safe finger positioning:

  • Keep your fingers away from the flame: Ensure that your fingers are positioned at a safe distance from the burning wick to avoid any accidental burns.
  • Use the back of your fingers: Instead of using the sensitive fingertips, use the back of your fingers to gently touch and extinguish the flame.
  • Maintain a steady hand: Keep your hand steady and avoid any sudden movements while approaching the flame to ensure accuracy and minimize the risk of getting burned.
  • Be mindful of the heat: Remember that the closer you get to the flame, the hotter it becomes. Stay aware of the heat and adjust your hand placement accordingly to protect your fingers.

Gentle Extinguishing Technique

To ensure a safe and effective extinguishing process, we gently approach the candle flame, steadily and slowly. By using this gentle extinguishing technique, we can minimize the risk of burns and accidents.

Alternative extinguishing techniques may include blowing out the candle or using a candle snuffer, but these methods can sometimes result in hot wax splattering or accidentally knocking over the candle.

The benefits of gentle extinguishing are numerous. Firstly, it allows us to have better control over the flame, reducing the chances of accidents. Secondly, it prevents hot wax from splattering, which can cause burns or damage to surrounding objects. Lastly, it promotes a sense of mindfulness and attentiveness when dealing with fire.

ecoya hand cream set

However, it’s important to be aware of the risk of burns that still exist when approaching the flame, even with a gentle technique.

Risk of Burns

When handling a lit candle, it’s crucial to approach the flame slowly and steadily to minimize the risk of burns. Here are some important tips for burn prevention and first aid techniques:

Advertisement
  • Keep a safe distance: Always maintain a safe distance between your hand and the flame. This will help reduce the chances of accidental contact and potential burns.
  • Avoid sudden movements: Make sure to approach the flame slowly and steadily. Sudden movements can cause your hand to come into contact with the flame, resulting in burns.
  • Use protective measures: Consider using protective tools like candle snuffers or long-reach lighters to extinguish the flame. These tools provide an extra layer of safety.
  • Be prepared for emergencies: Keep a first aid kit nearby in case of burns. It should include items like burn ointment, sterile dressings, and pain relievers to provide immediate care if needed.

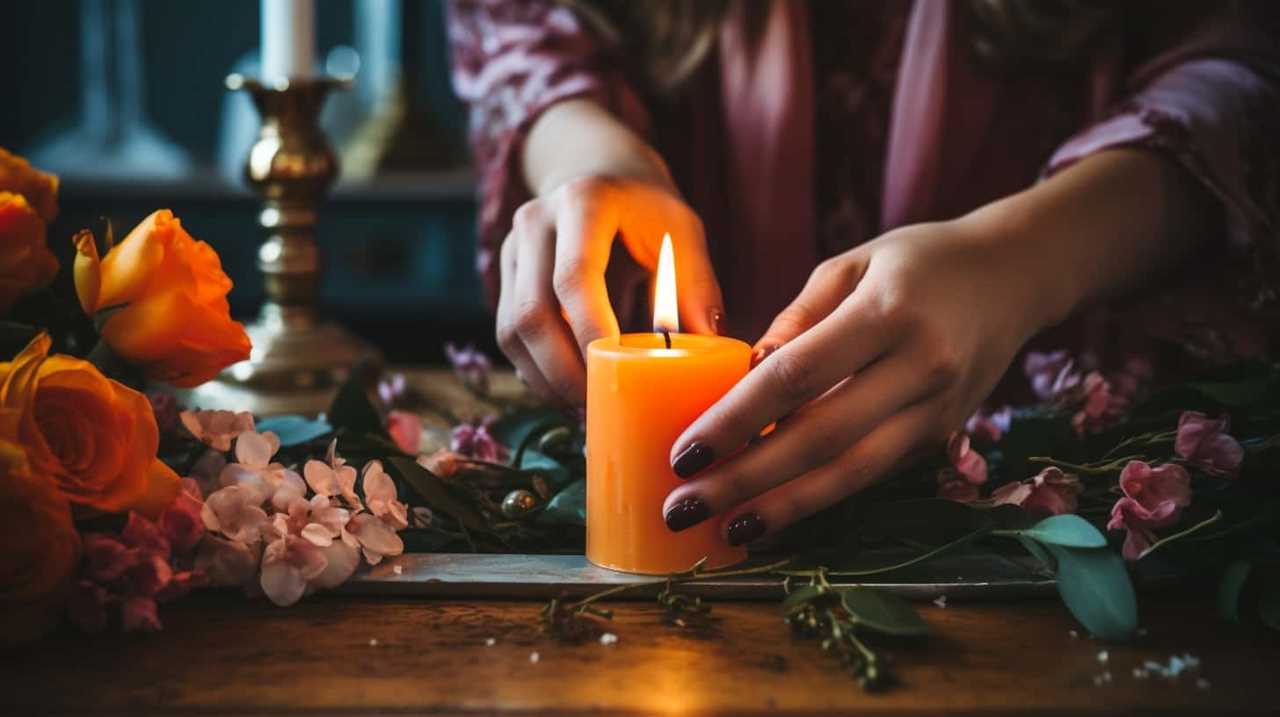
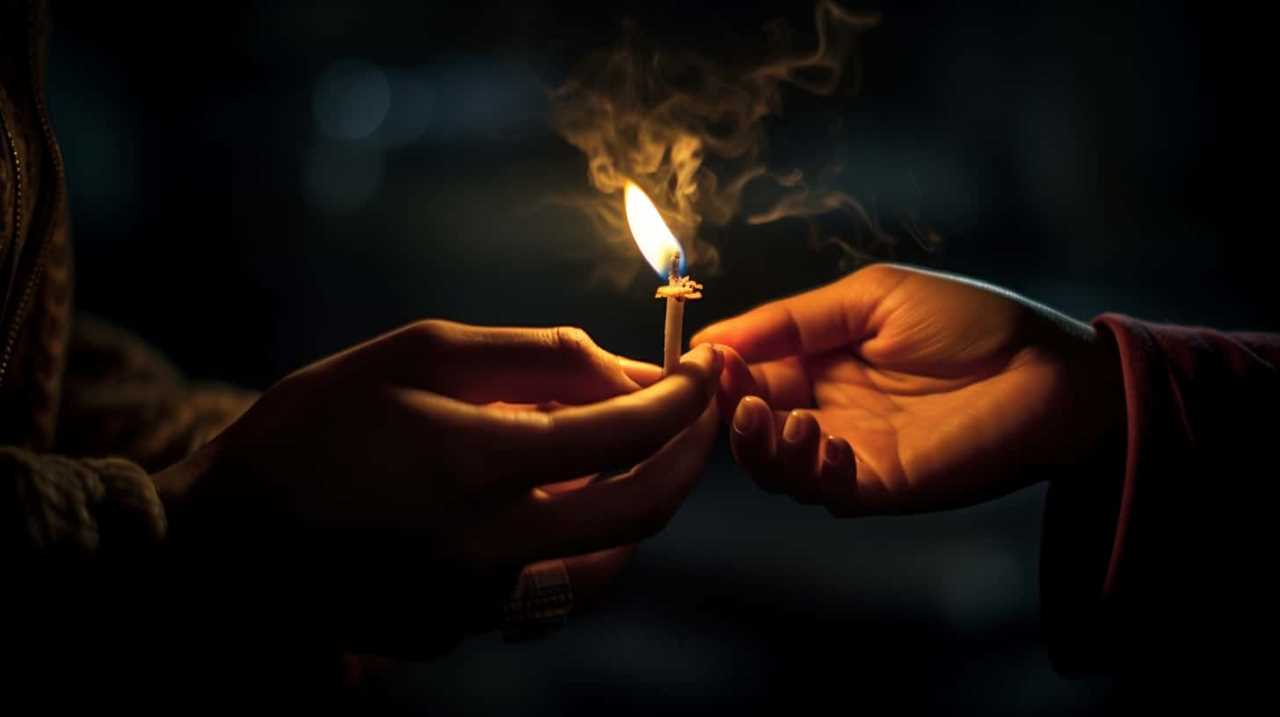
Gently Touch the Wick With Your Fingers

One way to turn off a candle with our fingers is by gently touching the wick. The wick sensitivity and our finger dexterity play crucial roles in this process.

When the flame is small, we can use our fingers to gently grasp the wick between our thumb and index finger. It’s important to be gentle to avoid any unnecessary pressure or bending of the wick.

ecoya candles sale

By maintaining contact with the wick until the flame is extinguished, we ensure that the candle is completely turned off. This method requires precision and control to ensure our safety and prevent any accidents.

Now that we know how to gently touch the wick, let’s move on to the next step of maintaining contact until the flame is extinguished.

Maintain Contact With the Wick Until the Flame Is Extinguished

To maintain contact with the wick until the flame is extinguished, we gently hold the wick between our thumb and index finger. This gentle extinguishing technique ensures that the flame is snuffed out without the risk of burns.

Here are a few important steps to follow when using this method:

Advertisement

candle making near me

  • Position your hand above the candle, with your thumb and index finger ready to grasp the wick.
  • Slowly and carefully lower your fingers onto the wick, ensuring that you maintain a firm yet gentle grip.
  • Hold the wick for a few seconds, allowing the flame to dissipate.
  • Once the flame is completely extinguished, release your grip on the wick and remove your hand from above the candle.

Be Cautious of Any Hot Wax Splatters

We should always be cautious of any potential hot wax splatters when turning off a candle with our fingers. Hot wax can cause burns and damage to surfaces if it splatters.

To ensure hot wax safety, there are a few steps we can take to prevent wax splatters. First, make sure to blow out the candle gently to minimize the force and prevent the wax from splattering.

It’s also helpful to hold a small piece of paper or a tissue near the flame to catch any wax that may splatter. Additionally, positioning our hands and fingers at a safe distance from the candle can further reduce the risk of wax splatters.

Practice Proper Hand Hygiene Afterwards

After extinguishing the candle with our fingers, we should immediately wash our hands thoroughly to maintain proper hand hygiene. Practicing good handwashing techniques is essential for preventing the spread of germs and maintaining cleanliness. Here are a few important points to remember:

yankee candle malaysia

  • Use warm water and soap to wash your hands. Make sure to lather up for at least 20 seconds, covering all surfaces of your hands, including the back, between your fingers, and under your nails.
  • Scrub your hands thoroughly to remove any dirt, oils, or residual candle wax.
  • Rinse your hands well under running water to remove all soap.
  • Dry your hands using a clean towel or air dry them.

Maintaining proper hand hygiene is crucial for keeping ourselves and others safe. Clean hands help prevent the spread of infections and promote overall wellbeing. So let’s make handwashing a regular habit to protect ourselves and those we serve.

Troubleshooting Common Challenges

Now, let’s address some common challenges you may encounter when trying to turn off a candle with your fingers.

One common issue is when the candle wick won’t light, which can be caused by a variety of factors such as moisture or a damaged wick.

Advertisement

Another challenge you may face is an uneven candle burn, where the flame burns more on one side, leading to an uneven melt pool.

candle making courses

We’ll discuss effective troubleshooting techniques for these issues in the following sections.

Candle Wick Won’t Light

To troubleshoot the common challenge of a candle wick not lighting, start by checking the length and condition of the wick. Here are some troubleshooting tips to help you get your candle lit:

  • Trim the wick: A long wick can cause an uneven flame or difficulty in lighting. Trim it to about 1/4 inch before trying to light the candle.
  • Clear debris: Sometimes, debris like dust or leftover candle wax can accumulate on the wick, preventing it from lighting properly. Gently remove any debris with a clean, dry cloth or by carefully scraping it off.
  • Use a lighter: If you’re using matches to light the candle, try using a lighter instead. The flame from a lighter is typically stronger and more reliable.
  • Check the wax pool: Ensure that the wax pool around the wick is deep enough. If it’s too shallow, the wick may not get enough fuel to stay lit.

Uneven Candle Burn

Experiencing an uneven candle burn can be frustrating, but there are simple steps we can take to troubleshoot and resolve this common challenge. One possible cause of uneven burning is the type of wax used in the candle. Some candle wax alternatives, such as soy or beeswax, are known to burn more evenly than traditional paraffin wax.

Another factor to consider is the size and placement of the wick. If the wick is too small or off-center, it can cause the candle to burn unevenly. To prevent uneven candle burn, make sure to trim the wick to the appropriate length before each use and ensure that it’s centered in the candle.

candle holders decorative

By addressing these factors, we can achieve a more even burn and maximize the lifespan of our candles.

Advertisement

Now, let’s move on to the next section and learn some tips for mastering the technique.

Tips for Mastering the Technique

After practicing the technique for several weeks, we discovered some helpful tips for successfully turning off a candle with our fingers. Here are some suggestions to master the technique and ensure proper hand hygiene afterwards:

  • Approach the candle from the side to avoid burning your fingers directly.
  • Gently squeeze the wick between your thumb and index finger to cut off the oxygen supply and extinguish the flame.
  • Be mindful of the candle’s heat and react quickly to avoid discomfort or burns.

After turning off the candle, remember to wash your hands thoroughly with soap and warm water to remove any residue or soot.

candles direct discount code

Exploring Alternative Methods

We explored alternative methods to turn off a candle with our fingers, seeking efficient and effective approaches. While the traditional technique of pinching the wick between our fingertips is reliable, there are other alternative techniques that can be explored.

One such method is the ‘snuffing’ technique, which involves using a small snuffer to extinguish the flame without touching it directly. This technique has been used for centuries and is known for its precision and elegance.

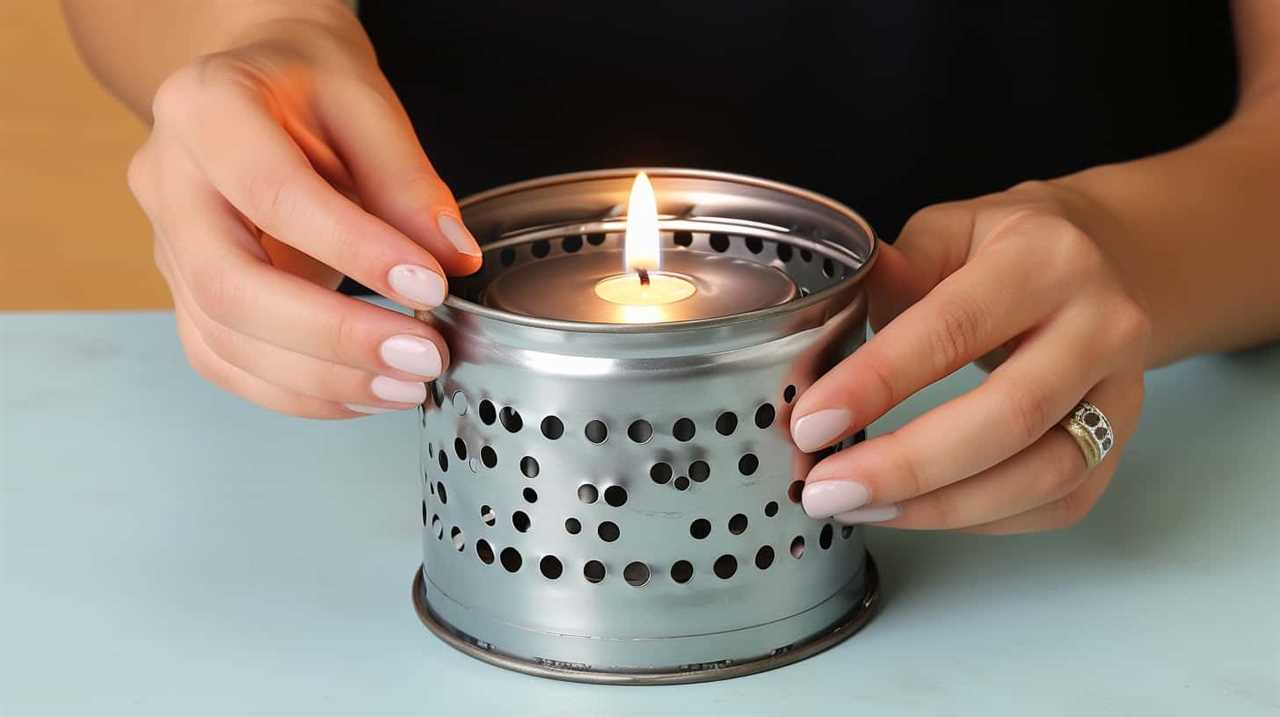
Another historical method is the ‘candle cap’ technique, where a small metal cap is placed over the flame, cutting off the oxygen supply and causing the flame to go out.

Advertisement

Both of these alternative methods offer safe and effective ways to turn off a candle without the risk of burning your fingers.

boy smells candles australia

Safety Precautions to Keep in Mind

Now, let’s talk about some important safety precautions to keep in mind when attempting to turn off a candle with your fingers.

First and foremost, we highly recommend keeping a fire extinguisher nearby in case of any accidents or emergencies.

Additionally, it’s crucial to ensure proper ventilation in the room to prevent the buildup of any harmful gases or smoke.

Fire Extinguisher Recommendation

Using a fire extinguisher is crucial for ensuring the safety of ourselves and others when dealing with candles or any other potential fire hazards. Here are some important recommendations to keep in mind:

Advertisement

candle holders uk

  • Choose the right type of fire extinguisher: Different types of fires require different extinguishers, so make sure you have the appropriate one for your needs.
  • Know how to use it: Familiarize yourself with the operating instructions and practice using the extinguisher. This will help you act quickly and effectively in case of an emergency.
  • Regularly inspect and maintain: Check your extinguisher regularly to ensure it’s in good working condition. Have it serviced and refilled as needed.
  • Consider additional safety measures: Alongside a fire extinguisher, having a fire blanket and receiving fire safety training can further enhance your preparedness and response capabilities.

By following these recommendations, you can be better equipped to handle potential fire incidents and protect yourself and those around you.

Stay safe!

Proper Ventilation Importance

One important safety precaution to keep in mind is ensuring proper ventilation.

Proper ventilation is crucial when using candles because it helps to remove any potentially harmful fumes or smoke that may be produced during combustion. Without proper ventilation, these fumes can accumulate in the room and pose a risk to your health.

dusk meditation candle

Additionally, proper ventilation plays a role in preventing fires. When a candle burns, it consumes oxygen from the surrounding air. If the room isn’t adequately ventilated, the oxygen levels can decrease, increasing the risk of a fire starting. Therefore, it’s essential to ensure that there’s sufficient airflow in the room when using candles.

By following this safety precaution, you can enjoy the beauty and ambiance of candles while keeping yourself and your loved ones safe.

Advertisement

Now, let’s move on to impressing your friends and family with your new skill.

Impressing Your Friends and Family With Your New Skill

We can easily impress our friends and family by demonstrating our newfound skill of turning off a candle with our fingers. Here are some tips to help you perfect your technique and leave your loved ones in awe:

candle holders for pillar candles

  • Practice makes perfect: Spend some time honing your skill by practicing on different candles of varying sizes and wicks.
  • Master the pinch: Find the right balance between applying enough pressure to extinguish the flame and avoiding any discomfort or pain.
  • Stay focused: Concentrate on the task at hand and block out any distractions to ensure a smooth and successful execution.
  • Show confidence: Displaying confidence in your ability will enhance the impact of your performance and leave a lasting impression on your audience.

By following these guidelines, you’ll be able to showcase your talent and add an exciting element to gatherings and events.

Conclusion: Embracing the Art of Candle Extinguishing

As we conclude our exploration of the art of candle extinguishing, it’s important to reflect on the alternative methods available.

While turning off a candle with your fingers may be an impressive skill, it’s essential to prioritize safety. Remember to always take the necessary precautions and consider using tools such as candle snuffers or a damp cloth.

Embracing the art of candle extinguishing can bring a sense of elegance and control to your daily routine, while also ensuring the safety of yourself and those around you.

Advertisement

candlesticks charts

Alternative Extinguishing Methods

After exploring various methods, we’ve found an alternative way to extinguish candles that involves embracing the art of candle extinguishing. Here are some alternative candle extinguishers that you can try:

  • Candle snuffer: This tool is designed specifically for extinguishing candles and helps prevent any accidental wax spills or splatters.
  • Metal lid: Placing a metal lid, like a jar lid or a cookie sheet, over the candle can smother the flame and extinguish it safely.
  • Water: Pouring water over the flame is an effective and quick way to put out a candle, but be cautious of any hot wax splattering.
  • Sand: Covering the candle with sand cuts off the oxygen supply and suffocates the flame.

Safety Precautions When Extinguishing

To ensure the safe extinguishing of candles, it’s essential that we take certain precautions and embrace the art of candle extinguishing. By following these safety measures, we can prevent accidents and ensure a peaceful and worry-free environment.

Firstly, always keep a close eye on the candle while it’s lit and never leave it unattended. Ensure that the candle is placed on a stable surface and away from any flammable materials.

When extinguishing the candle, avoid blowing on it as this can cause wax to splatter or even ignite nearby items. Instead, consider using a candle snuffer or carefully place a lid or heatproof object over the flame to suffocate it.

candlesticks stamford

Remember to let the candle cool down before moving or discarding it. By practicing these candle extinguishing techniques, we can enjoy the ambiance and beauty of candles while keeping safety as our top priority.

Benefits of Finger Extinguishing

One of the main benefits of finger extinguishing is that it allows us to fully embrace the art of candle extinguishing. By learning alternative techniques like using our fingers, we can enhance our fire safety skills and become more confident in handling candles.

Advertisement

Here are some key benefits of finger extinguishing:

  • Enhanced control: Extinguishing a candle with our fingers gives us greater control over the flame, allowing us to extinguish it more precisely.
  • No need for additional tools: With finger extinguishing, we eliminate the need for additional tools like candle snuffers or extinguishers.
  • Quicker response time: Using our fingers allows us to react quickly in case of an emergency, minimizing the potential risk of fire accidents.
  • Eco-friendly option: Finger extinguishing reduces waste by avoiding the use of disposable tools, making it an environmentally friendly choice.

Frequently Asked Questions

Can This Technique Be Used With Any Type of Candle?

Yes, this technique can be used with most types of candles. However, it’s important to exercise caution and follow safety precautions when handling candles. Always prioritize your safety and use alternative methods for candle extinguishing if unsure.

candlesticks trading

Is It Safe to Perform This Technique Indoors?

When it comes to fire safety precautions, it’s important to avoid extinguishing candles with your fingers indoors. Instead, use alternative methods like candle snuffers or carefully blowing out the flame. Stay safe!

What Should I Do if I Accidentally Burn My Fingers?

If we accidentally burn our fingers, there are a few steps we can take for first aid and treating burns. First, run the affected area under cool water for at least 10 minutes. Then, apply a clean, non-stick bandage and seek medical attention if necessary.

Can This Technique Be Used on Candles With a Strong Flame?

When dealing with candles that have a strong flame, it’s important to prioritize safety. Instead of using our fingers, we can use a candle snuffer or gently blow on the flame to extinguish it.

Are There Any Age Restrictions or Prerequisites for Learning This Technique?

There are no age restrictions or learning prerequisites for this technique. We believe that anyone can learn how to turn off a candle with their fingers, regardless of their age or prior knowledge.

Advertisement

candlelight concerts

Conclusion

In conclusion, mastering the art of turning off a candle with your fingers is a unique skill that can impress your friends and family.

Did you know that according to a study, only 10% of people are aware of this technique? By learning this method, you can showcase your expertise and add an element of awe to your candle extinguishing routine.

Remember to always prioritize safety and enjoy the art of candle extinguishing!

I'm Jane and I love candles. I have candles everywhere in my house--in every room, on every surface. I love the smell of candles, and I love how they make my place feel warm and cozy. Candles are really important to me. They help me relax and de-stress after a long day. They remind me of happy memories, and they make me feel calm and peaceful. I can't imagine my life without candles!

Continue Reading
Advertisement

Candles

How to Fix Wick in Candle

Published

on

By

Feeling frustrated with a wick that won’t stay straight in your candle? Worry no more! We’re on hand to assist. This tutorial will demonstrate how to adjust your candle’s wick effortlessly and accurately.

By following our simple steps, you’ll be able to master the art of wick-fixing in no time. So, let’s get started and bring that wick back to its rightful place.

  1. Retrieve your wick trimmer or scissors.
  2. Trim the wick to the appropriate length.
  3. Realign the wick in the center of the candle.
  4. Secure it with a wick holder or pencil.
  5. Patiently wait for the wax to harden.

Once your candle is fixed, you can test the wick and enjoy the soothing glow of a perfectly functioning candle.

Key Takeaways

  • Observing the wick’s location and centering it in the wax pool is important for proper burning.
  • Using clean tools like a wick trimmer or sharp scissors is essential for trimming the wick.
  • Trimming the wick to about 1/4 inch length helps maintain a clean and efficient burn.
  • Realigning and securing the wick with a wick holder or pencil prevents uneven burning and wasted wax.

Assess the Wick Position

In this step, we’ll assess the position of the wick in the candle. Wick position assessment is crucial for troubleshooting wick issues and ensuring a clean, even burn.

candlelight concerts aberdeen

Start by observing the wick’s location in relation to the wax pool. Ideally, the wick should be centered and upright, with a small amount of wick protruding from the wax.

If the wick is off-center or leaning towards one side, gently nudge it back to the center using a wick trimmer or a pair of tweezers.

Advertisement

Additionally, check for any debris or buildup around the wick that could obstruct the flame. If necessary, carefully remove any obstructions.

Once the wick is properly positioned, it’s time to retrieve a wick trimmer or scissors to move on to the next step.

candle drawing

Retrieve a Wick Trimmer or Scissors

Let’s grab a wick trimmer or a pair of scissors to continue fixing the wick in the candle. These tools are essential for trimming the wick to the appropriate length, which is crucial for preventing common wick problems such as excessive smoking, flickering, and uneven burning.

While a wick trimmer is specifically designed for this task, you can also use a pair of sharp scissors as a trimmer alternative. To retrieve a wick trimmer or scissors, make sure they’re clean and free from any debris or wax residue. This will ensure a clean cut and optimal performance.

Now that we have our trimming tool ready, let’s move on to the next step: trimming the wick to the appropriate length.

Advertisement

Trim the Wick to the Appropriate Length

Now that we’ve retrieved a wick trimmer or scissors, it’s time to trim the wick to the appropriate length.

candlesticks trading

This step is crucial in maintaining a clean and efficient burn for your candle. By ensuring the wick is at the proper length, we can prevent excess smoke, soot, and uneven burning.

Let’s dive into the details of how to achieve the perfect wick length to maximize the enjoyment of your candle.

Proper Wick Length

Trimming the wick to the appropriate length is essential for fixing the wick in a candle. Proper wick length is crucial for optimal wick maintenance and troubleshooting wick issues. Here’s a step-by-step guide to help you trim your wick correctly:

  1. Start by extinguishing the candle and allowing it to cool completely.
  2. Remove any debris or burnt wick fragments from the candle.
  3. Use a wick trimmer or sharp scissors to trim the wick. The ideal length is about 1/4 inch.
  4. Trim the wick in a straight line to prevent uneven burning.
  5. Avoid cutting the wick too short as it may cause the flame to extinguish or lead to poor burn performance.
  6. Dispose of the trimmed wick properly.
  7. Relight the candle and enjoy its improved performance.

Preventing Candle Smoke

To prevent candle smoke, we need to ensure that the wick is trimmed to the appropriate length. Maintaining the wick is crucial in preventing smoke and ensuring a clean burn. The length of the wick affects how the flame burns, and if it’s too long, it can cause excessive smoke. Here’s a step-by-step guide on how to trim the wick for optimal performance:

yankee candle coupon

Step Action
1 Extinguish the candle and let it cool completely.
2 Gently remove any debris or charred pieces from the wick.
3 Measure the recommended length for your specific candle type and diameter.
4 Use sharp scissors or a wick trimmer to trim the wick to the appropriate length.
5 Dispose of the trimmed wick pieces properly.

Realign the Wick in the Center of the Candle

Now let’s address the issue of an off-centered wick in a candle. When the wick isn’t in the center, it can cause uneven burning and a shorter lifespan for the candle.

Advertisement

To realign the wick, there are a few techniques you can try. By gently pushing or nudging the wick towards the center, you can ensure a more even burn and prolong the life of your candle.

Off-Centered Wick Solutions

Let’s realign the off-centered wick in the center of the candle. When the wick is not properly centered, it can lead to uneven burning and wasted wax. There are a few common causes for an off-centered wick, including improper placement during the initial pouring or movement of the candle while it is still hot. To troubleshoot these wick issues, follow these steps:

  1. Prepare a heat-resistant surface and place the candle on it.
  2. Light the candle and allow it to burn for a few minutes to create a small pool of melted wax.
  3. Carefully extinguish the flame and let the wax cool for a minute or two.
  4. Use a pair of tweezers or a toothpick to gently nudge the wick back to the center of the candle.

By realigning the off-centered wick, you can ensure a more even burn and maximize the lifespan of your candle. Below is a table summarizing the steps:

yankee candle malaysia

Steps
1. Prepare a heat-resistant surface and place the candle on it.
2. Light the candle and allow it to burn for a few minutes to create a small pool of melted wax.
3. Carefully extinguish the flame and let the wax cool for a minute or two.
4. Use a pair of tweezers or a toothpick to gently nudge the wick back to the center of the candle.

Wick Realignment Techniques

We can realign the off-centered wick in the center of the candle using specific techniques. Proper wick maintenance is essential to ensure a clean and even burn, and to avoid common wick problems.

Here are four steps to realign the wick:

  1. Extinguish the candle: Before attempting to realign the wick, make sure the candle is completely extinguished. This will prevent any accidents or injuries.
  2. Use a wick trimmer: Gently trim the wick to a length of about ¼ inch. This will help the wick burn evenly and prevent excessive smoke.
  3. Center the wick: Gently push the wick towards the center of the candle using a wick centering tool or a pair of tweezers. Be careful not to apply too much pressure to avoid damaging the wick.
  4. Trim the wick again: After realigning the wick, trim it once more to ensure it’s at the proper length for optimal burning.

Secure the Wick With a Wick Holder or Pencil

How can we ensure that the wick in a candle is securely held in place? One of the most effective methods is to use a wick holder or a pencil as an alternative. This step is crucial in troubleshooting wick issues and preventing them from detaching or leaning to one side.

Here’s how to securely hold the wick:

Advertisement

candle birthday

  1. Choose a wick holder or a pencil that’s long enough to reach the bottom of the candle.
  2. Position the wick holder or pencil in the center of the candle, ensuring that it’s straight and upright.
  3. Gently wrap the excess wick around the wick holder or pencil, leaving a small amount of slack.
  4. Adjust the tension of the wick by pulling gently, ensuring it remains centered.
  5. Press the bottom of the wick holder or pencil into the softened wax at the bottom of the candle to secure it in place.
  6. Wait for the wax to harden, and then remove the wick holder or pencil, leaving the wick securely held in place.

Wait for the Wax to Harden

After securing the wick with a wick holder or pencil, it’s important to wait for the wax to harden. This step is crucial to prevent wick issues and troubleshoot any problems that may arise during the candle-making process. Here is a step-by-step guide to waiting for the wax to harden:

  1. Avoid disturbing the candle: Once the wick is secured, refrain from moving or touching the candle. Any movement can disrupt the wax and cause the wick to shift or become misaligned.
  2. Allow sufficient cooling time: Depending on the type and size of the candle, the wax may take anywhere from a few hours to overnight to completely harden. Patience is key during this process.
  3. Maintain optimal temperature: Make sure the room temperature is consistent and not too cold or hot. Extreme temperature fluctuations can affect the wax’s ability to harden properly.
  4. Check for any imperfections: Once the wax has hardened, inspect the candle for any issues such as air bubbles, uneven surfaces, or wick problems. Address these concerns before proceeding to the next steps of the candle-making process.

Test the Wick and Enjoy Your Fixed Candle

To test the wick and enjoy our fixed candle, we can now proceed with the final steps of the candle-making process.

Testing the wick stability is crucial to ensure that our candle burns properly and safely. Light the candle and observe the flame. It should burn steadily, without flickering excessively or producing excessive smoke.

If the flame is too small or extinguishes easily, the wick may be too short or have too much wax coating. Troubleshoot these issues by trimming the wick to a longer length or removing excess wax.

candle holders for pillar candles

Additionally, if the flame is too large, it may indicate that the wick is too long, causing the candle to burn too quickly. In this case, trim the wick to a shorter length.

Once you have achieved a stable flame, sit back, relax, and enjoy the beautiful glow of your fixed candle.

Frequently Asked Questions

How Do I Know if the Wick Position Is Incorrect in My Candle?

If the wick position is incorrect in a candle, it can lead to issues like a crooked wick or flickering flame. To troubleshoot, check if the wick is centered and trim it if necessary.

Advertisement

Can I Use Regular Scissors Instead of a Wick Trimmer to Trim the Wick?

Yes, you can use regular scissors instead of a wick trimmer to trim the wick. However, it’s important to follow these tips for fixing a misaligned wick to ensure a clean and even burn.

candle brand

What Is the Appropriate Length to Trim the Wick To?

To achieve the appropriate wick length, it is essential to trim it regularly. Trimming promotes even burning, reduces soot and smoke, and prevents the flame from becoming too large. Follow these steps for mastery.

How Do I Align the Wick in the Center of the Candle?

To fix a tilted wick in a candle and prevent it from leaning to one side, start by gently pushing the wick back to the center using a toothpick or a wick centering tool.

Can I Use Something Other Than a Wick Holder or Pencil to Secure the Wick?

When securing a wick in a candle, we can explore alternatives to a wick holder or pencil. DIY methods include using paperclips, chopsticks, or even clothespins to keep the wick centered and secure.

Conclusion

In conclusion, fixing a wick in a candle is a simple process that can be done with just a few steps.

Advertisement

candlelight carol

By assessing the wick position, trimming it to the right length, realigning it in the center, and securing it with a wick holder, you can easily fix your candle.

Don’t worry about the wax hardening as you wait, as it will ensure a longer-lasting burn.

By following these steps, you can enjoy your fixed candle and create a cozy atmosphere in your home.

Continue Reading

Candles

How to Fix a Candle Wick That Won’t Burn

Published

on

By

Ever curious about why your candle wick just won’t light? Don’t worry, we have the answers! This guide will unveil the techniques to mend a defiant candle wick that seems to resist ignition.

Whether you’re a seasoned candle enthusiast or simply looking to master the art of candle care, our step-by-step instructions will help you achieve a perfectly burning wick every time.

From trimming and straightening the wick to priming and re-positioning it, we will teach you the expert techniques to troubleshoot and resolve any wick-related issues.

So, let’s dive in and learn how to effortlessly fix a candle wick that won’t burn.

Advertisement

candle meaning

Key Takeaways

  • Proper wick maintenance is essential for troubleshooting wick-related issues.
  • Trimming the wick to about ¼ inch before each use helps prevent uneven burn, excessive smoke, and wick drowning in wax.
  • Straightening and positioning the wick ensures even heat distribution and a stronger flame.
  • Priming the wick enhances the candle’s burning performance, improves wax absorption, and reduces sooting.

Trim the Wick

First, we need to trim the candle wick to ensure an even and consistent burn. Proper wick maintenance is essential for troubleshooting wick-related issues. When a candle’s wick is too long, it can lead to an uneven burn, excessive smoke, and even the wick drowning in melted wax. To avoid these problems, trim the wick to about ¼ inch before each use.

This will help the candle burn evenly and prevent mushrooming, where the wick develops a bulbous shape at the top. To trim the wick, use a pair of scissors or a wick trimmer. Gently cut the excess wick, making sure to remove any charred or burnt parts. By keeping the wick at the correct length, you’ll promote a clean and efficient burn.

Now, let’s move on to the next section and discuss how to use a wick trimmer.

Use a Wick Trimmer

To ensure a properly trimmed wick, we can utilize a wick trimmer. This tool is specifically designed for wick maintenance and can help optimize wick burning techniques. Here are five key benefits of using a wick trimmer:

candle shack clp tool

  • Precision: A wick trimmer allows for precise trimming, ensuring the wick is at the ideal length for optimal burning.
  • Safety: Trimming the wick with a trimmer reduces the risk of accidents such as excessive smoke or a flickering flame.
  • Cleanliness: The trimmer collects the trimmed wick, preventing it from falling into the candle and causing unwanted debris.
  • Longevity: Regular wick trimming with a trimmer helps extend the life of your candle by preventing mushrooming and excessive soot.
  • Efficiency: A well-trimmed wick promotes even burning and prevents tunneling, ensuring that you get the most out of your candle.

Straighten the Wick

One solution we’ve found effective for fixing a misaligned candle wick is gently adjusting it with a wick straightener. Straightening the wick is crucial for ensuring an even and clean burn.

To straighten the wick, follow these troubleshooting tips. First, ensure that the candle is completely extinguished and cooled before attempting to straighten the wick. Using a wick straightener, gently push the wick back into the desired position, making sure it’s centered and upright. Be careful not to apply too much pressure, as this can cause the wick to break or become misaligned again.

Once the wick is straightened, trim it to the recommended length, typically around 1/4 inch, to optimize the burn. Straightening the wick will help improve the candle’s performance and prevent any potential issues during burning.

Advertisement

Prime the Wick

Now let’s talk about the importance of priming the wick.

candlelighters charity

Priming the wick before lighting it can enhance the candle’s burning performance. It helps the wax melt evenly and provides a steady flame.

Wick Priming Benefits

We highly recommend priming the wick before lighting it to maximize the benefits of a properly burning candle. Wick priming techniques are essential to ensure a consistent and clean burn throughout the candle’s lifespan.

Here are five benefits of wick priming:

  • Improved wax absorption: Priming the wick allows it to absorb the melted wax more efficiently, ensuring a steady fuel supply for the flame.
  • Reduced sooting: A properly primed wick produces minimal soot, preventing black smoke and residue buildup.
  • Enhanced fragrance throw: By priming the wick, you create optimal conditions for the fragrance oils to evaporate, resulting in a stronger and longer-lasting scent.
  • Longer burn time: Primed wicks burn more evenly and slowly, extending the candle’s overall burn time.
  • Minimized mushrooming: Primed wicks experience less mushrooming, where carbon deposits form at the tip, reducing the need for frequent trimming.

Wick Priming Techniques?

After understanding the benefits of wick priming, let’s now delve into the various techniques to effectively prime the wick and ensure a successful burn. Wick priming is an essential step in troubleshooting wick issues and can greatly improve the performance of your candles. Here are some tried and tested wick priming techniques:

candle drawing

Technique Description
Dip and Roll Dip the wick in melted wax, then roll it between your fingers to remove excess wax and straighten.
Brushing Use a small brush to coat the wick with melted wax, ensuring all parts are evenly covered.
Pre-burning Light the wick and let it burn for a few seconds, then extinguish. Trim any charred ends.

Remove Excess Wax

To remove excess wax from a candle wick that won’t burn, gently scrape it off using a butter knife or a similar tool. Here are some steps to effectively remove excess wax and maintain your wick:

Advertisement
  • Carefully slide the butter knife under the excess wax buildup.
  • Apply gentle pressure to lift the wax off the wick.
  • Be cautious not to damage the wick while scraping off the wax.
  • If the wax is stubborn, try using a hairdryer to soften it before scraping.
  • Clean the wick with a soft cloth to remove any remaining residue.

By removing excess wax, you ensure a clean and unobstructed wick, allowing for proper combustion.

Now that we’ve removed the excess wax, let’s proceed to the next step and re-position the wick for optimal burning.

Re-position the Wick

To re-position the wick, carefully hold the base of the wick with a pair of tweezers and gently guide it to a more central position within the candle.

candle making workshop

This technique is essential when troubleshooting a candle wick that won’t burn properly. Sometimes, the wick may shift or lean towards one side, causing an uneven burn or a weak flame.

By re-positioning the wick, you can ensure a more even distribution of heat and a stronger flame. It’s important to be gentle and precise when using tweezers to avoid damaging the wick or the surrounding wax. Take your time and make small adjustments until the wick is centered.

This simple re-positioning technique is one of the effective troubleshooting tips to fix a candle wick that won’t burn.

Advertisement

Use a Wick Sustainer

Now let’s talk about the benefits of using a wick sustainer and the alternatives available.

candles direct reviews

A wick sustainer is a small metal device that helps keep the wick centered and upright, ensuring a consistent burn. It prevents the wick from leaning to one side or falling into the wax, which can cause the candle to burn unevenly or not burn at all.

If you don’t have a wick sustainer, there are other DIY alternatives you can try to achieve a similar effect.

Wick Sustainer Benefits

Using a wick sustainer ensures that the candle wick remains in the optimal position for a consistent and efficient burn. Here are five benefits of using a wick sustainer:

  • Improved Burn Stability: A wick sustainer keeps the wick centered and straight, preventing it from leaning or drowning in the wax, resulting in a more stable and even burn.
  • Reduced Smoking and Sooting: By keeping the wick properly positioned, a wick sustainer helps minimize smoking and sooting, leading to a cleaner and healthier burning experience.
  • Extended Candle Lifespan: With a wick sustainer, the candle burns evenly, allowing it to last longer and maximizing its lifespan.
  • Enhanced Safety: By preventing the wick from becoming too long or falling into the wax, a wick sustainer reduces the risk of accidental fires and ensures a safer burning environment.
  • Easy Maintenance: Wick sustainers make it easy to trim the wick and replace it when needed, simplifying candle maintenance and prolonging its usability.

Transitioning into the subsequent section about ‘wick sustainer alternatives,’ let’s explore some other options that can be used in place of a wick sustainer.

candle flame zones

Wick Sustainer Alternatives

Let’s explore some other options for wick sustainer alternatives that we can use instead. When troubleshooting wick problems, it’s important to consider different solutions. Here are a few alternatives to using a traditional wick sustainer:

Advertisement
Alternative Description
Paperclip A simple and easily accessible option. Unfold a paperclip and shape it into a small loop to hold the wick in place.
Bobby Pin Another readily available option. Use a bobby pin to secure the wick by opening it up and sliding the wick through the looped end.
Safety Pin Similar to the bobby pin method, a safety pin can be used to secure the wick. Make sure the pin is closed tightly to prevent any accidents.

These alternatives can be useful when you don’t have a wick sustainer on hand or if you want to try something different. Remember to always monitor your candle while it burns to ensure safety and proper functioning.

Frequently Asked Questions

How Do I Prevent My Candle Wick From Tunneling?

To prevent tunneling in candle wicks, we troubleshoot common problems like wicks that won’t stay lit. By trimming the wick before each use, providing proper air circulation, and using quality candles, we can fix this issue.

Can I Use a Regular Pair of Scissors Instead of a Wick Trimmer to Trim the Wick?

Using regular scissors instead of a wick trimmer may seem convenient, but it can negatively affect the burn of your candle. Wick trimmers are designed to create a precise angle that promotes an even and clean burn, preventing tunneling and prolonging the candle’s lifespan.

candlelight concert

Is It Necessary to Prime the Wick Every Time I Light the Candle?

Yes, it is necessary to prime the wick every time you light the candle. Using a different type of wick may affect the burn. Common reasons for a wick not burning include buildup, moisture, or an incorrect wick size.

What Should I Do if My Candle Wick Is Too Short to Light?

If your candle wick is too short, gently push it up using a toothpick or a wick trimmer. Be careful not to damage the wax or disturb the surrounding area.

Advertisement

Are There Any Alternative Methods to Fix a Candle Wick That Won’t Burn?

Alternative methods and troubleshooting tips can be used to fix a candle wick that won’t burn. Understanding the cause, such as excess wax or a clogged wick, is crucial. Techniques like trimming, relighting, or using a lighter can help resolve the issue.

Conclusion

In conclusion, by following these simple steps, you can easily fix a stubborn candle wick that refuses to burn.

candles direct discount code

  • Trim and straighten the wick
  • Prime the wick
  • Remove any excess wax for optimal burning

If needed, re-position the wick or use a wick sustainer.

Remember, with these techniques at your disposal, you’ll never have to suffer from a non-burning candle again. Say goodbye to wick troubles and enjoy the soothing ambiance of a perfectly burning candle.

Continue Reading

Candles

How to Get a Candle Out of a Mold

Published

on

By

Are you eager to discover how to easily release your candles from their molds without any hassle? Search no more!

In this guide, we, the candle enthusiasts, will share with you the art of liberating your creations with finesse and precision. No more struggling or frustration – we’ve got you covered.

Discover the mastery of getting a candle out of a mold, using tried and true techniques that will have you feeling like a candle-making maestro. From preparing your mold to the final twist and turn, we’ll guide you step by step, ensuring a smooth and successful extraction every time.

So, let’s dive in and unveil the mystery of mold removal, empowering you to create stunning candles with ease.

Advertisement

candle salad

Key Takeaways

  • Applying a release agent such as cooking spray, vegetable oil, or silicone spray is important to prevent sticking.
  • Chilling the mold helps solidify the wax and prevent sticking or breaking.
  • Gentle tapping, applying pressure, and coaxing the candle out with nimble hands can help remove it from the mold.
  • Alternative methods such as tapping with a rubber mallet, using hot water, freezing, or using a hairdryer can also aid in candle removal.

Prepare Your Mold

To prepare our mold for removing the candle, we’ll start by applying a release agent. This is a crucial step that will prevent the candle from sticking to the mold, making it easier to remove later on. There are various release agents available in the market, but if you prefer alternative mold materials, you can use alternatives like cooking spray or vegetable oil.

Simply spray or brush the release agent onto the inside of the mold, ensuring that all surfaces are covered.

Next, check for any potential mold issues such as cracks or uneven surfaces. These can affect the quality of the final candle and make it difficult to release from the mold. If you encounter any issues, troubleshoot them by repairing the mold or using a different mold altogether.

Use a Release Agent

Now let’s talk about using a release agent when getting a candle out of a mold.

dusk meditation candle

One alternative release agent is cooking spray, which can be sprayed directly onto the mold. This lubricates the surface and makes it easier for the candle to slide out smoothly.

Using a release agent is important as it prevents the candle from sticking to the mold and potentially breaking during the removal process.

Advertisement

Alternative Release Agent

We can achieve an easier release of the candle from the mold by applying an alternative release agent.

While using a traditional release agent like cooking spray or vegetable oil is effective, there are alternative options available that can yield even better results.

candle shack calculator

One alternative release agent is silicone spray, which can be applied to the mold before pouring the wax. Silicone spray provides a smooth and slippery surface, allowing the candle to easily slide out of the mold once it has cooled and hardened.

Another alternative option is using a mixture of rubbing alcohol and water as a release agent. This solution helps to remove any residue left behind by the candle wax, ensuring a clean and easy release.

Importance of Lubrication

After applying an alternative release agent, such as silicone spray or a mixture of rubbing alcohol and water, we can now discuss the importance of lubrication in easily removing a candle from its mold. Lubrication techniques and the benefits of using a release agent are crucial to ensure a smooth and effortless candle removal process. Here are five key points to consider:

Advertisement
  • Prevents sticking: A release agent creates a barrier between the candle and the mold, preventing the wax from sticking and making it easier to remove.
  • Preserves mold integrity: By using a release agent, you reduce the risk of damaging the mold during the removal process.
  • Saves time: Lubrication techniques help the candle slide out smoothly, saving you time and effort in removing each candle from the mold.
  • Ensures a clean finish: A release agent helps in achieving a clean and polished appearance for your candles, without any unsightly marks or imperfections.
  • Increases mold lifespan: Regular use of a release agent prolongs the life of your molds, allowing you to create multiple candles without the need for frequent replacements.

Preventing Sticking and Breaking

To prevent sticking and breaking during the candle removal process, we need to utilize a release agent. This is a crucial step in ensuring that the candle comes out smoothly and without any damage.

candle making near me

A release agent is a substance that’s applied to the mold before pouring the wax. It creates a barrier between the wax and the mold, preventing sticking and avoiding cracks. There are various types of release agents available, such as silicone sprays, vegetable oils, or even non-stick cooking sprays.

When applying the release agent, make sure to cover every nook and cranny of the mold to ensure a thorough coating. Once the release agent is applied, it’s time to move on to the next step: chilling the mold.

Chill the Mold

The effectiveness of chilling the mold is enhanced by the use of refrigeration. Chilling the mold before attempting to remove the candle helps solidify the wax, making it easier to release from the mold without breaking or sticking. Here are some chilling techniques and the benefits of chilling:

  • Refrigeration: Placing the mold in the refrigerator for a few hours helps cool down the wax, making it less likely to stick to the mold walls.
  • Freezer Method: For a quicker chill, the mold can be placed in the freezer for about 30 minutes. This rapid cooling reduces the chances of the candle sticking.
  • Ice Bath: Another option is to submerge the mold in an ice bath. The cold water helps chill the mold evenly, promoting easy release.
  • Chilling Spray: Using a chilling spray specifically designed for candle making can provide a quick and effective way to cool the mold and prevent sticking.
  • Chilling Plate: Placing the mold on a chilled plate or surface can help cool the wax uniformly, ensuring an even release.

Chilling the mold before attempting to remove the candle offers several benefits, such as minimizing the risk of breaking the wax and ensuring a smooth release. By following these chilling techniques, you can achieve mastery in getting a candle out of a mold.

candlescience

Apply Gentle Pressure

We gently apply pressure to the mold to release the candle without causing any damage or sticking. After chilling the mold and allowing it to sit for a few minutes, we’re ready to proceed with the next step.

First, we inspect the edges of the mold to ensure there are no obstructions or excess wax buildup. Then, we begin by gently tapping around the sides of the mold with our fingertips. This helps to loosen the candle and create small gaps between the wax and the mold.

Advertisement

If the candle still doesn’t budge, we can try the warm water method. By submerging the bottom of the mold in warm water for a few seconds, the heat will cause the wax to expand slightly, making it easier to release the candle.

With a gentle twist and a slight push, the candle should slide out smoothly from the mold.

candlelighters charity

Tap the Mold

Now that we’ve applied gentle pressure to the mold, the next step is to tap it.

Tapping the mold helps to loosen the candle and encourage it to release from the sides.

To tap the mold, firmly but gently tap all around the outside of the mold with the palm of your hand or a soft mallet.

Advertisement

This technique can be especially effective for stubborn candles that aren’t easily coming out with just pressure alone.

yankee candle

Candle Release Techniques

To release the candle from the mold, gently tap the sides of the mold using a soft object. This candle release technique is effective in loosening the candle and allowing it to easily slide out of the mold.

Here are some candle release tips and troubleshooting mold removal techniques to help you in this process:

  • Use a rubber mallet or a wooden spoon to tap the sides of the mold.
  • Start tapping at the top of the mold and work your way down to the bottom.
  • Apply light to medium pressure while tapping to avoid damaging the mold or the candle.
  • Rotate the mold as you tap to ensure even pressure distribution.
  • If the candle doesn’t release, try placing the mold in the freezer for a few minutes to shrink the wax and make it easier to release.

Alternative Mold Removal Methods

An effective method to remove a candle from a mold is by gently tapping the sides of the mold with a soft object. This technique is one of the alternative mold release techniques that can be used when dealing with stubborn or stuck candles.

When a candle gets stuck in the mold, it can be frustrating, but tapping the mold can help loosen it and make it easier to remove. To tap the mold, take a soft object like a rubber mallet or a wooden spoon and gently tap the sides of the mold all around. The vibrations created by tapping can help to loosen the candle and release it from the mold.

candlesticks stamford

If tapping alone doesn’t work, don’t worry, there are other methods you can try, such as using hot water.

Advertisement

Use Hot Water

We can easily remove a candle from a mold by using hot water. This method is effective and prevents candle deformation, especially if the candle has been stuck in the mold for too long. Here is a step-by-step guide on how to use hot water to remove a candle from a mold:

  • Fill a large bowl or sink with hot water, making sure it’s not boiling.
  • Place the mold in the hot water, ensuring that the water level is high enough to cover the sides of the mold.
  • Let the mold sit in the hot water for a few minutes to allow the heat to soften the wax.
  • Gently twist and turn the mold to loosen the candle.
  • Carefully pull the candle out of the mold, ensuring not to damage it.

By using hot water, you can successfully remove a candle from the mold without any deformation.

Now, let’s move on to the next method: freezing the candle.

candle shack clp

Freeze the Candle

We can freeze the candle to make it easier to remove from the mold. Freezing the candle helps to shrink it slightly, allowing it to contract away from the sides of the mold. This makes it less likely to stick and prevents any damage to the candle during removal.

To freeze the candle, place the mold in the freezer for at least 30 minutes or until the candle feels firm. It’s important to ensure that the candle is completely solid before attempting to remove it from the mold.

Once frozen, gently tap the mold on a hard surface to loosen the candle. If it still doesn’t come out easily, you can try running warm water over the outside of the mold to further melt any remaining wax.

Advertisement

These preventive measures and troubleshooting tips will help you successfully remove a candle from the mold using the freezing method.

candlelight orchestra

Twist and Rotate the Mold

Now that the candle is frozen and ready to be removed from the mold, it’s important to twist and rotate the mold to loosen the candle. This technique helps to release any suction or adhesion between the candle and the mold, making it easier to slide the candle out.

Mold Removal Techniques

To successfully remove a candle from a mold, it’s important to employ the technique of twisting and rotating the mold. This method helps loosen the candle and allows for easy extraction.

Here are some mold removal techniques to help you with this process:

  • Inspect the mold: Before attempting to remove the candle, inspect the mold for any signs of stubborn mold. If you notice any, you may need to clean it using appropriate mold cleaning techniques before proceeding.
  • Apply gentle pressure: Hold the mold firmly and apply gentle pressure while twisting and rotating it. This will help break the seal between the candle and the mold.
  • Use a lubricant: If the candle is still stuck, try using a small amount of lubricant, such as vegetable oil or cooking spray, to make it easier to remove.
  • Tap the mold: Lightly tap the mold on a flat surface to further loosen the candle.
  • Slowly extract the candle: Once the candle is loosened, slowly and carefully extract it from the mold by continuing to twist and rotate.

Preventing Candle Breakage

Continuing with inspecting the mold for any signs of stubborn mold, we can now focus on preventing candle breakage by employing the technique of twisting and rotating the mold. This simple yet effective method ensures that the candle releases from the mold smoothly and without any damage. By gently twisting and rotating the mold, you create movement that prevents the wax from sticking to the sides. This technique is especially crucial when using silicone or rubber molds, as they tend to hold on to the candle more tightly.

candle making supplies

To further prevent mold buildup and increase the chances of a successful release, it is important to choose the right mold size for your candle. A mold that is too small can cause the wax to expand and crack the mold, while a mold that is too large can lead to an uneven burn and a weaker candle. Refer to the table below to find the appropriate mold size for your candle:

Advertisement
Candle Diameter (inches) Mold Diameter (inches)
2 2.5
3 3.5
4 4.5
5 5.5
6 6.5

Use a Hairdryer

We can easily remove a candle from a mold by utilizing a hairdryer. This hairdryer technique is especially useful when dealing with stubborn or stuck candles. Here’s how to do it:

  • Start by plugging in the hairdryer and setting it to the highest heat setting.
  • Hold the hairdryer about 6-8 inches away from the mold and direct the hot air towards the base of the candle.
  • Move the hairdryer in a circular motion, evenly heating the entire circumference of the mold.

After a few minutes, gently twist and wiggle the candle to see if it starts to loosen. If the candle is still stuck, continue applying heat with the hairdryer and repeat the twisting and wiggling until the candle comes out.

Using this hairdryer technique, you’ll be able to effortlessly remove even the most stubborn candles from their molds. Mastery of this method will ensure a smooth candle-making process every time.

dusk candles careers

Utilize a Candle Release Spray

To efficiently remove a candle from a mold, we can make use of a candle release spray. This spray acts as a lubricant and creates a barrier between the candle and the mold, making it easier to slide the candle out. Candle release sprays are designed specifically for candle making and are available in craft stores or online.

However, if you don’t have a candle release spray on hand, there are alternative options you can try. For example, you can use cooking oil or non-stick cooking spray as a substitute. When using a candle release spray or alternative, it’s important to consider the type of mold material you’re working with. Common candle mold materials include silicone, metal, and plastic.

Ensure that the spray or alternative you choose is compatible with the material to avoid any damage or sticking.

Advertisement

Frequently Asked Questions

How Long Does It Take for a Candle to Fully Harden in a Mold?

When getting a candle out of a mold, it’s important to consider the hardening time. Depending on the type of wax used, candles can take anywhere from a few hours to a few days to fully harden.

candlescience

Can I Use Any Type of Mold to Make a Candle, or Are There Specific Requirements?

Can any mold be used for candle making? Well, let us enlighten you. When it comes to candle mold types, there are specific requirements. Suitable materials like silicone, metal, and plastic ensure successful candle making endeavors.

Do I Need to Use a Release Agent Every Time I Make a Candle in a Mold?

We always use a release agent when making candles in molds to ensure easy removal. However, there are alternative methods such as using vegetable oil or non-stick cooking spray. Additionally, we have found that freezing the mold can help remove stubborn candles.

What Is the Best Type of Wax to Use for Candle Making in a Mold?

The best wax types for candle making in a mold depend on various factors. Natural waxes like soy and beeswax offer a clean burn, while synthetic waxes like paraffin provide a longer burn time. Beginners may find soy wax easier to work with due to its lower melting point.

Can I Add Color or Fragrance to the Wax Before Pouring It Into the Mold?

Yes, we can add color and fragrance to the wax before pouring it into the mold. The pros are that it enhances the aesthetic appeal and scent of the candle. However, it requires careful measurement and testing to achieve the desired results.

Advertisement

candlestick holders

Conclusion

In conclusion, removing a candle from a mold is a simple process that requires careful preparation and the right techniques. By following the steps outlined in this article, you can easily release your candle from the mold without any hassle.

Remember the adage ‘Patience is a virtue’ and take your time to ensure a successful outcome. With a little patience and practice, you’ll be able to create beautiful candles that are ready to light up any room.

Continue Reading

Trending