Connect with us

Candles

How Do You Put Out a Candle With Your Fingers

Published

on

Have you ever thought about how to snuff out a candle using just your fingertips? Acquiring this ability entails understanding, rehearsal, and the highest level of care.

In our quest for mastery, we delve into the intricacies of candle flames, understanding their behavior and the importance of safety. We prepare our hands, ensuring they are ready for the task at hand.

Through two techniques – the pinch method and the cover and smother method – we explore the art of extinguishing candles without any tools. However, it is crucial to know when attempting this method is not advisable.

We also explore alternative methods for those seeking a safer approach. Remember, practice makes perfect in this endeavor.

Advertisement

candlelight carol

Join us on this journey as we uncover the secrets of putting out a candle with our fingers.

Key Takeaways

  • Finger protection and fire prevention are crucial aspects to consider.
  • The pinch method is a safe and effective technique for extinguishing a candle with your fingers.
  • Safety precautions, such as keeping nails short and approaching the flame from the side, should be followed.
  • Regular practice and finger exercises enhance hand flexibility, dexterity, and control over the flame.
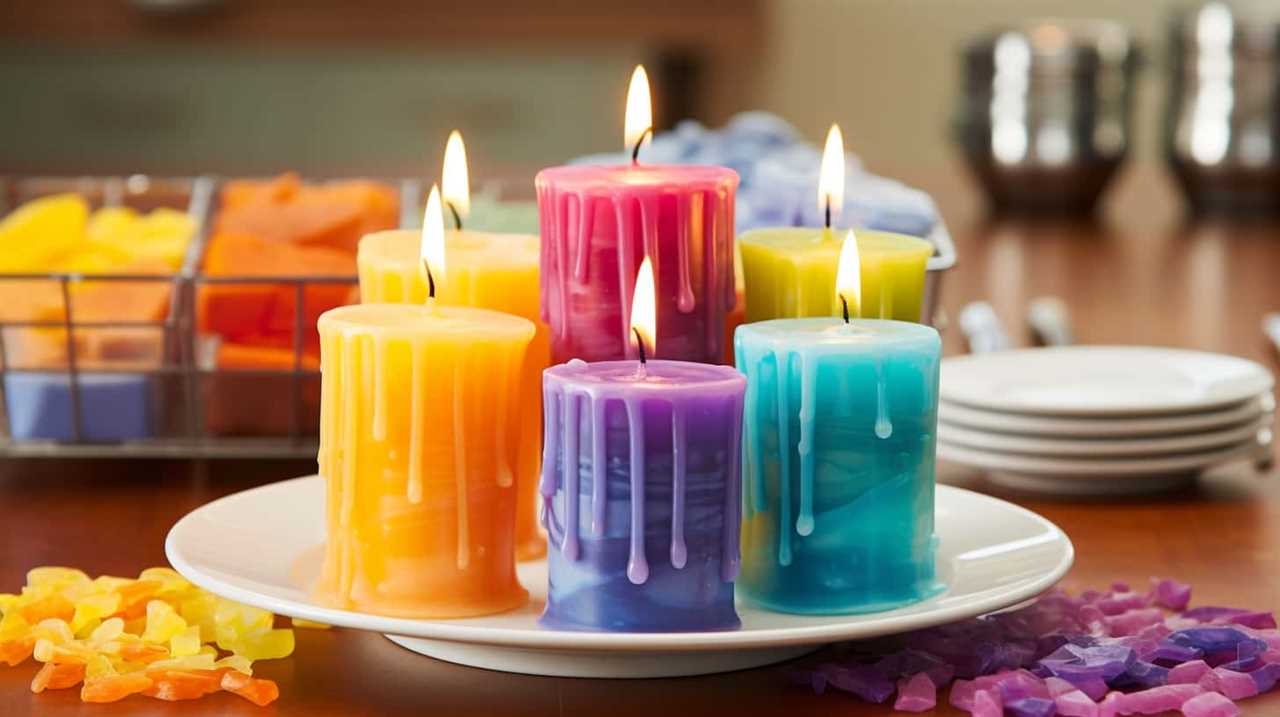
The Importance of Safety

We emphasize the importance of safety when attempting to extinguish a candle with our fingers. Finger protection and fire prevention are crucial aspects to consider in order to avoid any potential harm.

Before attempting to put out a candle with our fingers, it’s essential to ensure that our hands are clean and dry to maintain a good grip. Additionally, trimming our nails short can help prevent any accidental scratches or burns.

It’s also advisable to have a nearby source of water or fire extinguisher, just in case the flames get out of control. Moreover, we must exercise caution and be aware of our surroundings to prevent any accidents.

yankee candle malaysia

Understanding Candle Flames

To effectively extinguish a candle with our fingers, it’s essential to comprehend the behavior and characteristics of candle flames. Here are four important points to understand about candle flames:

  1. Candle flame colors: Candle flames can have different colors depending on the temperature and the elements present. A blue flame indicates a hotter temperature, while a yellow flame suggests a cooler temperature. Understanding the color can help gauge the intensity of the flame.
  2. Candle burning time: The duration a candle burns depends on various factors such as the size of the wick, the type of wax, and the ambient conditions. Thicker wicks and softer wax tend to burn longer. By considering these factors, one can estimate the remaining burning time of a candle.
  3. Flame shape and movement: Candle flames often have a teardrop shape, with a brighter, hotter base and a cooler, dimmer tip. The flame can flicker and dance due to air currents or uneven burning. Observing the flame’s movement can provide insights into the candle’s environment.
  4. Oxygen supply: A candle flame requires oxygen to sustain combustion. If the oxygen supply is limited or obstructed, the flame will weaken or be extinguished. Understanding this can help when attempting to put out a candle by using our fingers.

Preparing Your Hands

Understanding the behavior and characteristics of candle flames, we can now move on to preparing our hands for the task of extinguishing a candle with our fingers. To successfully accomplish this feat, it’s crucial to ensure that our fingers and hands are adequately prepared.

Finger exercises are an excellent way to enhance hand flexibility and dexterity, making it easier to manipulate and control the flame. Simple exercises like finger stretches, squeezing stress balls, or using hand grippers can significantly improve the flexibility and strength of our hands. Regular practice of these exercises won’t only increase our ability to safely extinguish a candle but also reduce the risk of injury.

Advertisement

Technique 1: The Pinch Method

Let’s now discuss the points related to the pinch method of extinguishing a candle with your fingers.

floral candle

First, we need to consider finger safety precautions to protect ourselves from burns.

Additionally, it’s important to explore alternative methods for candle extinguishing in case the pinch technique doesn’t work effectively.

Finger Safety Precautions

When putting out a candle with our fingers, we need to be cautious and take safety precautions. Here are some finger safety tips to keep in mind:

  1. Finger exercises: Before attempting to pinch out a candle flame, it’s important to warm up your fingers and improve their dexterity. Perform simple stretches and hand exercises to loosen up your muscles and increase flexibility.
  2. Trim your nails: Long nails can increase the risk of injury when handling a lit candle. Keep your nails short to prevent accidental burns or scratches.
  3. Approach from the side: When extinguishing a candle using the pinch method, approach the flame from the side rather than from above. This minimizes the risk of getting too close to the flame and reduces the chances of burning your fingers.
  4. Know your limits: It’s essential to understand your own pain tolerance and refrain from attempting this technique if you have sensitive or easily injured fingers. Safety should always be a priority when dealing with open flames.

Candle Extinguishing Alternatives

To continue our discussion on candle extinguishing, let’s explore an alternative method known as the pinch technique.

candle holders glass

This technique involves using your thumb and index finger to pinch the wick of the candle, cutting off the oxygen supply and extinguishing the flame. The pinch method is a safe and effective way to put out a candle without the use of any tools or accessories.

Advertisement

However, it’s important to remember to practice proper finger safety and fire safety when using this technique. Make sure your fingers are dry and free from any oils or lotions that could increase the risk of burns. Additionally, be cautious of the hot wax and avoid touching it directly to prevent any injuries.

Pinch Technique Effectiveness

One effective method for extinguishing a candle with our fingers is by using the pinch technique. This technique requires proper finger technique and flame control to ensure safe and effective extinguishing. Here’s how to do it:

  1. Position your thumb and index finger: Place your thumb and index finger on opposite sides of the candle flame, ensuring a firm and controlled grip.
  2. Pinch the flame: Gently pinch the base of the flame, cutting off its oxygen supply. Be careful not to squeeze too hard or touch the hot wax.
  3. Hold for a few seconds: Maintain the pinch for a few seconds to allow the flame to die out completely.
  4. Release and check: Carefully release your fingers and observe the candle to ensure the flame is completely extinguished.

Technique 2: The Cover and Smother Method

We use a simple yet effective technique, known as the cover and smother method, to extinguish a candle with our fingers.

candle salad

This technique involves placing our hand over the flame, completely covering it, and then smothering it by applying gentle pressure with our fingers.

The key to successfully using this method is to ensure that our fingers are adequately protected. We can achieve this by keeping our fingers together and slightly bent, forming a protective barrier. By doing so, we minimize the risk of getting burned.

While there are alternative techniques for extinguishing a candle with our fingers, the cover and smother method provides a reliable and efficient way to put out the flame.

Advertisement

With practice and proper finger protection, mastery of this technique is attainable.

doji candle

Technique 3: The Blowout Method

Now let’s talk about Technique 3: The Blowout Method. This method involves blowing on the candle to extinguish the flame. It’s a popular and commonly used technique because it’s simple and requires no physical contact with the flame.

However, it’s important to note that blowing on a candle can sometimes cause hot wax to splatter, so it’s essential to take precautions.

Are there any alternative methods to blowing out a candle that are safer and equally effective? Let’s find out.

Safe Finger Extinguishing

After learning about the safe finger extinguishing techniques, we can now explore the third method known as the Blowout Method. This technique involves blowing out the candle with a forceful breath, using your fingers to shield the flame from your face.

Advertisement

candle making

Here are the steps to safely execute the Blowout Method:

  1. Position your fingers: Hold your hand with your fingers slightly spread apart and positioned slightly above the flame.
  2. Take a deep breath: Inhale deeply to gather enough air for a forceful exhale.
  3. Aim for the base of the flame: Direct your breath towards the base of the flame, focusing on extinguishing it completely.
  4. Shield your face: Use your fingers to shield your face from any hot wax or sparks that may fly when blowing out the candle.

Alternatives to Blowing?

To explore alternatives to blowing out a candle with your fingers, let’s delve into the effectiveness of the Blowout Method. This technique involves blowing on the candle to extinguish the flame instead of using your fingers. While it may seem simple, there are important considerations to ensure finger protection and candle safety.

When using the Blowout Method, make sure to position your face at a safe distance from the flame to avoid burns. Additionally, be cautious of any loose clothing or hair that could catch fire. It’s also crucial to blow gently and steadily to prevent hot wax from splattering.

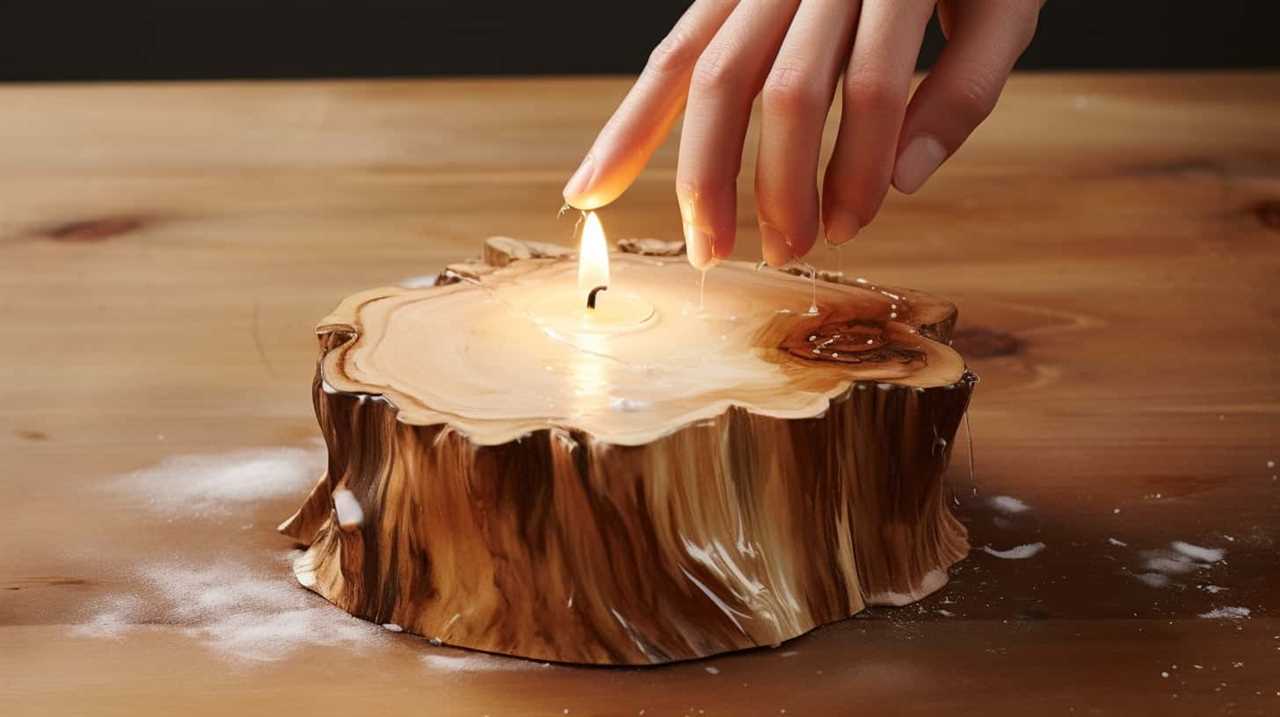
Technique 4: The Wet Fingers Method

One effective way to extinguish a candle using our fingers is by using the wet fingers method. This technique involves wetting our fingers before attempting to put out the flame. Here’s how to do it safely and effectively:

candle flame zones

  1. Prioritize finger safety: Make sure your fingers are clean and free from any cuts or open wounds. Wetting your fingers can make them more susceptible to burns, so it’s important to exercise caution.
  2. Wet your fingers: Dip your fingertips into a bowl of water, ensuring that they’re thoroughly wet. This will provide a protective barrier between your skin and the flame.
  3. Pinch the wick gently: Using your wet fingers, pinch the base of the wick where it meets the wax. Apply gentle pressure to smother the flame.
  4. Hold for a few seconds: Hold your fingers on the wick for a few seconds to ensure the flame is completely extinguished.

Remember to always prioritize fire safety and exercise caution when attempting to put out a candle with your fingers.

Technique 5: The Wax Barrier Method

Now, let’s delve into Technique 5: The Wax Barrier Method, where we create a protective shield using melted wax.

This technique involves carefully melting the wax from the candle and creating a small pool of liquid wax in your palm. Once the wax is melted, you quickly dip your fingertips into the liquid wax, coating them with a thin layer. The wax barrier acts as a protective layer between your fingers and the flame, effectively preventing any burns. It’s important to ensure that the layer of wax is thin and even to maximize its effectiveness.

Advertisement

With practice and patience, mastering the technique of creating a wax barrier can provide a safe and efficient way to extinguish a candle using your fingers.

candle making kits for adults

Now, let’s move on to Technique 6: The Candle Snuff Method.

Technique 6: The Candle Snuff Method

For Technique 6, we’ll explore the Candle Snuff Method, which builds upon the protective wax barrier discussed in the previous subtopic. When using this technique, it’s important to prioritize finger protection to ensure safety.

Here are four snuffing techniques to help you put out a candle with your fingers:

  1. The Pinch and Snuff: Gently pinch the wick between your thumb and index finger, then swiftly snuff it out by pressing your fingers together.
  2. The Snap and Snuff: Hold the wick between your thumb and middle finger, and snap your fingers downward to break the flame. Immediately follow with a snuffing motion to extinguish it completely.
  3. The Roll and Snuff: Roll the tip of your thumb and index finger over the wick, applying slight pressure as you move from one side to the other. Finish by snuffing the flame.
  4. The Slide and Snuff: Place your thumb and index finger on opposite sides of the wick. Slowly slide your fingers together, compressing the wick until the flame is extinguished.

Mastering these snuffing techniques will enhance your ability to safely extinguish candles with your fingers. Remember to exercise caution and always prioritize finger protection.

candles direct portugal

Common Mistakes to Avoid

To avoid common mistakes, we should ensure that we have a firm grip on the candle and maintain steady pressure while extinguishing the flame with our fingers.

Advertisement

One common mistake to avoid is not positioning our hand correctly. It is crucial to place our fingers on the sides of the flame, rather than directly on top, to prevent finger injuries. Placing our fingers on top of the flame increases the risk of getting burned.

Another mistake to avoid is not applying enough pressure when pinching the flame. If we do not exert enough pressure, the flame may not be fully extinguished, resulting in a potential fire hazard.

Fire Safety Tips

When it comes to fire safety, it’s essential for us to be aware of and follow proper precautions. Here are some important tips to prevent fire accidents and ensure candle care:

candle holders for pillar candles

  1. Keep flammable materials away from candles: Make sure to keep curtains, papers, and other flammable objects at a safe distance from burning candles.
  2. Never leave candles unattended: Always remember to extinguish candles before leaving a room or going to bed.
  3. Use stable candle holders: Place candles in sturdy holders that won’t easily tip over, causing a potential fire hazard.
  4. Keep candles out of reach of children and pets: Children and pets can accidentally knock over candles or be burned by the flame, so it’s important to keep them out of their reach.

Following these fire safety tips can greatly reduce the risk of accidents.

However, there are situations when attempting to put out a candle with your fingers isn’t recommended.

When Not to Attempt This Method

Before attempting to put out a candle with your fingers, it’s important to be aware of safety precautions for beginners. This method requires a certain level of skill and experience, so it isn’t recommended for those who are inexperienced or unsure.

Advertisement

Additionally, there are alternative extinguishing techniques that can be used instead, such as using a candle snuffer or blowing it out gently.

candlesticks trading

Safety Precautions for Beginners

We should exercise caution and refrain from attempting this method if we’re inexperienced or unsure of our ability to safely extinguish a candle with our fingers. Safety should always be our top priority, especially when dealing with open flames. Here are some precautions for beginners to keep in mind:

  1. Assess your comfort level: Before attempting to put out a candle with your fingers, make sure you’re confident and comfortable with the technique. It’s okay to start with other beginner-friendly techniques first.
  2. Consider the size of the flame: If the flame is too large or flickering uncontrollably, it’s best to use a proper extinguishing tool like a snuffer or a candle extinguisher. Avoid attempting to use your fingers in such situations.
  3. Avoid long nails or jewelry: Long nails or jewelry can increase the risk of injury when attempting to put out a candle with your fingers. Keep your nails short and remove any jewelry that may interfere with the process.
  4. Stay focused and mindful: Always be fully present and attentive when attempting this method. Distractions or lack of focus can lead to accidents and burns.

Alternative Extinguishing Techniques

If we’re inexperienced or unsure of our ability to safely extinguish a candle with our fingers, it’s important to explore alternative techniques for putting out the flame.

While the method of using our fingers can be effective, it requires a certain level of skill and finger protection. If we don’t feel confident in our ability to do this safely, it’s best to consider other options.

One alternative technique is to use a candle snuffer, which is a small cone-shaped tool designed specifically for extinguishing candles.

dusk candles careers

Another technique is to blow out the flame using breath control. By gently blowing on the flame from a safe distance, we can effectively extinguish the candle without putting ourselves at risk.

Advertisement

It’s crucial to prioritize our safety and choose the method that best suits our skill level and comfort.

Alternative Methods for Extinguishing Candles

One can explore various alternative methods to extinguish candles without using their fingers. Here are four creative extinguishing methods that provide finger protection:

  1. Candle snuffer: This tool is specifically designed to safely extinguish candles. Gently place the snuffer over the flame, allowing it to suffocate and extinguish the candle without any risk to your fingers.
  2. Candle dippers: These long, slender tools allow you to dip the wick into the melted wax, cutting off the oxygen supply and extinguishing the flame. Be sure to let the wax solidify before removing the dipper.
  3. Candle extinguishing spray: This innovative product releases a fine mist that quickly puts out the candle flame. Simply aim the spray at the flame from a safe distance and press the nozzle.
  4. Candle lid: If your candle came with a lid, you can use it to extinguish the flame. Place the lid over the candle, cutting off the oxygen supply and smothering the flame.

Practice Makes Perfect

Now that we’ve learned about alternative methods for extinguishing candles, let’s discuss the importance of practice in mastering the technique of putting out a candle with our fingers.

dusk candle holder

Developing this skill requires consistent practice, as it involves building muscle memory and refining our technique. By dedicating time to practice, we can improve our precision and control, allowing us to confidently extinguish candles with our fingers.

Skill Development Tips

We frequently practice our skills to achieve perfection. When it comes to developing finger dexterity and hand-eye coordination, consistent practice is key. Here are some tips to help you improve these essential skills:

  1. Finger exercises: Engage in activities that promote finger dexterity, such as playing a musical instrument or using hand grip strengtheners. These exercises will help improve the strength and flexibility of your fingers.
  2. Hand-eye coordination games: Play video games or engage in activities like juggling or throwing and catching a ball. These activities require precise coordination between your hands and eyes, helping to enhance your overall coordination skills.
  3. Fine motor skill practice: Engage in activities that require precise finger movements, such as painting, drawing, or assembling small objects. These activities will help develop your fine motor skills and improve your control and accuracy.
  4. Practice with tools: Use tools that require intricate finger movements, such as knitting needles or a Rubik’s Cube. Regular practice with these tools will enhance your finger dexterity and coordination.

Benefits of Consistent Practice

Developing finger dexterity and hand-eye coordination through consistent practice offers numerous benefits to individuals striving for mastery in their chosen skill. The benefits of consistency cannot be overstated, as it plays a crucial role in achieving excellence. By persevering and practicing regularly, individuals can reap the following rewards:

Benefits of Consistency The Role of Perseverance Improved skill mastery Increased efficiency Enhanced muscle memory
Consistent practice allows for continuous improvement and mastery of the skill. Perseverance is essential in overcoming challenges and setbacks along the way. Regular practice helps to refine techniques and achieve a higher level of proficiency. Consistency leads to improved efficiency and speed in performing the skill. Through consistent practice, muscle memory is developed, enabling smoother and more precise movements.

Final Thoughts and Conclusion

After considering various methods and techniques, we’ve reached the conclusion that extinguishing a candle with your fingers is indeed a delicate and precise skill. Through consistent practice, one can develop the necessary control and dexterity to perform this technique effectively.

Advertisement

candle meaning

Here are some final thoughts and conclusions to keep in mind:

  1. Alternative extinguishing techniques: While using fingers is a unique skill, it’s important to remember that there are other methods available, such as using a snuffer or blowing out the candle.
  2. Benefits of consistent practice: By regularly practicing this technique, you can improve your hand-eye coordination and increase your ability to control the pressure and speed of your fingers.
  3. Patience and focus: Extinguishing a candle with your fingers requires a calm and focused mindset. It’s crucial to remain patient and avoid rushing the process.
  4. Safety precautions: Always exercise caution when attempting this skill. Ensure that your fingers are clean and dry, and be aware of any potential hazards, such as hot wax or a too-hot flame.

Frequently Asked Questions

Can I Use Any Type of Candle for These Techniques?

When it comes to putting out a candle with our fingers, it’s important to consider the different types of candles we may encounter. We must also prioritize safety precautions while attempting these techniques.

Is There a Specific Age Limit for Attempting These Techniques?

Age limitations and safety precautions should always be considered when attempting techniques involving fire. It’s important to ensure that individuals attempting these methods are of an appropriate age and have the necessary knowledge to do so safely.

Are There Any Specific Hand Positions or Grips I Should Use?

When attempting to extinguish a candle with our fingers, it is crucial to maintain proper hand positions and utilize effective finger grips. Mastering these techniques will ensure a safe and successful outcome.

candlelight concerts bristol

Can I Use Gloves or Any Other Protective Gear While Attempting These Techniques?

Gloves or other protective gear might be considered for safety precautions when attempting techniques involving extinguishing candles with fingers. However, alternatives like proper hand positioning and controlled movements can also ensure safety.

What Should I Do if My Fingers Get Burned While Attempting These Techniques?

If our fingers get burned while attempting these techniques, we should immediately stop and treat the burn. First aid for burns includes running cold water over the affected area and seeking medical attention if necessary.

Advertisement

Conclusion

In conclusion, extinguishing a candle with your fingers can be done safely and effectively using the pinch or cover and smother methods. It’s important to prioritize safety and understand the behavior of candle flames before attempting these techniques.

However, if you aren’t comfortable with using your fingers, there are alternative methods available.

dusk candle holder

Remember, practice makes perfect when it comes to mastering this skill. So, why not test your newfound knowledge and see if you can put out a candle with your fingers?

I'm Jane and I love candles. I have candles everywhere in my house--in every room, on every surface. I love the smell of candles, and I love how they make my place feel warm and cozy. Candles are really important to me. They help me relax and de-stress after a long day. They remind me of happy memories, and they make me feel calm and peaceful. I can't imagine my life without candles!

Continue Reading
Advertisement

Candles

How to Seal Concrete Candle Holders

Published

on

By

You’ve created stunning concrete candle holders and are ready to enhance their appeal. We have the perfect solution for you: a reliable technique to seal your candle holders, ensuring they have a sleek, professional look.

In this guide, we will walk you through the step-by-step process of sealing your concrete candle holders, ensuring that they are protected against moisture and wear. From gathering the necessary materials to adding those final finishing touches, we’ll cover it all.

So grab your apron and let’s get started on transforming your concrete candle holders into stunning pieces that will be the envy of all who see them.

Let’s dive in, shall we?

Advertisement

candle shack clp tool

Key Takeaways

  • Gathering necessary materials and preparing the work area are important steps before sealing concrete candle holders.
  • Cleaning and sanding the surfaces of the candle holders ensures a smooth and even application of sealant.
  • Applying a concrete sealant primer is necessary to enhance adhesion and durability.
  • Patience is key during the drying time of the sealant, and multiple coats may be necessary for optimal protection.

Gather Necessary Materials

First, we gather the necessary materials for sealing concrete candle holders.

When it comes to sealant options, there are a few choices that offer different benefits. One option is a penetrating sealant, which is absorbed into the concrete to create a barrier against moisture and stains. Another option is a topical sealant, which sits on the surface and provides a protective layer. It’s important to choose a sealant that’s specifically designed for concrete to ensure optimal results.

In terms of sealing techniques, it’s crucial to thoroughly clean the candle holders and remove any dirt or debris before applying the sealant. Then, using a brush or roller, evenly apply the sealant in thin coats, allowing each coat to dry completely before applying the next. This will ensure a strong and durable seal for your concrete candle holders.

Prepare Your Work Area

To ensure a smooth and efficient process, we need to prepare our work area before sealing the concrete candle holders.

candles direct reviews

First, gather all the necessary cleaning tools such as a broom, dustpan, and wet cloth. Use the broom to sweep away any dirt or debris on the surface of your workspace.

Next, use the dustpan to collect the swept debris and dispose of it properly.

Advertisement

Afterward, dampen the wet cloth and wipe down the entire work area, removing any remaining dust or dirt.

Once the area is clean, organize your workspace by arranging the concrete candle holders in a neat and accessible manner. This will make it easier to apply the sealant evenly and efficiently.

candlewood suites

Clean the Concrete Candle Holders

Let’s begin by gently scrubbing the concrete candle holders to remove any dirt or residue. Cleaning the candle holders properly is essential before sealing them to ensure a smooth and flawless finish.

Here are some effective cleaning techniques for removing stains from concrete candle holders:

  • Use a mild detergent and warm water solution: Combine a small amount of mild detergent with warm water and apply it to the candle holders using a soft-bristled brush. Gently scrub the surface in circular motions to lift off any dirt or stains.
  • Try vinegar and water mixture: Mix equal parts of white vinegar and water in a spray bottle. Spray the solution onto the candle holders and let it sit for a few minutes. Scrub the surface with a brush to remove any stubborn stains.
  • Baking soda paste: Create a paste by mixing baking soda with water. Apply the paste to the stained areas of the candle holders and let it sit for about 15 minutes. Scrub the surface with a brush and rinse thoroughly.
  • Use a pressure washer: If the candle holders have extensive stains or dirt buildup, consider using a pressure washer. Adjust the pressure to a suitable level and spray the holders to remove any debris or stains effectively.

Sand the Surfaces

After cleaning the concrete candle holders, we can now move on to sanding the surfaces for a smoother finish.

Sanding is an essential step in the process of sealing concrete candle holders as it helps to smooth out any rough surfaces and enhance durability.

Advertisement

candles direct reviews

To begin, gather a medium-grit sandpaper and a sanding block. Start by gently sanding the entire surface of the candle holder in a circular motion, applying even pressure. This will help to remove any imperfections or rough spots that may be present. Be sure to pay extra attention to any areas that feel particularly rough or uneven.

Once the surfaces have been sanded, wipe away any dust or debris with a clean cloth. Remember, a smooth and even surface will provide the best results when sealing the candle holders.

Apply a Concrete Sealant Primer

Now, we’ll move on to applying a concrete sealant primer in order to further protect and enhance the durability of the candle holders. This step is crucial in ensuring that your concrete candle holders are sealed and protected against moisture, stains, and other potential damage.

To achieve the best results, it’s important to follow proper sealant application techniques and ensure an even coating. Here are some key points to consider:

candlelighters charity

  • Use a high-quality concrete sealant primer that’s specifically designed for indoor or outdoor use, depending on where you plan to place your candle holders.
  • Prior to application, thoroughly clean and dry the surfaces of the candle holders to remove any dirt, dust, or residue.
  • Apply the primer using a paintbrush or roller, making sure to cover the entire surface evenly and avoid any drips or puddles.
  • Allow the primer to dry completely before proceeding with the next step.

Let the Primer Dry

Once the primer has been applied, we need to allow it to dry completely before moving on to the next step. Proper drying techniques are crucial to ensure a strong and durable seal on your concrete candle holders.

To expedite the drying process, it’s essential to provide adequate ventilation in the drying area. This can be achieved by opening windows or using fans to circulate the air. Additionally, maintaining a consistent temperature and humidity level can help speed up the drying time. It’s important to note that the drying time may vary depending on the type of primer used and the atmospheric conditions.

Advertisement

If you’re looking for alternative sealant options, you may consider using epoxy or acrylic sealants, which offer different levels of durability and protection.

Once the primer has completely dried, we can proceed to apply the first coat of sealant, ensuring a flawless finish.

candles uk

Apply the First Coat of Sealant

Now that the primer has dried, it’s time to apply the first coat of sealant to the concrete candle holders.

The drying time for the sealant will depend on the specific product being used, so be sure to follow the manufacturer’s instructions.

When applying the sealant, it’s important to use proper techniques such as brushing or spraying evenly to ensure a smooth and protective coating.

Advertisement

Drying Time for Sealant

We typically recommend allowing the first coat of sealant to dry for at least 24 hours before applying any additional coats. This drying time is crucial to ensure that the sealant fully sets and adheres to the concrete surface, providing optimal protection and longevity.

candle shack clp tool

However, there are some drying techniques that can help speed up the drying process, such as using fans or dehumidifiers to increase air circulation and reduce moisture. Additionally, placing the candle holders in a warm and dry environment can also accelerate drying.

It’s important to note that rushing the drying process may compromise the effectiveness of the sealant, so patience is key. Once the first coat is fully dry, we can move on to the next step of sealant application techniques.

Sealant Application Techniques

To begin applying the first coat of sealant to the concrete candle holders, we will use a brush or roller. This ensures even coverage and allows for easy application. Before we proceed, it is crucial to choose the right sealant for the job. Consider factors such as the type of concrete, the desired level of protection, and the environment in which the candle holders will be placed. Here are some sealant application tips to keep in mind:

Sealant Application Tips
Clean the surface thoroughly before applying the sealant
Use a brush or roller for a smooth and even application
Apply the sealant in thin, even coats to prevent drips and runs

Importance of Even Coating

For the first coat of sealant application, it’s essential to ensure an even coating on the concrete candle holders. This step plays a crucial role in achieving the desired level of durability and long-lasting protection for your candle holders. Here are four reasons why an even coating is of utmost importance:

Advertisement

candlelight concerts manchester

  • Enhanced Durability: An even application of sealant creates a strong protective barrier that enhances the durability of the concrete candle holders, making them more resistant to wear and tear.
  • Long-Lasting Protection: The even coating provides a consistent layer of protection against external factors such as moisture, heat, and UV rays, ensuring that your candle holders maintain their original condition for an extended period.
  • Uniform Appearance: An even application ensures a uniform and aesthetically pleasing appearance, enhancing the overall visual appeal of the candle holders.
  • Prevention of Cracks and Damage: Uneven coatings can lead to weak spots and cracks in the concrete, compromising the structural integrity of the candle holders. Applying an even coat helps prevent such issues, ensuring their longevity.

Allow the First Coat to Dry

Once the first coat of sealant has been applied to the concrete candle holders, it’s crucial to allow it to fully dry. The drying time for the coat will vary depending on factors such as temperature and humidity, so it’s important to exercise patience during this step. Rushing the process can result in a compromised seal and decreased durability.

Once the first coat is completely dry, we can move on to the next steps in sealing the concrete candle holders.

Drying Time for Coat

We recommend allowing sufficient drying time for the first coat of sealant to ensure a sturdy and long-lasting finish. Proper drying time is crucial as it allows the sealant to fully cure and adhere to the concrete surface.

Here are some tips for faster drying:

candle shack clp tool

  • Optimal temperature: Maintain a temperature between 70-80 degrees Fahrenheit for faster drying.
  • Adequate ventilation: Ensure good air circulation in the drying area to expedite the evaporation process.
  • Thin coat application: Apply a thin, even coat of sealant to promote quicker drying.
  • Avoid high humidity: Sealants take longer to dry in high humidity, so try to seal your candle holders on a dry day.

Importance of Patience

Typically, we recommend patiently allowing the first coat of sealant to fully dry before proceeding with the next steps. This step is crucial in the process of sealing concrete candle holders as it ensures the best results and longevity of the seal. The importance of perseverance and the benefits of practicing patience can’t be overstated in this regard.

By allowing the first coat to dry completely, you allow the sealant to bond effectively with the concrete surface, creating a strong and durable barrier against moisture, stains, and other damage. Rushing this step may result in a compromised seal and a shorter lifespan for your candle holders.

Practicing patience also allows you to observe the drying process and make any necessary adjustments before proceeding. It gives you the opportunity to ensure that the first coat is evenly applied and free from any imperfections. This attention to detail ultimately leads to a more professional and aesthetically pleasing finish.

Advertisement

Once the first coat is fully dry, you can confidently move on to the next steps in the sealing process, which will be discussed in the following section.

bell book and candle

Next Steps After Drying

After allowing the first coat of sealant to fully dry, we can proceed with the next steps in sealing the concrete candle holders.

Repairing cracks and enhancing durability are crucial aspects of this process. Here are the next steps to follow:

  • Inspect the sealed surface for any visible cracks or imperfections.
  • Use a concrete repair compound to fill in any cracks or gaps. Ensure that the compound is compatible with the sealant used.
  • Smooth out the repaired areas with a putty knife or trowel, ensuring a seamless finish.
  • Allow the repair compound to dry completely before moving on to the next step.

By addressing cracks and imperfections, we ensure that the sealant adheres properly and provides maximum protection. This enhances the durability of the concrete candle holders, allowing them to withstand the test of time.

Following these steps diligently will result in a professionally sealed and long-lasting finished product.

candle picture

Apply Additional Coats if Desired

Applying additional coats of sealant enhances the durability and longevity of the concrete candle holders. To achieve the desired finish, it is recommended to apply multiple coats of sealant. Each coat adds an extra layer of protection, fortifying the surface against moisture, stains, and wear. Here is a table outlining the steps to follow when applying additional coats:

Advertisement
Step Description
1 Ensure the previous coat is completely dry.
2 Lightly sand the surface to remove any imperfections.
3 Apply the next coat of sealant using a brush or roller.
4 Allow the coat to dry according to the manufacturer’s instructions.

Let the Final Coat Dry Completely

Once we’ve applied the final coat of sealant to the concrete candle holders, we need to allow it to dry completely. Proper drying techniques are crucial in maintaining the durability of the sealant and ensuring long-lasting protection for your candle holders.

Here are some key points to consider during the drying process:

  • Avoid direct sunlight: Direct sunlight can cause uneven drying and may lead to cracking or discoloration of the sealant.
  • Provide adequate ventilation: Good airflow will help expedite the drying process and prevent moisture buildup, which can compromise the effectiveness of the sealant.
  • Maintain optimal temperature: Ideally, the temperature should be between 50°F and 90°F, as extreme temperatures can impede drying and affect the overall quality of the sealant.
  • Allow sufficient time: Patience is essential. Depending on the weather conditions and the type of sealant used, it may take anywhere from 24 to 72 hours for the final coat to dry completely.

Once the sealant is fully dried, we can proceed to inspect and touch up any imperfections that may have arisen during the drying process.

jo malone candle

Inspect and Touch up Any Imperfections

Now that the final coat of sealant has dried completely, it’s time to carefully inspect the concrete candle holders for any imperfections. We’ll focus on three main points:

  1. Repairing any cracks that may have formed during the drying process.
  2. Smoothing out any rough surfaces that could affect the overall finish.
  3. Enhancing the appearance of the candle holders.

Repairing Concrete Cracks

To ensure a smooth and polished finish, we thoroughly inspect the concrete candle holders for any cracks or imperfections before proceeding with the repair process. It’s crucial to address any concrete cracks promptly to prevent further damage and maintain the structural integrity of the candle holders.

Here are some key steps we follow when repairing concrete cracks:

  • Assess the extent of the damage: We carefully examine the cracks to determine their size, depth, and potential causes.
  • Prepare the crack for repair: We clean the crack thoroughly, removing any loose debris or dirt that may interfere with the repair.
  • Fill the crack: Using a high-quality concrete crack filler, we carefully fill the crack, ensuring that it’s completely filled and level with the surrounding surface.
  • Smooth the repaired area: After the filler has dried, we smooth out the area to create a seamless finish.

Smooth Out Rough Surfaces

We inspect the concrete candle holders for any rough surfaces or imperfections that may require touch-ups. Before sealing the candle holders, it’s crucial to ensure that the surfaces are smooth and free from any cracks or blemishes. To achieve a flawless finish, we must address any rough areas or imperfections that we come across during the inspection process.

candle making supplies uk

To begin, we carefully examine the candle holders, paying close attention to the surface texture. Any cracks or uneven areas should be repaired before proceeding with the sealing process. We use a high-quality concrete repair product to fill in the cracks and smooth out the rough surfaces. It’s important to follow the manufacturer’s instructions for proper application and drying time.

Advertisement

Once the repair work is complete, we move on to surface preparation. This involves thoroughly cleaning the candle holders to remove any dirt, dust, or debris. We use a mild detergent and water solution, along with a scrub brush, to ensure that the surfaces are clean and ready for sealing.

Enhance Overall Finish

After addressing any rough surfaces or imperfections, we proceed to enhance the overall finish of the concrete candle holders by inspecting and touching up any remaining blemishes. This step is crucial in achieving a flawless and professional-looking final product.

Here are four key aspects we focus on to improve durability and prevent staining:

interesting facts about candles

  • Smoothness: We carefully examine the surface of each candle holder, feeling for any areas that may require further attention. By ensuring a smooth finish, we create a visually appealing product that will withstand the test of time.
  • Color consistency: We meticulously inspect the color of the concrete and compare it to our desired outcome. Any discrepancies in color are addressed, and touch-ups are made to achieve a consistent and uniform appearance.
  • Seamlessness: We pay close attention to the seams and joints of the candle holders, ensuring they’re seamless and free from any visible imperfections. This meticulous attention to detail enhances the overall aesthetic and quality of the finished product.
  • Cleanliness: Before proceeding, we thoroughly clean the candle holders, removing any dust, debris, or fingerprints. This not only improves the appearance but also ensures a smooth and flawless application of the sealer.

Add Finishing Touches

Once the sealing process is complete, the final step is to enhance the appearance of the concrete candle holders with a touch of elegance. Adding finishing touches not only improves the overall aesthetics but also helps to protect the concrete from potential damage. To achieve this, there are several options to consider:

Finishing Touches Description
Paint Apply a coat of paint to add color and style to the candle holders. Choose a paint that is specifically designed for concrete surfaces to ensure durability.
Metallic Accents Add a touch of sophistication by incorporating metallic accents such as gold leaf or metallic paint. These accents can be applied to specific areas or used to create patterns or designs.
Decorative Elements Enhance the visual appeal by attaching decorative elements such as beads, shells, or mosaic tiles. These elements can be embedded into the concrete or glued onto the surface.
Sealing Apply a final layer of sealant to protect the finishing touches and provide additional durability. Choose a sealant that is compatible with the paint or decorative elements used.

Display and Enjoy Your Sealed Concrete Candle Holders

To showcase our sealed concrete candle holders, we can proudly display and enjoy them in various areas of our home. With the right display techniques and candle holder placement, we can create a captivating ambiance that enhances the overall aesthetic of our living space.

Here are four markdown bullet points to inspire our audience:

Advertisement
  • Create a centerpiece: Place the sealed concrete candle holders on a dining table or coffee table to serve as a stunning centerpiece that draws attention and sparks conversation.
  • Utilize shelving: Arrange the candle holders on a wall-mounted shelf to add visual interest and create a focal point in any room.
  • Accentuate corners: Position the candle holders in the corners of a room to create a cozy atmosphere and make the space feel more intimate.
  • Outdoor elegance: Bring the sealed concrete candle holders outdoors and place them on a patio or deck to create a warm and inviting atmosphere for gatherings or relaxation.

Frequently Asked Questions

How Long Should I Let the Primer Dry Before Applying the First Coat of Sealant?

We recommend letting the primer dry for at least 24 hours before applying the first coat of sealant. The drying time may vary depending on the specific primer used. As for the sealant, the best type to use would be a waterproof concrete sealant for optimal protection.

candlestick

Can I Use Any Type of Sealant on My Concrete Candle Holders?

Yes, you can use different types of sealants on your concrete candle holders. However, it’s important to choose the best sealant for concrete. Consider factors like durability, water resistance, and heat resistance when making your selection.

Do I Need to Sand the Surfaces of My Candle Holders Before Applying the Sealant?

Before applying the sealant, sanding the surfaces of the candle holders is necessary to ensure proper adhesion. It creates a rough texture for the sealant to grip onto. However, there may be alternative sealants that do not require sanding.

How Many Coats of Sealant Should I Apply for Optimal Protection?

For optimal protection, we recommend applying two coats of sealant to your concrete candle holders. The first coat will provide a base layer, while the second coat will enhance durability. Make sure to choose the right sealant and apply it evenly for best results.

Can I Use My Sealed Concrete Candle Holders Outdoors?

Yes, you can use sealed concrete candle holders outdoors. Applying multiple coats of sealant using proper sealing techniques and using the best outdoor sealants will provide optimal protection against weather elements and ensure longevity.

candle brand

Conclusion

After following these meticulous steps to seal your concrete candle holders, you can finally enjoy the irony of their delicate appearance contrasted with their robust protection.

Advertisement

The precise application of the sealant ensures that your candle holders will withstand the test of time, providing a beautiful addition to your home decor.

So, sit back, relax, and revel in the irony of concrete elegance.

Continue Reading

Candles

How to Snuff Out a Candle With Fingers

Published

on

By

Do you consider yourself a master at extinguishing candles, huh? Brace yourself, because we’re about to unveil the supreme method for putting out a candle using nothing more than our naked fingers. Indeed, you heard it right, everyone – no need for sophisticated equipment or devices. All it takes is a bit of understanding, plenty of expertise, and an intense eagerness to become a pro at the craft of candle snuffing.

In this guide, we will walk you through the steps to safely and efficiently snuff out a candle using only your fingers. So get those digits ready, because it’s time to show that flame who’s boss.

Let’s dive in and become the finger-flicking maestros of candle snuffing!

Key Takeaways

  • Assess the candle’s size and condition before snuffing it out.
  • Use proper finger protection techniques or a snuffer tool to minimize the risk of burns.
  • Approach the candle from the side and press fingers down firmly to cover the entire surface.
  • Hold fingers on the flame for a few seconds to ensure thorough extinguishment and prevent re-ignition.

Assess the Candle’s Size and Condition

To properly snuff out a candle with our fingers, we must first assess its size and condition. Candle size assessment is crucial to determine the amount of heat and wax remaining. A larger candle may require a different approach compared to a smaller one, as it may produce more heat and burn for a longer time.

cheap candles online australia

Additionally, candle condition evaluation is essential to ensure that the wick is intact and the flame isn’t flickering excessively. A candle with a damaged wick or an unstable flame may pose a higher risk when attempting to snuff it out.

Advertisement

Prepare Your Fingers for Safety

Now let’s talk about how to prepare our fingers for safe candle snuffing.

There are several techniques we can use to protect our fingers from burns while extinguishing a candle.

Finger Protection Techniques

We protect our fingers by using proper techniques and precautions. Finger protection is essential when attempting to snuff out a candle with our fingers.

scented candle

One crucial aspect of finger protection is hand positioning. To minimize the risk of burns, it’s important to position our hand correctly before attempting to extinguish the flame. The recommended hand position is to curl your fingers slightly, ensuring that the fingertips are away from the flame. This positioning helps to create a protective barrier between the flame and our fingers, reducing the chances of getting burned.

Preventing Burns While Snuffing

Our main goal is to ensure the safety of our fingers while snuffing out a candle. To prevent burns, it’s important to use proper finger protection techniques and maintain a proper hand positioning technique.

Advertisement

Here are some tips to keep in mind:

Finger Protection Techniques:

myer

  1. Trim your nails: Short nails reduce the risk of accidentally touching the flame.
  2. Use a snuffer: A snuffer is a tool specifically designed for extinguishing candles safely without touching the flame.

Proper Hand Positioning Technique:

  1. Cup your hand: Create a cup shape with your hand and gently place it over the candle flame.
  2. Avoid direct contact: Keep your fingers away from the flame and focus on covering the flame with your hand.

Approach the Candle From the Side

To effectively snuff out a candle with our fingers, we must carefully approach it from the side. This technique ensures that we can quickly and safely extinguish the flame without the risk of burning ourselves. Here are four steps to successfully snuff out a candle from the side:

  1. Assess the flame: Before approaching the candle, take a moment to observe the size and intensity of the flame. This will help you determine the best angle and distance for snuffing it out.
  2. Extend your fingers: Gently extend your index and middle fingers, keeping them close together. This will create a larger surface area to smother the flame effectively.
  3. Approach from the side: Slowly move your extended fingers towards the flame from a side angle. Avoid approaching from the top, as this may cause the flame to flicker or spread.
  4. Press down firmly: Once your fingers are close to the flame, press them down, covering the entire surface of the candle. Hold this position for a few seconds to ensure the flame is fully extinguished.

Gently Press Your Fingers Onto the Flame

To safely extinguish a candle with our fingers, gently press our fingertips onto the flame. However, before attempting this technique, it’s crucial to prioritize finger safety.

Begin by ensuring that our fingertips are clean and free from any oils or lotions that may increase the risk of burns. Additionally, it’s essential to approach the flame with caution, as even a small candle can still produce a significant amount of heat.

candle & co

When gently pressing our fingers onto the flame, it’s important to remember that a quick and light touch is sufficient to snuff out the candle. Avoid prolonged contact with the flame to minimize the risk of burns.

Hold for a Few Seconds to Snuff Out the Flame

After gently pressing our fingertips onto the flame, we should hold for a few seconds to effectively snuff out the candle. This step is crucial in ensuring proper extinguishment while minimizing the risk of burns. Here are four key reasons why holding for a few seconds is essential for finger protection and preventing burns:

Advertisement
  1. Heat dissipation: By maintaining contact with the flame, our fingers help dissipate the heat, reducing the risk of burns.
  2. Oxygen depletion: Holding our fingers on the flame for a few seconds prevents the oxygen flow, causing the flame to suffocate and extinguish.
  3. Complete snuffing: Holding for a few seconds ensures that the flame is thoroughly extinguished, preventing any re-ignition.
  4. Enhanced control: By keeping our fingers on the flame, we’ve better control over the extinguishing process, minimizing the chances of accidental burns.

Remove Your Fingers Slowly and Carefully

We carefully remove our fingers from the extinguished flame, ensuring a slow and cautious movement. The key to removing your fingers from the candle without getting burned is to prioritize finger protection and prevent any potential burns.

As you lift your fingers away, be mindful of the residual heat that may still be present on the wick or the surrounding wax. By removing your fingers slowly and carefully, you allow the heat to dissipate gradually, reducing the risk of burns.

candles direct portugal

Keep in mind that even though the flame is extinguished, the wax can still be hot. To further protect your fingers, you may consider using a damp cloth or wearing heat-resistant gloves.

Taking these precautions will help ensure a safe and burn-free experience when snuffing out a candle with your fingers.

Check for Any Remaining Embers or Smoke

Now that we’ve safely snuffed out the candle with our fingers, it’s crucial to check for any remaining embers or smoke. This step is essential to ensure that the candle is completely extinguished and there’s no risk of fire.

Safety Precautions for Snuffing

To ensure safety when snuffing out a candle with our fingers, it’s important to carefully check for any remaining embers or smoke. Here are some safety precautions to follow:

Advertisement

candles shoes

  1. Proper hand positioning: Before attempting to snuff out the candle, make sure your hand is positioned correctly. Place your thumb and index finger on either side of the candle’s wick, ensuring a firm but gentle grip.
  2. Avoiding finger injuries: Be cautious of any hot wax that may drip as you snuff out the candle. To prevent burns, keep your fingers away from the flame and try to avoid touching the melted wax.
  3. Check for any remaining embers: After snuffing out the flame, examine the candle’s wick for any glowing embers. Use caution when inspecting to avoid burning your fingers.
  4. Look for smoke: Even if the flame is extinguished, smoke may still be present. Carefully observe the area around the wick for any lingering smoke before considering the candle completely snuffed out.

Proper Hand Positioning Technique

To ensure the safety of our hands while snuffing out a candle, it’s vital to master the proper hand positioning technique and carefully check for any remaining embers or smoke. Finger positioning plays a crucial role in preventing burns or accidents.

Start by extending your index and middle fingers together, keeping them slightly bent. Gently press the tips of your fingers onto the candle’s wick, allowing them to cover the flame completely. This technique provides stability and control, reducing the risk of injury.

After snuffing out the flame, don’t immediately remove your fingers. Take a moment to observe for any remaining embers or smoke. This step ensures that the candle is fully extinguished, preventing any potential fire hazards.

Prioritizing hand safety and following proper finger positioning techniques will help you master the art of snuffing out a candle safely.

cheap candles online australia

Preventing Accidental Burns

We need to carefully check for any remaining embers or smoke to prevent accidental burns. Fire safety is of utmost importance when dealing with candles. Here are four steps to help prevent burns and ensure a safe environment:

  1. Inspect the candle: Before leaving the area, make sure the flame is completely extinguished. Look for any remaining embers or smoke that may indicate the candle is still burning.
  2. Use a snuffer or cover: Instead of blowing out the candle, which can potentially cause sparks or hot wax to fly, use a snuffer or cover to suffocate the flame. This reduces the risk of accidental burns and keeps the area safe.
  3. Wait for cool down: Allow sufficient time for the candle to cool down completely before touching or moving it. Hot wax and glass can cause serious burns if not handled with caution.
  4. Store candles safely: Keep candles away from flammable materials, ensure they’re placed on stable surfaces, and never leave them unattended. Following these precautions will greatly reduce the risk of accidental burns and promote fire safety.

Now, let’s move on to the next section on practicing proper candle extinguishing techniques.

Practice Proper Candle Extinguishing Techniques

For practicing proper candle extinguishing techniques, we can use our fingers to snuff out the flame safely and effectively. When extinguishing a candle with our fingers, it’s crucial to prioritize finger protection and maintain proper hand positioning.

Advertisement

To protect our fingers from potential burns, we should wet them before attempting to extinguish the candle. This helps to create a barrier between the flame and our skin. Additionally, we should position our hand above the flame, ensuring that our fingers are spread apart to avoid any accidental contact with the hot wax or flame.

candlelight concerts edinburgh

Consider Alternative Methods for Larger or Hard-To-Reach Candles

When dealing with larger or hard-to-reach candles, it’s important to explore alternative methods for extinguishing them. Here are four alternative methods you can consider:

  1. Use a candle snuffer: A candle snuffer is a tool specifically designed to safely extinguish candles. It consists of a long handle and a bell-shaped end that can be placed over the flame to cut off the oxygen supply and snuff it out.
  2. Use a long metal spoon: If you don’t have a candle snuffer, a long metal spoon can be a handy alternative. Simply hold the spoon upside down and use the back of the spoon to press down on the flame until it goes out.
  3. Blow it out with a straw: Another option is to use a straw. Position the straw close to the flame and blow gently to extinguish the candle. This method works best for candles that are within reach.
  4. Use a candle extinguisher spray: For tall candles that are difficult to reach, consider using a candle extinguisher spray. These sprays release a fine mist that suffocates the flame and puts it out.

Remember to always prioritize safety when handling candles and consider using these alternative methods for tall or hard-to-reach candles.

Frequently Asked Questions

Can I Use This Method to Snuff Out a Candle That Is Very Large or Hard to Reach?

Alternative methods for snuffing out a candle that is very large or hard to reach may be more effective. Consider using a long-handled extinguisher or a snuffer bell to safely extinguish these types of candles.

What Should I Do if There Are Still Embers or Smoke After Using This Method?

If there are still embers or smoke after using this method, it’s important to take immediate action. Make sure to blow out any remaining flames and ensure the candle is completely extinguished to avoid any potential fire hazards.

candle shack

Are There Any Safety Precautions I Should Take Before Attempting to Snuff Out a Candle With My Fingers?

Before attempting to snuff out a candle with our fingers, we must take safety precautions to minimize potential risks. It is important to be aware of the heat and potential burns that can occur.

Advertisement

Is There a Specific Technique I Should Use When Pressing My Fingers Onto the Flame?

There are various technique variations for snuffing out a candle with fingers, but it is crucial to prioritize finger protection. Carefully applying pressure to the flame and swiftly withdrawing can extinguish it effectively.

Can I Use This Method to Snuff Out a Candle That Is Already in a Glass Container?

Using this method to snuff out a candle in a glass container may be risky, so it’s better to avoid it. There are alternative methods, such as using a candle snuffer or blowing out the flame.

Conclusion

Snuffing out a candle with our fingers can be done with care and precision. By assessing the candle’s size, preparing our fingers for safety, and gently pressing onto the flame, we can extinguish it effectively.

candle price

Remember to remove our fingers slowly and check for any remaining embers or smoke. Just like a gentle breeze extinguishing a flickering flame, mastering this technique will make candle extinguishing a breeze.

Advertisement

Continue Reading

Candles

How to Revive a Candle

Published

on

By

Ever found yourself with a candle that appeared to have dimmed its light? Worry not, fellow candle lovers! We’re here to divulge our tips on rejuvenating a candle and restoring its magnificent glow.

With a few simple steps, you can breathe new life into your beloved candles and enjoy their warm glow once again. From assessing the condition of the candle to enhancing its fragrance, we will guide you through the process of reviving candles with mastery.

So gather your candles, trim those wicks, and let’s embark on this journey of candle revival together. Get ready to witness the magic unfold before your very eyes!

Key Takeaways

  • Checking the color of the candle is important to assess its condition.
  • Trimming the wick before each use ensures safety and efficient burning.
  • Proper wick maintenance prevents excessive soot build-up.
  • Reviving candles can be done through methods like hot water, microwave intervals, adding fragrance or essential oils, and reusing old candles through the melt and pour method.

Check the Candle’s Condition

To begin, we should assess the condition of the candle. When trying to revive a candle, it’s crucial to check its color and assess the quality of the wax. The color of the candle can give us valuable insights into its condition. If the candle has turned yellow or has dark spots, it might be an indication of improper storage or exposure to heat. On the other hand, if the candle’s color remains intact and vibrant, it suggests that it’s still in good condition.

candle shack discount code

Next, we need to assess the quality of the wax. Look for any signs of discoloration, cracking, or separation. These could be signs of deterioration or poor quality wax. By carefully examining the candle, we can determine the extent of its revival needs.

Advertisement

Once we’ve assessed the condition of the candle, we can then proceed to the next step: trimming the wick.

Trim the Wick

When it comes to reviving a candle, one important step is to trim the wick. By keeping the wick at the proper length, you ensure both safety and efficient burning.

A longer wick can cause the flame to flicker and produce more soot, while a shorter wick may not burn evenly.

yankee candle malaysia

Wick Length for Safety

In our article, we’ll discuss the importance of trimming the wick for safety when reviving a candle. Wick maintenance is crucial for ensuring fire safety and preventing accidents. Here are three key reasons why trimming the wick is essential:

  1. Preventing excessive flame height: A long wick can cause the flame to burn too high, increasing the risk of the candle tipping over or catching nearby objects on fire. By trimming the wick to a proper length, you can control the flame height and minimize potential hazards.
  2. Reducing soot production: An untrimmed wick can create excessive black soot that not only stains the candle container but also pollutes the air. Trimming the wick regularly helps prevent soot buildup, ensuring cleaner and healthier air quality.
  3. Enhancing candle longevity: A longer wick burns the wax faster, shortening the overall lifespan of the candle. By keeping the wick trimmed to the recommended length, you can enjoy your candle for a longer time, maximizing its value and enjoyment.

Efficient Burning Tips

Now let’s explore how we can ensure efficient burning by addressing the importance of trimming the wick.

Wick maintenance plays a crucial role in candle safety and ensuring that your candle burns evenly and cleanly. When the wick becomes too long, it can create a larger flame that burns through the wax too quickly, leading to uneven burning and wasted wax.

Advertisement

By trimming the wick to a quarter of an inch before each use, you promote a steady and controlled flame, allowing the candle to burn more efficiently. This simple act not only extends the lifespan of your candle but also prevents excessive soot build-up, which we’ll discuss in the next section.

candle homewares

Prevent Soot Build-Up

To prevent soot build-up and ensure efficient burning, we should continue the discussion by addressing the importance of trimming the wick. Proper wick maintenance is one of the most effective preventive measures to keep your candles burning cleanly and evenly. Here are three cleaning methods to help you keep your wick in optimal condition:

  1. Trim the wick to about 1/4 inch before each use. This ensures a controlled flame height, minimizing the risk of soot and black smoke.
  2. Use a wick trimmer or sharp scissors for a clean cut. Avoid using your fingers to pinch or break the wick, as this can cause it to fray and create uneven burning.
  3. Remove any debris or excess wick trimmings from the candle before lighting. This helps prevent the wick from becoming clogged, ensuring a steady and even burn.

Remove Any Debris

Let’s start by clearing away any debris from the candle. Proper wick maintenance is essential for a clean and efficient burn. Over time, debris such as charred wick remnants, dust, and other particles can accumulate on the surface of the candle. This not only affects the appearance but also hinders the candle’s ability to burn evenly.

To remove debris, gently brush off any loose particles using a soft-bristle brush or a cotton swab. For stubborn debris, you can use cleaning techniques like gently scraping it off with a blunt knife or using a damp cloth to wipe it away. Remember to be gentle to avoid damaging the candle’s surface.

Soften the Wax

Soften the wax is a crucial step in reviving a candle that has been worn down. There are several methods you can use to achieve this.

candle price

One option is to heat the candle in order to melt the wax, either by using hot water or by microwaving it in intervals.

Advertisement

Heat for Melting

We can use a double preposition to effectively apply heat and melt the wax, reviving the candle. By using an external heat source, we can soften the hardened wax and bring the candle back to life.

Here are three alternative methods for applying heat to melt the wax:

  1. Hot Water Bath: Fill a heat-resistant container with hot water and place the candle in it. The heat from the water will slowly melt the wax, allowing the wick to burn again.
  2. Hairdryer: Set your hairdryer to a medium heat setting and aim it at the candle. Move the dryer back and forth to evenly distribute the heat and watch as the wax begins to soften and melt.
  3. Oven Method: Preheat your oven to a low temperature (around 150°F) and place the candle on a baking sheet. Leave it in the oven for a few minutes until the wax becomes pliable.

Use Hot Water

To continue applying heat and melting the wax, we can use hot water to soften the hardened wax and revive the candle. This method is one of the most effective reheating methods for candles.

candles direct uk

The benefits of using hot water include its ability to evenly distribute heat, ensuring that the wax melts uniformly. Additionally, hot water is a safe and easy-to-use option, as it eliminates the risk of accidentally overheating the wax or causing a fire.

To use this method, simply place the candle in a heat-resistant container and pour hot water around it, making sure the water level is below the candle’s rim. Let the candle sit in the hot water for a few minutes, allowing the wax to soften. Once softened, the candle can be easily relit.

Transitioning into the next section on using the microwave in intervals, let’s explore another method for reviving candles.

Advertisement

Microwave in Intervals

To further explore candle revival methods, another effective option involves using the microwave in intervals to achieve softening of the wax. This method is quick and convenient, but it requires caution and careful attention to prevent accidents.

candlelight concerts belfast

Here are three steps to follow when using the microwave to revive your candle:

  1. Place the candle in a microwave-safe container and cover it loosely with a microwave-safe lid or paper towel. This will prevent any wax from splattering and creating a mess inside the microwave.
  2. Set the microwave to a low power setting, such as 50% power, to avoid overheating the wax. Start with short intervals, such as 15-30 seconds, and check the candle after each interval. This will allow the wax to gradually soften without melting too quickly.
  3. Use oven mitts or a towel to carefully remove the container from the microwave and stir the softened wax. If there are any unmelted chunks, continue microwaving in short intervals until the wax is completely liquefied.

Remember to always follow heat precautions and never leave the microwave unattended while reviving your candle. While this method can be effective, it’s important to consider alternative methods as well, such as using hot water or a hairdryer, depending on the type of candle and the amount of wax left.

With these techniques, you can bring your favorite candles back to life and continue enjoying their warm glow for hours on end.

Add Fragrance or Essential Oils

One option to rejuvenate a candle is by infusing it with a delightful scent using fragrance or essential oils. Adding fragrance to a candle not only enhances its aroma but also creates a soothing ambiance in your space. By using fragrance blending techniques, you can create unique and personalized scents that cater to your preferences. Essential oils, on the other hand, offer the added benefits of aromatherapy, which can promote relaxation, reduce stress, and uplift your mood. Here is a table showcasing some popular fragrance oils and their corresponding benefits:

candlelight concert

Fragrance Oil Benefits
Lavender Calming and promotes better sleep
Citrus Energizing and refreshing
Vanilla Comforting and relaxing
Eucalyptus Clears the mind and promotes focus

Melt and Pour Method

Now let’s talk about the melt and pour method, a fantastic way to reuse old candles and create something new.

Advertisement

With this easy melting technique, you can transform your unused candles into beautiful creations.

Reusing Old Candles

We often find ourselves with old candles that have burned down, but instead of throwing them away, we can revive them by using the melt and pour method. Reusing candle jars and repurposing candle wax not only saves money, but it also allows us to exercise creativity and reduce waste.

Here are three ways to make the most out of our old candles:

boy smells candles australia

  1. Clean and reuse the candle jars: After the candle has burned down, place the jar in the freezer for a few hours. This will make the remaining wax shrink and easily pop out. Clean the jar thoroughly with warm soapy water, and it’s ready to be repurposed as a storage container or a stylish vase.
  2. Create new candles: Collect the leftover wax from multiple candles and melt them together using a double boiler method. Add essential oils or dried flowers for a personalized touch. Pour the melted wax into cleaned candle jars, insert a new wick, and let it cool. Now, we’ve a brand new candle ready to be enjoyed.
  3. Make wax melts or fire starters: Melt the leftover wax, add some fragrance oils or essential oils, and pour it into silicone molds. Once cooled and hardened, these wax melts can be used in wax warmers to fill our homes with delightful scents. Alternatively, mix the melted wax with sawdust or shredded paper to create fire starters for camping or fireplace use.

Easy Melting Technique

To easily revive a candle, we can utilize the melt and pour method. This technique allows us to melt down the remaining wax and pour it into a new container or mold to create a brand new candle. It’s a simple yet effective way to breathe new life into our old candles. However, it’s important to prioritize melting safety to avoid any accidents. Always use a double boiler or a heat-resistant container when melting the wax to prevent it from overheating or catching fire. Additionally, there are alternative methods we can explore, such as using a slow cooker or a microwave. By following these safety precautions and exploring different melting techniques, we can master the art of candle revival.

Melting Safety Alternative Methods
Use a double boiler or heat-resistant container to melt the wax. Use a slow cooker to melt the wax.
Avoid overheating or exposing the wax to an open flame. Try melting the wax in the microwave.
Always monitor the melting process and stir occasionally. Experiment with different methods to find what works best for you.

Pouring With Precision

After melting the wax using the melt and pour method, it’s time to carefully pour it into the desired container or mold. Precision pouring is essential to ensure that the candle sets evenly and has a professional finish.

To achieve this, here are three measuring techniques that will help you pour with accuracy and finesse:

Advertisement
  1. Use a heat-resistant measuring cup: This will allow you to accurately measure the melted wax and provide a steady pour without any spills or drips.
  2. Slow and steady: Pour the wax slowly and steadily into the container or mold. This will prevent air bubbles and ensure that the wax fills every corner evenly.
  3. Aim for the center: When pouring the wax, aim for the center of the container or mold. This will create a balanced candle that burns evenly and avoids any uneven melting.

Reheat and Reshape the Candle

One simple step to revive a candle is by gently reheating and reshaping it. When it comes to reheating techniques, there are a few options to consider.

candle making set

One method is to use a hairdryer on low heat, holding it a few inches away from the candle. This allows the heat to gradually soften the wax without causing any damage.

Another technique is to place the candle in a warm oven for a short period of time, ensuring to monitor it closely to prevent any overheating.

As for reshaping tools, a butter knife or a spoon can be used to gently push and mold the softened wax back into its original form.

It’s important to be patient and gentle throughout the process to avoid any breakage.

yankee candle coupon

Blend Multiple Candles

To enhance the rejuvenation process, we can combine various candles to create a unique and captivating aroma. Blending different scents allows us to experiment and create our own signature fragrance.

Advertisement

Here are three ways to blend multiple candles:

  1. Layering: Start by burning one candle with a specific scent and then light another candle with a complementary scent. As the two scents mingle, they create a harmonious and complex aroma that fills the room.
  2. Mixing: If you have leftover wax from different candles, you can melt them together to create a completely new scent. Heat the wax in a double boiler, add a few drops of essential oil for an extra touch, and pour it into a new container. This way, you can repurpose old candles and create a unique blend.
  3. Creating combinations: Experiment with different candle combinations by placing them in close proximity to each other. The heat from one candle can help release the fragrance from another, resulting in an enticing fusion of scents.

Create a Layered Effect

To achieve a layered effect in candle revival, we blend different scents to create a captivating and unique aroma. But why stop at just the scents? By incorporating a mix and match of colors, we can create an ombre effect that adds visual interest to our candles as well.

This technique involves melting two or more different colored candles and pouring them into the container one layer at a time. As each layer solidifies, a beautiful gradient of colors is formed, creating a stunning visual effect.

candles direct portugal

The key to achieving a seamless ombre effect is to carefully pour each layer and allow sufficient time for it to cool and set before adding the next layer. With this technique, we can transform our candles into works of art that not only smell amazing but also look visually captivating.

Use Candle Accessories

Now let’s explore how we can enhance our candle revival process by utilizing various candle accessories. These accessories aren’t only functional but also add beauty and elegance to our candle setup.

Here are three essential candle accessories that can elevate our candle experience:

Advertisement
  1. Candle Holder: A stylish and sturdy candle holder not only provides a secure base for our candles but also adds a touch of sophistication to our decor. Choose a holder that complements the style and ambiance of your space, whether it’s a sleek modern design or a vintage-inspired piece.
  2. Candle Snuffer: Using a candle snuffer isn’t only practical but also helps to preserve the fragrance and prevent unnecessary smoke. Snuffing out the flame with a snuffer eliminates the need to blow it out, preventing wax splatters and keeping the wax pool clean for future burns.
  3. Candle Trays: Candle trays serve a dual purpose of protecting surfaces from heat and wax drips while also enhancing the visual appeal of our candle arrangement. Opt for trays in materials like metal, glass, or ceramic that match the aesthetics of your space, and consider adding decorative elements such as pebbles or dried flowers for an extra touch of beauty.

Store and Maintain Your Revived Candle

After reviving our candle, we should properly store and maintain it to ensure its longevity and continued enjoyment.

floral candle

Proper candle storage is essential to preserve its quality and prevent any damage. When storing your revived candle, make sure to keep it in a cool, dry place away from direct sunlight or heat sources. This will help maintain its shape and prevent melting or warping.

It’s also important to store your candle in a container or box to protect it from dust and debris. Additionally, regular candle maintenance is crucial to ensure optimal performance.

Trim the wick to about 1/4 inch before each use to prevent excessive smoke and uneven burning. Keep the candle free from any debris or burnt wick remnants.

Frequently Asked Questions

Can I Use Any Type of Fragrance or Essential Oils to Add Scent to My Revived Candle?

When reviving a candle, it’s important to consider alternative fragrance options. While any type of fragrance or essential oils can be used, it’s best to choose scents that complement the candle’s original aroma. Proper maintenance is key for achieving optimal results.

candle making kit

How Long Should I Let the Candle Cool Before I Can Use It Again?

To achieve optimal results when cooling your candle after using a hairdryer for revival, it is recommended to allow it to cool for a sufficient amount of time. Patience is key in ensuring the candle is ready for use again.

Advertisement

Can I Use a Hairdryer to Soften the Wax if I Don’t Have a Heat Gun?

Yes, you can use a hairdryer to soften the wax if you don’t have a heat gun. It’s a great alternative method for reviving candles without a heat gun. Just be sure to use a low heat setting and be cautious not to overheat the wax.

Can I Mix Different Scents Together When Blending Multiple Candles?

Mixing scents allows for endless fragrance options. It’s a delightful way to create unique and personalized aromas. Experiment with different combinations to find your perfect blend. The possibilities are truly intoxicating.

Is It Safe to Use Candle Accessories Like Candle Holders or Trays With a Revived Candle?

Using candle accessories with a revived candle is generally safe, but it’s important to take safety precautions. Consider the material and size of the holder or tray, and ensure it can withstand the heat.

candles

Conclusion

Reviving a candle is like breathing new life into an old flame. With a little TLC, your candles can shine bright once again, adding warmth and ambiance to any space.

By checking the condition, trimming the wick, and softening the wax, you can ensure your candle burns beautifully.

Advertisement

Don’t forget to add a personal touch with fragrance or essential oils, and get creative with blending and layering.

With proper care and maintenance, your revived candle will continue to bring joy for many cozy nights to come.

ecoya penrith

Continue Reading

Trending