Connect with us

Candles

How to Trim Your Candle Wick With Scissors

Published

on

Ready to find out how to trim your candle wick using scissors? We’re here to walk you through each step of the process.

Trimming your wick is an important task that ensures your candle burns safely and efficiently. By keeping the wick at the right length, you’ll prevent excessive smoke and soot, while extending the life of your favorite candles.

To get started, all you’ll need are a pair of scissors and a few minutes of your time. We’ll show you the ideal length to trim your wick and provide tips for maintaining a clean burn.

So, let’s dive in and discover how to keep your candles shining bright!

Advertisement

yankee candle singapore

Key Takeaways

  • Trimming the wick prevents excessive smoke and soot buildup.
  • Regular wick trimming ensures a cleaner burn and longer candle life.
  • Proper tools like scissors or wick trimmers ensure optimal performance.
  • Trimming to the recommended length promotes a controlled flame and minimizes smoke.
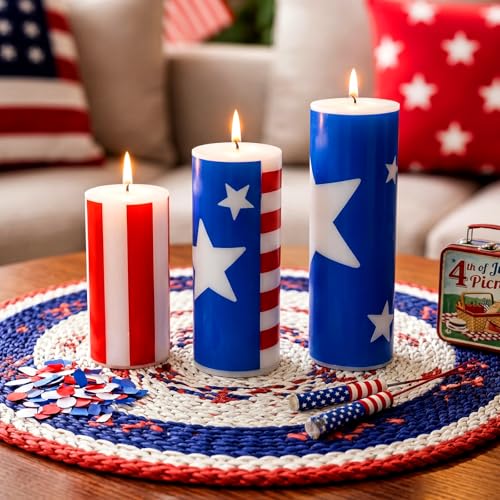
Why Trimming Your Candle Wick Is Important

Trimming your candle wick is important because it helps to prevent excessive smoke and soot buildup when the candle is burning. Regular wick trimming is essential for maintaining a clean burn and ensuring a longer-lasting and more enjoyable candle experience.

When a wick is too long, it can produce a larger flame, causing the candle to burn faster and create more smoke. By trimming the wick to the recommended length of about 1/4 inch before each use, you can control the size of the flame and reduce the amount of smoke and soot emitted. This not only improves air quality but also prevents the formation of black residue on your candle jar or surrounding surfaces.

Additionally, regularly trimming the wick promotes a more even and consistent burn, maximizing the fragrance throw and extending the overall burn time of your candle.

Tools You’ll Need for the Job

To effectively trim your candle wick with scissors, there are a few tools you’ll need for the job.

dusk gifts

First, you’ll need to determine the necessary trimming frequency based on the type of candle and its burn time.

Next, it’s important to have a pair of scissors that are specifically designated for wick trimming to ensure proper handling and prevent any potential wax contamination.

Advertisement

Lastly, understanding the benefits of regular wick trimming, such as a cleaner burn and extended candle life, will reinforce the importance of having the right tools for the job.

Necessary Trimming Frequency

We recommend regularly trimming your candle wick with scissors to ensure optimal burning conditions and prolong the life of your candle. The ideal wick length is about ¼ inch, as a longer wick can result in a larger flame and excessive smoke.

candle salad

Trimming the wick to the recommended length will promote a steady and even burn, preventing any tunneling or uneven melting. But how often should you trim your candle wick? It’s best to trim it before each use or every 3-4 hours of burn time. This will maintain a clean and efficient burn, preventing any black soot from accumulating on the container or affecting the fragrance.

Now that you know the necessary trimming frequency, let’s move on to proper scissor handling for this task.

Proper Scissor Handling

To effectively handle scissors for trimming your candle wick, it is important to have the right tools for the job. Proper scissor care is essential to ensure their longevity and optimal performance. Here are some common scissor problems and the tools you’ll need to address them:

Advertisement
Scissor Problem Tools You’ll Need
Dull blades Sharpening stone or professional scissor sharpener
Rust or corrosion Fine-grit sandpaper or rust remover solution
Loose pivot screw Screwdriver or hex key
Sticky residue Rubbing alcohol or adhesive remover
Stuck blades Lubricating oil or silicone spray

Benefits of Wick Trimming

As we continue with our discussion on proper scissor handling, it’s important to understand the benefits of wick trimming and the tools needed for the job.

candle holders decorative

Trimming the wick of your candle has numerous advantages. Firstly, it helps to increase the burn time of the candle. A trimmed wick allows the flame to burn more efficiently, preventing excessive melting of the wax and ensuring a longer-lasting candle.

Additionally, wick trimming reduces soot production. When the wick is too long, it can create a larger flame that produces more soot. By regularly trimming the wick, you can minimize the amount of soot released into the air, creating a cleaner and healthier environment.

To trim the wick, you’ll need a pair of sharp scissors or wick trimmers specifically designed for the job. These tools allow for precise and clean cuts, ensuring optimal candle performance.

Step-By-Step Guide to Trimming Your Candle Wick

To properly trim your candle wick, begin by gathering a pair of sharp scissors. Follow these best practices for wick trimming to ensure a safe and enjoyable candle burning experience:

Advertisement

candle meaning

  • Make sure your candle is completely cooled before trimming the wick.
  • Remove any debris or charred bits from the top of the candle with a wick trimmer or your fingers.
  • Hold the scissors at a slight angle and trim the wick to about 1/4 inch in length.
  • Be careful not to cut the wick too short, as this can cause the candle to burn improperly.
  • Dispose of the trimmed wick in a safe manner, away from the candle.

By following these simple steps, you can maintain your candle wick and enhance the overall performance and longevity of your candles.

Happy trimming!

How to Safely Handle the Scissors

When it comes to safely handling the scissors for trimming your candle wick, there are a few important points to keep in mind.

First, make sure you have a proper scissor grip and technique to ensure precision and control.

candle shack clp

Second, always prioritize safety by keeping your fingers away from the blades and avoiding any sudden movements while trimming.

Scissor Grip and Technique

Our recommended scissor grip and technique for safely handling the scissors is crucial to ensure a precise and secure trimming of your candle wick. Here are some scissor grip techniques and scissor maintenance tips to help you achieve the best results:

Advertisement
  • Hold the scissors with your dominant hand, placing your thumb in one handle and your middle and index fingers in the other.
  • Keep your fingers away from the blades to avoid accidents.
  • Use gentle pressure when cutting to prevent damaging the wick or the candle.
  • Regularly clean the scissors with a soft cloth to remove any wax residue.
  • Store your scissors in a dry place to prevent rusting.

Safety Precautions While Trimming

For the safe handling of the scissors, it’s important to abide by proper safety precautions while trimming your candle wick.

First and foremost, ensure that you have a designated safe scissor storage area. This will prevent any potential accidents or injuries when not in use.

candlelight inn

When using the scissors, hold them firmly but not too tightly to maintain control. Keep your fingers away from the blades while trimming to avoid any accidental cuts.

Additionally, be mindful of preventing wick debris from falling into the candle as you trim. This can be done by holding the scissors close to the wick and cutting it at a slight angle, allowing the debris to fall onto a tissue or a designated tray.

By following these safety precautions, you can enjoy a worry-free candle trimming experience.

Now let’s move on to the next section, where we’ll discuss the ideal length to trim your candle wick.

Advertisement

candle flame zones

The Ideal Length to Trim Your Candle Wick

After determining the proper technique for trimming your candle wick with scissors, it’s important to understand the ideal length to maintain for optimal burning. Keeping your candle wick at the ideal length not only ensures a clean and even burn but also prolongs the life of your candle. Here are some key points to consider:

  • The ideal wick length is typically around 1/4 inch.
  • Trimming the wick to this length helps prevent excessive flickering and soot buildup.
  • A shorter wick promotes a controlled flame while minimizing smoke.
  • Maintaining the ideal wick length reduces the risk of uneven burning and tunneling.
  • Regularly trimming your candle wick enhances its overall performance and allows you to fully enjoy its fragrance and ambiance.

Tips for Maintaining a Clean Burn

To achieve a clean burn when using candles, it’s important to follow these tips.

First, make sure to trim the wick to the recommended length before lighting the candle. This helps maintain the fragrance and prevents soot buildup.

Additionally, ensure that the candle is placed on a stable and heat-resistant surface to avoid any accidents. Keep the candle away from drafts, as they can cause uneven burning and excessive smoke.

candle shack uk

When extinguishing the flame, use a candle snuffer or gently blow it out to prevent any hot wax from splattering.

Finally, remember to never leave a burning candle unattended and always keep them out of reach of children and pets. By following these guidelines, you can enjoy a clean burn while maximizing the longevity of your candle.

Advertisement

Now, let’s discuss some common mistakes to avoid when trimming your wick.

Common Mistakes to Avoid When Trimming Your Wick

One common mistake to avoid when trimming your wick is neglecting to use proper tools. When it comes to trimming your candle wick, it’s important to have the right equipment on hand to ensure a clean and efficient trim. Here are some common mistakes to avoid and troubleshooting tips:

candlelight concerts aberdeen

  • Using scissors that aren’t specifically designed for wick trimming can result in an uneven cut.
  • Trimming your wick too short can cause the flame to be too small, leading to poor burning performance.
  • Neglecting to trim your wick regularly can result in a buildup of carbon, which can affect the quality of the burn.
  • Trimming your wick while the candle is still lit can be dangerous and increase the risk of accidents.
  • Not properly disposing of the trimmed wick can create a mess and potentially cause a fire hazard.

Frequently Asked Questions About Candle Wick Trimming

Let’s address some frequently asked questions about candle wick trimming. As candle enthusiasts, we understand the importance of maintaining our candles to ensure a clean and safe burn. To provide you with the information you need, we have compiled a list of common questions and their answers in the table below:

FAQ Answer
Can I use alternatives to candle wicks? While proper wick trimming is essential, there are alternatives available such as wooden wicks or cotton rope wicks. These alternatives can offer unique benefits and enhance your candle experience.
What are the benefits of longer wicks? Longer wicks allow for a larger flame, which can result in a stronger scent throw and a brighter glow. However, it is crucial to ensure that the wick is not too long as it may cause excessive smoking or uneven burning. Regular trimming is still necessary for optimal performance.

Frequently Asked Questions

Can I Use Any Type of Scissors to Trim My Candle Wick?

We should use scissors specifically designed for trimming candle wicks. Regular trimming is important to prevent excessive soot and uneven burning. It ensures a longer and cleaner burn, making our candle experience more enjoyable.

How Often Should I Trim My Candle Wick?

When it comes to trimming candle wicks, we’ve learned that it’s important to prevent wick mushrooming and dispose of trimmings properly. But how often should we trim? Let’s find out!

Is It Necessary to Trim the Wick Before Every Use?

It’s important to trim candle wicks for an optimal burn. Neglecting to do so can result in uneven burning and excessive smoke. Common mistakes to avoid include trimming too short or leaving the wick too long.

Advertisement

candle in the wind

Can I Use a Different Tool to Trim My Candle Wick if I Don’t Have Scissors?

If scissors aren’t available, we can still trim candle wicks with different tools. Alternatives include nail clippers, wire cutters, or even a small knife. Safety is key, so choose a tool that can safely and effectively trim the wick.

Can I Reuse the Leftover Wick Trimmings for Anything Else?

We can repurpose leftover candle wick trimmings for creative DIY projects. By incorporating them into crafts or using them as kindling for fire starters, we can give them a new purpose and reduce waste.

Conclusion

In conclusion, trimming your candle wick is a simple yet crucial step in ensuring a clean and safe burn.

By using the right tools and following the step-by-step guide, you can maintain the ideal wick length and avoid common mistakes.

candle warmer

Remember to handle the scissors with care and always prioritize safety.

Advertisement

With regular trimming and proper maintenance, you’ll enjoy a longer-lasting and more enjoyable candle experience.

I'm Jane and I love candles. I have candles everywhere in my house--in every room, on every surface. I love the smell of candles, and I love how they make my place feel warm and cozy. Candles are really important to me. They help me relax and de-stress after a long day. They remind me of happy memories, and they make me feel calm and peaceful. I can't imagine my life without candles!

Continue Reading
Advertisement

Candles

How to Get Candle Wax off Candle Holder

Published

on

By

Are you exhausted from battling to get rid of hard-to-remove candle wax from your candlesticks? Don’t worry! We’ve got the ideal remedies to assist you in becoming a master at maintaining your candle holders.

In this guide, we will explore various methods that will effortlessly rid your candle holders of unwanted wax. From the freezing method to using boiling water, heat guns, and even dishwashing liquid, we have you covered.

No longer will you have to endure the frustration of scraping and scrubbing. With our expert techniques and handy tips, you’ll be able to easily restore your candle holders to their former glory.

So, let’s dive in and discover the secrets to getting candle wax off candle holders like a pro!

Advertisement

cheap candles australia

Key Takeaways

  • Freezing the candle holder can help detach frozen wax and make it easier to remove.
  • Applying heat, either through boiling water or a hairdryer, can solidify and soften the wax for removal.
  • Spoon scraping is an effective and versatile method for removing hardened wax.
  • Alternative cleaning methods like rubbing alcohol, vinegar solution, baking soda paste, and dishwashing liquid can also be used to remove wax residue.

Freezing Method

To remove candle wax from a candle holder using the freezing method, we’ll need to follow a few simple steps.

First, place the candle holder in a plastic bag to prevent condensation from forming on the surface.

Next, put the bagged candle holder in the freezer for about 2-3 hours. Freezing the wax will make it brittle and easier to remove.

Once the time is up, take the candle holder out of the freezer and gently tap it on a hard surface. The frozen wax should easily detach from the holder.

candle holders for pillar candles

If there are any stubborn residue left, you can use a plastic scraper or your fingernail to scrape it off. Remember, it’s important to avoid using sharp or metal tools as they can damage the candle holder.

If you’re concerned about potential damage, you can also consider using alternative materials like silicone or glass candle holders, which are easier to clean.

Advertisement

Boiling Water Method

Alright, let’s talk about the boiling water method for getting candle wax off a candle holder.

This method is quick and effective because heat melts the wax, allowing it to easily be removed. Plus, there’s no residue left behind, so you’ll have a clean candle holder in no time.

candle shack

Heat Melts Wax

We can remove candle wax from a candle holder using the boiling water method. This technique involves pouring boiling water into the holder and allowing the heat to melt the wax. Before attempting this method, make sure the candle holder is heat-resistant and can withstand the temperature of boiling water.

Alternatively, you can use a hairdryer to apply heat directly to the wax, causing it to melt and become easier to remove. Be cautious when using a hairdryer, as the hot air can blow the wax around and create a mess.

In the next section, we’ll discuss a quick and effective method to remove candle wax from a candle holder.

Advertisement

Quick and Effective Method

Using the boiling water method, we can quickly and effectively remove candle wax from a candle holder. This method is a great alternative to the hairdryer method and offers several benefits over the freezing method.

candle shack

The boiling water method is simple, efficient, and requires minimal effort. Here’s how it works:

  1. Fill a pot with water and bring it to a boil.
  2. Carefully pour the boiling water into the candle holder, making sure to cover the wax completely.
  3. Allow the water to cool down and the wax to harden.
  4. Once the wax has solidified, simply remove it from the candle holder.

No Residue Left Behind

By using this method, you can ensure that there’s no residue left behind on your candle holder. The boiling water method is an effective way to remove candle wax stains without leaving any traces behind. Here’s how to do it:

  • Fill a pot with water and bring it to a boil.
  • Carefully pour the boiling water into a heat-resistant bowl or container.
  • Make sure the container is large enough to fully submerge the candle holder.
  • Be cautious to avoid any splashes or burns.
  • Gently lower the candle holder into the hot water, ensuring it’s fully immersed.

Leave the candle holder in the water for a few minutes to allow the wax to soften and melt. Carefully remove the candle holder from the water and wipe it clean with a soft cloth. Repeat the process if any residue remains until the candle holder is completely clean.

Use of Heat Gun

Now let’s talk about using a heat gun to remove candle wax from a candle holder.

candle holders decorative

This method involves using an alternative heat source to melt the wax and make it easier to remove.

However, it’s important to take safety precautions when using a heat gun.

Advertisement

Some precautions include wearing protective gloves and keeping flammable objects away from the area.

Alternative Heat Sources

We found that employing a heat gun effectively removes candle wax from the candle holder. However, if you’re looking for alternative heat sources, there are a few eco-friendly options to consider:

candle flame zones

  1. Solar-powered heating pads:
  • These pads use the sun’s energy to generate heat and can be placed under the candle holder to melt the wax.
  • They’re portable and easy to use, making them a convenient choice for outdoor settings.
  1. Electric heating plates:
  • These plates are powered by electricity and provide a controlled and consistent heat source.
  • Place the candle holder on top of the plate and let it melt the wax away.

Safety Precautions

Let’s go over the safety precautions when using a heat gun to remove candle wax from a candle holder. It’s important to take these measures to prevent accidents and ensure a safe cleaning process. Here are some key safety precautions to keep in mind:

Safety Precautions
Use protective gloves to prevent burns.
Keep the heat gun away from flammable materials.
Use the heat gun in a well-ventilated area to avoid inhaling fumes.
Keep a safe distance from the candle holder to prevent damage.

Hairdryer Method

Occasionally, we use a hairdryer to remove candle wax from a candle holder. When using this method, it’s essential to prioritize hairdryer safety to prevent accidents. Here are some tips to keep in mind:

  • Set the hairdryer to the lowest heat setting to avoid damaging the candle holder or causing the wax to splatter.
  • Hold the hairdryer at least six inches away from the wax to ensure even distribution of heat.
  • Move the hairdryer in a circular motion around the wax, gradually melting it.
  • Place a paper towel or cloth underneath the candle holder to catch any dripping wax.

It’s important to note that if you don’t have a hairdryer available, there are alternative heat sources you can use. These include using a warm oven or placing the candle holder in warm water. Remember to exercise caution when using any heat source to avoid accidents and damage to the candle holder.

Scraping With a Spoon

When it comes to removing candle wax from a candle holder, scraping with a spoon can be an effective technique. Not only does it allow for easy removal of hardened wax, but it also helps to prevent scratching or damaging the holder.

candlesticks charts

However, if you don’t have a spoon on hand, there are alternative scraping methods that can be just as effective.

Advertisement

Additionally, taking preventative measures, such as using a liner or applying a thin layer of oil, can help to minimize future wax buildup and make cleaning easier.

Spoon Technique Effectiveness

We found that using a spoon to scrape off candle wax from a candle holder was highly effective. The spoon technique offers a simple and practical solution to remove stubborn wax.

Here are the pros and cons of using a spoon for this task:

dusk candle holder

  • Pros:
  • Versatility: A spoon can be easily maneuvered into tight spaces, reaching wax that may be difficult to remove with other tools.
  • Gentle on surfaces: Unlike sharp objects or abrasive materials, a spoon is less likely to scratch or damage the candle holder.
  • Cons:
  • Time-consuming: Depending on the amount of wax, scraping off with a spoon can be a time-consuming process.
  • Limited effectiveness on melted wax: The spoon technique may not be as effective when dealing with melted wax, as it tends to spread the wax rather than fully removing it.

Alternative Scraping Methods

To explore alternative scraping methods, let’s delve into the effectiveness of using a spoon to remove candle wax from a holder. Scraping with a spoon can be a useful technique when traditional methods fail or are not available. The curved edge of a spoon allows for precise scraping without damaging the candle holder. Here is a table summarizing the pros and cons of using a spoon for wax removal:

Pros Cons
Easily accessible Requires patience
Gentle on the holder May leave residue
Versatile Requires effort

While using a spoon can be effective, it is important to note that there are other scraping alternatives and non-traditional methods available. Now, let’s move on to the next section and discuss preventing future wax buildup to maintain a clean candle holder.

Preventing Future Wax Buildup

To prevent future wax buildup on candle holders, it’s important to regularly scrape off any excess wax using a spoon. Here are some steps to follow:

Advertisement
  • Hold the candle holder securely and position it over a trash can or a piece of newspaper to catch the wax.
  • Take a spoon and gently scrape off any visible wax residue on the surface of the holder. Be careful not to scratch or damage the holder.
  • Use the edge of the spoon to remove any wax that might’ve dripped down the sides of the holder.
  • After scraping off the wax, wipe the holder with a soft cloth to remove any remaining residue.

By regularly scraping off excess wax, you can prevent future damage to your candle holder and keep it looking clean and attractive.

jo malone candle

If you prefer alternative cleaning solutions, such as using heat or freezing methods, refer to the previous section for more information.

Use of Ice Cubes

One effective method for removing candle wax from a candle holder is by utilizing ice cubes. This technique is a practical and mess-free way to tackle stubborn wax residue.

To begin, place the candle holder in the freezer for about 30 minutes. The cold temperature will cause the wax to harden and contract, making it easier to remove.

Once the wax is frozen, take a plastic spatula or a butter knife and gently scrape off the wax. Alternatively, you can wrap the candle holder in a plastic bag and use a hammer to break the frozen wax into smaller pieces, which can then be easily removed.

candle light

This method eliminates the need for using heat or chemicals and provides a quick and efficient solution for wax removal.

Advertisement

Hot Towel Technique

Let’s talk about the hot towel technique for removing candle wax from a candle holder. This method is effective in loosening and softening the wax, making it easier to remove.

But are there any alternative cleaning methods that can achieve the same results? Let’s explore the points and find out.

Effective Wax Removal

We found that using a hot towel is an effective method for removing wax from a candle holder. Here is how you can do it:

candlestick patterns

  • Prepare a hot towel by soaking it in boiling water. Be careful not to burn yourself while handling the hot water.
  • Place the hot towel on top of the hardened wax on the candle holder. The heat from the towel will soften the wax, making it easier to remove.
  • Gently press the towel against the wax and hold it in place for a few minutes. This allows the heat to penetrate and loosen the wax.
  • Use a soft cloth or paper towel to wipe away the softened wax. Repeat this process until all the wax is removed.

Remember to exercise hairdryer safety precautions if you’re using a hairdryer instead of a hot towel. Always keep a safe distance between the hairdryer and the candle holder to prevent any accidents.

Alternative Cleaning Methods?

Continuing with the effective wax removal method discussed earlier, we can explore alternative cleaning methods for removing candle wax from a candle holder. In addition to using the freezing method, there are other options available that utilize alternative cleaning products and natural cleaning solutions. These alternatives can be just as effective and may even be more environmentally friendly.

One alternative method is the hot towel technique. This method involves placing a damp, hot towel over the wax on the candle holder. The heat from the towel helps to soften the wax, making it easier to remove. After a few minutes, gently wipe away the softened wax with the towel. Be careful not to burn yourself in the process.

Advertisement

Here is a table that compares the hot towel technique with the freezing method and using alternative cleaning products:

candle holders for pillar candles

Method Pros Cons
Hot Towel Technique – Uses natural cleaning solution
– Softens wax for easy removal
– Possibility of burning yourself
– Requires hot water and towels
Freezing Method – Simple and effective
– Does not require additional products
– May damage delicate candle holders
– Not suitable for all materials
Alternative Cleaning Products – Environmentally friendly
– Effective at removing wax residue
– May require additional time and effort
– Some products may be expensive

Rubbing Alcohol Method

To effectively remove candle wax from a candle holder using the rubbing alcohol method, it’s important to frequently and carefully apply the solution. Rubbing alcohol, also known as isopropyl alcohol, is a highly effective solvent that dissolves wax easily. Here are the benefits of using rubbing alcohol:

  • It evaporates quickly, leaving no residue behind.
  • It’s readily available and affordable.
  • It doesn’t damage most surfaces, making it safe to use on various candle holder materials.

To use rubbing alcohol for removing candle wax, follow these steps:

  1. Place the candle holder in the freezer for about 30 minutes to harden the wax.
  2. Carefully scrape off the wax using a plastic scraper or credit card.
  3. Dampen a cloth or cotton ball with rubbing alcohol.
  4. Gently rub the affected area to dissolve the remaining wax.
  5. Wipe off any residue with a clean cloth.

Vinegar Solution

After using the rubbing alcohol method to remove candle wax, the next effective solution for getting candle wax off a candle holder is by using a vinegar solution.

Vinegar is a versatile household ingredient that can work wonders in cleaning and removing stubborn stains. To create the vinegar solution, mix equal parts of white vinegar and water in a spray bottle. Spray the solution onto the wax residue and let it sit for a few minutes to loosen the wax. Use a soft cloth or sponge to wipe away the wax. The acidity of the vinegar helps to dissolve the wax, making it easier to clean.

candlelight inn

Additionally, vinegar can also help prevent future wax buildup on your candle holders. Simply wipe the holders with a vinegar-soaked cloth after each use to remove any residual wax and prevent it from accumulating.

Now, let’s move on to the next method: the baking soda paste.

Advertisement

Baking Soda Paste

Now let’s delve into the next method for removing candle wax off a candle holder: creating a baking soda paste.

Baking soda is a versatile ingredient known for its cleaning properties, making it an excellent choice for homemade cleaning solutions.

candle making workshop

To create a baking soda paste, follow these simple steps:

  1. Combine equal parts baking soda and water in a small bowl to form a thick paste.
  2. Using a cloth or sponge, apply the paste to the wax residue on the candle holder.
  • The paste should cover the wax completely, ensuring maximum effectiveness.
  • Allow the paste to sit on the wax for about 10 minutes, allowing it to penetrate and loosen the residue.
  1. Gently scrub the area with a soft brush or cloth to remove the wax.
  2. Rinse the candle holder with warm water and dry it thoroughly.

Dishwashing Liquid and Warm Water

Continuing our exploration of candle wax removal methods, let’s now delve into the effectiveness of dishwashing liquid and warm water. This method is simple yet effective in getting rid of stubborn wax residue from candle holders. By using a combination of dishwashing liquid and warm water, you can easily dissolve the wax and restore the shine of your candle holder.

To use this method, follow these steps:

  1. Fill a sink or basin with warm water.
  2. Add a few drops of dishwashing liquid to the water and mix it well.
  3. Submerge the candle holder in the soapy water and let it soak for a few minutes.
  4. Gently scrub the holder with a sponge or cloth to remove any remaining wax.
  5. Rinse the holder with clean water and dry it thoroughly.

By using dishwashing liquid and warm water, you can effectively remove candle wax from your holders without damaging them. It is a safe and convenient method that requires minimal effort.

candle shack europe

Pros Cons Tips
Easy to use May not work on thick or hardened wax Use a soft sponge or cloth to avoid scratching the holder
Safe for most materials Requires soaking time Use warm water, not hot, to prevent damage
Leaves no residue Not suitable for delicate or antique holders Dry the holder completely to prevent water spots

Use of Cotton Swabs

To further improve the effectiveness of wax removal, we often employ the use of cotton swabs. These handy tools are perfect for tackling those hard-to-reach crevices and corners where candle wax tends to cling stubbornly. Here are two sub-lists to help you visualize the process:

Advertisement
  • Step 1: Softening the wax
  • Gently heat the wax using a hairdryer on low heat.
  • As the wax softens, use the cotton swab to carefully loosen and lift the softened wax.
  • Step 2: Removing the wax
  • Once the wax is loosened, use the cotton swab to wipe away the softened wax.
  • Repeat this process until all the wax is removed.

By using cotton swabs, you can easily clean candle wax spills without damaging your candle holder.

Now, let’s move on to the next section where we’ll discuss the effectiveness of goo gone or similar products in wax removal.

Goo Gone or Similar Products

To enhance the effectiveness of wax removal, we can utilize the power of Goo Gone or similar products. Goo Gone is a versatile adhesive remover that can effectively dissolve candle wax residue from candle holders. Unlike other methods, such as scraping or freezing, Goo Gone offers a more efficient and convenient solution. Its powerful formula breaks down the wax, making it easier to remove without damaging the surface of the candle holder.

candle picture

When using Goo Gone or similar products, it is important to follow the instructions provided. Here is a comparison between using a heat gun and a hairdryer for wax removal:

Heat Gun Hairdryer
Generates intense heat Produces moderate heat
Quick and efficient Slower process
Suitable for larger wax spills Best for smaller amounts of wax
Requires caution and careful handling Safer and easier to use

Commercial Candle Wax Remover

For removing candle wax from candle holders, we can utilize a commercial wax remover. These products are specifically designed to break down and dissolve the wax, making it easier to clean. When using a commercial wax remover, consider the following:

  • Choose a reputable brand: Look for commercial wax removers that are known for their effectiveness and safety.
  • Follow the instructions: Each product may have specific instructions on how to use it, so make sure to read and follow them carefully.
  • Test on a small area: Before applying the remover to the entire candle holder, test it on a small, inconspicuous area to ensure it doesn’t damage the material.
  • Use heat gun alternatives: If you don’t have a heat gun, a commercial wax remover can be a great alternative to soften and remove the wax from the holder.

Frequently Asked Questions

Can I Use the Freezing Method on Any Type of Candle Holder Material?

Yes, we can use the freezing method on most types of candle holder materials. It’s a simple and effective way to remove candle wax. However, prevention is key – consider using non-stick candle holders or applying a thin layer of oil before lighting candles.

Is There a Risk of Damaging the Candle Holder When Using the Boiling Water Method?

There’s always a risk of damaging the candle holder when using the boiling water method. However, there are alternative methods like freezing or using a hairdryer that can help remove candle wax without causing any harm.

Advertisement

Candle

Can I Use a Hairdryer on Delicate or Heat-Sensitive Candle Holders?

We recommend using alternative methods to remove candle wax from delicate or heat-sensitive candle holders. Instead of using a hairdryer, try freezing the wax or using a butter knife to gently scrape it off.

What Is the Best Way to Remove Candle Wax From a Textured or Intricate Candle Holder?

To remove candle wax from textured or intricate holders, we found alternative methods. One tip is to freeze the holder and gently scrape off the wax. To prevent buildup, try applying a thin layer of cooking oil before lighting the candle.

Are There Any Safety Precautions to Consider When Using Commercial Candle Wax Remover?

Safety precautions should always be considered when using commercial candle wax remover. Proper handling and following the instructions on the product are essential to ensure a safe and effective removal process.

Conclusion

In conclusion, removing candle wax from a candle holder can be easily done using various methods. These methods include freezing, boiling water, heat gun, hairdryer, scraping with a spoon, dishwashing liquid, cotton swabs, or using commercial products like Goo Gone.

candlesticks charts

By following these simple steps, you can effectively clean your candle holders and enjoy their beauty for years to come.

Advertisement

Continue Reading

Candles

How to Get Candle to Burn Evenly With Foil

Published

on

By

Have you ever ignited a candle, only to discover it’s burning unevenly, creating a tunnel of unused wax? Worry not, for we bring you the solution: employ foil to ensure your candle burns evenly!

In this guide, we will share our expert tips and techniques on how to get your candle to burn evenly with the help of foil. By following our step-by-step instructions, you will be able to master this method and enjoy a perfectly even burn every time.

So, let’s dive in and discover the secrets of using foil to enhance your candle burning experience.

Key Takeaways

  • Foil helps achieve a more consistent and balanced burn throughout the entire candle.
  • Choosing the right foil thickness and finish is important for optimal burning conditions.
  • Proper preparation and application of foil can prevent uneven burning.
  • Maximizing candle performance involves trimming the wick, applying foil tightly, and keeping the candle away from drafts.

Why Use Foil for Even Candle Burning

We use foil for even candle burning because it helps us achieve a more consistent and balanced burn throughout the entire candle.

candle holders ikea

When it comes to choosing foil thickness, it’s important to consider the size and type of candle you’re working with. Thicker foil is generally better for larger or longer burning candles, as it provides more insulation and heat reflection. However, for smaller or shorter burning candles, a thinner foil can be sufficient.

Advertisement

Experimenting with foil placement is also crucial to ensure an even burn. Placing the foil directly under the candle can help distribute the heat evenly, preventing one side from burning faster than the other. Alternatively, wrapping the entire candle in foil can create a more controlled burn, allowing the wax to melt evenly.

Choosing the Right Foil for Your Candle

When selecting the appropriate foil for your candle, consider the thickness and size of the foil in relation to the candle. The foil thickness is crucial in ensuring proper heat distribution and protection for your candle. Thicker foils are more effective at insulating the candle, preventing heat from escaping too quickly and allowing for a longer, more even burn.

On the other hand, thinner foils may not provide enough insulation, resulting in uneven burning and potential damage to the candle. Additionally, different foil finishes can also affect the burn quality. Matte finishes tend to absorb and distribute heat more evenly, while glossy finishes may reflect heat and cause uneven burning.

candlelight

It’s important to choose a foil thickness and finish that best suits your candle to achieve optimal burning conditions.

Preparing Your Candle for Foil Application

To ensure a successful application of foil to your candle, there are a few key points to keep in mind.

Advertisement

First, the foil wrapping technique is crucial for achieving an even burn. By tightly wrapping the foil around the candle, you create a barrier that helps regulate the heat distribution.

Second, preparing your candle by trimming the wick and removing any debris will prevent uneven burning and maximize its overall performance.

candlestick

Foil Wrapping Technique

Proper preparation is essential for achieving optimal results when utilizing the foil wrapping technique to ensure the even burning of your candle.

Before applying the foil, it’s important to consider alternatives to traditional foil, such as aluminum baking cups or heat-resistant glass containers. These options can provide a snug fit around the candle, preventing heat from escaping and promoting even burning.

Additionally, experimenting with different wrapping techniques can also contribute to a more uniform burn. One technique involves folding the foil around the edges of the candle, creating a protective barrier that traps the heat.

Advertisement

Another technique is to wrap the foil tightly around the base of the candle, leaving the top exposed for easy lighting.

candles uk

Preventing Uneven Burning

To prevent uneven burning and prepare our candle for foil application, we’ll analyze various techniques and alternatives to ensure a consistent and efficient burn.

Maximizing candle performance is essential for achieving a longer burn time and getting the most out of your candle. Uneven burning can be caused by factors such as drafts, improper wick trimming, or uneven wax distribution.

Before applying foil wrapping, it’s important to trim the wick to a quarter of an inch to promote an even burn. Additionally, ensuring that the candle is placed on a level surface away from drafts can prevent uneven burning.

Maximizing Candle Performance

One important step in maximizing candle performance is ensuring that we’ve properly prepared the candle for foil application. To prevent wax drips and enhance the candle scent, here are five key things to consider:

Advertisement

myer

  • Trim the wick: Before applying the foil, make sure to trim the wick to about a quarter inch. This will help promote an even burn and prevent excessive smoke.
  • Clean the candle: Remove any dust or debris from the candle surface before applying the foil. This will ensure better adhesion and prevent any interference with the foil’s effectiveness.
  • Apply foil tightly: When wrapping the foil around the candle, make sure it’s snug and secure. This will help retain heat and maintain a consistent burn throughout the candle’s lifespan.
  • Keep the candle away from drafts: Drafts can disrupt the flame and cause uneven burning. Place the candle in a draft-free area to ensure optimal performance.
  • Use a candle warmer: Before lighting the candle, consider using a candle warmer to release the fragrance. This will enhance the scent and create a more enjoyable experience.

Wrapping the Candle With Foil

To wrap the candle with foil, we’ll carefully cover it using a sheet of aluminum foil. Wrapping the candle with foil offers several benefits.

Firstly, it helps to insulate the candle, ensuring that the heat is distributed evenly and preventing any hotspots that may cause uneven burning.

Secondly, it creates a barrier that traps the heat and slows down the rate of burning, allowing the candle to last longer.

Additionally, the foil can help to catch any drips or spills, protecting surfaces from damage.

candlelight concerts bristol

When wrapping the candle, make sure to cover it completely, leaving no gaps or openings. Smooth out any wrinkles or creases in the foil to ensure a snug fit.

Ensuring Proper Airflow With Foil

When using foil to ensure an even burn, it’s important to consider its impact on airflow.

Advertisement

Proper airflow is crucial for maximizing the effectiveness of the candle burn. By wrapping the candle with foil, we can create a barrier that directs the airflow towards the flame, allowing it to burn evenly and efficiently.

Foil’s Impact on Airflow

We can ensure proper airflow with foil by strategically placing it around the base of the candle. By doing so, we can control the airflow around the flame and enhance the candle’s burn. Here are five important ways in which foil impacts airflow and heat distribution:

candlelight concerts edinburgh

  • Foil acts as a barrier, preventing drafts from disturbing the flame.
  • It helps to create a more controlled environment for the candle, allowing for a steady and consistent burn.
  • Foil can redirect the flow of air, ensuring that the flame receives an adequate supply of oxygen.
  • It helps to distribute heat evenly around the candle, preventing uneven burning and wax wastage.
  • By reflecting heat back towards the candle, foil can help to increase the temperature in the immediate vicinity of the flame.

Maximizing Candle Burn

To optimize the burn of the candle, we can ensure proper airflow by strategically using foil. By using foil, we can maximize the candle flame and achieve even heat distribution. This will result in a longer-lasting and more efficient burn.

To understand how to maximize the candle burn, let’s take a look at the following table:

Technique Description
Foil tent Create a tent-like structure with foil to direct airflow towards the flame. This increases oxygen supply, making the flame burn brighter and hotter.
Foil collar Wrap a strip of foil around the base of the candle to prevent excess heat from escaping. This encourages a more even heat distribution, preventing tunneling.
Foil plate Place a sheet of foil under the candle to reflect heat upwards. This helps to evenly distribute heat throughout the candle, preventing uneven wax melting.

Lighting Your Foil-Wrapped Candle

To light our foil-wrapped candle, we’ll need a match or a lighter. Here are some important steps to follow for a successful lighting technique and fire safety precautions:

  • Make sure the foil is securely wrapped around the candle, leaving the top exposed.
  • Hold the match or lighter close to the exposed wick and ignite it.
  • Keep your hand steady and slowly bring the flame towards the wick until it catches fire.
  • Once the wick is lit, gently blow out the match or lighter and set it aside in a safe place.
  • Always double-check that there are no loose pieces of foil or flammable materials nearby before lighting the candle.

With our foil-wrapped candle now lit, we can move on to the next step of monitoring its burn with foil.

candlelight concerts bristol

Monitoring the Candle’s Burn With Foil

Now let’s talk about the benefits of using foil to monitor the burn of your candle and how it helps prevent uneven burning.

Advertisement

By wrapping the candle in foil, you create a barrier that helps retain heat and distribute it evenly, resulting in a more uniform burn.

The foil also acts as a reflective surface, allowing you to easily observe the progress of the candle’s burn and make any necessary adjustments.

Benefits of Using Foil

Our favorite benefit of using foil to monitor the candle’s burn is its ability to ensure an even and consistent melting of wax. The advantages of foil wrapping go beyond just aesthetics. Here are five reasons why using foil is beneficial when it comes to monitoring the candle’s burn:

candle shack lemongrass and ginger

  • Heat distribution: Foil helps distribute heat evenly, preventing hot spots and ensuring a uniform burn.
  • Reduced soot: By enclosing the candle in foil, it minimizes the amount of soot produced during the burning process.
  • Longer burn time: The foil acts as a barrier, slowing down the burning rate and extending the candle’s lifespan.
  • Protection from drafts: Foil wrapping shields the flame from air currents, reducing the likelihood of flickering and uneven burning.
  • Enhanced safety: Foil provides an added layer of protection, preventing accidents such as wax spills or the flame reaching the edge of the container.

By using foil to monitor the candle’s burn, you can enjoy a longer-lasting, safer, and more visually appealing candle experience.

Now let’s explore how foil can prevent uneven burning.

Preventing Uneven Burning

When using foil to monitor the candle’s burn, we can prevent uneven burning by taking a few simple steps. Maximizing candle performance and adjusting foil placement are key to achieving an even burn.

Advertisement

To ensure the best results, follow these guidelines:

candle holders uk

  1. Trim the wick: Before lighting the candle, trim the wick to about 1/4 inch. This helps prevent excessive soot and promotes an even burn.
  2. Place the foil: Position the foil around the candle, making sure it covers the top and sides. This helps trap heat and encourages even melting.
  3. Adjust foil placement: Throughout the candle’s burn, regularly check the foil to ensure it’s still snug around the candle. Adjust as needed to maintain proper heat distribution.

Adjusting Foil Placement for Even Burning

To achieve even burning, adjust the placement of the foil around the candle. Here are some troubleshooting techniques for proper foil positioning:

  • Ensure that the foil is snugly wrapped around the base of the candle. This will prevent any air gaps and allow for a more even distribution of heat.
  • If you notice the candle burning more on one side, gently rotate the foil to redistribute the heat. This will help the candle burn evenly.
  • If the flame is too small or flickering, adjust the foil to create a larger opening. This will allow for better airflow and a stronger, more consistent flame.
  • If the flame is too large or smoking excessively, adjust the foil to create a smaller opening. This will help regulate the amount of oxygen reaching the flame and prevent excessive burning.
  • Regularly monitor the candle and foil during burning. Adjust the foil as needed to maintain an even burn and avoid any potential safety hazards.

Extending the Burn Time With Foil

We can further enhance the burn time of our candle by utilizing foil. By strategically placing foil around the candle, we can improve its performance and extend its burn time. The foil acts as a heat reflector, trapping the heat and directing it towards the wax, allowing the candle to burn more slowly and evenly. To maximize the effectiveness of the foil, we need to ensure that it is wrapped tightly around the candle, leaving only a small opening for the flame. This helps to create a controlled burn and prevents excessive heat loss. By extending the burn time, we can enjoy our candle for longer periods and make the most out of its fragrance and ambiance.

To visualize the proper foil placement, refer to the table below:

Foil Placement Benefits
Around the sides of the candle Reflects heat back to the wax, promoting even burning
Underneath the candle Prevents heat loss through the bottom, extending burn time
On top of the candle Traps heat and prevents excessive evaporation of fragrance

With the foil in place, we can now move on to the next step, which is removing the foil safely from a burning candle.

candlesticks holders

Removing Foil Safely From a Burning Candle

Now that we’ve covered how to get a candle to burn evenly with foil, it’s important to discuss the safe removal of foil from a burning candle.

To avoid any fire hazards, it’s crucial to follow proper techniques when removing the foil.

Advertisement

Additionally, we’ll provide some general tips for candle burning to enhance safety and enjoyment.

Safe Foil Removal Techniques

One simple technique for safely removing foil from a burning candle is by using a pair of heat-resistant gloves. Here are some alternative methods for safe removal:

dusk candle holder

  • Use a pair of long-handled tongs to carefully lift the foil off the candle.
  • Gently blow on the foil to create a small gap between the foil and the candle, then use a non-flammable tool, like a wooden skewer, to lift the foil away.
  • Place a heat-resistant plate or tray next to the candle and carefully slide the foil onto it, ensuring the flame doesn’t come into contact with the foil.
  • If the foil is only partially covering the candle, use a pair of tweezers to carefully lift and remove the foil.
  • Consider using a candle snuffer to extinguish the flame before attempting to remove the foil.

Now that we know how to safely remove the foil, let’s move on to preventing fire hazards.

Preventing Fire Hazards

To prevent fire hazards when removing foil from a burning candle, it’s important to take proper precautions. Safety precautions should always be a priority to avoid accidents and ensure a safe environment.

When removing foil from a burning candle, wait until the flame is completely extinguished and the candle has cooled down. Using heat-resistant gloves or a pair of tongs, carefully grasp the foil and gently peel it away from the candle. Be cautious not to touch the hot wax or any exposed flame. Dispose of the foil properly, ensuring it’s fully extinguished before discarding.

By following these safety precautions, you can prevent accidents and ensure a safe candle burning experience.

Advertisement

jo malone candle

Now, let’s move on to some candle burning tips to further enhance your candle experience.

Candle Burning Tips

To ensure safe removal of foil from a burning candle, we can employ practical candle burning tips that promote an even burn. Here are some tips for safely removing foil from a burning candle:

  • Use a pair of long, heat-resistant tweezers or tongs to carefully lift and remove the foil from the candle.
  • Avoid blowing on the flame or using your bare hands to remove the foil, as this can cause accidents or burns.
  • Wait until the candle has cooled down before attempting to remove the foil.
  • Keep a fire extinguisher or a bucket of water nearby, just in case of any unexpected incidents.
  • Always supervise the candle while it’s burning and never leave it unattended.

By following these tips, you can enjoy the cozy ambiance created by your candle without compromising safety.

Remember to choose candle scents that you enjoy, as they can enhance the overall experience of relaxation and comfort.

candle & co

Reusing Foil for Future Candle Burning

We reuse foil to ensure our future candle burnings are even and efficient. Reusing foil offers several benefits.

First, it helps to distribute heat more evenly, resulting in a more consistent and balanced burn.

Advertisement

Additionally, it prevents any wax from dripping onto the surface below, protecting our furniture and keeping it clean.

Reusing foil also reduces waste and is an environmentally friendly option.

floral candle

However, if you prefer not to use foil, there are alternative methods to achieve a similar effect.

One option is to place the candle on a heat-resistant plate or coaster.

Another alternative is to use a candle snuffer to extinguish the flame, as this can help prevent uneven burning.

Advertisement

Troubleshooting Uneven Burning With Foil

Continuing our exploration of reusing foil for future candle burnings, troubleshooting uneven burning with foil can help ensure a more consistent and balanced burn. When it comes to preventing foil mishaps and achieving an even burn, here are some key tips to keep in mind:

candles shoes

  • Trim the wick: Uneven burning can be caused by a wick that’s too long. Trim the wick to around ¼ inch before lighting the candle.
  • Center the wick: Make sure the wick is centered in the candle before lighting it. This will help promote even burning.
  • Avoid drafts: Drafts can cause the flame to flicker and burn unevenly. Place your candle in a draft-free area to prevent this.
  • Rotate the candle: If you notice uneven burning, rotate the candle periodically to ensure all sides burn evenly.
  • Remove excess wax: If one side of the candle has a higher wax level, carefully remove some wax to promote a more balanced burn.

Tips and Tricks for Using Foil With Candles

Here are some helpful tips and tricks for using foil with candles to ensure an even burn. When using foil as a DIY candle accessory, it’s important to choose the right type and follow proper techniques. If you’re looking for foil alternatives, consider using a heat-resistant glass plate or a candle coaster made from ceramic or metal. These options can provide a level surface for your candle and help distribute heat evenly. Additionally, you can create your own DIY candle accessories by repurposing items like aluminum cans or small metal containers. Just make sure they are heat-resistant and stable. By using these tips and tricks, you can enhance the burning experience of your candles and enjoy a more consistent and long-lasting flame.

Tip Description
Choose the right foil Opt for heavy-duty aluminum foil that can withstand high temperatures and won’t tear easily.
Wrap the base Wrap a layer of foil around the base of your candle to catch any dripping wax and protect your surfaces.
Create a reflector Fold a piece of foil into a small triangle and place it behind the flame to reflect the heat and create a more even burn.
Use a foil tent To prevent the top of your candle from burning faster than the rest, create a tent shape with foil and place it over the candle.

Final Thoughts on Getting Even Candle Burning With Foil

To wrap up our discussion on getting even candle burning with foil, let’s reflect on the effectiveness of using this DIY candle accessory. Adjusting foil placement can help troubleshoot uneven burning and ensure a more consistent and longer-lasting burn.

Here are five key takeaways to consider:

  • Experiment with different foil sizes: Try using larger or smaller pieces of foil to see which works best for your candle.
  • Place foil under the candle: This can help distribute heat evenly and prevent tunneling.
  • Ensure foil is securely wrapped around the candle’s base: This will prevent the foil from shifting and affecting the burn.
  • Monitor the candle’s burn regularly: Keep an eye on the flame and check for any signs of uneven burning.
  • Be cautious of drafts: Avoid placing the candle in a drafty area, as this can cause uneven heat distribution.

Frequently Asked Questions

Can I Use Any Type of Foil for Wrapping My Candle?

We can use different types of foil to wrap our candles. However, it’s important to consider the pros and cons of using foil for candle burning. Let’s discuss the various options and their effectiveness.

candle brand

How Long Should I Leave the Foil on the Candle for Even Burning?

We’ve discovered the perfect technique for achieving even candle burning! By leaving the foil on for just the right amount of time, you’ll avoid residue and enjoy the benefits of using foil. Let us enlighten you!

Can I Reuse the Foil After Removing It From the Candle?

Yes, you can reuse the foil after removing it from the candle. However, there are alternative methods to achieve even burning, such as using a candle warmer or trimming the wick regularly.

Advertisement

What Should I Do if the Candle Still Burns Unevenly After Using Foil?

If the candle still burns unevenly after using foil, we should try troubleshooting techniques. Adjust the wick to ensure it’s centered and trim it to 1/4 inch. Also, ensure the candle wax pool reaches the edges by burning it for longer periods.

Are There Any Safety Precautions I Need to Take When Using Foil With Candles?

When using foil with candles, it is important to take safety precautions. Ensure the foil is securely placed and keep flammable objects away. After use, let the foil cool before disposing of it properly.

candle holders glass

Conclusion

In conclusion, using foil to achieve even candle burning is a practical and efficient method. By choosing the right foil, preparing the candle properly, and ensuring proper airflow, you can enjoy a well-burning candle.

Remember to reuse the foil for future candle burning and troubleshoot any issues that may arise.

With these tips and tricks, you’ll be able to create a soothing and balanced ambiance in your space. So go ahead, light that candle and let the foil work its magic!

Advertisement

Continue Reading

Candles

How to Fix Wick in Candle

Published

on

By

Feeling frustrated with a wick that won’t stay straight in your candle? Worry no more! We’re on hand to assist. This tutorial will demonstrate how to adjust your candle’s wick effortlessly and accurately.

By following our simple steps, you’ll be able to master the art of wick-fixing in no time. So, let’s get started and bring that wick back to its rightful place.

  1. Retrieve your wick trimmer or scissors.
  2. Trim the wick to the appropriate length.
  3. Realign the wick in the center of the candle.
  4. Secure it with a wick holder or pencil.
  5. Patiently wait for the wax to harden.

Once your candle is fixed, you can test the wick and enjoy the soothing glow of a perfectly functioning candle.

Key Takeaways

  • Observing the wick’s location and centering it in the wax pool is important for proper burning.
  • Using clean tools like a wick trimmer or sharp scissors is essential for trimming the wick.
  • Trimming the wick to about 1/4 inch length helps maintain a clean and efficient burn.
  • Realigning and securing the wick with a wick holder or pencil prevents uneven burning and wasted wax.

Assess the Wick Position

In this step, we’ll assess the position of the wick in the candle. Wick position assessment is crucial for troubleshooting wick issues and ensuring a clean, even burn.

candlelight concerts aberdeen

Start by observing the wick’s location in relation to the wax pool. Ideally, the wick should be centered and upright, with a small amount of wick protruding from the wax.

If the wick is off-center or leaning towards one side, gently nudge it back to the center using a wick trimmer or a pair of tweezers.

Advertisement

Additionally, check for any debris or buildup around the wick that could obstruct the flame. If necessary, carefully remove any obstructions.

Once the wick is properly positioned, it’s time to retrieve a wick trimmer or scissors to move on to the next step.

candle drawing

Retrieve a Wick Trimmer or Scissors

Let’s grab a wick trimmer or a pair of scissors to continue fixing the wick in the candle. These tools are essential for trimming the wick to the appropriate length, which is crucial for preventing common wick problems such as excessive smoking, flickering, and uneven burning.

While a wick trimmer is specifically designed for this task, you can also use a pair of sharp scissors as a trimmer alternative. To retrieve a wick trimmer or scissors, make sure they’re clean and free from any debris or wax residue. This will ensure a clean cut and optimal performance.

Now that we have our trimming tool ready, let’s move on to the next step: trimming the wick to the appropriate length.

Advertisement

Trim the Wick to the Appropriate Length

Now that we’ve retrieved a wick trimmer or scissors, it’s time to trim the wick to the appropriate length.

candlesticks trading

This step is crucial in maintaining a clean and efficient burn for your candle. By ensuring the wick is at the proper length, we can prevent excess smoke, soot, and uneven burning.

Let’s dive into the details of how to achieve the perfect wick length to maximize the enjoyment of your candle.

Proper Wick Length

Trimming the wick to the appropriate length is essential for fixing the wick in a candle. Proper wick length is crucial for optimal wick maintenance and troubleshooting wick issues. Here’s a step-by-step guide to help you trim your wick correctly:

  1. Start by extinguishing the candle and allowing it to cool completely.
  2. Remove any debris or burnt wick fragments from the candle.
  3. Use a wick trimmer or sharp scissors to trim the wick. The ideal length is about 1/4 inch.
  4. Trim the wick in a straight line to prevent uneven burning.
  5. Avoid cutting the wick too short as it may cause the flame to extinguish or lead to poor burn performance.
  6. Dispose of the trimmed wick properly.
  7. Relight the candle and enjoy its improved performance.

Preventing Candle Smoke

To prevent candle smoke, we need to ensure that the wick is trimmed to the appropriate length. Maintaining the wick is crucial in preventing smoke and ensuring a clean burn. The length of the wick affects how the flame burns, and if it’s too long, it can cause excessive smoke. Here’s a step-by-step guide on how to trim the wick for optimal performance:

yankee candle coupon

Step Action
1 Extinguish the candle and let it cool completely.
2 Gently remove any debris or charred pieces from the wick.
3 Measure the recommended length for your specific candle type and diameter.
4 Use sharp scissors or a wick trimmer to trim the wick to the appropriate length.
5 Dispose of the trimmed wick pieces properly.

Realign the Wick in the Center of the Candle

Now let’s address the issue of an off-centered wick in a candle. When the wick isn’t in the center, it can cause uneven burning and a shorter lifespan for the candle.

Advertisement

To realign the wick, there are a few techniques you can try. By gently pushing or nudging the wick towards the center, you can ensure a more even burn and prolong the life of your candle.

Off-Centered Wick Solutions

Let’s realign the off-centered wick in the center of the candle. When the wick is not properly centered, it can lead to uneven burning and wasted wax. There are a few common causes for an off-centered wick, including improper placement during the initial pouring or movement of the candle while it is still hot. To troubleshoot these wick issues, follow these steps:

  1. Prepare a heat-resistant surface and place the candle on it.
  2. Light the candle and allow it to burn for a few minutes to create a small pool of melted wax.
  3. Carefully extinguish the flame and let the wax cool for a minute or two.
  4. Use a pair of tweezers or a toothpick to gently nudge the wick back to the center of the candle.

By realigning the off-centered wick, you can ensure a more even burn and maximize the lifespan of your candle. Below is a table summarizing the steps:

yankee candle malaysia

Steps
1. Prepare a heat-resistant surface and place the candle on it.
2. Light the candle and allow it to burn for a few minutes to create a small pool of melted wax.
3. Carefully extinguish the flame and let the wax cool for a minute or two.
4. Use a pair of tweezers or a toothpick to gently nudge the wick back to the center of the candle.

Wick Realignment Techniques

We can realign the off-centered wick in the center of the candle using specific techniques. Proper wick maintenance is essential to ensure a clean and even burn, and to avoid common wick problems.

Here are four steps to realign the wick:

  1. Extinguish the candle: Before attempting to realign the wick, make sure the candle is completely extinguished. This will prevent any accidents or injuries.
  2. Use a wick trimmer: Gently trim the wick to a length of about ¼ inch. This will help the wick burn evenly and prevent excessive smoke.
  3. Center the wick: Gently push the wick towards the center of the candle using a wick centering tool or a pair of tweezers. Be careful not to apply too much pressure to avoid damaging the wick.
  4. Trim the wick again: After realigning the wick, trim it once more to ensure it’s at the proper length for optimal burning.

Secure the Wick With a Wick Holder or Pencil

How can we ensure that the wick in a candle is securely held in place? One of the most effective methods is to use a wick holder or a pencil as an alternative. This step is crucial in troubleshooting wick issues and preventing them from detaching or leaning to one side.

Here’s how to securely hold the wick:

Advertisement

candle birthday

  1. Choose a wick holder or a pencil that’s long enough to reach the bottom of the candle.
  2. Position the wick holder or pencil in the center of the candle, ensuring that it’s straight and upright.
  3. Gently wrap the excess wick around the wick holder or pencil, leaving a small amount of slack.
  4. Adjust the tension of the wick by pulling gently, ensuring it remains centered.
  5. Press the bottom of the wick holder or pencil into the softened wax at the bottom of the candle to secure it in place.
  6. Wait for the wax to harden, and then remove the wick holder or pencil, leaving the wick securely held in place.

Wait for the Wax to Harden

After securing the wick with a wick holder or pencil, it’s important to wait for the wax to harden. This step is crucial to prevent wick issues and troubleshoot any problems that may arise during the candle-making process. Here is a step-by-step guide to waiting for the wax to harden:

  1. Avoid disturbing the candle: Once the wick is secured, refrain from moving or touching the candle. Any movement can disrupt the wax and cause the wick to shift or become misaligned.
  2. Allow sufficient cooling time: Depending on the type and size of the candle, the wax may take anywhere from a few hours to overnight to completely harden. Patience is key during this process.
  3. Maintain optimal temperature: Make sure the room temperature is consistent and not too cold or hot. Extreme temperature fluctuations can affect the wax’s ability to harden properly.
  4. Check for any imperfections: Once the wax has hardened, inspect the candle for any issues such as air bubbles, uneven surfaces, or wick problems. Address these concerns before proceeding to the next steps of the candle-making process.

Test the Wick and Enjoy Your Fixed Candle

To test the wick and enjoy our fixed candle, we can now proceed with the final steps of the candle-making process.

Testing the wick stability is crucial to ensure that our candle burns properly and safely. Light the candle and observe the flame. It should burn steadily, without flickering excessively or producing excessive smoke.

If the flame is too small or extinguishes easily, the wick may be too short or have too much wax coating. Troubleshoot these issues by trimming the wick to a longer length or removing excess wax.

candle holders for pillar candles

Additionally, if the flame is too large, it may indicate that the wick is too long, causing the candle to burn too quickly. In this case, trim the wick to a shorter length.

Once you have achieved a stable flame, sit back, relax, and enjoy the beautiful glow of your fixed candle.

Frequently Asked Questions

How Do I Know if the Wick Position Is Incorrect in My Candle?

If the wick position is incorrect in a candle, it can lead to issues like a crooked wick or flickering flame. To troubleshoot, check if the wick is centered and trim it if necessary.

Advertisement

Can I Use Regular Scissors Instead of a Wick Trimmer to Trim the Wick?

Yes, you can use regular scissors instead of a wick trimmer to trim the wick. However, it’s important to follow these tips for fixing a misaligned wick to ensure a clean and even burn.

candle brand

What Is the Appropriate Length to Trim the Wick To?

To achieve the appropriate wick length, it is essential to trim it regularly. Trimming promotes even burning, reduces soot and smoke, and prevents the flame from becoming too large. Follow these steps for mastery.

How Do I Align the Wick in the Center of the Candle?

To fix a tilted wick in a candle and prevent it from leaning to one side, start by gently pushing the wick back to the center using a toothpick or a wick centering tool.

Can I Use Something Other Than a Wick Holder or Pencil to Secure the Wick?

When securing a wick in a candle, we can explore alternatives to a wick holder or pencil. DIY methods include using paperclips, chopsticks, or even clothespins to keep the wick centered and secure.

Conclusion

In conclusion, fixing a wick in a candle is a simple process that can be done with just a few steps.

Advertisement

candlelight carol

By assessing the wick position, trimming it to the right length, realigning it in the center, and securing it with a wick holder, you can easily fix your candle.

Don’t worry about the wax hardening as you wait, as it will ensure a longer-lasting burn.

By following these steps, you can enjoy your fixed candle and create a cozy atmosphere in your home.

Continue Reading

Trending