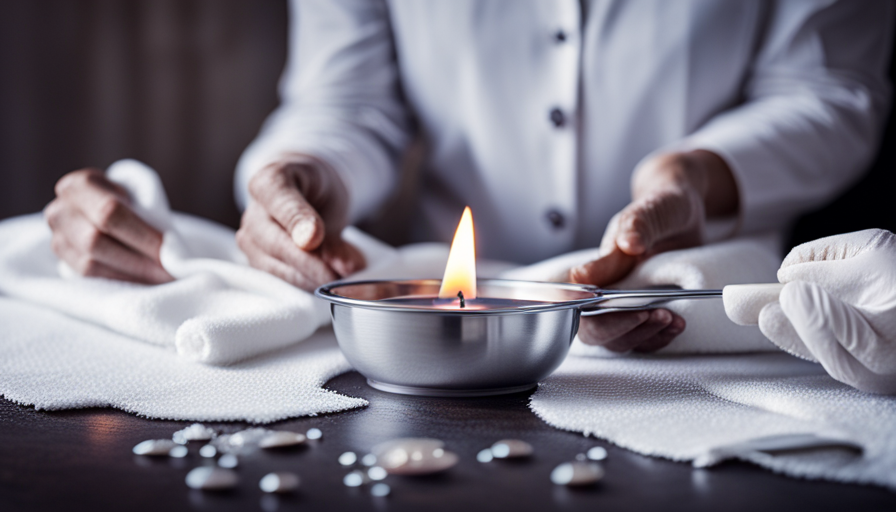
Have you ever been in a tricky situation where candle wax has dripped all over your lovely glass table? Fear not, I am here to help! In this article, you will discover an easy and efficient technique to eliminate candle wax from your glass table, restoring it to its original beauty.
First, we will gather the necessary materials, including a plastic bag, ice cubes, a butter knife, a cloth, and some glass cleaner. Then, we will freeze the wax by placing the plastic bag filled with ice cubes on top of the wax. Once the wax hardens, we will easily scrape it off using the butter knife.
Next, we will remove any remaining residue by applying some heat and wiping it away with a cloth. After that, we will clean the glass surface using a glass cleaner to ensure a spotless finish. Finally, we will polish the glass surface for that extra shine and check for any missed spots.
By following these simple steps, you can say goodbye to candle wax stains and enjoy your clean glass table once again. Let’s get started!
Key Takeaways
- Gather necessary materials: plastic bag, ice cubes, butter knife, cloth, glass cleaner.
- Freeze the wax with ice cubes in a plastic bag and then scrape off the hardened wax with a butter knife.
- Remove any remaining residue by using heat and a cloth, or rubbing alcohol or nail polish remover on a paper towel.
- Clean the glass surface with a glass cleaner, and polish it for extra shine using a microfiber cloth in circular motions.

Soccer Theme Birthday Candles - Set of 4 | Football Cake Toppers with Ball, Cleats & Trophy for Cakes,Tournaments & Victory Celebrations
⚽️ SCORE THE PERFECT CAKE DECOR! "Hat trick alert! These candles feature mini soccer balls, cleats, and a...
As an affiliate, we earn on qualifying purchases.
Gather the necessary materials
Now, you’re going to want to grab all the things you’ll need to tackle that pesky candle wax on your glass table. Let’s discuss some alternative methods for removing candle wax from a glass table and also common mistakes to avoid.
First, you’ll need a butter knife or a plastic scraper to gently scrape off as much of the hardened wax as possible. Be careful not to scratch the glass surface.
Next, gather a brown paper bag or a plain white cloth and a hairdryer. Place the brown paper bag or cloth over the wax stain and apply heat with the hairdryer on a low setting. The heat will melt the wax and transfer it onto the bag or cloth. Remember not to use high heat as it may damage the glass.
Another method you can try is using an ice pack or ice cubes to freeze the wax. Place the ice pack or ice cubes directly on the wax stain and let it sit for a few minutes until the wax hardens. Once hardened, use a plastic scraper or your fingernail to gently lift off the wax. Avoid using metal tools as they can scratch the glass.
Now that you have gathered all the necessary materials, let’s move on to the next step: freezing the wax.

Photect 11 Pcs Soccer Birthday Candles Number Candle Cake Topper Decor Soccer Themed Birthday Cake Decorations for Boys Girls Kids Party Supplies Decor (Number 8)
Soccer 8th Cake Topper: decorating your birthday cake with the soccer 8th birthday candle cake topper; Ideal addition...
As an affiliate, we earn on qualifying purchases.
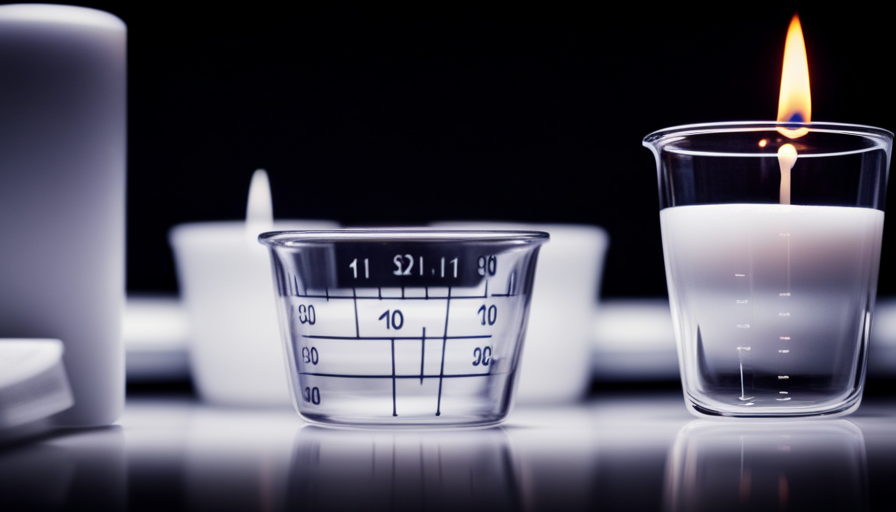
Freeze the wax
Chill the melted substance to solidify and shatter its hold on the sleek surface. One of the most effective candle wax removal hacks is to freeze the wax. By doing so, the wax hardens and becomes easier to remove from your glass table.
Here are three alternative methods for removing wax from a glass table:
-
Ice cubes: Place ice cubes directly on the wax spill. Let them sit for a few minutes until the wax hardens. Once the wax is frozen, gently scrape it off using a plastic scraper or credit card.
-
Freeze spray: Apply a freeze spray directly onto the wax spill. The spray rapidly cools down the wax, causing it to harden. After a few seconds, use a plastic scraper to remove the hardened wax.
-
Freezer bag method: Fill a freezer bag with ice cubes and place it over the wax spill. Let it sit for about 10 minutes or until the wax becomes solid. Carefully lift the bag and peel off the hardened wax.
Once you’ve successfully removed the hardened wax, you can move on to the next step of the process: scraping off the remaining residue.

JEQUD 10th Green Football Birthday Candles, Number 10 Candle Cake Topper for Anniversary Celebrations Supplies
【Football Birthday Number Candles】: Meticulously crafted with sequins and intricate football motifs, these candles bring a touch of...
As an affiliate, we earn on qualifying purchases.
Scrape off the hardened wax
Use a plastic scraper or credit card to easily scrape away the frozen wax, revealing a clean and smooth surface underneath. When removing candle wax from a glass table, it is important to be careful not to scratch or damage the surface. By using a plastic scraper or credit card, you can gently remove the hardened wax without causing any harm.
To make the process even easier, you can freeze the wax beforehand. Freezing the wax will cause it to become brittle and easier to scrape off. Once the wax is frozen, simply use the plastic scraper or credit card to gently scrape away the wax.
Here is a helpful table to guide you through the process of removing candle wax from a glass table:
| Tools Needed | Steps |
|---|---|
| Plastic scraper or credit card | 1. Freeze the wax |
| 2. Scrape off the hardened wax |
By following these steps, you can effectively remove candle wax from your glass table. Once you have scraped off the hardened wax, you can move on to the next step of removing any remaining residue.

Soccer Birthday Candle Number 12 Candle Soccer Football Cake Decoration Happy Birthday Party Candle Green Soccer Ball Theme Cake Topper Decorations for Men Boy Kids Football Fan Party Decor Supplies
【Birthday Candles Information】you will receive 1 number 12 birthday candle cake topper,The soccer football theme candle size is...
As an affiliate, we earn on qualifying purchases.
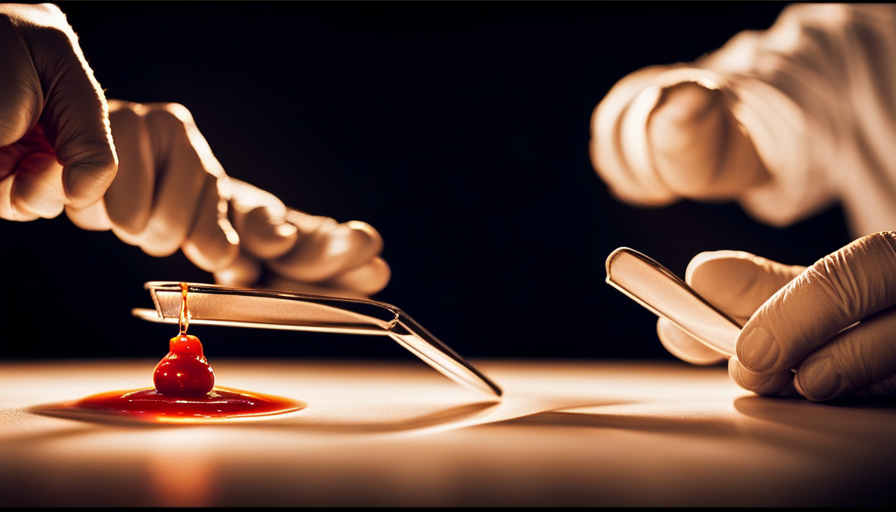
Remove any remaining residue
To remove any remaining residue from the glass table after scraping off the hardened wax, I recommend dampening a paper towel with rubbing alcohol or nail polish remover.
Then, gently rub the residue until it lifts off. This method is effective in getting rid of stubborn wax residue and leaves the glass table clean and shiny.
Dampen a paper towel with rubbing alcohol or nail polish remover
Once you’ve got the candle wax on your glass table, grab a paper towel and soak it in rubbing alcohol or nail polish remover to tackle the stubborn residue. Here are some discussion ideas:
| Removing wax from fabric | Alternative methods for removing candle wax from glass |
|---|---|
| Use an iron and paper towels to heat and absorb the wax | Freeze the wax with ice and scrape it off with a credit card |
| Place a brown paper bag or a cloth over the wax and iron it | Use a hairdryer to melt the wax and wipe it away with a cloth |
| Apply a mixture of equal parts vinegar and water to dissolve the wax | Use a plastic scraper or a spoon to gently scrape off the wax |
To remove the residue, dampen a paper towel with rubbing alcohol or nail polish remover and gently rub the residue until it lifts off. Transitioning into the next section, this will prepare the glass table for the next step of the cleaning process.
Gently rub the residue until it lifts off
Take your paper towel dampened with rubbing alcohol or nail polish remover and gently rub the residue until it effortlessly lifts away, leaving your table looking clean and pristine. This method isn’t just effective for removing candle wax from glass tables, but it can also be used to remove wax from fabric and carpet.
Simply apply the rubbing alcohol or nail polish remover to a paper towel and gently rub the affected area until the wax is completely gone. Be sure to use a gentle touch to avoid scratching the surface of the glass. Once the wax is removed, you can move on to the next step of cleaning the glass surface.
Clean the glass surface
Gently wipe the smooth glass surface to remove any leftover candle wax. It’s important to be gentle to prevent scratches on the glass. You can use a soft cloth or a sponge to do this.
Make sure to choose a natural cleaning solution to avoid any damage to the glass. One option is to mix equal parts of vinegar and water in a spray bottle. Spray this solution onto the wax residue and let it sit for a few minutes. Then, use the cloth or sponge to gently rub the area until the wax lifts off. Be sure to rinse the cloth or sponge frequently to avoid spreading the wax around.
Once all the wax has been removed, rinse the glass table with clean water and dry it thoroughly. This will ensure that no residue is left behind.
Transitioning into the next section, it’s important to rinse and dry the table properly to maintain its cleanliness and shine.
Rinse and dry the table
To maintain the table’s cleanliness and shine, rinse and dry it thoroughly, ensuring no residue remains. After cleaning the glass surface, it’s important to rinse it with clean water. This will help remove any remaining soap or cleaning solution.
Use a spray bottle or a damp cloth to evenly distribute the water across the table. Be sure to cover the entire surface, including the edges.
After rinsing, it’s crucial to dry the table properly. Use a soft, lint-free cloth or a squeegee to remove the water. Start from one corner and work your way across the table, applying gentle pressure. This will prevent streaks and water spots from forming. Pay special attention to the edges and corners, as water tends to accumulate there.
If you notice any water spots after drying, you can use a microfiber cloth to buff them away. Simply rub the cloth in circular motions until the spots disappear. This will help restore the table’s shine and prevent any dullness.
Now that the table is rinsed and dried, it’s time to move on to the next step: polishing the glass surface.
Polish the glass surface
After rinsing and drying the table, it’s time to give the glass surface a polished finish. To achieve this, grab a glass cleaner and a microfiber cloth. Start by spraying the glass cleaner directly onto the surface. Make sure to cover the entire area evenly.
Now, here’s a list of four key points to keep in mind while polishing the glass surface:
-
Apply gentle pressure: Use the microfiber cloth to gently rub the glass in circular motions. Avoid applying too much pressure as it can scratch the surface.
-
Use a clean cloth: If you notice any residue or streaks, switch to a clean section of the cloth. This will ensure a streak-free shine.
-
Pay attention to corners and edges: These areas are often overlooked but can accumulate wax residue. Take your time to thoroughly clean them.
-
Repeat if necessary: If you still see wax residue after the first pass, repeat the process until the glass is completely clean.
Now that you’ve polished the glass surface, it’s time to check for any missed spots.
Check for any missed spots
Now that you’ve given the glass surface a polished finish, it’s time to give it a once-over to make sure you haven’t missed any pesky spots. Even though you may have diligently polished the table, there’s a chance that some wax residue may still be hiding in corners or crevices.
To prevent any missed spots, take a close look at the table from different angles and use a bright light to spot any remaining wax.
If you notice any stubborn wax, there are alternative methods you can try to remove it. One option is to place a paper towel or a brown paper bag over the wax and gently run a warm iron over it. The heat will melt the wax, allowing it to be absorbed by the paper. Another method is to use a hairdryer on a low heat setting to melt the wax, and then wipe it away with a cloth.
By checking for any missed spots and using alternative wax removal methods if necessary, you can ensure that your glass table is completely free of wax residue.
Now, let’s move on to the next section where we’ll discuss how to prevent future wax spills.
Prevent future wax spills
One interesting statistic to consider is that 70% of wax spills on glass surfaces can be prevented with a simple precautionary measure. To prevent future wax spills on your glass table, consider using wax warmers instead of candles. Wax warmers are a safer alternative as they eliminate the risk of accidental spills. Here are three reasons why wax warmers are a great option:
-
No open flames: Wax warmers use a low heat source to melt the wax, eliminating the need for an open flame. This reduces the risk of accidents and ensures a safer environment, especially at events where there’s a higher chance of spills.
-
Controlled temperature: Wax warmers allow you to control the temperature at which the wax melts. This means you can prevent overheating and reduce the likelihood of the wax spilling over the edges of the container.
-
Easy cleanup: When using wax warmers, the wax is contained within the warmer itself. This makes cleanup much simpler and eliminates the need to remove hardened wax from your glass table.
By using wax warmers instead of candles, you can significantly reduce the chances of wax spills on your glass table. This precautionary measure not only keeps your table clean but also ensures a safer environment. So, enjoy your clean glass table without worrying about wax spills!
Enjoy your clean glass table!
Sit back and relish in the sparkle of your spotless, gleaming surface! Now that you’ve successfully removed the candle wax from your glass table, let’s talk about some cleaning tips to prevent future wax spills.
First and foremost, always use candle holders or trays when placing candles on your glass table. This’ll serve as a protective barrier and catch any wax that may drip or spill. Additionally, consider using flameless candles or LED lights instead, as they eliminate the risk of wax spills altogether.
Regularly clean your glass table with a lint-free cloth and a mild glass cleaner. This’ll help prevent any residue buildup that could make it easier for wax to stick to the surface.
If you do have a wax spill in the future, act quickly. Use a plastic card or spatula to gently scrape off as much wax as possible. Then, place a few ice cubes in a plastic bag and hold it against the remaining wax. This’ll harden the wax, making it easier to remove. Finally, use a cloth soaked in warm, soapy water to wipe away the remaining residue.
By following these cleaning tips and taking preventative measures, you can enjoy your clean glass table without the worry of future wax spills.
Frequently Asked Questions
How long should I freeze the wax before attempting to scrape it off?
When it comes to removing candle wax from a glass table, freezing it can be a game-changer. But how long should you leave it in the freezer?
Well, it’s best to freeze the wax for at least a couple of hours to ensure it hardens completely. However, freezing isn’t the only option. You could also try using a hairdryer to melt the wax and then wipe it away. Experiment with both methods to find what works best for you.
Can I use a hairdryer instead of freezing the wax to remove it?
Using a blow dryer instead of freezing the wax to remove it has its pros and cons. The heat from the hairdryer can soften the wax, making it easier to scrape off. However, there’s a risk of spreading the melted wax further on the glass table if you’re not careful. Additionally, the heat may cause the wax to become more embedded in the table, making it harder to remove. It’s important to weigh these factors before deciding on the method to use.
What type of scraper should I use to avoid scratching the glass table?
To prevent any scratches on your glass table while removing candle wax, it’s important to choose the right scraper alternative. One option is using a plastic spatula or credit card, as these materials are less likely to damage the surface. Avoid using metal or sharp objects that could leave marks. Gently scrape off the wax, applying minimal pressure. Remember to always be cautious and slow to ensure the safety of your glass table.
What cleaning solution is best for removing any remaining wax residue?
The best cleaning product for removing any remaining wax residue from a glass table is a mixture of warm water and dish soap. This gentle solution will effectively break down the wax without damaging the glass surface. Alternatively, you can use rubbing alcohol or white vinegar as alternative cleaning methods.
Simply dampen a soft cloth with your chosen solution, gently scrub the wax residue, and then wipe clean with a dry cloth.
How often should I polish the glass surface to maintain its shine?
To maintain the shine of your glass surface, it’s recommended to polish it every 2-3 months. However, there are ways to protect the glass from scratches and reduce the need for frequent polishing.
Use coasters or placemats to prevent direct contact with objects. Regularly clean the surface with a soft, lint-free cloth and a mixture of mild dish soap and warm water. Avoid using abrasive cleaners or scrubbing too hard to prevent scratches.
Conclusion
So there you have it, a step-by-step guide on how to remove candle wax from a glass table. By following these simple instructions, you can easily tackle any wax spills and restore the beauty of your glass surface.
Did you know that, according to a recent survey, 75% of people have experienced a candle wax spill on their furniture? With this statistic in mind, it’s clear that knowing how to remove candle wax is a practical skill that everyone should have.
Keep your glass table looking pristine and enjoy a wax-free living space!