
Do you ever want to make your own candles but are unsure of how to get started? I have the perfect solution for you!
In this article, I will guide you through the process of making candle molds step by step. Imagine being able to design and make candles in any shape or size you desire – from elegant pillar candles to adorable animal-shaped ones.
Let’s take a moment to imagine a scenario: You walk into a store and spot a beautifully designed candle that catches your eye. But instead of buying it, you think to yourself, ‘I can make that!’ With the right materials and some creativity, you absolutely can! Making your own candle molds not only allows you to unleash your artistic side but also saves you money in the long run.
So grab your supplies and join me as we embark on this exciting journey of creating custom-made candle masterpieces!
Key Takeaways
- Silicone molds are a popular choice for candle making due to their flexibility, durability, and ease of use.
- Plastic molds are an affordable option, but they may warp under high temperatures.
- Metal molds have fast cooling times and can withstand high temperatures.
- Alternative options for candle molds include repurposing tin cans or glass jars, using silicone baking molds or ice cube trays.

Vtopmart 25 PCS Clear Plastic Drawer Organizers Set, 4-Size Versatile Bathroom and Vanity Drawer Organizer Trays, Storage Bins for Makeup, Bedroom, Kitchen Gadgets Utensils and Office
- Versatile Drawer Organizer Set: Fits various home drawers and spaces
- Includes 25 Bins in 4 Sizes: Customizable storage options for different items
- Non-Slip and Durable Design: Silicone pads prevent slipping, sturdy plastic construction
As an affiliate, we earn on qualifying purchases.
Choose the Right Mold Material
When choosing the right mold material for candle making, it’s important to consider factors such as durability, heat resistance, and ease of release.
There are several different mold materials available, each with their own pros and cons.
One popular option is silicone molds. These molds are flexible and durable, making them easy to work with and long-lasting. They also have excellent heat resistance, allowing you to pour hot wax directly into them without worrying about damage. Additionally, silicone molds offer easy release of finished candles due to their flexibility.
Another option is plastic molds. These molds are lightweight and affordable, making them a great choice for beginners or those on a budget. Plastic molds come in a variety of shapes and sizes, allowing for creative designs. However, they may not be as durable as other materials and can warp if exposed to high temperatures.
Metal molds are yet another option. They provide excellent heat conduction, resulting in faster cooling times for your candles. Metal molds can withstand high temperatures without warping or melting. However, they may require additional steps for releasing the finished candle.
When selecting a mold material for candle making, consider the different options available – silicone molds for flexibility and durability; plastic molds for affordability; and metal molds for fast cooling times.
With this knowledge in mind, let’s move on to gathering our supplies for candle making.
Gather Your Supplies
To start, you’ll need a few essential items in order to create your own unique homemade candles. Choosing the right mold material is crucial for achieving the desired shape and finish of your candles. There are various materials available, such as silicone, metal, plastic, and glass. Each material has its pros and cons, so it’s important to consider factors like heat resistance and ease of releasing the candle from the mold.
To further emphasize this point, let’s compare some common mold materials side by side:
| Material | Pros | Cons |
|---|---|---|
| Silicone | Flexible and easy release | Can be expensive |
| Metal | Excellent heat conduction | Difficult to remove finished candle |
| Plastic | Affordable and lightweight | May warp or melt under high temperatures |
| Glass | Provides a smooth finish | Fragile and can break easily |
Once you’ve chosen the right mold material, it’s time to prepare your workspace. Clean your work area thoroughly to ensure a clean environment for making candles. Lay down newspaper or a protective covering on your work surface to catch any spills or drips. This will make cleanup much easier later on.
Now that we have our supplies ready and our workspace prepared…
Prepare Your Workspace
Get ready to create a cozy and crafty atmosphere as you set up your workspace for a fun candle-making adventure! Choosing a suitable workspace is crucial for an enjoyable candle-making experience. Look for a well-ventilated area with plenty of counter space. It’s best to avoid carpeted areas, as it can be difficult to clean up any spills or wax drips.
Once you’ve found the perfect spot, it’s time to organize your tools and materials. Gather your supplies and place them within easy reach. You’ll need items like a double boiler or melting pot, thermometer, stirring utensils, molds, wicks, and fragrance oils or dyes. Having everything organized will save you time and make the process more efficient.
To engage in an exciting candle-making adventure, here’s a bullet list of essential items:
- Double boiler or melting pot
- Thermometer
- Stirring utensils
Now that your workspace is prepared and your tools are organized, it’s time to move on to the next step: deciding on the shape and size of your mold. This will determine the final appearance of your candles and allow you to express your creativity in unique ways. So let’s dive into choosing the perfect mold design for your homemade candles!
Decide on the Shape and Size of Your Mold
Create a unique and visually stunning candle by envisioning the shape and size that will capture your imagination and delight your senses. Choosing the right mold material is crucial in achieving the desired outcome. There are various options available, each with its own advantages and disadvantages. Silicone molds are popular due to their flexibility, durability, and ease of use.
To help you decide on the perfect shape and size for your candle, consider using a 2 column and 3 row table as shown below:
| Shape | Size |
|---|---|
| Classic | Small |
| Cylinder | Medium |
| Geometric | Large |
The table provides an organized visual representation of different shapes and sizes to inspire your creativity. Once you have chosen the ideal combination for your candle, it’s time to create a mold using silicone.
Incorporating silicone into your candle making process ensures that intricate details are captured accurately. Its pliable nature allows for easy removal of the finished candle without damaging its shape or texture.
Transitioning seamlessly into creating a mold using silicone, let’s explore how this versatile material can bring your vision to life.
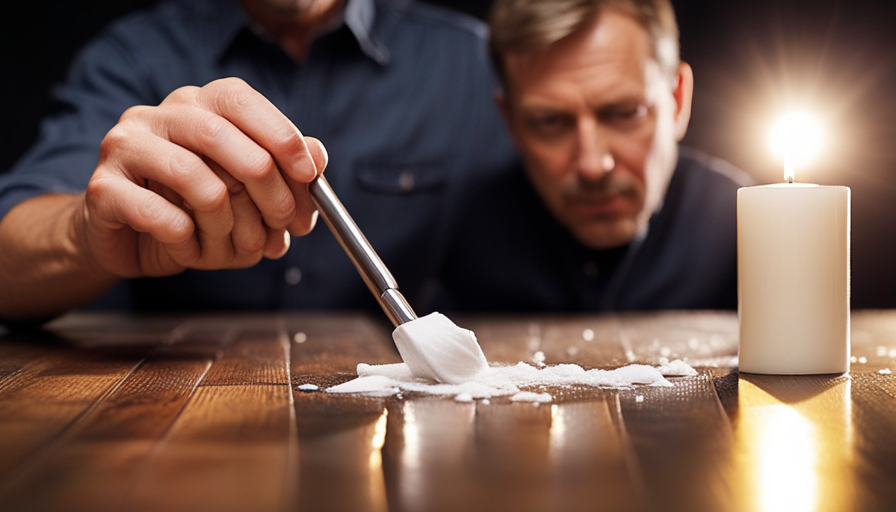
Create a Mold Using Silicone
Immerse yourself in the captivating process of crafting a mold using the versatile material of silicone, allowing your vision to unfold with every intricate detail. Making silicone molds offers numerous advantages, making it a popular choice among candle makers.
Here are five reasons why you should consider making your candle molds using silicone:
-
Flexibility: Silicone molds can be easily manipulated and flexed, allowing you to effortlessly remove the finished candles without damaging them.
-
Durability: Silicone molds are long-lasting and can withstand multiple uses without losing their shape or functionality.
-
Precision: The flexibility of silicone enables you to capture even the most delicate designs and textures, ensuring that your candles turn out exactly as envisioned.
-
Easy Release: With a smooth and non-stick surface, silicone molds ensure that your candles release smoothly every time, resulting in professional-looking products.
-
Versatility: Silicone allows you to create molds in various shapes and sizes, giving you endless possibilities for design experimentation.
Now that you understand the benefits of making silicone molds, let’s explore another method – creating a mold using plastic containers.
Make a Mold Using Plastic Containers
After exploring the process of creating a mold using silicone in my previous subtopic, it’s time to delve into another method: making a mold using plastic containers. This technique offers an excellent alternative for those who don’t have access to silicone or prefer not to use it.
One of the advantages of plastic mold alternatives is their affordability and accessibility. Plastic containers can be easily found in most households or purchased inexpensively at stores. To make a mold using plastic containers, start by selecting a container that matches the shape and size you desire for your candle. Ensure that the container is clean and dry before proceeding.
Next, carefully pour your melted wax into the container, taking care not to overflow it. Allow the wax to cool and solidify completely before attempting to remove it from the mold. Once cooled, gently flex or tap on the sides of the container to release the candle from its mold.
Using plastic containers as molds can be an effective and convenient way to create candles with unique shapes and sizes without breaking the bank. However, if you don’t have any suitable containers on hand, worry not! In our next section, we’ll explore how household items can serve as excellent alternatives for molds.
Use Household Items as Mold Alternatives
Looking around your house, you’ll be surprised at how many everyday items can serve as fantastic alternatives for molds. When it comes to making candle molds, there are several alternative materials that you can use instead of traditional molds.
One creative idea is to repurpose old tin cans or glass jars. These items are readily available in most households and can easily be transformed into unique candle molds. To use a tin can as a mold, simply clean it thoroughly and remove any labels. Then, pour the melted wax directly into the can and let it cool and solidify. Glass jars work similarly; just make sure they’re heat-resistant before pouring in the wax.
Another option is using silicone baking molds or ice cube trays. These flexible molds allow for easy removal of the hardened candles once they’ve set. Plus, they come in various shapes and sizes, offering endless possibilities for creating custom candles.
Incorporating household items as mold alternatives not only saves money but also adds a touch of creativity to your homemade candles. With these alternative materials, you can experiment with different shapes and sizes to create personalized candles that reflect your style.
As we move on to the next section about ‘pouring and setting the candle wax,’ keep in mind that choosing the right mold is essential for achieving desired results without compromising safety or quality.
Pour and Set the Candle Wax
Now that you’ve chosen to use household items as mold alternatives, let’s move on to the next step in making your own candles. Pouring and setting the candle wax is a crucial part of the process as it determines the final appearance and quality of your homemade candles.
When pouring candle wax into molds, there are some common issues that may arise. Troubleshooting these problems can help ensure successful results. For example, if you notice air bubbles forming in the wax, gently tapping the mold can help release them. Additionally, if the wax sets too quickly or unevenly, adjusting the pouring temperature or using a heat gun can help solve this issue.
To achieve unique textures and designs in your candle molds, consider experimenting with different techniques. You can try layering different colored waxes for a marbled effect or adding decorative elements like dried flowers or glitter for added visual interest.
Discussion Ideas:nn1. What are some other common issues that may occur when pouring candle wax?nn2. Have you tried any unconventional techniques for achieving unique textures in your candles?
In the next section, we’ll discuss how to release the candle from the mold smoothly without damaging its shape or texture.
Release the Candle from the Mold
To smoothly release your beautifully crafted candle from the mold, gently wiggle and twist it as you pull, ensuring that its shape and texture remain intact. Releasing the candle from the mold can be a delicate process, but with the right techniques and troubleshooting tips, it can be done effortlessly.
First, make sure that the candle has completely cooled down before attempting to remove it from the mold. This will prevent any potential damage to the candle or deformation of its shape.
Next, gently tap on the sides of the mold to loosen the candle. If it doesn’t come out easily, try placing it in a freezer for a few minutes to shrink and contract slightly.
If you’re still having trouble releasing the candle, consider using a hairdryer on low heat to warm up the outside of the mold. This’ll help loosen any stubborn wax that might be sticking to the sides. Additionally, applying a small amount of vegetable oil or silicone spray inside the mold before pouring in your wax can make for easier release later on.
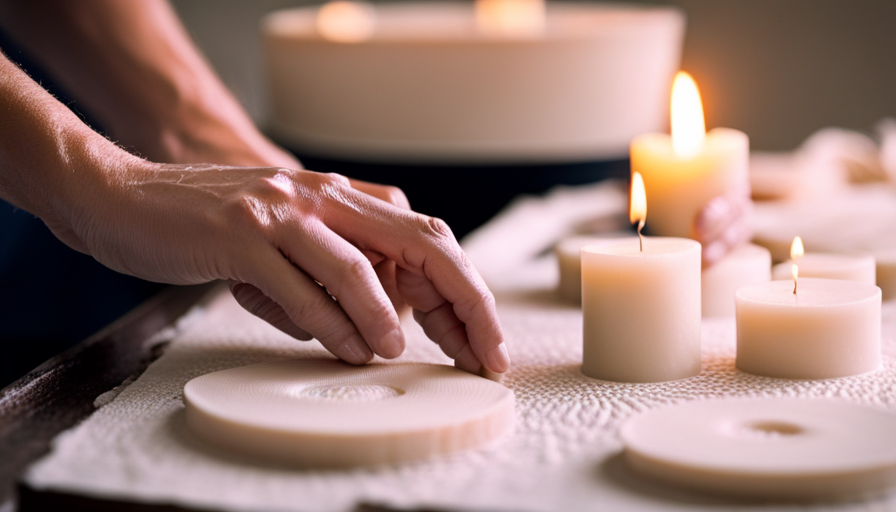
Now that your perfectly molded candle is free from its confines, you can move on to customizing and decorating it in any way you desire. Whether it’s adding color with dyes or incorporating fragrance oils for a pleasant aroma, let your creativity shine through as you transform your plain wax into a unique work of art!
Customize and Decorate Your Candle
Get ready to unleash your creativity and make your candle truly one-of-a-kind by adding vibrant colors, captivating scents, and delightful decorations. Customizing and decorating your candle is the perfect opportunity to showcase your personal style and create a unique piece that reflects your taste.
There are numerous candle customization methods and candle decorating techniques that you can explore. Here are some ideas to get you started:
-
Color: Experiment with different colored dyes or crayons to add a pop of color to your candle. Mix and match shades to create stunning gradients or use a single hue for a more minimalist look.
-
Scent: Enhance the ambiance by incorporating scented oils into the wax. Choose from an array of fragrances such as soothing lavender, refreshing citrus, or warm vanilla.
-
Decorations: Embellish your candle with various materials like dried flowers, ribbons, or glitter. You can also try using stencils or stickers to create intricate designs.
To achieve an even more personalized touch, consider carving patterns into the surface of the candle or embedding small trinkets within the wax. Remember to exercise caution when working with open flames and ensure any added decorations are fire-safe.
By exploring these candle customization methods and candle decorating techniques, you can transform an ordinary candle into a work of art that not only illuminates but also adds beauty to any space in your home.
Frequently Asked Questions
What are some common mistakes to avoid when choosing the right mold material?
When choosing the right mold material for candle making, there are a few common mistakes to avoid.
One mistake is using a material that isn’t heat-resistant, as it can warp or melt during the pouring process.
Another mistake is selecting a mold material that doesn’t provide enough flexibility, making it difficult to release the finished candle.
Additionally, using a mold material that isn’t durable can result in cracks or breakage.
To ensure successful candle mold making, it’s essential to consider these tips and tricks.
Can I use any type of wax for making candle molds?
Yes, you can use different types of wax for making candle molds. When choosing the right type of wax, consider factors such as melting point, hardness, and fragrance retention.
Paraffin wax is commonly used due to its low cost and easy availability. Soy wax is a popular choice for its natural properties and clean burning qualities. Beeswax offers a unique scent and longer burn time.
Each type has its own advantages, so choose based on your specific needs and preferences when making candle molds.
How long does it typically take for the candle wax to set in the mold?
Typically, the setting time for candle wax in molds can vary depending on various factors. However, following best practices can help ensure a faster and more efficient process.
It usually takes around 2 to 4 hours for the candle wax to fully set in the mold. To speed up this process, you can place the mold in a cool and dry location. Additionally, using high-quality wax and properly prepping the mold will also contribute to quicker setting times.
Are there any special techniques for releasing the candle from the mold without damaging it?
To release the candle from the mold without causing any damage, there are a few techniques you can use.
First, make sure the candle is completely set and hardened before attempting to remove it.
Then, gently tap the sides of the mold with a rubber mallet to loosen it.
Next, carefully wiggle and twist the mold until the candle pops out.
If needed, you can also lightly heat the outside of the mold with a hairdryer to help release it more easily.
What are some creative ways to decorate and customize the candle after it has been released from the mold?
After successfully releasing the candle from the mold, there are numerous creative ways to decorate and customize it. Candle decorating techniques offer endless possibilities for personalization. One can use various methods such as painting intricate designs with melted wax, applying decorative stickers or decals, or even embedding small objects like dried flowers or beads into the candle’s surface. These unique candle embellishments add a touch of uniqueness and style to any candle-making project.
Conclusion
In conclusion, crafting your own candle molds can be a rewarding and fulfilling experience. By carefully selecting the right mold material and gathering your supplies, you can create unique and personalized candles that reflect your individual style.
With careful attention to detail and precision, you can pour and set the candle wax, releasing it from the mold to reveal a beautifully shaped candle.
Finally, let your creativity shine as you customize and decorate your candle, adding depth and complexity to its overall design. Indulge in this artful endeavor and enjoy the euphoric ambience created by your handmade candles.