
Did you know that candles have been used for centuries to provide both light and heat? The first candles in history were used in ancient Egypt over 5,000 years ago.
Today, candles are not only functional but also serve as a beautiful addition to our homes and can create a relaxing ambiance. If you’ve ever wanted to create your own unique candles, learning how to make a candle mold is an essential skill.
With just a few supplies and some creativity, you can make molds in various shapes and sizes to bring your candle-making dreams to life. In this article, I will guide you through the process of making a candle mold step-by-step. From choosing the right materials to releasing the final mold, I’ll provide all the details you need to start creating stunning homemade candles.
So let’s get started on this exciting journey into the world of candle making!
Key Takeaways
- Choosing the right mold material is crucial, with silicone molds being the most popular choice for candle makers.
- Building a mold box with plywood or melamine boards is important for containing the wax and preventing leaks.
- Tap or shake the mold box to release air bubbles that may form on top of the poured mold material.
- Gently remove the mold from the box by sliding a butter knife or spatula along the edges, then twist and pull it out slowly to avoid damage.

Vtopmart 25 PCS Clear Plastic Drawer Organizers Set, 4-Size Versatile Bathroom and Vanity Drawer Organizer Trays, Storage Bins for Makeup, Bedroom, Kitchen Gadgets Utensils and Office
- Versatile Drawer Organizer Set: Fits various home drawers and spaces
- Includes 25 Bins in 4 Sizes: Customizable storage options for different items
- Non-Slip and Durable Design: Silicone pads prevent slipping, sturdy plastic construction
As an affiliate, we earn on qualifying purchases.
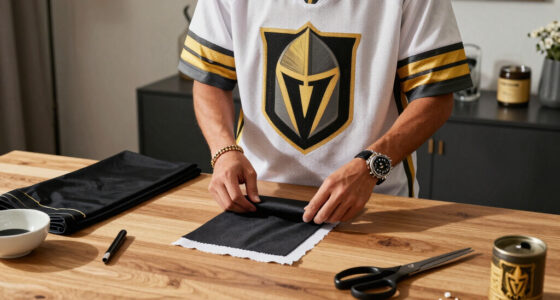
Gather Your Supplies
Now that you’ve gathered all of your supplies, it’s time to dive into the exciting process of making your very own candle mold. Candle making techniques and candle mold design are essential aspects to consider when embarking on this creative journey.
To begin, let’s talk about candle making techniques. There are various methods you can use, such as dip, pour, or rolled candles. Each technique offers a unique aesthetic appeal and requires different materials. Depending on the style you desire for your finished product, choose the appropriate candle-making technique.
Next, let’s focus on candle mold design. You have endless possibilities when it comes to designing your mold. You can opt for traditional cylindrical shapes or get more adventurous with intricate designs like flowers or animals. The key is to ensure that the mold allows easy removal of the finished candle while maintaining its shape and integrity.
Transitioning into choosing a mold material is crucial at this point in our candle-making journey. The right material will determine how well your mold holds up during the pouring process and how easily you can remove the hardened wax afterward. So now that we’ve explored the fundamentals of candle making techniques and discussed various options for designing molds, let’s move on to selecting the perfect material for our project.
Choose a Mold Material
First, let’s consider the material you’ll need for crafting your candle mold. Did you know that silicone molds are the most popular choice among candle makers, accounting for 80% of all mold types used? When it comes to mold materials, there are several options to choose from, each with its own pros and cons.
Silicone molds are a top choice because they’re flexible and durable. They can withstand high temperatures and can be reused multiple times without losing their shape. Another advantage is that silicone molds allow for easy release of the finished candle. However, they can be more expensive than other materials.
Another option is plastic molds. These are affordable and readily available in various shapes and sizes. Plastic molds are lightweight and easy to clean but may not have the same level of detail as silicone molds.
Metal molds offer excellent heat conduction, resulting in a faster cooling time for your candles. They also provide intricate designs due to their rigidity. However, metal molds can be challenging to release the finished candle from without damaging its shape.
When choosing a mold material, consider factors such as cost, durability, flexibility, ease of use, and desired level of detail.
Now that you’re familiar with different mold materials, let’s move on to preparing your candle shape by discussing wax pouring techniques.
Prepare Your Candle Shape
To get started, you’ll want to ensure that your chosen shape for the candle is properly prepared. Candle shape customization allows you to create unique and personalized candles that reflect your style and taste. Whether you prefer classic cylindrical shapes or more intricate designs, it’s important to prepare your candle shape before moving on to the next step.
When preparing your candle shape, consider using alternative mold materials such as silicone or latex. These materials offer flexibility and durability, making it easier to achieve intricate details in your candles. Additionally, they can be reused multiple times, saving you money in the long run.
To evoke an emotional response from your audience, imagine a table with two columns and three rows. In the first column, list different candle shapes like hearts, stars, and animals. In the second column, describe how each shape adds a touch of whimsy and personality to any space. This creative presentation will inspire readers to experiment with various shapes when making their own candles.
Now that you have prepared your candle shape using alternative mold materials, it’s time to move on to building the mold box. This step will allow us to contain the wax securely while it solidifies into our desired shape.
Build the Mold Box
Create a sturdy and secure mold box to contain the wax as it solidifies into your desired shape, ensuring a successful and enjoyable candle-making process. Building techniques for a mold box vary, but one popular method is using plywood or melamine boards. Cut the boards to the desired dimensions for your candle and assemble them into a rectangular shape. Secure the corners with screws or nails for added stability.
To prevent any leaks, line the inside of the mold box with plastic wrap or aluminum foil. This will create a barrier between the wax and the box, keeping everything contained. Additionally, it makes it easier to remove the candle once it has hardened.
Troubleshooting tips: If you notice any gaps or cracks in your mold box, seal them with silicone caulk or hot glue. This will ensure that no wax escapes during the pouring process.
Once you have built your mold box and ensured that it is secure and leak-proof, you’re ready to move on to sealing it before pouring in the wax mixture. By taking these steps to create a solid foundation for your candle-making project, you can guarantee that your final product will turn out exactly how you envisioned.
Seal the Mold Box
Now it’s time to ensure that your mold box is tightly sealed, so you can embark on an exciting candle-making journey without any worries. Sealing techniques are crucial to prevent any leaks or spills during the molding process. Here are some effective ways to seal your mold box:
-
Use silicone caulk: Apply a thin layer of silicone caulk along the inside edges of the mold box. This creates a watertight seal and prevents any liquid from escaping.
-
Secure with clamps: If your mold box has removable sides, use clamps to hold them tightly together. This provides extra reinforcement and ensures a tight seal.
-
Double-check with tape: To be extra cautious, run a strip of duct tape along the seams of the mold box. This helps in creating a secure barrier against any potential leaks.
Troubleshooting common seal issues:
-
Examine for gaps: Carefully inspect all corners and edges for any gaps or openings. Fill these areas with additional caulk or tape to achieve a complete seal.
-
Check for excess material: Sometimes, excess wax or other materials may obstruct the sealing process. Remove any obstructions before sealing.
With your mold box properly sealed, you’re now ready to move on to the next step – mixing and pouring the mold material.
Mix and Pour the Mold Material
Once the mold box is properly sealed, it’s time to mix and pour the material for your new creation. This step is crucial in achieving a perfectly formed candle mold.
To begin, gather all the necessary materials: the mold material itself, a mixing container, and any additives or dyes you wish to incorporate. Follow the instructions on the packaging of your chosen mold material to determine the correct ratio of water and powder. Carefully measure out these ingredients and combine them in the mixing container.
Next comes the pouring technique. Slowly pour the mixture into the mold box, starting from one corner and moving towards the opposite corner. This ensures an even distribution of material throughout the entire mold. Be cautious not to overfill, as this can lead to excess spillage or an uneven surface.
It’s important to troubleshoot common mold issues during this process. If you notice any air bubbles forming on top of your poured mixture, gently tap or shake the mold box to help release them. Additionally, if you accidentally pour too much material into certain areas, use a tool like a toothpick or skewer to redistribute it evenly.
As you finish pouring, transition into allowing the mold to cure by placing it in a cool and dry location for at least 24 hours. This waiting period allows sufficient time for the material to harden and set completely before moving on to further steps in candle making.
Allow the Mold to Cure
To achieve the best results, you’ll need to patiently wait for the mold to cure, allowing the material to harden and set completely. This step is crucial in ensuring that your candle mold turns out perfectly.
While it may be tempting to rush through this process, it’s important to resist the urge and give the mold ample time to cure.
During the curing process, it’s essential to pay attention to a few key factors. First, make sure you remove any air bubbles that may have formed while pouring the mold material. You can do this by gently tapping or shaking the mold to release any trapped air.
Additionally, managing the curing time is crucial. The specific duration will vary depending on the type of mold material used, so be sure to follow the manufacturer’s instructions carefully.
As you wait for your candle mold to cure, take this opportunity to clean up your workspace and prepare for the next steps in creating your beautiful candles.
Once your mold has fully cured and hardened, it will be ready for you to release and begin making your candles.
Transitioning into releasing the candle mold, now let’s move on to releasing our beautifully cured candle molds!
Release the Candle Mold
When it comes to releasing the candle mold, there are a few key techniques that I’ve found to be effective.
First, gently tap the sides of the box with a rubber mallet or hammer to loosen the mold.
Then, carefully slide a butter knife or spatula along the edges of the mold to separate it from the box.
Lastly, give the mold a gentle twist and pull it out slowly to avoid any damage to both the mold and candle shape.
Remember to take your time and handle everything with care for optimal results!
Techniques for removing the mold from the box
Swiftly slipping the silicone mold from its snug setting, carefully coaxing it out of the box, is a crucial step in candle making. To remove the mold safely and avoid any damage to both the mold and your candle shape, here are some helpful techniques:
- Gently tap the sides of the box to loosen any trapped air or debris that may be holding onto the mold.
- Use a soft-bristled brush or a clean cloth to wipe away any excess dust or particles on the surface of the mold.
- Apply a small amount of vegetable oil or non-stick cooking spray to help lubricate the mold and ease its removal.
Taking these precautions will ensure that your candle mold is released smoothly without any hiccups.
Now let’s move on to some valuable tips for avoiding damage to both your precious mold and delicate candle shape.
Tips for avoiding damage to the mold or candle shape
If you really want to ruin your masterpiece, go ahead and ignore these helpful tips for protecting both your precious mold and delicate candle shape.
When removing the mold from the box, be extra careful to avoid any sudden movements or jerks that could cause damage. Slowly and gently release the mold from its container, ensuring that it remains intact.
To prevent air bubbles from forming in your candle, make sure to pour the melted wax slowly and steadily into the mold. This will allow any trapped air to escape naturally without causing any deformities in your final product. Additionally, avoid pouring wax that’s too hot as this can also result in unwanted air bubbles.
By following these precautions, you can ensure a smooth and flawless candle shape without any unsightly imperfections. Now let’s move on to how to clean and maintain the mold…
Clean and Maintain the Mold
When it comes to cleaning and maintaining the candle mold, it’s crucial to remove any residue or excess material that may have accumulated after each use. This ensures that the mold remains in pristine condition and is ready for future candle-making endeavors.
Additionally, proper storage and maintenance are key to prolonging the mold’s lifespan, allowing me to continue creating beautiful candles for years to come.
Removing any residue or excess material from the mold
First, take a moment to carefully inspect your candle mold for any leftover residue or excess material. It’s important to start with a clean mold to ensure the quality of your candles.
To remove any excess material, gently tap the mold on a hard surface to loosen it. Then, use a soft brush or cloth to wipe away any debris or residue that may be stuck inside the mold. Pay close attention to corners and crevices where material may accumulate.
For stubborn residue, you can use warm soapy water and a sponge to gently scrub the mold until it’s clean. Remember to thoroughly dry the mold before storing it in a cool, dry place.
Proper storage and maintenance will help prolong the lifespan of your candle mold by preventing damage and buildup.
Proper storage and maintenance to prolong the mold’s lifespan
To ensure your candle mold lasts as long as possible, it’s crucial to store and maintain it properly. Proper cleaning is essential in maintaining the quality of your mold.
After each use, wash the mold with warm soapy water to remove any leftover residue or wax. Use a soft cloth or sponge to gently scrub away any stubborn spots. Avoid using abrasive materials that could damage the surface of the mold.
Once the mold is clean and dry, store it in a cool, dry place away from direct sunlight. Excessive heat can cause the mold to warp or melt, compromising its shape and effectiveness. Consider wrapping the mold in tissue paper or placing it inside a storage bag to protect it from dust and moisture.
By following these storing techniques, you can prolong the lifespan of your candle mold and continue creating beautiful candles with ease.
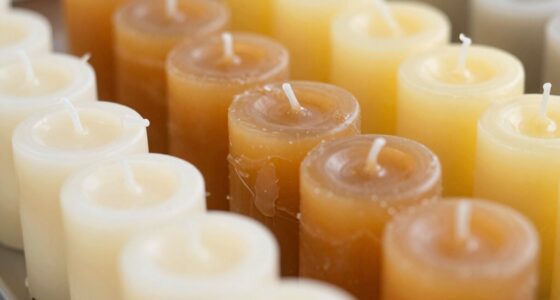
Create Beautiful Candles with Your Mold
Crafting candles with your own mold adds a touch of artistry and allows you to unleash your creative flair. Not only can you create unique shapes and sizes, but you also have the freedom to experiment with different candle decorating ideas and candle fragrance options.
Here are three ways to make beautiful candles using your mold:
-
Decorative Embeds: Add small decorative elements, such as dried flowers or colorful beads, into the melted wax before pouring it into the mold. As the wax hardens, these embeds will be visible within the candle, creating an eye-catching effect.
-
Layered Colors: Pour different colored waxes in layers to create stunning visual effects. Start by pouring one color into the mold and letting it partially set before adding another layer of a contrasting color. Repeat this process until you achieve your desired design.
-
Scented Candles: Enhance the ambiance of any space by adding fragrance oils to your melted wax before pouring it into the mold. Choose from a wide range of scents like lavender for relaxation or vanilla for a cozy atmosphere.
By incorporating these candle decorating ideas and exploring various candle fragrance options, you can bring your homemade candles to life and enjoy their beauty and aroma in any setting.
Frequently Asked Questions
How long does it take for the mold material to cure?
The curing time for the mold material varies depending on the type you use. Generally, it can take anywhere from a few hours to several days for the material to fully cure.
It’s important to follow the manufacturer’s instructions for the specific mold material you’re using. Once cured, the mold material is typically reusable, allowing you to make multiple candle molds without having to purchase new materials each time.
What are some common mistakes to avoid when building the mold box?
Common mistakes to avoid when building the mold box include not measuring accurately, using the wrong materials, and not securing the sides tightly.
It’s important to ensure precise measurements to create a well-fitting mold. Using inappropriate materials can result in leaks or an unstable structure. To prevent any mishaps, make sure to secure the sides firmly with clamps or tape.
Troubleshooting these issues will save you time and frustration throughout the candle-making process.
Can I reuse the mold material for multiple candle molds?
Yes, you can definitely reuse the mold material for multiple candle molds, and there are several benefits to using reusable molds.
Not only does it save you money in the long run, but it also reduces waste. By reusing the mold material, you can create a variety of shapes and sizes without having to purchase new materials each time.
Additionally, reusable molds provide consistent results and allow for easy adjustments or modifications if needed. So go ahead and get creative with your candle making while being eco-friendly!
How often should I clean and maintain the mold?
As the saying goes, ‘A clean mold is a happy mold.’ When it comes to keeping your candle mold in tip-top shape, proper cleaning and maintenance are essential.
To ensure optimal results, I recommend cleaning the mold after every use. This can be done by gently washing it with warm soapy water and allowing it to air dry completely.
Additionally, regularly inspecting the mold for any signs of wear or damage and addressing them promptly will help prolong its lifespan.
Are there any tips for creating unique candle designs with the mold?
When it comes to creating unique candle designs, I find inspiration in various places. I’m inspired by nature’s vibrant colors and intricate patterns found in textiles. The possibilities for unique designs are endless.
To bring these ideas to life, I experiment with creative candle making techniques. I enjoy marbling, layering different colored wax, and embedding decorative elements. These techniques allow me to craft one-of-a-kind candles that truly stand out.
The key is to let your creativity flow and have fun with the process!
Conclusion
And there you have it, my friends! With just a few simple steps, you can become the master of candle making.
Your home will be transformed into a haven of beautifully crafted candles, filling the air with enchanting scents and casting a warm glow over every corner.
Friends and family will marvel at your newfound talent, begging for their own personalized creations.
So go forth, embrace your inner artist, and let the magic of candle making ignite your creativity!