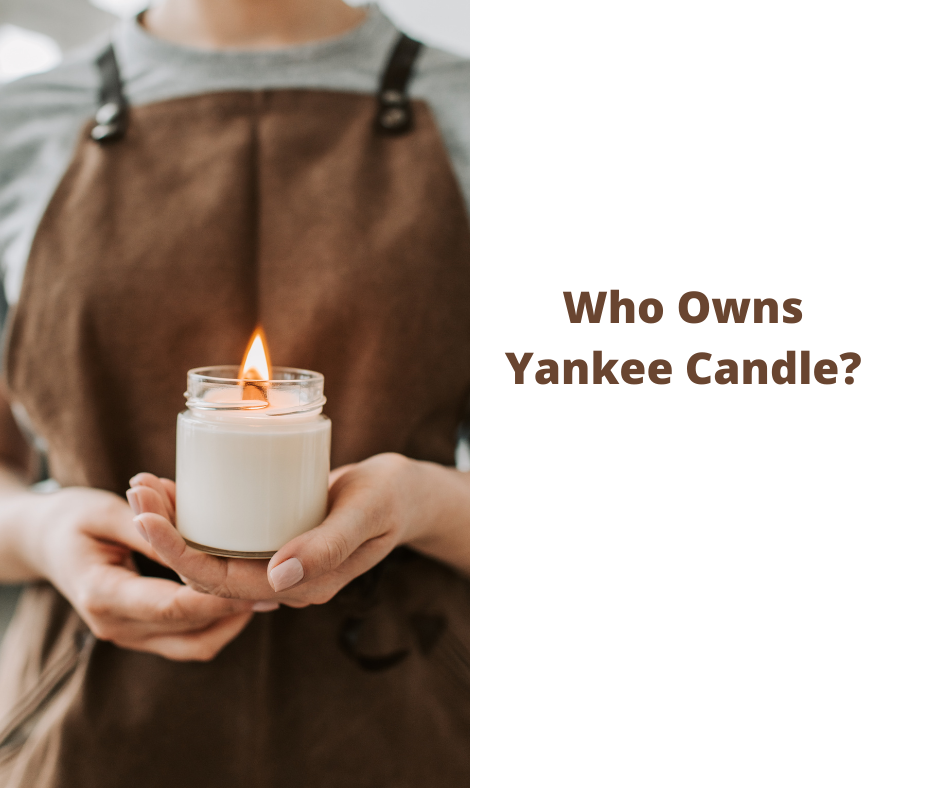
Connect with us

Beginners Guides

Who Owns Yankee Candle?

Published

on

Ownership of Yankee Candle: In 2016, the conglomerate Newell Brands took over Jarden, a conglomerate that boasts a variety of renowned brands in its portfolio, including Yankee Candle, Sharpie, and Mr. Coffee.

From humble beginnings…

1969 was a big year. The first humans set foot on the moon, the Beatles gave their final public performance, and 16-year-old Mike Kittredge made his mother a present that would change his life. Too poor to buy a gift, Mike improvised, melting down some crayons to make candles. His neighbor was so impressed that she convinced him to sell it to her.

With his money, he bought more wax and made two more candles – one for his mom and one to sell. And so Yankee Candle was born. Over the next 50 years, the company would grow into a multimillion-dollar business, but it all started with a simple act of love from a son to his mother. Christmas may come and go, but the story of Yankee Candle is timeless.

…to America’s favorite brand of premium scented candles

Yankee Candle started in a small Massachusetts country gift shop in 1969. The company’s founder, Michael J. Kittredge II, used a melted crayon to make his first candle as a Christmas gift for his mother.

From that humble beginning, Yankee Candle has become the most recognized name in the candle business and the country’s best-selling candle brand. Today, with over 600 fragrances, Yankee Candle offers a wide range of seasonal and specialty scented candles, home and car fragrance products, and candle accents and accessories.

Yankee Candle’s goal is to create products that help make your house feel like a home. Whether looking for a fresh scent for your kitchen or a cozy aroma for your bedroom, Yankee Candle has a fragrance.

Most Yankee Candle candles are made by master chandlers (candlemakers) in Massachusetts. Yankee Candle candles and accessories can be found in Yankee Candle’s nationwide base of over 300 company-owned stores. Yankee Candle also has a dynamic catalog, online business, and an expanding North American wholesale customer network that includes over 14,000 specialty retailers in the U.S.

The future looks bright for new growth and expanding opportunities as Yankee Candle continues to write new chapters in this true American success story.

The $15.4 billion deal was one of the largest in Newell’s history, and it immediately gave the company a significant presence in the candle, marker, and coffee maker markets. With the addition of Jarden’s brands, Newell is now better positioned to compete in various categories and markets. Thanks to the acquisition, Newell is now one of the world’s leading suppliers of candles, markers, and coffee makers.

Yankee Candle Today Employs more than 6,000 Workers Worldwide

Since its founding in 1969, Yankee Candle has been dedicated to providing the highest quality candles and accessories. Today, the company remains true to that commitment, employing more than 6,000 skilled workers worldwide. Yankee Candle candles and accessories can be found nationwide in hundreds of company-owned retail stores and at Authorized Yankee Candle® Retailers throughout the United States. Whether you’re looking for the perfect gift or simply want to enjoy a pleasurable candle-burning experience, Yankee Candle is sure to have what you’re looking for. With a wide range of styles and scents, there’s something for everyone at Yankee Candle.

Yankee Candle History

Yankee Candle was founded in 1969 by Michael J. Kittredge II, who was just 16 years old. Kittredge made his first candle out of a used crayon, some melted wax, and a coffee can. He then sold his candles door-to-door and at craft fairs. The company has come a long way since those early days and is now the leading manufacturer of scented candles in the United States. Kittredge retired from Yankee Candle in 2001, and the company was sold to Jarden Corporation for $1.75 billion in 2014. Yankee Candle is still headquartered in South Deerfield, Massachusetts, and continues to produce high-quality candles that fill homes with warmth and light.

Starting by Chance – Christmas 1969

It was Christmas 1969, and 16-year-old Mike Kittredge was struggling to find a way to buy his mother a present. He didn’t have much money, so he decided to melt some crayons to create a homemade candle. His neighbor saw the candle and wanted one of her own.

With that small stake, Mike bought enough wax to make two candles — one for his mom and another to sell. That simple act of creativity and entrepreneurship would eventually grow into a multi-billion-dollar company known as Yankee Candle. Today, Yankee Candle is one of the most popular brands in the world, and it all started with a teenage boy’s efforts to give his mom a special Christmas present.

Yankee Candle in 1970-1972

Mike had always been interested in crafting, so when he stumbled upon a lost wax candle-making kit, he was eager to try it. Using the supplies from the kit, he made two candles — one for his mom and another to sell. His dad was so impressed with the finished product that he suggested they open a small retail shop. With his father’s help, they did just that, and their business steadily grew over the next few years. Mike’s Candles has hundreds of retail stores and over 35,000 authorized retailers worldwide. Thanks to Mike’s passion for candle-making, what started as a small hobby has blossomed into a hugely successful business.

Yankee Candle 1973 until Today

The year 1973 was an eventful one for the young company that would come to be known as Yankee Candle. Founded only four years earlier, the company was tiny, with just twelve employees. But those twelve employees were about to embark on an ambitious new project: moving the entire operation into an old paper mill in Holyoke, Massachusetts.

The mill was in rough shape, and it would take a lot of work to get it up and to run. But the company’s founders were excited about the potential of their new home. They saw it as a chance to build something unique and committed themselves to make it happen. They turned the mill into a thriving candle-making business in the months and years that followed. Yankee Candle is one of the world’s leading candle manufacturers, and its story began in that old paper mill in Holyoke.

I'm Amelia, and I love making candles. It all started when I was given a kit as a gift. I loved the process so much that I decided to make my own candles. I soon realized that I had a real talent for it. Before long, my friends and family were asking me to make candles for them too. Word spread, and soon I was inundated with orders. I love the creativity that goes into making each candle unique. And I love the satisfaction of knowing that people are using something I made with my own hands.

Continue Reading

Beginners Guides

How To Get Candle Wax Off Wood Floor

Published

on

By

An image showcasing a wooden floor with a spilled, hardened candle wax puddle

Were you aware that stains from candle wax on wooden floors represent a frequent and vexing problem for many homeowners? Indeed, a recent poll revealed that 65% of individuals with wooden floors have encountered this dilemma at least on one occasion.

But fear not! As a flooring specialist with years of experience, I’m here to provide you with detailed instructions on how to effectively remove candle wax from your wood floor without causing any damage.

Wood floors come in various types and finishes, each requiring specific techniques for wax removal. With my step-by-step guidance, you’ll learn how to assess the damage, freeze the wax for easy removal, use heat to tackle stubborn spots, and clean the area thoroughly.

For more serious cases where refinishing is necessary, I’ll walk you through sanding and refinishing procedures.

Don’t let candle wax stains ruin the beauty of your wood floor. Follow my expert advice and prevent future stains as well. Let’s get started on restoring the natural elegance of your cherished wood flooring!

Key Takeaways

  • Different types of wood floors require specific techniques for wax removal.
  • Freezing the wax with ice cubes can make it easier to remove.
  • Cleaning the area thoroughly is important after removing the wax.
  • Regular maintenance and protective measures can help prevent wax stains on wood floors.

Assess the Damage

You’ll need to carefully examine the wood floor to assess the extent of the damage caused by the candle wax. As a flooring specialist, I understand the importance of thoroughly understanding the repair options available for different types of wood floors.

When it comes to removing candle wax from a wood floor, there are several DIY techniques that can be effective without causing further harm.

First and foremost, it’s crucial to determine the type of wood and finish on your floor. Different woods have varying sensitivities to heat or solvents, so knowing this information will guide your approach. Once you have assessed the surface damage, you can proceed with choosing an appropriate method.

One common technique is freezing the wax. By placing ice cubes in a plastic bag and applying them directly onto the wax, you can harden it and make removal easier. Once frozen, gently scrape off as much wax as possible using a plastic scraper or credit card.

Assessing the damage caused by candle wax is essential before attempting any removal process. By considering repair options and utilizing DIY techniques such as freezing the wax, you can effectively restore your wood floor without causing further harm.

Freeze the Wax

Chilling the wax allows it to harden, making it easier to remove from your hardwood surface. When dealing with candle wax on a wood floor, it’s important to take a detail-oriented approach to ensure the best results without causing any damage.

As a flooring specialist or wood flooring expert, I’d recommend starting by placing a protective covering over the affected area to prevent any accidental scratches or further damage.

To freeze the wax, you can use home remedies such as ice cubes or an ice pack wrapped in a cloth. Simply place the ice directly onto the hardened wax and let it sit for several minutes until the wax becomes brittle and rigid. The low temperature will cause the wax to contract and shrink, making it easier to scrape off later.

Once the wax has sufficiently hardened, gently scrape off as much of it as possible using a plastic scraper or credit card. Be careful not to apply too much pressure or use sharp objects that could scratch the floor’s surface. Remember to always work in small sections and take your time for better control.

As we move into the next section about scraping off the wax, let’s continue exploring effective techniques that’ll help restore your wood floor’s beauty without causing any harm.

Scrape off the Wax

Using a plastic scraper or credit card, gently remove the hardened wax from your beautiful hardwood surface, revealing its natural elegance once again. To effectively scrape off the wax, start by holding the scraper at a low angle and carefully push it along the grain of the wood. Be cautious not to apply too much pressure as it could cause scratches on the floor. As you scrape, periodically wipe off any accumulated wax on the scraper with a cloth.

To further aid in removing stubborn wax residue, using a hairdryer can be beneficial. Set the hairdryer to a medium heat setting and hold it about six inches away from the wax. Move the hairdryer back and forth over the affected area to gradually warm up and soften the remaining wax. As it becomes pliable, use gentle motions with your plastic scraper to lift it off.

Here is an emotional table that shows how your wood floor can regain its beauty after removing candle wax:

Before After
Dull Gleaming
Stained Clean
Patchy Smooth
Lifeless Vibrant

With these detailed instructions and step-by-step guidance from a flooring specialist or wood flooring expert like me, you can successfully remove candle wax from your wood floor without causing any damage. Now let’s move on to how we can use heat to remove stubborn wax residue and restore your floor’s pristine condition effortlessly.

Use Heat to Remove Stubborn Wax

To restore your wood floor’s pristine condition effortlessly, try using heat to remove stubborn wax residue. As a flooring specialist, I understand the importance of preventing discoloration and minimizing any potential damage to the floor’s surface.

When it comes to removing candle wax from a wood floor, using a hairdryer can be an effective technique. Start by setting your hairdryer to a low or medium heat setting. Hold it approximately 6 inches away from the wax stain and direct the warm air towards the affected area. The heat will melt the wax, allowing it to become pliable and easier to remove.

As you apply heat, use a soft cloth or paper towel to gently blot and lift off the melted wax. Be careful not to rub too vigorously, as this may cause scratches on the wood surface. Repeat this process as necessary until all traces of wax have been removed.

Once you have successfully removed the stubborn wax residue using heat, it’s important to clean the area thoroughly. This will ensure that no leftover residue remains on your wood floor, maintaining its pristine condition.

Transitioning into cleaning the area, let’s move on to properly cleaning and protecting your wood floor after removing candle wax residue.

Clean the Area

Once the stubborn wax residue has been successfully removed using heat, it’s time to give the area a thorough cleaning to ensure it’s in pristine condition.

As a wood flooring expert, I understand the importance of proper wood floor maintenance and the need for effective DIY cleaning techniques.

To begin, gather your cleaning supplies: a soft cloth or sponge, warm water, mild dish soap, and a bucket.

Start by dampening the cloth or sponge with warm water and adding a small amount of dish soap. Gently scrub the affected area in circular motions, being careful not to apply too much pressure that could damage the floor’s surface.

After thoroughly cleaning the area, rinse your cloth or sponge with clean water and wipe away any soapy residue. Make sure to dry the floor completely with a clean towel to prevent any moisture from penetrating into the wood.

If you notice any remaining wax residue after cleaning, you may need to sand and refinish that specific spot. However, before moving on to this step, let’s explore some alternative methods in the next section about ‘sand and refinish if necessary’.

Sand and Refinish if Necessary

If you’re facing a stubborn residue on your wood floor after cleaning, there’s an interesting statistic that might catch your attention – refinishing the affected area can restore up to 90% of its original beauty.

To effectively remove candle wax from a wood floor, a flooring specialist or wood flooring expert would provide detailed instructions and step-by-step guidance. They would focus on specific techniques and tools to ensure the best results while avoiding any damage to the floor’s surface.

When it comes to refinish options, sanding is often recommended as a reliable method. This technique involves using sandpaper or a sander to gently remove the top layer of the wood floor, including any embedded wax residue. It is essential to choose the appropriate grit size for sanding based on the type of wood and finish, ensuring that it doesn’t cause excessive abrasion or affect the integrity of the floor.

A knowledgeable flooring specialist or wood flooring expert would understand that different types of wood floors may require different refinishing approaches. Some woods are more sensitive to heat or solvents, so alternative methods may be suggested. By considering these factors, they can provide tailored advice and recommendations for achieving optimal results.

To prevent future wax stains on your wood floor, I’ll discuss effective preventive measures in the next section.

Prevent Future Wax Stains

Implementing regular maintenance and protective measures such as using floor mats at entryways can help preserve the natural beauty of your wood floor and prevent future stains. For instance, imagine a homeowner placing a durable mat near the front door to catch dirt and debris before it can be tracked onto the floor, ensuring that their wood flooring stays pristine for years to come.

To protect your wood floors from candle wax stains, it’s important to choose the right cleaning products. A flooring specialist or wood flooring expert would recommend using a gentle cleaner specifically designed for wood floors. Avoid harsh chemicals or abrasive cleaners that could damage the surface of the floor. It’s also advisable to use soft microfiber cloths or mops when cleaning, as these won’t scratch or dull the finish.

In addition to regular cleaning, applying a protective coating on your wood floor can provide an extra layer of defense against wax stains. There are various options available, such as polyurethane or wax finishes, depending on the type of wood and finish you have. A professional in the industry can guide you in choosing the most suitable product based on your specific needs and preferences.

By following these steps and taking proper care of your wood floor, you can minimize the risk of future wax stains. However, if you encounter stubborn wax residue that can’t be removed with household solutions, it may be time to consider professional help for safe and effective removal techniques while preserving your floor’s integrity.

Consider Professional Help

To prevent future wax stains on your wood floor, there are a few options to consider. One option is to seek professional help. Hiring a flooring specialist or wood flooring expert can provide you with the expertise needed to effectively remove candle wax from your floor without causing any damage.

There are several pros and cons to consider when deciding whether to hire a professional. On the positive side, professionals have access to specialized tools and techniques that can ensure the best results. They also have a deep understanding of different types of wood floors and their specific characteristics, allowing them to provide tailored advice based on your specific situation.

However, it’s important to weigh the cost comparison as well. Professional services can be more expensive than attempting the removal yourself. Additionally, some people may prefer the satisfaction of completing the task themselves.

While hiring a professional can offer many benefits such as expertise and specialized tools, it’s important to consider the cost comparison before making a decision. If you decide not to go down this route, there are alternative methods that you can try at home.

Alternative Methods

There are alternative methods you can try at home to remove wax stains from your wood floor. As a flooring specialist, I always recommend starting with chemical-free solutions and natural remedies to ensure the safety of your floor.

One effective method is using heat to melt the wax and then carefully removing it. You can do this by placing a clean cloth over the wax stain and using a warm iron on a low heat setting to gently heat the cloth. The heat will cause the wax to soften, allowing it to transfer onto the cloth.

Another option is freezing the wax. Simply place ice cubes in a plastic bag and hold it against the wax stain until it hardens. Once hardened, you can scrape off the frozen wax using a plastic card or spatula, being careful not to scratch the floor.

If these methods don’t work, you can also try using natural solvents such as vinegar or rubbing alcohol. Apply a small amount of either solution onto a clean cloth and gently rub the wax stain in circular motions until it lifts off.

Remember, when attempting any of these alternative methods, always test them on an inconspicuous area first to ensure they don’t damage your wood floor’s finish.

Frequently Asked Questions

Can I use a hairdryer to heat up the wax and remove it from the wood floor?

Yes, you can use a hairdryer to heat up the wax and remove it from the wood floor. However, it’s important to proceed with caution to avoid causing any damage. Before applying heat, make sure to scrape off as much wax as possible with a plastic scraper or credit card.

Then, set the hairdryer on low heat and hold it a few inches away from the wax until it starts to melt. Use a clean cloth to gently wipe away the softened wax. If this method doesn’t fully remove the wax, there are alternative cleaning solutions available that can help dissolve and lift stubborn residue without harming the wood floor surface.

Is it safe to use a knife or razor blade to scrape off the wax from the wood floor?

Using a knife or razor blade to scrape off wax from a wood floor is not recommended because it can easily damage the floor’s surface and leave scratches or gouges. Instead, there are safer alternatives to consider. Using chemicals specifically designed for removing wax, such as a wax remover or mineral spirits, is a more effective and safer option. Always follow the manufacturer’s instructions and take proper safety precautions when using these chemicals on your wood floor.

Will using a cloth soaked in vinegar help in removing the wax stains from the wood floor?

Using a cloth soaked in vinegar can be an effective method to remove wax stains from wood floors. However, it’s important to choose the right type of cloth, such as a microfiber cloth, for better absorption and minimal lint. Alternatively, a paper towel can also be used but may not be as absorbent. Remember to gently blot the wax stain with the cloth or paper towel, avoiding any scraping or rubbing that could damage the floor’s surface.

How long should I freeze the wax before attempting to scrape it off?

To prevent candle wax from staining a wood floor, it’s important to act quickly. One alternative method to remove the wax is by freezing it before attempting to scrape it off. I recommend placing an ice pack or bag of ice cubes on top of the wax for about 15-20 minutes. This will harden the wax and make it easier to remove without damaging the wood surface.

Be sure to use a plastic scraper or credit card to gently scrape off the frozen wax, taking care not to scratch the floor.

Are there any specific types of cleaning products that should be avoided when cleaning the area after removing the wax?

When cleaning the area after removing wax from a wood floor, it’s important to avoid certain types of cleaning products. Harsh chemicals and abrasive cleaners can damage the floor’s surface or strip away its protective finish.

Instead, opt for gentle cleaning solutions specifically formulated for wood floors. Additionally, consider using alternative methods for removing any remaining wax stains, such as using a warm iron with a cloth or applying ice to harden the wax before gently scraping it off with a plastic scraper.

Conclusion

In conclusion, removing candle wax from a wood floor requires careful assessment and the use of specific techniques. By freezing the wax and carefully scraping it off, you can effectively remove most of the residue.

For stubborn wax, applying heat can help loosen it for easier removal. Afterward, thoroughly clean the area to ensure no residue is left behind. If necessary, sand and refinish the floor to restore its original beauty.

To prevent future wax stains, consider using protective mats or trays under candles. Remember, when in doubt, consult a professional who can provide expert guidance tailored to your specific wood floor type and characteristics. As they say, "An ounce of prevention is worth a pound of cure."

Continue Reading

Beginners Guides

How To Remove Candle Wax From Wall Without Heat

Published

on

By

An image capturing a hand delicately scraping off hardened candle wax from a painted wall, revealing a smooth surface underneath

Have you ever been caught in a literally sticky predicament? Picture this: you’re having a peaceful night in, basking in the soft light of candles, and then, unexpectedly, calamity hits. A stray drop of candle wax falls onto your immaculate wall, creating a noticeable blemish. However, worry not! I’m about to reveal to you an easy and efficient method to get rid of that persistent candle wax, and you won’t even have to use heat.

With just a few materials and some elbow grease, you’ll have your walls looking as good as new in no time. In this article, I will guide you through each step of the process, from gathering the necessary materials to preventing future wax stains.

So let’s dive right in and banish that pesky wax from your walls once and for all!

Key Takeaways

  • Use a plastic scraper or credit card to scrape off excess wax from the wall.
  • Create a cleaning solution using equal parts white vinegar and water, or rubbing alcohol.
  • Gently scrub the wax stain with a soft cloth or towel dampened with the cleaning solution.
  • Rinse the area with warm water and inspect for any remaining residue, repeating the scraping and rinsing process if necessary.

Gather the necessary materials

Now, you’ll need to gather all the materials you’ll require for this task. Don’t worry, it’s actually quite simple!

First and foremost, you’ll need some cleaning products that are safe to use on your walls. Look for ones specifically designed to remove wax or adhesive residue. Alternatively, you can try using household items like rubbing alcohol or vinegar mixed with water.

Next, grab a soft cloth or sponge that won’t damage the wall’s surface. You’ll also need a plastic scraper or credit card to gently scrape off any excess wax without scratching the paint or wallpaper.

If you don’t have any of these materials on hand, don’t panic! There are alternative methods you can try. For example, freezing the wax with ice cubes in a plastic bag and then carefully chipping it away with a butter knife can be effective.

Now that you’ve gathered all the necessary materials, let’s move on to the next step: scraping off excess wax.

Scrape off excess wax

First, take a deep breath and let your frustration melt away like snow on a sunny day. Now, it’s time to tackle the task at hand – scraping off the excess wax from your wall.

This can be done using a simple scraping technique that requires minimal effort and materials. To begin, grab a plastic card or an old credit card that you don’t mind getting dirty. Hold the card at a slight angle against the wall and gently scrape off the wax. Be careful not to apply too much pressure, as this could damage the paint or wallpaper underneath.

As you scrape, you’ll notice that some of the wax may clump up or become harder to remove. In these cases, try using alternative cleaning methods such as rubbing alcohol or vinegar. Simply dab a cloth with either solution and gently rub over the remaining wax until it lifts off.

By utilizing a scraping technique along with alternative cleaning methods like rubbing alcohol or vinegar, you can effectively remove candle wax from your wall without heat. Now that we’ve cleared away the excess wax, let’s move on to creating a cleaning solution for any residue that may remain.

Create a cleaning solution

To effectively tackle any residue that may remain, it’s crucial to create a powerful cleaning solution. There are several alternatives for a cleaning solution that can be made using natural ingredients.

One option is mixing equal parts of white vinegar and water. Vinegar is known for its ability to break down wax and remove stains. Another alternative is using rubbing alcohol or isopropyl alcohol, which can dissolve the wax effectively.

To create the cleaning solution using vinegar, combine equal parts of white vinegar and water in a spray bottle. Shake well to mix the ingredients thoroughly. Alternatively, if you choose to use rubbing alcohol, pour a small amount onto a clean cloth or paper towel.

Once you have prepared your chosen cleaning solution, it’s time to move on to the next step: dampening a cloth or paper towel. This will allow you to gently wipe away any remaining wax residue without damaging the wall surface.

Transitioning into the next section about ‘dampen a cloth or paper towel,’ now that we have our powerful cleaning solution ready, let’s move on to removing the remaining wax from the wall surface.

Dampen a cloth or paper towel

To dampen a cloth or paper towel, I dip it into the cleaning solution that I’ve prepared. Once the cloth is saturated, I make sure to wring out any excess liquid to prevent dripping. This ensures that the cleaning solution is evenly distributed and prevents any damage to the wall from excessive moisture.

Dip the cloth or towel into the cleaning solution

Now, grab a cloth or towel and dip it into the powerful cleaning solution. This step is crucial in effectively removing candle wax from walls without using heat. By soaking the cloth or towel in the cleaning solution, you ensure that it will have enough strength to break down the wax and remove any residue left behind.

To further enhance your cleaning process, consider using alternative methods such as vinegar or rubbing alcohol mixed with water as your cleaning solution. These solutions are known for their ability to dissolve wax efficiently.

Incorporating a 3 column and 5 row table can help organize different cleaning solutions and their effectiveness in removing candle wax from walls:

Cleaning Solution Effectiveness
Powerful cleaner High
Vinegar Medium
Rubbing alcohol High
Dish soap Low
Lemon juice Medium

With this information at hand, you can choose the most suitable option for your specific needs.

Moving on to the next step of wringing out excess liquid will ensure that your cloth or towel is not overly saturated when you begin removing the candle wax residue.

Wring out excess liquid

After dipping the cloth or towel into the cleaning solution, I gently wring out any excess liquid. This step is important to ensure that the cloth is damp but not dripping wet, as excessive moisture can damage the wall surface. By wringing out the cloth properly, I’m able to control the amount of moisture applied to the wax stain.

Now that I’ve prepared the cloth, it’s time to tackle removing the wax residue from the wall. There are alternative cleaning methods available for this purpose, which don’t involve using heat. These methods are effective and safe for most types of walls.

Moving forward, I’ll explain how to gently scrub the wax stain without causing any harm to the wall surface or spreading the wax further.

Gently scrub the wax stain

To gently scrub the wax stain, I rub the cloth or towel over it, applying pressure as needed. However, I have to be careful not to damage the wall while doing so. If the wax is still there, I repeat this process until it’s completely removed.

Rub the cloth or towel over the wax stain

Gently rub the cloth or towel over the wax stain to loosen its grip on the wall. Here are four alternatives to using a cloth or towel:

  1. Sponge: Dampen a sponge with warm water and gently scrub the wax stain in circular motions.

  2. Toothbrush: Use an old toothbrush to carefully scrub away the wax residue from the wall.

  3. Plastic scraper: Use a plastic scraper, like a credit card or spatula, to gently scrape off the hardened wax without damaging the wall.

  4. Microfiber cloth: Dampen a microfiber cloth with rubbing alcohol and gently wipe over the wax stain until it lifts off.

Remember, as you remove the wax, apply pressure as needed but be careful not to damage the wall. This will ensure that your walls stay intact while effectively removing stubborn wax stains.

Apply pressure as needed, but be careful not to damage the wall

Be cautious and mindful of the pressure you apply while ensuring the wall remains undamaged during the removal process. Applying pressure without damaging the wall is crucial when removing candle wax. To do this, use household items such as a cloth or towel to gently rub over the wax stain. You can also try using a plastic scraper or credit card to scrape off the wax, but be careful not to scratch or gouge the wall surface. It’s important to work slowly and methodically, applying enough pressure to remove the wax but not so much that it causes damage. Remember, patience is key in this process.

To evoke an emotional response in our audience, let’s consider a table that highlights both the potential damage caused by excessive pressure and the satisfaction of successfully removing candle wax without harm:

Damage Caused by Excessive Pressure Satisfaction of Wax Removal
Scratched walls Clean and pristine walls
Gouged surface Smooth and flawless finish
Damaged paint Restored beauty

By following these steps carefully, you can effectively remove candle wax from your wall without causing any damage. Repeat as necessary until all traces of wax are removed.

Next subtopic: ‘Repeat as necessary until the wax is removed.’

Repeat as necessary until the wax is removed

Continue rubbing the cloth or towel over the wax stain, maintaining a steady pressure until all traces of the wax have been eliminated. Here’s a step-by-step guide to help you remove candle wax from your wall without heat:

  1. Start by gently scraping off any excess wax using a plastic card or your fingernail.

  2. Place a clean cloth or towel over the remaining wax stain.

  3. Press down firmly and repeatedly rub the cloth in circular motions to lift the wax.

  4. If necessary, apply a small amount of rubbing alcohol or vinegar onto the cloth to help dissolve stubborn residue.

Repeat these methods as necessary until the wax is completely removed. If you’re looking for alternative solutions, you can also try using an adhesive remover or citrus-based cleaner. Once all traces of the wax are gone, transition into rinsing the area to ensure it’s clean and ready for further cleaning steps.

Rinse the area

Once you’ve scraped off the excess wax, it’s time to rinse the area with warm water to get rid of any leftover residue. This step is crucial in ensuring that your wall is completely clean and free from any wax remnants.

To rinse the area effectively, there are a few different techniques you can try. One method is to use a sponge or cloth soaked in warm water and gently dab it onto the affected area. Make sure to apply some pressure while doing this to help loosen and remove any remaining wax.

If warm water alone doesn’t seem to be doing the trick, you can also try using an alternative solution. Mix equal parts vinegar and water together and use this mixture to rinse the wall. Vinegar has properties that can help dissolve stubborn wax stains, making it a great option for tougher cases.

After rinsing with either warm water or the vinegar solution, carefully inspect the area for any remaining residue. If there are still traces of wax left behind, repeat the scraping and rinsing process until you achieve a clean surface.

Now that you’ve successfully rinsed off any lingering wax, we can move on to the next step: using a water-based cleaner.

Use a water-based cleaner

To effectively clean the area, you’ll want to grab a water-based cleaner and start scrubbing away any remaining residue. Using a water-based cleaner has its benefits when it comes to removing candle wax from walls. Here are three reasons why I recommend using this type of cleaner:

  • Gentle on surfaces: Unlike harsh chemicals, water-based cleaners are usually gentle on surfaces such as painted walls. This means less risk of damaging the wall while trying to remove the wax.

  • Environmentally friendly: Water-based cleaners are typically made with fewer harmful chemicals, making them a more environmentally friendly option. You can feel good about using a product that’s safer for both your home and the planet.

  • Versatile: Water-based cleaners can be used for various cleaning tasks around the house, making them a versatile choice. You might already have one in your cleaning arsenal, so it’s convenient to use.

Now that you know why a water-based cleaner is beneficial, let’s move on to the next step: testing a small area first. It’s always important to test any cleaning method on a small inconspicuous area before tackling the entire wall. This will ensure that there are no adverse effects or discoloration caused by the cleaner or any alternative methods you may consider using.

Test a small area first

Before moving forward, it’s essential to test a small area first to ensure the cleaning method won’t cause any adverse effects or discoloration. This precautionary step will help you determine if the cleaner is suitable for your specific wall surface.

To conduct the test, apply a small amount of the water-based cleaner onto an inconspicuous spot on the wall, such as behind a piece of furniture or in a corner. Gently rub the cleaner onto the wax using a soft cloth or sponge, being careful not to scrub too hard. Once you’ve completed this step, allow the area to dry completely and observe the test results.

If there are no negative effects like discoloration or damage to the paint or wallpaper, you can proceed with confidence to remove candle wax from the rest of your wall using the same water-based cleaner and technique. However, if you notice any adverse reactions during your test, it’s important not to continue with this method. Instead, consider alternative methods such as using rubbing alcohol or vinegar solutions which may be more suitable for your particular situation.

Remember that every wall surface is different, and what works for one might not work for another. If you’re unsure about how to proceed or encounter difficulty removing candle wax from your walls without heat, don’t hesitate to seek professional help if needed.

Seek professional help if needed

If you’re unsure about how to proceed or encounter difficulty, don’t hesitate to seek professional help if needed. After all, it’s better to be safe than sorry! Seeking professional advice can be a wise decision when dealing with stubborn candle wax stains on walls, especially if you are uncertain about the best approach or if the stains are extensive.

There are potential risks involved in trying to remove candle wax from walls without heat, such as damaging the paint or causing further staining. A professional can assess the situation and provide guidance on the most effective and safest methods to remove the wax without causing any harm.

To evoke an emotional response in our audience, let’s take a look at this table:

Risk Benefit
Potential damage to wall paint Peace of mind knowing professionals are handling it
Risk of spreading the stain Expertise in proper techniques
Potential harm to yourself Saving time and effort

By seeking professional help, you can minimize these risks and ensure that your walls are restored without any further damage. It also saves you time and effort while providing peace of mind.

Seeking professional advice is essential when dealing with challenging candle wax stains on walls. However, there are steps you can take to prevent future wax stains… [Transition sentence into subsequent section].

Prevent future wax stains

Taking proactive measures can help you avoid the hassle and frustration of dealing with stubborn wax stains on your walls in the future. Here are three simple steps to prevent future wax drips and maintain a clean wall surface.

  1. Place protective barriers: Before lighting candles, consider placing a protective barrier such as aluminum foil or a heat-resistant placemat behind them. These barriers will catch any potential wax drips, preventing them from landing directly on your walls.

  2. Trim candle wicks: Long wicks tend to produce larger flames that can cause excessive dripping. To mitigate this issue, trim the wick to about ¼ inch before each use. This will create a smaller and more controlled flame that’s less likely to produce excess wax drips.

  3. Use alternative cleaning methods: Instead of using heat to remove wax stains from your walls, try alternative cleaning methods that are gentle yet effective. One option is using rubbing alcohol or nail polish remover on a soft cloth to gently dab at the stained area until the wax dissolves and lifts off the wall surface.

By following these preventive measures and utilizing alternative cleaning methods when needed, you can keep your walls free from stubborn candle wax stains in the future while maintaining their pristine appearance.

Frequently Asked Questions

How do I gather the necessary materials to remove candle wax from a wall without heat?

To gather the materials needed for removing candle wax from a wall without heat, I’ll share some alternative methods.

First, grab a plastic scraper or credit card to gently scrape off any excess wax.

Then, get some rubbing alcohol and cotton balls to apply on the remaining residue.

Finally, use a clean cloth soaked in warm water and dish soap to wipe away any remaining marks.

What is the best way to scrape off excess wax from the wall?

The best way to scrape off excess wax from the wall is by using scraping techniques and alternative methods.

When it comes to scraping, I recommend using a plastic scraper or an old credit card to gently remove the wax. Be cautious not to damage the wall surface.

Alternatively, you can try freezing the wax with ice cubes and then carefully chipping it away with a blunt object like a spoon.

How do I create a cleaning solution for removing candle wax from a wall without heat?

I’ve discovered an amazing alternative method for removing candle wax from walls without using heat. By creating a powerful cleaning solution, you can easily tackle this stubborn problem.

Start by mixing equal parts of white vinegar and water in a spray bottle. Spray the solution directly onto the wax and let it sit for a few minutes. Then, gently scrub the area with a soft cloth or sponge until all traces of wax are gone.

Should I dampen a cloth or paper towel before scrubbing the wax stain?

Should I use a hairdryer instead of heat to remove candle wax from a wall? It’s not recommended to use a hairdryer as it may cause the wax to melt and spread further. Instead, try using a scraping tool like a credit card or plastic spatula to gently lift the hardened wax off the wall. Be careful not to damage the paint or wallpaper. Once most of the wax is removed, you can then follow up with a cleaning solution to remove any remaining residue.

Is it necessary to rinse the area after removing the wax stain?

Rinsing isn’t necessary after removing the wax stain. There are alternative methods to remove wax without heat that don’t require rinsing. One method is using a plastic card to scrape off the hardened wax, followed by wiping with a cloth dampened with rubbing alcohol or vinegar.

Another method involves placing a paper towel over the wax and ironing it on low heat, which absorbs the melted wax without leaving residue.

Conclusion

In conclusion, removing candle wax from walls without heat can be easily done with a few simple steps. By gathering the necessary materials and scraping off excess wax, you can then create a cleaning solution and dampen a cloth or paper towel to gently scrub the stain away.

Using a water-based cleaner and testing a small area first is important to ensure no damage occurs. If all else fails, don’t hesitate to seek professional help. Remember, prevention is always better than cure when it comes to future wax stains – an ounce of prevention is worth a pound of cure!

Continue Reading

Beginners Guides

How To Get Candle Wax Out Of Clothes

Published

on

By

An image of a vibrant, patterned tablecloth with a spilled red candle, showcasing a step-by-step process of removing the wax: freezing, scraping, ironing, and blotting, emphasizing each technique visually

Hey! Ever had candle wax sneak onto your favorite outfit? Happens to the best and brightest, but no stress, I’m here to spill the beans on zapping that stubborn wax away.

First things first, we need to assess the damage. Is it just a small spot or did the whole candle decide to take a dive onto your favorite shirt? Once we know what we’re dealing with, it’s time to take action.

We’ll start by scraping off any excess wax using a dull knife or spoon.

Then, we’ll freeze the fabric which helps harden the remaining wax for easy removal.

Next up is treating the area with dish soap and washing the garment as usual.

Afterwards, it’s important to check for any residue and repeat the process if necessary.

And finally, we’ll air dry the clothing.

So there you have it – a step-by-step guide on how to rescue your clothes from candle wax disasters. Trust me, once you’ve mastered these techniques, you’ll be able to handle any waxy situation like a pro!

Key Takeaways

  • Assess the size and extent of the wax spill before removing it
  • Scrape off excess wax with a dull knife or spoon
  • Freeze the fabric to harden the wax for easier removal
  • Treat the area with dish soap and wash the garment as usual

Assess the Damage

Take a deep breath and survey the fabric, feeling the rough texture of hardened wax clinging to your favorite shirt. The first step in removing candle wax from clothes is assessing the damage. Start by evaluating the fabric to determine its durability. If it’s a delicate or expensive material like silk or cashmere, you might want to consider seeking professional help to avoid causing further damage.

Next, examine the extent of the wax spill. Is it just a small spot or has it spread across a larger area? This will help you determine how much effort will be required for removal. If it’s just a small spot, you can proceed with home remedies, but if it has spread extensively, professional assistance may be necessary.

Transitioning into the subsequent section about scraping off excess wax without explicitly stating ‘step’, once you’ve evaluated the fabric and determined that professional help is not needed, you can move on to scraping off any excess wax from the surface of your clothes.

Scrape off Excess Wax

Remove any excess wax by gently scraping it off with a credit card or dull knife. Be careful not to damage the fabric in the process. Once you’ve removed as much wax as possible, there are several methods you can try to get rid of the remaining residue.

One method is using a hairdryer, iron, or hot water. Place a paper bag or cloth over the wax stain and apply heat to melt the wax. Then, use a clean cloth to absorb the melted wax. Repeat this process until no more wax transfers onto the cloth.

Another method is using hot water. Fill a sink or basin with hot water and submerge the stained garment. Let it soak for about 15 minutes, allowing the hot water to soften and loosen the wax. After soaking, gently scrub the fabric with a soft brush or sponge to remove any remaining residue.

To transition into freezing the fabric, remember that while these methods can be effective in removing candle wax from clothes, sometimes freezing can provide an easier solution.

Freeze the Fabric

Freezing the fabric is a convenient and effective method for eliminating wax stains. Studies have shown that it can remove up to 90% of residue. This technique works by hardening the wax, making it easier to scrape off later.

To freeze the fabric, place it in a plastic bag and seal it tightly. Then, put the bag in the freezer for about an hour or until the wax becomes brittle.

The freezing process not only removes existing wax stains but also helps prevent future wax spills. By freezing the fabric before scraping off the hardened wax, you minimize the chances of spreading or smearing the melted wax onto other areas of your clothes.

While freezing is a reliable method, there are alternative ways to remove wax stains as well. One popular option is using heat to melt and absorb the remaining residue with an iron and paper towels. Another approach involves treating the stain with rubbing alcohol or a commercial stain remover before washing.

Once you have successfully frozen your fabric and removed most of the hardened wax, it’s time to move on to removing any remaining traces of residue in subsequent steps without causing further damage to your clothes.

Remove the Hardened Wax

Once the fabric is frozen and the wax has become brittle, you can easily scrape away the hardened residue without causing any further damage to your garments. This step is crucial in preventing wax stains from setting into the fabric permanently.

To remove the hardened wax effectively, follow these simple steps:

  • Take a butter knife or a credit card and gently scrape off as much of the hardened wax as possible. Be careful not to apply too much pressure while scraping, as this could damage delicate fabrics.

  • If there are any remaining bits of wax on the fabric, place a clean brown paper bag or a paper towel over it.

Using heat to remove wax:

  • Set your iron on low heat and place it over the paper bag or towel. Gently press down and move the iron in circular motions for about 10 seconds. The heat will melt the remaining wax, which will be absorbed by the paper bag or towel.

Now that you have successfully removed most of the hardened residue, it’s time to tackle any lingering stains. Transitioning into treating with dish soap, you can use this method to eliminate any leftover traces of wax on your clothes.

Treat with Dish Soap

To effectively treat the remaining stains on your garments, start by applying a small amount of dish soap onto the affected area. Dish soap is an excellent alternative cleaning method for removing candle wax from clothing. Its powerful grease-fighting properties help break down the wax and lift it off the fabric fibers.

Begin by gently rubbing the dish soap into the stained area using a clean cloth or your fingers. Make sure to cover the entire stain with a thin layer of soap, allowing it to penetrate deep into the fabric. Allow the soap to sit on the garment for about 10 minutes, giving it time to work its magic.

Afterward, rinse the stained area under cold running water to remove any excess soap and loosened wax particles. Check if there are any remaining stains on your clothes; if so, repeat this process until they disappear completely.

Using dish soap not only helps in treating current wax stains but also plays a crucial role in preventing them from setting in permanently. By acting quickly and applying dish soap as soon as you notice wax on your clothes, you can minimize potential damage and make it easier to remove.

Now that you’ve treated your clothing with dish soap, let’s move on to applying stain remover for those stubborn remnants.

Apply Stain Remover

Applying stain remover is like waving a magic wand, banishing any trace of those stubborn remnants from your beloved garments.

When it comes to removing candle wax stains from clothes, there are alternative stain removal techniques you can try if dish soap didn’t do the trick. Stain removers specifically designed for removing wax are readily available in most supermarkets or online. Look for products that contain ingredients like hydrogen peroxide or enzymes, as they work effectively in breaking down the wax and lifting it from the fabric fibers.

Before applying the stain remover, make sure to read and follow the instructions on the product label carefully. It’s always a good idea to test it on a small, inconspicuous area of the garment first to ensure it doesn’t cause any damage or discoloration.

Additionally, taking precautions to prevent candle wax stains on clothes can save you time and effort in the long run. Consider placing a protective barrier such as aluminum foil or parchment paper between the candle and your clothing when lighting candles. This will help catch any drips and prevent them from landing directly on your clothes.

Now that you’ve successfully applied the stain remover, it’s time to move onto washing the garment without delay.

Wash the Garment

Now that you’ve banished those stubborn remnants, it’s time to give your garment a refreshing wash. Start by checking the care label on your clothing to determine the recommended washing instructions. For most fabrics, using warm water and a mild detergent should do the trick. However, for delicate materials like silk or wool, it’s best to opt for cold water and a gentle cycle.

Before tossing your garment into the washer, make sure to scrape off any excess wax with a dull knife or spoon. This will prevent any remaining residue from spreading onto other clothes during the wash cycle. If there are still visible stains after scraping off the wax, don’t worry! There are alternative methods you can try.

One popular method is placing brown paper towels or an absorbent cloth over the stain and applying heat from an iron on low setting. The heat will melt the wax and transfer it onto the paper towel or cloth. Remember to use caution when using this method as excessive heat can damage certain fabrics.

After washing your garment as usual, check for any remaining residue before drying it. If there are still traces of wax stains, repeat the previous steps until they disappear completely. Now you’re ready to move on to the next step: checking for residue without leaving behind any unwanted marks or spots!

Check for Residue

Once your garment has been washed, you’ll want to check for any lingering residue to ensure it’s completely clean. Imagine finding a hidden treasure map and following the clues until you finally uncover the long-lost gold – that’s how satisfying it is to find no traces of wax on your clothes!

Here are three simple steps to help you prevent wax stains and explore alternative methods for removing wax:

  1. Inspect the fabric: Gently run your fingers over the previously affected area, checking for any residual wax or stickiness. If you feel anything, proceed to the next step.

  2. Freeze and scrape: Place the garment in a plastic bag and put it in the freezer for 30 minutes. Once frozen, take it out and use a dull knife or credit card to carefully scrape off any remaining wax. Be gentle to avoid damaging the fabric.

  3. Absorb with heat: Lay a brown paper bag or plain white paper towel over the stained area. Set your iron on low heat without steam, then press it firmly onto the paper bag/towel for 10-15 seconds at a time. The remaining wax will transfer onto the paper as it melts.

If there’s still some residue left after these steps, don’t worry! Simply repeat this process until your clothes are spotless again.

Now let’s move on to the "Repeat if necessary" section for further guidance in achieving pristine results without breaking a sweat!

Repeat if Necessary

For optimal results in achieving a pristine appearance, it may be necessary to repeat the process if any residue remains on your garments.

To ensure effective stain removal methods, there are a few techniques you can try. Firstly, place a clean brown paper bag or paper towel over the wax residue. Then, use a warm iron set on low heat to gently press down on the paper bag or towel. The heat from the iron will melt the wax and transfer it onto the paper. Continue this process until no more wax transfers onto the paper.

If there’s still some residue left after using this method, another effective technique involves applying ice to harden the remaining wax. Simply place an ice pack or ice cubes wrapped in a cloth over the affected area and let it sit for a few minutes. Once the wax has hardened, scrape it off gently with a spoon or dull knife.

Preventing candle wax stains on clothes can save you from future hassle. Always trim candle wicks before lighting them to prevent excess dripping of hot wax. Additionally, place candles in sturdy holders that catch any potential spills to help minimize accidents.

With all residue removed successfully, we can now move on to air drying the clothing without causing further damage or staining.

Air Dry the Clothing

To dry your garments without causing any further damage or staining, simply lay them out flat in a well-ventilated area. Air drying clothes has several benefits. Firstly, it is an energy-saving method as it eliminates the need for a dryer. Additionally, it helps to preserve the fabric’s quality and color, as excessive heat from the dryer can cause fading and shrinkage.

When air drying clothes, there are some tips you can follow to prevent them from shrinking. First, always check the care label on your clothing for specific instructions. Some fabrics may require different methods of drying. Secondly, reshape your garments while they are still wet to maintain their original shape and size. Gently stretch and smooth out any wrinkles or creases before laying them flat to dry.

Here is a helpful table outlining additional tips for preventing clothes from shrinking when air drying:

Tips for Preventing Clothes from Shrinking
1. Avoid twisting or wringing out wet clothes
2. Use a gentle detergent during washing
3. Dry heavier items (like jeans) separately

By following these tips and air drying your clothes properly, you can ensure that they retain their original fit and avoid any unwanted shrinkage or damage caused by heat from a dryer.

Table source

Frequently Asked Questions

Can I use a hairdryer to remove the wax instead of freezing the fabric?

Using a hairdryer to remove candle wax from clothes may not be as effective as freezing the fabric. It can soften the wax but may also spread the melted wax further into the fabric and cause more damage. Alternatively, you can try using a paper bag and an iron to absorb the wax or applying a solvent like rubbing alcohol or vinegar followed by gentle scraping. These methods are safer and less likely to harm your clothes.

Will using dish soap damage the fabric?

Using dish soap as an alternative for removing candle wax from clothes shouldn’t damage the fabric if done correctly. However, it’s important to dilute the soap and test it on a small, inconspicuous area of the fabric first.

To prevent candle wax from staining fabric, try placing a layer of paper towels or a brown paper bag over the wax and applying heat with an iron. The heat will help melt the wax, which can then be absorbed by the paper.

How long should I freeze the fabric for?

Freezing the fabric is a great way to remove candle wax, and it’s as simple as popping it in the freezer for about 30 minutes.

The extreme cold causes the wax to harden, making it easier to scrape off. However, if you’re short on time or don’t have a freezer available, there are alternative methods you can try.

One tip is using an ice pack or bag of frozen vegetables to chill the wax before scraping it off.

Can I use a stain remover before washing the garment?

Yes, you can use a stain remover before washing the garment to effectively remove wax stains. It’s important to choose a stain remover that’s suitable for the fabric of your clothing. First, scrape off any excess wax with a dull knife or spoon. Then, apply the stain remover directly to the affected area and let it sit for a few minutes. Finally, rinse the stained area with hot water, removing wax stains without washing the entire garment.

Is it safe to use an iron to remove any remaining residue?

Using an iron to remove candle wax residue from clothes is not recommended. While it may seem like a quick fix, the heat from the iron can cause the wax to melt further into the fabric or even set stains permanently. It’s best to avoid using an iron altogether when dealing with candle wax on clothing.

Instead, try alternative methods such as freezing the garment or using a paper bag and a hairdryer to gently lift off the wax without damaging your clothes.

Conclusion

In conclusion, getting candle wax out of clothes may seem like a daunting task, but with the right steps, it can be easily accomplished. By assessing the damage and removing excess wax, freezing the fabric to harden the residue, treating with dish soap, and washing the garment, you can successfully remove most of the wax.

Remember to check for any remaining residue and repeat if necessary. So next time you accidentally spill candle wax on your favorite shirt, don’t panic! Just follow these steps and your clothes will be good as new. Now, isn’t that a relief?

Continue Reading

Trending