
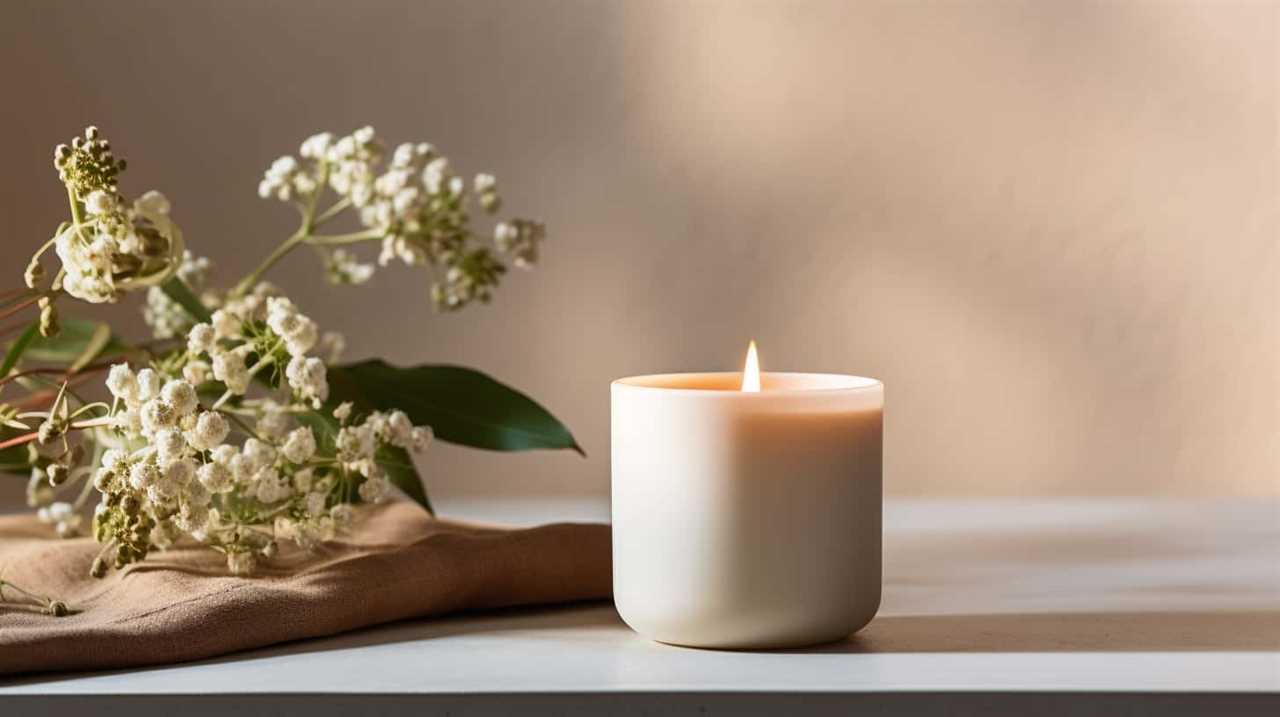
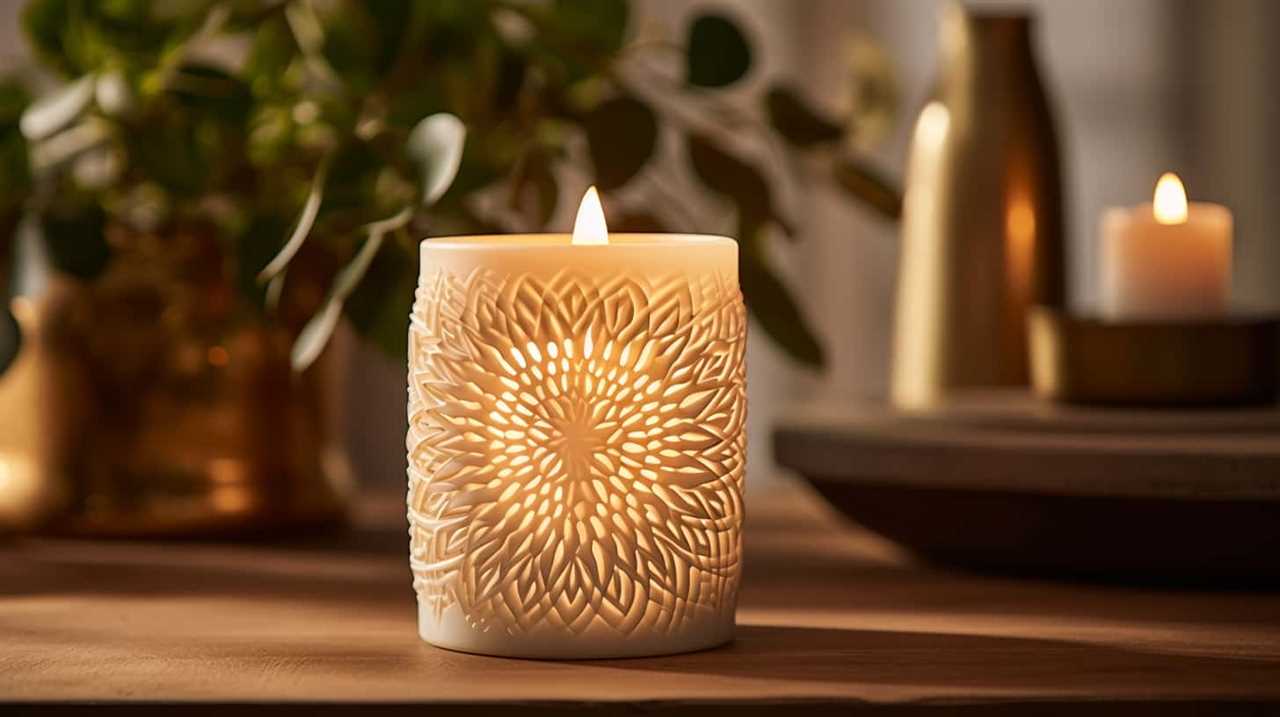
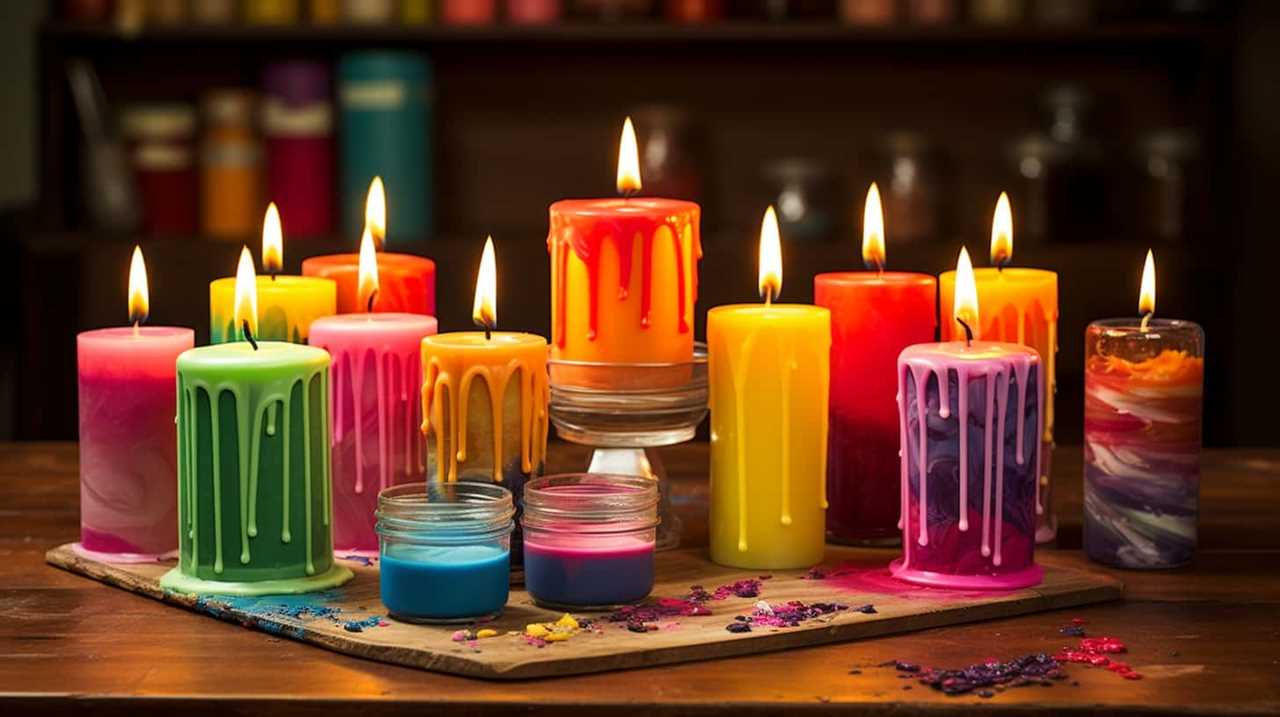
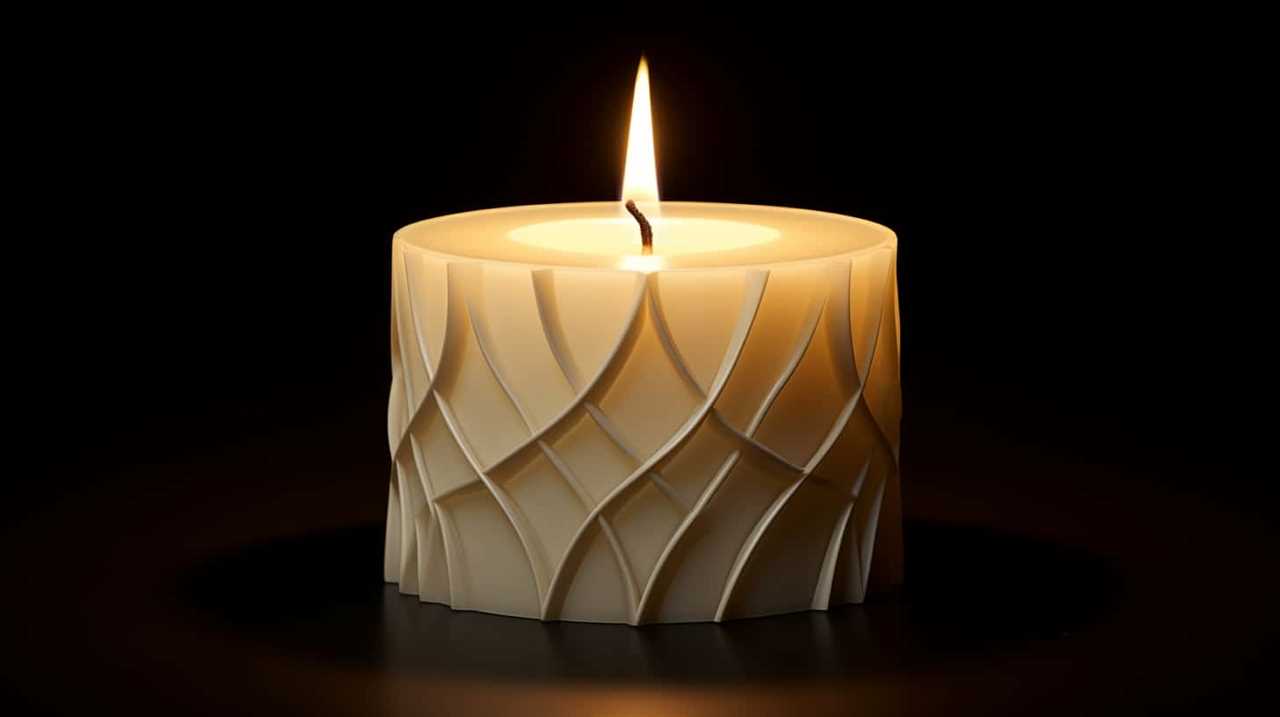
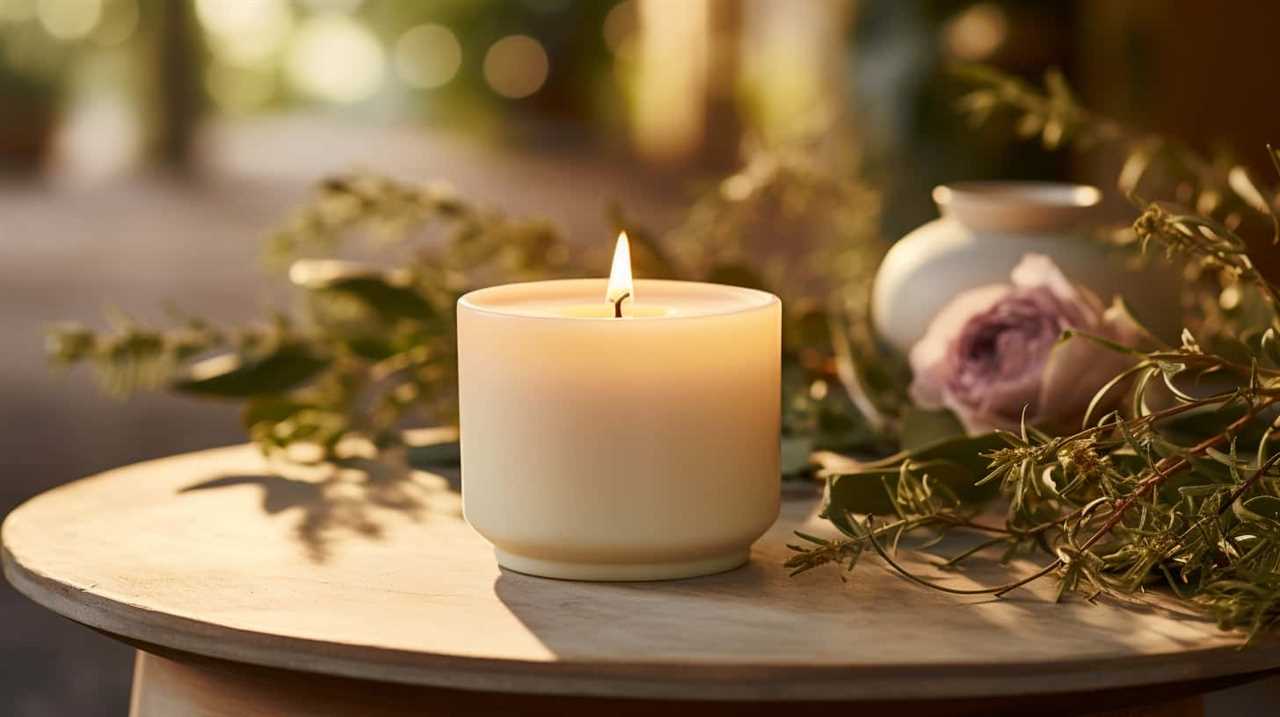
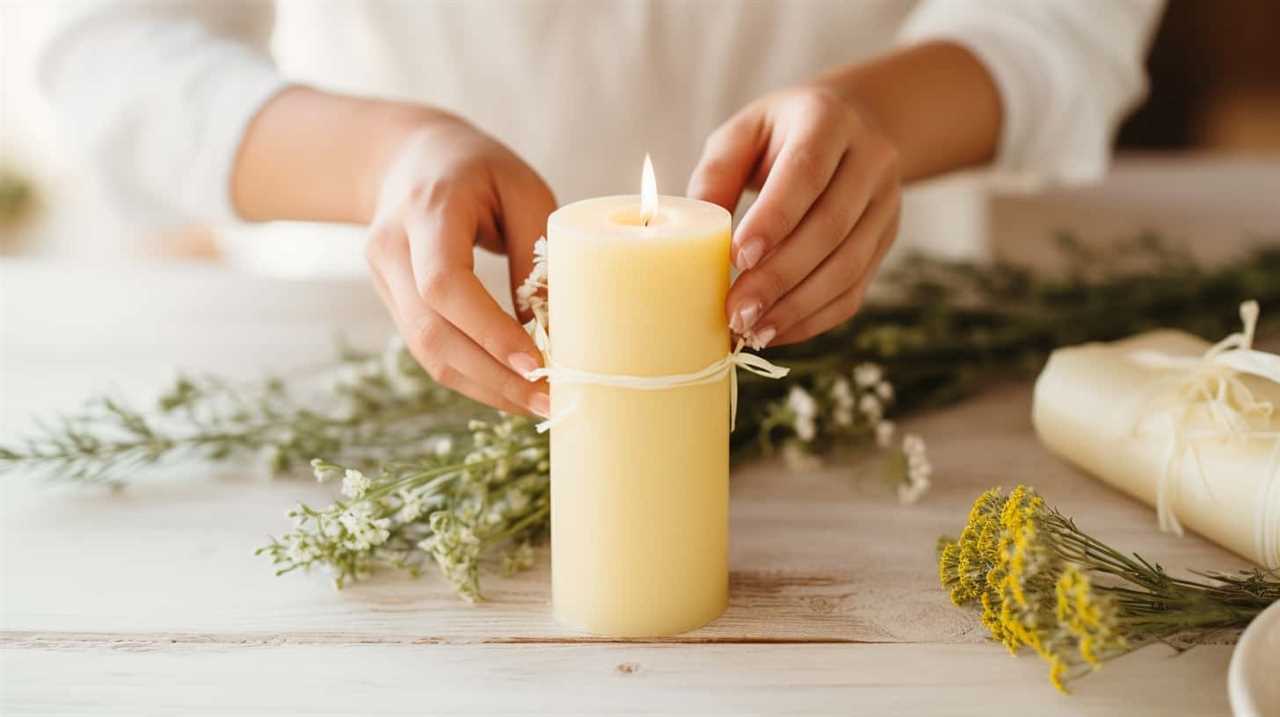
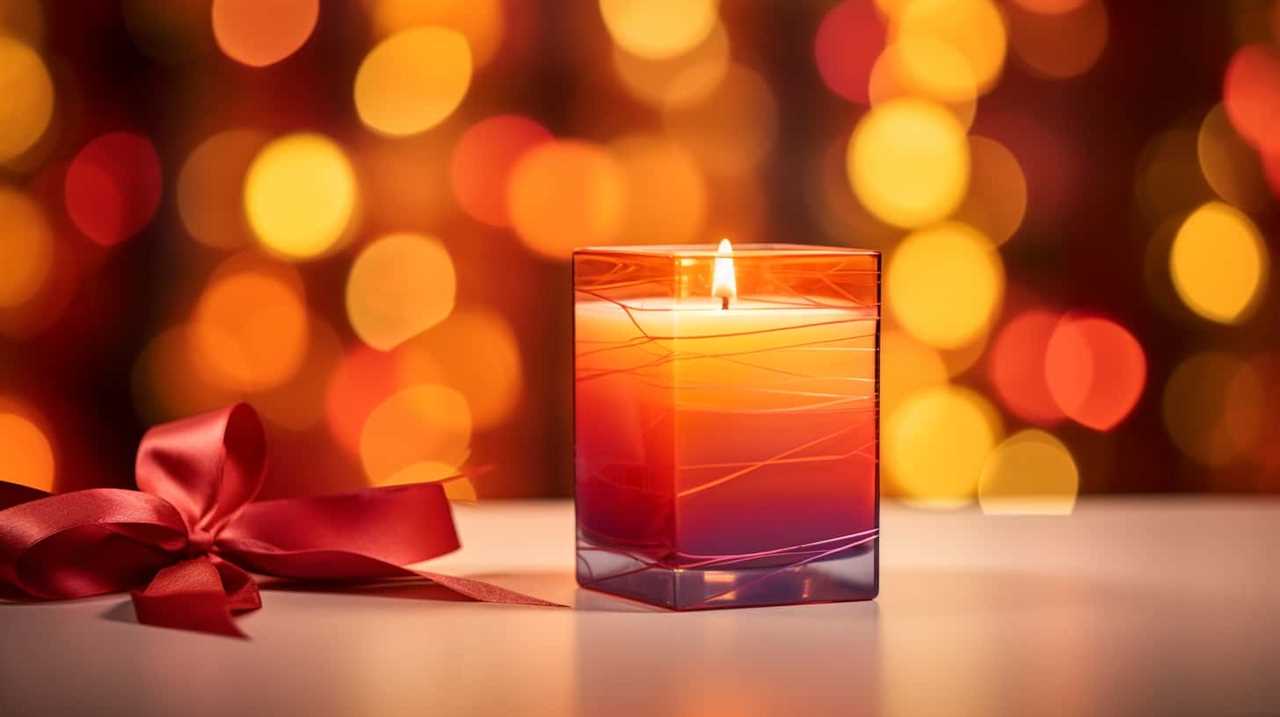
Candles
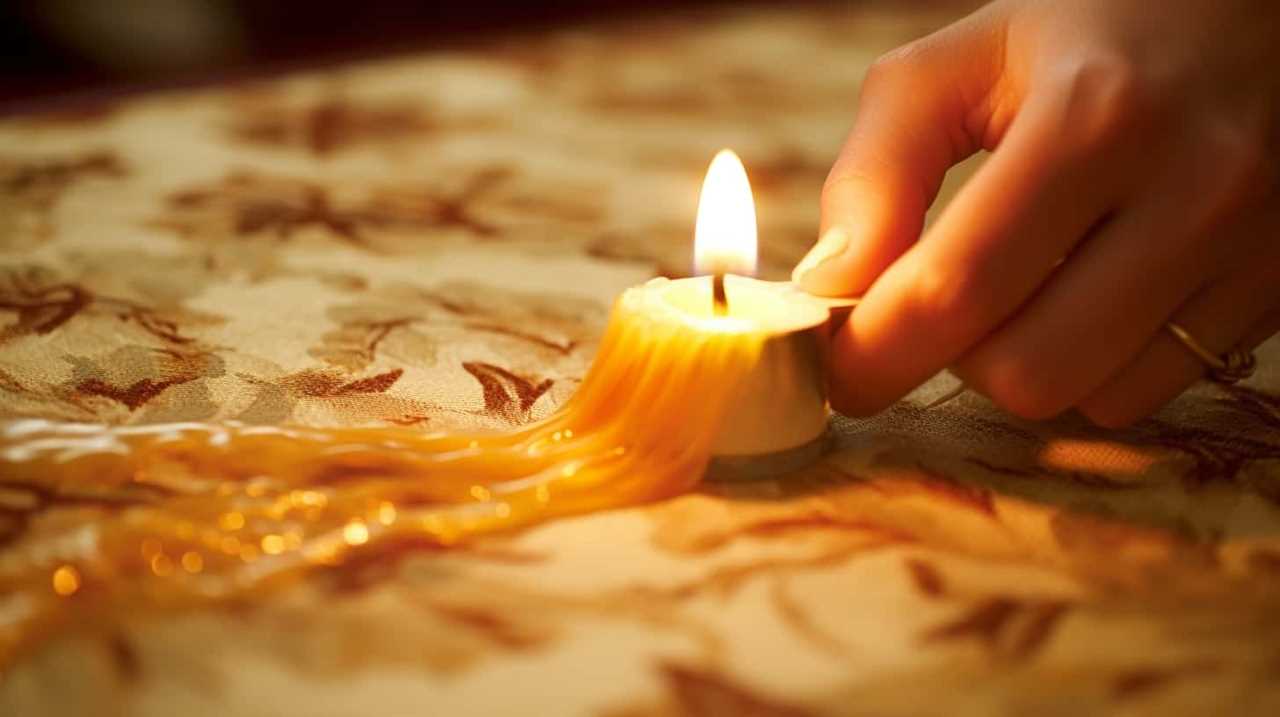
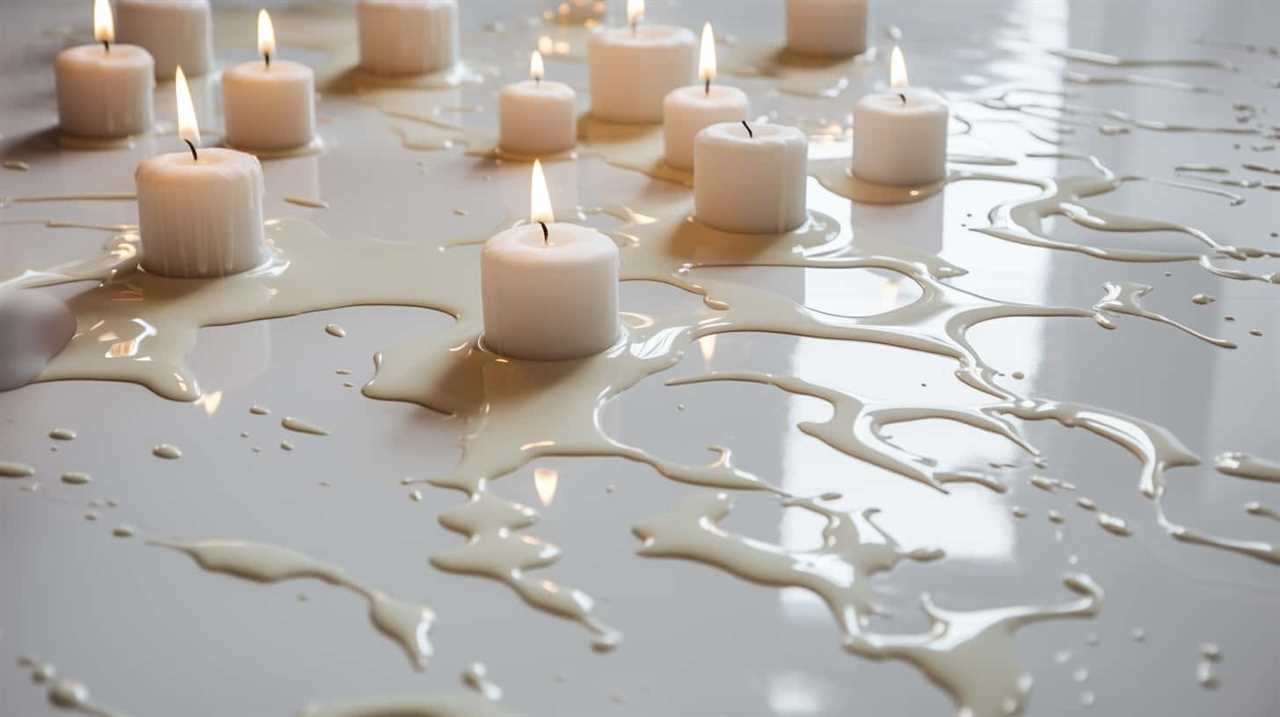
Why Is My Candle Wax Cracking
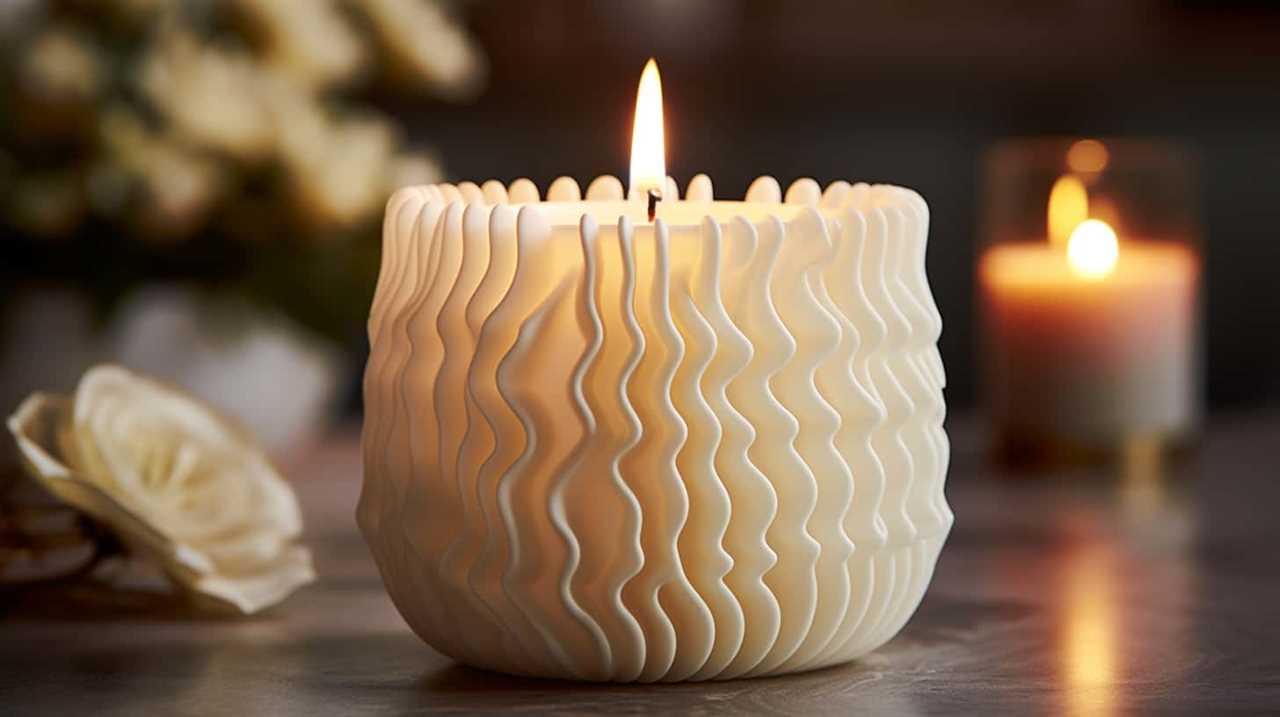
Ever pondered the reason behind the cracking of your candle wax? Allow us to illuminate this subject for you.
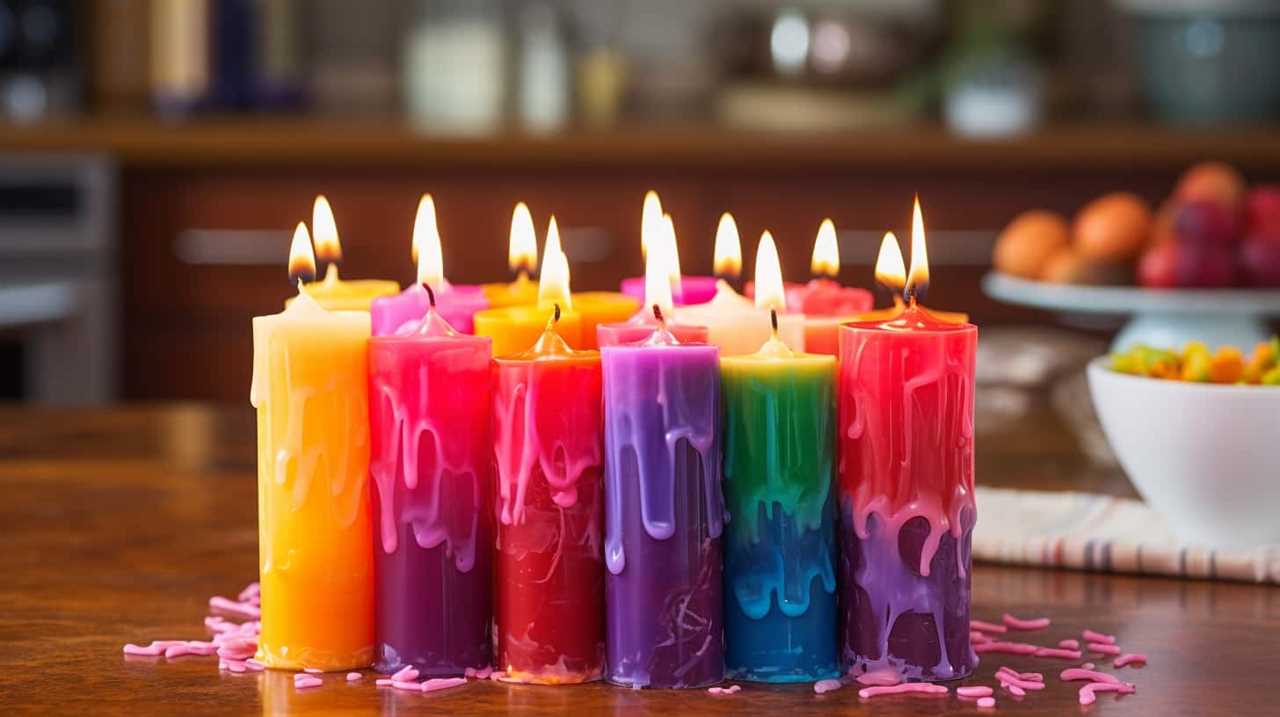
Cracking candle wax can be frustrating, but fear not, we’re here to help. There are various factors that could be causing this issue, and understanding them can lead to a solution.
From poor-quality wax to improper pouring temperatures, rapid cooling, and environmental factors, there are many possible culprits. Even something as seemingly insignificant as the wick size or the fragrance and dye concentration can play a role.
Additionally, overfilling the container, improper handling or storage, and lack of proper testing and quality control can contribute to the problem.

By identifying the cause, you can ensure a crack-free and enjoyable candle-burning experience.
Key Takeaways
- Poor-quality wax and improper pouring temperature can lead to wax cracking during packaging and shipping.
- Controlling the cooling process and environmental factors such as temperature fluctuations and humidity levels is crucial to prevent cracking.
- Using the correct wick size and regular wick maintenance help avoid cracks in the wax.
- Overheating the wax, insufficient curing time, high fragrance or dye concentration, overfilling the container, and improper handling or storage can contribute to wax cracking.
Poor-Quality Wax
Why is our candle wax cracking when we use poor-quality wax?
The answer lies in improper packaging and shipping issues.
When candle wax isn’t packaged and shipped correctly, it can become compromised, leading to cracks and other problems.
Improper packaging can expose the wax to extreme temperatures, causing it to expand and contract, which weakens its structure.
Additionally, shipping issues such as rough handling or excessive vibrations can also contribute to the cracking of poor-quality wax.
It’s essential to ensure that the packaging is secure and protective, shielding the wax from any potential damage during transit.
Incorrect Pouring Temperature
When our candle wax cracks, it’s often due to using an incorrect pouring temperature. Adjusting pouring temperature is crucial to ensure a smooth and crack-free candle. Pouring wax at too high a temperature can cause the wax to shrink and crack as it cools, while pouring at too low a temperature can result in poor adhesion to the container.
To avoid these issues, it’s essential to follow proper pouring techniques. Start by melting the wax to the recommended temperature, usually between 160-180 degrees Fahrenheit. Allow the wax to cool slightly before pouring, around 135-145 degrees Fahrenheit. This will help the wax adhere better to the container and reduce the likelihood of cracking.
Rapid Cooling
We need to be mindful of rapid cooling in order to prevent candle wax cracking. When wax cools too quickly, it can lead to cracks forming on the surface.
To prevent this, it’s important to control the cooling process. One way to do this is by allowing the candle to cool at room temperature, avoiding any sudden changes in temperature. Placing the candle in a draft-free area can also help regulate the cooling process. Additionally, using a heat-resistant container can provide insulation, preventing the wax from cooling too rapidly.
If cracks still appear despite these precautions, troubleshooting cracks involves reheating the wax slightly and smoothing it out with a heat gun or hairdryer.
Environmental Factors
Now let’s talk about the environmental factors that can cause candle wax to crack.
Temperature fluctuations can have a significant impact on the stability of the wax, especially if it goes from extreme heat to cold rapidly. This sudden change can cause the wax to expand and contract, leading to cracks.
Additionally, humidity levels can also play a role, as high humidity can soften the wax and make it more prone to cracking.
Temperature Fluctuations
Temperature fluctuations can cause cracking in candle wax. Maintaining proper temperature control is crucial for preventing this issue. The composition of the wax can also play a role in its susceptibility to cracking. To illustrate this, consider the following table:
| Temperature Control | Wax Composition |
|---|---|
| Consistent temperatures | High-quality wax |
| Avoid extreme changes | Pure and refined |
| Use a thermometer | Proper additives |
| Keep away from heat | Avoid excessive dye |
| Store in a cool place | Optimal fragrance |
Humidity Levels
To prevent cracking in candle wax, it’s important to consider the impact of humidity levels on its stability.
Humidity refers to the amount of moisture present in the air. High humidity levels can cause the wax to absorb moisture, leading to cracking. On the other hand, low humidity levels can cause the wax to dry out, also resulting in cracks.
To maintain the ideal humidity for your candles, it’s crucial to have proper humidity control in the environment where they’re stored or displayed. Using a dehumidifier or humidifier can help regulate the moisture levels and prevent wax cracking.
Additionally, storing candles in a cool, dry place can further aid in preventing wax cracking caused by humidity fluctuations.
Taking these precautions will ensure that your candles remain beautiful and crack-free.
Improper Wick Size
When it comes to candle making, the size of the wick matters. An improper wick size can lead to cracks in the wax.
Wick Size Matters
We found that using an improper wick size can lead to cracking in candle wax. When the wick is too small, it doesn’t provide enough heat and oxygen for the wax to burn evenly. This can result in the wax cracking and forming unsightly patterns.
On the other hand, a wick that’s too large can create excessive heat, causing the wax to melt unevenly and potentially crack.
To prevent these issues, it’s crucial to choose the right wick size based on the diameter of your candle. Proper wick maintenance and troubleshooting techniques can also help avoid cracking.
Regularly trimming the wick to the recommended length and ensuring it stands upright can promote a more even burn, reducing the likelihood of wax cracking.
Cracks Caused by Wick
One major factor contributing to cracks in candle wax is the use of an improper wick size. When the wick is too small for the candle, it doesn’t generate enough heat to melt the wax evenly. As a result, the wax can crack and form unsightly patterns on the surface.
To avoid this issue, it’s important to choose the correct wick size for your candle. This can be determined by considering the diameter of the candle and the type of wax being used.
Regular wick maintenance is also crucial in preventing cracks caused by the wick. Troubleshooting wick issues involves trimming the wick to the appropriate length and ensuring it’s properly centered in the candle.
Adjusting Wick Prevents Cracking
To prevent cracking caused by an improper wick size, we need to adjust the wick accordingly. Here are some troubleshooting techniques to help prevent cracking and ensure a smooth burn:
- Choose the correct wick size for your candle type and diameter.
- Trim the wick to the appropriate length before each burn.
- Avoid using wicks that are too thick, as they can result in excessive heat and cracking.
- Consider using a wick holder or centering device to keep the wick in place during the cooling process.
- Experiment with different wick types and sizes to find the optimal one for your specific wax and container.
By following these tips, you can prevent cracking caused by an improper wick size and create beautiful, crack-free candles.
Now, let’s move on to the next section and discuss how overheating the wax can also lead to cracking.
Overheating the Wax
When heating candle wax, it’s important to avoid applying excessive heat to prevent the wax from cracking. Overheating the wax can lead to structural instability and cause cracks to form.
To prevent cracks, it’s crucial to monitor the temperature carefully during the melting process. Wax should be heated slowly and gently, using a double boiler or a dedicated wax melter with temperature controls.
Avoid direct heat sources, such as stovetops or microwaves, as they can cause uneven heating and lead to cracks.
If you notice cracks in your candle wax, troubleshooting can involve adjusting the heating method or reducing the temperature.

Insufficient Curing Time
Sometimes, we find that our candle wax is cracking because we haven’t allowed it enough time to cure properly. Insufficient drying time can result in the formation of cracks on the surface of the candle, affecting its appearance and structural integrity.
To ensure that your candle wax cures properly, it’s important to follow proper curing techniques. Here are some key factors to consider:
- Temperature and humidity: Maintain the recommended temperature and humidity levels during the curing process.
- Ventilation: Provide adequate ventilation to allow moisture to escape and prevent condensation.
- Curing time: Allow your candles to cure for the recommended period, usually around 48-72 hours.
- Testing: Perform a simple bend test to check if the wax is fully cured before burning the candle.
- Storage: Store cured candles in a cool, dry place to prevent cracking or melting.
High Fragrance or Dye Concentration
When the fragrance concentration in candle wax is too high, it can cause the wax to crack. This occurs because the fragrance oil can interfere with the proper solidification of the wax, leading to structural weaknesses.
Similarly, using a high concentration of dye can also contribute to wax cracking, as it can alter the chemical composition and affect the integrity of the wax.
Fragrance Causing Wax Cracks
Using a high concentration of fragrance or dye in candle wax can cause cracks to form. When selecting fragrances for candles, it’s important to consider their compatibility with the wax being used. Some fragrances may contain ingredients that can react negatively with the wax, leading to cracking.
Additionally, the quality of the wax itself can affect its ability to handle high fragrance or dye concentrations. Lower quality waxes may not have the necessary strength or flexibility to withstand the expansion and contraction that can occur when highly concentrated fragrances are added.
To avoid cracks caused by fragrance, it’s advisable to choose fragrances specifically formulated for candle making and to ensure the wax used is of good quality.
Dye Concentration and Cracking
One possible cause of wax cracking is a high concentration of dye or fragrance in the candle. While dye adds color and fragrance enhances the scent, using too much of either can lead to issues with the wax. High dye concentration can result in dye bleeding, where the color seeps out of the wax and onto surfaces. This can be prevented by using the appropriate amount of dye recommended by the manufacturer. Additionally, a high concentration of fragrance can impact the burning time of the candle. The more fragrance added, the faster the candle may burn. It is important to find a balance between achieving the desired scent and preserving the longevity of the candle. By carefully considering the dye and fragrance concentrations, you can prevent cracking and enjoy a beautiful, long-lasting candle.

| Issue | Prevention |
|---|---|
| Dye bleeding | Use recommended dye concentration |
| Impact on burning time | Find balance between scent and longevity |
Overfilling the Container
We found that overfilling the container with wax can cause it to crack. When troubleshooting cracked wax, it’s important to consider the amount of wax poured into the container.
Here are some key points to prevent cracking due to overfilling:
- Proper Wax Level: Ensure that the wax is filled to the recommended level, leaving some space at the top to allow for expansion and contraction during the burning process.
- Container Size: Use a container that’s appropriate for the amount of wax you’re using. Avoid using containers that are too small, as it can lead to excessive pressure on the wax.
- Temperature Control: Maintain proper temperature control during the pouring process to prevent overheating and expansion, which can lead to cracking.
- Cooling Time: Allow the wax to cool and solidify completely before moving or using the candle to minimize the risk of cracking.
- Quality Containers: Use high-quality containers that are specifically designed for candle making to ensure they can withstand the heat and pressure generated by the burning wax.
Improper Handling or Storage
During our candle making process, improper handling or storage can contribute to the cracking of the wax. It is important to take proper storage precautions to ensure the quality and longevity of your candles. One of the main factors that can impact the wax is temperature. Extreme heat or cold can cause the wax to expand or contract, leading to cracks. To avoid this, it is recommended to store candles in a cool, dry place away from direct sunlight or heat sources. Additionally, it is essential to handle candles with care, avoiding dropping or mishandling them, as this can also result in cracks. By following these simple guidelines, you can prevent the cracking of your candle wax and enjoy beautiful, long-lasting candles.
| Improper Storage Precautions | Impact of Temperature |
|---|---|
| Store in cool, dry place away from direct sunlight or heat sources | Extreme heat or cold can cause the wax to expand or contract |
| Handle candles with care to avoid drops or mishandling | Can result in cracks in the wax |
Lack of Proper Testing and Quality Control
To prevent cracking of candle wax, it’s crucial to ensure proper testing and quality control. Implementing effective testing procedures and quality control measures can help identify and address potential issues before the candles are produced and sold. Here are five important steps to consider:

- Conduct thorough testing on different wax formulations to determine their performance and compatibility with various additives and fragrance oils.
- Regularly test the candles under different conditions, such as temperature and humidity, to assess their stability and resistance to cracking.
- Establish quality control checkpoints throughout the production process to monitor the consistency of the wax and identify any abnormalities.
- Implement rigorous inspection procedures to check for cracks, air bubbles, or other defects in the finished candles before packaging and distribution.
- Continuously evaluate and improve testing procedures and quality control measures based on customer feedback and industry standards.
Frequently Asked Questions
How Do I Know if the Wax I Purchased Is of Poor Quality?
If your candle wax is of poor quality, it may display signs of discoloration or cracking. To prevent this, consider purchasing high-quality wax from reputable sources and follow proper storage and handling tips.
What Is the Ideal Pouring Temperature for Candle Making?
The ideal pouring temperature for candle making is crucial. If it’s too hot, your candle will be a hot mess. If it’s too cold, it’ll be a stubborn block. Mastering pouring techniques is key!
Can Rapid Cooling Cause Candle Wax to Crack?
Rapid cooling can cause candle wax to crack due to the effects of temperature. To prevent this, gradually cool the wax and avoid exposing it to extreme temperature changes.
Are There Any Environmental Factors That Can Contribute to Candle Wax Cracking?
Environmental factors such as high humidity and temperature fluctuations can contribute to candle wax cracking. Exposing the wax to moisture can increase its moisture content, leading to expansion and contraction, ultimately causing cracks to form.
How Can I Determine the Proper Wick Size for My Candles?
To determine the proper wick size for our candles, we consider factors like candle fragrance and container size. By conducting tests and observing the burn characteristics, we ensure our candles provide optimal scent throw and even burn.
Conclusion
In conclusion, when it comes to candle making, it’s crucial to pay attention to the quality of wax, pouring temperature, cooling process, and environmental factors.
Choosing the right wick size and avoiding high concentrations of fragrance or dye can also prevent wax cracking.
Additionally, be cautious of overfilling containers and handle and store candles properly.
Lastly, thorough testing and quality control are essential to ensure a successful and crack-free candle-making experience.
Remember, just like a delicate dance, the art of candle making requires precision and attention to detail.

I’m Jane and I love candles. I have candles everywhere in my house–in every room, on every surface. I love the smell of candles, and I love how they make my place feel warm and cozy.
Candles are really important to me. They help me relax and de-stress after a long day. They remind me of happy memories, and they make me feel calm and peaceful. I can’t imagine my life without candles!


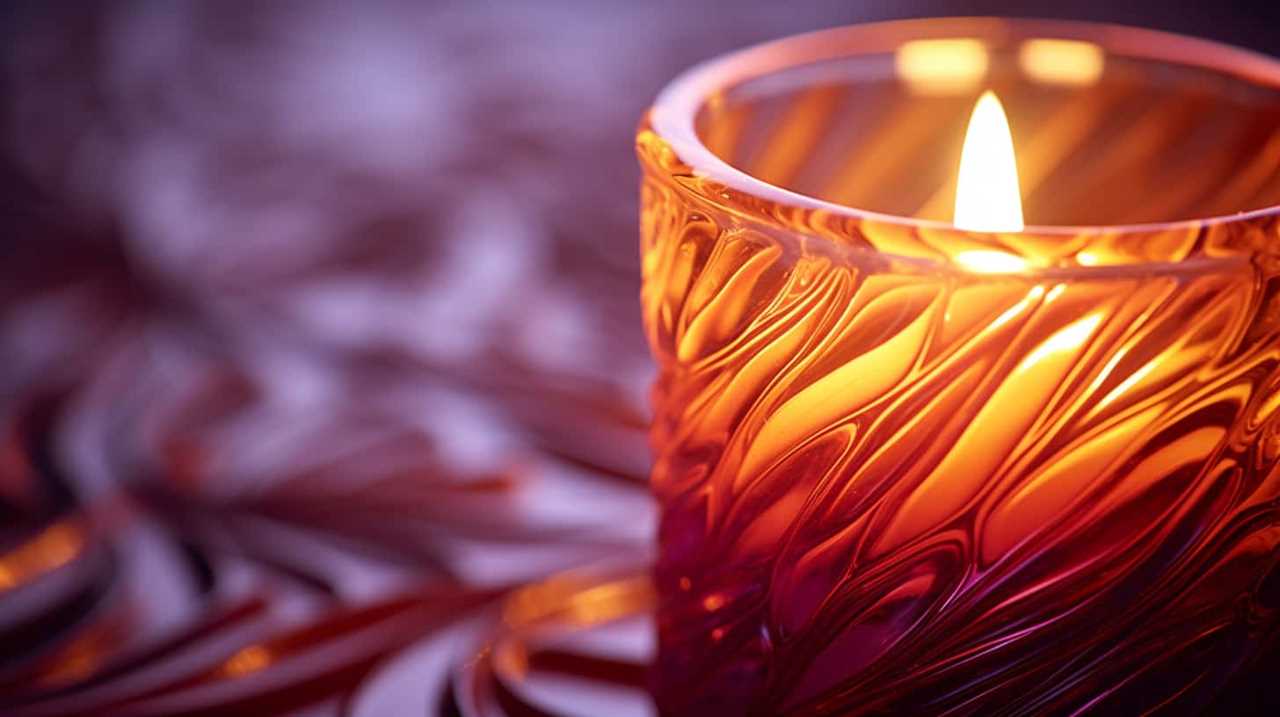
At our luxury candle company, we believe that the real definition of extravagance in a candle comes from a harmonious mix of components. We take pride in only using the best quality ingredients, ensuring that each candle is crafted with careful attention to detail and skill.
Our exquisite fragrances are carefully curated to create an immersive and indulgent experience for our customers. With a long-lasting burn time, our candles provide hours of soothing ambiance and relaxation.
Our unique and artistic designs add a touch of elegance to any space. We also offer limited edition collections, allowing our customers to experience exclusive scents that are truly one-of-a-kind.
With attention to detail and a commitment to providing an exceptional customer experience, our luxury candles are designed to serve and delight.
Key Takeaways
- Meticulously selected ingredients and unique fragrance blends crafted for exceptional luxury and opulence.
- Handcrafted with care using traditional techniques and high-quality materials, showcasing artistry and craftsmanship.
- Customizable options and limited editions that reflect individual style and preferences, enhancing the luxury candle experience.
- Attention to detail and focus on customer experience, providing unforgettable olfactory experiences, personalized recommendations, and seamless online shopping with prompt and helpful customer service.
High-Quality Ingredients
When it comes to luxury candles, we believe that using high-quality ingredients is essential. At our candle workshop, we meticulously select each ingredient to create a truly exceptional product.
Our unique fragrance blends are carefully crafted, combining exquisite scents to evoke a sense of luxury and opulence. We use only the finest natural wax alternatives, such as soy, coconut, and beeswax, which not only provide a clean and long-lasting burn but also contribute to a sustainable and eco-friendly experience.
By using these high-quality ingredients, we ensure that our candles not only look elegant but also deliver an exquisite fragrance that will fill any space with a sense of indulgence.
Now, let’s explore the next section where we dive into the world of exquisite fragrances.
Exquisite Fragrances
When it comes to luxury candles, the fragrance is of utmost importance. We, as discerning consumers, seek out candles that offer a sensory indulgence through their captivating scents.
These exquisite fragrances have the power to transport us to different places, evoke memories, and create unforgettable olfactory experiences.
Sensory Indulgence Through Scent
We love experiencing the sensory indulgence of exquisite fragrances in luxury candles. The power of scent can transport us to another time and place, evoking memories and emotions. But luxury candles offer more than just a pleasant aroma. They provide scent therapy, harnessing the benefits of aromatherapy to enhance our well-being.
Here are three ways luxury candles can provide sensory indulgence through scent:
- Relaxation and Stress Relief: Certain fragrances, like lavender and chamomile, have calming properties that help us unwind and reduce stress.
- Mood Enhancement: Scents like citrus or vanilla can uplift our mood and create a more positive atmosphere, perfect for a cozy night in or entertaining guests.
- Focus and Concentration: Essential oils like rosemary and peppermint can improve mental clarity and sharpen our focus, making luxury candles a great addition to our workspaces.
Luxury candles not only enhance our surroundings with their exquisite fragrances but also offer the benefits of scent therapy, bringing a touch of indulgence to our daily lives.
Unforgettable Olfactory Experiences
Our favorite part of luxury candles is the myriad of unforgettable olfactory experiences they provide. These candles are carefully crafted using customized fragrance blends, designed to transport you to a world of sensory delight.
The art of creating exquisite fragrances is a combination of science, creativity, and expertise. By blending different aromatic notes, candle makers can create unique scents that evoke specific emotions and memories. The use of sensory marketing techniques further enhances the olfactory experience, as the subtle interplay of fragrance and ambiance creates a truly immersive environment.
To give you a taste of the incredible variety found in luxury candles, we’ve compiled a table showcasing three popular fragrance profiles: fresh and invigorating, warm and cozy, and exotic and mysterious. Each category offers its own distinct sensory journey, allowing you to curate the perfect olfactory experience for any occasion.
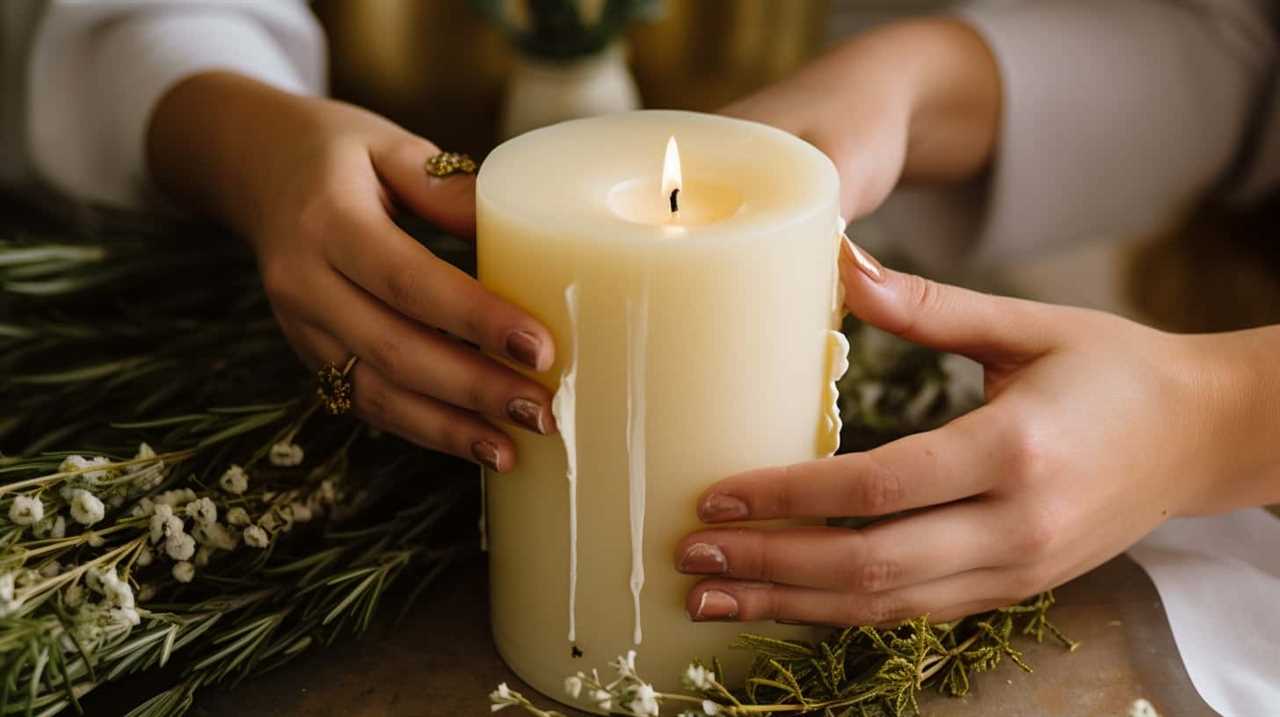
Handcrafted With Care
When it comes to luxury candles, one of the key factors that sets them apart is the meticulous handcrafting process.
Artisanal candle making involves a level of skill and attention to detail that mass-produced candles simply can’t match.
From pouring the wax to placing the wick, every step is executed with care and precision, resulting in a candle that isn’t only visually stunning but also burns evenly and emits a captivating fragrance.
Artisanal Candle Making
Crafted by skilled artisans, luxury candles are meticulously made using traditional techniques and high-quality materials. These artisans bring years of experience and a deep understanding of their craft to create candles that exude elegance and sophistication.
Here are three key elements of artisanal candle making:
- Artisanal techniques: Artisans employ age-old methods, passed down through generations, to create candles that are truly unique. From hand-pouring the wax to meticulously placing the wick, every step is carefully executed to ensure the highest quality product.
- Traditional craftsmanship: Artisans take pride in their work and pay attention to the smallest details. They carefully select the finest ingredients, such as premium waxes and fragrances, to create a luxurious sensory experience that elevates any space.
- Personal touch: Artisanal candle making is a labor of love. Each candle is infused with the passion and creativity of the artisan, resulting in a product that isn’t only beautiful but also imbued with a personal touch.
These artisanal candles are a testament to the dedication and skill of the craftsmen, making them a perfect choice for those who appreciate the finer things in life.
Attention to Detail
Crafting luxury candles with meticulous attention to detail is essential for creating a truly exquisite product. At our candle atelier, we pride ourselves on employing handcrafted techniques that have been passed down through generations. Each candle is carefully poured, ensuring that the wax is evenly distributed and the fragrance is perfectly balanced. To add a personal touch, we offer a range of personalized options, such as custom labels or unique scents tailored to your preferences. To give you a glimpse into our process, here is a table showcasing the steps involved in creating our handcrafted luxury candles:
| Step | Description |
|---|---|
| 1 | Selecting the finest raw materials |
| 2 | Melting and blending the wax |
| 3 | Adding fragrance and dye, if desired |
| 4 | Pouring the wax into molds |
| 5 | Carefully trimming the wick and inspecting the final product |
Long-lasting Burn Time
Our luxury candles are carefully crafted to provide a remarkably long-lasting burn time, ensuring hours of enjoyment for our customers. We understand that a candle’s burn time is an important factor in creating a memorable and exceptional customer experience.
Here are three reasons why our candles offer an extended burn time:
- Premium Wax Blend: We use a high-quality blend of natural waxes that are known for their slow and even burn. This ensures that our candles burn longer without compromising on fragrance or performance.
- Expert Wick Selection: Our wicks are thoughtfully chosen to optimize burn time. They’re designed to promote an even and consistent flame, minimizing wastage and maximizing the hours of indulgence.
- Customizable Options: We offer customizable options such as larger sizes and multiple wicks, allowing our customers to tailor their candle experience to their preferences.
With our long-lasting burn time, our candles create an ambiance that lasts.
Now let’s explore our next topic: unique and artistic designs.
Unique and Artistic Designs
As connoisseurs of luxury candles, we appreciate the unique and artistic designs that elevate these creations to true masterpieces.
The handcrafted nature of these candles allows for exquisite attention to detail, resulting in captivating and visually stunning pieces.
The unparalleled artistic craftsmanship showcased in the intricate patterns, shapes, and textures of these candles truly sets them apart and adds a touch of sophistication to any space.
Handcrafted Masterpieces
With meticulous attention to detail, we create handcrafted masterpieces that boast unique and artistic designs. Our candles are more than just sources of light and fragrance; they’re works of art that elevate any space. Here’s what sets our handmade elegance apart:
- Artisanal Craftsmanship: Our candles are lovingly crafted by skilled artisans who take pride in their work. Each candle is carefully poured and finished by hand, ensuring a level of quality that mass-produced candles simply can’t match.
- Unique Designs: We believe that a luxury candle should be a statement piece, and our designs reflect that philosophy. From intricate patterns to bold color combinations, our candles are as visually stunning as they’re fragrant.
- Limited Editions: We understand the desire for exclusivity, which is why we offer limited edition collections. These one-of-a-kind candles are created in small batches, making them truly special and sought after.
Our commitment to handmade elegance and artisanal craftsmanship is evident in every aspect of our candles.
Now, let’s delve into the next section, where we explore the exquisite attention to detail that goes into our creations.
Exquisite Attention to Detail
We take great pride in meticulously crafting our luxury candles, paying exquisite attention to detail to ensure that each one boasts a unique and artistic design. Our hand poured technique and fine craftsmanship set us apart, allowing us to create candles that are not only functional but also works of art. We believe that every candle should be a reflection of elegance and beauty, and that is why we go above and beyond to create designs that are visually stunning and captivating. From intricate patterns to delicate textures, each candle is carefully crafted to create a truly exceptional piece. Our dedication to detail ensures that every customer receives a candle that is not only luxurious but also a true work of art.
| Column 1 | Column 2 | Column 3 |
|---|---|---|
| Meticulously crafted | Unique designs | Fine craftsmanship |
| Hand poured technique | Artistic | Intricate patterns |
| Exquisite attention to detail | Visually stunning | Delicate textures |
Unparalleled Artistic Craftsmanship
Our commitment to creating luxury candles of unparalleled artistic craftsmanship is evident in our unique and captivating designs. Each candle is meticulously and uniquely crafted, showcasing the expertise and creativity of our skilled artisans. Our designs aren’t just beautiful, but also thoughtfully created to evoke a sense of elegance and sophistication in any space.
Here are three reasons why our artistic craftsmanship sets us apart:
- Attention to detail: Every aspect of our candles, from the shape to the color, is carefully considered to ensure a harmonious and aesthetically pleasing design.
- Innovative techniques: We constantly push the boundaries of candle making by exploring new techniques and materials, resulting in one-of-a-kind designs that can’t be found elsewhere.
- Superior quality: Our commitment to excellence means that we only use the finest materials and employ the highest standards of craftsmanship, ensuring that each candle is of superior quality.
Our dedication to unparalleled artistic craftsmanship extends to our use of sustainable and eco-friendly materials, as we believe in creating luxury products that are both beautiful and responsible.
Sustainable and Eco-friendly Materials
The use of sustainable and eco-friendly materials is essential to crafting a luxury candle. We carefully select materials that are renewable, biodegradable, and ethically sourced. Our candles are made from natural waxes, such as soy or beeswax, which aren’t only better for the environment but also provide a cleaner and longer burn.
At our candle manufacturing facility, we prioritize sustainable manufacturing practices to minimize our environmental impact. We ensure that our packaging is eco-friendly, using recycled materials whenever possible and minimizing waste. We understand the importance of reducing our carbon footprint and strive to create candles that not only bring joy but also contribute to a healthier planet.
Luxurious Packaging
When it comes to luxurious packaging for candles, there are certain key elements that set them apart.
Elegant design elements, such as intricate patterns or embossed logos, create a sense of sophistication and exclusivity.
High-quality materials, such as heavyweight paper or satin ribbons, add a tactile experience that enhances the overall luxury.
Attention to detail in the form of hand-finished touches, like wax seals or custom-designed labels, further elevate the packaging and make it a true work of art.
Elegant Design Elements
We believe that incorporating elegant design elements, such as luxurious packaging, elevates a candle’s status to that of a luxury item. When it comes to elegant packaging, a minimalist design is often the key to creating a sophisticated and upscale feel.
Here are three ways in which elegant packaging enhances the luxury of a candle:
- Sleek and Minimalist Design: A simple and clean packaging design exudes elegance and refinement. It allows the candle itself to take center stage, showcasing its beauty and craftsmanship.
- High-Quality Materials: Luxury candles are often packaged using premium materials such as thick, textured paper, embossed logos, and metallic accents. These details add a touch of opulence and create a memorable unboxing experience.
- Attention to Detail: From the carefully selected color palette to the precise placement of branding elements, every aspect of the packaging is thoughtfully considered. This attention to detail enhances the overall luxurious feel of the candle and reflects the brand’s commitment to excellence.
High-Quality Materials
To achieve a luxurious packaging for a candle, it is essential to use high-quality materials. At our company, we prioritize high quality manufacturing and sustainable sourcing to create packaging that reflects the elegance and sophistication of our luxury candles. We understand that our discerning audience desires to serve others in the most exquisite way possible, and our packaging plays a crucial role in that experience. We carefully select materials that not only exude opulence but also align with our commitment to sustainability. From premium glass vessels to responsibly sourced paper and ribbons, every aspect of our packaging is thoughtfully chosen to ensure the highest level of quality and environmental consciousness. By using high-quality materials, we elevate the overall experience of our luxury candles, setting the stage for the attention to detail that awaits.
| High-Quality Materials | Luxurious Packaging |
|---|---|
| Premium glass vessels | Exquisite detailing |
| Responsibly sourced paper | Elegant ribbons |
| Sustainable materials | Embossed logos |
| High-quality printing | Intricate patterns |
| Luxurious finishes | Customized boxes |
Now, let’s delve into the next aspect of what makes a luxury candle: attention to detail.
Attention to Detail
Our commitment to excellence extends to the smallest details, ensuring that our luxury candles are packaged with meticulous care and precision. We understand that the packaging is just as important as the candle itself, as it sets the tone for the entire experience. That’s why we offer a range of customization options and personalized packaging to add that extra touch of luxury.
Here are three ways we pay attention to detail in our packaging:
- Customization options: We believe that every customer is unique, and their candle should reflect their individuality. That’s why we offer the option to customize the packaging with initials, monograms, or even personalized messages.
- Premium materials: We use only the finest materials for our packaging, ensuring that it not only looks luxurious but also provides protection for the candle inside. From elegant boxes to satin ribbons, every element is carefully selected to enhance the overall presentation.
- Thoughtful design: Our packaging is designed with both aesthetics and functionality in mind. We consider every aspect, from the size and shape of the box to the placement of the candle within. Attention to detail is key, as we strive to create an unboxing experience that’s as exquisite as the candle itself.
With our personalized packaging and meticulous attention to detail, we aim to exceed your expectations and deliver a truly luxurious experience from the moment you receive your candle.
Premium Wax Formulation
With meticulous attention to detail, our team crafts luxury candles using a carefully selected blend of premium waxes. We understand that the quality of wax used in a candle greatly affects its performance and overall experience. That’s why we spare no expense in sourcing the finest waxes available.
Our premium wax formulation ensures a clean and even burn, allowing the fragrance to fully bloom and fill your space with its aromatic notes. We believe that the combination of high-quality wax, infused with our premium fragrance oils, and paired with natural wick materials, creates a truly luxurious candle that surpasses expectations.
The harmonious blend of these elements guarantees an exceptional candle that not only serves as a stunning centerpiece but also elevates your sensory experience.
As we delve into the next section, let’s explore how our candles achieve an even and clean burning.
Even and Clean Burning
Crafting luxury candles involves achieving an even and clean burning, ensuring a truly indulgent experience for our customers. We understand that a clean flame and an even burn are essential for creating the perfect ambiance. Here are three reasons why even and clean burning is important:
- Superior fragrance diffusion: An even burn allows the fragrance to disperse uniformly throughout the room, creating a captivating and immersive atmosphere.
- Longer burn time: A clean flame ensures that the candle burns efficiently, maximizing its lifespan and providing hours of enjoyment.
- Minimal soot and residue: Our candles are meticulously crafted to minimize soot and residue, preventing any unwanted mess and ensuring a clean and elegant experience.
Intense Scent Throw
Achieving an intense scent throw is crucial for creating a truly luxurious candle experience. We understand that our discerning audience desires a candle that not only looks elegant but also fills the room with a captivating fragrance.
Our candles are carefully crafted to deliver an intense fragrance that envelops your space, creating a warm and inviting ambiance. We use premium quality fragrance oils that are expertly blended to ensure a long-lasting scent that lingers even after the flame has been extinguished.
Our commitment to excellence means that every candle is meticulously tested to guarantee an exceptional scent throw, allowing you to indulge in a sensory journey that’s both comforting and indulgent.
Experience the delight of a truly luxurious candle with our intense and long-lasting scents.
Customizable Options
We offer our discerning audience the opportunity to personalize their luxury candle experience with a range of customizable options. At our candle atelier, we understand that our clients value uniqueness and exclusivity. That’s why we’ve curated a selection of personalized options to ensure that each candle is a true reflection of their individual style and preferences.
Here are three ways in which our customers can customize their candles:
- Customizable Scents: Our master perfumers have created a diverse collection of exquisite scents, from delicate florals to rich woody notes. Clients can mix and match fragrances to create their own signature scent, tailored to their mood or occasion.
- Personalized Labels: We offer the option to add a personal touch to the candle labels. Whether it’s a special message, a monogram, or a custom design, our team will work closely with clients to create a label that’s truly unique and meaningful.
- Bespoke Containers: For those seeking the utmost luxury, we provide the opportunity to select custom containers for their candles. From hand-blown glass vessels to artisanal ceramic jars, our clients can choose the perfect vessel to complement their home decor and elevate their candle experience.
With our personalized options, we aim to create candles that not only illuminate spaces but also tell a story and evoke emotions. Because we believe that luxury isn’t just about the product, but also the experience.
Limited Edition Collections
Our limited edition collections feature unique candle designs and scents that captivate the senses and elevate the luxury candle experience. These limited edition exclusivities are highly sought after by candle enthusiasts and are often considered collectors’ items. Each collection is carefully curated to offer a one-of-a-kind experience, showcasing the artistry and craftsmanship of our brand. With a limited quantity available, these candles offer a sense of exclusivity and rarity, making them highly coveted among our discerning clientele. The table below provides a visual representation of our limited edition collections, highlighting the distinctive designs and scents that make them truly special.
| Collection Name | Design | Scent |
|---|---|---|
| Midnight Bliss | Hand-painted porcelain jar with gold accents | Sensual blend of jasmine, vanilla, and amber |
| Serene Gardens | Glass jar with intricate floral motif | Fresh notes of blooming lilacs and green tea |
| Enchanted Forest | Rustic wooden container with forest-inspired carving | Earthy blend of cedarwood, pine, and moss |
| Opulent Elegance | Crystal encrusted jar with a luxurious silver lid | Rich aroma of oud wood and black orchids |
As we embrace the limited edition collections, let us now delve into the world of expertly curated scents that further enhance the luxury candle experience.

Expertly Curated Scents
To create a truly luxurious candle, it’s essential to curate scents with expert precision. Our team of fragrance specialists takes great care in selecting and blending the finest ingredients to create bespoke fragrances that will envelop your space in an exquisite aroma.
Here’s how we ensure our scents are truly exceptional:
- Meticulous Ingredient Selection: We source the highest quality essential oils, resins, and botanical extracts from around the world. Each ingredient is carefully chosen for its purity and olfactory impact, ensuring a superior scent experience.
- Artful Blending Techniques: Our perfumers skillfully combine these ingredients to create harmonious scent compositions. They understand the complexities of fragrance notes and use their expertise to balance and layer them in a way that evokes emotion and captivates the senses.
- Sensory Exploration: We believe in the power of scent to transport and transform. Our curated scents are crafted to take you on a sensory journey, whether it be to a tranquil garden, a cozy cabin, or a vibrant tropical paradise.
Attention to Detail
With meticulous attention to detail, we ensure that every aspect of our luxury candles is thoughtfully considered. From the selection of the finest ingredients to the exquisite packaging, our commitment to artisanal craftsmanship and sustainable practices shines through. Our candles are hand-poured by skilled artisans, who meticulously blend fragrances and pour the wax to create a perfectly balanced scent and a clean, even burn. We use only natural, sustainable materials, such as soy wax and lead-free cotton wicks, to ensure a healthier and eco-friendly experience. Our packaging is carefully designed to reflect the elegance and sophistication of our candles, using recycled materials whenever possible. Every step of our process is marked by our unwavering attention to detail, resulting in candles that are not only luxurious but also ethically crafted.
| Aspects of Attention to Detail | Description | Importance |
|---|---|---|
| Ingredient Selection | We carefully choose premium ingredients for our candles, ensuring the highest quality scents and materials. | Essential for creating luxurious and long-lasting fragrance experiences. |
| Quality Control | Each candle undergoes rigorous testing and inspection to guarantee consistent quality and performance. | Crucial in maintaining our commitment to excellence and customer satisfaction. |
| Presentation and Packaging | Our candles are meticulously packaged to reflect the elegance and luxury of the product. | Adds to the overall customer experience and makes our candles perfect for gifting. |
Exceptional Customer Experience
Having established our commitment to attention to detail, we consistently strive to provide an exceptional customer experience with our luxury candles. We understand that our customers not only desire high-quality products but also excellent service. Here’s how we ensure that every interaction with us is memorable:
- Personalized Recommendations: We believe that every customer is unique, and we take the time to understand their preferences and needs. Our knowledgeable team is always ready to offer personalized recommendations to help our customers find the perfect luxury candle for any occasion.
- Seamless Online Shopping Experience: We know that convenience is important to our customers. That’s why we’ve invested in creating a user-friendly and intuitive online shopping platform. From easy navigation to secure payment options, we strive to make the online shopping experience seamless and enjoyable.
- Dedicated Customer Support: Our commitment to exceptional customer experience extends beyond the purchase. Our dedicated customer support team is available to address any queries, concerns, or issues that may arise. We value our customers’ satisfaction and will go above and beyond to ensure their happiness.
At [Company Name], we believe that serving our customers is a privilege, and we’re dedicated to providing an exceptional customer experience every step of the way.
Frequently Asked Questions
Can Luxury Candles Be Customized to Suit My Personal Preferences?
Yes, luxury candles can be customized to suit our personal preferences. We can choose the scent, color, and design, creating a unique sensory experience that reflects our individual taste and style.
Are There Any Limited Edition Collections Available for Purchase?
Limited edition candles and special edition collections are available for purchase. These exclusive offerings provide a unique and luxurious experience, showcasing exquisite craftsmanship and attention to detail. Elevate your space with these one-of-a-kind treasures.
What Steps Are Taken to Ensure That the Candle Burning Is Even and Clean?
To ensure clean burning and even distribution, we take meticulous steps in candle maintenance. Our luxury candles are crafted with the finest ingredients and designed with precision, resulting in an exquisite experience for our discerning customers.
Can You Tell Me More About the Sustainable and Eco-Friendly Materials Used in the Production of Luxury Candles?
At our company, we prioritize sustainability and eco-friendly production. We source our materials from renewable sources, such as soy wax and organic essential oils. Our commitment to the environment sets us apart in the luxury candle industry.
How Does the Brand Create an Exceptional Customer Experience When Purchasing Their Luxury Candles?
Exceptional customer service is at the heart of our brand. We strive to create a memorable experience by providing personalized recommendations and addressing any concerns. Our unique packaging adds an extra touch of luxury and sophistication to the purchasing process.
Conclusion
In the world of luxury candles, it’s the meticulous attention to detail that sets them apart. From the high-quality ingredients to the exquisite fragrances, each element is carefully chosen to create a sensory experience like no other.
Handcrafted with care and boasting long-lasting burn times, these candles aren’t just ordinary objects, but works of art. With unique designs and limited edition collections, they offer an exclusive and exceptional customer experience.
Indulge in the world of luxury candles and elevate your space to a new level of sophistication.
I’m Jane and I love candles. I have candles everywhere in my house–in every room, on every surface. I love the smell of candles, and I love how they make my place feel warm and cozy.
Candles are really important to me. They help me relax and de-stress after a long day. They remind me of happy memories, and they make me feel calm and peaceful. I can’t imagine my life without candles!

Have you ever thought about what sets apart a high-quality candle from the average ones? Let me shed some light on this topic.
When it comes to creating a warm and inviting atmosphere, a good candle can make all the difference. It’s not just about the flickering flame, but also the quality of the wax, the fragrance options, and the burn time.
We believe in serving others by providing candles that not only smell amazing but also burn clean and evenly. Safety is a top priority, so we ensure our candles are made with high-quality wicks and come in safe packaging. And for those who care about the environment, we offer eco-friendly options.
At the end of the day, it’s about providing value for your money and creating a memorable experience.
Key Takeaways
- The choice of wax, such as soy or beeswax, can impact the burn time, scent throw, and environmental impact of a candle.
- Customizable fragrance blends, such as citrus and herb or floral and fruity, offer a variety of aromas to suit different preferences.
- The quality and performance of the wick, including proper trimming and choosing the right size, are crucial for a consistent and safe burn.
- Burn time, clean burns, and safety measures, such as trimming the wick, avoiding drafts, and using non-toxic ingredients, contribute to a longer-lasting and enjoyable candle experience.
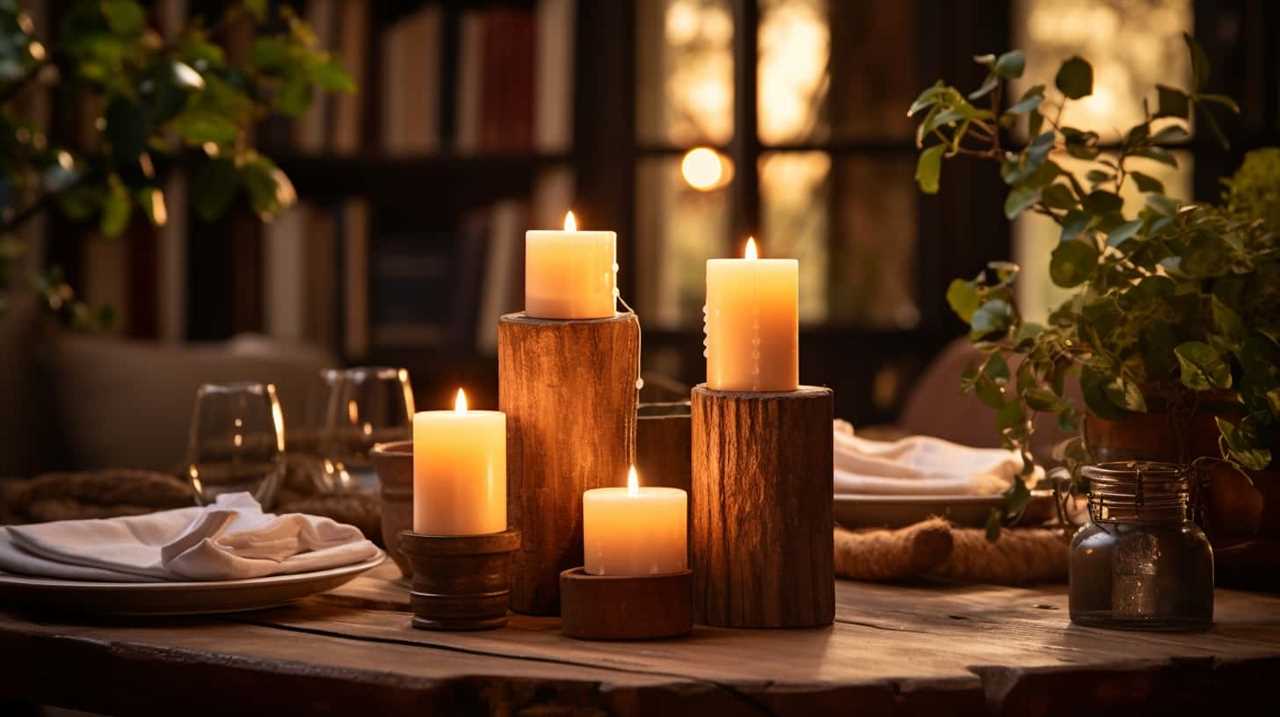
Types of Wax
When it comes to determining what makes a good candle, one important aspect to consider is the type of wax used. There are several different wax types available, each with its own set of pros and cons.
One such type is soy wax, which has gained popularity in recent years due to its natural and renewable properties. One of the main advantages of soy wax is its clean burn, as it produces minimal soot and smoke. It also has a longer burn time compared to other waxes, making it more cost-effective. Additionally, soy wax is derived from soybeans, making it a sustainable and eco-friendly choice.
However, soy wax tends to have a softer consistency and may not hold fragrance as well as other waxes.
Fragrance Options
When it comes to fragrance options, we’re spoiled for choice. Popular scent choices like vanilla, lavender, and citrus can create a soothing or invigorating atmosphere in any room.
But what sets good candles apart is the ability to customize fragrance blends, allowing you to create a unique scent that suits your preferences perfectly.
And let’s not forget about long-lasting aromatic options that fill your space with delightful fragrance for hours on end.
Popular Scent Choices
Our favorite scents for candles include lavender, vanilla, and citrus. These popular fragrance choices not only create a pleasant ambiance but also offer various benefits for our well-being. Lavender is known for its calming properties, perfect for creating a soothing atmosphere for relaxation and sleep. Vanilla, with its warm and comforting aroma, adds a touch of sweetness and warmth to any space. Citrus scents, such as orange or lemon, invigorate the senses and bring a refreshing burst of energy. To help you choose the right candle fragrance for your needs, here is a table showcasing the different characteristics of these popular scent choices:
| Scent | Benefits | Best Use |
|---|---|---|
| Lavender | Calming | Bedroom, meditation |
| Vanilla | Comforting | Living room, kitchen |
| Citrus | Energizing | Office, bathroom |
With these fragrance options, you can create a welcoming and relaxing environment that caters to your specific desires.
Customizable Fragrance Blends
What customizable fragrance blends can we explore to create unique and personalized candle scents? When it comes to creating candles with customizable scent profiles, the options are endless. By blending different fragrance oils, we can create a range of captivating aromas that cater to individual preferences.
Here are four fragrance options to consider:
- Citrus and Herb: A refreshing blend of zesty citrus notes and aromatic herbs, perfect for those who enjoy a clean and invigorating scent.
- Floral and Fruity: This combination of delicate floral aromas and juicy fruits creates a romantic and uplifting ambiance, ideal for those with a love for all things sweet and floral.
- Woodsy and Spicy: For a warm and cozy atmosphere, try blending earthy wood tones with hints of spicy notes. This fragrance profile appeals to those who appreciate a touch of depth and complexity.
- Fresh and Clean: A simple yet timeless choice, a blend of crisp and clean scents like linen and cotton creates an ambiance of purity and tranquility.
Long-Lasting Aromatic Options
To explore long-lasting aromatic options, we can delve into a variety of fragrance choices that enhance the overall candle experience. Opting for high-quality fragrances made from sustainable materials ensures a longer-lasting and more eco-friendly candle experience. These fragrances not only provide a pleasant scent but also contribute to creating a soothing and inviting ambiance.
When it comes to selecting fragrances for candles, it’s important to consider both the scent’s longevity and its impact on candle safety. By prioritizing candle safety, we can enjoy the aromatic benefits without compromising on the well-being of ourselves and our surroundings.
Now that we’ve explored the importance of long-lasting aromatic options, let’s move on to the next essential aspect of a good candle: wick quality.
Wick Quality
When it comes to creating a good candle, the quality of the wick is paramount. The length of the wick plays a crucial role in how the candle burns, ensuring a consistent and even flame.
Additionally, the material of the wick is important to consider, as it affects the burn time and performance of the candle.
Importance of Wick Length
As we delve into the topic of the importance of wick length (wick quality), it becomes evident that selecting the appropriate length plays a crucial role in achieving a well-performing and long-lasting candle. Here are four reasons why wick length is essential:
- Wick maintenance: The length of the wick determines how efficiently the candle burns. If the wick is too long, it may produce excessive soot or smoke, leading to poor air quality. On the other hand, if the wick is too short, the flame may struggle to stay lit.
- Candle aesthetics: The length of the wick also affects the way the candle looks when lit. A properly trimmed wick will create a steady, even flame that enhances the overall ambiance of the candle.
- Burn time: The length of the wick can impact the burn time of the candle. A longer wick may burn the candle faster, while a shorter wick may prolong the burn time.
- Safety: Choosing the right wick length is crucial for ensuring the safety of the candle. A wick that’s too long can cause the flame to become too high, increasing the risk of fire hazards.
Wick Material Considerations
We prioritize the selection of high-quality wick materials to ensure the overall performance and longevity of our candles. The choice of wick material plays a crucial role in determining the quality and effectiveness of a candle.
One of the key benefits of using high-quality wick materials is that they burn evenly and consistently, providing a steady flame throughout the candle’s lifespan. This not only enhances the visual appeal of the candle but also ensures optimal fragrance release. Additionally, high-quality wick materials are less likely to produce excess smoke or soot, creating a cleaner and healthier burning experience.
Furthermore, the size of the wick is equally important. A properly sized wick ensures that the candle burns evenly, without tunneling or excessive wax build-up. By carefully considering both the wick material and size, we can create candles that offer exceptional performance and long-lasting enjoyment for our customers.
Wick Performance and Burn
To ensure the wick performance and burn of our candles, we carefully select high-quality materials. We understand the importance of a well-performing wick in creating a delightful candle experience for our customers. Here are some key factors that contribute to the wick performance and burn:
- Wick maintenance: Regularly trimming the wick to about 1/4 inch before each use helps to prevent excessive smoking and mushrooming, ensuring a clean and even burn.
- Proper candle accessories: Using tools like wick trimmers and snuffers can aid in maintaining the wick’s performance and prolong the life of your candle.
- Wick size selection: Choosing the right wick size for each candle ensures optimal burn performance and prevents issues like tunneling or uneven melting.
- High-quality wick materials: We use only the finest cotton and natural fibers in our wicks, which provide a steady and consistent burn throughout the candle’s lifespan.
Burn Time
The burn time of a good candle is an important factor to consider when selecting a candle for purchase. It refers to the length of time the candle will burn before it’s completely consumed. A longer burn time means more value for your money and a longer-lasting fragrance in your space.
The burn rate of a candle can vary depending on factors such as the type of wax used, the size of the candle, and how well it’s cared for. To ensure a longer burn time, it’s essential to properly trim the wick before each use, keep the candle away from drafts, and allow it to burn for a sufficient amount of time during each use.
By following these candle care practices, you can enjoy a longer burn time and maximize the longevity of your candles.
As we move into the next section on clean, even burns, it’s important to note that burn time is closely related to the overall quality of the candle.
Clean, Even Burns
Achieving a clean, even burn is essential for a good candle, ensuring optimal fragrance release and a longer-lasting candle experience. Here are four key factors that contribute to clean, even burns:
- Quality wick: A properly sized wick is crucial for an even burn. It should allow for a consistent flame size and prevent tunneling.
- Evenly distributed flames: A well-designed candle will have multiple wicks or a large enough wick to create evenly distributed flames. This helps to prevent uneven melting and ensures that all the wax is used.
- Non-toxic ingredients: Using high-quality, non-toxic ingredients is important for a clean burn. Inferior materials can produce excessive soot, smoke, and unpleasant odors.
- Proper candle care: Trim the wick to 1/4 inch before each use and keep the candle away from drafts to maintain an even burn.
By following these guidelines, you can enjoy a clean, even burn and enhance your candle experience.
Now, let’s move on to discussing the necessary safety measures.
Safety Measures
For a good candle, ensuring safety measures is of utmost importance. Fire prevention and proper handling are key aspects to consider when enjoying the warm glow of a candle.
To ensure a safe and enjoyable experience, here are some essential safety tips:
- Always trim the wick to ¼ inch before lighting to prevent excessive flames and soot buildup.
- Place candles on a heat-resistant surface and keep them away from flammable objects.
- Never leave a burning candle unattended or within the reach of children or pets.
- Avoid burning candles near drafts or open windows to prevent accidental fires.
- Extinguish candles before going to bed or leaving the room to prevent any potential accidents.
Packaging and Presentation
Now let’s move on to the next important aspect of a good candle – how it’s packaged and presented. Packaging design plays a crucial role in catching the attention of customers and conveying the essence of the brand. To ensure a successful presentation, consider the following branding strategies:
- Eye-catching design: A visually appealing packaging design can make a candle stand out on the shelves and attract potential buyers. Incorporate unique shapes, bold colors, and elegant finishes to create a memorable impression.
- Clear branding: The packaging should clearly communicate the brand’s identity and values. Utilize logos, slogans, and consistent color schemes to establish a strong brand presence and build customer loyalty.
- Functional features: Practical aspects, such as easy-to-open boxes or protective sleeves, enhance the overall customer experience. Thoughtful packaging design can make a candle feel more luxurious and increase perceived value.
- Sustainable materials: In today’s eco-conscious world, using environmentally friendly packaging materials can help differentiate a brand and appeal to environmentally conscious customers.
Eco-Friendly Options
Let’s explore eco-friendly options for packaging and presenting candles.
In today’s world, where sustainability is a priority, it’s essential to choose candles that are produced with sustainable production methods and made from renewable resources. Opting for candles that are sustainably produced ensures that they’re manufactured in a way that minimizes harm to the environment. Look for candles that use natural waxes, such as soy or beeswax, as these are renewable resources that can be replenished.
Additionally, consider candles that come in packaging made from recycled materials or are biodegradable. By choosing eco-friendly candles, we can make a conscious effort to protect our planet while still enjoying the warm glow and delightful scents that candles bring to our lives.
Now, let’s explore how to find candles that offer value for money.
Value for Money
After considering eco-friendly options for packaging and presenting candles, we can now delve into the important aspect of value for money. When it comes to purchasing candles, it’s essential to find a product that not only offers a beautiful aesthetic but also provides a delightful sensory experience.
Here are four key factors to consider when assessing the value for money of a candle:
- Longevity: A good candle should have a burn time that justifies its price, allowing you to enjoy its fragrance and ambiance for hours on end.
- Quality Ingredients: Look for candles made with high-quality, natural ingredients that ensure a clean and even burn, maximizing the lifespan of the candle.
- Scent Throw: A well-designed candle should offer a strong and consistent scent throw, filling your space with its captivating fragrance.
- Packaging: Consider the packaging of the candle, ensuring it not only protects the product but also complements its overall aesthetic, adding value to your purchase.
Frequently Asked Questions
How Do I Choose the Right Candle Scent for My Home?
Choosing the perfect fragrance for your home can create a cozy ambiance. Consider scents that evoke positive emotions and complement your decor. Experiment with different fragrances to find the one that brings you joy and relaxation.
Can I Use a Candle With a Shorter Burn Time for Shorter Periods of Time?
We can use a candle with a shorter burn time for shorter periods. However, it’s important to consider the effectiveness of the candle. A good candle should still provide a strong scent and long-lasting ambiance, even with a shorter burn time.
Are There Any Safety Precautions I Should Take When Burning a Candle?
When it comes to candle safety, there are a few precautions we should always take. Keep the candle away from flammable materials, never leave it unattended, and ensure it’s placed on a stable surface. These candle burning tips can help prevent accidents.
What Are Some Eco-Friendly Options for Candle Materials?
Sustainable wax alternatives and natural dyes are essential for eco-friendly candles. These options not only contribute to a healthier environment but also provide numerous benefits, like cleaner air and supporting local communities.
How Can I Ensure That the Candle I Purchase Offers Good Value for Money?
When it comes to candle quality, we’ve learned that price is not always the best indicator. To ensure good value for money, we recommend thorough candle price comparison and considering factors like burn time and fragrance intensity.
Conclusion
In conclusion, creating a captivating candle experience involves the meticulous selection of wax, fragrance, wick quality, burn time, and safety measures.
The packaging and presentation should be aesthetically pleasing, while eco-friendly options add a touch of responsibility to the mix.
And of course, the value for money should be evident.
By carefully considering these factors, we can ensure that every moment spent in the tranquil glow of a candle is a truly delightful and enchanting experience.
I’m Jane and I love candles. I have candles everywhere in my house–in every room, on every surface. I love the smell of candles, and I love how they make my place feel warm and cozy.
Candles are really important to me. They help me relax and de-stress after a long day. They remind me of happy memories, and they make me feel calm and peaceful. I can’t imagine my life without candles!

Have you ever thought about the true significance of the song ‘Candle in the Wind’? Let’s explore the heart of this iconic ballad together.
This song has captivated hearts and minds for decades, and today, we aim to uncover its meaning and significance. As we delve into the background, inspiration, and historical context of the song, we’ll also explore Elton John’s personal connection to it. Moreover, we’ll discover the emotional response it has evoked from fans all around the world.
We’ll also touch upon the various covers and adaptations, controversies and criticisms, and the profound influence ‘Candle in the Wind’ has had on Elton John’s career.
So, join us on this journey as we unravel the mystery behind this timeless masterpiece.

Key Takeaways
- "Candle in the Wind" was originally written as a tribute to Marilyn Monroe, but was later adapted and dedicated to Princess Diana after her death in 1997. It captures the essence and impact of these beloved figures and resonates with listeners on a profound level.
- The symbolism and meaning of the song revolve around the candle as a symbol of light in the darkness, representing hope, guidance, and the memory and legacy of the person being honored. The flickering flame also represents the fragility and fleeting nature of life, evoking emotions of love, loss, and the power of memory.
- The song’s historical context and cultural significance are reflected in its release in 1973 and its prominence in 1997. It tapped into collective mourning and grief for Princess Diana, becoming a symbol of tribute and remembrance. It reminds us of the impact one person can have on the world and captures a specific moment in history.
- Elton John’s personal connection to the song, his experience with fame, isolation, and the pressures of public life, and his recognition of its universal appeal led him to rewrite the lyrics as a tribute to Princess Diana. The tribute version had significant musical differences and had a powerful impact on the audience, becoming one of the best-selling singles of all time and sparking debates about the boundaries of art and public mourning.
The Background of ‘Candle in the Wind
The background of ‘Candle in the Wind’ is revealed by exploring the inspirations and events that shaped the iconic song.
Released in 1973, the song was written by Elton John and Bernie Taupin as a tribute to Marilyn Monroe. However, it was later reworked and dedicated to Princess Diana after her tragic death in 1997.
The song’s popularity skyrocketed after its performance at Princess Diana’s funeral, becoming one of the best-selling singles of all time.
‘Candle in the Wind’ carries a powerful message of loss, remembrance, and the fleeting nature of fame. It serves as a poignant reminder of the impact that individuals can have on the world, even long after they’re gone.
The song’s emotional resonance and universal themes continue to resonate with audiences, making it a timeless classic.
The Inspiration Behind the Lyrics
Our deep admiration for Marilyn Monroe and the tragic loss of Princess Diana inspired the heartfelt lyrics of ‘Candle in the Wind’. This iconic song, originally written as a tribute to Monroe, was later adapted and dedicated to Princess Diana after her untimely death in 1997. The historical inspiration behind the lyrics is evident in the way the song captures the essence of these beloved figures and the impact they had on the world. The emotional resonance of ‘Candle in the Wind’ lies in its ability to express both grief and admiration, connecting with listeners on a profound level. Through its poignant lyrics and haunting melody, the song serves as a timeless reminder of the fragility of life and the enduring legacy of those who are no longer with us.
| Historical Inspiration | Emotional Resonance | Impact on Audience |
|---|---|---|
| Marilyn Monroe | Grief and admiration | Profound connection |
| Princess Diana | Fragility of life | Enduring legacy |
Significance of the Candle Symbol
To understand the significance of the candle symbol in the song ‘Candle in the Wind,’ we must delve into its powerful symbolism and the emotions it evokes.
The candle holds a deep and universal symbolic meaning across cultures. It represents light in the darkness, hope in times of despair, and a guiding force in uncertain times.
In the context of the song, the candle symbolizes the memory and legacy of the person being honored. It serves as a metaphor for their enduring impact and the light they brought into the world.
The flickering flame of the candle also captures the fragility and fleeting nature of life, reminding us to cherish every moment.
Through this cultural interpretation, the candle symbol in ‘Candle in the Wind’ becomes a poignant and evocative representation of love, loss, and the enduring power of memory.
Historical Context of the Song
The historical context of the song ‘Candle in the Wind’ holds immense cultural significance and impact.
Released in 1973 by Elton John, the song was originally written as a tribute to Marilyn Monroe but gained even more prominence when it was reworked as a tribute to Princess Diana after her tragic death in 1997.
This shift in subject matter not only reflected the changing times but also highlighted the universal themes of loss, fame, and the human condition, making the song relevant and resonant in modern times.
Cultural Significance and Impact
When examining the cultural significance and impact of the song ‘Candle in the Wind,’ it becomes apparent that its historical context is crucial in understanding its profound resonance. This iconic song, originally released in 1973 by Elton John and later re-released in 1997 as a tribute to Princess Diana, holds immense cultural value.
Here are three key reasons why:
- Emotional connection: The song’s heartfelt lyrics and poignant melody resonated deeply with listeners, allowing them to connect emotionally with the message of loss and grief.
- Societal impact: By choosing to dedicate the song to Princess Diana, Elton John tapped into the collective mourning and grief felt by millions worldwide, turning it into a symbol of tribute and remembrance.
- Historical relevance: ‘Candle in the Wind’ not only captured the essence of a specific moment in history but also became a powerful anthem that transcended time, reminding us of the fragility of life and the impact one person can have on the world.
Relevance in Modern Times
In our modern times, the song ‘Candle in the Wind’ continues to hold significant relevance due to its historical context and the lasting impact it has had on popular culture.
This iconic song, originally written and performed by Elton John in 1973 as a tribute to Marilyn Monroe, has been adapted over the years to honor other influential figures, such as Princess Diana.
The modern interpretations of this song reflect the ongoing fascination with larger-than-life individuals and the emotions they evoke in society. ‘Candle in the Wind’ remains relevant to current events as it captures the essence of grief, loss, and the enduring impact of iconic personalities.
Its heartfelt lyrics and powerful melody resonate with audiences, reminding us of the universal experiences of love, fame, and tragedy.

As we continue to navigate through the complexities of our world, this timeless song provides solace and reflection, making it a valuable piece of our cultural fabric.
Elton John’s Personal Connection
Elton John has always felt a deep personal connection to the song Candle in the Wind. This emotional bond stems from several factors:
- Tribute to Princess Diana: Elton John rewrote the lyrics of Candle in the Wind as a tribute to his dear friend, Princess Diana, after her tragic death in 1997. This heartfelt gesture resonated with fans worldwide, who also mourned the loss of the beloved princess.
- Reflecting on personal struggles: The song’s lyrics touch upon themes of fame, isolation, and the pressures of public life. As someone who’s experienced these challenges firsthand, Elton John’s personal connection to the song’s message is profound.
- Universal resonance: Beyond his own experiences, Elton John recognizes the universal appeal of Candle in the Wind. Its ability to evoke empathy and stir emotions in listeners has made it an enduring anthem, creating a powerful emotional response from fans across generations.
Through his personal connection to the song, Elton John hasn’t only touched the hearts of millions but also used his platform to serve others by honoring Princess Diana’s memory and addressing the complexities of fame.
The Original Version Vs. the Princess Diana Tribute
When comparing the original version of ‘Candle in the Wind’ to the Princess Diana tribute, several points arise.

Firstly, there are notable musical differences and changes, such as alterations in the lyrics and instrumentation.
Secondly, the impact on the audience is significant, as the tribute version resonated deeply with people around the world, becoming one of the best-selling singles of all time.
Lastly, the contextual significance and controversy surrounding the tribute version add another layer to the discussion, as it was released in the aftermath of Princess Diana’s tragic death and sparked debates about the boundaries of art and public mourning.
Musical Differences and Changes
During the tribute to Princess Diana, we made several musical changes and differences to the original version of the song Candle in the Wind. These alterations were aimed at capturing the essence of Princess Diana’s life and impact on the world.

Here are three key differences that were made:
- Lyrics: We revised the lyrics to pay homage to Princess Diana, highlighting her grace, compassion, and untimely departure. The new lyrics resonated deeply with fans, as they felt a personal connection to the Princess and her story.
- Instrumentation: We incorporated orchestral elements to create a more emotional and poignant sound. The addition of strings and piano added a sense of grandeur and melancholy, perfectly reflecting the somber mood of the tribute.
- Vocals: The original version was re-recorded with a more heartfelt and vulnerable vocal performance. This allowed the audience to feel the raw emotions and grief associated with Princess Diana’s tragic death.
These changes in the musical arrangement of Candle in the Wind helped to elevate the tribute to Princess Diana, creating a powerful and moving experience for fans around the world.
Impact on Audience
We were amazed by the overwhelming emotional response the Princess Diana tribute version of ‘Candle in the Wind’ elicited from the audience.
The song, originally written as a tribute to Marilyn Monroe, took on a new meaning when it was performed at Princess Diana’s funeral in 1997.

The emotional resonance of the lyrics, combined with Elton John’s heartfelt delivery, struck a chord with fans around the world.
Fan testimonials poured in, expressing how deeply they were moved by the song. Many described it as a cathartic experience, allowing them to grieve and remember Princess Diana in a profound way.
The tribute version of ‘Candle in the Wind’ not only became a symbol of the loss of a beloved princess, but also a testament to the power of music to touch the hearts of millions.
Contextual Significance and Controversy
The contextual significance and controversy surrounding ‘Candle in the Wind’ arise from the comparison between the original version, written as a tribute to Marilyn Monroe, and the Princess Diana tribute version. The song’s transformation into a tribute for Princess Diana sparked intense public reception and stirred historical relevance.
Here are three key points to consider:
- Public reception: The original version of the song, released in 1973, was well-received by the public and became a hit. However, the Princess Diana tribute version, released in 1997, catapulted the song to even greater fame, becoming one of the best-selling singles in history.
- Historical relevance: The original version’s lyrics were a reflection on Marilyn Monroe’s tragic life, capturing the essence of her struggles and untimely death. In contrast, the tribute version adapted the lyrics to emphasize Princess Diana’s impact on the world and the collective grief felt by millions.
- Controversy: While the Princess Diana version received widespread acclaim and touched many hearts, some critics argued that transforming a song originally written for one icon into a tribute for another was inappropriate, diluting its original meaning.
The contextual significance and controversy surrounding ‘Candle in the Wind’ set the stage for deeper interpretations and analysis of the lyrics.
Interpretations and Analysis of the Lyrics
One possible interpretation of the lyrics in the song ‘Candle in the Wind’ is that it uses vivid imagery to convey the tragic life and untimely death of a beloved public figure.
The song, originally written as a tribute to Marilyn Monroe and later adapted to honor Princess Diana, is filled with symbolic meaning and lyrical interpretations.
The lyrics paint a poignant picture of a bright flame, representing the public figure, burning out too soon. It speaks to the fleeting nature of fame and the overwhelming pressures that come with it.
The use of imagery, such as ‘candle in the wind’ and ‘footprints on the sands of time,’ evokes a sense of vulnerability and fragility.
Through these powerful lyrics, the song captures the essence of a life cut short and the lasting impact it leaves behind.
This interpretation sets the stage for a deeper exploration of the song’s cultural impact and legacy.
Cultural Impact and Legacy
Its cultural impact and legacy can be seen in the widespread recognition and emotional resonance that the song ‘Candle in the Wind’ continues to evoke.
This iconic ballad, originally written by Elton John and Bernie Taupin as a tribute to Marilyn Monroe, has transcended time and has become a symbol of grief and loss.
Its significance in pop culture is undeniable, as it has been performed at numerous high-profile events, including the funeral of Princess Diana.
The song’s lasting legacy is evident in its enduring popularity, with its heartfelt lyrics and haunting melody still touching the hearts of listeners today.
It serves as a reminder of the fragility of life and the universal emotions we all experience.
‘Candle in the Wind’ has become a timeless anthem of empathy and remembrance, leaving an indelible mark on music history.
Chart Success and Awards
When discussing the chart success and awards of the song ‘Candle in the Wind,’ it’s important to acknowledge its record-breaking sales and accolades.
The song, originally released in 1973 and then re-released in 1997 as a tribute to Princess Diana, became one of the best-selling singles of all time, with over 33 million copies sold.
In addition to its commercial success, ‘Candle in the Wind’ received numerous awards and recognition, including a Grammy Award for Best Male Pop Vocal Performance.
Record-Breaking Sales and Awards
We were amazed by the record-breaking sales and awards that Candle in the Wind achieved. This iconic song by Elton John captivated audiences worldwide and became a cultural phenomenon. Here are three reasons why its success was unprecedented:
- Unparalleled Sales: Candle in the Wind sold over 33 million copies worldwide, making it one of the best-selling singles in history. Its emotional tribute to Marilyn Monroe resonated with fans, propelling it to the top of the charts in multiple countries.
- Global Popularity: The song reached number one in numerous countries, including the United States, United Kingdom, and Australia. Its universal appeal transcended language barriers, connecting with people from all walks of life.
- Award-Winning Achievement: Candle in the Wind received numerous accolades, including a Grammy Award for Best Male Pop Vocal Performance. Its impact on popular culture was recognized by the induction into the Grammy Hall of Fame.
The success of Candle in the Wind solidified its place in music history, leaving an indelible mark on the hearts of millions.
Cultural Impact and Recognition
The impact and recognition of Candle in the Wind can be seen through its chart success and numerous awards.

The song, originally released by Elton John in 1973 as a tribute to Marilyn Monroe, gained cultural significance when it was re-recorded and dedicated to Princess Diana after her tragic death in 1997.
The reworked version became a global phenomenon, reaching the top of the charts in multiple countries and becoming one of the best-selling singles of all time.
Its success was further cemented by its critical acclaim, earning Elton John a Grammy Award for Best Male Pop Vocal Performance.
Beyond its chart success and awards, Candle in the Wind has left a lasting legacy, serving as a poignant reminder of Princess Diana’s impact and the universal emotions of loss and remembrance.

Collaborators and Production Details
Elton John collaborated with songwriter Bernie Taupin and producer Gus Dudgeon to create the iconic song Candle in the Wind. The production details of the song, along with the creative decisions and musical arrangements made, played a significant role in its success.
Here are three key aspects of the collaboration and production process:
- Behind the scenes stories: The studio atmosphere and dynamics between Elton John, Bernie Taupin, and Gus Dudgeon were filled with creativity and collaboration. They worked tirelessly to perfect the song’s emotional impact and lyrical depth.
- Technical aspects of the production: The team experimented with different musical arrangements and instrumentation to create a unique sound that resonated with audiences. The use of piano, strings, and John’s powerful vocals added to the song’s emotional intensity.
- Influence on other artists: Candle in the Wind’s success not only impacted Elton John’s career but also influenced countless artists who admired the power of collaboration and the importance of artistic vision and execution.
The collaboration between Elton John, Bernie Taupin, and Gus Dudgeon resulted in a song that touched the hearts of millions. The emotional response from fans reflects the impact this song had on their lives.
Emotional Response From Fans
When it comes to the emotional response from fans, the song ‘Candle in the Wind’ has undoubtedly left a lasting impact.
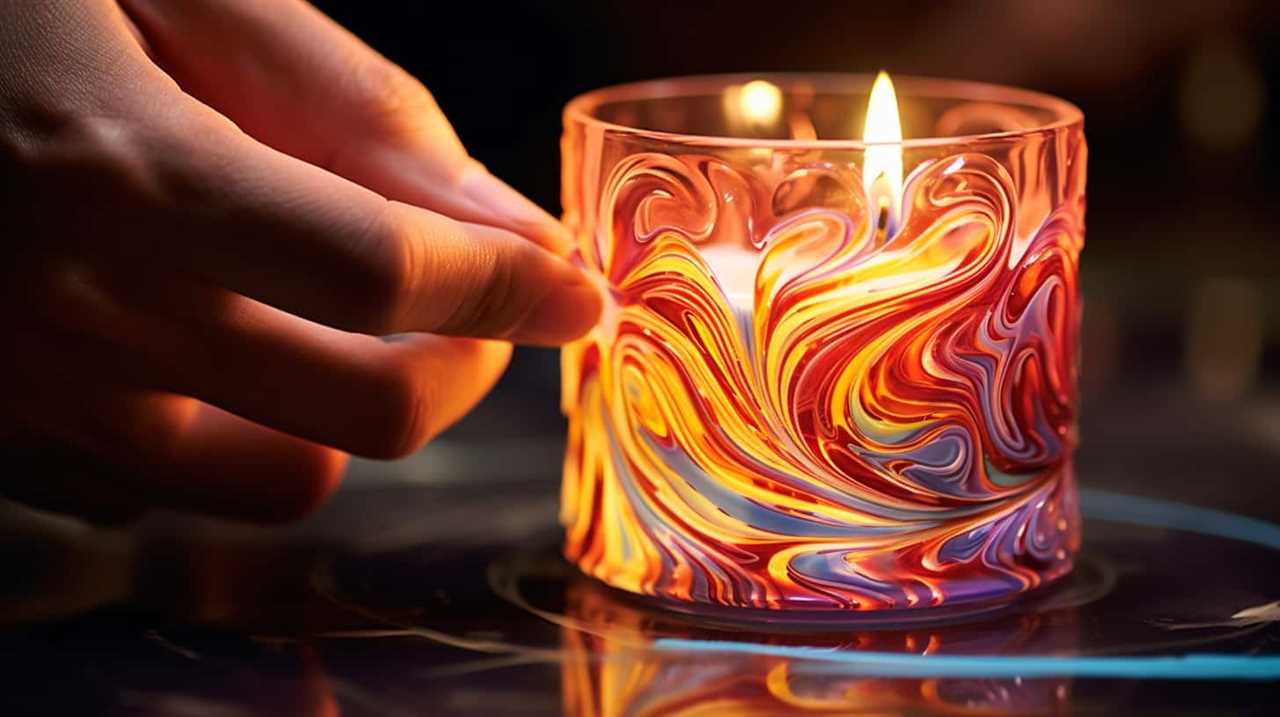
The tears shed and profound emotions experienced by fans are a testament to the song’s power to connect with people on a deep level.
This emotional connection hasn’t only solidified Elton John’s fanbase but also created a sense of shared experience among his listeners.
Fan Tears and Emotions
As fans listen to ‘Candle in the Wind,’ they’re overwhelmed with tears and emotions. The song has a profound impact on its listeners, evoking a deep emotional connection. Here are three reasons why fans have such intense reactions to this iconic song:
- Raw vulnerability: Elton John’s heartfelt lyrics and powerful delivery tap into the raw emotions that many fans can relate to. The song captures the pain and loss experienced in the face of tragedy, creating a cathartic experience for listeners.
- Personal attachment: ‘Candle in the Wind’ has become synonymous with the loss of Princess Diana. Fans who admired her and felt a personal connection to her are particularly moved by the song’s tribute to her life and legacy.
- Timeless resonance: Despite its connection to a specific event, ‘Candle in the Wind’ transcends time and continues to resonate with fans of all ages. Its universal themes of love, loss, and remembrance strike a chord with listeners, allowing them to connect on a deeply emotional level.
These emotional reactions from fans highlight the lasting impact ‘Candle in the Wind’ has had on its fanbase.
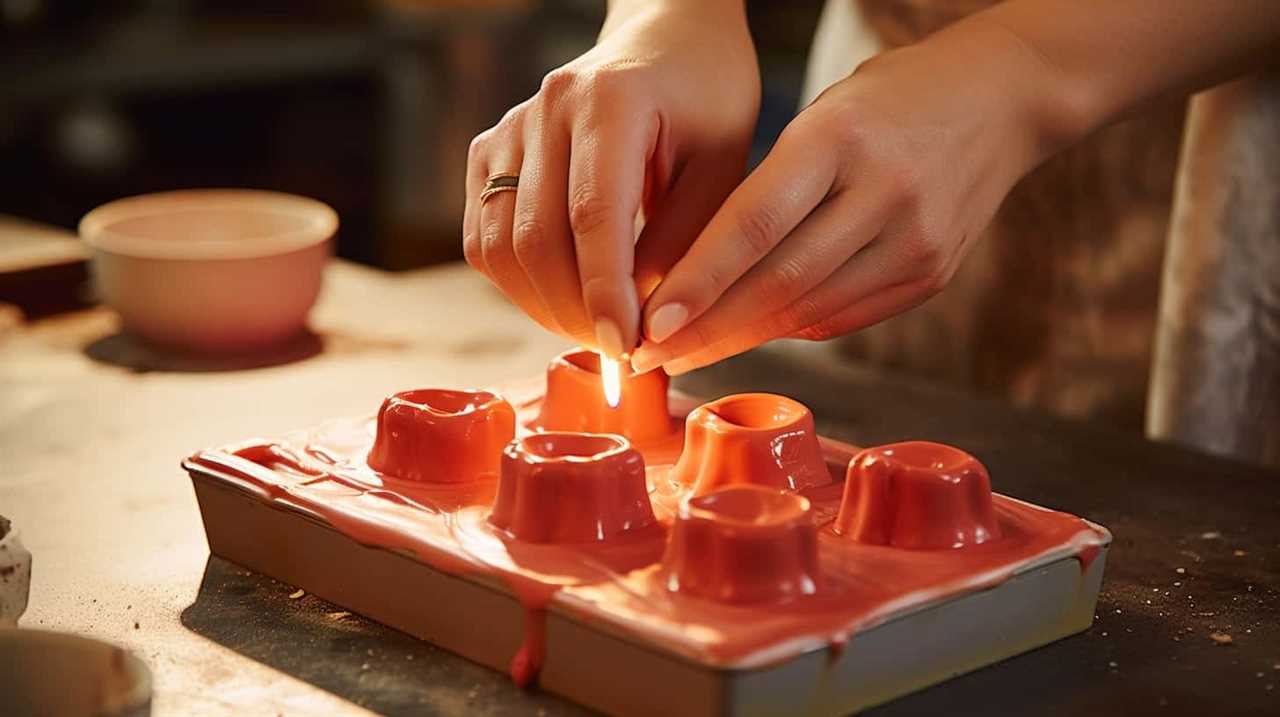
Impact on Fanbase
The emotional impact of ‘Candle in the Wind’ on its fanbase is undeniable. This iconic song by Elton John has resonated deeply with listeners, eliciting strong fan reactions and forging an emotional connection that transcends generations.
The heartfelt lyrics, written by Bernie Taupin, pay homage to the tragic life and untimely death of Marilyn Monroe. Through its poignant storytelling and introspective melodies, ‘Candle in the Wind’ has touched the hearts of millions, evoking feelings of empathy, nostalgia, and melancholy.
Fans have been moved to tears by the raw emotion conveyed in the song, finding solace and comfort in its relatable themes of loss and longing. This emotional connection between the song and its fanbase sets the stage for the numerous covers and adaptations that have followed, as artists seek to capture the same raw emotion and connect with listeners on a profound level.
Covers and Adaptations of the Song
After learning about the meaning behind the song ‘Candle in the Wind,’ we were intrigued by the numerous covers and adaptations that have been made over the years. This demonstrates the impact the song has had on popular culture and its ability to resonate with people from different backgrounds and musical styles.

The following three examples highlight the diversity of covers and tributes:
- Elton John’s live performance at Princess Diana’s funeral: This heartfelt rendition brought the song to a new level of emotional depth, capturing the grief and sadness felt by millions around the world.
- Ed Sheeran’s acoustic cover: Sheeran’s stripped-down version showcased his unique vocal style and brought a contemporary twist to the classic song.
- The Broadway adaptation: The inclusion of ‘Candle in the Wind’ in the hit musical ‘Moulin Rouge!’ introduced the song to a new generation of theatergoers, adding a theatrical flair to the iconic tune.
These covers and adaptations not only pay tribute to the original version but also allow the song to continue touching hearts and inspiring audiences across generations.
Controversies and Criticisms
We frequently encountered controversies and criticisms surrounding the song ‘Candle in the Wind’. Despite its immense popularity and critical acclaim, the song has also faced its fair share of public backlash and controversial reception.
One of the main controversies surrounding the song is its subject matter. Originally written as a tribute to Marilyn Monroe, it was later adapted as a tribute to Princess Diana after her tragic death in 1997. While many praised Elton John’s heartfelt performance and the song’s emotional impact, others criticized it as a opportunistic move to capitalize on a tragedy.
The song’s release was met with mixed reactions, with some questioning the appropriateness of turning a tribute to one iconic figure into another. Nonetheless, the controversy and public backlash didn’t diminish the impact and influence of ‘Candle in the Wind’ on Elton John’s career.
Influence on Elton John’s Career
One significant aspect of ‘Candle in the Wind’ is its influence on our career as musicians. Elton John’s musical influence has been profound, and this song played a crucial role in solidifying his status as a legendary artist. Here are three ways in which ‘Candle in the Wind’ impacted our journey:
- Elevating our songwriting abilities: The lyrical depth and emotional resonance of this song inspired us to push the boundaries of our own songwriting, striving to create music that resonates with people on a deeper level.
- Amplifying our social impact: Through this song, Elton John used his platform to bring attention to important social issues, showcasing the power of music as a catalyst for change. This has motivated us to use our music to address relevant societal concerns as well.
- Providing solace during personal struggles: Elton John’s personal struggles, as reflected in ‘Candle in the Wind’, reminded us that even in the face of adversity, music can be a source of healing and strength. This has influenced us to approach our own challenges with resilience and find solace in our art.
Frequently Asked Questions
What Is the Meaning Behind the Title "Candle in the Wind"?
The meaning behind the title "Candle in the Wind" is often debated due to its ambiguity. It has sparked controversy, as some interpret it as a symbol of fragility and fleeting fame, while others see it as a tribute to someone who burned brightly but tragically.
How Did the Song "Candle in the Wind" Become Popular?
The song "Candle in the Wind" became popular due to its profound cultural impact and the overwhelming positive reactions from fans. Its emotional and heartfelt lyrics resonated with audiences, making it a timeless and iconic piece of music.
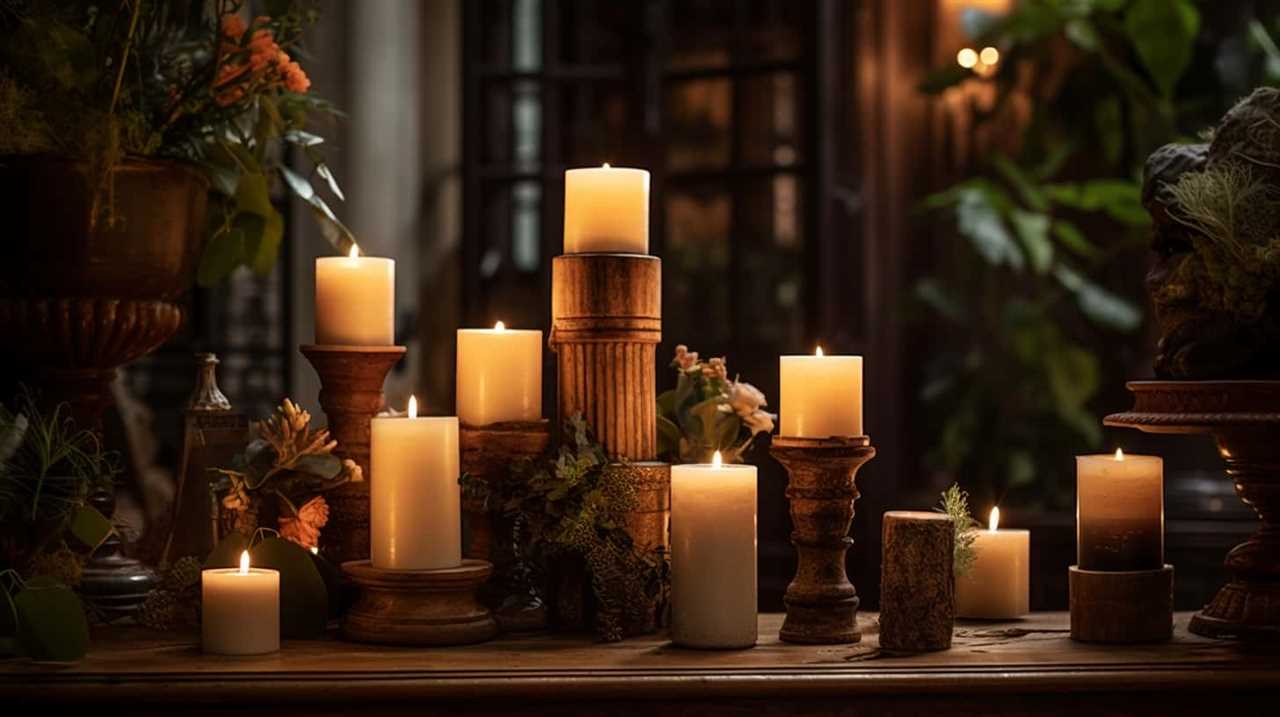
Were There Any Controversies Surrounding the Song?
Controversies surrounding the song ‘Candle in the Wind’ include public reaction to its release and criticism over the re-release after Princess Diana’s death. These controversies fueled discussions about the song’s impact and appropriateness.
Who Were the Other Musicians Involved in the Production of "Candle in the Wind"?
Elton John and Bernie Taupin, the talented musicians involved in the production of "Candle in the Wind," crafted a heartfelt tribute to a beloved icon. Their collaboration resulted in a timeless song that resonates with audiences to this day.
How Did Elton John Feel About the Song’s Success and Impact on His Career?
Elton John’s emotional connection to "Candle in the Wind" is undeniable. Its impact on his legacy cannot be overstated. The success of the song not only elevated his career but also solidified his status as a music icon.
Conclusion
In conclusion, ‘Candle in the Wind’ is a poignant and emotional song that holds a significant place in music history. With its heartfelt lyrics and powerful melody, the song speaks to the universal experience of loss and grief.

One interesting statistic to note is that ‘Candle in the Wind’ became the best-selling single of all time, with more than 33 million copies sold worldwide. This achievement highlights the song’s immense popularity and enduring impact on listeners around the globe.
I’m Jane and I love candles. I have candles everywhere in my house–in every room, on every surface. I love the smell of candles, and I love how they make my place feel warm and cozy.
Candles are really important to me. They help me relax and de-stress after a long day. They remind me of happy memories, and they make me feel calm and peaceful. I can’t imagine my life without candles!


What Makes a Luxury Candle
How To Make A Lotion Candle
How To Get Candle Wax Off Laminate Floor
How To Decorate A Candle Jar

What Makes a Good Candle
The Similarities of Candle and Light Bulb Lamps

How to Determine If Candles Will Melt Outside
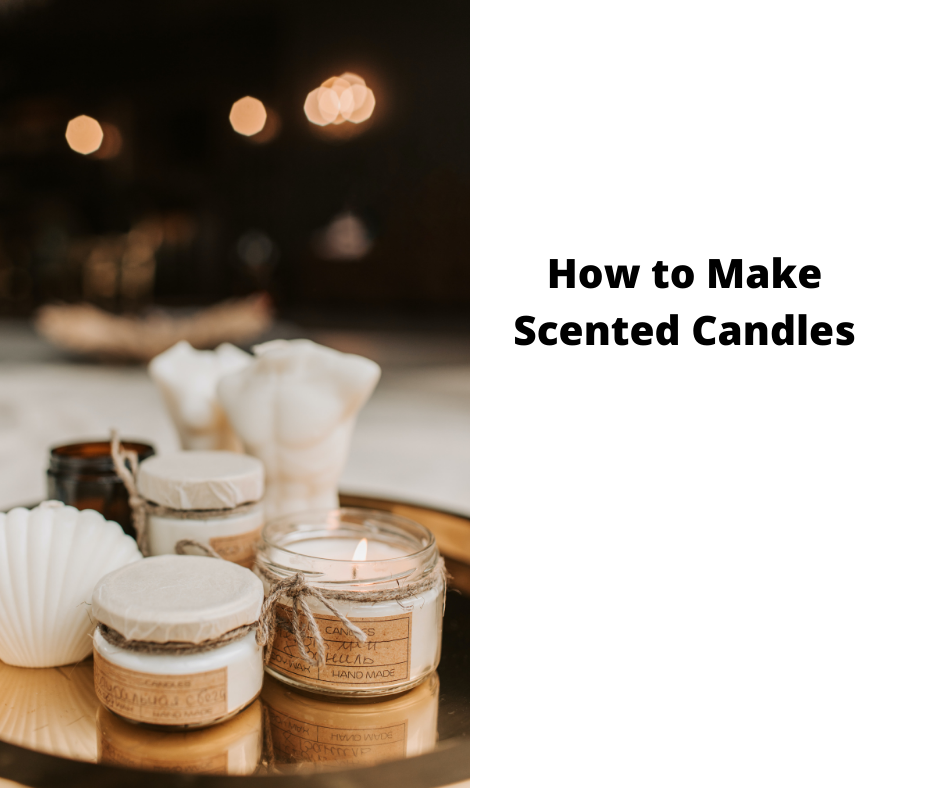
How to Make Scented Candles
Are Yankee Candles Vegan?
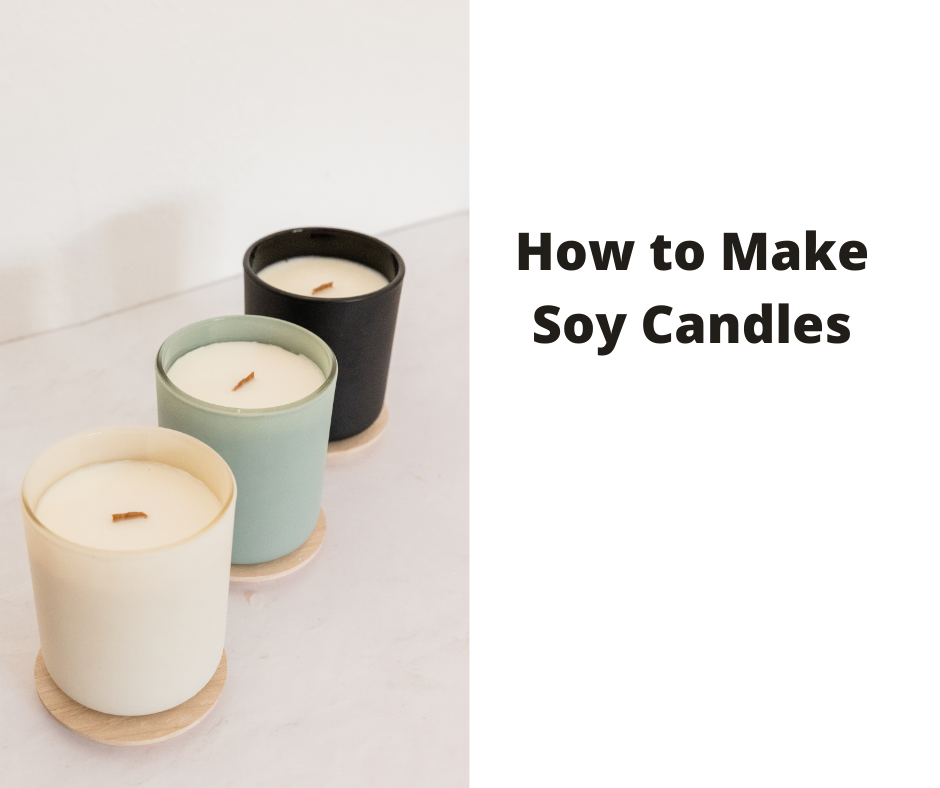
How to Make Soy Candles
-
Beginners Guides1 week ago
The Similarities of Candle and Light Bulb Lamps
-
Beginners Guides1 week ago
How to Determine If Candles Will Melt Outside
-
 Beginners Guides3 months ago
How To Burn A Candle Without A Wick
-
Candles3 weeks ago
How to Make Scented Candles
-
Beginners Guides3 weeks ago
Are Yankee Candles Vegan?
-
Beginners Guides3 weeks ago
How to Make Soy Candles
-
 Beginners Guides1 month ago
How to Make Candles in 5 Easy Steps
-
 Beginners Guides1 week ago
Why is My Candle Not Sticking to the Glass?