Connect with us

Beginners Guides

What Time Is Candle Lighting

Published

on

An image featuring a cozy, dimly lit room with a beautifully adorned table displaying a burning candle

Ever been curious about when the candle lighting occurs?

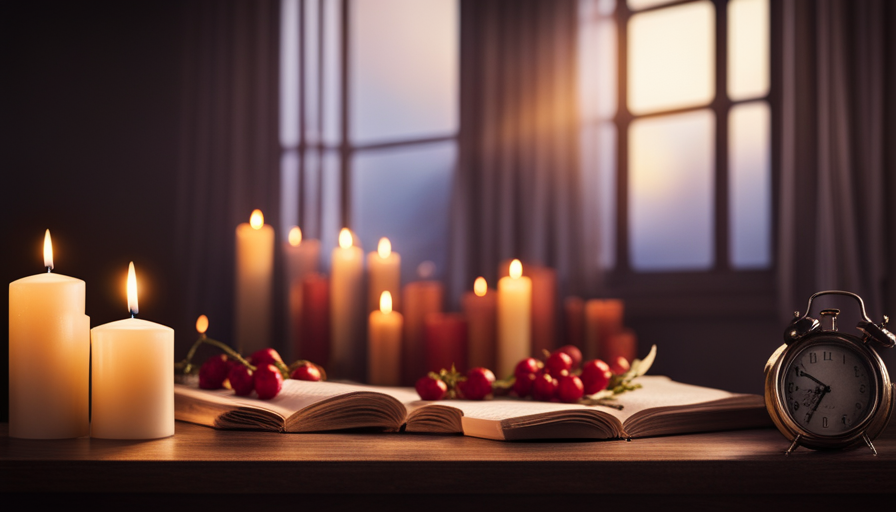
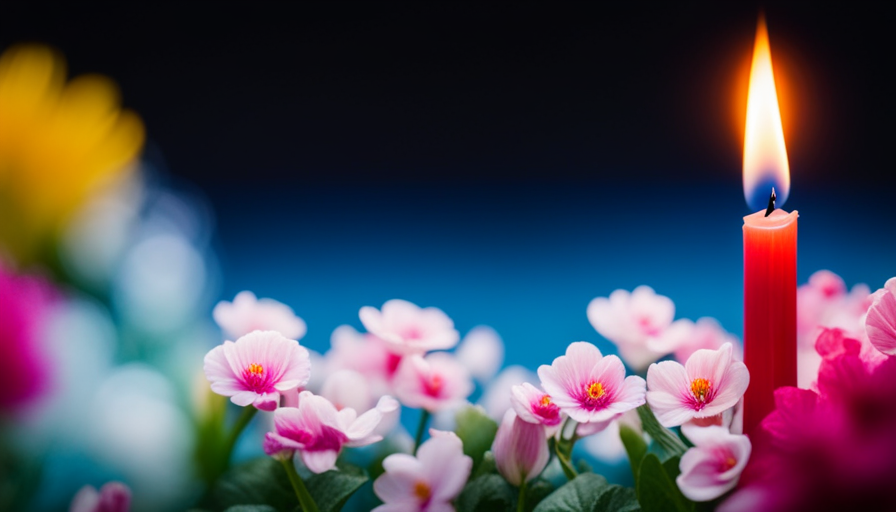
As the flickering flames cast a warm and inviting glow, candles have been a symbol of comfort and tranquility for centuries. They have the power to transform any space into a haven of relaxation and serenity.

In this article, I will delve into the importance of candle lighting, explore the various occasions when it is commonly used, and discuss the factors that influence the ideal candle lighting time.

Whether you are planning a romantic dinner, hosting a festive gathering, or simply seeking to create a cozy atmosphere in your home, understanding the art of candle lighting is essential.

Join me as we discover the perfect time to ignite these enchanting sources of light and explore the world of candlelight.

Advertisement

Key Takeaways

  • Candle lighting is a significant tradition that holds deep spiritual and emotional connections.
  • Candles have historical significance and are associated with enlightenment, hope, and guidance.
  • Candle lighting is important in many cultures and religions, used in special occasions like birthdays, weddings, and religious ceremonies.
  • The time of candle lighting can vary depending on the specific occasion or cultural/religious tradition.

Importance of Candle Lighting

Candle lighting is a truly significant and heartwarming tradition. It holds a special place in many cultures and religions, symbolizing various meanings. The act of lighting a candle is not just about the physical act itself, but also about the deeper spiritual and emotional connection it represents.

Candle lighting traditions have been practiced for centuries, dating back to ancient civilizations. The historical significance of this ritual is rooted in the symbolism of light. Candles have long been associated with enlightenment, hope, and guidance. Lighting a candle can bring comfort and peace, especially during times of darkness or uncertainty.

In addition to its historical significance, candle lighting also plays an important role in various special occasions. Whether it’s a birthday, wedding, or religious ceremony, candles are often used to mark these significant moments. The soft glow of a candle creates a warm and intimate ambiance, adding a touch of elegance and beauty to any event.

As we delve into the next section about candle lighting for special occasions, it’s important to understand the rich history and symbolism behind this cherished tradition. The act of lighting a candle not only brings light into the darkness but also represents the hope and joy that special occasions bring into our lives.

Candle Lighting for Special Occasions

When it comes to special occasions, candle lighting plays a significant role in setting the mood and creating a meaningful atmosphere. Whether it’s birthdays, anniversaries, or religious observances, the act of lighting candles adds a touch of warmth and symbolism to the event.

It not only signifies the passing of another year or the celebration of a milestone, but also serves as a reminder of the light and joy that these occasions bring into our lives.

Advertisement

Birthdays

On birthdays, it’s always a joyous celebration filled with laughter and cake. The importance of birthday celebrations cannot be overstated. It’s a time to reflect on the past year and look forward to the future. Birthday traditions hold a special meaning, as they symbolize the milestones we have achieved and the growth we have experienced. One popular tradition is the candle lighting ceremony, where each candle represents a year of life. As the candles are lit, we make a wish and blow them out, hoping for good fortune in the coming year. It’s a moment of reflection and anticipation, surrounded by loved ones who share in the excitement. Birthdays remind us of our journey and the people who have supported us along the way. Now, let’s transition into the next section about anniversaries.

Anniversaries

As I celebrate anniversaries, I can’t help but feel a sense of nostalgia as I reminisce about the milestones my partner and I have achieved together.

Anniversaries are a time to honor the commitment and love we have for each other. It is also a time to reflect on the journey we have taken as a couple and the growth we have experienced.

Anniversary traditions vary from couple to couple, but they often involve exchanging thoughtful gifts and spending quality time together. Some popular anniversary gift ideas include personalized photo albums, romantic getaways, or even renewing our vows. These gestures not only demonstrate our love and appreciation for each other, but they also serve as a reminder of our commitment to continue building a strong and lasting relationship.

As I look forward to celebrating our anniversary, I can’t help but feel excited about the upcoming religious observances.

Advertisement

Religious Observances

Amidst the excitement of celebrating our anniversary, the anticipation of upcoming religious observances adds a deeper sense of meaning to our festivities. The importance of religious observances can’t be overstated. They provide a spiritual connection and remind us of our beliefs and values.

One of the most significant rituals during these observances is candle lighting. The benefits of candle lighting go beyond the aesthetic appeal. It creates a serene and peaceful atmosphere, allowing us to reflect on our blessings and express gratitude. The soft glow of the candles brings a sense of warmth and comfort, enhancing the overall experience.

Additionally, candle lighting symbolizes unity and hope, bringing people together in shared faith and purpose. As we delve into creating a cozy atmosphere, we can explore various ways to enhance the ambiance of our celebrations.

Creating a Cozy Atmosphere

When it comes to creating a cozy atmosphere, there are a few key points to consider. First, candlelight dinners can instantly set a romantic and intimate mood, making any meal feel special.

Second, candles are also perfect for relaxation and meditation, as their soft, flickering light can help to calm the mind and create a peaceful ambiance.

Advertisement

Lastly, when it comes to setting the mood, candles are an essential tool. Their warm glow and gentle scent can instantly transform any space into a cozy haven, perfect for unwinding after a long day.

Candlelight Dinners

During a candlelight dinner, it’s always romantic to have soft music playing in the background. The combination of candlelight romance and candlelight ambience creates a warm and inviting atmosphere that is perfect for a special evening with your loved one. As you sit at the table, enjoying each other’s company, the flickering candlelight dances across your faces, casting a soft glow that enhances the intimate connection between you. To further enhance the ambiance, you can set the table with elegant tableware and incorporate fragrant flowers or scented candles. The table below provides some ideas for creating a cozy and inviting atmosphere during your candlelight dinner.

Table Setting Lighting Decor
Fine china Dim Fresh flowers
Crystal glasses Soft Scented candles
Linen napkins Warm Seasonal centerpiece
Silverware Flickering Romantic tablecloth

With the perfect candlelight dinner setting, you can create a relaxing and intimate atmosphere that sets the stage for the subsequent section about relaxation and meditation.

Relaxation and Meditation

To fully embrace the calming effects of relaxation and meditation, it’s essential to create a serene and tranquil environment. By practicing relaxation techniques such as deep breathing, progressive muscle relaxation, and guided imagery, one can achieve a state of deep relaxation. This allows the body to release tension and stress, while promoting a sense of inner peace and well-being.

Moreover, the benefits of meditation are numerous. Regular meditation practice has been shown to reduce anxiety, improve focus and concentration, increase self-awareness, and enhance overall mental and emotional well-being. It can also help to lower blood pressure, strengthen the immune system, and improve sleep quality.

Advertisement

To transition into the subsequent section about ‘setting the mood,’ it’s important to consider how the right atmosphere can further enhance the experience of relaxation and meditation.

Setting the Mood

Create a soothing ambiance by using soft music and dimming the lights, allowing yourself to fully immerse in the relaxation and meditation experience. Setting the ambiance is an essential part of creating a tranquil atmosphere for relaxation and meditation.

One effective way to do this is through candlelight therapy. The gentle flickering of candles can help to calm the mind and promote a sense of serenity. By strategically placing candles around the room, you can create a warm and inviting space that enhances your overall experience. The soft glow of candlelight can also help to reduce stress and anxiety, allowing you to fully relax and let go.

Factors such as the type and scent of candles can also influence the ambiance.

Now, let’s explore the factors influencing candle lighting time.

Advertisement

Factors Influencing Candle Lighting Time

Get ready to witness the whimsical wonders of the wax world as the factors influencing candle lighting time are revealed! Understanding the various factors that come into play when determining the perfect time to light a candle can greatly enhance your overall experience.

Here are four key factors to consider:

  1. Season: The time of year can greatly affect candle lighting time. During the winter months, when daylight is shorter, it’s common to light candles earlier in the evening to create a cozy atmosphere. In contrast, during the summer months, when daylight is longer, candles are often lit later in the evening to set the mood for relaxation.

  2. Occasion: The purpose of lighting a candle can also impact the timing. For a romantic dinner, it’s ideal to light the candles just before your partner arrives. However, for a party or gathering, it’s best to have the candles lit well in advance to create a welcoming ambiance.

  3. Candle Type: Different candle types have varying burn times. Be sure to check the estimated burn time on the candle packaging to ensure you light it with enough time to enjoy its full potential.

  4. Personal Preference: Ultimately, the perfect candle lighting time is subjective and depends on your personal preference. Experiment with different timings to find what suits you best.

Now that you’re familiar with the factors influencing candle lighting time, let’s move on to some tips for finding the perfect timing without skipping a beat.

Tips for Finding the Perfect Candle Lighting Time

Discovering the ideal moment to ignite your favorite candle can enhance the ambiance and elevate your overall experience. When it comes to finding the perfect candle lighting time, there are a few tips that can help ensure you make the most of your candle’s fragrance and glow.

Firstly, consider the purpose of your candle. Are you lighting it for relaxation, to create a romantic atmosphere, or simply to add a touch of warmth to your space? Understanding the intention behind lighting your candle will guide you in choosing the right time.

Advertisement

Secondly, explore different candle suppliers. Each brand may have its own recommended lighting time based on the composition of their candles and the scent profiles they offer. Researching different suppliers and reading customer reviews can give you insight into the best time to light their candles for optimal performance.

If you enjoy a more hands-on approach, consider DIY candle making. By creating your own candles, you have the freedom to experiment and find the perfect lighting time that suits your preferences. You can customize the fragrance, wax type, and wick length to create a candle that burns beautifully at your desired time.

By taking these factors into account, you can find the ideal candle lighting time that complements your desired atmosphere. Once you’ve mastered the art of finding the perfect moment, you can delve into the world of candle lighting rituals, where you can incorporate meaningful practices to enhance your candle experience.

Candle Lighting Rituals

When it comes to candle lighting rituals, there are three key points to consider:

  • Symbolism and meaning play a significant role in candle lighting rituals, as each candle represents a specific intention or purpose.

  • The lighting order and placement of the candles also holds significance, as it can symbolize the progression of the ritual or the importance of each candle’s purpose.

  • Finally, prayer and reflection are integral to the candle lighting ritual, as it provides a moment of quiet contemplation and connection with the divine.

By understanding these key points, one can fully engage in and appreciate the depth and significance of candle lighting rituals.

Advertisement

Symbolism and Meaning

Symbolism and meaning are deeply embedded in the act of candle lighting. Candle lighting rituals have been a part of various cultures and religions for centuries, and they hold significant symbolism. The act of lighting a candle represents the presence of light in the darkness, symbolizing hope, guidance, and enlightenment. It is a way of connecting with the divine and bringing positivity into our lives.

Candle lighting traditions vary across cultures, with some lighting candles for specific occasions or celebrations, while others incorporate candles into daily spiritual practices. The flickering flame is often seen as a representation of the soul or spirit, and the act of lighting a candle can be a form of prayer or meditation. Understanding the symbolism behind candle lighting adds depth and meaning to this beautiful ritual.

Transitioning into the subsequent section about ‘lighting order and placement’, we can explore how these symbolic rituals are further enhanced by the way candles are arranged and lit.

Lighting Order and Placement

In understanding the symbolism and meaning behind candle lighting, it’s crucial to delve into the importance of lighting order and placement.

The order in which candles are lit holds significance, as it follows a specific pattern that reflects the progression of the ritual. Typically, the central candle, known as the ‘shamash,’ is lit first, representing the source of light and guidance. Then, the remaining candles are lit from left to right, symbolizing the spreading of light and the sharing of warmth and positivity.

Advertisement

It’s also worth noting that different types of candles can be used during the lighting ceremony, such as traditional wax candles or more modern electric candles. The choice of candles can add a personal touch and enhance the ambiance of the ritual.

Transitioning into the subsequent section about prayer and reflection, the act of lighting candles sets the stage for a meaningful and introspective experience.

Prayer and Reflection

Pause for a moment and let your thoughts and emotions settle as you enter a space of prayer and reflection. This is an important part of the candle lighting process, as it allows us to connect with our inner selves and find a sense of peace and calm.

Prayer and reflection go hand in hand, as they both involve mindfulness and self-care. Taking the time to pray and reflect allows us to focus on our intentions and desires, and to align ourselves with the divine. It is a time for introspection and gratitude, as we express our thanks for the blessings in our lives.

This moment of prayer and reflection sets the stage for the next step of using candles for decoration, as we infuse our space with positive energy and create a sacred atmosphere.

Advertisement

Using Candles for Decoration

When it comes to using candles for decoration, there are a few key points to keep in mind. First and foremost, choosing the right candle is crucial. You’ll want to consider factors such as the size, color, and scent to ensure it complements the space.

Additionally, arranging candles in different spaces can create a variety of atmospheres, whether you’re looking for a cozy and intimate setting or a bright and energetic ambiance.

Lastly, it’s essential to prioritize safety precautions when using candles for decoration. Always place them on a stable surface, keep them away from flammable materials, and never leave them unattended.

Choosing the Right Candle

To choose the right candle for your needs, you can consider factors such as the scent, color, and size. For example, if you want to create a relaxing atmosphere, you might opt for a lavender-scented candle in a soothing shade of blue.

Scented candles can help set the mood and create a specific ambiance in any space. Additionally, the color of the candle can complement the overall decor or theme of the room.

Advertisement

Size is also important, as larger candles tend to burn longer and make a bolder statement, while smaller ones are perfect for creating a cozy atmosphere.

By carefully considering these factors, you can select the perfect candle to enhance the desired ambiance in your space.

Now, let’s move on to arranging candles in different spaces.

Arranging Candles in Different Spaces

When it comes to creating a cozy atmosphere with candle lighting, choosing the right candles is just the beginning. Now, let’s talk about arranging candles in different spaces.

Whether you’re decorating your living room, bedroom, or outdoor patio, there are endless creative possibilities to explore. Here are a few ideas to get you started:

Advertisement
  • Cluster candles of varying heights and sizes on a tray or mirrored surface for an elegant centerpiece.

  • Place candles in lanterns or mason jars to add a rustic touch to your outdoor space.

  • Create a romantic ambiance by lining a pathway or staircase with candles in glass holders.

  • Hang candles in decorative lanterns from tree branches to illuminate your garden or patio.

Now that we’ve explored some creative options for arranging candles, let’s move on to the next important topic: safety precautions.

Safety Precautions

Now let’s focus on the importance of taking safety precautions when creating a cozy atmosphere with candles. Candle safety is of utmost importance to prevent accidents and ensure a peaceful ambiance.

First and foremost, never leave a burning candle unattended. It’s crucial to extinguish them before leaving the room or going to bed.

Keep candles away from flammable objects, such as curtains or paper. Always place them on a stable, heat-resistant surface and away from drafts.

Trim the wick to ¼ inch before lighting to prevent excessive smoke or large flames. Additionally, avoid placing candles in high-traffic areas where they can be knocked over.

Advertisement

Lastly, consider using flameless LED candles as a safer alternative. By following these precautions, you can enjoy the cozy glow of candles while prioritizing fire prevention.

Moving on to alternative lighting options…

Alternative Lighting Options

When it comes to alternative lighting options, there are a few key points to consider.

First, battery-powered candles are a great choice for those who want the look and ambiance of a traditional candle without the safety risks. These candles can be easily turned on and off and are often made with realistic flickering flames.

Second, LED lights are another popular choice for alternative lighting. These lights are energy-efficient and long-lasting, making them a great option for both indoor and outdoor use.

Advertisement

Finally, fairy lights are a whimsical and versatile option for adding a touch of magic to any space. They come in a variety of colors and can be easily wrapped around objects or hung up to create a festive atmosphere.

Battery-powered Candles

You can use battery-powered candles to create a cozy and romantic ambiance without the worry of an open flame. Battery-powered candles are a popular choice for individuals looking for alternative lighting options. These candles are typically made from wax or plastic and come in a variety of shapes, sizes, and colors. They are powered by small batteries, usually AA or AAA, which can be easily replaced when they run out of power.

Battery-powered candles offer several advantages over traditional candles. Firstly, they eliminate the risk of fire hazards, making them a safer option, especially in homes with young children or pets. Additionally, they are reusable and can be used multiple times without melting away like traditional candles.

To give you a better understanding, here is a table comparing battery-powered candles and traditional candles:

Battery-Powered Candles Traditional Candles
No open flame Open flame
Safer option Fire hazard
Reusable One-time use

As we move on to the next section about LED lights, it is important to explore the different lighting options available.

Advertisement

LED Lights

Imagine being able to create a warm and inviting atmosphere with just the flick of a switch. LED lights offer the perfect solution for those seeking a hassle-free and safe alternative to traditional candles.

The benefits of LED lights are numerous. Firstly, they’re energy-efficient, consuming significantly less power than traditional incandescent bulbs. Additionally, they have a longer lifespan, reducing the need for frequent replacements. LED lights also emit very little heat, making them safer to use and reducing the risk of accidents.

With advancements in LED light technology, they now come in a wide range of colors and brightness levels, allowing you to customize the ambiance to your liking. LED lights aren’t just practical but also versatile, making them an ideal choice for any occasion.

Transitioning into the subsequent section about ‘fairy lights’, users can also explore the enchanting possibilities of these delicate and whimsical lighting options.

Fairy Lights

With their delicate glow and whimsical charm, fairy lights add a touch of enchantment to any space. These dainty strands of lights are perfect for creating a cozy and magical atmosphere in your home or event.

Advertisement

Fairy light decorations come in various shapes, sizes, and colors, allowing you to customize your lighting design to fit your personal style. Installing fairy lights is relatively simple and can be done by anyone with a little bit of patience and creativity. You can hang them on walls, drape them over furniture, or create a stunning centerpiece by wrapping them around a vase or jar.

Their versatility makes them a popular choice for weddings, parties, and holiday celebrations.

Now, let’s delve into the world of candle lighting etiquette, where we will explore the proper ways to light and extinguish candles for different occasions.

Candle Lighting Etiquette

When it comes to candle lighting etiquette, there are a few key points to keep in mind. First and foremost, it’s important to use candles properly to ensure safety and avoid accidents. This includes keeping them away from flammable materials and never leaving them unattended.

Secondly, it’s crucial to extinguish candles in a respectful manner, making sure to fully extinguish the flame and never blowing it out.

Advertisement

Lastly, consideration for others is essential when using candles, such as not placing them in areas where they may cause discomfort or inconvenience to others.

Overall, following these guidelines will help create a safe and respectful candle lighting experience for everyone involved.

Proper Candle Usage

To properly use candles, make sure you light them at the appropriate time, just like you would strike a match to start a fire. Candle safety is of utmost importance when using candles. Always place them on a heat-resistant surface and keep them away from flammable materials. Never leave a candle unattended and make sure to extinguish it before leaving the room or going to bed.

Regular candle maintenance is also crucial. Trim the wick to about ¼ inch before each use to prevent excessive smoke and soot. Keep the wax pool free of debris and trim any mushrooming at the top of the wick.

By following these guidelines, you can enjoy the beauty and ambiance of candles while minimizing the risk of accidents. Now, let’s move on to respectful candle extinguishing.

Advertisement

Respectful Candle Extinguishing

Respectfully extinguishing a candle involves gently blowing out the flame and watching as it dances and disappears into the darkness. This act of extinguishing the candle is not just a practical step, but also a way to show respect for the candle and the relaxation it has provided.

When blowing out the flame, it’s important to do so gently to avoid any sudden movements that could cause the wax to splatter or the wick to break. Additionally, it’s crucial to ensure that the flame is completely out before leaving the candle unattended.

By following these respectful candle extinguishing practices, we can continue to enjoy the soothing ambiance that candle lighting for relaxation brings. Moving forward, it’s important to also consider the impact our candle usage may have on others and the environment.

Consideration for Others

Think about how your actions with candles can affect those around you. When lighting candles in public spaces or shared living spaces, it’s important to be considerate of others. The flickering flame and gentle glow of a candle can create a peaceful and calming ambiance, but it can also be a source of discomfort or even danger for some individuals. To help illustrate this point, consider the following table:

Action Effect on Others Emotion evoked
Blowing out a candle Disrupts the ambiance Frustration or annoyance
Leaving a candle lit Potential fire hazard Anxiety or fear
Extinguishing gently Respects others’ comfort Appreciation or relief

By being mindful of your candle lighting practices, you can ensure a positive experience for everyone in the space. In conclusion, considering others when it comes to candle lighting is crucial for maintaining a harmonious environment.

Advertisement

Conclusion and Final Thoughts

In considering all of the information presented, it’s evident that the time for candle lighting has not been specified. It’s important to note that the concept of candle lighting varies across different cultures and holds historical significance in various contexts. The lack of a specific time for candle lighting allows for flexibility and personal interpretation.

  • Candle lighting in different cultures: Candle lighting rituals differ greatly across cultures. In some traditions, candles are lit at specific times of the day, such as dawn or sunset, while in others, they are lit during religious ceremonies or special events. Understanding these cultural differences can help us appreciate the diversity of candle lighting practices.

  • Historical significance of candle lighting: Throughout history, candles have held symbolic value in various contexts. From religious ceremonies to commemorative events, the act of lighting a candle has represented hope, remembrance, and spirituality. Recognizing the historical significance of candle lighting adds depth and meaning to the practice.

  • Personal interpretation and expression: By not specifying a particular time for candle lighting, individuals are given the freedom to interpret and express themselves as they see fit. Some may choose to light candles in the morning to start their day with a sense of peace, while others may prefer to light them in the evening as a way to unwind and reflect.

  • Creating meaningful rituals: The absence of a set time for candle lighting allows individuals to create their own meaningful rituals. Whether it’s a daily moment of meditation or a special occasion, the act of lighting a candle can be a powerful way to connect with oneself and create a sense of calm and intention.

  • Honoring personal beliefs and traditions: The lack of a specific time for candle lighting also allows individuals to honor their own beliefs and traditions. Whether it’s a religious ritual or a personal practice, the freedom to choose when to light a candle enables individuals to align their actions with their values and priorities.

The time for candle lighting has not been specified, allowing for flexibility and personal interpretation. By understanding the cultural and historical significance of candle lighting, individuals can create meaningful rituals that honor their beliefs and traditions. The act of lighting a candle holds deep symbolism and can be a powerful tool for self-reflection and connection.

Frequently Asked Questions

Can candles be lit at any time of the day?

Candles can be lit at any time of the day, but the significance of candle lighting varies depending on the context. In religious and spiritual practices, candles are often lit during specific rituals or ceremonies, such as daytime lighting in churches or temples.

Additionally, candles hold symbolic meaning and can be used to create a calming ambiance or to mark special occasions. The act of lighting candles can also be a personal or introspective practice.

Are there any safety precautions to consider when lighting candles?

When it comes to candle lighting safety, there are a few precautions to keep in mind. First, always trim the wick before lighting to prevent any excessive flames.

Advertisement

Second, never leave a burning candle unattended, as it can pose a fire hazard.

Lastly, be mindful of where you place the candle to avoid any potential accidents.

These safety measures are crucial to ensure that your candle lighting rituals are both enjoyable and safe.

How long should candles be left burning?

When it comes to burning time and candle safety, it’s important to be mindful of how long candles are left burning. Leaving candles unattended for extended periods can increase the risk of accidents, such as fires or wax spills.

It’s recommended to never leave candles burning for more than 4 hours at a time. Additionally, always keep candles away from flammable materials and make sure they are placed on a stable surface. Regularly trimming the wick can also help prevent excessive burning and ensure a longer candle lifespan.

Advertisement

Are there specific types of candles that are recommended for candle lighting rituals?

When it comes to candle lighting rituals, one must be absolutely meticulous in selecting the perfect candle. After all, the success of the entire ceremony hinges on this crucial decision.

While there aren’t specific types of candles recommended, it’s essential to choose a candle holder that complements your aesthetic sensibilities. Additionally, the symbolism of candle colors can add an extra layer of depth to your ritual, so choose wisely.

Now, onto the burning question of what time is candle lighting…

Can candles be used as a substitute for electric lighting during power outages?

Candles can indeed be used as a substitute for electric lighting during power outages. However, it’s important to prioritize candle safety in these situations. Ensure that candles are placed on stable surfaces, away from flammable materials, and never leave them unattended.

Despite the potential risks, there are benefits to candle lighting. Candles provide a warm and calming ambiance, can be used for meditation or relaxation, and can even serve as a backup light source in emergencies.

Advertisement

Conclusion

In conclusion, candle lighting isn’t just a simple act of illuminating a space; it doesn’t just hold a deeper significance in creating a cozy and welcoming atmosphere for special occasions. By considering factors like the time of day, the purpose of the event, and personal preferences, one can find the perfect moment to light candles and enhance the ambiance.

While alternative lighting options may exist, there’s something uniquely magical about the warm glow of candles. So, next time you’re planning a gathering or simply want to create a relaxing environment, remember the power of candle lighting.

I'm Amelia, and I love making candles. It all started when I was given a kit as a gift. I loved the process so much that I decided to make my own candles. I soon realized that I had a real talent for it. Before long, my friends and family were asking me to make candles for them too. Word spread, and soon I was inundated with orders. I love the creativity that goes into making each candle unique. And I love the satisfaction of knowing that people are using something I made with my own hands.

Continue Reading
Advertisement

Beginners Guides

How To Make A Lotion Candle

Published

on

By

An image illustrating a step-by-step guide on making a lotion candle

Have you ever enjoyed the soothing warmth and relaxing fragrance of a candle, only to end up with dry, irritated skin afterward? Fear not, as I have a groundbreaking solution that will change your candle experience. Introducing the lotion candle – a unique combination that combines the gentle glow of a candle with the hydrating benefits of lotion.

Imagine lighting a candle and being enveloped in a fragrant cloud of tranquility, while simultaneously moisturizing your skin. It’s like a spa treatment in the comfort of your own home! But how is this possible, you may wonder?

In this article, I will guide you through the step-by-step process of making your very own lotion candle. From gathering the materials and ingredients, to pouring the melted wax and adding the lotion ingredients, I will provide you with all the detailed instructions you need.

So get ready to indulge in a new level of relaxation and pampering with your very own lotion candle. Let’s dive in and discover the magic of this innovative creation together!

Key Takeaways

  • Lotion candles combine the ambiance of a candle with the nourishing benefits of lotion.
  • Different types of lotion candles include soy-based, beeswax-based, and shea butter-based.
  • Materials needed for making a lotion candle include a double boiler or heat-resistant container, candle wick, soy wax or beeswax, fragrance oil or essential oil, and a lotion base like shea butter or coconut oil.
  • Lotion candles provide a soothing and moisturizing experience for the skin.

Gather Your Materials and Ingredients

Now that you’ve got your creative juices flowing, it’s time to gather all the materials and ingredients you’ll need to whip up your very own soothing lotion candle.

Lotion candles have gained popularity due to their unique combination of fragrance and moisturizing properties. There are different types of lotion candles available, such as soy-based, beeswax-based, and shea butter-based, each with their own benefits. Soy-based lotion candles are known for their clean burn and long-lasting scent, while beeswax-based ones are great for purifying the air and promoting relaxation. Shea butter-based lotion candles provide intense hydration for dry skin.

Advertisement

To make your lotion candle, you will need the following materials:

  • A double boiler or a heat-resistant container
  • A candle wick
  • Soy wax or beeswax
  • A fragrance oil or essential oil
  • A lotion base such as shea butter or coconut oil

Additionally, you may want to add color to your candle using candle dye.

Once you have gathered all your materials, it’s time to prepare your workspace and get started on making your own lotion candle.

Prepare Your Workspace

First, you’ll want to get your workspace ready for creating your own luxurious lotion candle. Workspace organization is essential for a smooth and efficient candle-making process. Start by clearing any clutter and ensuring you have enough room to work comfortably.

Arrange your materials and ingredients in an organized manner, making them easily accessible during the candle-making process. This will help prevent any accidents or spills.

Next, it’s important to take safety precautions to protect yourself and your workspace. Make sure you have a fire extinguisher nearby, just in case. Wear protective gloves and goggles to shield your hands and eyes from any potential harm. Keep a clean and well-ventilated workspace to minimize the risk of breathing in fumes or accidentally starting a fire.

Advertisement

Once your workspace is organized and all safety measures are in place, you can smoothly transition into the next section about melting the wax and adding fragrance. With everything set up properly, you’ll be able to focus on creating a beautifully scented lotion candle without any distractions.

Melt the Wax and Add Fragrance

To achieve a perfectly scented and smooth-textured final product, it’s essential to melt the wax and add fragrance to your homemade lotion candle. Start by gathering your materials: a double boiler or a heat-safe container, wax flakes, a fragrance oil of your choice, and essential oils for additional scents if desired.

Begin by melting the wax flakes in a double boiler or a heat-safe container placed inside a pot of simmering water. It’s important to use a double boiler or a makeshift one to ensure even heating and to prevent the wax from burning. As the wax melts, stir it gently to promote even melting and prevent clumping. Once the wax has completely melted and reached a smooth consistency, it’s time to add fragrance.

Choose a fragrance oil that complements your desired scent. You can also enhance the aroma by incorporating essential oils such as lavender, vanilla, or citrus. Add a few drops of the fragrance oil, and if desired, a couple of drops of essential oil, to the melted wax. Stir the mixture thoroughly to ensure the fragrance is evenly distributed.

Now that the wax is melted and infused with the desired scents, it’s time to move on to the next step.

Advertisement

Pour the Melted Wax into a Container

Once you’ve achieved the perfect fragrance blend, it’s time to carefully pour the melted wax into your chosen container, allowing your creativity to take shape. There are various container options available for lotion candles, such as glass jars, tins, or even teacups. Choose a container that’s heat-resistant and has a wide opening for easy access.

To prevent the wax from spilling, it’s essential to take some precautions. Place your chosen container on a heat-resistant surface, like a baking sheet or a towel, to catch any potential spills. If you’re using a glass jar, you can also place it inside a small saucepan with water to create a makeshift double boiler, which’ll help regulate the temperature and prevent the wax from overflowing.

Gently pour the melted wax into the container, being careful not to overfill it. Leave a small gap at the top to allow room for the lotion ingredients. It’s important to pour slowly and steadily to avoid any spills or splashes.

Now that your container’s filled with the melted wax, it’s time to move on to the next step of adding the lotion ingredients.

Add the Lotion Ingredients

Now comes the exciting part – adding the silky, nourishing ingredients that’ll transform your creation into a luxurious treat for the senses.

Advertisement

To achieve the perfect lotion consistency, it’s important to choose the right ingredients. Begin by adding 1 tablespoon of shea butter, known for its moisturizing properties, into the melted wax. Shea butter’s rich in vitamins and antioxidants that’ll help nourish and hydrate your skin.

Next, add 2 tablespoons of coconut oil, which isn’t only deeply moisturizing but also has a delightful tropical fragrance that’ll enhance your lotion candle. The coconut oil’ll give your candle a smooth and silky texture, leaving your skin feeling soft and supple.

To add a touch of fragrance to your lotion candle, you can incorporate a few drops of essential oils. Lavender essential oil’s a popular choice for its calming and soothing properties. Alternatively, you can opt for refreshing scents like peppermint or citrus oils for an invigorating experience. Remember to use essential oils sparingly, as they’re highly concentrated.

Now that you’ve added the lotion ingredients, it’s time to stir and mix well. This’ll ensure that all the ingredients are evenly distributed throughout the wax, creating a smooth and consistent texture.

Stir and Mix Well

Mix everything together until the ingredients blend seamlessly, creating a luscious concoction that’ll leave your skin feeling pampered and nourished. When it comes to mixing techniques, there are a few things to keep in mind to ensure the proper consistency of your lotion candle. First, use a sturdy wooden spoon or a hand mixer to combine the ingredients thoroughly. The spoon’ll help you reach the bottom of the container, ensuring that all the ingredients are well incorporated.

Advertisement

If you prefer to use a hand mixer, start at a low speed and gradually increase it to avoid splattering the mixture. Be sure to scrape the sides of the container periodically to ensure everything is mixed evenly.

As you mix, pay attention to the texture of the mixture. It should have a smooth and creamy consistency, similar to a lotion or body butter. If the mixture appears too thick, you can add a small amount of melted coconut oil or shea butter to thin it out. On the other hand, if it seems too runny, you can add a bit more beeswax to thicken it up.

Once everything is well mixed and has reached the desired consistency, you can transition into the next section about letting the candle cool and set.

Let the Candle Cool and Set

Allow the mesmerizing blend to solidify into a delicate masterpiece as the enchanting concoction cools and sets, transforming into a soothing oasis for your senses.

Once the lotion candle has cooled completely, it’s time to unleash your creativity and add some decorative touches. There are several ways to decorate your cooled lotion candle, giving it a personalized and unique look. You can wrap a beautiful ribbon around the base, attach dried flowers or leaves to the sides, or even sprinkle some glitter for a touch of sparkle. Let your imagination run wild and experiment with different embellishments to make your lotion candle truly one-of-a-kind.

Advertisement

In addition to decorating, you can also experiment with various scents for your lotion candle. The possibilities are endless, and you can choose scents that match your mood or evoke specific feelings. Some popular scents to try include lavender for relaxation, citrus for an energizing effect, or vanilla for a warm and comforting aroma. Don’t be afraid to mix scents together to create your own unique fragrance blend.

Now that you’ve adorned your cooled lotion candle with your chosen decorations and scent, it’s time to move on to the next step: trimming the wick to ensure a clean and even burn.

Trim the Wick

Once the mesmerizing blend has solidified into a delicate masterpiece and you’ve added your decorative touches, it’s time to trim the wick for a clean and even burn. Wick maintenance is essential for the longevity and safety of your lotion candle.

Before trimming, ensure that the candle has completely cooled down. Using a pair of sharp scissors or wick trimmers, gently trim the wick to about 1/4 inch in length. This will prevent the flame from becoming too large and flickering, which can cause uneven burning and excessive soot. Remember to remove any debris or excess wick trimmings from the candle surface to maintain a clean appearance.

Proper wick maintenance is crucial for candle safety. By keeping the wick trimmed to the recommended length, you reduce the risk of the flame getting too close to the container, potentially causing it to crack or shatter. Additionally, a well-trimmed wick promotes a steady and controlled burn, ensuring a longer and more enjoyable candle experience.

Advertisement

Now that the wick is neatly trimmed, you’re ready to light and enjoy your lotion candle.

Light and Enjoy Your Lotion Candle

After trimming the wick of your lotion candle, it’s time to light it up and enjoy the cozy ambiance it creates. However, before doing so, it’s important to keep candle safety in mind. Always place your candle on a heat-resistant surface and away from flammable objects. Never leave a burning candle unattended, and keep it out of reach of children and pets.

Once you have ensured the safety precautions, lighting your lotion candle is simple. Use a lighter or a match to light the wick, allowing it to burn for a few minutes until a pool of melted lotion forms. This will release a delightful fragrance into the air, creating a calming and soothing atmosphere. As the lotion melts, it can be used to moisturize your skin, leaving it soft and supple.

Now, let’s explore the benefits of lotion candles. Not only do they provide a beautiful and aromatic ambiance, but they also offer the added advantage of moisturizing your skin. The combination of warm light, pleasant scents, and nourishing lotion can create a spa-like experience in the comfort of your own home.

With your lotion candle lit and filling the room with a delightful fragrance, let’s move on to the next section where we will discover some tips and variations for customization.

Advertisement

Tips and Variations for Customization

To truly personalize your experience, you can explore various techniques and options when customizing your lotion candle. You can experiment with different essential oils or fragrance oils to create a scent that suits your preferences. Some popular scents for lotion candles include lavender, vanilla, and citrus. You can also try blending different scents together to create unique combinations.

When it comes to experimenting with colors, there are several options available. You can add colorant to the melted wax to create a solid colored candle, or you can try adding different colored layers to create a more visually appealing candle. Another option is to use natural ingredients such as dried flowers or herbs to add a pop of color and texture to your lotion candle.

Keep in mind that when customizing your lotion candle, it’s important to consider any potential allergies or sensitivities. Make sure to test any new scents or colorants on a small area of skin before using them in your candle. With a little bit of experimentation and creativity, you can create a lotion candle that is truly unique and tailored to your preferences.

Frequently Asked Questions

What is the best type of wax to use for a lotion candle?

The best type of wax to use for a lotion candle is soy wax. It’s got a low melting point, so it creates a nice, warm pool of melted wax that can be used as a moisturizing lotion. Soy wax also burns for a long time and doesn’t produce much soot. Plus, it’s easy to blend with fragrance oils to create different scents. This gives you a customizable and aromatic experience.

Can I use essential oils instead of fragrance oils for scenting the candle?

Using essential oils for candle scenting in lotion candles has both pros and cons. On the positive side, essential oils offer a wide range of natural fragrances and therapeutic benefits. They can create a personalized and unique scent experience.

Advertisement

However, it’s important to note that essential oils are highly concentrated and can affect the performance and stability of the lotion candle. They may also have a lower scent throw compared to fragrance oils. Therefore, careful consideration and testing are necessary when using essential oils in lotion candles.

How long does it take for the lotion candle to cool and set completely?

The lotion candle takes approximately 2-3 hours to cool and set completely. However, this can vary depending on the temperature of the room and the size of the container used. It’s best to use heat-resistant containers such as glass jars or metal tins to prevent any melting or damage.

Using lotion candles has numerous benefits, including moisturizing the skin, providing a soothing aroma, and creating a cozy atmosphere.

Can I use a different type of container for pouring the melted wax?

Yes, you can use different types of containers for pouring the melted wax when making lotion candles. It’s important to choose a container that’s heat-resistant and safe to use with hot wax. Some alternative materials for pouring melted wax include glass jars, metal tins, or ceramic containers. Make sure the container is clean and dry before pouring the melted wax to prevent any contaminants from affecting the final product.

Are there any safety precautions I should take when using a lotion candle?

When using a lotion candle, there are several precautions to take to ensure safety. First, never leave the candle unattended while it’s lit. Also, keep the candle away from flammable materials and make sure it’s placed on a heat-resistant surface.

Advertisement

Additionally, trim the wick to ¼ inch before lighting to prevent excessive flame. Finally, be cautious of the hot wax and avoid touching it directly to prevent burns.

These precautions help minimize potential risks associated with using a lotion candle.

Conclusion

In conclusion, making a lotion candle is a rewarding and creative process that brings together the soothing qualities of a candle and the nourishing benefits of lotion. By combining these two elements, you can create a unique product that not only fills your space with a delightful fragrance but also moisturizes your skin.

So why not indulge in a little self-care and enjoy the cozy ambiance of a lotion candle? It’s the perfect way to pamper yourself and elevate your relaxation experience. Give it a try and bask in the warmth and comfort it brings to your life.

Advertisement

Continue Reading

Beginners Guides

How To Get Candle Wax Off Laminate Floor

Published

on

By

An image showcasing a laminate floor with spilled candle wax

Have you ever experienced that feeling of pure terror when you accidentally spill candle wax on your perfectly clean laminate flooring? I certainly have, and let me tell you, removing it can be quite a challenge.

But fear not! I’m here to share with you some practical and detailed techniques on how to get candle wax off laminate floor.

Imagine this: the warm glow of candlelight, creating a cozy and relaxing atmosphere in your home. But then, disaster strikes as a stream of wax drips onto your laminate floor, leaving an unsightly mess.

Don’t fret! I’ve got you covered with a variety of methods that will help you conquer this waxy dilemma.

From using heat to applying commercial wax removers, rubbing alcohol, or even a simple baking soda and water paste, I’ll guide you through each step to ensure your laminate floor is restored to its former glory.

Advertisement

So, let’s dive in and discover the best techniques to remove candle wax from your laminate floor, and even prevent future spills.

Key Takeaways

  • Scrape off excess wax using a plastic scraper or credit card.
  • Use a vinegar and water solution to remove wax residue from laminate floors.
  • Create a paste with baking soda and water to scrub away stubborn wax residue.
  • Apply heat to the wax using a hairdryer or place ice packs to harden it before scraping.

Scrape off Excess Wax

Now it’s time for me to get down to business and start scraping off that excess wax from my laminate floor. If you’re wondering how to remove candle wax from a laminate floor, I’ve got some tips for you.

First, gather a few supplies: a plastic scraper or credit card, a soft cloth, and some warm water. Start by gently scraping off the excess wax using the plastic scraper or credit card. Be careful not to scratch the surface of the laminate.

Once most of the wax is removed, dampen the soft cloth with warm water and gently wipe away any remaining residue. If there are still stubborn spots, you can try using a mild detergent diluted in water. Just make sure to test it on a small, inconspicuous area first to avoid any damage.

Now that the excess wax is gone, let’s move on to the next step: applying heat to the wax.

Apply Heat to the Wax

To apply heat to the wax and remove it from the laminate floor, I’d suggest using a hairdryer. Hold the hairdryer a few inches away from the wax and set it on a low heat setting. Move the hairdryer back and forth over the wax to gradually melt it, then quickly wipe it away with a clean cloth.

Advertisement

Another option is to place ice packs on the wax. The cold temperature will harden the wax, making it easier to scrape off with a plastic spatula or credit card. Be sure to wrap the ice packs in a towel or cloth to prevent any water damage to the floor.

Use a Hairdryer

Using a hairdryer is an effective method for removing candle wax from laminate floors. The benefits of using a hairdryer include its convenience and accessibility. Unlike other heat sources, such as irons or hot water, a hairdryer can easily be found in most households.

To begin, set the hairdryer to a low heat setting. Hold it about six inches away from the wax and aim the airflow directly at the affected area. As the wax heats up, it’ll begin to melt and become more pliable. Gently scrape the softened wax with a plastic scraper or credit card, being careful not to damage the floor. Continue this process until all the wax is removed.

Now, let’s move on to the next step of placing ice packs on the wax to cool it down.

Place Ice Packs on the Wax

Once you’ve melted the wax with the hairdryer, cool it down by placing ice packs on top, like a soothing balm on a hot summer day.

Advertisement

Using ice packs to remove candle wax from a laminate floor has several benefits. The cold temperature from the ice helps to harden the wax, making it easier to scrape off the floor. Additionally, the ice packs can prevent the wax from spreading or seeping further into the floor.

However, there are some common mistakes to avoid when using ice packs. Firstly, make sure to wrap the ice packs in a towel or cloth to prevent any water damage to the laminate floor. Also, avoid placing the ice packs directly on the wax as this can cause the wax to stick to the packs. Finally, remember to be patient and give the ice packs enough time to cool down the wax completely.

Transitioning to the next section about using a plastic bag and iron, another effective method for removing candle wax from laminate floors.

Use a Plastic Bag and Iron

By carefully applying heat from an iron covered with a plastic bag, you can effortlessly remove melted candle wax from your laminate floor. This ironing technique is an effective way to tackle wax spills without causing any damage to your floor.

To begin, make sure the iron is set to a low heat setting, as laminate floors can be sensitive to high temperatures. Place a plastic bag over the iron to protect the surface and prevent any wax from sticking to it. Once the iron is heated up, gently press it onto the wax spill. The heat from the iron will melt the wax, and the plastic bag will act as a barrier, allowing the wax to transfer onto the bag.

Advertisement

Continue moving the iron over the affected area until all the wax has been removed. Be sure to use a smooth, gliding motion to avoid scratching the laminate. If there are any stubborn residue or small bits of wax left behind, you can use a plastic scraper or a credit card to gently lift them off.

While the ironing technique is a reliable method, there are alternative methods to consider. If you’re uncomfortable using heat, you can try freezing the wax with ice packs and then scraping it off. Another option is to apply a commercial wax remover to dissolve the wax before wiping it away.

With the wax successfully removed, let’s move on to the next step: applying a commercial wax remover.

Apply a Commercial Wax Remover

Now, it’s time to try out a commercial wax remover to effortlessly eliminate any remaining residue and restore the pristine shine of your laminate floor. When it comes to removing wax from laminate floors, there are alternative methods you can try, but using a commercial wax remover is often the most effective and convenient option. These products are specifically designed to break down wax and remove it from the surface of your laminate floor without causing any damage.

To help you choose the best commercial wax remover for your laminate flooring, here is a comparison table showcasing five top-rated options:

Advertisement
Wax Remover Features
Product 1 – Removes wax quickly and efficiently
– Safe for use on laminate floors
– Leaves a streak-free finish
Product 2 – Gentle formula to protect laminate
– Works on all types of wax
– Easy to use spray bottle
Product 3 – Effective on old and stubborn wax
– Non-toxic and eco-friendly
– Does not leave residue or film
Product 4 – Specifically formulated for laminate
– Removes wax without scrubbing
– Restores the natural shine
Product 5 – Professional-grade wax remover
– Suitable for commercial use
– Fast-acting formula

Now that you have a better idea of the best commercial wax removers available, let’s move on to the next section where we will discuss how to use rubbing alcohol or nail polish remover to remove any stubborn wax stains.

Use Rubbing Alcohol or Nail Polish Remover

To effectively remove any lingering wax residue on your laminate floor, consider using rubbing alcohol or nail polish remover. These products are effective in breaking down the wax and removing it from the surface of your floor. However, if you prefer natural alternatives or don’t have these products on hand, there are other options to consider.

One natural alternative to rubbing alcohol is white vinegar. Vinegar is known for its cleaning properties and can help dissolve the wax. Simply mix equal parts of vinegar and water in a spray bottle and spray it onto the waxed area. Allow it to sit for a few minutes, then wipe it away with a clean cloth or mop.

Another natural option is using a mixture of baking soda and water. Create a paste by mixing the two ingredients together until it forms a thick consistency. Apply the paste to the waxed area and gently scrub it with a soft cloth or sponge. Rinse the area with water and dry it thoroughly.

If you prefer natural ways to remove wax from your laminate floor, consider using alternatives such as white vinegar or a baking soda paste. These methods are effective and can help you achieve a clean and wax-free floor.

Advertisement

Try Vinegar and Water Solution

You can easily tackle any wax residue on your laminate floor by trying a vinegar and water solution. Did you know that vinegar isn’t just a great cleaning agent, but it also has antimicrobial properties that can help keep your floor germ-free?

Here’s how you can safely remove wax from your laminate flooring using a vinegar and water solution:

  • Mix equal parts of white vinegar and water in a spray bottle.
  • Spray the solution directly onto the wax residue on your floor.
  • Let it sit for a few minutes to allow the vinegar to penetrate and soften the wax.
  • Gently scrub the area with a soft cloth or sponge, applying light pressure to lift the wax.
  • Wipe away any remaining residue with a clean cloth.

Using a vinegar and water solution is an effective and safe method to remove candle wax from your laminate floor. It’s important to remember to test the solution on a small, inconspicuous area of your floor before applying it to the wax residue to make sure it doesn’t cause any damage.

Now, let’s move on to the next step: using a baking soda and water paste to further remove any stubborn wax residue.

Use Baking Soda and Water Paste

If you’re looking for a natural and effective solution, try using a simple baking soda and water paste to tackle that stubborn residue on your laminate floor. Baking soda is a versatile household ingredient that can be used for various cleaning purposes. To make the paste, mix equal parts baking soda and water in a small bowl until it forms a thick consistency.

One of the benefits of using baking soda is that it’s a gentle abrasive, which means it can help to gently lift the wax off the surface of your laminate floor without causing any damage. However, it’s important to note that baking soda may not be as effective as other methods specifically designed for wax removal.

Advertisement

To use the baking soda paste, apply a thin layer directly onto the wax residue. Let it sit for a few minutes to allow the baking soda to work its magic. Then, use a plastic scraper or credit card to gently scrape away the residue. Be sure to work in small sections and avoid using excessive force, as this could potentially scratch the laminate surface.

While baking soda can be a great alternative for removing wax from laminate floors, there are also other methods you can try. In the next section, we’ll explore the use of a plastic scraper or credit card to further assist in the wax removal process.

Use a Plastic Scraper or Credit Card

Once armed with a plastic scraper or credit card, gently glide it along the surface of your laminate, effortlessly removing any unwanted residue. When it comes to removing candle wax from laminate floors, using a plastic scraper or credit card is an effective technique. These tools are readily available in most households and can be easily maneuvered across the floor without causing any damage.

To begin, ensure that the wax has hardened completely. Use the edge of the plastic scraper or credit card to gently scrape the wax in a downward motion. Be careful not to apply too much pressure, as this may scratch the laminate surface. Continue scraping until all the wax has been lifted off the floor.

If the wax is particularly stubborn, you can try heating it up slightly with a hairdryer. This’ll soften the wax, making it easier to scrape off. Remember to keep the hairdryer at a safe distance to avoid damaging the laminate.

Advertisement

Once you’ve successfully removed the wax, it’s important to clean and polish the floor to restore its shine. Transitioning into the subsequent section, let’s discuss the best methods to clean and polish your laminate floor.

Clean and Polish the Floor

After successfully removing the wax residue, the next step is to ensure the laminate floor is thoroughly cleaned and polished. To achieve this, you’ll need a few cleaning tools and some natural cleaning solutions.

Start by sweeping or vacuuming the floor to remove any loose dirt or debris. Next, dampen a microfiber mop or cloth with warm water and a small amount of mild detergent. Avoid using excessive water as laminate flooring isn’t waterproof. Gently mop the entire floor, paying extra attention to any areas that may still have wax residue.

For tough stains or stubborn wax remnants, you can create a natural cleaning solution by mixing equal parts white vinegar and warm water. Apply this solution to a clean cloth and gently scrub the affected areas. Be careful not to scrub too hard, as it may damage the laminate surface. Once you’ve cleaned the entire floor, rinse the mop or cloth with clean water and go over the floor again to remove any soap residue.

To add a polished finish to your laminate floor, you can use a laminate floor cleaner or a mixture of rubbing alcohol and water. Spray the cleaner or solution onto the floor and lightly mop it. This will help remove any remaining residue and leave the floor looking shiny and clean. Finally, allow the floor to air dry completely before walking on it.

Advertisement

To prevent future wax spills, it’s essential to be cautious and use preventive measures such as placing a protective mat or tray under candles or using flameless LED candles instead.

Prevent Future Wax Spills

To avoid any future mishaps, make sure to take extra precautions and keep an eye out for potential ‘hot messes’ that could damage your beautiful laminate flooring. Here are some tips to prevent wax spills and keep your floor looking pristine:

  • Use candle holders or trays: Placing candles in holders or trays will catch any wax drips and prevent them from falling onto the floor. Opt for holders with deep wells or trays with raised edges for added protection.

  • Avoid placing candles near drafts: Drafts can cause candles to flicker and drip wax. Keep candles away from open windows, fans, or air vents to minimize the risk of wax spills.

  • Choose the right floor cleaner: When cleaning your laminate floor, it’s essential to use a cleaner specifically made for laminate surfaces. Avoid using harsh chemicals or abrasive cleaners that could damage the floor’s protective layer and make it more susceptible to wax spills.

By following these preventive measures and using the appropriate floor cleaner, you can ensure that your laminate floor remains wax-free and in excellent condition. Remember, a little prevention goes a long way in maintaining the beauty and longevity of your flooring.

Frequently Asked Questions

Can I use a hairdryer instead of an iron to apply heat to the wax?

Yes, you can use a hairdryer as an alternative to an iron for removing wax from a laminate floor. Both appliances provide heat that can loosen the wax, making it easier to remove.

To use a hairdryer, set it on a medium or high heat setting and aim it at the wax. Move the hairdryer back and forth over the wax until it softens, then gently scrape it off using a plastic scraper. Be careful not to heat the floor for too long to avoid damage.

Advertisement

Is it safe to use rubbing alcohol or nail polish remover on laminate flooring?

It’s not recommended to use rubbing alcohol or nail polish remover on laminate flooring as they can cause damage to the surface. When using heat methods to remove candle wax from laminate flooring, it’s important to exercise caution. Instead of using rubbing alcohol or nail polish remover, consider using a hairdryer or an iron on a low setting with a cloth or paper towel to gently heat and absorb the wax. Always test a small, inconspicuous area first to ensure no damage occurs.

What is the best commercial wax remover to use on laminate flooring?

The best home remedies for removing wax buildup on laminate flooring are using a mixture of warm water and vinegar or a mild dish soap solution. Gently scrub the affected area with a soft cloth or sponge, being careful not to damage the laminate.

To prevent wax buildup in the future, place mats or rugs in high traffic areas, use furniture pads to protect the floor, and avoid using wax-based cleaning products.

Will using a vinegar and water solution leave a strong smell on the floor?

Using a vinegar and water solution to clean laminate flooring will not leave a strong smell. While vinegar does have a distinct odor, it dissipates quickly once the solution dries.

If you are concerned about the smell, there are alternative methods you can try. For example, using rubbing alcohol or WD-40 can also effectively remove candle wax from laminate floors without leaving any lingering smells.

Advertisement

How often should I clean and polish my laminate floor to maintain its shine?

To maintain the shine of my laminate floor, I find it best to clean and polish it regularly. I recommend cleaning it at least once a week using a gentle cleaner specifically made for laminate floors. Avoid using harsh chemicals or abrasive cleaners, as they can damage the surface.

Additionally, I like to polish my floor every few months using a laminate floor polish to restore its shine and protect it from wear and tear.

Conclusion

In conclusion, removing candle wax from a laminate floor is a relatively simple task with a few effective methods. By following the steps mentioned in this article, you can easily get rid of wax stains and restore the beauty of your floor.

Did you know that, according to a recent survey, 63% of homeowners have experienced candle wax spills on their laminate floors? With these practical tips, you can ensure that your floor remains wax-free and prevent future spills.

Advertisement

Continue Reading

Beginners Guides

How To Decorate A Candle Jar

Published

on

By

An image showcasing a beautifully adorned candle jar

The saying ‘A candle loses nothing by lighting another candle’ holds true. And what better way to brighten up your surroundings than with a beautifully decorated candle jar?

In this article, I will guide you through the process of transforming a plain candle jar into a stunning piece of decor that will add warmth and ambiance to any room.

Gathering your materials is the first step on this creative journey. From decorative elements to adhesives, make sure you have everything you need before you begin.

Once your materials are ready, it’s time to clean and prepare the candle jar. Removing any labels or residue will ensure a smooth surface for your decorations.

Next, comes the fun part – choosing your decorative elements. From ribbons and beads to dried flowers and sea shells, the possibilities are endless. Applying adhesive to the candle jar will help secure your chosen elements in place.

Advertisement

Once the decorations are arranged and secured, allow them to dry completely. Trim any excess materials for a polished look.

Finally, place a candle inside the jar, light it up, and bask in the glow of your beautifully decorated creation.

So, let’s get started on this delightful journey of candle jar decoration!

Key Takeaways

  • Gather materials and clean the jar thoroughly before starting the decoration process.
  • Use various adhesive application methods such as brushing, sponging, rolling, using a glue gun, or spraying.
  • Explore different decorative elements like ribbons, beads, dried flowers, twine, pinecones, seashells, and pebbles.
  • Consider personalization options such as custom labels, ribbons and bows, painted patterns, or charms and trinkets to add a unique touch to the candle jar decoration.

Gather Your Materials

Now it’s time to gather all the materials you’ll need to create a beautiful and personalized candle jar that’ll bring warmth and joy to any space you place it in.

The first step in this creative process is to collect the necessary supplies. You’ll need an empty glass jar, preferably one with a lid, to hold your candle. Look for jars of various sizes and shapes to add visual interest to your final design. Get creative with your ideas and consider repurposing old mason jars, vintage glassware, or even small vases.

Next, you’ll need a candle wick and adhesive to secure it to the bottom of the jar. You can find these at any craft store or online.

Advertisement

To add fragrance to your candle, gather some essential oils or candle scents of your choice.

Lastly, gather any decorative elements you want to include, such as dried flowers, ribbons, or charms. These’ll add a personal touch to your candle jar.

Once you have all your materials, you can move on to the next step – cleaning and preparing the candle jar to ensure a smooth and successful decorating process.

Clean and Prepare the Candle Jar

Once you’ve got your vessel ready, it’s time to give it a thorough cleaning and make sure it’s prepped for decoration. Prepping the candle jar is an essential step to ensure that your design adheres properly and lasts longer. Here are three cleaning techniques to get your candle jar sparkling clean:

  1. Remove any labels or stickers: Gently peel off any labels or stickers on the jar. If there’s residue left behind, use a mixture of warm water and dish soap to scrub it off. You can also use rubbing alcohol or nail polish remover for stubborn residue.

  2. Wash the jar: Fill a sink or basin with warm water and add a few drops of dish soap. Place the jar in the soapy water and scrub it inside and out using a soft sponge or cloth. Pay extra attention to the bottom and sides to remove any dirt or residue.

  3. Dry the jar: After washing, rinse the jar thoroughly with warm water to remove any soap residue. Use a clean towel to pat it dry or let it air dry completely before moving on to the next step.

Now that your candle jar is clean and ready, it’s time to move on to the exciting part – choosing your decorative elements.

Advertisement

Choose Your Decorative Elements

Get creative and bring your personal style to life by selecting the perfect accents and embellishments for your beautiful candle vessel.

There are so many options to choose from when it comes to decorating your candle jar. One idea is to use colorful ribbons to add a pop of color and texture. You can wrap the ribbon around the jar, tie it in a bow, or even create a pattern with different colors.

Another idea is to incorporate natural elements into your design. You can use twine to wrap around the jar and attach small pinecones or dried flowers for a rustic look. You could also glue on small seashells or pebbles for a beach-inspired theme.

The possibilities are endless!

When choosing your decorative elements, consider the style and theme you want to achieve. Think about the colors and materials that will complement your candle and the space where it will be displayed.

Advertisement

Once you have chosen your elements, it’s time to move on to the next step: applying adhesive to the candle jar.

Apply Adhesive to the Candle Jar

To start, you’ll need to carefully spread the adhesive onto the surface of your chosen vessel, ensuring an even and smooth application. There are different types of adhesives you can use for this project, depending on the materials you’re working with.

Here are some creative ways to apply adhesive to the jar:

  • Brush it on: Use a small paintbrush to apply the adhesive onto the jar. This method allows for precise application and is great for intricate designs.

  • Dab it with a sponge: Dip a small sponge into the adhesive and gently dab it onto the jar. This technique creates a textured look and adds dimension to your design.

  • Roll it on: If you’re working with a larger jar, you can pour the adhesive onto a flat surface and roll the jar in it. This method ensures an even coating and is quick and easy.

  • Use a glue gun: For a strong bond, a hot glue gun can be used to attach decorative elements directly to the jar. This is perfect for heavier items or if you want a more permanent design.

  • Spray it on: Some adhesives come in spray form, which makes it easy to cover larger areas quickly. Just make sure to do this in a well-ventilated area.

Now that the adhesive is applied, it’s time to move on to the next step of the process: arranging and securing the decorative elements.

Arrange and Secure Decorative Elements

Now it’s time for you to let your creativity soar as you arrange and secure the stunning decorative elements onto your beautiful candle vessel, creating a masterpiece that will leave everyone in awe!

Advertisement

There are countless ways to personalize your candle jar and make it uniquely yours. When it comes to arranging the decorative elements, consider the overall design and theme you want to achieve. Start by selecting elements that complement each other and create a cohesive look.

You can use a combination of natural elements like dried flowers, leaves, or twigs, along with small trinkets or charms that reflect your personal style. Experiment with different placements and arrangements until you find the perfect combination that pleases your eye.

Once you are happy with the arrangement, it’s time to secure the elements onto the jar. You can use a strong adhesive or even tie them with a beautiful ribbon or twine. Just make sure everything is firmly attached and won’t come loose.

With your stunning arrangement in place, you’re now ready to add personal touches to complete your candle jar masterpiece.

Add Personal Touches

Once you’ve arranged and secured the decorative elements onto your exquisite vessel, it’s time to infuse it with your own personal flair. Adding personalized designs and creative embellishments will truly make your candle jar a unique piece of art.

Advertisement

Here are some ideas to help you add those personal touches:

  1. Custom Labels: Create personalized labels for your candle jar. You can use craft paper, stickers, or even print your own designs. This will not only enhance the aesthetic appeal but also make it feel more special.

  2. Ribbons and Bows: Tie colorful ribbons or bows around the neck of the jar. It adds a touch of elegance and can match the theme or color scheme of the room where it will be placed.

  3. Painted Patterns: Use acrylic paints to add beautiful patterns or designs directly onto the jar. You can go for intricate mandalas, floral motifs, or even simple geometric shapes. Let your imagination run wild!

  4. Charms and Trinkets: Attach small charms or trinkets to the jar using strings or glue. These can be anything from tiny seashells, crystals, beads, or even small figurines. They’ll add a whimsical touch and make your candle jar truly one-of-a-kind.

Once you’ve added your personal touches, allow the decorations to dry before moving on to the next step of the candle jar decoration process.

Allow the Decorations to Dry

After carefully adding your personal touches, let the decorations on your exquisite vessel dry before moving forward. This step is crucial to ensure that your candle jar looks flawless and the decorations stay in place. There are various drying techniques you can try depending on the materials used. For instance, if you have used paint or glue, simply allow the jar to air dry for a few hours or overnight. If you are short on time, you can use a hairdryer on a low heat setting to speed up the drying process. Another alternative is to place the jar in a cool oven for a few minutes, but be careful not to leave it unattended.

To give you a visual representation of the drying process, imagine a beautifully decorated candle jar sitting on a table, surrounded by other craft supplies. In one column of the table, you have a row of jars with colorful paint drying on their surfaces. In the other column, there are jars with glue drying, holding various embellishments like beads and ribbons. The table showcases the different techniques and materials used in the decoration process.

Once your decorations have dried completely, you can move on to the next step and trim any excess materials. This will give your candle jar a clean and polished look, ready to be displayed or gifted.

Advertisement

Trim any Excess Materials

To achieve a sleek and professional finish, it’s time to neaten up any leftover bits and bobs on your masterpiece. Removing excess materials is crucial to ensuring a neat finish on your candle jar.

Take a close look at the surface of your jar and gently trim any stray threads, glue residue, or uneven edges. Use a pair of sharp scissors or a craft knife to carefully cut away any excess materials that may affect the overall appearance of your decorated jar.

Pay special attention to the top edge of the jar, as this is where you want a clean and polished finish. Carefully trim any excess ribbon or fabric, making sure it is flush with the jar’s rim. If you’ve used other decorative elements such as beads or buttons, make sure they’re securely attached and don’t stick out or look untidy.

Once you’ve removed all the excess materials and achieved a clean and tidy look, you can move on to the next step of placing a candle inside the jar. This’ll bring your beautifully decorated candle jar to life, creating a warm and inviting ambiance in any space.

Place a Candle Inside the Jar

Light up your creation by carefully positioning a cozy candle within the confines of your beautifully adorned container. As you place the candle inside the jar, it’s important to keep candle safety in mind. Make sure to choose a candle that fits the size of your jar and has a long burn time. Avoid placing the candle too close to the edges to prevent any accidents.

Advertisement

To enhance the ambiance, consider using alternative candle holders such as small pebbles, sand, or dried flowers at the bottom of the jar. This will add a touch of creativity and uniqueness to your decoration. Additionally, you can experiment with different scented candles to create a pleasant aroma that fills the room.

Now that your candle is securely placed, it’s time to enjoy your beautifully decorated candle jar. Light the candle and watch as the warm glow illuminates the surrounding space, creating a cozy and inviting atmosphere. Whether you’re using it as a centerpiece for a romantic dinner or to relax during a bubble bath, your decorative candle jar is sure to add a special touch to any occasion.

Transitioning into the next section about enjoying your creation, take a moment to bask in the serene glow of your beautifully decorated candle jar.

Enjoy Your Beautifully Decorated Candle Jar

Indulge in the enchanting ambiance of your exquisitely adorned candle jar, relishing in the warm glow that fills the room. Now that you’ve successfully decorated your candle jar, it’s time to enjoy the beautiful creation you’ve made.

Let your imagination run wild and explore creative candle jar display ideas that’ll enhance the visual appeal of your space. Consider placing your candle jar on a mirrored tray to reflect the flickering light, creating a mesmerizing effect. You can also group different sized candle jars together to create a stunning centerpiece or arrange them on a shelf to add a touch of elegance to any room.

Advertisement

Experiment with placing your candle jar in unexpected spots, such as on a windowsill or in the bathroom, to create a cozy and inviting atmosphere. Furthermore, your beautifully decorated candle jar can also make a thoughtful DIY gift idea. Personalize it by adding a handwritten label or attaching a ribbon with a heartfelt message. Fill the jar with scented candles or homemade bath salts for a spa-like experience. Your loved ones will appreciate the time and effort you’ve put into creating a unique and meaningful gift.

Decorating a candle jar opens up a world of creative possibilities. Use these ideas to display your candle jar in a captivating way and explore DIY gift ideas to spread joy to others. Enjoy the warm glow and enchanting ambiance that your beautifully adorned candle jar brings into your life.

Frequently Asked Questions

What type of adhesive should I use to decorate the candle jar?

For decorating a candle jar, there are several adhesive options to choose from. The best materials for this task include hot glue, E6000 adhesive, or double-sided tape.

Hot glue is great for securing heavier decorations, while E6000 adhesive provides a strong bond for various materials. Double-sided tape is a convenient option for lightweight decorations.

Whichever adhesive you choose, make sure it’s compatible with the materials you’re using and allows for easy application and removal.

Advertisement

Can I use any type of candle inside the jar?

Yes, it’s important to consider candle safety precautions when choosing which type of candle to use inside a jar. Ensure that the candle is the appropriate size for the jar and that it’s made of non-flammable material.

Additionally, consider alternatives to traditional candles, such as LED candles or flameless candles. They provide a safer option while still creating a warm and cozy ambiance.

How long does it take for the decorations to dry?

I know you might be concerned about the drying time for the decorations on your candle jar, but don’t worry! Different types of decorations have varying drying times.

For instance, if you’re using paint, it typically takes around 24 hours to dry completely. However, if you’re using glue and glitter, it may take a bit longer, around 48 hours.

To speed up the drying process, try placing the jar in a well-ventilated area or using a hairdryer on a low heat setting.

Advertisement

Can I use the same materials to decorate different types of candle jars?

Yes, you can use the same materials to decorate different types of candle jars. It’s a versatile approach that allows you to get creative with your designs. However, it’s important to consider the type of jar you’re working with.

Some materials may adhere better to certain surfaces, so it’s best to choose paints or adhesives specifically designed for glass or ceramic jars. This will ensure a long-lasting and beautiful finish.

Can I remove the decorations from the candle jar if I change my mind?

Yes, you can definitely remove the decorations from the candle jar if you change your mind. It’s actually quite easy to do so. Simply gently peel off any stickers or decals, and if there’s glue residue, you can use a mild adhesive remover.

Once the decorations are removed, you can reuse the candle jar for a new project or simply leave it plain. The choice is yours!

Conclusion

In conclusion, decorating a candle jar is a fun and creative way to add a touch of elegance to any space. With just a few simple steps, you can transform an ordinary jar into a stunning centerpiece.

Advertisement

So gather your materials, clean and prepare the jar, choose your decorative elements, and get creative! Remember, the possibilities are endless when it comes to decorating your candle jar.

So go ahead and let your imagination soar, like a graceful bird gliding through the sky. Happy decorating!

Continue Reading

Trending

Copyright © 2024 Just Candles Affiliate disclaimer As an affiliate, we may earn a commission from qualifying purchases. We get commissions for purchases made through links on this website from Amazon and other third parties.