Connect with us

Candles

How to Wrap a Candle as a Gift

Intriguingly transform a simple candle into a stunning gift with meticulous wrapping techniques that elevate the art of gifting.

Published

on

gift wrapping a candle

Selecting the perfect packaging is crucial for presenting a candle as a gift.

But what follows is just as crucial. Ensuring the candle remains snug and secure within its wrapping requires attention to detail and a touch of creativity.

From the choice of paper to the final decorative touches, each step plays a vital role in presenting a beautifully wrapped gift.

Let's explore the art of wrapping a candle to perfection, step by step.

Key Takeaways

  • Choose high-quality wrapping materials for an elegant presentation.
  • Consider eco-friendly and sustainable wrapping paper options.
  • Measure and cut the wrapping paper with precision for a neat appearance.
  • Secure the wrapped candle with a ribbon for a finishing touch.

Gather Supplies and Materials

Let's gather all the necessary supplies and materials to create a beautifully wrapped candle gift.

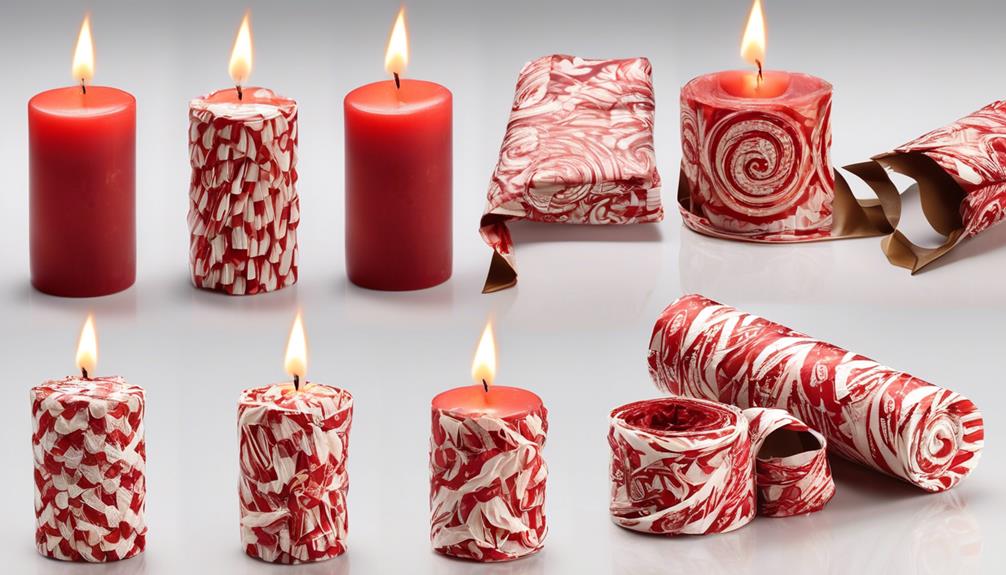
To start this elegant endeavor, we'll need exquisite taper candles, known for their slender and elongated form that exudes sophistication. Selecting taper candles in hues that complement the wrapping paper will enhance the overall aesthetic appeal.

Advertisement

Next, procure high-quality wrapping paper that speaks to the recipient's style. Whether it's a luxurious metallic finish or a charming floral pattern, the wrapping paper sets the tone for the gift. A satin ribbon, in a coordinating color, will add a touch of opulence to the final presentation. Don't forget sharp scissors for clean cuts and double-sided tape for seamless adhesion.

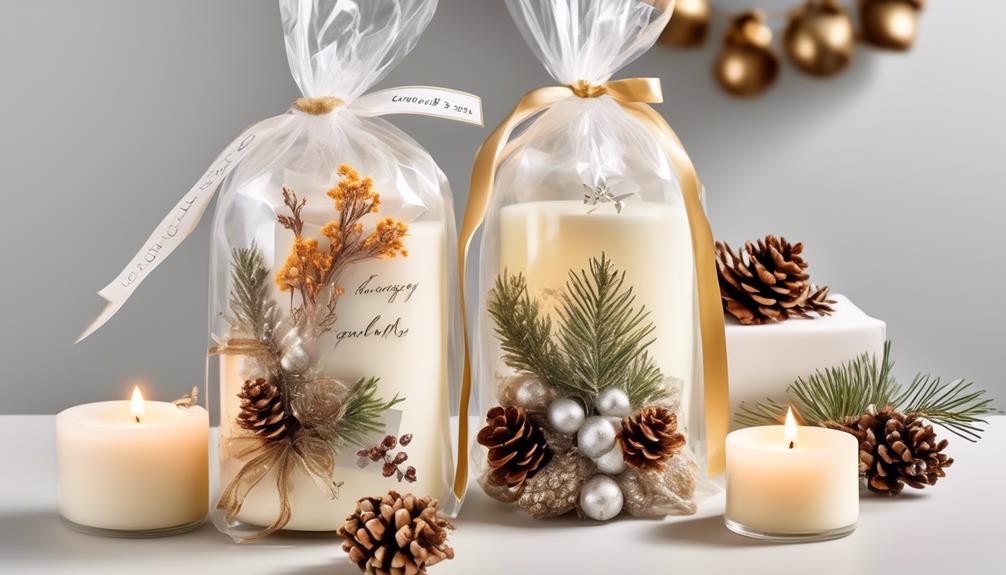
Lastly, consider embellishments like dried flowers or small ornaments to adorn the gift. These delicate additions will elevate the wrapping to a work of art.

With these meticulously chosen supplies, we're well on our way to crafting a candle gift that will leave a lasting impression.

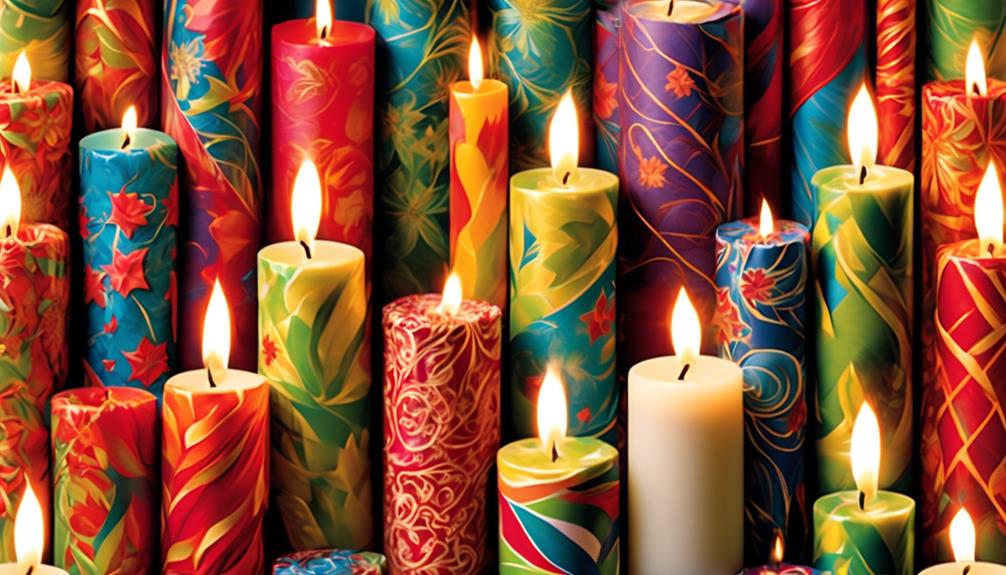
Choose the Right Wrapping Paper

selecting the perfect gift wrap

As we gather our supplies for wrapping a candle gift, the choice of the right wrapping paper plays a crucial role in enhancing the overall presentation. When selecting wrapping paper for your candle gift, consider the following:

  1. Size Matters: Ensure the wrapping paper is appropriate for the size of the candle. A bag or box that fits the candle well won't only protect it but also add to the aesthetic appeal.
  2. Layer with Care: Wrap the candle in attractive tissue paper before placing it in the bag or box. This step adds an extra touch of elegance to your gift.
  3. Quality Counts: Opt for thick and recyclable tissue paper to prevent any movement or damage to the candle during transportation. It shows attention to detail and care for the recipient.
  4. Eco-Friendly Options: Choose reusable gift bags over single-use options. Not only are they eco-friendly, but they also require less tissue paper, making them a sustainable choice for wrapping your candle gift.

Measure and Cut the Paper

Once the dimensions of your candle gift are known, carefully measure and cut the wrapping paper to ensure a snug and polished fit. Precision is key in this step to achieve a professional-looking wrap. Here is a helpful guide to assist you in measuring and cutting the wrapping paper for your candle gift:

Measurement Candle Height Candle Circumference
Inches 8 5
Centimeters 20.3 12.7
Paper Size 12×12 inches

Start by measuring the height of the candle from the base to the end of the candle. Next, measure the circumference around the widest part of the candle. Add a few extra inches to accommodate overlaps and folds while cutting the wrapping paper. Carefully cut the paper according to the measurements, ensuring straight edges for a neat finish. Remember, a well-measured and cut wrapping paper sets the foundation for an elegant gift presentation.

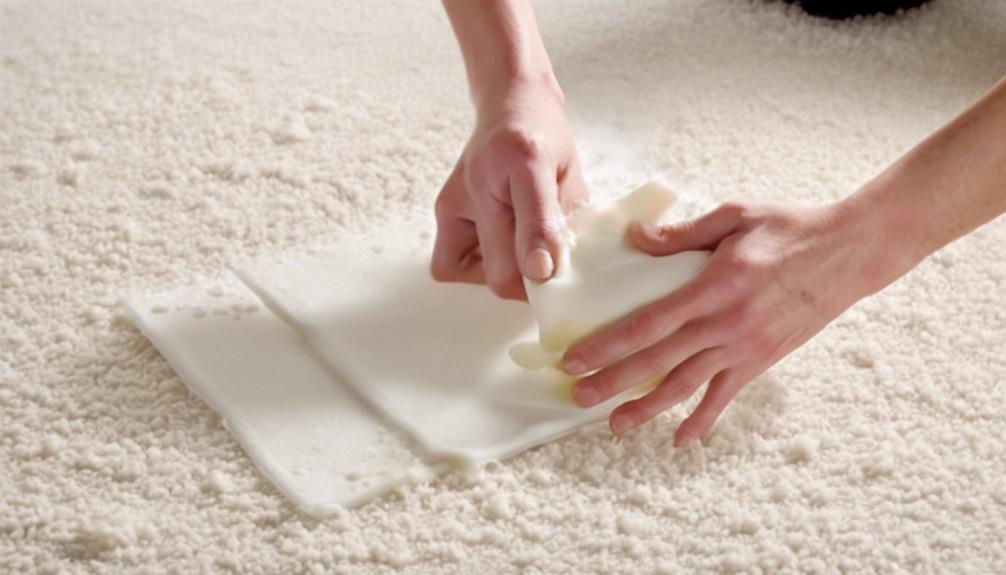
Fold the Edges Neatly

precise folding of paper

Let's ensure our gift wrapping skills shine by neatly folding the corners of the wrapping paper around the candle, creating a tidy finish.

Using our fingers or a bone folder, we can craft precise, sharp edges for a polished presentation.

Advertisement

Once folded, let's secure the edges with tape or adhesive to maintain a seamless look that highlights the candle's shape.

Neatly Fold Corners

How can we ensure the edges of the wrapping paper are elegantly and precisely folded for a polished finish when wrapping a candle as a gift? When it comes to neatly folding corners, attention to detail is key. Here's how to master this step:

  1. Take a piece of gift wrap large enough to cover the entire base of the candle.
  2. Place the candle at the bottom center of the paper and wrap it snugly.
  3. As you fold the edges, use your fingers to create sharp, clean creases for a flawless finish.
  4. Smooth out any bumps or unevenness in the folds as the finishing touch to your perfectly wrapped candle.

Smooth Out Creases

To achieve a refined and polished presentation when wrapping a candle as a gift, ensuring that the edges of the wrapping paper are elegantly and precisely folded is essential.

After carefully wrapping the candle, the next crucial step is to smooth out any creases that may have formed. Using your fingers or a ruler, gently press down on the edges to create clean, sharp folds.

Take your time to ensure that the paper is folded neatly and evenly, guaranteeing a professional finish. Pay special attention to the corners, ensuring they're neatly and securely folded.
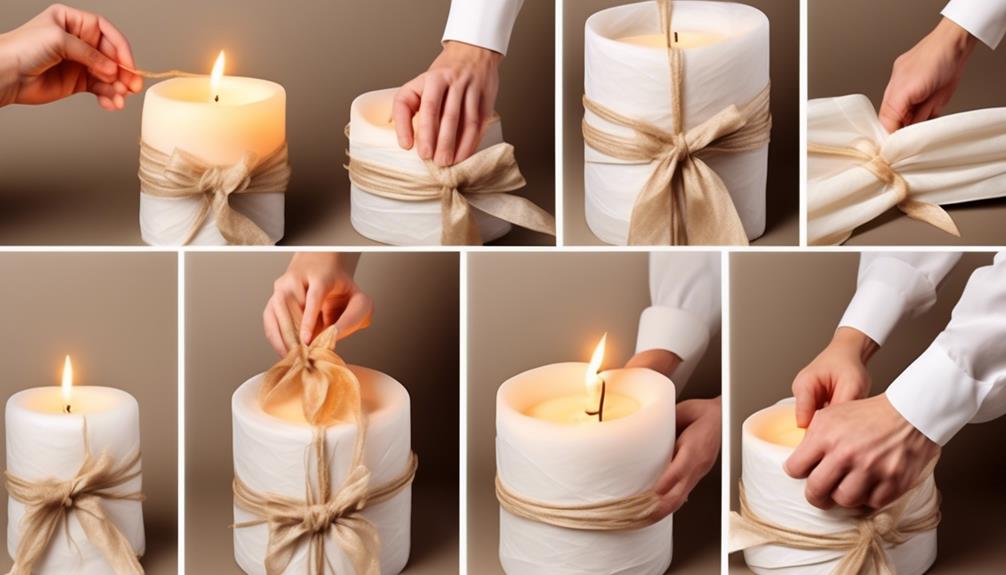
Secure With Ribbon

Neatly folding the edges of the wrapping paper not only enhances the presentation but also provides a clean and polished look when securing a ribbon around the wrapped candle gift.

Advertisement

To ensure a flawless finish, follow these steps:

  1. Use your fingers or a bone folder to crease the edges of the paper for a crisp fold.
  2. Cut a length of ribbon that's long enough to wrap around the candle and tie a bow.
  3. Place the ribbon over the folded edges of the paper, ensuring it's centered.
  4. Tie a tight knot or bow to secure the ribbon in place, adjusting as needed for a visually pleasing finish.

Wrap the Candle Securely

candle wrapped for safekeeping

Let's ensure the candle is snug and secure for its journey.

Select a bag or box that fits the candle snugly to prevent any shifting.

Adding a touch of elegance with decorative ribbon won't only secure the wrapping but also enhance its presentation.

Choose Wrapping Paper

When wrapping a candle as a gift, the choice of wrapping paper plays a crucial role in enhancing the overall presentation and ensuring the candle is securely wrapped to prevent any damage during transit. Here are some tips to help you select the perfect wrapping paper:

  1. Complement the Candle: Choose a wrapping paper that matches the candle's style and the occasion.
  2. Secure Wrapping: Use tape or adhesive to wrap the candle securely, preventing it from shifting or getting damaged.
  3. Extra Protection: Consider using thicker, recyclable tissue paper to provide additional cushioning and protection.
  4. Eco-Friendly Option: Opt for reusable gift bags that are eco-friendly, requiring less tissue paper and reducing waste.

Use Adhesive Tape

To ensure the wrapping paper securely encases the candle and complements its style, utilizing adhesive tape is essential for a polished presentation and protection during transit.

When applying the adhesive tape, it's crucial to do so with precision and care. Start by securing one end of the tape to the wrapping paper, ensuring it's firmly attached. Then, gently wrap the tape around the candle, making sure it holds the paper in place snugly but without wrinkling or damaging it.

Advertisement

Once you have wrapped the candle completely, trim the tape neatly and press down any loose edges to create a seamless finish. By using adhesive tape attentively, you can guarantee the wrapping remains intact and elegant until the very end.

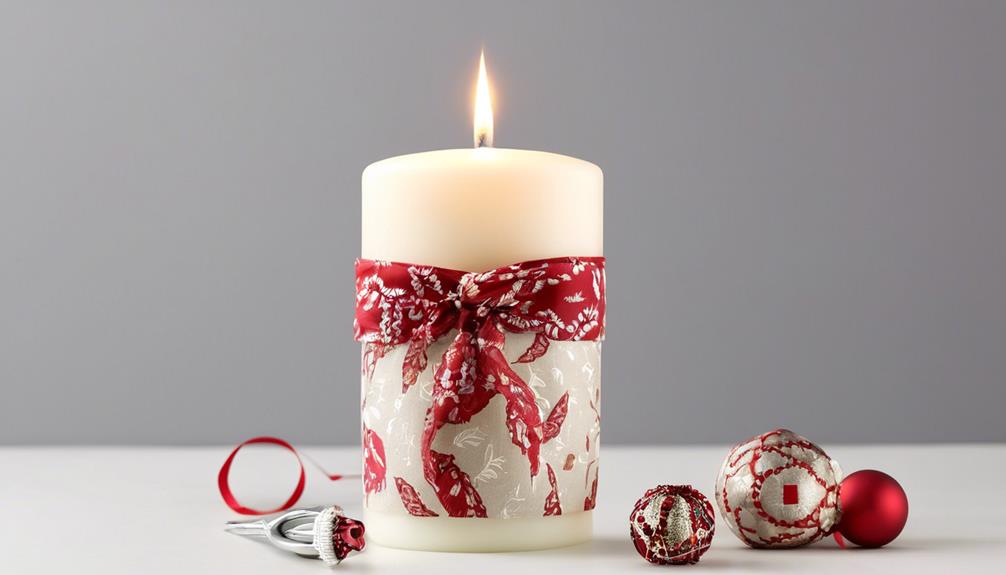
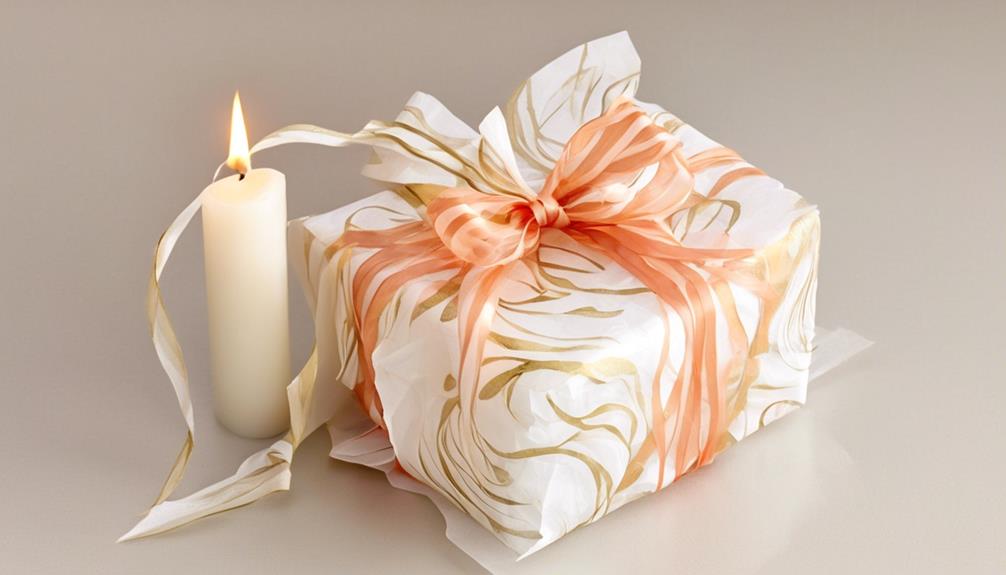
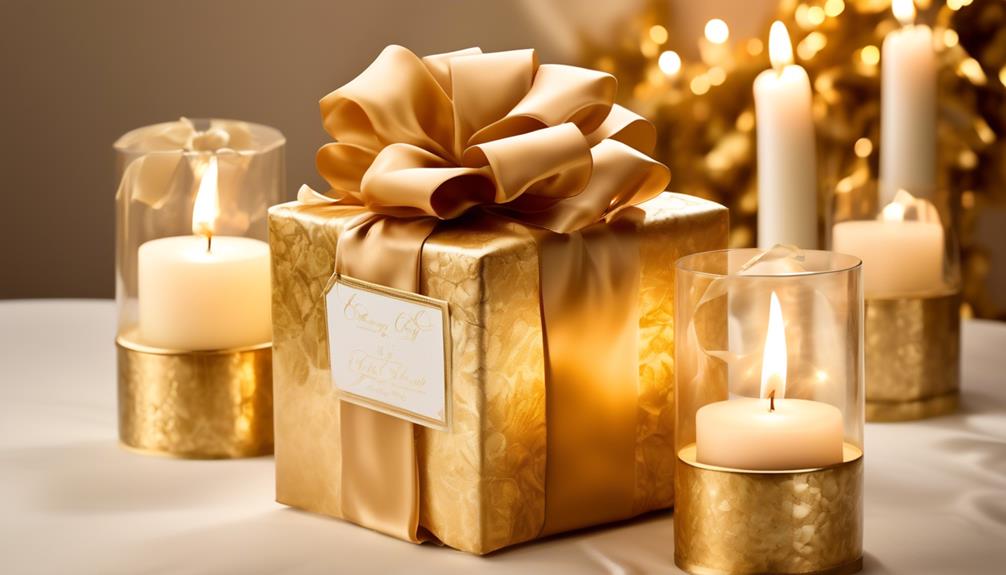
Add Decorative Ribbon

For a touch of sophistication and charm, elegantly intertwine a length of decorative ribbon around the candle, ensuring a secure and stylish wrap. To achieve this, follow these steps:

  1. Cut a length of decorative ribbon that's long enough to wrap around the candle.
  2. Secure one end of the ribbon to the bottom of the candle using tape or a small dot of hot glue.
  3. Wrap the ribbon tightly around the candle, making sure it covers the tape or glue.
  4. Secure the other end of the ribbon to the bottom of the candle, again using tape or hot glue.

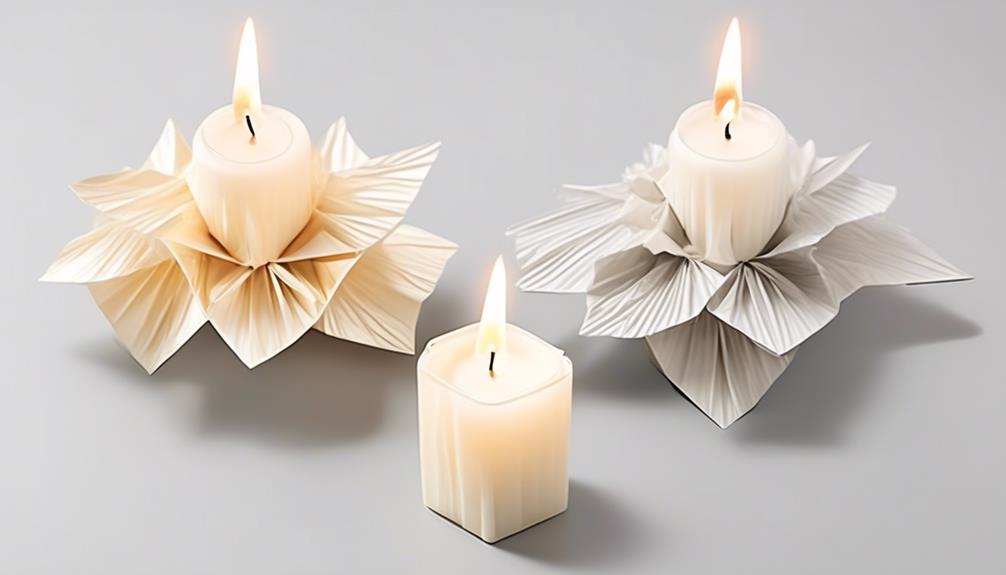
Add Decorative Embellishments

enhance with ornamental details

Delicately tying a ribbon around the candle transforms it into a beautifully adorned gift, perfect for any occasion. To elevate the presentation further, consider adding a small ornament or charm to the ribbon, creating a delightful focal point at the top of the candle. This extra touch brings an element of sophistication and elegance to your gift wrapping.

For a more creative flair, incorporate decorative washi tape into the design. You can use it to craft intricate patterns on the wrapping paper, enhancing the overall aesthetic appeal. Additionally, adding a personalized gift tag with the recipient's name or a heartfelt message lends a thoughtful and exclusive touch to the gift.

To infuse a sense of celebration and joy, sprinkle glitter or confetti on the wrapping paper. This simple yet effective embellishment adds a festive sparkle and a touch of whimsy to the package. By combining these decorative elements, you can create a beautifully wrapped candle that's sure to impress and delight the recipient.

Use Ribbons or Twine for a Finishing Touch

decorate with ribbons or twine

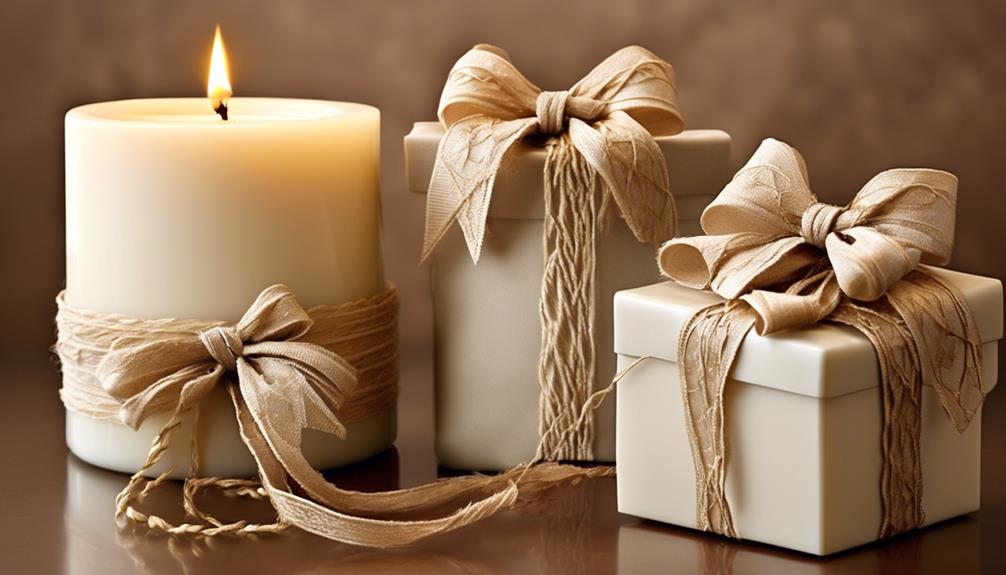
Opting for a luxurious satin ribbon or rustic twine can provide an exquisite finishing touch to your beautifully wrapped candle gift. The choice of ribbon or twine can elevate the presentation of your gift and add a touch of sophistication. Here are some tips to expertly incorporate ribbons or twine into your candle wrapping:

  1. Choose the Right Material: Select a ribbon or twine that complements the candle's packaging and suits the occasion. Satin ribbons are ideal for a more formal look, while twine can add a rustic charm.
  2. Tie with Precision: When securing the ribbon or twine around the candle, ensure it's tied neatly and securely. A well-tied bow or knot enhances the overall appearance.
  3. Add Embellishments: Enhance the ribbon or twine with additional embellishments such as small charms, beads, or dried flowers to create a personalized touch.
  4. Positioning Matters: Experiment with different ways to sit the candle within the wrapping to showcase the ribbon or twine effectively. Whether centered or off to the side, find the position that best highlights your chosen finishing touch.

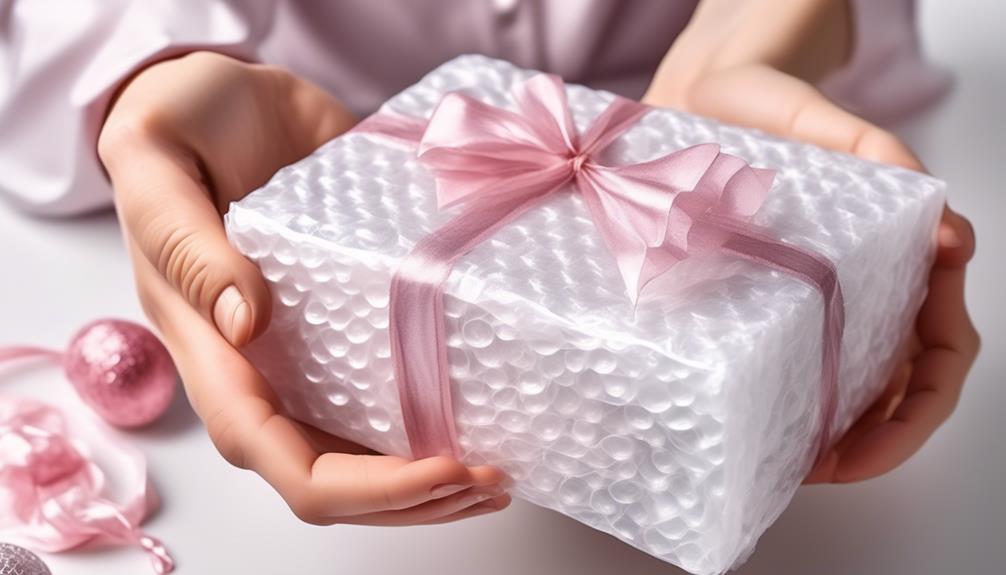
Consider Using a Gift Bag

creative gift wrapping solution

Consider enhancing the presentation of your candle gift by utilizing a carefully selected gift bag. When choosing a gift bag, ensure it is appropriate for the size of the candle you are gifting. Place the candle in the bag, ensuring it is centered for a pleasing aesthetic. To provide extra protection, wrap the candle in tissue paper before gently placing it in the bag. Fill the bag with additional tissue paper to prevent the candle from shifting during transportation. For an eco-friendly touch, consider using a reusable gift bag to reduce waste and add a sustainable element to your gift presentation.

Gift Bag Selection Additional Tips
Choose a bag that fits the candle size Ensure the candle is centered in the bag
Use tissue paper for added protection Fill the bag with more tissue paper to secure the candle
Consider a reusable gift bag Add a sustainable touch to your gift presentation
Match the bag to the occasion Personalize the bag with a decorative touch

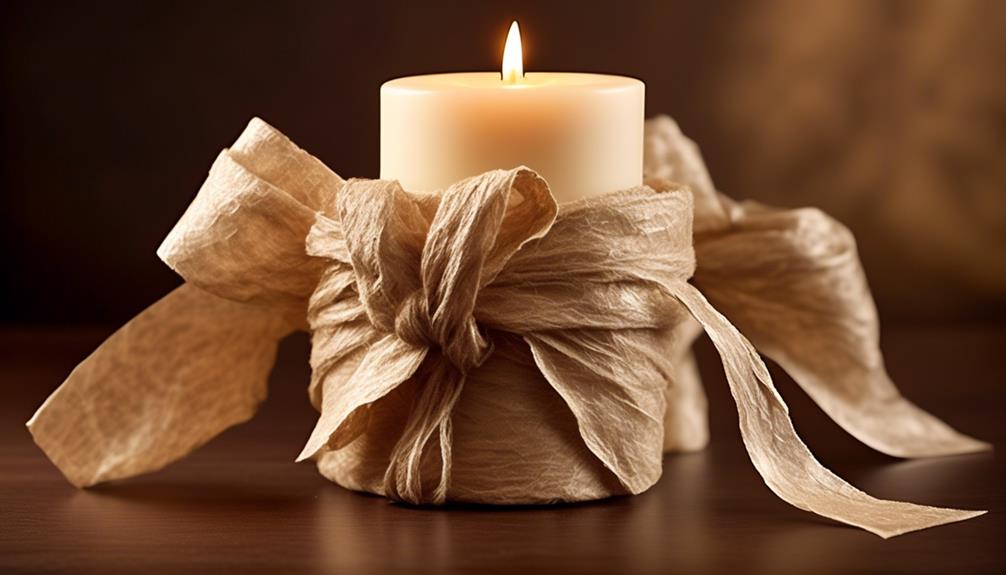
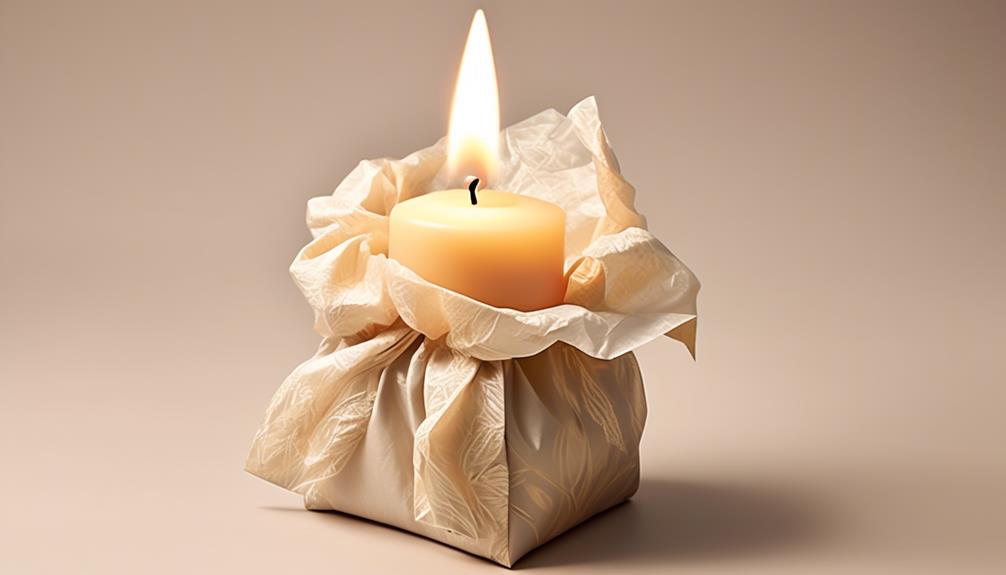
Try the Wrap-and-Gather Technique

efficiently wrap and gather

Utilizing the wrap-and-gather technique elevates the presentation of a candle gift with a touch of elegance and creativity. When wrapping a candle using this method, consider the following steps for a stunning result:

  1. Lay a large square of wrapping paper or fabric flat on the table. This provides a clean and smooth surface to work on.
  2. Place the candle in the center of the paper and gather the four corners slightly above it. This positioning ensures a balanced presentation.
  3. Create a cylindrical shape by pulling the corners together and securing them with twine or ribbon. This technique adds dimension and style to the wrapping.
  4. Customize the aesthetic by adding a bow or knot to the gathered wrapping. This final touch adds a personalized and charming finish to your gift.

Next time you wrap a candle, remember these steps to master the wrap-and-gather technique, impressing your recipient with a beautifully wrapped present.

Explore the Tootsie-Roll Method

unique technique for candy

Let's embark on exploring the Tootsie-Roll Method for wrapping candles in a delightful and efficient manner.

To begin, make sure to place your candle in the center of a sheet of wrapping paper.

Advertisement

Next, roll the candle tightly in the paper, mimicking the technique used to roll a Tootsie Roll candy. This method ensures a snug and neat wrap for your candle.

After rolling the candle, make sure to secure the ends of the paper with tape or adhesive to keep the candle securely wrapped. This step is crucial in maintaining the elegant presentation of your gift.

For an added touch of sophistication, use decorative ribbon or twine to tie off the ends of the wrapped candle. This not only enhances the aesthetic appeal but also adds a refined finish to your gift.

To complete the wrapping process, consider adding a gift tag or personalized message. This final detail adds a thoughtful and personal touch to your beautifully wrapped candle gift.

Master the Fan Fold Technique

efficient paper folding method

Embrace the artistry of gift wrapping with the elegant and meticulous technique known as the Fan Fold Method. Mastering this technique requires attention to detail and a creative touch to ensure a beautifully wrapped candle every time.

Follow these steps to perfect the fan fold technique:

Advertisement
  1. Lay a square piece of wrapping paper flat on the table, ensuring it's the right size to wrap around the candle seamlessly.
  2. Fold the paper accordion-style, creating even, parallel folds that will form the basis of your fan fold.
  3. Fold the accordion in half to create a fan shape, adjusting the folds as needed to achieve a symmetrical look.
  4. Carefully wrap the fan around the candle, securing it with tape at the bottom to hold the shape in place.

Ensure the Candle Is Securely Wrapped

candle wrapped securely and ensured

To ensure the candle is securely wrapped after mastering the Fan Fold Method, carefully use tape to attach the wrapping paper to the candle. Start by folding and creasing the wrapping paper tightly around the candle to prevent it from coming loose. Use additional tape or adhesive to secure any loose ends or edges of the wrapping paper. Consider adding a ribbon or twine around the wrapped candle for extra security. Place the securely wrapped candle in a box or bag to provide additional protection during transportation or gifting.

Steps to Ensure Secure Wrapping
1. Attach wrapping paper to candle with tape
2. Fold and crease paper tightly around candle
3. Secure loose ends with tape or adhesive
4. Add ribbon or twine for extra security

Following these steps will guarantee that your candle is not only beautifully wrapped but also securely protected, ensuring a delightful unwrapping experience for the recipient.

Add Protective Layers if Necessary

adding protective layers as needed

When safeguarding a delicate or fragile candle, consider wrapping it in bubble wrap for added protection and cushioning. This extra layer helps absorb shocks and prevents any damage during handling.

To ensure the candle remains in pristine condition, it may be necessary to take further protective measures. Here are some steps to add protective layers if necessary:

  1. Wrap in Cellophane: For increased protection against moisture and dust, encase the bubble-wrapped candle in a cellophane bag.
  2. Secure with Tape: To guarantee the wrapping stays intact, use tape to secure all edges and seams tightly.
  3. Use Padded Envelopes or Boxes: For candles that are exceptionally delicate or valuable, consider placing them in padded envelopes or boxes for enhanced protection.
  4. Prevent Transportation Damage: Whether mailing or transporting the candle, take precautions to avoid bumps and scrapes that could harm the candle.

Personalize With a Handwritten Note

adding a personal touch

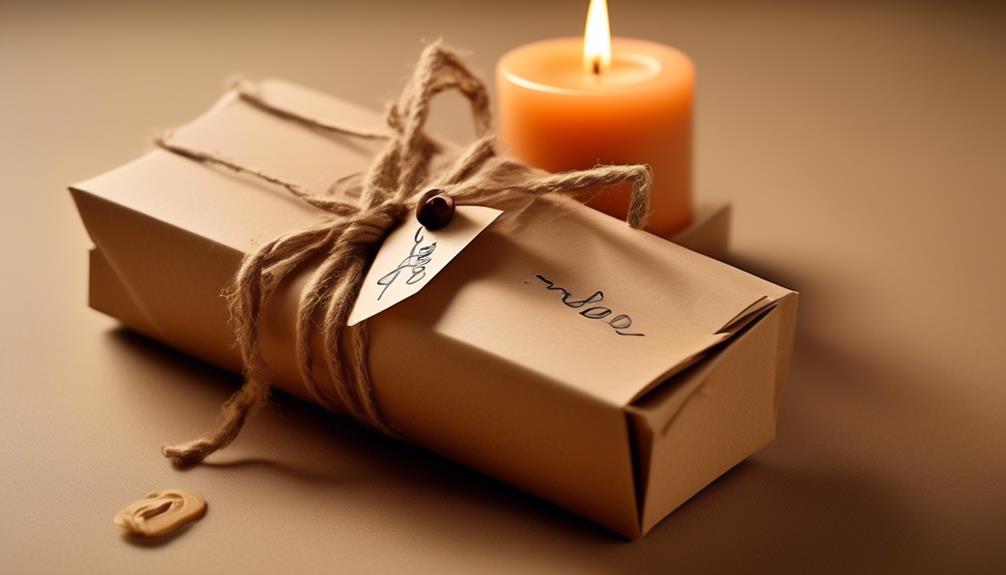
Let's infuse your gift with a touch of warmth and personality by customizing it with thoughtful, handwritten words.

A handwritten note adds a personal touch that can express sentiments beyond what a pre-printed card can convey. By taking the time to craft a heartfelt message, you show the recipient that you truly care and appreciate them.

Customize With Thoughtful Words

Incorporate a meaningful quote or message on a card that accompanies the wrapped candle to add a personal touch that resonates with the recipient. When customizing your gift with thoughtful words, here are some tips to consider:

  1. Reflect Their Personality: Choose a quote or message that aligns with the recipient's interests or characteristics.
  2. Use Quality Materials: Opt for a high-quality pen or marker to ensure your handwritten note looks polished and elegant.
  3. Express Gratitude: Start your message with a heartfelt expression of gratitude or well wishes to show appreciation.
  4. Add a Personal Touch: Personalizing the gift with a handwritten note not only adds a special touch but also conveys your thoughtfulness and care.

Add a Personal Touch

To infuse an extra layer of sentiment into your gift, start by crafting a personalized handwritten note that truly reflects the recipient's uniqueness and conveys your heartfelt appreciation. Use a special pen or marker to add a personal touch to your message, making it stand out. Consider using decorative stationery or a small notecard to elevate the presentation of your handwritten note.

Express your gratitude or share a special memory related to the candle, creating a connection between the gift and the recipient. Make the note specific to the individual by mentioning their name or referencing a shared experience. By personalizing your message in this way, you can show the recipient how much they mean to you and make the gift even more meaningful.

Advertisement

Express Your Sentiments

Crafting a heartfelt handwritten note adds a personal touch that enhances the sentiment behind the gift. When expressing your sentiments through a handwritten note, consider the following:

  1. Write a Thoughtful Message: Let your feelings guide your pen as you write a message that conveys your emotions and well wishes for the recipient.
  2. Consider the Occasion and Relationship: Tailor your message to suit the specific occasion and the nature of your relationship with the recipient.
  3. Infuse Your Personal Style: Use your unique voice and style to make the note feel genuine and heartfelt.
  4. Sign Your Name: Conclude your note by signing your name, ensuring the recipient knows who the heartfelt gift is from.

Let's start crafting a meaningful handwritten note to accompany your beautifully wrapped candle gift.

Present Your Gift With Pride

embrace your unique talents

Let's ensure the presentation of your candle gift reflects the care and thought put into selecting it.

Present your gift with pride by choosing a suitable bag or box that fits the candle perfectly.

Opt for attractive tissue paper to wrap the candle delicately before placing it in the bag.

Ensure that the candle is carefully nestled within the bag, using thick, recyclable tissue paper to prevent any movement or damage during transport.

Consider the eco-friendly option of reusable gift bags, which not only reduce waste but also require less tissue paper, adding an extra layer of sophistication to your present.

Advertisement

Frequently Asked Questions

How Do You Wrap a Candle for a Present?

When wrapping a candle for a present, we ensure elegance and protection. We carefully choose a fitting bag or box, then wrap the candle in luxurious tissue paper to safeguard it. Using thick, recyclable paper prevents shifting and damage.

Opting for reusable gift bags aligns with eco-conscious values and requires less paper.

Finishing touches like a tasteful bow or knot enhance the aesthetic appeal, creating a truly special gift presentation.

How Do You Gift a Christmas Candle?

When gifting a Christmas candle, we ensure an elegant presentation by selecting a suitable bag or box.

Wrapping it in quality tissue paper adds a touch of sophistication. Using thick, recyclable paper secures the candle in place.

Advertisement

Opting for reusable gift bags aligns with eco-conscious values. Personalizing with a festive bow or knot enhances the aesthetic appeal.

Our approach combines practicality with style for a memorable gift-giving experience.

How Do You Wrap a Candle for a Hostess Gift?

When wrapping a candle for a hostess gift, we prioritize elegance and thoughtfulness. Choose a bag or box that complements the candle's size.

Wrap it in thick, recyclable tissue paper to protect it during transport. Consider using reusable gift bags for an eco-friendly touch.

Add a beautiful bow or knot to personalize the aesthetic. These details show appreciation and care for the hostess, making the gift even more special.

Advertisement

Is It OK to Give Candle as a Gift?

Yes, it's absolutely acceptable to give a candle as a gift. Candles are versatile, thoughtful presents that suit a variety of occasions.

From relaxation to ambiance, they offer a touch of luxury and warmth. Plus, with an array of scents and designs available, you can find the perfect candle for anyone on your gift list.

Conclusion

Now that you have learned how to wrap a candle as a gift, imagine the joy on your friend's face as they unwrap a beautifully wrapped candle personalized just for them.

Picture a cozy evening by candlelight, creating memories that will last a lifetime.

So next time you want to give a thoughtful gift, remember the simple yet elegant art of candle wrapping.

Advertisement

It's a small gesture that can make a big impact.

I'm Amelia, and I love making candles. It all started when I was given a kit as a gift. I loved the process so much that I decided to make my own candles. I soon realized that I had a real talent for it. Before long, my friends and family were asking me to make candles for them too. Word spread, and soon I was inundated with orders. I love the creativity that goes into making each candle unique. And I love the satisfaction of knowing that people are using something I made with my own hands.

Continue Reading
Advertisement

Candles

How to Make a Unity Candle

Published

on

By

Are you ready to embark on the journey of crafting a beautiful unity candle? Join us as we guide you through each step in designing your own unique symbol of love and unity.

In this guide, we will take you step by step, sharing our expertise and techniques for creating a masterpiece that will be the highlight of your wedding ceremony.

With our easy-to-follow instructions and helpful tips, you’ll learn how to gather the necessary materials, choose a design that reflects your unique style, and prepare the candle containers.

So, let’s dive in and start making memories that will last a lifetime with our guide on how to make a unity candle.

Advertisement

decorative candle

Key Takeaways

  • The unity candle symbolizes the merging of two lives into one.
  • Customizing the design of the unity candle allows for personal expression and reflection of shared interests.
  • Selecting the perfect wax is crucial for creating a high-quality unity candle.
  • Adding fragrance and color to the unity candle can enhance its aesthetic appeal and complement the wedding theme.

Gather Your Materials

To begin making a unity candle, we need to gather all of our materials.

The materials needed for creating a unity candle are simple yet significant. First and foremost, we require two taper candles, one for the bride and one for the groom, symbolizing their individuality.

Next, we need a larger pillar candle, representing the unity of their lives coming together. Additionally, we’ll need candleholders or stands to keep the candles secure during the ceremony.

It’s essential to choose candles and holders that reflect the couple’s personal style and preferences, as they’ll become a cherished keepsake.

candles uk

The unity candle symbolizes the merging of two lives into one and holds immense meaning in wedding ceremonies.

Choose a Design for Your Unity Candle

Now that we’ve gathered our materials, let’s decide on a design for our unity candle.

Advertisement

The design of a unity candle can vary greatly, allowing couples to express their individuality and personal style. Here are some popular unity candle designs to consider:

  • Classic Design:
  • This design features a simple, elegant candle with the couple’s names and wedding date engraved on it.
  • It symbolizes the unity and commitment of the couple, with the flame representing the eternal bond they’re creating.
  • Customized Design:
  • Couples can opt for a customized design that reflects their shared interests, hobbies, or cultural backgrounds.
  • They can incorporate symbols, images, or colors that hold personal significance, making the unity candle truly unique and meaningful.

Prepare the Candle Containers

After choosing the design for our unity candle, we need to prepare the candle containers. This step is crucial to ensure that the candle decoration is well-executed and the personalized unity candle looks flawless.

candlelight concerts by fever

First, we should select containers that are suitable for holding the candles securely and allowing them to burn evenly. Glass containers are commonly used for unity candles due to their heat resistance and elegant appearance.

Next, we should clean the containers thoroughly to remove any dust or debris that could interfere with the candle’s presentation.

Additionally, consider adding a personal touch by decorating the containers with ribbons, flowers, or other embellishments that complement the overall design.

Select the Perfect Wax for Your Candle

Once we’ve prepared the candle containers, the next step is to select the perfect wax for our unity candle. When it comes to candle waxes, there are several types to choose from, each with its own unique characteristics. To help you make an informed decision, here are two sub-lists that outline the different types of candle waxes and the benefits of soy wax:

Advertisement

uses of candles in daily life

Types of Candle Waxes:

  • Paraffin wax
  • Beeswax
  • Soy wax
  • Coconut wax
  • Palm wax

Benefits of Soy Wax:

  • Eco-friendly and renewable
  • Burns cleaner and longer
  • Produces less soot and toxins
  • Has a lower melting point, making it safer to handle
  • Holds fragrance and color well

Add Fragrance and Color to Your Candle

To enhance our unity candle, we’ll add fragrance and color using a variety of options.

When it comes to fragrance, there are numerous options to choose from. You can opt for essential oils, such as lavender or eucalyptus, which not only provide a pleasant scent but also offer therapeutic benefits. Alternatively, you could go for fragrance oils, which come in a wide range of scents, allowing you to find the perfect aroma to complement your ceremony.

candle in the wind

As for color choices, you can use either liquid dyes or color blocks specifically designed for candle making. These options offer a vast array of vibrant and subtle hues, enabling you to customize your unity candle to match your wedding theme or personal preference.

Now that we’ve selected our fragrance and color, it’s time to move on to the next step: melting and pouring the wax into the containers.

Melt and Pour the Wax Into the Containers

Now that we’ve added fragrance and color to our candle, it’s time to move on to the next step: melting and pouring the wax into the containers.

Advertisement

Safety precautions are crucial during this process, as melting wax can be dangerous. Once we’ve ensured our safety measures, we can proceed with pouring the melted wax into our containers, taking care to decorate the unity candle to our liking.

candlesticks patterns

Safety Precautions for Melting Wax

We always prioritize safety when melting the wax and pouring it into the containers. Here are some important safety precautions to keep in mind:

Wax melting techniques:

  • Use a double boiler or a wax melting pot to ensure even heat distribution and prevent the wax from overheating or catching fire.
  • Stir the wax gently and consistently to avoid hot spots and promote uniform melting.

Proper ventilation while melting wax:

  • Choose a well-ventilated area to melt the wax, preferably near an open window or with a fan running, to prevent the accumulation of harmful fumes.
  • If working in a small space, consider using a fume hood or wearing a respiratory mask to protect yourself from inhaling the vapors.

Decorating the Unity Candle

After ensuring the safety precautions for melting wax have been followed, it’s time for us to decorate our unity candle by melting and pouring the wax into the containers. This step is crucial in creating a beautiful and personalized unity candle for your ceremony.

candlesticks holders

To begin, gather your containers and place them on a heat-resistant surface. Next, melt the wax using a double boiler or a melting pot specifically designed for candle making. Be sure to stir the wax gently and consistently to prevent air bubbles from forming.

Once the wax has reached the desired temperature, carefully pour it into the containers, taking care not to spill or overflow. This is a great opportunity to get creative and add unique touches to your unity candle. Consider adding dried flowers, ribbons, or even personalized decals to make it truly special.

Advertisement

With the wax poured, it’s time to move on to the next step: inserting the wicks and letting the candles cool.

Insert the Wicks and Let the Candles Cool

To begin, it’s important to insert the wicks into the candles and allow them to cool. This step is crucial in candle making techniques as it ensures that the wicks are securely in place and the candles set properly. Here are some key points to keep in mind during this process:

candlelight concerts belfast

  • Choose the right wicks: Select wicks that are appropriate for the size and type of candles you’re making. There are various wick sizes and materials available, such as cotton or wooden wicks, to suit different candle designs.
  • Insert the wicks correctly: Place the wicks at the center of each candle, making sure they’re straight and secure. You can use a wick holder or simply hold the wick in place until the wax cools.

After inserting the wicks, it’s essential to let the candles cool completely. This allows the wax to solidify and ensures that the wicks remain centered. Once the candles have cooled, you can move on to the next step of decorating your unity candle, where you can unleash your creativity and explore alternative unity candle ideas.

[Transition sentence]: Now that the wicks are inserted and the candles have cooled, it’s time to let your imagination run wild and decorate your unity candle.

Decorate Your Unity Candle

Now that we’ve inserted the wicks and allowed the candles to cool, let’s unleash our creativity and decorate our unity candle.

Decorating the unity candle is an opportunity to add personal touches and symbolism to your wedding ceremony. The unity candle holds immense significance as it represents the joining of two individuals and families.

Advertisement

ecoya candles sale

To enhance the symbolism, you can incorporate elements such as ribbons, charms, or engraved names and dates. Consider using colors that hold special meaning to you and your partner.

Alternatively, you can explore alternative unity candle ideas, such as using different-sized candles to represent each partner and their families, or even creating a custom-designed unity candle that reflects your unique style.

Light the Unity Candle in Your Wedding Ceremony

To continue with the ceremony, we light the unity candle, symbolizing the union of two individuals and families. Lighting the unity candle is a significant moment in a wedding ceremony, representing the coming together of two lives.

Here are some lighting techniques and the symbolism behind the unity candle:

candlesticks holders

  • Lighting Techniques:
  • The traditional method involves the bride and groom each taking a lit taper candle and simultaneously lighting the larger unity candle together.
  • Another option is to have the parents of the couple light the taper candles, symbolizing the support and love from both families.
  • Symbolism of the Unity Candle:
  • The two taper candles represent the separate lives of the bride and groom.
  • The larger unity candle represents their new life together as one.
  • As the couple lights the unity candle, it signifies their commitment to each other and the merging of their families.

Frequently Asked Questions

How Long Does It Take for the Candles to Cool After Pouring the Wax?

After pouring the wax, the candles need about 2-3 hours to cool completely. To ensure the best results, use a high-quality wax specifically designed for unity candles, as it will have a longer cooling time.

Can I Use Scented Wax for the Unity Candle?

Using scented wax for the unity candle can add a delightful fragrance to your ceremony. However, it’s important to consider the pros and cons. Alternatively, you can explore other ways to add fragrance.

Advertisement

What Kind of Wicks Should I Use for the Unity Candle?

When making a unity candle, it’s important to choose the right kind of wicks. We recommend using cotton wicks, as they are the most reliable and give a clean, even burn.

Can I Use a Different Type of Container for the Unity Candle?

Using alternative materials for the unity candle allows for endless creativity. Whether it’s a unique container or personalized decorations, the possibilities are exciting. With careful attention to detail, the unity candle can become a true masterpiece.

candles direct discount code

How Long Does the Unity Candle Typically Burn During a Wedding Ceremony?

During a wedding ceremony, the unity candle typically burns for around 5-10 minutes. It symbolizes the joining of two families and the unity of the couple. Alternatives to the unity candle include sand ceremonies or handfasting rituals.

Conclusion

In conclusion, creating a captivating unity candle for your wedding ceremony is an artful and aromatic endeavor. By gathering the necessary materials, choosing a design, and carefully preparing the containers, you can craft a candle that symbolizes the union of two souls.

With the perfect wax, fragrance, and color, your candle will radiate beauty and significance. So, immerse yourself in the process, ignite your creativity, and let the flickering flames of your unity candle illuminate your love story.

Advertisement

Continue Reading

Candles

How to Make a Wickless Candle

Published

on

By

Are you interested in creating a candle without a wick? Look no further! This step-by-step tutorial will guide you through the process of crafting a wickless candle.

By following our expert instructions, you will master the art of crafting these unique candles in no time. We will guide you through the process, from gathering the necessary supplies to decorating your finished creation.

Our language is tailored for those seeking mastery in candle making, providing you with the knowledge and skills to create beautiful wickless candles.

So, let’s get started on this exciting journey and discover the secret behind making your very own wickless candle!

Advertisement

candles direct portugal

Key Takeaways

  • Choose the right wax by considering options like soy, beeswax, paraffin, and coconut wax
  • Consider the benefits of each wax, such as affordability, scent throw, burn time, and toxicity levels
  • Select a suitable container based on size, material, burn time, and the purpose of the candle
  • Explore different ways to decorate the candle, including ribbons, labels, dried flowers, and unique designs

Gather Your Supplies

To start making a wickless candle, we need to gather our supplies.

First, we must consider our container options. Glass jars or heat-resistant containers are ideal for holding the melted wax. Make sure the container is clean and free from any debris.

Next, we need to gather the ingredients for the melting process. We’ll need soy wax flakes, fragrance oils, and dye if desired. Additionally, we’ll need a double boiler or a heat-resistant container and a heat source, such as a stove or a hot plate. It’s important to have a thermometer to monitor the temperature of the wax.

Lastly, don’t forget about the tools like a whisk or a stirrer, a scale for measuring the wax, and a pouring pitcher for easy pouring.

candle shack

With these supplies ready, we can move on to the next step of making our wickless candle.

Choose Your Wax

Now that we’ve gathered our supplies, we need to choose the right wax for our wickless candle.

Advertisement

There are several options available, such as soy, beeswax, paraffin, and coconut wax. Each type of wax has its own benefits and characteristics, so it’s important to consider these factors before making a decision.

Let’s explore the properties of each wax and how they can affect the overall quality of our candle.

candlesticks forex

Soy or Beeswax

We prefer using soy or beeswax as our wax choice when making a wickless candle. Both soy and beeswax have their own benefits and uses, so it ultimately comes down to personal preference. To help you decide, here is a comparison and cost analysis of the two options:

Wax Type Benefits and Uses Cost
Soy – Natural and renewable material
  • Burns longer and cleaner
  • Releases fragrance well
  • Easy to work with | Generally more affordable than beeswax |
    | Beeswax | – Natural and sustainable
  • Burns longer and emits a warm glow
  • Releases a subtle honey scent
  • Purifies the air | Generally more expensive than soy |

Consider your priorities and budget when choosing between soy and beeswax for your wickless candle. Both options have their advantages, so go with the one that aligns with your needs and preferences.

Paraffin or Coconut

When considering the wax for our wickless candle, the choice between paraffin or coconut is an important decision to make. Both paraffin and coconut wax have their own unique properties and benefits. Here is a comparison to help you decide the best wickless candle wax for your needs:

  1. Paraffin wax:
  • Made from petroleum byproducts.
  • Provides a strong scent throw, filling the room with fragrance.
  • Has a longer burn time compared to other waxes.
  1. Coconut wax:
  • Made from the meat of coconuts.
  • Offers a clean and natural burn.
  • Produces a soft, creamy texture that’s easy to work with.

Ultimately, the choice between paraffin and coconut wax depends on your preferences and priorities. If you prioritize a strong scent throw and longer burn time, paraffin wax may be the best option for you. On the other hand, if you value a clean and natural burn, along with a soft and creamy texture, coconut wax may be the better choice.

candle making kit

Consider your desired outcome and experiment with both to find the perfect wax for your wickless candle.

Advertisement

Benefits of Each

The advantages of each wax type should guide our choice when deciding between paraffin and coconut wax for our wickless candle. Understanding the benefits of wickless candles is essential in order to use them effectively.

Paraffin wax is a popular choice due to its affordability and accessibility. It has a high melting point, which means it can hold its shape well. Additionally, paraffin wax has a strong scent throw, meaning it can release fragrance effectively. However, it does produce some soot and may contain toxins.

On the other hand, coconut wax is a natural and sustainable option. It has a lower melting point, which allows for a longer burn time. Coconut wax also has a clean burn, producing minimal soot and no toxins. It has a subtle scent throw, making it perfect for those who prefer a more subtle fragrance.

candlelight concert

Considering these benefits, we can make an informed decision when choosing between paraffin and coconut wax for our wickless candle.

Select a Container

Now that we’ve chosen our wax, it’s time to select a container for our wickless candle.

Advertisement

There are a few points to consider when choosing the right container. First, think about the size options available – do you want a small, travel-sized candle or a larger one for your living room?

Next, consider the material of the container – glass, ceramic, or tin?

dusk candles review

Lastly, let’s explore some decorative container ideas to add a personal touch to your candle-making project.

Container Size Options

We prefer using a glass jar as our container for making wickless candles. When selecting a container size, it’s important to consider the burn time of the candle. Here are three options to choose from:

  1. Small containers: These are great for shorter burn times, typically ranging from 10-15 hours. They’re perfect for small spaces or for trying out different scents without committing to a larger candle.
  2. Medium containers: These provide a longer burn time, usually lasting between 20-30 hours. They’re ideal for medium-sized rooms or for those who enjoy having a candle burning for a longer period.
  3. Large containers: These offer the longest burn time, lasting between 40-50 hours. They’re perfect for larger rooms or for those who prefer to have a candle burning throughout the day.

When selecting a container size, consider the space you intend to use the candle in and how long you want it to burn.

Material Considerations

For our wickless candle, we need to carefully consider the materials used for the container. Choosing the right material is crucial for both the functionality and safety of the candle.

Advertisement

candle holders uk

When selecting a container, it’s important to keep in mind alternative materials that can be used instead of traditional options like glass or ceramic. One alternative material that’s gaining popularity is silicone. Silicone containers are heat-resistant and can withstand high temperatures without melting or warping, making them a safe option for wickless candles.

Another alternative material to consider is stainless steel. Stainless steel containers aren’t only durable and long-lasting, but they also provide excellent heat retention, ensuring that the candle melts evenly and efficiently.

When it comes to wickless candle safety, selecting the right container material is essential for a successful and worry-free candle-making experience.

Decorative Container Ideas

When selecting a container for our wickless candle, it’s important to consider various decorative options available. Here are some ideas for decorative candle holders and repurposing household items:

candlelight concerts bristol

  1. Mason jars: These versatile containers can be found in various sizes and styles. They provide a rustic and cozy feel to your wickless candle. You can decorate them with ribbons, twine, or even paint them to match your decor.
  2. Teacups and saucers: Repurpose vintage teacups and saucers as unique candle holders. They add a touch of elegance and charm to any space. You can find these at thrift stores or flea markets.
  3. Glass bottles: Give a second life to empty glass bottles by turning them into candle holders. Remove the labels, clean them thoroughly, and insert your wickless candle. You can even add decorative elements such as beads or seashells inside the bottle for an extra touch of creativity.

Prepare the Container

To prepare the container for our wickless candle, gather all necessary materials and ensure that it’s clean and free of any debris.

First, consider the size of the container. Wickless candles can be made in various sizes, depending on your preference and the amount of wax you have. Smaller containers are perfect for a personal candle while larger ones are ideal for creating a centerpiece.

Advertisement

Next, think about the material of the container. Glass jars are a popular choice as they’re heat resistant and allow you to see the beautiful glow of the candle. Ceramic or metal containers can also be used, but make sure they’re heat-safe.

Once you have chosen the container, thoroughly clean it with warm soapy water to remove any dirt or dust. Dry it completely to ensure a clean surface for your wickless candle.

dusk meditation candle

Melt the Wax

Now that we’ve prepared our container, it’s time to melt the wax. The temperature for melting wax should be around 180-185 degrees Fahrenheit to ensure that it melts evenly and doesn’t burn.

If you don’t have access to a stove or microwave, you can also consider using alternative wickless materials such as soy or beeswax melts, which can be melted in a wax warmer.

Temperature for Melting Wax

Our recommended temperature for melting the wax is crucial to ensure a smooth and even consistency. It’s important to note that different types of waxes have different melting points.

Advertisement

Here is a step-by-step guide on achieving the optimal temperature for melting your wax:

candlelight concerts bristol

  1. Determine the melting point of your specific wax. This information can usually be found on the packaging or from the supplier.
  2. Set up a double boiler system by placing a heat-resistant container filled with wax pellets or chunks into a larger pot filled with water. This indirect method will prevent the wax from scorching.
  3. Heat the water on low to medium heat and monitor the temperature using a candy or candle thermometer. Aim for a temperature that’s just above the melting point of your wax, usually between 160°F to 180°F (71°C to 82°C).

Alternative Wickless Materials

After determining the optimal temperature for melting the wax, we frequently use alternative wickless materials to achieve the desired consistency. These alternative materials provide different options for making wickless candles, allowing for creative experimentation and customization.

One popular alternative material is soy wax, which is derived from soybean oil and has a lower melting point than traditional candle wax. Soy wax is known for its clean burn and longer-lasting scent.

Another option is beeswax, which has a natural honey scent and a higher melting point. Beeswax is often used for its eco-friendly properties and ability to purify the air.

Lastly, coconut oil can be used as an alternative wickless material. It has a low melting point and provides a smooth and creamy texture to the candle.

candlelight concerts manchester

These alternative materials give you the flexibility to create unique wickless candles with different scents and textures.

Advertisement

Add Fragrance and Color

We enhance the wickless candle by adding fragrance and color. Here’s how to do it:

  1. Fragrance Selection:
  • Choose high-quality fragrance oils specifically designed for candles.
  • Consider the scent’s strength and how it complements the purpose of your candle.
  • Experiment with different combinations to create unique aromas.
  1. Color Combinations:
  • Use candle dye chips or liquid candle dyes for coloring.
  • Start with small amounts and gradually add more until you achieve the desired shade.
  • Mix different colors to create custom shades or use pre-made color combinations.

Adding fragrance and color to your wickless candle enhances its appeal and creates a more enjoyable experience. Remember to test your fragrance and color combinations beforehand to ensure the desired results.

Pour the Wax Into the Container

To complete the process, the wax is poured into the container. Pouring the wax is a crucial step in creating a wickless candle, as it ensures that the wax is evenly distributed and properly sets in the container.

candle picture

There are different methods you can use to pour the wax into the container, depending on your preference and the desired outcome. One method is to slowly pour the melted wax from the pouring pitcher into the container, making sure to leave some space at the top for the fragrance. Another method is to use a ladle or a spoon to carefully transfer the melted wax into the container.

Whichever method you choose, make sure to pour the wax slowly and steadily to avoid any spills or uneven distribution.

Once the wax is poured, it’s time to let it cool and harden, which we’ll discuss in the next section.

Advertisement

Let the Wax Cool and Harden

Once the wax has been poured into the container, we need to allow it to cool and harden. This step is crucial to ensure that our wickless candle sets properly and provides the desired benefits.

Candle

Here are some tips for cooling and hardening the wax:

  1. Patience is key: It’s important to resist the temptation to touch or move the container while the wax is cooling. This can disrupt the process and result in an uneven surface.
  2. Room temperature matters: Find a cool and undisturbed area in your home where the candle can be left to cool. Avoid placing it near drafts or direct sunlight, as these can affect the cooling process.
  3. Give it time: Depending on the size of your candle, it may take several hours or even overnight for the wax to completely cool and harden. Be patient and allow sufficient time for the process to complete.

Trim the Excess Wax

After the wax has cooled and hardened, we can proceed to trim the excess wax. Trimming the excess wax is an important step to ensure that our wickless candle looks neat and professional. To do this, we will need a sharp knife or a wick trimmer. Gently hold the candle and start trimming the excess wax around the edges. Be careful not to cut too deep or damage the candle. As you trim, you can collect the excess wax and use it for future candle making projects. Once you are satisfied with the shape and appearance of your candle, wipe off any wax residue with a clean cloth. Now, our wickless candle is ready to be displayed or gifted to someone special.

Alternatives to Wickless Candles Techniques for Trimming Excess Wax
Battery-operated candles Use a sharp knife or wick trimmer
Flameless LED candles Trim excess wax around the edges
Wax melts Be careful not to cut too deep
Reed diffusers Collect excess wax for future use
Scented plugins Wipe off any wax residue with a cloth

Decorate Your Wickless Candle

How can we creatively enhance the appearance of our wickless candle?

Decorating your wickless candle can make it truly unique and eye-catching. Here are some ideas to get you started:

candle gift

  1. Different types of decorative materials for wickless candles:
  • Gemstones: Add a touch of elegance and sparkle by gluing gemstones onto the outside of your candle.
  • Ribbons and bows: Wrap a colorful ribbon around the base of the candle or tie a bow on top for a charming look.
  • Dried flowers: Press dried flowers onto the surface of the candle using a heat-resistant adhesive.
  1. Techniques for creating unique designs on wickless candles:
  • Wax carving: Use a heated tool to carve intricate patterns, symbols, or words directly onto the surface of the candle.
  • Decoupage: Cut out decorative paper or fabric and adhere it to the candle using decoupage glue for a personalized design.
  • Stenciling: Place a stencil on the candle and apply paint or glitter over it to create a beautiful design.

Store and Enjoy Your Wickless Candle

To store and enjoy our wickless candle, we simply need to find a safe and suitable location in our home. Here is a step-by-step guide on how to properly store and enjoy your wickless candle:

  1. Storage: Find a cool, dry place away from direct sunlight, heat sources, and flammable materials. A cupboard or shelf works well.
  2. Placement: Ensure the candle is on a stable, heat-resistant surface. Avoid placing it near curtains, bedding, or other combustible items.
  3. Enjoyment: To enjoy your wickless candle, place it in a wax warmer or diffuser designed for wickless candles. Turn it on and allow the fragrance to fill the room. Remember to follow the manufacturer’s instructions for your specific wax warmer or diffuser.
  4. Safety: Never leave a wax warmer or diffuser unattended, and keep it out of reach of children and pets. Remember to extinguish the warmer when not in use.

Safety Precautions and Tips

For safe and enjoyable use, it’s important to be aware of the necessary safety precautions and tips when using a wickless candle. Here are some key guidelines to follow:

  1. Preventing Burns
  • Always place the wickless candle on a heat-resistant surface to avoid any accidents.
  • Keep the candle away from flammable objects and ensure it’s out of reach of children and pets.
  • Never leave a burning wickless candle unattended.
  1. Choosing the Right Wax
  • Opt for a high-quality, non-toxic wax that’s specifically designed for wickless candles.
  • Avoid using paraffin wax, as it can release harmful toxins when burned.
  • Consider using soy wax or beeswax, which are natural and environmentally friendly alternatives.

Frequently Asked Questions

How Do I Clean the Container After Using a Wickless Candle?

After using a wickless candle, we have found some helpful cleaning tips for removing residue from the container. First, let the container cool completely. Then, use a cloth or sponge to gently scrub away any leftover wax.

Can I Use Essential Oils Instead of Fragrance Oils for My Wickless Candle?

Yes, you can use essential oils instead of fragrance oils for your wickless candle. Essential oils offer many benefits, such as natural aromas and potential therapeutic effects. However, ensure you use a proper carrier oil to avoid any safety risks or damage to your candle.

Advertisement

the candle library stockists

What Are Some Creative Ways to Decorate a Wickless Candle?

Looking to personalize your wickless candle? Get ready for some creative candle decorating ideas! We’ve got unique ways to make your candle stand out and reflect your style. Let’s dive in!

Can I Use a Different Type of Wax for My Wickless Candle?

Yes, we can use different types of wax for our wickless candles. It offers various benefits, such as the ability to incorporate essential oils for a lovely scent. Let’s explore the step-by-step process of making a wickless candle with different wax options.

How Long Does It Take for the Wax to Cool and Harden Completely?

The wax cooling time can vary depending on factors like room temperature and the type of wax used. It typically takes a few hours for the wax to cool and harden completely.

Conclusion

Now that you’ve learned how to make a wickless candle, you can indulge in the cozy and comforting glow of candlelight without any worries. Imagine the soft flickering flames dancing within your beautifully decorated container, filling your space with a warm and inviting atmosphere.

candlesticks forex

With a bit of creativity and some basic supplies, you can create your own unique wickless candles that will add a touch of magic to any room. So go ahead, unleash your creativity, and enjoy the soothing ambiance of your homemade wickless candles.

Advertisement

Continue Reading

Candles

How to Make Candle Labels on Canva

Published

on

By

Ready to take your candle-making business to the next level? This guide will walk you through creating stunning candle labels with Canva.

With Canva’s user-friendly interface and powerful design tools, you’ll be able to create professional-looking labels that will make your products stand out from the competition.

We’ll walk you through the process step-by-step, from choosing the perfect template to adding text and graphics that reflect your brand.

Plus, we’ll share tips for a polished finish and guide you on how to print and apply your labels.

Advertisement

candles direct

Get ready to elevate your candle packaging game and impress your customers with beautiful, custom-made labels.

Let’s dive in!

Key Takeaways

  • Canva offers a wide range of templates and customization options for designing candle labels.
  • Consider color selection tips, font choices, and graphics to enhance the overall look and feel of the label.
  • Canva allows for easy customization of candle labels with a wide range of font styles, layout options, and image placement techniques.
  • Experiment with colors, backgrounds, and label design elements to create visually appealing and personalized candle labels.

Getting Started With Canva

To begin creating candle labels on Canva, we’ll first need to familiarize ourselves with the platform and its features. Canva is a user-friendly graphic design tool that offers a wide range of templates and customization options.

When designing candle labels, one of the key factors to consider is the color scheme. Choosing the right colors can evoke different emotions and enhance the overall aesthetic of your labels. Canva provides a vast selection of color palettes to choose from, making it easy to find the perfect combination for your candles.

dusk gifts

Additionally, Canva offers a variety of design templates specifically designed for labels. These templates provide a great starting point and can be customized to fit your brand and style.

With Canva’s intuitive interface and helpful features, creating stunning candle labels has never been easier.

Advertisement

Choosing the Perfect Template

We can easily find the ideal template for candle labels by exploring Canva’s extensive selection of design options. When it comes to template selection, Canva offers a wide range of choices to suit any style or theme.

Here are five key considerations to keep in mind when browsing for the perfect template:

candlesticks trading

  • Design Inspiration: Canva provides a plethora of pre-designed templates that can serve as inspiration for your candle label design.
  • Customizability: Look for templates that allow you to customize the colors, fonts, and graphics to match your brand or personal preferences.
  • Layout Options: Consider templates with different layout options, such as circular labels, rectangular labels, or even custom shapes.
  • Theme and Aesthetic: Choose a template that aligns with the theme and aesthetic of your candles, whether it’s rustic, minimalist, or elegant.
  • Label Size: Ensure that the template is the right size for your candle labels, whether you’re using tin containers, glass jars, or any other packaging.

With these considerations in mind, we can now move on to customizing the design elements to create unique and eye-catching candle labels.

Customizing the Design Elements

Now that we’ve chosen the perfect template for our candle labels, let’s dive into customizing the design elements.

The first point to consider is color selection tips, as the right colors can evoke the desired mood or match your brand aesthetic.

Next, we’ll delve into font and typography choices, exploring how different styles can enhance the overall look and feel of the label.

Advertisement

candle holders for pillar candles

Lastly, we’ll discuss the importance of adding graphics and illustrations to make your candle labels visually appealing and unique.

Color Selection Tips

For the color selection tips when customizing the design elements for your candle labels on Canva, consider using an article determiner. The right colors can make a significant impact on the overall appeal and effectiveness of your candle labels. Here are some tips to help you choose the perfect colors for your labels:

  • Understand color psychology and how different colors can evoke specific emotions or convey certain messages.
  • Consider the color coordination with your brand identity and the overall theme of your candles.
  • Use contrasting colors to make important information or elements stand out.
  • Experiment with different color combinations to find the one that best represents your brand and resonates with your target audience.
  • Don’t be afraid to use bold and vibrant colors to grab attention and create a memorable impression.

When you’ve chosen the perfect colors for your candle labels, it’s time to move on to the next important aspect: font and typography choices.

Font and Typography Choices

After considering the color selection tips for your candle labels on Canva, it’s important to now focus on customizing the design elements by choosing the right font and typography. Font pairing plays a crucial role in creating visually appealing and cohesive designs. By combining different fonts that complement each other, you can add depth and personality to your candle labels. It’s essential to stay updated with typography trends to ensure your designs look modern and professional. Here are a few popular font pairings and typography trends to consider:

candle making supplies uk

Font Pairing Typography Trends
Serif + Sans-serif Minimalistic Designs
Script + Sans-serif Handwritten Elegance
Bold + Light Contrast and Hierarchy
Monospace + Sans-serif Retro and Vintage

Adding Graphics and Illustrations

To further enhance the visual appeal of your candle labels, we can now delve into the process of incorporating graphics and illustrations into the design elements. Graphics and branding play a significant role in capturing the attention of your customers and conveying your brand’s identity.

Here are five ways to incorporate illustrations into your candle label design:

Advertisement
  • Add a small icon or symbol that represents your brand or the scent of the candle.
  • Use illustrations to showcase the key ingredients or materials used in the candle.
  • Create custom illustrations that reflect the mood or theme of the candle.
  • Incorporate illustrations of the candle’s packaging or container to give customers a preview of what they can expect.
  • Use graphics to highlight any special features or benefits of the candle, such as long-lasting burn time or eco-friendly ingredients.

By incorporating illustrations strategically, you can create a visually appealing and cohesive candle label design that aligns with your brand’s identity.

Now that we’ve covered the graphics and illustrations, let’s move on to adding text to your candle label.

candlelight inn

Adding Text to Your Candle Label

We love adding text to our candle labels using Canva because it allows us to easily customize and personalize each label. With Canva’s wide range of font selection and label layout options, we can create beautiful and professional-looking designs that capture the essence of our candles. The right font can evoke a sense of elegance, warmth, or playfulness, depending on the mood we want to convey. To give you an idea of the possibilities, here’s a table showcasing different font styles and their emotional impact:

Font Style Emotional Impact
Script Romantic
Sans Serif Modern
Serif Classic
Handwritten Whimsical
Bold Strong

Incorporating Images and Graphics

When it comes to creating candle labels that catch the eye, the visual impact of graphics is crucial. Incorporating images and graphics in your design can elevate the overall look and feel of your label.

From choosing the right images to utilizing image placement techniques, we’ll explore how to design candle labels that leave a lasting impression.

Visual Impact of Graphics

By incorporating eye-catching images and graphics, we enhance the visual impact of our candle labels on Canva. Visual storytelling is an important aspect of branding, and it helps to convey the message and personality of our candles.

Advertisement

candlelight concerts edinburgh

Here are five ways in which we can make our candle labels visually impactful:

  • Choose high-quality images that capture the essence of our candles and align with our brand identity.
  • Use bold and vibrant colors to draw attention and create a cohesive look.
  • Incorporate unique and creative typography to make our labels stand out.
  • Experiment with different shapes and layouts to add visual interest and break away from the traditional label design.
  • Consider adding subtle textures or patterns to add depth and make our labels more tactile.

Designing With Images

One effective way to enhance the visual appeal of candle labels on Canva is by incorporating high-quality images and graphics. Designing with illustrations not only adds a touch of creativity but also helps to convey the essence of the product.

When incorporating product details into the design, using images can be a powerful tool to showcase the unique features and qualities of the candles. For example, you can include images of the different scents or ingredients used in the candles to give customers a better idea of what they can expect.

Furthermore, graphics such as decorative borders or patterns can add visual interest and make the labels more eye-catching. By carefully selecting and incorporating images and graphics, you can create candle labels that aren’t only visually appealing but also effectively communicate the essence of your product.

candles direct reviews

Image Placement Techniques

To incorporate images and graphics effectively into candle labels on Canva, we can utilize various image placement techniques. These techniques allow us to enhance the visual appeal of our labels and create a cohesive and professional design. Here are five image placement techniques that can elevate your candle labels:

  • Blend Modes: Experiment with different blend modes to seamlessly integrate your images with the background and other elements of your label design.
  • Layering: Use multiple layers to create depth and dimension in your design. Arrange your images in a way that complements the overall composition.
  • Masking: Utilize masking techniques to selectively reveal or hide parts of your images. This allows you to create unique effects and highlight specific elements.
  • Alignment: Ensure that your images are properly aligned with other design elements, such as text or graphics. This helps maintain a balanced and visually pleasing layout.
  • Resizing and Scaling: Adjust the size of your images to fit the label dimensions and maintain clarity. Scaling your images proportionally prevents distortion and pixelation.

Playing With Colors and Backgrounds

We frequently experiment with colors and backgrounds to enhance our candle labels on Canva. Color psychology plays a crucial role in creating a cohesive design that resonates with our audience. By understanding the emotions and associations different colors evoke, we can strategically choose hues that reflect the essence of our brand and the mood we want to convey.

For example, warm tones like red and orange can evoke feelings of warmth and comfort, perfect for cozy candle labels. On the other hand, cool tones like blue and green can create a sense of calm and serenity, ideal for relaxing scents. By experimenting with different color combinations and backgrounds, we can create visually appealing labels that capture the attention of our customers.

Advertisement

Now, let’s dive into how we can use Canva’s design tools and features to bring our candle labels to life.

candlesticks trading

Using Canva’s Design Tools and Features

Our favorite design tool on Canva is its user-friendly interface, which allows us to create stunning candle labels with ease. With Canva’s collaboration features, we can work seamlessly with our team members, making the design process more efficient.

Here are five amazing features that Canva offers for creating candle label mockups:

  • Drag-and-drop functionality: Canva’s drag-and-drop feature allows us to effortlessly add and arrange elements on our candle label design.
  • Extensive library of templates: Canva provides a wide range of pre-designed templates specifically tailored for candle labels, saving us time and effort.
  • Customizable text options: We can choose from a variety of fonts and text styles, ensuring that our candle label design perfectly matches our brand.
  • Image editing tools: Canva allows us to edit and enhance our candle label images, making them more visually appealing.
  • Access to a vast collection of graphics and illustrations: Canva’s extensive library of graphics and illustrations gives us endless possibilities for creating unique and eye-catching candle label designs.

With these powerful design tools and features, Canva makes creating candle labels a breeze, allowing us to unleash our creativity and produce professional-looking designs.

Making Your Label Unique With Personalization

Let’s add a personal touch to our candle labels by customizing the design and adding unique elements.

candle light

By using Canva’s design tools and features, we can create labels that truly reflect our brand and style.

Advertisement

Whether it’s choosing a specific font, adding a personal logo, or incorporating meaningful images, personalization allows us to create labels that stand out and leave a lasting impression on our customers.

Customizing Label Design

To customize the design of your candle labels and make them truly unique, incorporate personalized elements that reflect your brand and aesthetics. Here are some ideas to help you create a stunning label design:

  • Custom Label Dimensions: Experiment with different label sizes to find the perfect fit for your candles. Consider square, rectangular, or even circular labels for a distinctive look.
  • Label Printing Options: Explore various printing techniques such as foil stamping, embossing, or matte finishes to add texture and visual appeal to your labels.
  • Color Palette: Choose colors that align with your brand identity and evoke the desired emotions. Consider using complementary or contrasting shades to make your labels stand out.
  • Typography: Select fonts that align with your brand personality and are legible at different sizes. Play with font styles, sizes, and spacing to create visual hierarchy and enhance readability.
  • Graphics and Illustrations: Incorporate custom illustrations or graphics that represent your brand or the scent of your candles. These elements can add a touch of uniqueness and personality to your labels.

Adding Personal Touch

One way to make your candle labels unique and personalized is by incorporating a custom logo or monogram. Adding a personal touch to your labels not only makes them stand out but also reflects your brand and style. There are various personalization techniques you can use to make your candle labels truly one-of-a-kind.

myer

For example, you can experiment with different fonts, colors, and graphics to create a visually appealing design. Another creative label idea is to include a handwritten element, such as a signature or a special message, to add a personal and heartfelt touch. Additionally, you can consider using unique shapes or patterns that align with your brand’s aesthetic. By utilizing these personalization techniques, you can create candle labels that aren’t only visually appealing but also reflect your brand’s identity and resonate with your customers.

Now, let’s move on to some tips for achieving a professional-looking finish on your candle labels.

Tips for a Professional-Looking Finish

To achieve a professional-looking finish for your candle labels, we recommend incorporating clean and minimalist designs that align with your brand aesthetic. Here are some tips to help you create labels that stand out:

Advertisement
  • Font Pairing: Choose fonts that complement each other and reflect the mood of your brand. A combination of a bold, eye-catching font with a more elegant and legible font can create a visually appealing label.
  • Label Sizing: Consider the size and shape of your candle containers when designing your labels. Make sure the labels fit properly and don’t overpower the candles. Experiment with different sizes to find the perfect balance.
  • Consistent Branding: Use consistent colors, fonts, and design elements across all your candle labels to create a cohesive and professional look.
  • High-Quality Images: Use high-resolution images that showcase your candles in the best light. Avoid pixelation and blur, as they can make your labels look unprofessional.
  • Attention to Detail: Pay close attention to spacing, alignment, and overall composition. A well-organized and well-balanced label will give off a professional vibe.

Printing and Applying Your Candle Labels

We recommend using a professional printing service to ensure high-quality results when printing and applying your candle labels. These printing techniques will help bring your designs to life with vibrant colors and sharp details. Look for a printing service that specializes in label printing to ensure they have the necessary equipment and expertise. They can guide you on the best paper and finish options for your labels, such as glossy or matte.

yankee candle

Once you have your beautifully printed labels, it’s time to apply them to your candles. Label application methods can vary depending on the type of label and container you’re using. Some common methods include using adhesive labels, heat shrink sleeves, or printing directly onto the candle itself. Experiment with different methods to find the one that gives you the desired professional finish.

Frequently Asked Questions

How Do I Create a Canva Account?

To create a Canva account, we simply visit the Canva website and click on the "Sign up" button. Then, we fill in our details, choose a password, and voila! We’re ready to start creating amazing designs with Canva.

Can I Use Canva on My Mobile Device?

Yes, you can use Canva on your mobile device. With the Canva mobile app, you have access to a wide range of design templates, allowing you to create stunning candle labels on the go.

Can I Save My Design and Come Back to It Later?

Yes, you can save your design and come back to it later on Canva. This feature ensures the accessibility and convenience of your work, allowing you to easily pick up where you left off and make any necessary adjustments.

candle holders glass

There are copyright restrictions on the images and graphics in Canva. However, Canva offers a range of licensing options to ensure you can use the content legally and avoid any copyright infringement issues.

Advertisement

Can I Print My Candle Labels at Home or Do I Need to Use a Professional Printing Service?

We can print our candle labels at home or use a professional printing service. Home printing offers convenience and control, while professional printing ensures high-quality results. It depends on our preferences and resources.

Conclusion

So there you have it, folks! Making candle labels on Canva is as easy as pie. Who needs professional designers when you can create stunning labels yourself?

With Canva’s user-friendly interface and a plethora of customizable templates, you’ll have your candles looking like they came straight from a high-end boutique.

uses of candles in daily life

So go ahead, unleash your inner artist and start designing your unique candle labels today. Your customers won’t believe you did it yourself!

Advertisement

Continue Reading

Trending

Copyright © 2024 Just Candles Affiliate disclaimer As an affiliate, we may earn a commission from qualifying purchases. We get commissions for purchases made through links on this website from Amazon and other third parties.