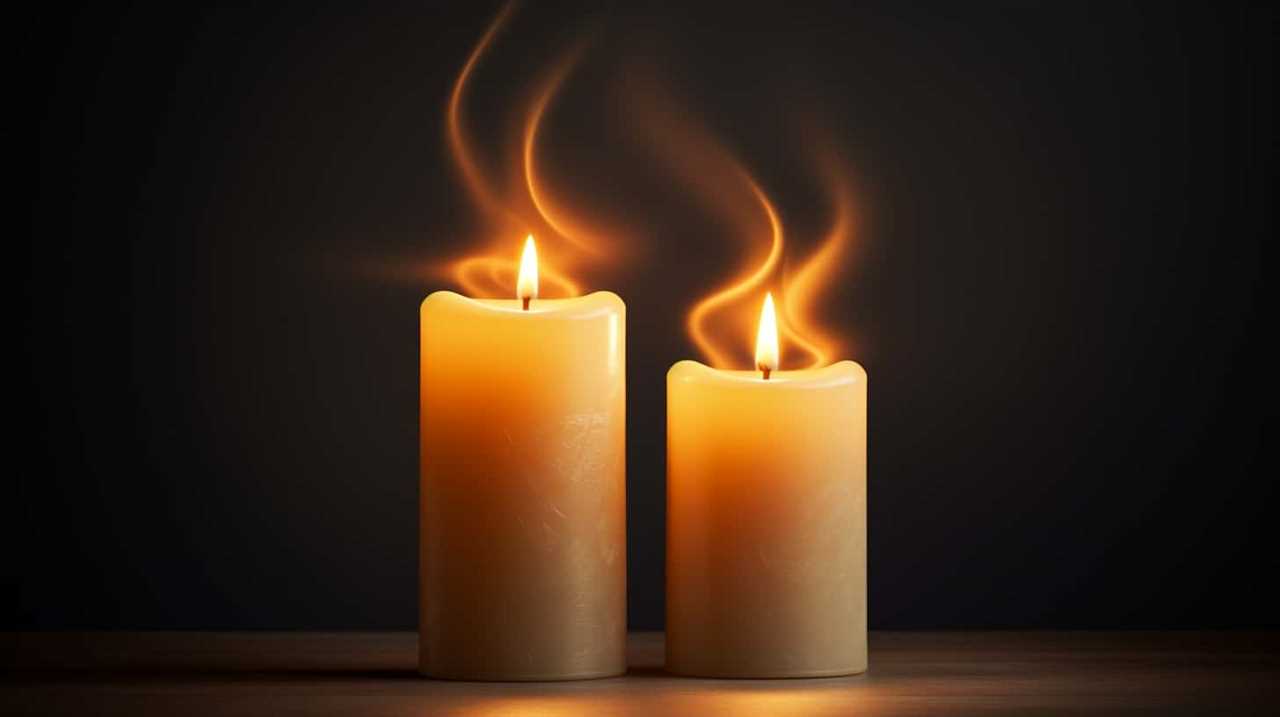
Connect with us

Candles

How to Remove Candle Wax From Vinyl Floor

Published

on

Were you aware that one of the leading reasons for stains on vinyl flooring is spills from candle wax? If you’re dealing with this problem, there’s no need to worry! We’ve got the ideal solution for you.

In this guide, we will show you how to remove candle wax from your vinyl floor with ease. By following our step-by-step instructions, you will master the art of wax removal in no time.

We will guide you through the process using simple and effective techniques, such as applying heat, using vinegar solutions, and even trying freezing methods. With our expert tips, you can say goodbye to those stubborn wax stains and enjoy a clean, wax-free vinyl floor once again.

Let’s get started!

Advertisement

interesting facts about candles

Key Takeaways

  • Scrape off excess wax using a plastic scraper or old credit card
  • Apply heat with a hairdryer or heat gun to soften the wax
  • Use the freezing method to make the wax brittle and easy to chip away
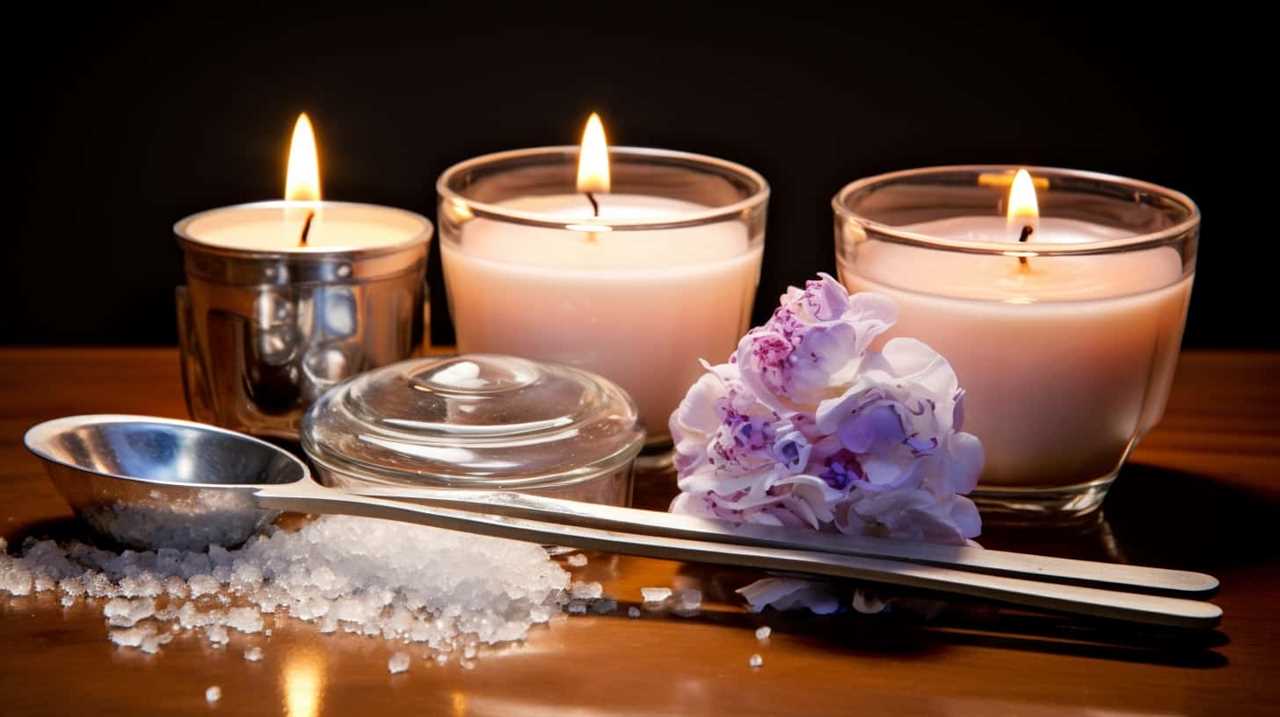
  • Create a cleaning solution with equal parts white vinegar and water to remove any remaining wax residue on the vinyl floor

Gather Necessary Supplies

To begin removing candle wax from a vinyl floor, we’ll need to gather the necessary supplies.

First, we’ll need a hairdryer or a heat gun to apply heat to the wax. This will help soften the wax and make it easier to remove.

Next, we’ll need a soft cloth or paper towels to absorb the melted wax.

Additionally, a cleaning solution specifically designed for vinyl floors will be required. This solution will help dissolve any remaining wax residue.

yankee candle

Finally, we’ll need a plastic scraper or an old credit card to scrape off excess wax. Remember to use caution when applying heat to prevent damage to the vinyl floor.

Now that we’ve gathered our supplies, let’s move on to the next step of removing candle wax from a vinyl floor.

Advertisement

Scrape off Excess Wax

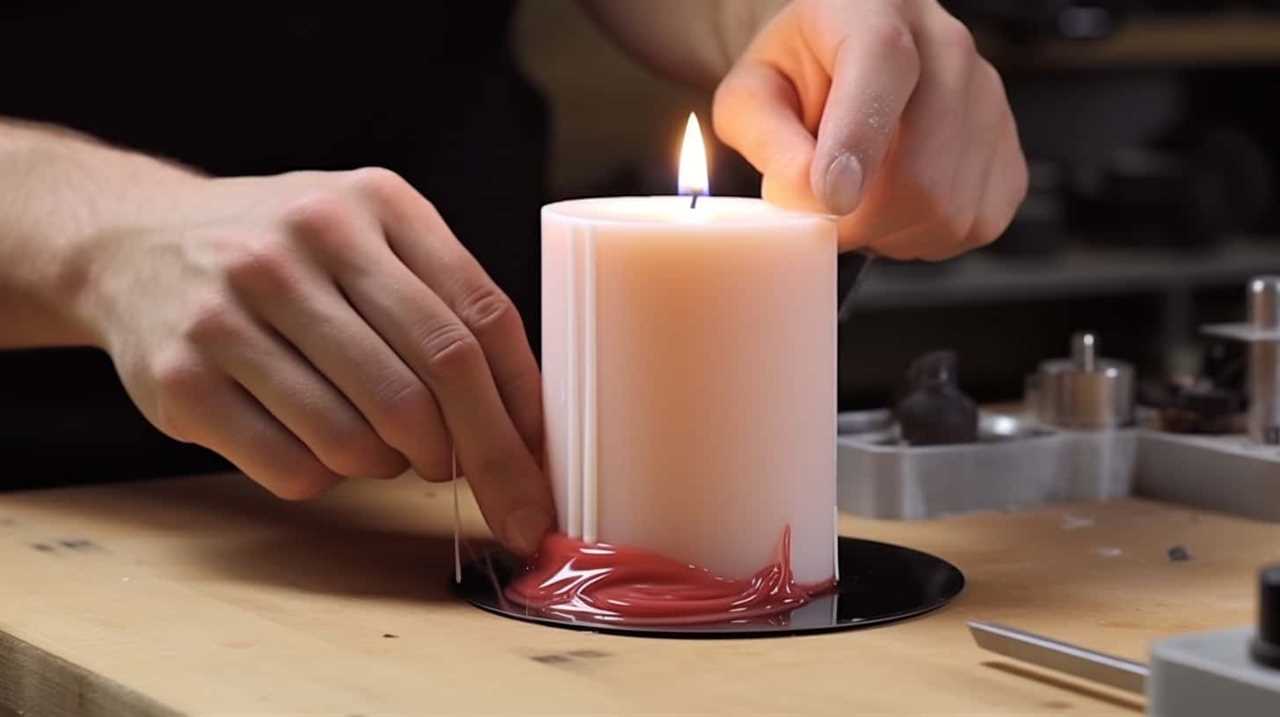
First, we will use a plastic scraper or an old credit card to carefully remove any excess wax from the vinyl floor. Gently slide the edge of the scraper or card under the wax, applying slight pressure to lift it off the surface. Be careful not to scratch or damage the vinyl while doing this. Once the majority of the wax has been scraped off, there might still be some residue left behind. To tackle this, we have two effective techniques: the hairdryer technique and the freezing method.

For the hairdryer technique, set your hairdryer to a medium heat setting and aim it at the remaining wax. The heat will soften the wax, making it easier to scrape off. Use the plastic scraper or credit card to gently lift and remove the softened wax.

candle salad

Alternatively, you can try the freezing method. Take a plastic bag filled with ice cubes and place it on top of the wax. Let it sit for a few minutes until the wax becomes brittle and hard. Then, use the plastic scraper or credit card to carefully chip away the frozen wax.

Hairdryer Technique Freezing Method
Applies heat to soften wax Uses cold temperature to harden wax
Easier to scrape off softened wax Wax becomes brittle and easy to chip away
Requires a hairdryer Requires ice cubes and a plastic bag
Ideal for small wax spills Suitable for larger wax spills
Quick and efficient method May take longer to freeze the wax

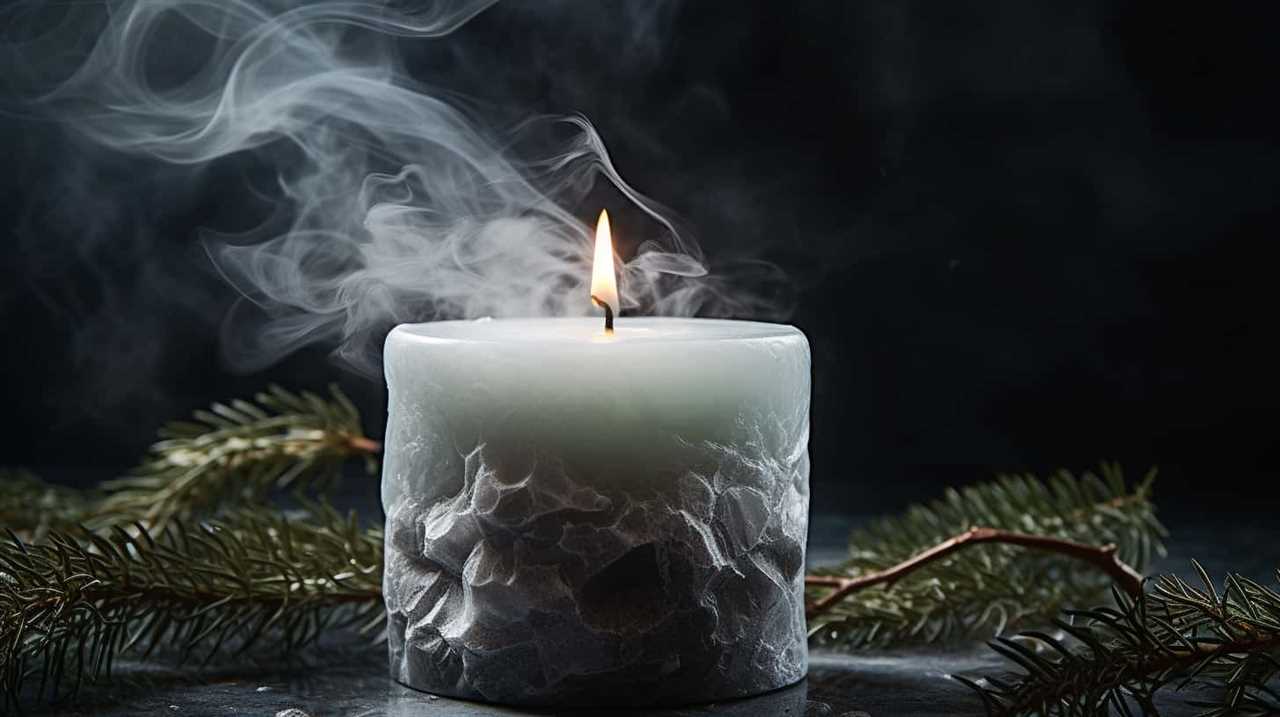
Apply Heat to Soften the Wax

Now let’s apply heat to soften the remaining wax on the vinyl floor. There are two effective methods you can use: the hairdryer method and the freezing technique.

First, let’s talk about the hairdryer method. Begin by setting your hairdryer to a medium or high heat setting. Hold the hairdryer about 6 inches away from the wax stain. Direct the hot air towards the wax, moving the hairdryer in a back-and-forth motion. The heat will cause the wax to soften and melt, making it easier to remove.

Advertisement

Alternatively, you can try the freezing technique. Take a plastic bag filled with ice cubes and place it on top of the wax stain. Leave it there for a few minutes until the wax becomes hard and brittle. Once the wax is frozen, use a plastic scraper or a credit card to gently lift and scrape off the wax from the vinyl floor.

candlestick patterns

Both methods are effective in softening and removing wax from vinyl floors. Choose the one that suits you best and proceed to the next step in the process.

Blot up Melted Wax

Now that the candle wax has been softened, we can move on to the next step: blotting up the melted wax.

This step involves a few different techniques, including heat and scrape, the ice method, and applying a cleaning solution.

By following these methods, we can effectively remove the wax from the vinyl floor and restore its original appearance.

Advertisement

yankee candle singapore

Let’s get started!

interesting facts about candles

Heat and Scrape

After the wax has been melted, we can proceed to blotting it up using a heat source and a scraping tool. This method is effective in removing candle wax from vinyl floors. Here are the steps to follow:

  1. Heat the wax: Use a hairdryer or a heat gun on its lowest setting to warm up the wax. Hold the heat source a few inches above the wax for a few seconds until it becomes soft and pliable.
  2. Scrape off the wax: Take a plastic scraper or an old credit card and gently scrape off the softened wax. Be careful not to scratch the vinyl surface. Use slow and controlled motions to lift the wax off the floor.
  3. Blot up any residue: After scraping, there may still be some wax residue left. Place a clean cloth or paper towel over the remaining wax and apply gentle pressure to blot it up. Repeat this process until no more wax transfers onto the cloth.

By following these scraping techniques and using heat effectively, you can successfully remove candle wax from your vinyl floor.

Now let’s move on to the next method, which involves using the ice method.

candle brand

Use Ice Method

To remove melted candle wax from a vinyl floor, we can use the ice method to blot up the wax residue. This technique involves freezing the wax to make it easier to remove. Here’s how to do it:

  1. Gather the necessary materials: ice cubes, a plastic bag, and a plastic scraper.
  2. Place the ice cubes in the plastic bag and seal it.
  3. Hold the bag of ice cubes directly on top of the wax spill.
  4. Leave the ice on the wax for about 15 minutes to freeze it thoroughly.
  5. Once the wax is frozen, use the plastic scraper to gently scrape off the wax. Be careful not to damage the vinyl floor.
  6. Continue scraping until all the wax has been removed.
  7. Clean the area with warm soapy water to remove any remaining residue.

Apply Cleaning Solution

To effectively remove any remaining residue of melted candle wax from the vinyl floor, we need to apply a cleaning solution and blot up the wax using a cloth or paper towels. Here’s how to do it:

  1. Apply Heat: Use a hair dryer or a heat gun on a low setting to warm up the wax. This will make it easier to remove.
  2. Vinegar Solution: Mix equal parts of white vinegar and water to create a cleaning solution. Vinegar is effective in breaking down wax and removing it from the floor.
  3. Blot up Melted Wax: Dip a cloth or paper towel in the vinegar solution and gently blot the melted wax. Be careful not to scrub or rub, as this can spread the wax or damage the floor.

Remove Remaining Residue With Vinegar Solution

Now let’s move on to removing the remaining residue with a vinegar solution.

Vinegar is a highly effective ingredient for wax removal due to its acidic properties.

Advertisement

candle shack uk

By using a vinegar solution, we can easily eliminate any leftover wax residue on the vinyl floor.

This step will ensure a thorough cleaning and leave your vinyl floor looking spotless.

Vinegar for Wax Removal

We found that vinegar effectively removes any remaining wax residue from the vinyl floor. Here are some alternative wax removal methods using vinegar:

  • Vinegar and warm water solution: Mix equal parts white vinegar and warm water in a bucket. Dip a clean cloth or sponge into the solution and wring out the excess liquid. Gently scrub the wax residue in a circular motion until it lifts off the floor.
  • Vinegar and baking soda paste: Create a paste by mixing vinegar and baking soda until it forms a thick consistency. Apply the paste onto the wax residue and let it sit for a few minutes. Scrub the area with a soft brush or cloth, then rinse with warm water to remove any remaining residue.
  • Vinegar and dish soap solution: Combine one cup of white vinegar, a few drops of dish soap, and warm water in a spray bottle. Spray the solution onto the wax residue and let it sit for a few minutes. Wipe the area clean with a damp cloth or sponge.

These vinegar methods provide effective alternatives for removing wax residue from your vinyl floor.

myer

Effective Residue Elimination

For effective residue elimination, we can remove any remaining wax residue from the vinyl floor using a vinegar solution. Vinegar is a versatile and effective cleaner that can break down and dissolve wax residue without damaging the vinyl flooring. Here’s a step-by-step guide on how to remove remaining residue with a vinegar solution:

  1. Mix a solution of equal parts white vinegar and warm water in a bucket or spray bottle.
  2. Dampen a clean cloth or sponge with the vinegar solution.
  3. Gently scrub the remaining wax residue on the vinyl floor.
  4. Let the vinegar solution sit on the residue for a few minutes to loosen it.
  5. Wipe away the residue with a clean cloth or sponge.
  6. Rinse the area with clean water and dry it thoroughly.

By using this vinegar solution, you can effectively remove any remaining wax residue from your vinyl floor. This method isn’t only efficient but also a safer alternative to harsh chemical cleaners.

Remember to take preventive measures to minimize future residue buildup and consider alternative cleaning methods for maintaining your vinyl floor.

Advertisement

Cleaning Vinyl With Vinegar

To clean vinyl and remove any remaining residue, we can use a vinegar solution. Vinegar is a natural and effective cleaner that can break down stubborn wax residue on vinyl floors. Here is a step-by-step guide on how to clean vinyl with vinegar:

yankee candle singapore

  1. Create a vinegar solution by mixing equal parts of white vinegar and warm water in a bucket or spray bottle.
  2. Apply the vinegar solution onto the affected area using a sponge or cloth.
  3. Gently scrub the vinyl floor in a circular motion to loosen and lift the remaining wax residue.

Using vinegar to clean vinyl has several benefits:

  • Vinegar is a natural and non-toxic cleaner, making it safe for both humans and pets.
  • It’s an affordable and readily available cleaning solution.
  • Vinegar also helps to remove any lingering odors, leaving your vinyl floor fresh and clean.

Remember that vinegar is acidic, so it’s important to test it on a small, inconspicuous area of the vinyl floor before applying it to the entire surface.

Scrub Stubborn Stains With Baking Soda Paste

To effectively remove stubborn stains from your vinyl floor, mix baking soda with water to create a paste. Baking soda is a versatile household ingredient that offers numerous benefits when it comes to cleaning. Not only is it safe to use on vinyl floors, but it also has gentle abrasive properties that help lift stains without causing damage.

Here is a step-by-step guide on how to scrub stubborn stains with a baking soda paste:

candles direct portugal

  1. In a small bowl, combine equal parts baking soda and water to form a thick paste.
  2. Apply the paste directly to the stubborn stain on your vinyl floor.
  3. Gently scrub the paste into the stain using a soft-bristled brush or sponge.
  4. Let the paste sit on the stain for a few minutes to allow it to work its magic.
  5. Rinse the area with clean water and wipe dry with a cloth.

Wipe Down the Floor With a Damp Cloth

Now that you have successfully removed the stubborn stains with a baking soda paste, it’s time to move on to the next step of the process.

Wiping down the floor with a damp cloth is crucial to ensure that all the remaining wax and cleaning solution are completely removed. This step helps to restore the shine and cleanliness of your vinyl floor, leaving it looking as good as new.

Heat and Scrape

After heating the candle wax on the vinyl floor, we can easily scrape it off and wipe down the floor with a damp cloth. This step is crucial in removing any remaining residue and ensuring a clean and polished finish. Here’s how to effectively heat and scrape candle wax from a vinyl floor:

Advertisement
  • Scraping Tools: Gather the necessary scraping tools such as a plastic scraper or a credit card. These tools will help remove the softened wax without damaging the surface of the vinyl floor.
  • Alternative Methods: If you don’t have scraping tools available, you can also use a plastic spatula or even a butter knife. Just be cautious not to apply too much pressure to avoid scratching the floor.
  • Wipe Down with a Damp Cloth: Once you have successfully scraped off the candle wax, take a damp cloth and wipe down the floor. This will remove any remaining wax particles and leave your vinyl floor looking spotless.

Remember to proceed with caution and be gentle when scraping to avoid any damage to the vinyl floor.

scented candle

Use Ice Method

We recommend using the ice method to effectively remove candle wax from a vinyl floor. This method is quick and efficient, and it requires minimal effort. Here’s how you can do it:

  1. Take a few ice cubes and place them in a resealable plastic bag.
  2. Gently press the bag against the wax stain on the floor.
  3. Leave the bag on the wax for a few minutes to allow the cold temperature to harden the wax.
  4. Once the wax is hard, use a plastic scraper or a credit card to carefully scrape it off the floor.
  5. If there are any remnants of wax left, dampen a cloth with warm water and wipe down the floor.
  6. Repeat this process until all the wax is removed.

Using the ice method is a great alternative to heat and scrape methods, as it allows for quick melting of the wax without the risk of damaging the vinyl floor.

Apply Cleaning Solution

To remove any remaining remnants of wax, dampen a cloth with warm water and wipe down the vinyl floor. This step is crucial in ensuring that all traces of wax are completely eliminated.

Here’s how to effectively apply a cleaning solution to remove excess wax from your vinyl floor:

voluspa

  • Dilute a mild soap or vinyl floor cleaner in a bucket of warm water.
  • Dip the cloth into the cleaning solution, making sure it’s well saturated.
  • Gently wipe down the floor, focusing on the areas where wax residue is present.
  • Apply slight pressure while wiping to effectively lift the wax off the surface.
  • Rinse the cloth frequently to avoid spreading the wax around.
  • Continue wiping until the floor is clean and free from any leftover wax.

Once finished, use a dry cloth to remove any excess moisture from the floor.

Dry the Floor Thoroughly

Once the candle wax has been removed, it is important to ensure that the vinyl floor is thoroughly dried. This step is crucial to prevent any residual moisture from causing damage to the floor. There are two effective methods for drying the floor: the hairdryer method and the freezing technique.

The hairdryer method involves using a hairdryer on a low heat setting to gently blow warm air over the wax stain. Move the hairdryer back and forth to evenly distribute the heat and facilitate the drying process. Be cautious not to hold the hairdryer too close to the floor as it may cause damage.

Advertisement

Alternatively, the freezing technique can also be used. Place a plastic bag filled with ice cubes over the wax stain and leave it for a few minutes until the wax becomes brittle. Then, gently scrape off the frozen wax using a plastic scraper or credit card.

bath and body works candle day

Table: Methods for Drying the Vinyl Floor

Method Technique
Hairdryer Method Use a hairdryer on low heat
Freezing Technique Apply ice cubes on wax stain

Polish the Floor for a Shiny Finish

Now that the floor is dry, it’s time to polish it for a shiny finish.

To achieve a glossy shine, we’ll need to use a buffer. Buffing the floor will help to remove any remaining residue and bring out its natural luster.

Additionally, we’ll discuss the proper techniques for applying polish to ensure an even and long-lasting shine.

Advertisement

candle making supplies

Buffing for Glossy Shine

How can we achieve a glossy shine on our vinyl floor by buffing it for a shiny finish?

Buffing is a crucial step in achieving a mirror-like shine on your vinyl floor. To help you master this technique, here are some steps you can follow:

  • Start by selecting the right buffing pad for your floor type. Different pads offer different levels of abrasiveness, so choose one that suits your vinyl floor.
  • Apply a small amount of buffing compound to the floor. This compound helps to remove any surface imperfections and enhances the shine.
  • Using a buffing machine, move it in slow, overlapping circles across the entire floor surface. Make sure to cover every inch of the floor for a consistent shine.

By following these buffing techniques, you’ll be able to achieve a glossy, mirror-like shine on your vinyl floor.

Now, let’s move on to the next step: polish application techniques.

candle homewares

Polish Application Techniques

To achieve a shiny finish on our vinyl floor, we can apply polish using specific techniques.

Polish application techniques can greatly enhance the appearance of the floor and provide a protective layer against scratches and stains. One effective method is to use a polishing machine. The benefits of using a polishing machine include a more even distribution of polish and a faster application process.

Advertisement

To begin, ensure that the floor is clean and dry. Apply the polish in a thin, even layer using a microfiber pad or a mop. Work in small sections, moving in a back-and-forth motion. Allow the polish to dry completely before applying additional coats.

Use a Hairdryer for Quick Wax Removal

We can quickly remove candle wax from a vinyl floor by using a hairdryer. The hairdryer benefits in this process are its ability to melt the wax and make it easier to remove. Here are some alternative wax removal methods:

candle holders glass

  • Scraping: Gently scrape off the excess wax with a plastic scraper or credit card. Be careful not to damage the vinyl floor.
  • Heating: Set the hairdryer to a medium heat setting and hold it a few inches above the wax. Move the dryer in a circular motion to evenly distribute the heat.
  • Blotting: Place a clean cloth or paper towel over the melted wax and press down firmly. The cloth will absorb the melted wax, leaving the floor clean.

With these hairdryer techniques, you can effectively remove candle wax from your vinyl floor.

Now, let’s explore another method to try freezing the wax for easy removal.

Try Freezing the Wax for Easy Removal

Continuing from our previous method, another effective way to remove candle wax from a vinyl floor is by freezing it for easy removal. This technique is especially useful when dealing with larger wax spills or when you want a quick wax removal solution.

Freezing the wax causes it to harden and become brittle, making it easier to scrape off. Here’s how to do it:

Advertisement

candle shack

  1. Fill a plastic bag with ice cubes or use a freezer pack.
  2. Place the bag directly on top of the wax spill.
  3. Let it sit for about 20 minutes to allow the wax to freeze.
  4. Once the wax is completely frozen, take a plastic scraper or credit card and gently scrape off the wax. Be careful not to scratch the vinyl floor.
  5. If there are any remaining residue or stubborn spots, you can use an alternative cleaning method such as rubbing alcohol or vinegar to remove them.

Use a Commercial Wax Remover as a Last Resort

If freezing the wax and alternative cleaning methods fail, our last resort is to use a commercial wax remover. While it’s always preferable to try DIY methods for removing candle wax, sometimes they may not be effective enough to completely remove the residue from your vinyl floor. In such cases, a commercial wax remover can be a reliable option. Here are a few alternatives you can consider before resorting to a commercial product:

  • Isopropyl alcohol: Apply a small amount of isopropyl alcohol onto a clean cloth and gently rub the wax residue until it’s lifted off.
  • Heat method: Use a blow dryer to melt the wax, and then immediately wipe it away with a cloth or paper towel. Be careful not to overheat the vinyl floor.
  • Vinegar solution: Create a mixture of equal parts vinegar and warm water, and use it to dampen a cloth. Gently rub the wax until it’s removed.

Prevent Future Wax Spills With Preventive Measures

To avoid future wax spills on your vinyl floor, take preventive measures to protect the surface. Here are some long-term solutions that can help you maintain a wax-free floor:

Preventive Measures Steps to Follow
Use Wax Guards Apply wax guards to the bottom of candles to catch any drips.
Place Mats or Trays Use mats or trays underneath candles to catch any wax spills.
Opt for Flameless Candles Consider using flameless candles that don’t produce wax.

Enjoy Your Clean and Wax-Free Vinyl Floor!

We can now relish the delight of a clean and wax-free vinyl floor. After successfully removing the candle wax, it’s important to maintain the cleanliness and shine of the floor.

Here are some cleaning techniques and maintenance tips to keep your vinyl floor looking its best:

the candle library stockists

  • Regular sweeping or vacuuming: Remove any dirt, dust, or debris from the floor’s surface to prevent scratches and maintain its shine.
  • Gentle cleaning solutions: Use a mild detergent or vinyl floor cleaner to remove any stains or spills. Avoid harsh chemicals that can damage the floor.
  • Soft mop or cloth: Wipe the floor gently with a soft mop or cloth to remove any residue and restore its luster.

Frequently Asked Questions

Can I Use a Hairdryer to Remove Wax From a Vinyl Floor?

Yes, we can use a hairdryer to remove wax from a vinyl floor. However, there are alternative methods for removing wax, such as using ice or a plastic scraper.

How Can I Prevent Future Wax Spills on My Vinyl Floor?

To prevent future wax spills on our vinyl floor, we can take proactive steps. Regularly clean the floor with a gentle cleaner to remove any residue. Place a protective mat or tray under candles to catch any drips.

What Should I Do if the Wax Is Stubborn and Won’t Come off With Vinegar Solution?

If the wax is stubborn and won’t come off with vinegar solution, we recommend using a heat gun and the scraping method. This technique allows for precise removal of the wax without damaging the vinyl floor.

Is It Safe to Use a Commercial Wax Remover on a Vinyl Floor?

Using homemade wax removers is effective and safe for removing candle wax from vinyl floors. However, it is important to be cautious when using commercial wax removers as they may have adverse effects on the vinyl surface.

Advertisement

candlesticks forex

What Other Preventive Measures Can I Take to Keep My Vinyl Floor Wax-Free?

To keep your vinyl floor wax-free, we recommend taking preventive measures and using proper cleaning techniques. Regularly sweep or vacuum to remove debris, place mats at entrances, and promptly clean up any spills.

Conclusion

Now that you’ve learned how to remove candle wax from your vinyl floor, you can confidently tackle any wax spills that come your way.

Remember, prevention is key, so take preventive measures to avoid future mishaps.

As the saying goes, ‘A stitch in time saves nine,’ taking prompt action will save you from a bigger clean-up later.

candlelight concert

Enjoy your sparkling clean and wax-free vinyl floor!

Advertisement

I'm Jane and I love candles. I have candles everywhere in my house--in every room, on every surface. I love the smell of candles, and I love how they make my place feel warm and cozy. Candles are really important to me. They help me relax and de-stress after a long day. They remind me of happy memories, and they make me feel calm and peaceful. I can't imagine my life without candles!

Continue Reading
Advertisement

Candles

Why Is the Flame on My Candle so Small

Published

on

By

Ever thought about why the flame on our candles is so tiny?

Well, let’s dive into the fascinating world of candle science and explore the various factors that can contribute to this phenomenon. From insufficient oxygen supply to drafts interfering with the airflow, there are several possible explanations.

Additionally, the length and trimming of the candle wick, as well as the presence of wax buildup, can all affect the size of the flame. Even the quality of the wick material and the location where the candle is placed can play a role.

So, join us as we unravel the mysteries behind the small flames on our candles and gain a mastery of this captivating subject.

Advertisement

birthday candle

Key Takeaways

  • Insufficient oxygen supply can cause a small flame on a candle.
  • Drafts or airflow interference can also affect the size of the flame.
  • Improper wick placement and material selection can result in a small flame.
  • Low-quality or expired candles, as well as candles with wax that is too hard or dense, may have small flames.

Insufficient Oxygen Supply

The insufficient oxygen supply causes the flame on our candle to be small. When the oxygen supply to a flame is blocked or limited, it undergoes a process known as oxygen deprivation. This occurs because fire requires oxygen to sustain its combustion. When there isn’t enough oxygen available, the flame struggles to stay alive and becomes smaller in size.

The blocked oxygen supply can be due to various factors, such as a lack of ventilation in the room or the presence of other gases that compete with oxygen for combustion. Understanding the importance of oxygen in maintaining a healthy flame helps us identify the underlying causes of a small flame.

Moving forward, let’s explore how drafts or airflow interference can also impact the size of the flame.

Drafts or Airflow Interference

When it comes to the small flame on a candle, drafts or airflow interference can be significant factors.

the candle library stockists

Blocked air supply, such as when a candle is placed in an enclosed space or near objects that obstruct the airflow, can cause the flame to diminish.

Additionally, a windy environment can easily disrupt the flame’s stability, leading to a smaller and flickering flame.

Advertisement

Lastly, poor ventilation in a room can create stagnant air, limiting the oxygen supply and resulting in a smaller flame.

Blocked Air Supply

To understand why the flame on our candle is small, it’s crucial to consider the potential blockage of air supply caused by drafts or airflow interference. When the airflow around a candle is blocked, it can lead to a restricted supply of oxygen, resulting in a smaller flame.

yankee candle malaysia

Blocked airflow can occur due to various factors such as closed windows, doors, or air vents, as well as the presence of objects obstructing the path of air. This obstruction prevents a sufficient amount of oxygen from reaching the flame, causing an oxygen deficiency and subsequently reducing the size of the flame.

Understanding the impact of blocked airflow on candle flames is essential for creating optimal conditions for their burning.

Now, let’s transition into the subsequent section about the effect of a windy environment on candle flames.

Advertisement

Windy Environment

In a windy environment, our candle’s flame may be diminished due to drafts or airflow interference. When there’s a breeze or airflow, it disrupts the balance of oxygen and fuel necessary for a healthy flame, causing it to flicker or even extinguish. To understand how to mitigate this issue, we need to consider proper candle placement and storage conditions.

myer

Candle placement is crucial in a windy environment. Placing the candle in a sheltered area, away from direct drafts, can help protect the flame from being affected by the wind. It’s also important to avoid placing candles near open windows or doors where airflow is more pronounced.

Additionally, proper storage conditions can play a significant role in maintaining the quality of the candle’s wick. Storing candles in a cool and dry place can help prevent the wick from becoming brittle or warped, making it more susceptible to being extinguished by even the slightest breeze.

Ventilation Issues

Despite the presence of drafts or airflow interference, our candle’s flame may be diminished due to ventilation issues. Ventilation design plays a crucial role in maintaining a healthy and consistent air circulation within a space.

When the ventilation system is inadequate or poorly designed, it can cause disruptions in the airflow, leading to a smaller flame on the candle. Insufficient ventilation restricts the flow of fresh air and hinders the proper supply of oxygen to the flame. This lack of oxygen can result in incomplete combustion, causing the flame to appear smaller and weaker.

Advertisement

candlesticks patterns

To address this issue, it’s important to ensure that the ventilation system is properly designed and maintained, allowing for efficient air circulation and an optimal environment for the candle flame to thrive.

Candle Wick Is Too Short

After trimming the candle wick too short, we noticed that the flame became significantly smaller. Candle wick maintenance is crucial for achieving optimal flame height and control. When the wick is too short, it can’t draw enough fuel to sustain a strong flame.

Here are three reasons why a short wick leads to a small flame:

  • Insufficient fuel absorption: A shorter wick has limited contact with the candle wax, resulting in inadequate fuel absorption. This hinders the wick’s ability to create a stable, robust flame.
  • Decreased oxygen supply: A shorter wick restricts the flow of oxygen to the flame, affecting its ability to burn brightly. Sufficient oxygen is necessary for proper combustion and a taller flame.
  • Incomplete heat transfer: A shorter wick may not reach the optimum temperature required to vaporize the wax fully. This incomplete heat transfer further contributes to a smaller flame.

To maintain an optimal flame height, ensure the wick is trimmed to the recommended length, usually around 1/4 inch, before each use.

candles direct voucher code

Candle Wick Is Improperly Trimmed

When the candle wick is improperly trimmed, it can lead to a small flame. The length of the wick directly affects the size and strength of the flame, as a short wick won’t be able to draw up enough fuel to sustain a larger flame.

To improve the flame, it’s important to regularly trim the wick to the appropriate length, ensuring that it isn’t too short.

Advertisement

Wick Length Affects Flame

The length of the wick affects the size of the flame on our candle when it’s improperly trimmed. When the wick is too long, the flame can become too large and produce a high amount of soot. This can result in a smoky and dirty burn, which isn’t only aesthetically unpleasing but also can be harmful to our health.

On the other hand, if the wick is too short, the flame may struggle to ignite and remain small and weak. This can lead to an inefficient burn and a diminished amount of light and heat. Additionally, the wick material can also impact the flame color, with different materials producing different hues and intensities.

candle in the wind

To improve the size of the flame, it’s necessary to trim the wick properly. By trimming the wick to the appropriate length, we can ensure a more optimal and consistent burn.

Trim Wick for Improvement

To improve the size of our candle flame, we need to properly trim the wick. One common reason for a small flame is improper wick placement. When the wick is too close to the edge of the candle, it can result in a weak and flickering flame. On the other hand, if the wick is too far from the edge, it may not receive enough oxygen to burn properly. Another factor to consider is the wick material selection. Different materials can affect the size and stability of the flame. For example, a cotton wick tends to burn more steadily and produce a larger flame compared to a paper wick. Therefore, it is important to trim the wick to the correct length and choose the appropriate material to achieve a desirable flame size.

Problem Solution
Improper wick placement Adjust wick position
Wick material selection Choose appropriate material

Short Wick, Small Flame

To address the issue of a short wick causing a small flame, we must ensure that the candle wick is properly trimmed. When the wick is improperly trimmed, it can lead to a shorter flame, as well as other problems such as uneven burning and excessive smoke. Here are three key points to consider regarding the impact of improper wick placement and wick material effects:

Advertisement
  • Improper wick placement: If the wick is too short, it may struggle to draw up enough fuel, resulting in a smaller flame. On the other hand, if the wick is too long, it can lead to a larger, unstable flame that may produce more soot and smoke.
  • Wick material effects: The material of the wick can also affect the size of the flame. Different wick materials burn at different rates, which can impact the size and intensity of the flame produced.
  • Consistent trimming: Regularly trimming the wick to the recommended length helps maintain a steady, desirable flame. This ensures that the wick can efficiently draw up the fuel and promote proper combustion.

Wax Buildup on the Wick

We’ve noticed that sometimes, candles with small flames can be caused by an accumulation of wax on the wick. Improper wick maintenance and the impact of debris can lead to this issue.

candle gift

When candles aren’t trimmed regularly or are exposed to drafts or excessive air movement, the flame can produce soot and carbon buildup. This buildup can then transfer to the wick, inhibiting the flow of fuel to the flame.

Additionally, if the candle is burning in an area where there’s debris or dust present, these particles can stick to the wick and hinder its performance.

To prevent wax buildup on the wick, it’s crucial to trim the wick to the correct length before each use and keep the candle in a clean, draft-free environment.

Low-Quality or Expired Candle

Continuing from the discussion on wax buildup on the wick, we’ve observed that a small flame on a candle can also be attributed to using a low-quality or expired candle. When candles are manufactured, the quality of the materials used can greatly impact their performance. Low-quality candles may contain substandard wax or wicks that aren’t designed to burn efficiently. Additionally, using an expired candle can result in a smaller flame due to the deterioration of the wax over time.

candlelight carol

Another factor to consider is the impact of humidity on the candle flame. High humidity levels can make it difficult for the wick to draw up the wax, resulting in a smaller and weaker flame. Understanding these factors can help you choose better quality candles and ensure a brighter, more consistent flame.

Advertisement

Now, let’s explore another possible reason for a small flame: when the candle wax is too hard or dense.

Candle Wax Is Too Hard or Dense

When the candle wax is too hard or dense, it can affect the size of the flame.

The hardness of the wax can make it difficult for the flame to ignite and sustain itself, resulting in a smaller flame.

candlescience

Additionally, the dense wax can hinder the combustion process, further limiting the size of the flame.

Wax Hardness Affects Flame Size

As we explore the reasons behind a small flame on a candle, it becomes evident that the wax hardness significantly affects the size of the flame. When the candle wax is too hard or dense, it can hinder the flow of fuel to the flame, resulting in a smaller flame. This can happen for several reasons:

Advertisement
  • Limited fuel release: Hard wax can impede the release of fuel through the wick, reducing the amount of fuel available to sustain a larger flame.
  • Incomplete combustion: Hard wax requires a higher temperature to melt and vaporize, which can lead to incomplete combustion and a smaller flame.
  • Flame color: The color of the flame can also be affected by the wax hardness. A smaller flame may appear dimmer and produce less light.

Understanding the impact of wax hardness on flame size can help us adjust the composition of candle wax to achieve optimal flame characteristics.

Dense Wax Hampers Combustion

The hinderance of combustion caused by dense wax is a significant factor in the small flame size of a candle. When candle wax is too hard or dense, it can act as an improper fuel for the flame, leading to incomplete combustion. Combustion inhibitors present in the wax can further impede the burning process.

ecoya penrith

These inhibitors are substances that interfere with the chemical reactions necessary for combustion to occur efficiently. They can limit the availability of oxygen, decrease the heat produced, or create a barrier that prevents the flame from accessing the fuel. As a result, the flame size is reduced, and the candle may produce less light and heat.

Now, let’s delve into the next section to explore the connection between small flame size and hard wax.

Small Flame, Hard Wax

To understand the connection between small flame size and hard wax, let’s explore how the density of candle wax affects combustion.

When the wax is too hard or dense, it can hinder the flow of fuel to the flame, resulting in a smaller flame.

Advertisement

ecoya candles sale

Here are three key factors to consider:

  • Composition: Hard wax is often made from a blend of different waxes, which can affect its density. Be sure to check the composition of the candle wax to ensure it’s suitable for proper combustion.
  • Temperature: The storage temperature of the candle can also impact the hardness of the wax. Extreme cold temperatures can cause the wax to become harder, making it more difficult for it to melt and provide fuel to the flame.
  • Airflow: Proper airflow is crucial for combustion. If the candle is placed in a drafty area, the flame may struggle to receive enough oxygen, resulting in a smaller flame.

Ensure you store your candles in a cool and dry place, away from extreme temperatures, to maintain the optimal density of the wax and achieve a larger flame.

Candle Container Is Too Small or Deep

Our experience with candles has taught us that a small or deep candle container can often result in a smaller flame. The design of the candle container plays a crucial role in the height and stability of the flame. When the container is too small, it restricts the airflow around the flame, causing it to struggle for oxygen and resulting in a smaller, weaker flame. On the other hand, a deep container can cause the flame to be too far from the surface, leading to heat loss and reduced flame height. Achieving the right balance between container size and flame height is essential for optimal candle performance.

Now, let’s explore another factor that can affect the flame size: using an incorrect candle size for the room.

candlelighters charity

Incorrect Candle Size for the Room

When it comes to the size of a candle in relation to the room, there are a few important factors to consider.

The size of the room can affect the size of the flame, as a larger room may require a larger candle to produce a sufficient amount of light.

Advertisement

Additionally, the size of the candle itself matters, as a small candle may not emit enough light to properly illuminate the space.

Choosing the proper size of candle for the room can greatly improve the lighting and ambiance.

candle holders for pillar candles

Room Size Affects Flame

Inadequate candle size for the room can cause the flame to be smaller than expected. The size of the room plays a significant role in determining the size of the candle flame. Here are three factors related to room size that can affect the flame:

  • Air circulation: A small room with poor air circulation can lead to a smaller flame. Limited airflow restricts the oxygen supply to the flame, resulting in a weaker and smaller flame.
  • Humidity: High humidity levels in the room can also impact the size of the flame. Moisture in the air can make it harder for the candle to burn efficiently, leading to a smaller flame.
  • Altitude: At higher altitudes, the air pressure decreases, which affects the flame’s size. As the air gets thinner, the candle flame may become smaller and flicker more due to the reduced supply of oxygen.

Understanding the relationship between room size and candle flame can help you choose the right candle size to achieve the desired flame size and brightness in your space.

Candle Size Matters

We should consider the impact of using an incorrect candle size for the room on the flame’s size. The size of a candle plays a crucial role in determining how long it will burn and the ambiance it creates.

When using a candle that’s too small for the room, the flame may appear small and weak. This is because the candle’s wick is designed to burn optimally with a certain amount of wax. When the candle is too small, it burns through the wax quickly, resulting in a shorter burning time and a smaller flame.

Advertisement

candle salad

Additionally, the ambiance created by the candle may be diminished as the smaller flame produces less light and heat. Therefore, it’s important to choose a candle size that’s appropriate for the room to achieve the desired ambiance and maximize the candle’s burning time.

Proper Size Improves Lighting

To further explore the impact of using an incorrect candle size for the room, let’s delve into how proper sizing improves the lighting. Proper candle size and placement are crucial factors in achieving optimal lighting conditions. Here are three reasons why proper sizing is essential:

  • Brightness: Using candles that are too small for a room will result in insufficient lighting. The flame will be smaller, emitting less light and reducing visibility. On the other hand, candles that are too large can create excessive brightness, causing discomfort to the eyes.
  • Ambiance: Candles play a significant role in setting the ambiance of a space. Choosing the right size ensures that the candle’s glow complements the room’s decor and creates the desired atmosphere.
  • Safety: Improperly sized candles can pose safety hazards. Oversized candles could melt unevenly, leading to dripping wax and potential fire hazards. Meanwhile, small candles may burn too close to the base, increasing the risk of accidental fires.

High Altitude Affects Flame Size

At high altitudes, the decreased oxygen levels result in a smaller flame size on candles. This is due to the fact that fire requires oxygen to sustain combustion. When there’s less oxygen available, the flame becomes smaller and weaker.

This can pose a safety concern, as a smaller flame may be more easily extinguished by a draft or breeze. It’s important to take high altitude safety precautions when using candles in such environments.

candles myer

Additionally, the flame color at high altitude may appear different than at sea level. The lower oxygen levels can cause a candle flame to burn with a more yellowish or orange hue, rather than the typical blue color seen at lower altitudes.

Being aware of these effects can help ensure the safe and effective use of candles in high altitude settings.

Advertisement

Candle Wick Is Too Thick

The flame on our candle may be small because of a thick wick. The thickness of the wick affects the amount of fuel that can reach the flame, thus impacting its size. When the wick is too thick, it restricts the flow of liquid wax to the flame, causing it to burn less efficiently and produce a smaller flame.

This correlation between wick thickness and flame size is crucial to understand for those seeking mastery in candle burning. To summarize, a thick wick can result in a smaller flame due to the limited fuel supply.

candlescience

In the subsequent section, we’ll explore another factor that can contribute to a small flame, namely when the candle wick is made of poor-quality material.

Candle Wick Is Made of Poor-Quality Material

Our candle’s small flame may be attributed to a poor-quality material used for the wick. The wick material plays a crucial role in determining the brightness of the flame. When the wick is made of a subpar material, it hinders the flow of fuel, resulting in a smaller flame. A poor-quality wick may be made of low-grade cotton or contain impurities that affect its ability to draw up the liquid wax efficiently. To illustrate the impact of wick material on flame brightness, consider the following table:

Wick Material Flame Brightness
High-quality cotton Bright
Poor-quality cotton Dim
Synthetic material Dim

As seen in the table, a wick made of high-quality cotton produces a bright flame, while a wick made of poor-quality cotton or synthetic material results in a dimmer flame. Therefore, it is essential to choose candles with wicks made from high-quality materials to ensure a brighter and more enjoyable flame.

Advertisement

Candle Is Placed in a Non-Optimal Location

To further explore the factors affecting the size of a candle’s flame, let’s now consider the impact of its placement in an optimal location. Improper candle placement can result in ineffective positioning, leading to a smaller flame. Here are three key points to consider:

candlelight concerts london

  • Distance from drafts: Placing a candle in close proximity to a drafty area, such as an open window or a vent, can disrupt the airflow around the flame. This can cause the flame to flicker and reduce its size.
  • Surrounding objects: Placing a candle near objects that can obstruct the flow of air, such as curtains or furniture, can impede the proper oxygen supply to the flame. This can result in a smaller, weaker flame.
  • Uneven surfaces: Placing a candle on an uneven or unstable surface can cause the wax to pool unevenly around the wick. This can lead to an inefficient burn and a smaller flame.

Candle Has Been Stored Improperly

We neglected to store our candles properly, which can have a significant impact on their burning duration and the size of the flame. Proper storage is essential in maintaining the quality and performance of candles. When candles are stored improperly, they can become damaged or deteriorated, resulting in a smaller flame and shorter burning time. Here is a table summarizing the effects of improper storage on candles:

Improper Storage Conditions Effects on Candle
Exposure to sunlight Fading of color
High temperature Softening
Low temperature Hardening
Excessive humidity Warping

To ensure candles burn properly and have a vibrant flame, it is crucial to store them in a cool, dry place away from direct sunlight. This will help preserve their quality and extend their burning duration.

Frequently Asked Questions

Can a Low-Quality or Expired Candle Affect the Size of the Flame?

Expired or low-quality candles can indeed affect the size of the flame. Factors such as the type of wax, wick quality, and chemical composition can all contribute to a smaller flame, reducing the overall brightness and effectiveness of the candle.

How Does High Altitude Affect the Size of a Candle Flame?

At high altitudes, the size of a candle flame can be dramatically affected. This is due to the lower atmospheric pressure, which reduces the oxygen availability necessary for a robust flame.

candle shack europe

Can the Size of the Candle Container Affect the Flame Size?

Does the type of wax used in a candle impact the size of the flame? Can the presence of drafts in the room affect the size of the candle flame? Yes, both factors can influence the flame size.

Advertisement

Does the Thickness of the Candle Wick Impact the Flame’s Size?

The thickness of the candle wick can indeed impact the size of the flame. A thicker wick allows for a larger flow of melted candle wax, resulting in a longer burning time and a larger flame.

Can Storing a Candle Improperly Affect the Flame’s Size?

Improper storage can indeed affect the size of a candle’s flame. Extreme temperatures may cause the wax to melt unevenly, resulting in a smaller flame. Additionally, poor air flow can also hinder the flame’s size.

Conclusion

Despite all the possible reasons for a small flame on your candle, one thing is clear: the magic and warmth it usually brings may be lacking.

candlewood suites

It’s ironic how something as simple as a small flame can leave us longing for more.

So, whether it’s insufficient oxygen or a poorly trimmed wick, let’s not underestimate the power of a flickering flame and the joy it can bring to our lives.

Advertisement

Continue Reading

Candles

Why Did My Candle Glass Crack

Published

on

By

Ever thought about why your candle jar cracked? As the saying goes, ‘knowledge is power,’ and comprehending the causes behind this occurrence can assist us in avoiding it in the future.

In this guide, we will explore the various factors that can lead to the unfortunate cracking of candle glass. From thermal shock and poor quality glass to uneven heat distribution and overheating, there are several culprits to consider.

Additionally, sudden temperature changes, manufacturing defects, and natural wear and tear can also play a role. By delving into these causes, we can arm ourselves with the knowledge needed to keep our candle glass intact and enjoy our candles worry-free.

So, let’s dive in and uncover the secrets behind why candle glass cracks.

Advertisement

candle salad

Key Takeaways

  • Glass with lower thermal conductivity and better thermal shock resistance can withstand temperature changes.
  • Poor quality glass, manufacturing defects, and impurities in the glass composition can compromise its strength and make it more susceptible to cracking.
  • Proper temperature regulation during manufacturing, including adequate annealing and quality control measures, is essential for preventing cracks.
  • Maintaining proper fire safety, practicing good candle care, and avoiding sudden temperature changes can help prevent glass cracking.

Thermal Shock

Why did our candle glass crack so easily due to thermal shock? The fragility of glass and its limited temperature tolerance are the key factors at play.

Glass is an amorphous material composed of a network of atoms that lack a defined crystalline structure. This lack of structure makes it inherently susceptible to thermal shock.

When exposed to rapid temperature changes, such as placing a hot candle in a cold glass, the glass expands or contracts unevenly. This creates internal stress within the material, leading to cracks or even complete fracture.

Glass with lower thermal conductivity, higher annealing temperature, and better thermal shock resistance can withstand rapid temperature changes without succumbing to fracturing.

candlesticks holders

Understanding the delicate nature of glass and its temperature limitations is crucial in preventing such incidents.

Poor Quality Glass

Poor quality glass can be a significant factor in causing candle glass to crack. One of the main reasons is the presence of thermal stress causes, which can result from the glass having a low melting point.

Advertisement

Additionally, manufacturing defects such as uneven thickness or impurities in the glass can weaken its structural integrity, making it more prone to cracking under the stress of temperature changes.

Thermal Stress Causes

One of the main causes of thermal stress in candle glass is the use of low-quality materials. When low-quality glass is used in the manufacturing process, it’s more prone to thermal stress due to its inability to handle rapid temperature changes. This can lead to cracks or even shattering of the glass.

birthday candle

The temperature regulation during the glass manufacturing process plays a crucial role in determining the quality of the glass. If the glass isn’t properly annealed or cooled down slowly and evenly, it can result in internal stresses within the glass. These internal stresses can then be triggered by the heat from the candle flame, causing the glass to crack.

Additionally, if the glass used isn’t of high quality, it may have impurities or defects that make it more susceptible to thermal stress.

Low Melting Point

Our experience with low-quality glass has shown that its low melting point is a significant factor in causing candle glass to crack. Glass quality plays a crucial role in determining its resistance to temperature fluctuations. When the glass used in candle containers is of poor quality, it tends to have a lower melting point. This means that it can easily melt or soften when exposed to high temperatures, such as those generated by a burning candle. As the glass heats up and expands, it becomes more susceptible to cracking under the stress of thermal expansion. To illustrate the impact of glass quality on melting point and susceptibility to cracking, consider the following table:

Advertisement
Glass Quality Melting Point Susceptibility to Cracking
High-Quality High Low
Low-Quality Low High
Medium-Quality Medium Medium

From the table, it is clear that low-quality glass with a low melting point is more prone to cracking due to thermal stress. Therefore, ensuring the use of high-quality glass in candle containers is essential for preventing cracks caused by temperature fluctuations.

candle shack clp

Manufacturing Defects

We discovered a significant factor in candle glass cracking: manufacturing defects in the form of poor quality glass. When it comes to glass production, quality control plays a crucial role in ensuring the durability and safety of the final product. However, when quality control measures aren’t properly implemented, it can result in candles being housed in glass containers that are inherently flawed.

Some common manufacturing defects that lead to poor quality glass include:

  • Air bubbles trapped within the glass structure, weakening its integrity.
  • Inadequate annealing, causing the glass to be more susceptible to thermal stress.
  • Inconsistent thickness, creating areas of weakness.
  • Impurities in the glass composition, compromising its strength.

These defects can ultimately lead to the cracking of the glass when exposed to the heat of the burning candle. Understanding these manufacturing defects is crucial in addressing the issue of candle glass cracking and moving on to the subsequent section about uneven heat distribution.

Uneven Heat Distribution

When discussing the issue of uneven heat distribution in candle glasses, there are several key points to consider.

candlesticks patterns

Firstly, having the flame too close to the glass can cause localized heating and lead to cracks.

Advertisement

Secondly, if the wax melts unevenly, with some areas melting faster than others, it can create uneven heat distribution and put stress on the glass.

Lastly, poor quality glass can be more prone to cracking due to its inability to withstand the fluctuating temperatures caused by uneven heat distribution.

Flame Too Close

Although the flame being too close to the candle glass can cause uneven heat distribution, it’s essential to understand the potential consequences and precautions to prevent cracking.

candle online

When the flame is too close to the glass, the concentrated heat can create hot spots, resulting in uneven expansion of the glass. This uneven expansion puts stress on the glass, making it more susceptible to cracking.

To prevent this, it’s crucial to maintain proper fire safety by keeping the flame at least one inch away from the glass.

Advertisement

Additionally, practicing good candle care is vital. Trim the wick to a quarter of an inch before lighting to ensure a controlled flame. Place the candle on a heat-resistant surface and avoid drafts to maintain even heat distribution.

Regularly inspect the glass for any signs of damage or stress to prevent potential cracking.

dusk gifts

Uneven Wax Melting

To understand the potential causes of candle glass cracking, it is important to address the issue of uneven wax melting, which can lead to uneven heat distribution. When a candle burns, the heat from the flame causes the wax to melt and create a pool of liquid wax. Ideally, this wax should melt evenly, allowing for consistent heat distribution and preventing excessive heat buildup in certain areas. However, if the wax melts unevenly, it can result in areas of the candle becoming hotter than others. This can cause stress on the glass container, potentially leading to cracks or even shattering. To ensure candle safety and proper candle care, it is crucial to take measures to promote even wax melting. This can be achieved by following proper burning instructions, such as trimming the wick to the recommended length and allowing the candle to burn for a sufficient amount of time to create an even wax pool.

Uneven Wax Melting Effects on Candle Glass
Uneven heat distribution Stress on glass container
Excessive heat buildup Cracks or shattering
Proper candle care Consistent heat distribution
Candle safety Even wax melting
Burning instructions Trim wick, allow even wax pool

Poor Quality Glass

Sometimes, we discover that poor quality glass can contribute to uneven heat distribution and ultimately lead to the cracking of our candle glass. The composition of the glass and the quality control measures taken during the manufacturing process play a crucial role in determining its durability.

Here are some factors that can contribute to poor quality glass:

Advertisement
  • Inconsistent glass composition: Variations in the composition of the glass can result in areas of the glass being more prone to cracking due to uneven heat distribution.
  • Insufficient quality control: Lack of stringent quality control measures during the manufacturing process can lead to the production of glass with structural weaknesses, making it more susceptible to cracking.

Understanding the impact of glass composition and the importance of quality control is essential for ensuring the longevity of our candle glass. With these factors in mind, let’s now delve into the next section, where we explore the issue of overheating and its effects on candle glass.

candlesticks stamford

Overheating

Our candles cracked due to the glass overheating. Overheating is a common issue that can lead to cracked candle glasses, posing a potential fire hazard. It’s crucial to understand the causes and preventive measures to ensure proper candle care.

Glass cracking occurs when there’s a significant difference in temperature between the candle flame and the glass container. When the flame burns for an extended period, it generates heat that transfers to the glass, causing it to expand. If the glass isn’t able to handle the excessive heat, it can crack.

To prevent overheating, it’s essential to use candles with proper wick sizes, ensure proper ventilation, and never leave candles unattended. Regular maintenance and following recommended burning times can also help mitigate overheating risks.

Sudden Temperature Changes

When exposed to sudden temperature changes, candle glass can crack. This is due to the phenomenon known as glass expansion, which occurs when there are significant temperature differentials. Here are four key factors to consider:

candle holders amazon

  • Thermal Shock: Rapid changes in temperature cause the glass to expand or contract unevenly, leading to stress buildup. This can result in cracks or even complete failure of the glass.
  • Heat Transfer: The rate at which heat is transferred to or from the glass plays a crucial role. Sudden temperature changes can cause the glass to expand or contract too quickly, exceeding its limits and causing it to crack.
  • Glass Quality: The quality and composition of the glass material can affect its ability to handle sudden temperature changes. Lower quality glass may be more prone to cracking under such conditions.
  • Environmental Factors: External factors like exposure to drafts, air conditioning, or direct sunlight can cause temperature fluctuations. These sudden changes can induce stress on the glass, increasing the likelihood of cracking.

Understanding the relationship between glass expansion and temperature differentials is essential for preventing cracks and ensuring the longevity of your candle glass.

Manufacturing Defects

We found that a significant number of candle glass cracks are due to manufacturing defects. These defects can be attributed to various factors, such as manufacturing flaws and improper production techniques.

Advertisement

Manufacturing flaws refer to any imperfections or faults in the glass itself that occur during the manufacturing process. These flaws can weaken the glass and make it more susceptible to cracking.

Improper production techniques, on the other hand, involve errors or mistakes in the way the candles are made. This can include issues with the cooling process, inadequate annealing, or improper handling during production.

candlelight concerts aberdeen

Identifying and addressing these manufacturing defects is crucial in ensuring the quality and durability of candle glassware. By employing proper quality control measures and using precise manufacturing techniques, the likelihood of glass cracking due to manufacturing defects can be significantly reduced.

Natural Wear and Tear

Over time, some candle glassware may develop cracks due to the natural wear and tear it experiences. It’s important to understand the cause of cracking and implement prevention tips to extend the lifespan of your candle glassware.

  • Thermal Stress: Frequent exposure to high temperatures can cause the glass to expand and contract rapidly, leading to cracks.
  • Physical Impact: Accidental knocks or drops can weaken the glass structure, making it more vulnerable to cracking.
  • Moisture: Excessive moisture can seep into the glass and weaken its integrity, making it prone to cracking.
  • Aging: Like any other material, glass undergoes aging and becomes more brittle over time, increasing the risk of cracks.

To prevent cracking, follow these tips:

  • Avoid exposing candle glassware to extreme temperature changes.
  • Handle glassware with care and avoid dropping or hitting it against hard surfaces.
  • Keep candle glassware away from excessive moisture or humidity.
  • Regularly inspect your glassware for signs of aging and consider replacing it if necessary.

Frequently Asked Questions

Can a Candle Glass Crack Due to a Manufacturing Defect Even if It Is Handled Properly?

Glass quality assurance and proper temperature control during the manufacturing process are crucial in preventing candle glass from cracking due to a manufacturing defect, even if it is handled properly.

candlestick

Are Certain Types of Candles More Prone to Causing Thermal Shock Than Others?

Certain types of candles, due to their wax composition and how they burn, can be more prone to causing thermal shock, which can lead to the cracking of candle glass. Factors such as candle glass durability also play a role.

Advertisement

Can Uneven Heat Distribution Be Prevented by Using Certain Types of Candle Holders?

Certain candle holder materials can affect heat distribution, potentially preventing uneven heating. Design features such as ventilation and heat-resistant materials can also help prevent thermal shock that could cause a candle glass to crack.

How Can One Identify Poor Quality Glass in Candle Holders Before Purchasing Them?

To identify poor quality glass in candle holders before buying, we look for signs like air bubbles, uneven thickness, and scratches. Checking the glass thickness is also crucial as thin glass is more prone to cracking.

Are Sudden Temperature Changes More Likely to Cause Cracking in Thicker or Thinner Candle Glass?

Sudden temperature changes can cause thermal stress in candle glass, leading to cracking. The heat resistance of the glass plays a role, but thicker glass may have a higher resistance to thermal stress than thinner glass.

candlelight orchestra

Conclusion

In conclusion, it’s essential to understand the factors that can cause a candle glass to crack.

Our analysis reveals that thermal shock, poor quality glass, uneven heat distribution, overheating, sudden temperature changes, manufacturing defects, and natural wear and tear are the main culprits.

Advertisement

By being aware of these factors, we can take precautions and choose high-quality candle glasses to prevent unfortunate incidents.

Remember, a little knowledge can go a long way in ensuring a safe and enjoyable candle-lit experience.

floral candle

Continue Reading

Candles

Why Is My Candle Cracking

Published

on

By

Ever wondered about the reason behind your candle cracking and making unusual noises? Don’t worry, we have the answers you’ve been looking for.

Cracking candles can be quite puzzling, but understanding the possible reasons behind this phenomenon can help you prevent it from happening again in the future.

In this guide, we will explore the various factors that can contribute to a cracking candle. From poor quality wax to improper storage conditions, we’ll cover it all.

So, if you’re ready to dive into the world of candle care and maintenance, let’s get started on our quest for crack-free candles.

Advertisement

candle shack

Key Takeaways

  • Poor quality wax can cause cracking, so it is important to choose high-quality wax for a smooth and consistent burn.
  • Overheating during burning can lead to uneven melting and cracking, so it is important to trim the wick to the recommended length and avoid placing the candle in direct sunlight or near sources of heat.
  • Rapid cooling after extinguishing the candle can result in fractures and cracks, so it is important to allow the candle to cool gradually and naturally.
  • Uneven wick placement can cause cracks in the candle, so it is essential to properly maintain and position the wick for an even flame and to reduce the risk of cracking.

Poor Quality Wax

Sometimes we encounter candles that crack when they burn, and one possible reason for this is the use of poor quality wax. Wax quality concerns can have a significant impact on candle performance.

Poor quality wax often contains impurities, such as excess moisture or debris, which can cause the candle to crack and create an uneven burn. When the wax is of low quality, it may not melt evenly, resulting in pockets of unburned wax that can lead to cracking.

Additionally, poor quality wax may have a lower melting point, causing the candle to burn too quickly and increase the likelihood of cracking.

To avoid these issues, it’s essential to choose high-quality wax that has been properly processed and refined, ensuring a smooth and consistent burn.

candle shack discount code

Overheating During Burning

To further understand the reasons behind candle cracking, we need to explore the potential issue of overheating during burning. Overheating occurs when a candle is exposed to excessive heat, causing the wax to melt too quickly and unevenly. This can result in the formation of cracks on the surface of the candle.

To prevent overheating, it’s crucial to follow optimal burning techniques. Firstly, ensure that the wick is trimmed to the recommended length, usually around ¼ inch, to promote a steady and controlled burn. Additionally, avoid placing the candle in direct sunlight or near sources of heat, such as vents or radiators. Finally, never leave a burning candle unattended.

Advertisement

Now, let’s delve into the next section about rapid cooling after extinguishing.

Rapid Cooling After Extinguishing

When a candle is extinguished, it undergoes rapid cooling, which can lead to fractures and cracks on the surface. This is because the sudden decrease in temperature causes the wax to contract quickly, resulting in stress and potential damage.

candlestick patterns

Temperature shock is the main culprit behind these cracks, as the candle transitions from a high temperature to a much lower one in a short period of time.

Fracture Due to Cooling

After extinguishing a candle, rapid cooling can cause it to fracture. This occurs when the temperature difference between the hot wax and the surrounding air is too great, leading to thermal stress and ultimately, cracking. To prevent this, it is important to allow the candle to cool gradually and naturally after extinguishing the flame. Avoid placing the candle in a drafty area or near open windows, as this can accelerate cooling and increase the risk of cracking.

Cracks in a candle can significantly impact its performance. They can affect the way the candle burns, causing uneven melting and a shorter burn time. Additionally, cracks can compromise the structural integrity of the candle, making it more prone to collapse or break apart. To maintain the quality and longevity of your candles, it is essential to handle them with care and ensure proper cooling after use.

Advertisement

To better illustrate the impact of cracks on candle performance, below is a table highlighting the potential consequences:

candle holders ikea

Consequence Effect
Uneven melting Incomplete burn, wasted wax
Shorter burn time Reduced overall candle life
Structural instability Increased risk of breakage
Reduced aesthetic appeal Diminished visual experience

Temperature Shock Causing Cracks

After extinguishing the candle, we need to be cautious of rapid cooling, as it can cause temperature shock and result in cracks. To prevent candle cracking due to rapid cooling, it’s important to understand the impact of temperature on candle quality.

Here are four key points to keep in mind:

  1. Gradual Cooling: Allow the candle to cool naturally and avoid exposing it to cold drafts or placing it in the refrigerator. Sudden temperature changes can lead to thermal shock and cause cracks.
  2. Room Temperature Storage: Store candles in a cool, dry place at room temperature. Avoid storing them in areas with extreme temperature fluctuations, such as near windows or heating vents.
  3. Avoid Water Exposure: Keep candles away from water or high humidity environments. Water can seep into the wax and cause it to expand and contract, leading to cracks.
  4. Proper Wick Trimming: Maintain a trimmed wick to prevent excessive heat that can cause the candle to heat up and cool down rapidly, increasing the risk of cracking.

Uneven Wick Placement

We noticed that our candle was cracking, and upon closer inspection, we realized that the uneven placement of the wick was the culprit.

Proper wick maintenance and candle burning techniques are essential to prevent this issue. When pouring the candle, it’s important to ensure that the wick is placed in the center of the container. An off-center wick can cause uneven burning, leading to cracks in the candle. To prevent this, carefully position the wick using a wick centering tool or a simple pencil.

candlesticks patterns

Additionally, trimming the wick to the appropriate length before each burn can help maintain an even flame and reduce the risk of cracking.

Advertisement

Insufficient Wick Trim

To prevent cracking in candles, it’s crucial to regularly trim the wick to the appropriate length. Wick maintenance is an essential part of candle burning techniques that ensures a safe and efficient burn. Here are four reasons why insufficient wick trim can lead to cracking:

  1. Carbon buildup: When a wick isn’t properly trimmed, it can create excessive carbon buildup. This buildup can cause the flame to become too large and hot, leading to cracks in the candle.
  2. Uneven melting: An untrimmed wick can cause the candle to melt unevenly. This can result in uneven pressure distribution within the wax, leading to cracks.
  3. Poor air circulation: A wick that’s too long can impede proper air circulation. This can cause the flame to flicker and dance, resulting in cracks due to the uneven heat distribution.
  4. Excessive heat: A long wick can generate more heat than necessary, causing the candle to overheat and crack.

Ensuring proper wick trim is crucial for preventing cracking in candles. However, it’s also important to consider other factors, such as the drafty environment, which we’ll discuss next.

Drafty Environment

In a drafty environment, the air currents can disrupt the flame of a candle and potentially contribute to cracking. When a candle is exposed to drafts, the flow of air can cause the flame to flicker and dance, leading to an uneven distribution of heat. This uneven heating can result in stress and strain on the wax, causing it to crack.

candlesticks charts

Additionally, the fluctuating air currents can create turbulence around the flame, altering the way the wax burns. The quality of the wax is also a crucial factor in determining how well it can withstand the effects of a drafty environment. High-quality, well-blended wax with proper additives is more resilient and less prone to cracking under such conditions.

Therefore, in order to prevent cracking in a drafty environment, it’s essential to ensure the use of high-quality wax and minimize exposure to air currents.

Excessive Fragrance Load

Excessive fragrance load in candles can have negative effects on both the fragrance concentration and the structural integrity of the candle. When the fragrance concentration is too high, it can lead to issues such as cracking and uneven burning.

Advertisement

Additionally, the excessive fragrance can cause the wax to become softer, making the candle more prone to cracking.

candle making supplies uk

It’s important to carefully consider the fragrance load when making candles to ensure optimal performance and longevity.

Fragrance Concentration Effects

When we use an excessive fragrance load in our candles, it can lead to cracking. The concentration of fragrance in a candle is an important factor that affects its overall performance. Here are four effects of excessive fragrance concentration in candles:

  1. Fragrance Evaporation: When the fragrance concentration is too high, the volatile components of the fragrance can evaporate more rapidly. This can lead to an imbalance in the candle’s composition, causing it to crack.
  2. Scent Throw: Excessive fragrance load can also affect the candle’s scent throw. While it may seem logical to think that more fragrance will result in a stronger scent, it can actually have the opposite effect. The excess fragrance can overwhelm the wax, hindering its ability to release the scent effectively.
  3. Uneven Burning: Candles with excessive fragrance concentration may burn unevenly. This is because the excessive fragrance can affect the way the wax melts and spreads the heat. As a result, certain areas of the candle may burn faster than others, leading to cracks.
  4. Safety Concerns: High fragrance concentration can also increase the risk of fire hazards. When the fragrance load is too high, the candle’s flame can become larger and more unstable, increasing the likelihood of accidents.

Causes of Candle Cracking

One possible cause of candle cracking is if we use too much fragrance in our candles. While fragrance is an important aspect of candle-making, excessive fragrance load can lead to structural issues in the candle, such as cracking. When we add an excessive amount of fragrance to the wax, it can affect the overall composition and integrity of the candle, causing it to crack during the burning process.

To prevent candle cracking due to excessive fragrance load, it is important to ensure proper overheating prevention and wax quality assurance. Overheating prevention involves monitoring the temperature of the wax during the fragrance addition process and ensuring that it does not exceed the recommended temperature range. Additionally, conducting thorough wax quality assurance checks can help identify any potential issues with the wax that could contribute to cracking.

candlelight carol

Overheating Prevention Wax Quality Assurance
Monitor wax temperature during fragrance addition Conduct thorough quality checks on wax
Ensure temperature does not exceed recommended range Identify any potential issues with the wax
Use a reliable thermometer for accurate temperature monitoring Ensure wax meets quality standards

Incorrect Candle Size for Container

We have found that using an oversized candle in a container can lead to cracking. When the candle is too big for the container, it doesn’t have enough room to expand as it burns. This can cause excessive heat buildup, which puts stress on the container and can result in cracks.

Advertisement

To avoid this issue, it’s important to choose a candle that’s the appropriate size for the container. Here are some considerations to keep in mind:

  1. Measure the diameter and height of the container accurately before selecting a candle.
  2. Check the burn time and melting rate of the candle to ensure it’s suitable for the container size.
  3. Consider the type of wax used in the candle, as different waxes have different melting points.
  4. Avoid using candles that are significantly larger than the container, as this increases the risk of cracking due to heat expansion.

Improper Storage Conditions

When it comes to the cracking of candles, improper storage conditions can play a significant role. Temperature and humidity levels have a direct impact on the structure of the candle, causing it to expand or contract. Extreme temperatures can lead to the wax melting or freezing, while high humidity levels can result in the absorption of moisture by the wax, both of which can cause cracks to form.

Therefore, it’s crucial to store candles in a cool, dry place to maintain their structural integrity and prevent cracking.

ecoya candles myer

Temperature and Humidity

Improper storage conditions, such as fluctuating temperature and humidity levels, can lead to cracking in candles. When candles are exposed to extreme temperature changes, they expand and contract, causing stress on their structure. High humidity levels can also contribute to cracking by softening the wax and making it more prone to damage.

Here are four ways in which temperature and humidity can cause candle cracking:

  1. Thermal Shock: Rapid temperature changes can cause the candle to expand and contract quickly, leading to cracks.
  2. Moisture Absorption: High humidity levels can make the candle absorb moisture, making the wax softer and more susceptible to cracking.
  3. Wax Melting: Excessive heat can cause the wax to melt, resulting in deformations or fractures in the candle.
  4. Cooling Unevenly: Uneven cooling due to temperature fluctuations can cause stress points in the candle, leading to cracking.

To prevent candle cracking, it’s essential to store them in a cool, dry place, away from direct sunlight and extreme temperature changes.

Impact on Candle Structure

Exposure to fluctuating temperature and humidity levels can significantly impact the structure of candles, potentially leading to cracking. Improper storage conditions, such as storing candles in areas with high temperature variations or high humidity, can cause the wax to expand and contract, resulting in stress on the candle’s structure. This stress can weaken the wax, making it more prone to cracking.

Advertisement

candle making courses

Furthermore, the impact on the candle’s structure can also affect its performance. When a candle cracks, it can affect the scent throw, the ability of the candle to release its fragrance. Cracks in the wax can cause the scent to escape more rapidly, reducing the overall scent throw of the candle.

In addition, the structural integrity of the candle can also impact its burn time. Cracks in the wax can lead to uneven burning, causing the candle to burn faster or slower than intended. This can result in a shorter burn time or an inefficient use of the candle.

To prevent these issues, it’s important to store candles in a cool, dry place away from direct sunlight and extreme temperature fluctuations. This will help maintain the structural integrity of the candle and ensure optimal performance in terms of scent throw and burn time.

Inadequate Candle Care and Maintenance

By neglecting proper care and maintenance, we risk causing our candles to crack. To prevent candle cracking and ensure their longevity, it’s crucial to follow these essential steps:

yankee candle

  1. Trim the wick: Trim the wick to 1/4 inch before each use. This prevents the flame from becoming too large and overheating the wax, which can lead to cracking.
  2. Avoid drafts: Place the candle in a draft-free area. Air currents can cause uneven burning, leading to stress on the candle’s structure and potential cracks.
  3. Proper cooling: Allow the candle to cool naturally after each use. Avoid moving or handling the candle while the wax is still hot, as this can cause cracks.
  4. Storage conditions: Store candles in a cool, dry place away from direct sunlight. Extreme temperatures and humidity can cause the wax to expand and contract, resulting in cracks.

Frequently Asked Questions

How Can I Tell if My Candle Is Made With Poor Quality Wax?

When determining the quality of wax in a candle, signs of low quality include excessive cracking, poor scent throw, and uneven burning. To choose high quality wax, look for natural ingredients and reputable manufacturers.

What Should I Do if My Candle Overheats During Burning?

If your candle overheats during burning, it’s important to take immediate candle safety precautions. Extinguish the flame, let it cool, and trim the wick. Proper candle care and maintenance will help prevent cracking and ensure a longer-lasting burn.

Advertisement

Why Does My Candle Crack When It Cools Down Quickly After Extinguishing?

Rapid cooling of a candle after extinguishing can cause cracking due to the contraction of the wax. Factors like high fragrance content, thick walls, and low-quality wax can exacerbate this effect.

Can Uneven Wick Placement Cause My Candle to Crack?

Uneven wick placement can indeed cause candles to crack. When the wick is not centered, it can lead to uneven melting, which creates stress on the wax. Regular wick trimming helps prevent this issue.

candlelight concerts bristol

How Can I Prevent My Candle From Cracking Due to Improper Storage Conditions?

To prevent cracking due to improper storage conditions, we must ensure our candles are stored safely. This involves keeping them in a cool, dry place away from direct sunlight and extreme temperatures. Properly stored candles are less likely to develop cracks.

Conclusion

In conclusion, it’s important to understand the various factors that can cause a candle to crack. Poor quality wax, overheating during burning, rapid cooling after extinguishing, and uneven wick placement can all contribute to this issue. Additionally, insufficient wick trim, excessive fragrance load, incorrect candle size for the container, improper storage conditions, and inadequate candle care and maintenance can also play a role in causing cracks.

By addressing these factors, you can ensure a crack-free and enjoyable candle experience. Don’t let your candles crack and ruin the ambiance—take proper care and enjoy their soothing glow to the fullest!

Advertisement

Continue Reading

Trending