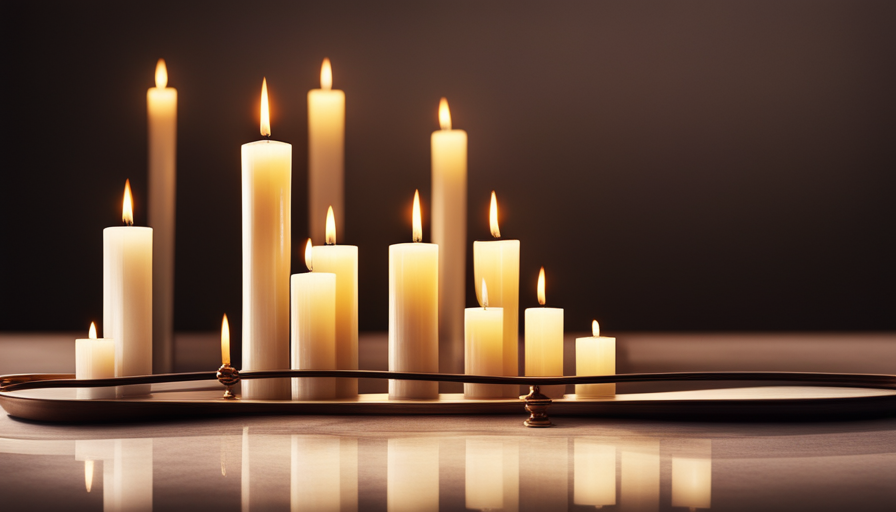
Connect with us

Beginners Guides

How To Make Candle Melts

Published

on

An image showcasing a hands-on tutorial on making candle melts

Are you poised to take a trip into the world of fragrant delight? Picture the soft, inviting light of candles flickering throughout your living space, paired with the deep, enticing scent of your chosen aroma. Now is the moment to discover the art of crafting candle melts, those small capsules of scent that will convert your home into a sanctuary of peace.

In this article, I will guide you through the process, step by step, so you can create your very own homemade candle melts. We’ll gather our supplies, choose the perfect wax, and select a fragrance that will transport you to your happy place. With just a few simple steps, you’ll have beautifully scented melts to enjoy or gift to loved ones.

So, roll up your sleeves and get ready to unleash your creativity. Making candle melts is a delightful and rewarding experience, allowing you to personalize your space with scents that speak to your soul.

Let’s dive in and create some magic together!

Key Takeaways

  • Candle melts can be made using various types of wax such as soy wax, beeswax, paraffin wax, or coconut wax.
  • Soy wax is a popular choice for candle melts due to its eco-friendly nature and clean burn.
  • Fragrance options for candle melts include essential oils, fragrance oils, or blends, with popular choices being lavender, citrus, vanilla, fresh linen, or caramel.
  • To make candle melts, the steps involve melting the wax, adding the fragrance, and pouring the mixture into molds.

Gather Your Supplies

Now, it’s time to gather all your supplies and get ready to dive into the world of candle melts – you’re in for a delightful and enchanting experience!

To begin, you’ll need a few essential items. First, choose your wax. There are different types of wax available for making candle melts, each with its own unique qualities. Soy wax is a popular choice, known for its clean burn and excellent scent throw. Beeswax is another great option, as it produces a warm, natural glow and has a subtle honey fragrance. Paraffin wax is widely used and offers a strong scent throw, making it perfect for creating highly fragrant melts.

Advertisement

Next, consider the fragrance. When choosing the right fragrance for your candle melts, it’s important to think about the mood or atmosphere you want to create. Floral scents like lavender or jasmine can promote relaxation, while fruity scents like citrus or berries can add a refreshing touch. Additionally, you can experiment with different combinations to create unique and personalized fragrances.

Now that you’ve gathered your supplies, let’s move on to choosing the perfect wax for your candle melts.

Choose Your Wax

First, you’ll want to decide which type of wax suits your preferences best, such as soy wax, which is known for its clean and long-lasting burn. Imagine how delightful it would be to fill every corner of your home with the warm and inviting fragrance of lavender-scented soy wax melts.

When it comes to making candle melts, there are different types of wax to choose from. Here are some options to consider:

  • Soy wax: Derived from soybean oil, soy wax is a popular choice among candle makers. It has a lower melting point, allowing for a longer burn time and a cleaner, soot-free experience.

  • Beeswax: Known for its natural golden color and sweet, honey-like scent, beeswax is another excellent option. It releases negative ions, which can help purify the air in your home.

  • Paraffin wax: This traditional wax is widely available and budget-friendly. It offers a strong scent throw and a smooth texture, making it a favorite among many candle enthusiasts.

  • Coconut wax: Made from coconut oil, this wax has a creamy texture and excellent fragrance retention. It burns slowly and evenly, providing a long-lasting aroma.

Using soy wax for candle melts has several benefits. It’s a renewable resource, making it an eco-friendly option. Soy wax also produces less soot and releases fragrance more effectively compared to other waxes.

Advertisement

Now that you’ve chosen your wax, it’s time to move on to the next step and select your fragrance.

Select Your Fragrance

Once you’ve chosen your wax, it’s time for you to indulge in the delightful task of selecting your preferred fragrance. The fragrance you choose for your candle melts is what will make them truly special and unique. There are different types of candle fragrances available, including essential oils, fragrance oils, and blends. Essential oils are derived from plants and offer natural scents like lavender, citrus, and eucalyptus. Fragrance oils, on the other hand, are synthetic and offer a wider variety of scents, such as vanilla, caramel, and fresh linen. Blends combine both essential and fragrance oils to create unique combinations.

To help you choose the perfect fragrance for your candle melts, here is a handy table that showcases some popular scents and their characteristics:

Fragrance Description
Lavender Calming and relaxing, perfect for creating a soothing atmosphere
Citrus Energizing and refreshing, great for boosting mood and productivity
Vanilla Warm and comforting, creates a cozy and inviting ambiance
Fresh Linen Clean and crisp, reminiscent of freshly laundered clothes
Caramel Sweet and indulgent, adds a touch of decadence to any space

Once you’ve selected your fragrance, it’s time to move on to the next step – melting the wax.

Melt the Wax

To begin the process, you’ll need to melt the wax, allowing it to transform into a luxurious, liquid state. This step is crucial in creating the perfect candle melts.

Advertisement

Here are some tips for achieving the perfect melt consistency:

  1. Choose the right wax: There are different types of wax you can use for candle melts, such as soy wax, beeswax, or paraffin wax. Each type has its own melting point and characteristics, so choose the one that suits your needs best.

  2. Use a double boiler: Place the wax in a heat-safe container and set it over a pot of simmering water. The indirect heat from the steam will gently melt the wax without causing it to burn or overheat.

  3. Stir occasionally: As the wax melts, stir it gently to ensure even heating and prevent any clumps or uneven consistency.

  4. Monitor the temperature: It’s important to keep an eye on the temperature of the wax. Different waxes have different melting points, so make sure to melt it at the recommended temperature to achieve the desired consistency.

By following these tips, you’ll be able to melt the wax to the perfect consistency for your candle melts.

Now, it’s time to move on to the next step and add the fragrance.

Add the Fragrance

Now comes the fun part – infusing your wax with a delightful fragrance that will transport you to a world of relaxation and serenity. Adding fragrance to your candle melts is what elevates them from ordinary to extraordinary. There are different types of candle fragrances available, each offering a unique scent profile that can enhance the ambiance of any space. When choosing the right fragrance for your candle melts, consider the mood you want to create and the preferences of your intended audience.

To help you make an informed decision, here is a table outlining three popular types of candle fragrances:

Advertisement
Fragrance Type Scent Profile Best Use
Floral Light, fresh, and feminine scents Perfect for creating a calming and romantic atmosphere
Woody Earthy, warm, and musky scents Ideal for cozy evenings or creating a rustic ambiance
Citrus Refreshing, uplifting, and fruity scents Great for energizing spaces or creating a cheerful environment

By carefully selecting the fragrance that aligns with your desired atmosphere, you can create a truly immersive experience for yourself and others. Now that your wax is infused with the perfect scent, it’s time to pour it into molds and shape your candle melts.

Pour the Wax into Molds

Gently pour the scented wax into your chosen molds, shaping them into beautiful and unique forms. When it comes to candle melts, the possibilities are endless.

There are various types of molds available in the market, ranging from classic shapes like hearts and stars to more intricate designs like flowers and animals. You can even use silicone molds that come in different sizes and patterns. Experimenting with different molds allows you to create melts that suit your personal style and preferences.

To achieve the perfect melt consistency, it’s important to follow a few tips. Firstly, make sure the wax is heated to the recommended temperature. This will ensure that it pours smoothly into the molds without any lumps or clumps. Secondly, avoid overfilling the molds as it can lead to uneven melting and difficulty in removal. Fill them up to three-quarters full to allow room for expansion and easy release. Lastly, gently tap the molds on a flat surface to remove any air bubbles that may have formed during the pouring process.

Once you have poured the wax into the molds, it’s time to let the melts harden. This step is crucial as it allows the wax to solidify and take the desired shape.

Advertisement

Let the Melts Harden

Once you’ve poured the wax into the molds, sit back and watch as your beautiful creations transform into solid masterpieces. It’s important to let the melts harden completely before moving on to the next step. This will ensure that they maintain their shape and don’t break when you try to remove them from the molds. Depending on the type of wax you’re using, this process can take anywhere from a few hours to overnight.

While you wait for the melts to harden, you can start thinking about how you want to decorate them. There are so many creative options to choose from! You can add dried flowers, herbs, or even glitter to make your melts stand out. Just make sure that anything you add is heat-safe and won’t catch fire when the melts are lit.

Once the melts have hardened and you’ve decorated them to your liking, it’s time to package and gift them. You can use small plastic bags or boxes to keep them protected and looking presentable. Consider adding a personalized label or tag to make them even more special. Candle melts make great gifts for birthdays, holidays, or just as a thoughtful gesture.

Now that your melts are beautifully decorated and packaged, it’s time to move on to the next step: popping them out of the molds.

Pop out the Melts

When you’re ready, you can easily release your beautiful creations from the molds and unveil their stunning designs.

Advertisement

Removing the melts from the molds is a crucial step in the process, and with a few simple tips, it can be done effortlessly.

Firstly, ensure that the melts have completely hardened before attempting to pop them out. This will prevent any mishaps and ensure that the melts maintain their shape.

Gently tap the bottom of the mold to loosen the melts, and then carefully push them out from the bottom. If you’re having trouble, you can try placing the mold in the freezer for a few minutes to help loosen the melts.

Additionally, using silicone molds can make the removal process even easier, as the flexibility of the material allows for smooth release.

With these tips, you’ll be able to remove your melts without any hassle and enjoy the fruits of your labor.

Advertisement

Now, let’s move on to the next step where we’ll discuss how to store your melts without compromising their quality.

Store Your Melts

After popping out the melts from their molds, it’s time to move on to the next step: storing your homemade candle melts.

Proper storage is crucial to ensure that your melts maintain their fragrance and shape until they’re ready to be used. There are a few different ways you can store your melts, depending on personal preference and the space you have available.

One option is to place them in airtight containers or ziplock bags. This’ll help to preserve their scent and prevent any dust or debris from settling on them. Another option is to use small glass jars or containers with lids. This not only keeps your melts fresh but also allows you to showcase them in an aesthetically pleasing way. You can arrange them in a decorative tray or on a shelf, creating a stunning display that adds a touch of ambiance to any room.

When it comes to storing your melts, it’s important to keep them away from direct sunlight and extreme temperatures. Heat can cause them to melt prematurely, while sunlight can fade their colors and weaken their fragrance. Find a cool, dark place to store them, such as a cupboard or drawer.

Advertisement

Now that your melts are safely stored, let’s move on to the next section where we’ll discuss how to enjoy your homemade candle melts without writing ‘step’.

Enjoy Your Homemade Candle Melts

To fully appreciate the delightful aroma and ambiance of your homemade melts, simply place them in a wax warmer and let the soothing fragrance fill the room. Homemade candle melts offer a wide range of fragrances that you can experiment with to create your desired atmosphere.

From calming lavender to invigorating citrus, the options are endless. You can even combine different scents to create unique blends that suit your preferences.

When it comes to packaging and gifting your homemade melts, there are several options to consider. One option is to place them in small, decorative containers or tins. You can add a personalized touch by attaching a handwritten label with the scent name and any special instructions.

Another option is to package them in small organza bags, tied with a ribbon or twine. This not only adds an elegant touch but also makes it easy to distribute and share your melts with others.

Advertisement

Homemade candle melts make wonderful gifts for birthdays, holidays, or any special occasion. You can create gift sets by combining different scents or packaging them with other homemade bath and body products. Additionally, you can include a small card with instructions on how to use the melts, adding a thoughtful touch to your gift.

Whether you choose to keep them for yourself or share them with others, homemade candle melts are a delightful and personalized way to enjoy the soothing scents of your choice.

Frequently Asked Questions

How long does it take for the candle melts to harden and set?

It typically takes around 2-3 hours for candle melts to harden and set completely. However, there are a few factors that can affect this process. One way to speed up the hardening process is by placing them in the refrigerator for about 30 minutes.

Additionally, if the candle melts aren’t setting properly, it could be due to using too much fragrance oil or not using enough wax. It’s important to follow the instructions and measurements carefully to ensure proper setting.

Can I use other types of fragrance oils instead of specifically designed candle fragrance oils?

Using essential oils in candle melts is a popular alternative to using specifically designed candle fragrance oils. Many people believe that using natural fragrance oils adds a unique and therapeutic element to their candles. Essential oils not only provide a pleasant aroma but also offer potential health benefits. For example, lavender essential oil is known to promote relaxation and reduce stress.

Advertisement

However, it’s important to research and choose essential oils that are safe to use in candle making to ensure a quality product.

What are some common mistakes to avoid when making candle melts?

When it comes to making candle melts, there are a few common mistakes that beginners should avoid.

One of the most important tips is to ensure that you measure the fragrance oil accurately. Using too much or too little can affect the scent throw of your melts.

Another mistake to avoid is not properly mixing the fragrance oil with the wax, which can result in an inconsistent scent.

Lastly, make sure to pour the wax at the right temperature to prevent frosting or cracking.

Advertisement

How do I clean the wax residue from the melting pot or utensils?

To clean wax residue from your melting pot or utensils, start by allowing them to cool completely. Then, use a plastic scraper or spatula to gently remove any excess wax.

Next, fill a sink or container with hot, soapy water and soak the tools for a few minutes. Scrub them with a sponge or brush to remove any remaining wax. For stubborn residue, you can use a wax remover or rubbing alcohol.

Rinse the tools thoroughly and dry them before using again.

Can I mix different fragrances to create unique scents for my candle melts?

Yes, you can definitely mix different fragrances to create unique scents for your candle melts. By combining different scented oils or wax melts, you can create a whole new aroma that’s personalized to your liking.

Experiment with different combinations and ratios to find the perfect blend. Start with a few drops of each fragrance and adjust according to your preference. Mixing fragrances allows you to unleash your creativity and create one-of-a-kind scents for your candle melts.

Advertisement

Conclusion

In conclusion, making candle melts is a delightful and rewarding experience. As I watched the wax transform into a liquid pool, I couldn’t help but feel a sense of transformation in myself.

The fragrance that filled the air symbolized the sweet aroma of accomplishment. With each step, from selecting the perfect wax to popping out the melts, I felt a sense of pride in my creation.

Now, as I store my homemade melts, I know that I have created something truly special. So go ahead, gather your supplies and embark on this wonderful journey of candle making. Enjoy the process and savor the symbolism behind each melt you create.

I'm Amelia, and I love making candles. It all started when I was given a kit as a gift. I loved the process so much that I decided to make my own candles. I soon realized that I had a real talent for it. Before long, my friends and family were asking me to make candles for them too. Word spread, and soon I was inundated with orders. I love the creativity that goes into making each candle unique. And I love the satisfaction of knowing that people are using something I made with my own hands.

Continue Reading
Advertisement

Beginners Guides

How To Burn A Candle Without A Wick

Published

on

By

An image capturing the ethereal glow of a flickering flame dancing atop a pool of melted wax, emanating warmth and tranquility, revealing the secret of burning a candle sans wick

Ever found yourself in the mood to make your living space feel warm and inviting, only to discover you’re fresh out of wick candles? Fear not, I have just the solution for you.

Imagine this scenario: It’s a cold winter evening, and you’re curled up on the couch with a good book and a cup of tea. The only thing missing is the warm, flickering glow of a candle. But what if I told you that you can still enjoy the ambience of a candle without a wick? Yes, it’s possible!

In this article, I will guide you through the process of burning a candle without a wick, from understanding the different types of waxes to experimenting with various heat sources. Whether you’re a candle enthusiast or simply looking to create a cozy atmosphere, this article will provide you with all the knowledge you need to create your own wickless candles.

So, let’s dive in and explore the fascinating world of wickless candles together!

Key Takeaways

  • Wickless candles, also known as flameless candles, use a small light bulb or LED to generate heat and melt scented wax.
  • Safety precautions for wickless candles include placing them on a heat-resistant surface and keeping them away from flammable materials.
  • Choosing the right wax is important for color vibrancy, eco-friendliness, and unique blends.
  • Experimenting with different heat sources like tea light warmers, electric wax warmers, oil burners, ceramic heaters, and induction stoves can create a mesmerizing flickering flame.

Understanding Wickless Candles

Wickless candles, also known as flameless candles, create a warm and inviting atmosphere without the need for a traditional wick. They’re a popular alternative to traditional candles because they offer the same cozy ambiance without the worry of an open flame.

Wickless candles work by using a small light bulb or LED to generate heat, which melts scented wax to release a pleasant fragrance. This innovative design allows for a safe and convenient way to enjoy the calming glow of a candle.

Advertisement

When using wickless candles, it’s important to follow some safety precautions. Always ensure that the candle is placed on a heat-resistant surface and kept away from flammable materials. Also, be mindful of the temperature of the candle, as it can become hot during use. It’s advisable to keep wickless candles out of reach of children and pets to prevent any accidents.

Choosing the right wax is the next step in creating a perfect wickless candle experience. The type of wax used can affect the fragrance throw and burn time of the candle. Be sure to select a high-quality wax that’s specifically designed for wickless candles. This will ensure optimal performance and a longer-lasting scent.

Choosing the Right Wax

When it comes to creating the perfect ambiance, selecting the ideal wax is crucial for achieving a mesmerizing glow. The right wax not only ensures a clean and even burn but also plays a significant role in the overall aesthetic appeal of your candle.

Here are three key factors to consider when choosing the right wax for your wickless candle:

  1. Choosing candle colors: The type of wax you select can greatly impact the vibrancy and intensity of your candle’s color. Some waxes have a natural creamy color that enhances the richness of darker hues, while others are more translucent, allowing for a brighter and more vibrant color palette. Consider the effect you want to achieve and select a wax that complements your desired candle colors.

  2. Finding eco-friendly wax alternatives: As more people prioritize sustainability, it’s essential to choose wax options that are environmentally friendly. Look for waxes made from renewable resources, such as soy or beeswax, which have a lower carbon footprint compared to petroleum-based waxes. These eco-friendly alternatives not only burn cleaner but also contribute to a healthier planet.

  3. Exploring unique wax blends: Don’t limit yourself to traditional wax options. Experiment with different wax blends to create a truly unique candle experience. Blending different waxes can enhance the scent throw, improve burn time, and even add a touch of luxury to your candle.

By carefully selecting the right wax for your wickless candle, you can create a visually stunning and environmentally conscious masterpiece. And once you’ve chosen the perfect wax, it’s time to delve into the exciting world of adding fragrance to your candle, where you can infuse your space with captivating scents that’ll enchant your senses.

Advertisement

Adding Fragrance to Your Candle

Once you’ve selected the perfect wax, it’s time to explore the enchanting world of adding fragrance to your candle. Adding scented oils to your candle not only enhances the overall experience but also allows you to personalize it according to your preferences.

There are a wide variety of scented oils available, ranging from floral and fruity to woody and musky. Experiment with different combinations to create your own unique scent profile.

To incorporate the fragrance into your candle, you have a couple of options. One popular method is to add the scented oil directly to the melted wax before pouring it into the container. This ensures that the fragrance is evenly distributed throughout the candle. Alternatively, you can use a candle warmer to gently heat the oil and release its aroma into the air. This method is perfect if you prefer a more subtle scent or want to change the fragrance regularly.

Once you’ve mastered the art of adding fragrance to your candle, it’s time to move on to creating the perfect container. This step involves selecting the right vessel for your candle and considering factors such as aesthetics, safety, and functionality. By carefully choosing the container, you can enhance the overall presentation and ensure a delightful experience for both yourself and others.

Creating the Perfect Container

To make your candle truly stand out, let’s explore the art of designing the perfect container for your fragrant creation. A well-designed container not only adds visual appeal but also enhances the overall experience of burning a candle without a wick.

Advertisement

Here are three sub-lists to guide you in container design:

  1. Material: Opt for high-quality materials like glass, ceramic, or concrete. These materials not only provide stability but also allow the candle’s glow to shine through, creating a mesmerizing ambiance.

  2. Shape: Consider the shape of your container, as it can greatly influence the candle’s burn time and scent throw. Wide, shallow containers allow for an even distribution of heat, ensuring a longer burn time. Additionally, a container with a narrower opening can help concentrate the fragrance, resulting in a stronger scent throw.

  3. Decorative Elements: Add a touch of sophistication to your candle by incorporating decorative elements. This could be anything from etched patterns, colorful designs, or even a personalized label. These details elevate the overall aesthetic and make your candle a true work of art.

Now that you’ve designed the perfect container, let’s move on to experimenting with different heat sources to create a beautiful, flickering flame.

Experimenting with Different Heat Sources

Enhance your candle experience by exploring different heat sources that create a mesmerizing flickering flame. When it comes to burning a candle without a wick, there are various heating alternatives and unconventional methods that you can try. By experimenting with these different heat sources, you can discover unique and captivating ways to enjoy the warm glow of a wickless candle.

To give you a visual representation of the possibilities, here is a 3 column and 5 row table showcasing some of the most popular heating alternatives:

Heat Source Description Benefits
Tea light warmer Utilizes a small tea light Portable and easy to use
Electric wax warmer Uses electricity to melt wax Offers precise temperature control
Oil burner Relies on a small flame fueled by oil Creates a cozy and aromatic ambiance
Ceramic heater Emits radiant heat Provides steady and even distribution of warmth
Induction stove Utilizes electromagnetic waves Quick and efficient heating

By exploring these heating alternatives, you can find the perfect method that suits your preferences and creates the desired ambiance. As you experiment with these unconventional methods, always prioritize safety. In the next section, we will discuss some important safety tips for burning wickless candles. Transitioning into the subsequent section, let’s now explore some essential safety tips for enjoying wickless candles without any concerns.

Advertisement

Safety Tips for Wickless Candles

With these safety tips, you can ensure your wickless candle experience shines bright and worry-free. When using burners to melt the wax, it’s important to prioritize burner safety. Make sure to place the burner on a stable surface away from flammable objects. Always keep an eye on the burner and never leave it unattended.

Additionally, ensure that the burner is in good condition and that the electrical cord isn’t damaged. Using alternative lighting options, such as LED lights or battery-operated candles, can also provide a safe way to enjoy wickless candles. These options eliminate the risk of open flames, reducing the chance of accidents.

Remember to always follow the manufacturer’s instructions for these lighting alternatives to ensure proper usage and safety. By following these safety tips and considering alternative lighting options, you can create a warm and inviting atmosphere without compromising on safety.

Transitioning into the next section, let’s explore how to enhance the ambiance of your wickless candle experience.

Enhancing the Ambiance

Create a cozy and inviting atmosphere with the perfect lighting and scent. Enhancing the ambiance of any space is essential for setting the right mood. Here are three key ways to create a captivating atmosphere without a wick:

Advertisement
  1. Choose the Right Lighting: Lighting plays a crucial role in creating ambiance. Opt for soft, warm-toned bulbs or dimmers to create a relaxing and intimate setting. You can also use fairy lights or string lights to add a touch of magic to the room.

  2. Utilize Aromatherapy: Scent is a powerful tool for enhancing ambiance. Use essential oils or scented wax melts to infuse the air with delightful fragrances. Lavender promotes relaxation, while citrus scents like lemon and orange can energize the space. Experiment with different scents to find the perfect match for your desired ambiance.

  3. Set the Scene: Pay attention to the details. Use decorative candles in various shapes, sizes, and colors to create visual interest. Place them strategically around the room to illuminate specific areas and create a warm glow. Additionally, consider incorporating cozy elements like plush pillows, soft blankets, and soothing music to complete the ambiance.

By enhancing the ambiance and creating the perfect mood, you can transform any space into a haven of relaxation and comfort.

Now, let’s explore some exciting DIY wickless candle projects to further ignite your creativity.

DIY Wickless Candle Projects

Now that we have discussed ways to enhance the ambiance of a room with wickless candles, let’s dive into some exciting DIY projects that will allow you to create your own wickless candles. These wickless candle alternatives not only provide a beautiful aesthetic, but they also give you the opportunity to personalize and customize your candle creations.

Incorporating wickless candle decorations into your DIY projects can add an extra touch of charm and elegance. To help you get started, I have prepared a table below that showcases five unique wickless candle ideas along with their corresponding decorations:

Wickless Candle Idea Decoration
Mason jar wax melts Dried flower petals
Essential oil diffuser Decorative stones
Scented wax tablets Ribbon and beads
Wax melt burner Glass mosaic tiles
Electric wax warmer Botanical leaves

By using these wickless candle alternatives and incorporating various decorations, you can create stunning focal points in any room. These DIY projects allow you to unleash your creativity and make candles that perfectly reflect your personal style and taste.

Advertisement

Now that we have explored the world of DIY wickless candles, let’s move on to the next section where we will discuss the benefits of using wickless candles.

Benefits of Wickless Candles

Immerse yourself in the enchanting glow and captivating fragrances of wickless candles, as they offer a multitude of benefits that’ll elevate your sensory experience. Wickless candles provide a safe and convenient alternative to traditional candles with wicks.

Here are some of the key benefits:

  • No Flame: With wickless candles, there’s no open flame, eliminating the risk of fire hazards. This makes them perfect for households with children or pets.

  • Longer Lasting: Wickless candles typically last longer than traditional candles. They’re designed to slowly release the fragrance without burning away quickly, allowing you to enjoy their scent for extended periods.

  • Easy to Use: Wickless candles are hassle-free and require no maintenance. Simply place them in a wax warmer or use a plug-in diffuser to melt the scented wax and release the fragrance.

  • Versatility: Wickless candles come in a wide range of fragrances, allowing you to switch up the scent based on your mood or preference. They also offer various styles and designs to complement your home decor.

When it comes to finding wickless candles, there are plenty of options available. From local home goods stores to online retailers, you can easily find a wide selection of wickless candles to suit your taste and style.

Transitioning to wickless candles is a simple yet effective way to enhance your sensory experience while enjoying the benefits they offer.

Advertisement

Where to Find Wickless Candles

When it comes to finding wickless candles, there are several options to consider. Online retailers offer a wide variety of choices, allowing you to browse and compare different brands and scents from the comfort of your own home.

Local craft fairs are another great place to find unique and handmade wickless candles, supporting local artisans and getting a one-of-a-kind product.

And if you’re feeling creative, you can even make your own wickless candles at home, experimenting with different ingredients and scents to create a personalized and eco-friendly option.

So whether you prefer the convenience of online shopping, the charm of a local fair, or the satisfaction of a DIY project, there are plenty of ways to find wickless candles that suit your preferences.

Online Retailers

To burn a candle without a wick, you can conveniently explore various online retailers. The online marketplace offers a wide range of options for wickless candles, allowing you to find exactly what you’re looking for.

Advertisement

One of the benefits of shopping online is that you can easily compare prices, read reviews, and choose from eco-friendly options. Many online retailers specialize in selling candles made from soy or beeswax, which are more sustainable and environmentally friendly compared to traditional paraffin candles.

Additionally, you can find unique and artisanal wickless candles that are handcrafted with love and attention to detail. These candles not only provide a beautiful ambiance but also make for great gifts.

So, if you’re looking for wickless candles, online retailers are the perfect place to start your search.

Now, let’s transition to the next section about local craft fairs.

Local Craft Fairs

Don’t miss out on the opportunity to discover hidden treasures and support local artisans at craft fairs in your area. Craft fairs are not only a great way to find unique and handmade items, but they also provide a platform for local artists and crafters to showcase their talent and passion. In recent years, craft fair trends have been shifting towards more eco-friendly and sustainable products, as well as a focus on supporting local communities. These fairs often feature a wide variety of handmade goods, including jewelry, home decor, clothing, and much more. Attending a local craft fair can be a rewarding experience, allowing you to connect with the artists behind the products and learn about their creative process. So, why wait? Start exploring your local craft fairs and be a part of the local craft fair success. And if you’re interested in homemade options, keep reading for some creative ideas.

Advertisement

Homemade Options

Get ready to create your own cozy and aromatic atmosphere with homemade scented candles. When it comes to burning a candle without a wick, there are plenty of homemade alternatives that can provide the same warm glow and delightful fragrance.

One option is to use a wax melt burner. Simply place a wax melt in the burner and light a tea light underneath. As the tea light heats up, the wax melt will melt and release its fragrance.

Another alternative is to use a candle warmer. This device uses a gentle heat source to melt the wax and release the scent into the air.

Both of these homemade options are easy to use and can create a soothing ambiance in any room. So go ahead and experiment with these alternative heat sources to enjoy the cozy glow and delightful fragrance of homemade candles.

Frequently Asked Questions

Are wickless candles safe to use around children and pets?

Wickless candles are a safe option to use around children and pets. With their flameless design, there’s no risk of accidental burns or fire hazards. They provide a worry-free ambiance without the need for constant monitoring. Their safety features, such as timers and automatic shut-offs, further ensure peace of mind. So, you can enjoy the warm glow and comforting scents of wickless candles, knowing that your loved ones are protected.

Advertisement

Can I use any type of wax for making wickless candles?

Yes, you can use various types of wax for making wickless candles. Soy wax is a popular choice due to its clean burn and eco-friendly nature. Another alternative is beeswax, which has a natural sweet aroma and purifies the air when burned. Coconut wax is also a great option as it has a long burn time and a smooth, creamy texture.

Wickless candles offer a multitude of benefits, such as no soot or smoke, longer burn time, and the ability to safely use them around children and pets.

How can I add fragrance to my wickless candle without using essential oils?

There are several alternative fragrance options you can use to add scent to your wickless candle without relying on essential oils.

One natural alternative is using dried herbs or flowers, like lavender or rose petals, which not only provide a lovely aroma but also add visual appeal.

Another option is to use spices, such as cinnamon or cloves, which release a warm and inviting scent when heated.

Advertisement

Additionally, you can experiment with citrus peels or vanilla extract for a refreshing fragrance.

What are some creative and unique container ideas for wickless candles?

Looking for unique and creative container ideas for your wickless candles? Look no further! Whether you’re a DIY enthusiast or just love getting crafty, there are plenty of candle container alternatives to explore.

From repurposed vintage teacups to elegant mason jars adorned with ribbons and lace, the possibilities are endless. Let your imagination run wild and create a one-of-a-kind centerpiece or gift with these wickless candle ideas.

Get ready to light up your space with style and charm!

Can I use unconventional heat sources like solar power or batteries to burn a wickless candle?

Yes, you can definitely use unconventional heat sources like solar power or batteries to burn a wickless candle. There are solar-powered candle options available in the market that use the energy from the sun to generate heat and melt the wax, creating a beautiful ambiance.

Advertisement

Similarly, battery-operated candle alternatives are also widely available, allowing you to enjoy the warm glow of a candle without the need for an open flame. These options provide a safe and convenient way to enjoy the comforting flicker of a candle anytime, anywhere.

Conclusion

In conclusion, wickless candles offer a unique and convenient way to enjoy the warm glow and aromatic ambiance of traditional candles without the hassle of a wick. By choosing the right wax, adding your favorite fragrance, and experimenting with different heat sources, you can create a personalized candle experience that suits your taste.

Whether you’re looking to relax after a long day or create a cozy atmosphere for a special occasion, wickless candles are the perfect solution. So why not give them a try and enhance your space with their soothing glow and delightful scent? You won’t be disappointed.

Continue Reading

Beginners Guides

How To Get Candle Wax Out Of Fur

Published

on

By

An image showcasing a fluffy white cat, with its gorgeous fur marred by drips of hardened candle wax

Fortuitously, I was placed in a challenging situation when an accident involving a candle resulted in wax covering my pet’s fur. Anxiety overwhelmed me as I deliberated on ways to return their coat to its original condition.

Thankfully, after some research and trial and error, I discovered a foolproof method to remove candle wax from fur. In this article, I will guide you through the steps to rescue your pet’s precious coat from the clutches of wax.

First, we’ll assess the situation, then cool the wax to make it easier to handle. Next, we’ll gently remove the excess wax before using heat to melt the remaining residue. We’ll then employ the power of blotting and a specially formulated solution to work the wax out of the fur. After rinsing and repeating if necessary, we’ll finish by drying and brushing the fur to restore its natural beauty.

And fear not, if all else fails, I’ll share when it’s time to seek professional help. So let’s get started on this wax-removal adventure together!

Key Takeaways

  • Assess the situation and determine the extent of wax on the fur before attempting to remove it.
  • Use cold to cool and harden the wax, then gently remove excess wax using a comb or brush.
  • Apply heat to melt the remaining wax and blot it away with a clean cloth.
  • Use a cleaning solution and work it into the fur to remove any residue, repeating the process if necessary.

Assess the Situation

Now, you’ll need to carefully examine the extent of the candle wax’s infiltration into your furry companion’s coat, ensuring you don’t overlook any hidden clumps or residue. Start by gently parting the fur and inspecting the affected areas. Look for any obvious signs of candle wax, such as hardened clumps or discoloration. Take note of the size and location of the wax, as this’ll help determine the best course of action.

Next, analyze the damage caused by the wax. If the wax has only lightly coated the fur and hasn’t reached the skin, you may be able to remove it yourself. However, if the wax has seeped deep into the fur or if your pet’s showing signs of discomfort, it’s crucial to consult a vet. They can assess the situation and provide guidance tailored to your pet’s specific needs.

Advertisement

Remember, every situation’s unique, and it’s important to approach this process with caution. Rushing or overlooking any clumps of wax could potentially harm your furry friend.

Once you’ve thoroughly examined the extent of the wax, you can move on to the next step: cooling the wax.

Cooling the Wax

First, you’ll want to cool the wax by placing a cold pack or ice cube on the affected area, which can provide immediate relief for your furry friend. Did you know that over 50% of pet owners have dealt with candle wax mishaps on their pet’s fur? When it comes to cooling techniques, there are a few options you can try. One effective method is to wrap an ice cube in a cloth and gently rub it over the wax. This will help solidify the wax, making it easier to remove. Another option is to use a cold pack or freezer pack, which can be applied directly to the waxed area. This will help reduce the temperature and harden the wax.

To make the process even more engaging, let’s take a look at a table that compares different cooling techniques:

Cooling Technique Pros Cons
Ice Cube Easy and accessible May be uncomfortable for pet
Cold Pack Provides longer cooling time May require multiple applications
Freezer Pack Convenient Can be too cold for some pets

Once you’ve cooled the wax, you can move on to gently removing the excess wax. This can be done using a comb or brush to carefully loosen and lift the hardened wax from the fur.

Advertisement

Gently Remove Excess Wax

Next, it’s time to delicately remove any leftover wax from your pet’s fur without causing any discomfort. To begin, you’ll need a few supplies: a butter knife, a soft cloth, and a hairdryer.

Start by gently scraping the excess wax off your pet’s fur using the butter knife. Be very careful not to tug or pull on the fur, as this may cause pain or discomfort. Once you’ve removed as much wax as possible with the butter knife, take the soft cloth and lightly blot the area to absorb any remaining residue.

If you’re dealing with delicate fabrics, such as silk or satin, it’s important to be extra cautious. Instead of using a butter knife, opt for a plastic card or spoon to scrape off the wax. This will prevent any damage to the delicate fabric. After scraping off the wax, gently dab the area with a soft cloth to remove any residue.

To prevent future wax spills on your pet’s fur, it’s a good idea to keep candles out of reach and use candle holders with covers. Additionally, consider using flameless candles or diffusers as a safer alternative. By taking these precautions, you can minimize the chances of another wax mishap.

Now that you’ve removed the excess wax, let’s move on to the next step: using heat to melt the remaining wax.

Advertisement

Use Heat to Melt the Wax

Once the excess wax has been gently removed, it’s time to bring in the heat and let it work its magic, melting away any lingering remnants like a warm summer sun melting ice cream on a hot day.

To effectively use heat to remove wax from fur, you can employ two different techniques: using a hairdryer or an iron.

To start, grab a hairdryer and set it to a low heat setting. Hold the hairdryer about six inches away from the wax stain and begin blowing hot air onto the affected area. As the heat from the hairdryer warms up the wax, it will start to melt and become more pliable. Use a soft cloth or paper towel to gently blot the melted wax, absorbing it as it becomes liquid.

Alternatively, you can use the ironing technique to remove wax from fur. Set your iron to a low heat setting and place a clean cloth over the wax stain. Then, gently press the iron onto the cloth, moving it in a circular motion. The heat from the iron will transfer to the cloth, melting the wax and transferring it onto the fabric. Continue this process until all the wax has been removed.

Now that the wax has been melted and removed from the fur, it’s time to move on to the next step – blotting the remaining wax residue with a clean cloth.

Advertisement

Blotting the Wax

Now let’s move on to a delightful step that involves gently dabbing away any remaining melted wax using a soft, clean cloth. This step is crucial for removing wax stains and preventing any future wax spills. Here’s how you can effectively blot the wax:

  • Place a clean cloth or paper towel over the affected area and apply gentle pressure. This’ll help absorb the melted wax into the cloth.

  • Continue blotting until no more wax transfers onto the cloth. Be careful not to rub the wax, as this can push it deeper into the fur.

  • If the cloth becomes saturated with wax, replace it with a fresh one to avoid spreading the wax around.

  • For stubborn wax stains, you can use a hairdryer on low heat to soften the wax and then blot it away.

  • Repeat the blotting process until the wax’s completely removed.

By following these steps, you can effectively remove candle wax from fur without causing any damage. Now, let’s move on to the next section where we’ll apply a cleaning solution to further tackle any remaining residue.

Apply a Cleaning Solution

To effectively tackle any remaining residue on your furry friend, it’s time to introduce a powerful cleaning solution. Using alternative cleaning methods can help remove candle wax from fur without causing any harm or discomfort to your pet. There are a few options you can try, such as using a mixture of dish soap and warm water or a pet-friendly stain remover.

To guide you in choosing the right cleaning solution, here is a table that compares different options:

Cleaning Solution Effectiveness Safety for Pets
Dish soap and warm water High Safe, but rinse thoroughly
Pet-friendly stain remover Moderate to high Read the label carefully

When applying the cleaning solution, make sure to follow the instructions provided. Gently massage the solution into the affected area, working it in the direction of hair growth. This will help loosen the wax and prevent any further buildup in the fur.

Advertisement

Now that you have successfully applied a cleaning solution, it’s time to move on to the next step: working the solution into the fur.

Work the Solution into the Fur

Gently massage the cleaning solution into the affected area to break down any remaining residue and prevent further buildup in your pet’s fur. When working with different fur types, it’s important to be gentle yet thorough. Start by applying a small amount of the cleaning solution onto a clean cloth or paper towel. Then, gently work the solution into the fur using circular motions. Be sure to focus on the areas where the wax is most concentrated.

For shorter fur, you can use your fingers to massage the solution into the fur. Make sure to reach all the way down to the skin to ensure a thorough cleaning. For longer fur, you may need to use a comb or brush to work the solution through the hair. Be careful not to pull or tug on the fur, as this can cause discomfort for your pet.

By thoroughly working the cleaning solution into the fur, you can help ensure that all traces of wax are removed. This will prevent any future wax spills from sticking to the fur and causing further issues.

Once you have finished working the solution into the fur, you can proceed to the next step of rinsing and repeating if necessary.

Advertisement

Rinse and Repeat if Necessary

If needed, you can repeat the rinsing process to ensure a thorough clean and leave your pet feeling refreshed and free from any lingering residue. When it comes to getting candle wax out of fur, it’s important to explore alternative methods if the initial rinse isn’t enough.

Here are three ideas to consider:

  1. Use ice cubes: Gently rub an ice cube over the wax to harden it. This will make it easier to remove without damaging your pet’s fur. Once the wax is solid, carefully scrape it off with a dull knife or your fingernail.

  2. Try a blow dryer: Set the blow dryer on a low heat setting and hold it a few inches away from the affected area. The warm air will melt the wax, which can then be blotted away with a clean cloth. Be cautious not to use high heat, as it may burn your pet.

  3. Apply dish soap: Mix a small amount of dish soap with warm water to create a soapy solution. Gently work the solution into the fur, focusing on the waxed area. Rinse thoroughly to remove any soap residue.

To prevent wax buildup in the future, consider keeping candles out of your pet’s reach or using flameless alternatives.

Now, let’s move on to the next section where we’ll discuss how to dry and brush the fur.

Dry and Brush the Fur

Once the wax has been removed, you can now proceed to dry and brush your pet’s fur to ensure a clean and well-groomed appearance.

Advertisement

Start by gently patting the area with a clean towel to absorb any excess moisture. Avoid rubbing vigorously as this may cause tangles or matting.

Next, use a hairdryer on a low heat setting to gently blow-dry the fur. Keep the dryer at least six inches away from your pet’s skin to avoid any discomfort or burns. Use your fingers or a wide-toothed comb to fluff and separate the fur as you dry it. This will help to prevent any clumps or knots from forming.

If you notice any remaining wax residue on the fur, you can try using the same method mentioned earlier, where you place a brown paper bag or a clean cloth over the area and gently iron over it. The heat from the iron should help to transfer the wax onto the paper or cloth. However, be cautious not to overheat or burn your pet’s fur.

Lastly, give your pet a thorough brushing using a comb or brush appropriate for their fur type. This will help to remove any remaining wax particles and leave their coat looking clean and shiny. Remember to brush in the direction of hair growth to avoid causing discomfort or pulling on the fur.

If you find that the wax is stubborn and difficult to remove, or if your pet is showing signs of discomfort, it may be best to seek professional help. A groomer or veterinarian will have the necessary expertise and tools to safely remove the wax without causing harm to your pet.

Advertisement

Seek Professional Help if Needed

Don’t hesitate to reach out to a professional if you need assistance with your pet’s wax removal process. Seeking professional help can have several advantages and is of utmost importance.

Professionals have the necessary knowledge and experience to handle the situation effectively and safely. They are trained in handling various types of situations and have a deep understanding of how to remove wax from fur without causing harm to your pet. They know the right techniques, tools, and products to use, ensuring a successful removal process.

Another advantage is that professionals have access to specialized equipment and products that may not be readily available to the average pet owner. These tools and products are specifically designed for removing wax from fur, making the process more efficient and effective. They can also provide recommendations on how to prevent future wax-related issues.

Moreover, professionals can also assess the overall health and condition of your pet’s fur during the removal process. They can identify any underlying issues or potential risks that may have been caused by the wax, ensuring that your pet’s well-being is prioritized.

Seeking professional assistance for removing candle wax from your pet’s fur is highly recommended. The advantages of their expertise, access to specialized equipment, and their ability to assess your pet’s overall health make it an important step in ensuring a safe and successful wax removal process.

Advertisement

Frequently Asked Questions

Can I use a hairdryer to melt the wax instead of using heat from an iron?

Using a hairdryer to melt wax is not recommended for removing it from fur. While it may seem like a convenient alternative to using an iron, the heat from a hairdryer is not sufficient to fully melt the wax, making it more difficult to remove. It’s best to stick with tried and true methods like using an iron with a cloth or the freezer method for effective wax removal from fur.

Is it safe to use a cleaning solution that contains bleach on the fur?

Using a cleaning solution that contains bleach on fur can be risky. Bleach is a strong chemical that can potentially damage the fur. Instead, it’s recommended to use bleach alternatives that are specifically designed for use on fabrics. These alternatives are gentler and less likely to cause harm. It’s important to always check the label and follow the instructions carefully to ensure the safety of the fur.

How long should I let the cleaning solution sit on the fur before rinsing it off?

I usually let the cleaning solution sit on the fur for about 10-15 minutes before rinsing it off. This allows the solution to penetrate the wax and loosen it from the fur fibers.

However, there are alternative methods to remove wax from fur. One method is to place a paper towel over the wax and use a warm iron to melt the wax, then blot it up with the paper towel. Another method is to freeze the wax with ice cubes and then gently scrape it off with a butter knife.

Can I use a regular brush to brush the fur, or do I need a specialized brush?

I can use a regular brush to brush the fur, but a specialized brush may be more effective in removing candle wax. Regular brushes may not have the bristle strength or design to effectively remove wax from fur fibers.

Advertisement

A specialized brush, like a pet hair brush or a stiff-bristle brush, can help to gently lift and remove the wax without damaging the fur. Additionally, using a hairdryer on a low heat setting can help to melt and remove the wax without the need for an iron, which may damage the fur.

What are some signs that indicate I should seek professional help instead of trying to remove the wax myself?

If you notice any of the following signs, it may be best to seek professional help for removing wax from fur.

Firstly, if the wax has deeply penetrated the fur and is difficult to remove, professional assistance may be necessary.

Additionally, if the fur is delicate or valuable, it’s crucial to avoid any potential damage that DIY methods may cause.

Finally, if you’re unsure about appropriate cleaning techniques or are worried about causing further harm, it’s wise to consult a professional.

Advertisement

Conclusion

Well folks, that’s a wrap! After following these steps, you’ll have those pesky candle wax stains out of your fur in no time.

It may seem like a hairy situation, but with a little patience and some elbow grease, you can conquer any wax mishap. Remember to stay cool under pressure, and don’t be afraid to seek professional help if things get too sticky.

Now go out there and rock that fur like a boss!

Continue Reading

Beginners Guides

How To Dispose Of A Candle

Published

on

By

An image of a pair of hands holding a melted candle jar over a recycling bin, with the flickering flame now extinguished

So, you’ve finally reached the end of enjoying your favorite candle and find yourself with the challenge of figuring out how to dispose of it correctly. Fear not, I’m here to help you through it.

In this article, I’ll guide you through the process of safely and responsibly disposing of a candle.

Let’s start with a real-life example to illustrate the importance of proper candle disposal. Sarah, a candle enthusiast, recently had a mishap when she poured hot wax down her kitchen sink. The result? A clogged drain and an expensive plumbing bill. Sarah quickly realized that she should have known better and sought out the proper way to dispose of her candles.

In this article, I’ll show you step-by-step how to dispose of a candle without any negative consequences. From extinguishing the candle safely to recycling the container, we’ll cover it all.

So, let’s get started and ensure that your candle-burning experience ends on a high note, with no mess or damage left behind.

Advertisement

Key Takeaways

  • Properly disposing of candle wax is important for reducing waste and minimizing environmental impact.
  • Recycling centers often accept wax made from natural materials like soy or beeswax.
  • Composting wax can provide nutrient-rich soil for plants and reduce the need for chemical fertilizers.
  • DIY projects using leftover wax can transform it into unique creations using decorative candle molds.

Extinguish the Candle Safely

To extinguish the candle safely, simply pinch the wick gently between your fingertips and watch as the glowing flame fades away, leaving behind a trail of delicate smoke. This method ensures that the flame is completely extinguished without causing any damage or spreading any sparks. It’s important to use safe methods when dealing with fire to prevent accidents and maintain a secure environment.

When pinching the wick, make sure to do it gently to avoid any hot wax splattering. This technique not only puts out the flame effectively but also minimizes the risk of accidentally dropping the candle or causing a fire. By taking these precautions, you can ensure a safe and hazard-free environment.

Once the flame is extinguished, the next step is to allow the wax to harden. This is a crucial step as it prevents any spills or accidents while disposing of the candle. Allowing the wax to cool and solidify ensures that it can be easily handled without any mess or risk of burns.

Once the wax is hardened, you can then move on to the proper disposal methods.

Allow the Wax to Harden

Once the wax has hardened, you can easily remove it from the container with a few simple steps.

Did you know that approximately 1 billion pounds of wax are used to make candles each year in the United States alone? It’s quite astonishing!

Advertisement

Now, let’s talk about what you can do with that hardened wax. One option is to reuse it. You can melt down the wax and create new candles or even use it to make wax melts for your wax warmer.

To melt the wax, there are a few techniques you can try. One popular method is the double boiler method, where you place the wax in a heat-resistant container and then place that container in a pot of boiling water. Another option is to use a candle warmer, which gently heats the wax until it melts. These techniques ensure that the wax is melted safely and efficiently.

Now that you know how to reuse the wax, let’s move on to the next step and learn how to remove any remaining wax from the container.

Remove any Remaining Wax

First, gently scrape off any remaining wax from the container using a butter knife or a similar tool. Be careful not to scratch the container while doing so.

Once you have removed as much wax as possible, there are several ways you can reuse the candle or its remnants:

Advertisement
  • Melt the leftover wax and pour it into a new container or mold to create a new candle.
  • Use the wax to lubricate sticky drawers or squeaky hinges.
  • Make fire starters by placing small pieces of wax in a cupcake liner with a wick.
  • Create wax sachets by placing scented wax pieces in a fabric pouch and using them to freshen up drawers or closets.
  • Mix the wax with other ingredients like essential oils or dried flowers to make homemade wax melts for a wax warmer.

By reusing the candle or its remnants, you can minimize waste and get more use out of your purchase.

Once you have removed the remaining wax, it’s time to move on to the next step: cleaning the candle holder.

Clean the Candle Holder

After you’ve successfully removed the remaining wax, it’s time to give the candle holder a sparkling makeover. Cleaning the candle holder is important not only for aesthetic reasons but also to ensure that it’s free from any residue that may affect future candles.

There are various cleaning techniques you can use, depending on the material of your candle holder.

For glass holders, a simple solution of warm water and dish soap works wonders. Gently scrub the inside and outside of the holder with a soft cloth or sponge to remove any stubborn stains or residue. Rinse it thoroughly with warm water and pat it dry with a clean towel. This will leave your glass holder looking as good as new.

If you have a metal candle holder, you can use a mixture of vinegar and baking soda to remove any tarnish or discoloration. Apply the mixture to the holder using a cloth or sponge, and scrub gently until the stains are gone. Rinse it off with warm water and dry it completely to prevent any rusting.

Advertisement

Once your candle holder is clean, you can also consider alternative uses for it. Glass holders can be repurposed as small vases for flowers or storage containers for small items. Metal holders can be used as plant pots or decorative objects. The possibilities are endless!

Now that your candle holder is clean and ready for a new purpose, let’s move on to the next step of recycling the glass or metal container.

Recycle the Glass or Metal Container

To give your candle holder a new lease on life, consider recycling the glass or metal container. Recycling is one of the best ways to dispose of a candle holder in an eco-friendly manner. Not only does it help reduce waste, but it also allows the materials to be reused, reducing the need for new resources.

Here are some recycling options and eco-friendly alternatives for your candle container:

  • Take it to a recycling center: Most glass and metal containers can be recycled at your local recycling center. Simply clean the container and drop it off. Recycling centers have specialized processes to break down and reuse these materials.

  • Repurpose it as a storage container: Clean the container thoroughly and use it to store small items like buttons, jewelry, or office supplies. This way, you can give it a second life while organizing your space.

  • Use it as a plant pot: Transform your candle container into a mini planter by adding soil and a small plant. It can make a charming addition to your home decor while being eco-friendly.

  • Donate it to a local crafter: Some crafters love using recycled materials in their projects. Consider donating your candle container to a local artist or craft store.

  • Upcycle it into a decorative item: Get creative and repurpose the container into a decorative object, such as a votive holder or a pen holder. Let your imagination run wild and give the container a new purpose.

By recycling the glass or metal container, you not only contribute to a more sustainable future but also open up possibilities for repurposing the container in creative ways.

Advertisement

In the next section, we’ll explore how to repurpose the container even further.

Repurpose the Container

Get ready to unlock the hidden potential of your glass or metal container by repurposing it into something unique and stylish. When it comes to repurposing candle containers, the possibilities are endless. Let me share some repurpose ideas that’ll inspire your creativity and help you give your container a new life.

One creative use for your candle container is to turn it into a mini succulent planter. Clean out the container thoroughly, add some small rocks for drainage, and fill it with soil. Plant your favorite succulent and watch it thrive in its new home. Not only will it add a touch of greenery to your space, but it’ll also serve as a conversation starter.

Another great idea is to transform your container into a stylish makeup brush holder. Clean out the container and fill it with small beads or decorative stones. This’ll help keep your brushes upright and organized, while also adding a chic touch to your vanity.

Before we move on to the next section on how to dispose of the wax properly, let’s explore more creative ways to repurpose your candle container.

Advertisement

Dispose of the Wax Properly

Once you’re done enjoying the beautiful glow of your candle, it’s important to handle the leftover wax in a responsible manner.

When it comes to disposing of the wax, there are eco-friendly options that can help reduce waste and minimize your impact on the environment. One way to dispose of the wax properly is by recycling it. Many recycling centers accept wax, especially if it’s made from natural materials such as soy or beeswax.

To recycle the wax, you can collect it in a heat-resistant container and melt it down. Once melted, pour the wax into a mold or container and let it cool and solidify.

Another option is to repurpose the wax by using it to make new candles or wax melts. This not only reduces waste but also allows you to enjoy your favorite scents again.

Consider composting the wax as well, as it can be a beneficial addition to your compost pile. Composting the wax will help it break down naturally and contribute to the nutrient-rich soil.

Advertisement

Transitioning into the next section, let’s explore the option of composting the wax for even more eco-friendly disposal methods.

Consider Composting the Wax

Why not try composting the leftover wax? It’s a great way to give back to the environment and nourish your plants with nutrient-rich soil. Composting wax has numerous benefits, including reducing waste and providing a natural alternative to chemical fertilizers. By composting wax, you can create a valuable resource for your garden while diverting waste from landfills.

To compost wax, there are a few steps you can follow. First, gather your materials: the leftover wax, a compost bin, and organic matter such as fruit and vegetable scraps. Next, break the wax into smaller pieces to speed up the decomposition process. Add the wax to your compost bin, layering it with other organic matter. Remember to turn the compost regularly to ensure proper aeration and decomposition.

Composting wax has its advantages. It improves soil structure, retains moisture, and enhances nutrient availability to plants. Moreover, it reduces the need for chemical fertilizers, minimizing the environmental impact of your gardening practices.

While composting is an excellent disposal method, it’s important to avoid pouring wax down the drain. This can clog pipes and harm aquatic ecosystems. Instead, consider composting or using alternative wax disposal methods to ensure a greener and more sustainable approach to candle disposal.

Advertisement

Avoid Pouring Wax Down the Drain

Instead of risking damage to your plumbing and harming aquatic ecosystems, find a better solution for disposing of wax by avoiding pouring it down the drain. Not only can wax clog your pipes, but it can also solidify and cause blockages in sewer systems, leading to costly repairs.

Instead, consider these alternative methods of wax disposal:

  1. Freeze and scrape: Place the candle jar in the freezer until the wax hardens. Then, use a knife or spoon to gently scrape off the wax and dispose of it in the trash.

  2. Reuse for fire starters: Melt down the leftover wax and pour it into small cardboard cups or muffin tins. Insert a wick, let it cool, and you’ll have homemade fire starters that are perfect for camping or bonfires.

  3. Make new candles: Collect leftover wax from multiple candles, melt them together, and pour the mixture into a new container with a new wick. This way, you can create unique and personalized candles.

  4. Repurpose for wax melts: Pour melted wax into silicone molds to create wax melts. These can be used in wax warmers to fill your home with pleasant scents.

By exploring these alternative methods of wax disposal, you can avoid the negative consequences of pouring wax down the drain.

Next, let’s delve into creative DIY projects with candle wax.

Explore Creative DIY Projects with Candle Wax

Get ready to unleash your creativity and discover amazing DIY projects using leftover wax from your candles. Don’t let that wax go to waste! With a little imagination and some basic supplies, you can transform your leftover candle wax into beautiful and unique creations. One way to make the most of your leftover wax is by using decorative candle molds. These molds come in various shapes and sizes, allowing you to create candles that are truly one-of-a-kind. From elegant pillars to whimsical animal shapes, the possibilities are endless.

Advertisement

To help you get started, here’s a table showcasing three different decorative candle molds and the unique shapes they can create:

Candle Mold Shape
Flower Delicate petals
Geometric Modern and sleek
Animal Cute and playful

Once you have your mold and wax ready, simply melt the leftover wax and pour it into the mold. Let it cool and solidify, and voila! You have a brand new candle in a shape that is sure to impress. These unique candles make for great gifts or can be used to add a touch of personality to your own space. So, don’t throw away that leftover wax—instead, get creative and enjoy the process of making something truly special.

Frequently Asked Questions

Can I throw away the candle while it’s still burning?

Throwing away a candle while it’s still burning is extremely dangerous and should never be done. The risk of fire and injury is too high. Safety precautions must be taken when disposing of a candle. Firstly, extinguish the flame completely by using a candle snuffer or gently blowing it out. Allow the wax to cool and solidify before handling. Then, wrap the candle in newspaper or place it in a heat-resistant container before throwing it away.

What should I do if the wax spills onto a carpet or fabric?

If wax spills onto a carpet or fabric, there are cleaning methods you can use to remove it.

First, let the wax cool and harden. Then, gently scrape off as much wax as possible using a butter knife or spoon.

Advertisement

Next, place a brown paper bag or paper towel over the wax and apply a warm iron to melt it, allowing the paper to absorb the wax. Repeat until no more wax transfers.

Prevention tips include using candle holders with drip catchers and keeping candles away from flammable materials.

Can I reuse the candle container for food storage?

Yes, you can repurpose candle containers for food storage. Candle containers can be a great alternative to traditional food storage containers. Before reusing them, make sure to clean them thoroughly. Remove any remaining wax by placing the container in the freezer and then scraping it off. Wash the container with warm soapy water and dry it completely. Now, you can use it to store dry goods or even small snacks. Just make sure to label it properly to avoid any confusion.

Is it safe to compost the wax if the candle contains artificial dyes or fragrances?

Composting candle wax that contains artificial dyes or fragrances might not be the best idea. The additives in these candles can affect the decomposition process and potentially harm your compost. It’s important to prioritize the health of your compost and opt for candles without artificial additives.

Instead, consider reusing the wax for other purposes or disposing of it properly.

Advertisement

How can I safely remove stubborn wax residue from a candle holder?

To safely remove stubborn wax residue from a candle holder, there are a few effective cleaning methods you can try. One method is to place the holder in the freezer for a few hours until the wax becomes brittle. Then, gently scrape it off with a plastic scraper or credit card.

Alternatively, you can place the holder in a warm water bath to melt the wax. Afterward, wipe it away with a cloth. It’s important to note that these methods should only be used on heat-resistant holders.

As for alternative uses, you can repurpose the wax residue by melting it down and creating new candles or using it as a fire starter for camping trips.

Conclusion

In conclusion, disposing of a candle properly isn’t just important for safety reasons but also for environmental purposes.

By following the steps outlined in this article, you can ensure that you’re handling the candle waste in the most responsible way possible.

Advertisement

Remember, just like a butterfly emerging from its cocoon, your candle can transform into something new and beautiful when recycled or repurposed.

So let’s all do our part and give our candles a second life, like a phoenix rising from the ashes.

Continue Reading

Trending