
Do you have an interest in making personalized, stunning candles for your loved ones or to sell as meaningful gifts? We have the perfect solution for you: a reusable candle mold!
With this simple and practical guide, we will show you how to make your very own candle mold so you can effortlessly replicate your favorite candle designs time and time again.
By following our step-by-step instructions, you will be able to serve others by creating stunning candles that bring warmth and joy into their lives.
So, let’s get started on this exciting crafting journey together and unlock your creativity in the world of candle making!

Key Takeaways
- Silicone and latex are common mold materials for making reusable candle molds.
- Release agents like mold release spray or vegetable oil are needed to ensure easy removal of the finished candle from the mold.
- Consider the size, shape, and design elements of the desired candle when choosing a mold.
- Troubleshoot common mold issues like air bubbles or unevenness by gently tapping the mold or using a leveling tool.

VEVOR 20Lbs Wax Melter for Candle Making, 10 L Extra Large Electric Wax Melting Pot, with Easy Pour Spout and 9-Level Temp Control, Easy Clean for Candle Soap Cream Beauty Bulk Production Business
Quick Heating: This wax melting pot with easy pour spout can quickly heat and melt wax with 1100W...
As an affiliate, we earn on qualifying purchases.
Gather Necessary Materials
To make a reusable candle mold, we’ll need to gather the necessary materials. There are various alternative mold materials that can be used, depending on personal preference and availability. One common option is silicone, which is flexible, durable, and easy to work with. Another alternative is latex, which provides a soft and detailed mold.
Additionally, you’ll need a release agent, such as mold release spray or vegetable oil, to ensure the candle easily releases from the mold. When gathering the materials, it’s important to consider the size and shape of the desired candle, as well as any specific design elements.
Troubleshooting common mold issues, such as air bubbles or unevenness, can be addressed by tapping the mold gently to release trapped air or using a leveling tool to ensure an even surface.

YJHSS 24-Pack 8oz Candle Tins with Lids, Metal Candle Jars for Candle Making, Bulk Empty Containers for Beginners & DIY Storage -Black
Capacity: 8oz =235ml; Dimensions : 3.15" (Diameter) x 2.35" (Height); Each candle tins are made of premium tinplate,...
As an affiliate, we earn on qualifying purchases.
Prepare the Candle Wax
To prepare the candle wax, we’ll need to melt it using a double boiler method. This method involves using two pots, one filled with water and the other placed on top to hold the wax. Fill the bottom pot with water and bring it to a simmer.

In the top pot, add the wax chunks or pellets. Slowly heat the water, allowing the wax to melt gradually. Keep an eye on the temperature of the wax using a candy or candle thermometer.
The ideal temperature for most candle waxes is between 160°F (71°C) and 180°F (82°C). If the wax gets too hot, it may discolor or produce air bubbles. If it’s too cool, the wax may not pour smoothly into the mold.
Troubleshooting common issues during this process will help ensure a successful outcome.
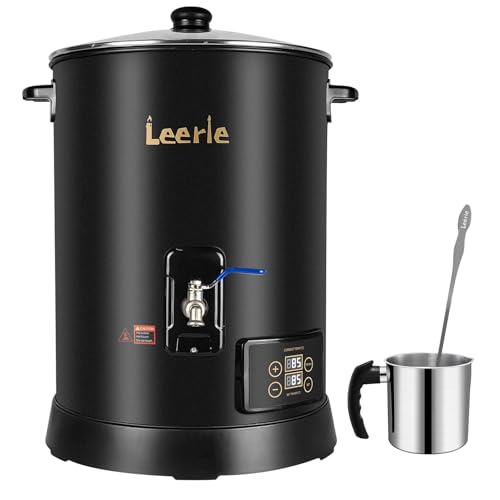
Leerie 30Lbs Digital Commercial Wax Melter for Candle Making - D15 Large Candle Wax Melting Pot with Accurate Temperature Control & Holds 30Lbs Melted Wax for Candle Making Business
✔ MELT MORE, SELL MORE—30LBS AT ONCE : Scale up without slowing down. Designed for professional makers, the...
As an affiliate, we earn on qualifying purchases.
Choose a Container for Your Mold
We often use a container that we’ve on hand to create our reusable candle mold. However, when choosing the right container for your candle mold, there are a few factors to consider.

First, ensure that the container is heat-resistant and can withstand the melting temperature of the wax. Glass or metal containers are commonly used for this purpose.
Additionally, consider the size and shape of the container. It should be large enough to hold the desired amount of wax and allow easy removal of the finished candle. The shape of the container will also determine the shape of the candle.
Finally, consider the aesthetics of the container. It should be visually appealing and complement the overall design of the candle.

TOAUTO 30Lbs Commercial Wax Melter for Candle Making Large Electric Wax Melting Pot for Candle Making Business with Temperature Control & Quick Pour Spout
Fast Melt 60 Candles for You: Achieving a rush order for a bulk order was made easy. TOAUTO...
As an affiliate, we earn on qualifying purchases.
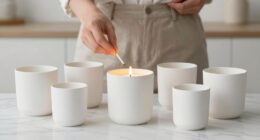
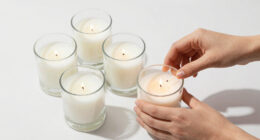
Create a Wick Placement
For our reusable candle mold, we carefully place the wick to ensure an even burn and optimal performance. Wick placement techniques play a crucial role in achieving a well-functioning candle. To assist you in understanding the various options available, we have compiled a table outlining different wick placement techniques and alternative wick materials. This table will help you make informed decisions while creating your candles.

| Technique | Description | Benefits | Drawbacks |
|---|---|---|---|
| Centered | The wick is placed at the center of the mold | Ensures even heat distribution | May require additional support for longer candles |
| Off-Center | The wick is placed slightly off-center | Creates a more aesthetically pleasing burn | May result in uneven melting |
| Multi-Wick | Multiple wicks are placed evenly throughout the mold | Provides a stronger scent throw | Requires careful measurement and placement |
| Wooden Wick | A wooden wick is used instead of traditional cotton wick | Provides a unique crackling sound | May require trimming and maintenance |
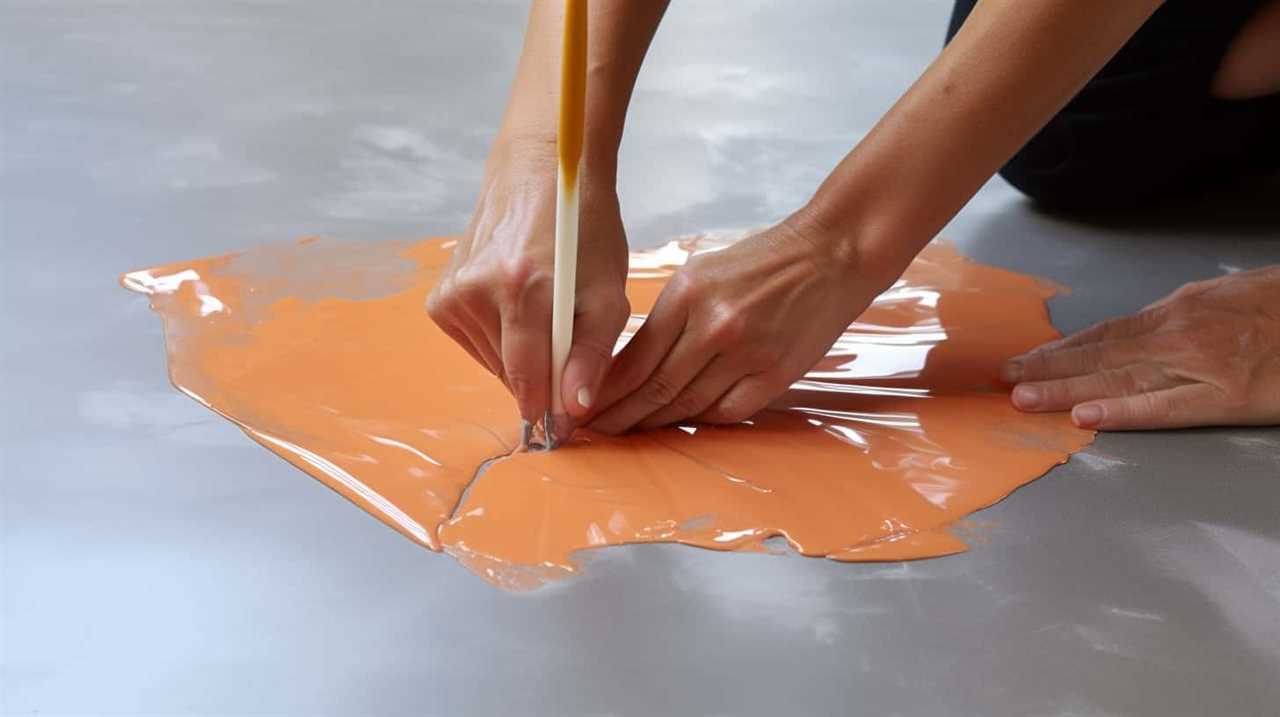
Mix and Pour the Mold Material
Now let’s talk about the different types of mold materials and the importance of mixing ratios.
When it comes to reusable candle molds, there are several options available, such as silicone, latex, or polyurethane. Each material has its own advantages and disadvantages, so it’s crucial to choose the one that suits your specific needs.
Additionally, getting the mixing ratios right is vital for achieving a successful mold. The correct proportions ensure that the mold material sets properly and produces a high-quality mold for your candles.
Mold Material Types
To mix and pour the mold material, gather the necessary ingredients and tools. When it comes to mold material options, there are several choices available. The best mold material choice depends on factors such as the complexity of the candle shape, the desired level of detail, and the number of times the mold will be used.

One common mold material is silicone rubber. This material is flexible, durable, and can capture intricate details. Another option is polyurethane rubber, which is known for its high tear strength and long lifespan. For simpler shapes, you can also consider using latex molds, which are cost-effective and easy to work with.
Before choosing a mold material, consider the specific requirements of your project and weigh the pros and cons of each option. Once you have selected the appropriate mold material, you can proceed to the next step: mixing ratios important?
Mixing Ratios Important?
To achieve the desired consistency and quality of your mold material, it’s crucial to pay careful attention to the mixing ratios. The importance of measuring ratios accurately can’t be overstated. Mixing ratios refer to the precise measurements of the different components used to create the mold material.
A slight deviation from the recommended ratios can significantly impact the final outcome of your mold. Factors that can affect the mixing ratios include variations in the temperature and humidity of your workspace, as well as the viscosity of the mold material itself.

It’s essential to follow the instructions provided by the manufacturer and use accurate measuring tools to ensure the proper balance of components. By doing so, you can ensure that the mold material sets correctly and produces optimal results.
Now let’s move on to the next step: letting the mold material set.
Let the Mold Material Set
Now that the mold material has been poured, it’s important to let it set properly. The setting time for the mold material will vary depending on the specific product you’re using, so it’s essential to follow the manufacturer’s instructions.
Additionally, if you’re looking for alternatives to traditional mold materials, there are various options available that offer shorter setting times or different characteristics.

Proper setting is crucial to ensure that the mold material hardens completely and creates a durable and reusable candle mold.
Setting Time for Mold
After pouring the mold material into the candle mold, we need to allow it to set for a specific amount of time. The setting time for the mold is crucial as it determines the quality and durability of the final product.
Generally, the recommended setting time for most mold materials is around 24 to 48 hours. However, it’s essential to follow the instructions provided by the manufacturer as different mold materials may have varying setting times.
If you encounter any issues with the mold not setting properly, it’s important to troubleshoot the problem. This may involve checking the temperature and humidity of the environment, ensuring proper mixing of the mold material, or adjusting the setting time accordingly.

Alternative Mold Materials
We recommend using a sufficient amount of mold material to ensure proper setting.
When it comes to alternative mold materials, silicone is a popular choice for its numerous benefits.
Firstly, silicone molds are flexible, allowing for easy removal of the candle once it has set. This eliminates the need for greasing or lining the mold, saving both time and effort.
Additionally, silicone molds are durable and reusable, making them a cost-effective option in the long run. They can withstand high temperatures, ensuring that the candle retains its shape and detail.

Silicone also offers excellent release properties, preventing the candle from sticking to the mold.
Importance of Proper Setting
Once the mold material has been poured into the candle mold, it’s crucial to allow it to properly set before proceeding with the next steps. The importance of temperature control during this stage can’t be overstated. Maintaining the recommended temperature range ensures that the mold material sets evenly and avoids potential issues such as cracking or uneven surfaces.
It’s essential to follow the manufacturer’s instructions regarding the ideal temperature and curing time for the specific mold material being used. If you encounter any problems during the setting process, there are common troubleshooting steps you can take. For instance, if the mold material is taking longer to set than expected, check if the room temperature is too low, or consider using a heat source to speed up the curing process. On the other hand, if the mold material is setting too quickly, try lowering the room temperature or adding a retarder to slow down the curing time.
Remove the Mold From the Container
How can the mold be safely removed from the container while ensuring its reusability?

Here are four steps you can follow to remove the mold effectively:
- Apply a release agent: Before attempting to remove the mold, apply a release agent to the inside of the container. This will help prevent the mold from sticking to the container and make it easier to remove.
- Gently loosen the mold: Start by gently tapping the sides of the container to loosen the mold. You can also use a rubber mallet or a wooden dowel to carefully push the mold away from the container walls.
- Slowly pull the mold out: Once the mold is loosened, slowly and carefully pull it out of the container. Take your time to avoid any damage to the mold or the container.
- Clean and store the mold: After removing the mold, clean it thoroughly with warm soapy water to remove any residue. Once dry, store the mold in a safe place to ensure its reusability for future candle-making projects.
Trim Excess Mold Material
To trim excess mold material, start by carefully cutting around the edges of the mold with a sharp knife. Be sure to follow the natural shape of the mold and use steady, controlled movements. This will help to remove any excess material and ensure a clean finish. It’s important to use the right trimming techniques to avoid damaging the mold or creating uneven edges. Take your time and be patient during this step to achieve the desired results.
By trimming the excess mold material, you’re preparing the mold for reuse. This allows you to save time and resources by using the same mold multiple times. It’s an efficient and cost-effective way to produce candles.
Once the excess material is trimmed, you can move on to the next step of preparing the mold for candle pouring.

Prepare the Mold for Candle Pouring
After trimming the excess mold material, we’re ready to prepare the mold for candle pouring. This step is crucial to ensure a successful and clean candle-making process. Here are four important steps to follow:
- Choose alternative mold materials: Traditional candle molds are usually made of silicone or metal, but there are also alternative materials available, such as plastic or glass. Consider using these alternatives based on your preferences and candle design.
- Clean the mold: Before pouring the wax, make sure to clean the mold thoroughly. Any dirt or residue can affect the quality of the final candle. Use warm water and mild soap to clean the mold, and then dry it completely before proceeding.
- Apply a release agent: To easily remove the candle from the mold once it has hardened, it’s essential to use a release agent. This can be a spray or liquid that creates a barrier between the mold and the wax. Apply the release agent evenly on the inner surface of the mold to ensure easy release.
- Secure the mold: To prevent any leaks or spills during the pouring process, secure the mold tightly. Use rubber bands or clamps to hold the mold together, ensuring that it remains stable and upright.
Pour the Melted Wax Into the Mold
Have we prepared the mold for candle pouring?
What’s the next step to create our reusable candles?
Now that we’ve our mold ready, it’s time to pour the melted wax into it. Before pouring, it’s essential to apply a mold release agent to ensure easy removal of the candle once it has cooled and solidified. The mold release helps prevent the wax from sticking to the mold, making it easier to unmold the candle without any damage.
To pour the melted wax, carefully hold the mold steady and slowly pour the wax into it, avoiding any spills or overflows. If you encounter any issues during the pouring process, such as air bubbles or uneven filling, troubleshoot by gently tapping the mold to release any trapped air and adjusting the pouring technique.
With the wax successfully poured into the mold, let the candle cool and cure to complete the creation process.
Transitioning into the next section, the cooling and curing process is crucial for achieving a high-quality reusable candle.
Let the Candle Cool and Cure
Once we’ve poured the melted wax into the mold, it’s important to let the candle cool and cure. This is a crucial step in the candle making process as it allows the wax to harden and take the shape of the mold. Here are four important steps to follow during the candle curing process to ensure optimal results and prevent mold breakage:
- Avoid moving or touching the mold: It’s essential to let the candle cool undisturbed to prevent any deformities or cracks from forming.
- Allow sufficient curing time: Different types of wax require different curing times. Generally, it’s recommended to let the candle cure for at least 24 hours or as per the specific wax manufacturer’s instructions.
- Control the temperature and humidity: Ensure that the curing area is at a stable temperature between 60-75°F (15-24°C) and low humidity to promote even curing and prevent sweating or cracking.
- Gently remove the candle from the mold: After the curing period, carefully release the candle from the mold by gently flexing the sides or using a release agent if necessary.
Following these steps will help you achieve beautifully cured candles without any mold breakage.

Frequently Asked Questions
How Long Does It Take for the Mold Material to Set?
Setting time for the mold material varies depending on the specific type used. It typically takes several hours for the material to fully set and dry. The exact duration can be found in the product instructions or by consulting a professional.
Can I Reuse the Mold Material for Future Candle-Making Projects?
Yes, you can reuse the mold material for future candle-making projects. Reusing the mold material offers several benefits such as cost savings, reduced waste, and the ability to create consistent and high-quality molds.
How Do I Clean the Mold After Removing the Excess Material?
To clean the mold after removing excess material, we recommend using a cleaning process that involves soaking the mold in warm soapy water and scrubbing gently with a soft brush. Alternatively, you can try using vinegar or baking soda for a more natural cleaning method.
Can I Use Different Types of Wax for the Candle?
Yes, you can use different types of wax for candles. Each type has its pros and cons. Beeswax is natural and burns longer, soy wax is eco-friendly, and paraffin wax is inexpensive but may release toxins.
How Long Does It Take for the Candle to Cool and Cure Completely?
The candle cooling time and curing process is crucial for achieving a high-quality candle. It typically takes several hours for the candle to cool completely, but the curing process can take up to a week for optimal results.
Conclusion
In conclusion, making a reusable candle mold is a simple and rewarding DIY project. By following the steps outlined above, you can create unique and personalized candles for yourself or as gifts.
For example, Sarah, a busy mom, used this method to make beautiful scented candles for her friends’ birthdays.
With a little creativity and some basic materials, you can enjoy the satisfaction of creating your own candles time and time again.
Happy crafting!