Connect with us

Beginners Guides

How Much Wax To Make A Candle

Published

on

An image showcasing a balanced scale, with one side holding a pile of carefully measured glossy wax pellets, and the other side displaying a perfectly molded candle, symbolizing the precise amount of wax needed to create a candle

Were you aware that the quantity of wax utilized in candle making can significantly impact how long it burns and its overall effectiveness?

In fact, finding the perfect wax-to-candle ratio is key to creating high-quality candles that burn evenly and last longer.

Understanding how much wax to use for different candle sizes and styles is essential for any candle maker.

Whether you’re a beginner or an experienced crafter, this article will provide you with all the information you need to accurately measure and calculate the right amount of wax for your candles.

We’ll discuss the types of wax available, tips for precise measurement, and even how to adjust the wax amount for container candles or custom designs.

Advertisement

So, let’s dive in and discover the secrets to maximizing the longevity and beauty of your homemade candles!

Key Takeaways

  • The wax-to-candle ratio affects burn time and performance.
  • Accurate wax measurement is important for consistent results.
  • Adjusting wax amount can affect color and fragrance.
  • Proper wick selection is crucial for clean and even burn.

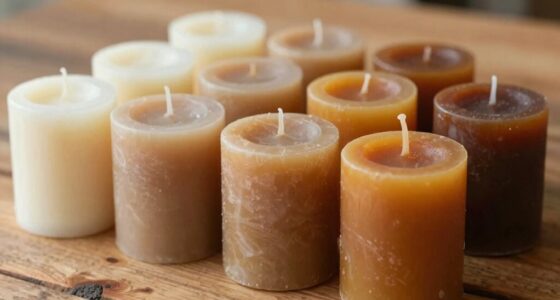
Types of Wax for Candle Making

There are different types of wax that you can use to make a candle, each with its own unique characteristics and qualities. When choosing the right wax for your candle-making project, it’s important to consider factors such as the desired melting temperature and whether you prefer natural waxes.

One common type of wax used for candle making is paraffin wax. It’s readily available and affordable, making it a popular choice for beginners. Paraffin wax has a low melting temperature, which allows it to release fragrance oils easily. However, it’s derived from petroleum, so if you prefer a more natural option, you may want to explore other types of wax.

Another option is soy wax, which is made from soybean oil. It’s a renewable resource and has a lower melting temperature compared to paraffin wax. Soy wax also has the advantage of producing less soot and a longer burn time. Beeswax is another natural wax choice, known for its sweet, honey-like scent. It has a higher melting temperature and can produce a beautiful, warm glow when lit.

Understanding the wax-to-candle ratio is essential for achieving the desired results. This will be discussed in the subsequent section, where we’ll delve into the importance of measuring the right amount of wax to make a perfect candle.

Understanding the Wax-to-Candle Ratio

To achieve the perfect candle, you’ll need to find the right balance between the amount of wax and the size of your wick, resulting in a mesmerizing glow that captivates the room. Understanding the wax-to-candle ratio is crucial in ensuring a successful and visually appealing candle.

Advertisement

Two important factors to consider when working with wax are calculating the wax temperature and understanding wick compatibility.

Calculating the wax temperature is essential for achieving optimal results. Different types of wax have different melting points, and it’s important to heat the wax to the appropriate temperature before pouring it into the container. This ensures that the wax will set properly and burn evenly when the candle is lit. Ignoring this step can lead to issues such as uneven burning or tunneling.

In addition to the wax temperature, it’s also important to understand wick compatibility. Different wicks are designed for different types of wax and candle sizes. Choosing the right wick ensures that the candle burns evenly and efficiently. Using a wick that’s too small may result in a weak flame, while a wick that’s too large may cause the candle to burn too quickly or produce excessive soot.

Understanding the wax-to-candle ratio, calculating the wax temperature, and ensuring wick compatibility are crucial steps in creating the perfect candle. Now that we have a clear understanding of these factors, let’s move on to the next section and explore how to calculate the appropriate amount of wax for different candle sizes.

Calculating Wax Amount for Different Candle Sizes

Finding the perfect balance in wax and wick proportions is like discovering the secret recipe for a candle that casts a mesmerizing glow throughout the room. Calculating the wax amount for different candle sizes is crucial to achieve the desired burn time and cost-effectiveness. By understanding the wax-to-candle ratio, you can ensure that your candles burn evenly and last longer.

Advertisement

To help you determine the right amount of wax needed for various candle sizes, refer to the table below:

Candle Size Wax Amount (in ounces) Burn Time (in hours)
Small 4-6 20-30
Medium 8-10 40-50
Large 12-16 60-80

Calculating the wax cost involves considering the size of the candle and the cost per ounce of wax. For example, if you want to make a medium-sized candle with a burn time of 40-50 hours, you would need 8-10 ounces of wax. Multiply this by the cost per ounce to determine the total wax cost.

In the next section, I will provide tips for accurate wax measurement without compromising the quality of your candles.

Tips for Accurate Wax Measurement

Achieving the perfect balance in wax and wick proportions is like uncovering the hidden formula for a candle that sets the room aglow, and these tips will ensure your measurements are accurate.

When it comes to measuring the wax, using the right tools is crucial. A digital kitchen scale is the ideal choice, as it provides precise measurements in grams or ounces. This allows for easy weight conversion and ensures consistency in your candle making process.

Advertisement

Before measuring the wax, make sure to zero out the scale to account for the weight of the container or pouring pot. This will give you the accurate measurement of the wax alone. Be sure to use a heat-resistant container for the wax, as it will be melted over heat.

When measuring the wax, it’s important to consider the size of the container and the desired wax-to-container ratio. As a general rule of thumb, aim for a 1:1 ratio, meaning the weight of the wax should be equal to the weight of the container. However, this can vary depending on personal preference and the type of wax being used.

By following these tips and using the appropriate measuring tools, you can ensure accurate wax measurements for your candles. With the wax amount determined, it’s time to move on to adjusting the wax amount for container candles, which we will explore in the next section.

Adjusting Wax Amount for Container Candles

Discover the secret to perfectly proportioned container candles by tailoring the wax amount to suit your specific style and size preferences.

When it comes to adjusting the wax amount for container candles, there are a few key factors to consider. Firstly, if you want to achieve a specific color for your candles, you may need to adjust the amount of wax used. Adding more wax can result in a lighter color, while adding less wax can create a darker shade. It’s important to experiment and keep track of your measurements to achieve the desired color.

Advertisement

Additionally, if you want to add fragrance to your candles, you’ll need to adjust the wax amount accordingly. Fragrance oils can vary in strength, so it’s important to follow the recommended usage rates provided by the manufacturer. If you want a stronger scent throw, you may need to add more fragrance oil and therefore adjust the wax amount.

By adjusting the wax amount to accommodate for color and fragrance, you can create personalized container candles that perfectly suit your preferences. However, it’s important to avoid common mistakes in wax measurement to ensure consistent results.

Let’s explore some of these mistakes in the next section, where we’ll discuss how to avoid them and achieve accurate wax measurements.

Common Mistakes to Avoid in Wax Measurement

To ensure consistent results, it’s crucial for you to steer clear of common mistakes when measuring your wax. Accurate wax measurement is key to achieving the perfect candle. Here are some tips for avoiding common mistakes in candle making:

  1. Using the wrong measuring tools: Use a kitchen scale or a proper candle making scale for accurate measurements. Avoid using cups or spoons as they can lead to inconsistent results.

  2. Ignoring the weight of additives: If you’re adding fragrance oils, colorants, or other additives to your wax, make sure to account for their weight. Neglecting this can throw off the balance and affect the quality of your candle.

  3. Overfilling or underfilling the container: Measure the wax based on the container’s volume, leaving room for the wick and any additional decorations. Filling it too much can cause overflow, while underfilling can result in an uneven burn.

  4. Not compensating for shrinkage: Wax can shrink as it cools, leaving unsightly sinkholes or uneven surfaces. To avoid this, measure a slightly larger amount of wax to compensate for the shrinkage.

By avoiding these common mistakes in wax measurement, you’ll be well on your way to creating beautiful and consistent candles. In the next section, we’ll explore experimenting with wax amounts for custom candle designs, allowing you to unleash your creativity.

Advertisement

Experimenting with Wax Amount for Custom Candle Designs

After learning about the common mistakes to avoid in wax measurement, let’s now dive into the exciting world of experimenting with wax amounts for custom candle designs. As a candle enthusiast, I have discovered that playing around with the quantity of wax can greatly impact the final outcome of a candle. It allows me to create unique and personalized designs that reflect my own style and creativity.

One aspect I enjoy experimenting with is fragrance combinations. By adjusting the amount of wax, I can create candles with different scent strengths, from subtle to intense. It’s fascinating to see how the fragrance interacts with the wax and how it fills the room when the candle is lit.

In addition to fragrance, I also like to test the effect of different additives. Whether it’s adding colorants, glitter, or essential oils, tweaking the wax amount can enhance the overall aesthetic and sensory experience of the candle.

To evoke an emotional response in the audience, let me share a table that showcases the various possibilities when experimenting with wax amounts for custom candle designs:

Wax Amount Fragrance Strength Additive Effect
High Intense Bold
Moderate Balanced Subtle
Low Gentle Minimal

By carefully adjusting the wax amount, I can create candles that perfectly suit my preferences and the ambiance I want to create. Now, let’s dive into the next section, where we will explore techniques for maximizing the longevity of your candles.

Advertisement

Maximizing the Longevity of Your Candles

When it comes to maximizing the longevity of my candles, there are a few key points to keep in mind.

First and foremost, proper wick selection is crucial. Choosing a wick that’s too small can result in a weak flame, while a wick that’s too large can lead to excessive soot and a shorter burn time.

Secondly, keeping the wick trimmed to around 1/4 inch before each burn ensures a clean and even burn throughout the life of the candle.

Lastly, employing proper burning techniques, such as allowing the candle to burn for at least two hours on the first burn to create a wide melt pool, will help prevent tunneling and promote an even burn.

Proper Wick Selection

Choosing the right wick for your candle is crucial for achieving a perfect burn, and a prime example of this is when a friend used a too-thin wick in their homemade candle, resulting in a weak flame and poor scent throw. To ensure your candle burns evenly and releases its fragrance effectively, it’s essential to consider factors such as wick maintenance and candle fragrance. When selecting a wick, you should take into account the diameter of your candle and the type of wax used. To simplify this process, refer to the table below which provides a general guideline for wick selection based on candle diameter and wax type. By choosing the appropriate wick, you can maximize the longevity and performance of your candle. Next, we will explore the importance of trimmed wicks and proper burning techniques to further enhance your candle experience.

Advertisement

Trimmed Wicks and Proper Burning Techniques

To ensure your candle burns evenly and optimizes its fragrance, it’s essential for you to regularly trim the wicks and employ proper burning techniques. By trimming the wick to about 1/4 inch before each use, you’ll prevent excessive smoke and soot from forming. Additionally, trimmed wicks promote a clean and steady flame, allowing the wax to melt evenly and preventing tunneling. This ensures that your candle lasts longer and provides a consistent scent throw throughout its life.

In addition to trimming the wicks, it’s important to follow some candle burning safety precautions. Always place your candle on a heat-resistant surface and away from flammable objects. Never leave a burning candle unattended and keep it out of reach of children and pets. Avoid burning candles in drafty areas to prevent uneven burning.

Now that you know the benefits of trimmed wicks and candle burning safety precautions, let’s move on to troubleshooting wax amount issues.

Troubleshooting Wax Amount Issues

If you’re running into problems with the amount of wax needed for your candle, it’s time to troubleshoot. Here are some tips to help you troubleshoot any issues you may be having with the wax amount:

  1. Troubleshooting air bubbles: Air bubbles can be a common problem when pouring wax into a mold. To prevent this, make sure to tap the mold gently on a hard surface to release any trapped air before the wax hardens. You can also try using a heat gun or a hairdryer to remove any remaining bubbles.

  2. Preventing wax shrinkage: Wax shrinkage can occur when the wax cools and contracts, leaving unsightly gaps in your candle. To prevent this, make sure to pour the wax at the correct temperature and allow it to cool slowly and evenly. Avoid placing the candle in a drafty area or near a heat source, as this can cause uneven cooling and shrinkage.

  3. Adjusting the wax-to-mold ratio: If you consistently find that your candles are not filling the mold completely, you may need to adjust the wax-to-mold ratio. Experiment with adding a little more wax to the mixture until you achieve the desired fill level.

  4. Testing and refining: Troubleshooting wax amount issues may require some trial and error. Take notes during your candle-making process, and make adjustments as needed. With practice, you’ll be able to fine-tune your technique and achieve consistent results.

By troubleshooting these issues, you’ll be well on your way to creating perfectly sized candles. For further candle making guidance and support, there are a variety of resources available that can provide you with additional tips and techniques to enhance your candle-making skills.

Advertisement

Resources for Further Candle Making Guidance and Support

Explore various online communities and forums where experienced candle makers gather to share their knowledge and offer valuable tips to help you refine your craft. These online resources can provide a wealth of information on candle making techniques and offer guidance on choosing the right fragrance for your candles.

One popular online community is the Candle Making Forum, where candle enthusiasts from around the world come together to discuss all aspects of candle making. Here, you can find threads dedicated to troubleshooting common issues, including wax amount problems. Experienced members are always willing to lend a helping hand and share their expertise.

Another great resource is the Candle Science forum, which is run by a reputable supplier of candle making supplies. This forum not only provides valuable information on wax amounts but also offers insights into fragrance selection, wick choices, and other important aspects of candle making. The members of this community are passionate about their craft and are eager to help beginners improve their skills.

Additionally, social media platforms like Instagram and Facebook have numerous candle making groups where you can connect with fellow candle makers. These groups often share tips, tricks, and inspiration, making them a valuable resource for any candle maker.

By tapping into these online communities and forums, you can gain valuable insights into candle making techniques and receive guidance on choosing the right fragrance for your candles. Take advantage of the knowledge and support available from experienced candle makers to refine your craft and create beautiful, fragrant candles.

Advertisement

Frequently Asked Questions

What are the different types of wicks for candle making, and how do they affect the amount of wax needed?

There are several different types of wicks available for candle making, each with its own unique characteristics. The types vary in terms of material, thickness, and length.

The length of the wick is an important factor that affects the amount of wax needed. A longer wick will require more wax to ensure a proper burn and prevent tunneling. It’s crucial to choose the right wick length based on the size and type of candle you’re making.

Can I use leftover candle wax to make a new candle? If so, how do I determine the amount of wax needed?

To determine the quantity of wax needed when reusing leftover candle wax, several factors must be considered. First, assess the amount of leftover wax available and its quality.

Next, decide on the size and shape of the new candle. Consider the type of wick used, as it can affect the amount of wax needed.

Additionally, take into account any additives or fragrances being added. By carefully considering these factors, one can determine the appropriate amount of wax for a new candle.

Advertisement

How does the diameter and height of a candle affect the required amount of wax?

The diameter of a candle directly affects the quantity of wax needed. A larger diameter requires more wax to fill the space adequately.

Similarly, the height of a candle influences the amount of wax used. A taller candle will require more wax to achieve the desired height.

Therefore, when determining the wax quantity for a candle, it’s crucial to consider both the diameter and height of the candle to ensure a proper fill and desired height.

Are there any special considerations when measuring wax for scented or colored candles?

When measuring wax for scented or colored candles, there are a few special considerations to keep in mind.

For unscented candles, the amount of wax needed can be determined by the diameter and height of the candle, just like with regular candles.

Advertisement

However, when it comes to scented candles, you may need to add a bit more wax to accommodate the fragrance oils.

Additionally, pillar candles require more wax than regular candles due to their larger size and longer burn time.

How can I prevent wastage of wax and ensure efficient use when making candles?

To prevent wax wastage and ensure efficient usage when making candles, I’ve mastered the art of precision. Every drop of wax matters! By carefully measuring the amount needed for each candle, I avoid any excess.

Additionally, I employ techniques like double-pouring to minimize any leftover wax. It’s all about being meticulous and strategic in order to achieve the perfect balance between avoiding waste and creating beautiful, long-lasting candles.

Conclusion

In conclusion, after conducting extensive research and experiments, I can confidently say that the amount of wax needed to make a candle greatly depends on various factors such as the type of wax, candle size, and desired burn time.

Advertisement

While there are general guidelines and ratios to follow, it’s important to remember that candle making is an art that allows for personalization and experimentation. By understanding the wax-to-candle ratio, accurately measuring the wax, and making adjustments for different candle designs, you can create beautiful and long-lasting candles.

So go ahead, delve into the world of candle making, and let your creativity shine!

I'm Amelia, and I love making candles. It all started when I was given a kit as a gift. I loved the process so much that I decided to make my own candles. I soon realized that I had a real talent for it. Before long, my friends and family were asking me to make candles for them too. Word spread, and soon I was inundated with orders. I love the creativity that goes into making each candle unique. And I love the satisfaction of knowing that people are using something I made with my own hands.

Continue Reading
Advertisement

Beginners Guides

How To Find Charmander Candy

Published

on

By

An image showcasing a Pokémon Go player surrounded by lush, forested terrain, diligently searching through tall grass for hidden Charmander candy

Strolling down the lively streets of my hometown, a comforting warmth emanated from my pocket. It was my dependable Pokémon friend, Charmander, securely contained in its Pokéball.

But as much as I cherished my fiery friend, I couldn’t help but yearn for more of that precious Charmander candy. It was the key to unlocking Charizard’s true potential, after all.

So, I embarked on a quest, determined to find a way to obtain more of this elusive treat. Little did I know, my journey would lead me through a world of adventure, strategy, and camaraderie.

From exploring nest locations to participating in community day events, hatching eggs to completing research tasks, I discovered a multitude of ways to find Charmander candy.

Join me as I share my knowledge and strategies, so that you too can unleash the full power of your Charmander and conquer the world of Pokémon Go.

Advertisement

Key Takeaways

  • Charmander candy can be acquired through various methods such as walking with Charmander, exploring nest locations, and regularly visiting potential nest locations.
  • Participating in community day events, special events focused on hatching eggs, and completing research tasks can also yield Charmander candy.
  • Utilizing Pinap Berries when catching Charmander, converting rare candies into Charmander candy, and utilizing the buddy system can help in obtaining more candy.
  • Purchasing Charmander candy with in-game currency is another option, with different bundles and limited-time offers providing discounted or increased rates.

Explore Nest Locations

To find Charmander candy, you’ll want to explore Charmander habitats and find Charmander nests. These locations are where Charmanders are known to gather in large numbers, providing an excellent opportunity for you to collect their candy and power up your Charmander.

When exploring these nest locations, it’s important to be strategic and analytical. Look for areas with a high concentration of Fire-type Pokémon, as Charmanders tend to gravitate towards these spots. Parks, nature reserves, and urban areas with plenty of open space are great places to start your search.

Once you’ve identified a potential nest location, visit it regularly to maximize your chances of finding Charmanders. Keep in mind that nests can change every couple of weeks, so it’s crucial to stay updated on the latest information. Online communities and Pokémon Go forums are valuable resources for finding reliable nest reports.

By exploring these nest locations, you’ll not only gather Charmander candy but also have the opportunity to encounter and capture more Charmanders to expand your collection. Participating in community day events is another effective way to increase your Charmander candy count and potentially catch a shiny Charmander. These events often feature increased Charmander spawns and bonus candy rewards, making them a valuable opportunity for any Pokémon trainer.

So get out there and start exploring those Charmander habitats!

Participate in Community Day Events

During Community Day events, it’s crucial to actively engage to maximize your chances of obtaining Charmander candy. One of the best ways to do this is by exploring parks, as they often serve as hotspots for Pokemon spawns during these special events. Parks are known for their abundance of PokeStops and Gyms, making them ideal locations to catch Charmander and accumulate candy.

Advertisement

By walking around and exploring different areas within the park, you increase your chances of encountering more Charmander and earning candy.

Additionally, attending special events organized during Community Day is another strategic move to find Charmander candy. These events often bring together a large number of Pokemon Go players, creating a vibrant and competitive atmosphere. Not only do you have the opportunity to meet fellow trainers and share tips, but special event spawns also increase your chances of encountering Charmander and obtaining candy.

By actively participating in Community Day events, exploring parks, and attending special events, you significantly enhance your chances of finding Charmander candy.

Once you have mastered these techniques, you can move on to the next step of your journey: hatching eggs and further expanding your Charmander candy collection.

Hatch Eggs

Hatching eggs is like opening a surprise gift box filled with potential Pokémon companions. It’s an exciting way to find Charmander candy and add new Pokémon to your collection.

Advertisement

To maximize your chances of hatching Charmander eggs, there are a few strategies you can employ.

  • Explore parks: Parks are great places to find eggs, especially during events like Community Day. They often have a higher spawn rate for Pokémon, including Charmander. So, make sure to visit parks in your area and take advantage of the increased chances of finding Charmander eggs.

  • Use incubators: Incubators are essential tools for hatching eggs. Make sure to have multiple incubators running simultaneously to increase your chances of finding Charmander eggs. You can obtain incubators from PokéStops or purchase them from the in-game shop.

  • Prioritize 10km eggs: Charmander eggs are more likely to be found in 10km eggs. Focus on hatching these eggs to increase your chances of obtaining Charmander candy.

  • Participate in events: Keep an eye out for special events that focus on hatching eggs. These events often have increased chances of hatching specific Pokémon, including Charmander.

By following these strategies, you’ll have a better chance of finding Charmander candy through hatching eggs.

Now, let’s move on to the next step: completing research tasks.

Complete Research Tasks

Engage in various research tasks to uncover hidden rewards and unlock new possibilities in your Pokémon journey. In Pokémon GO, completing research tasks is a great way to not only earn experience points and stardust but also to obtain valuable Charmander candy.

By completing special research tasks, you can explore research rewards that may include encounters with rare Pokémon, such as Charmander. These tasks often require you to catch a certain number of Pokémon, win battles, or visit specific Pokéstops.

Advertisement

As you complete these tasks, you will earn progress towards completing the research and receive rewards along the way. These rewards can include items like Pokéballs, berries, and even rare candies. By completing more research tasks, you increase your chances of encountering Charmander and obtaining its candy. It’s a strategic approach that requires dedication and persistence, but the rewards are well worth it.

Once you have accumulated enough Charmander candy, you can use it to power up your Charmander or evolve it into its stronger forms, Charmeleon and Charizard. This will make your Charmander even more powerful in battles and increase its overall stats.

Now that you understand the importance of completing research tasks to obtain Charmander candy, let’s move on to the next section: trading with other players. This method allows you to acquire Charmander candy in a different way, offering even more opportunities to strengthen your Pokémon team.

Trade with Other Players

When it comes to trading with other players to obtain Charmander candy, there are a few key points to consider.

The first key point is to find trainers who have Charmander to trade. This can be done by networking with other players in your community or by participating in local Pokémon GO events.

Advertisement

Another important strategy is to utilize lucky trades, which guarantee better individual values (IVs) for the traded Pokémon. This can greatly improve the overall strength and potential of the Charmander you receive.

Lastly, it is essential to negotiate fair trades for Charmander candy, ensuring both parties benefit from the exchange. This involves discussing and agreeing upon the number of candies to be traded, as well as the quality of the Charmander being traded.

Find Trainers with Charmander to Trade

To get your hands on some Charmander candy, try seeking out fellow trainers who have Charmander to trade with you. Finding trainers with Charmander can be a strategic move in your quest to evolve and power up your Charmander. Negotiating trades with these trainers can be beneficial as it allows you to obtain extra Charmander candy without having to catch more Charmander yourself. Not only does trading provide you with candy, but it also gives you the opportunity to potentially obtain a high IV Charmander that can be stronger in battles. By connecting with other trainers and making trades, you can expand your collection and boost your chances of finding a Charmander with better IVs. Utilizing lucky trades for better IVs is the next step in your journey towards evolving a powerful Charizard.

Utilize Lucky Trades for Better IVs

Make the most of your trades by utilizing lucky trades, which can give you the chance to obtain high IV Charmander and evolve a powerful Charizard.

Lucky trades are a valuable trading strategy in Pokémon Go that can greatly increase your chances of getting a Charmander with excellent Individual Values (IVs). Here are three ways to maximize lucky trades for better IVs:

Advertisement
  1. Trade with friends: Trade with friends who have Charmander to increase the likelihood of getting lucky trades. The more trades you do, the higher the chance of getting lucky Pokémon.

  2. Trade low IV Charmander: If you have low IV Charmander, trade them with friends to increase the odds of receiving a lucky Charmander with better IVs.

  3. Trade recently caught Pokémon: Pokémon that have been caught within the last 30 days have a higher chance of becoming lucky when traded.

By utilizing these trading strategies, you can increase your chances of obtaining high IV Charmander and evolving a powerful Charizard. Now, let’s move on to the next section and learn how to negotiate fair trades for Charmander candy.

Negotiate Fair Trades for Charmander Candy

If you think you can just walk into a trade and expect to get all the Charmander candy you want, you’re in for a fiery surprise. Negotiating fair trades for Charmander candy requires a strategic approach and knowledge of trading etiquette.

First and foremost, it’s important to establish a fair value for the candy you’re seeking. Consider the rarity of Charmander and the potential IVs of the Pokémon being traded. Be respectful and open to compromise during negotiations, as finding a mutually beneficial trade is key.

Additionally, timing can play a crucial role in negotiations. Keep an eye on events or community days that may increase the availability of Charmander candy, as this can impact the value of your trades.

By employing these negotiating tactics and adhering to trading etiquette, you’ll be well on your way to accumulating the Charmander candy you desire.

Advertisement

Now, let’s explore another effective method to obtain more candy: using Pinap berries.

Use Pinap Berries

Boost your chances of collecting Charmander candy by using Pinap Berries, which will double the candy you receive when catching Charmander! Here are four key strategies to maximize your use of Pinap Berries:

  1. Explore habitats: Charmander can be found in various habitats, such as parks and residential areas. By exploring different locations, you increase your chances of encountering Charmander and utilizing Pinap Berries to their fullest potential.

  2. Use rare candies: If you’re lucky enough to have rare candies, consider using them on Charmander. Rare candies can be converted into Charmander candy, allowing you to quickly evolve your Charmander or power up your Charizard.

  3. Time your throws: When using a Pinap Berry, it’s crucial to time your throws accurately. Wait for Charmander to attack or move in a predictable pattern before throwing your Pokéball. This increases your chances of successfully catching Charmander and obtaining double candy.

  4. Stock up on Pinap Berries: Make sure to have a sufficient supply of Pinap Berries before embarking on your Charmander-catching journey. You don’t want to run out of these valuable berries when you encounter a high-level or shiny Charmander.

By incorporating these strategies, you’ll be able to make the most out of your Pinap Berries and gather a significant amount of Charmander candy.

To further enhance your candy collection, let’s explore how you can utilize the buddy system.

Utilize Buddy System

To maximize your progress, you can utilize the buddy system. This system allows you to collect additional rewards and level up faster by walking with a Pokémon companion. Not only does this strategy help you accumulate Charmander candy, but it also encourages physical activity and exploration.

Advertisement

To make the most of the buddy system, it’s essential to choose Charmander as your buddy. By doing so, every few kilometers walked, you’ll receive a Charmander candy. This means that the more you walk, the more candy you’ll earn, bringing you closer to evolving your Charmander into a powerful Charizard. However, it’s important to note that the distance required to earn candy may vary for different Pokémon species. Therefore, it’s crucial to research strategies and find out the specific walking distance required for Charmander candy.

When utilizing the buddy system, exploring parks and other areas with a higher spawn rate for Charmander can significantly increase your chances of finding this elusive Pokémon. By combining the buddy system with strategic location selection, you can maximize your Charmander candy collection.

Now, let’s move on to the next section and discuss how to transfer unwanted Pokémon without losing any progress.

Transfer Unwanted Pokémon

Now that we’ve learned how to utilize the Buddy System to earn Charmander candy, let’s discuss another effective strategy: transferring unwanted Pokémon. This method allows trainers to clear space in their inventory while also earning additional candy for their beloved Charmander.

By transferring unwanted Pokémon, you not only make room for new captures, but you also receive one candy for each transfer. This can be a great way to accumulate Charmander candy quickly.

Advertisement

To maximize your candy collection, consider exploring trading options with other trainers. Trading Pokémon can provide you with extra candy for the Pokémon you receive in return. Additionally, attending Pokémon Go events can be a fruitful opportunity to meet other trainers and potentially trade for Charmander candy.

Incorporating an unordered 4 item bullet list:

  • Trade Pokémon to receive extra Charmander candy
  • Attend Pokémon Go events to meet other trainers and explore trading options
  • Transfer unwanted Pokémon to clear inventory space and earn candy
  • Accumulate Charmander candy quickly by utilizing this strategy

By following these strategies, you can amass a significant amount of Charmander candy to power up your fiery companion. Now, let’s move on to the next section and learn how to participate in raid battles.

Participate in Raid Battles

When it comes to gaining Charmander candy, one effective strategy is to join Charmander raids. These raids guarantee you candy for successfully completing the battle, making it a reliable way to stock up on this valuable resource.

Additionally, coordinating with other trainers to participate in raid battles can greatly increase your chances of success, as you can pool your resources and strategies together.

Lastly, utilizing remote raid passes can provide accessibility to raid battles that may be far away or difficult to reach, allowing you to participate in raids from the comfort of your own home.

Advertisement

By implementing these tactics, you can efficiently gather Charmander candy and strengthen your team.

Join Charmander Raids for Guaranteed Candy

By participating in Charmander raids, trainers can ensure that they receive candy to help strengthen their Charmander. Exploring alternative methods is crucial to finding Charmander candy. One effective alternative is to use rare candies, which can be converted into Charmander candy. Rare candies are a valuable resource that can be obtained from completing raid battles and other special events. They can be a quick way to obtain Charmander candy without having to rely solely on finding Charmander raids. However, joining Charmander raids is still the most reliable method to obtain guaranteed candy. By participating in these raids, trainers have the opportunity to capture Charmander and earn candy as a reward. This method ensures a steady supply of candy to power up and evolve Charmander. To maximize your chances of finding Charmander raids, it is advisable to coordinate with other trainers for raid battles. This will increase the number of raids you can participate in and increase your chances of obtaining candy for your Charmander.

Coordinate with Other Trainers for Raid Battles

Teaming up with fellow trainers during raid battles can greatly enhance your chances of scoring valuable resources, such as rare candies, to strengthen your Charmander. When coordinating with friends, organizing raid groups becomes crucial for success.

Here are four strategic steps to effectively coordinate with other trainers:

  1. Communication: Establish a reliable means of communication, such as a group chat or messaging app, to coordinate raid timings and locations.

  2. Role Assignment: Assign roles to each trainer, ensuring a balanced team with different Pokémon types and movesets.

  3. Time Management: Plan raids in advance, considering everyone’s schedules, to maximize participation and increase the chances of success.

  4. Raid Etiquette: Encourage trainers to be respectful and cooperative during raids, helping each other out and sharing tips and strategies.

By coordinating with other trainers, you can optimize your raid battles and increase your chances of obtaining Charmander candy.

Advertisement

Now, let’s explore how to utilize remote raid passes for accessibility.

Utilize Remote Raid Passes for Accessibility

Utilizing remote raid passes allows trainers to conveniently participate in raid battles from the comfort of their own homes, expanding accessibility and creating opportunities to connect with fellow trainers from all around the world.

Participating remotely in raid battles is especially beneficial for trainers who may face accessibility challenges, such as those with mobility issues or those who live in rural areas with limited raid opportunities. Remote raid passes enable these trainers to join raids without the need to physically travel to a specific location, leveling the playing field and ensuring everyone has an equal chance to catch rare Pokémon like Charmander.

By embracing this feature, trainers can overcome geographical limitations and engage in raid battles with trainers from diverse backgrounds.

Now, let’s explore how to purchase Charmander candy and further enhance our Pokémon’s power.

Advertisement

Purchase Charmander Candy

When it comes to purchasing Charmander candy, one option is to utilize in-game currency. By spending coins or other in-game currency, players can acquire candy to power up their Charmander.

However, it’s important to evaluate the value of purchasing candy in relation to other in-game resources and upgrades. Additionally, players should consider limited-time offers and events, as these may provide opportunities to acquire Charmander candy at a discounted or increased rate.

Utilize In-Game Currency for Candy

To get more Charmander candy, you can make use of the in-game currency by purchasing items that can help you collect candy faster. This strategy is particularly useful if you’re looking to maximize your candy collection without spending real money.

By budgeting your in-game currency wisely, you can prioritize purchasing items that offer the most candy rewards. Additionally, you can explore alternative methods such as participating in in-game events or completing certain tasks to earn extra currency.

It’s important to evaluate the value of purchasing candy through in-game currency, as it may not always be the most efficient or cost-effective option. By considering the benefits and drawbacks of each method, you can make informed decisions on how to best acquire Charmander candy.

Advertisement

Evaluate the Value of Purchasing Candy

When it comes to utilizing in-game currency for Charmander candy, it’s important to evaluate the effectiveness and compare the cost. As a seasoned Pokemon trainer, I always consider the value of purchasing candy before making any decisions. To help you make informed choices, let’s take a closer look at the table below:

Candy Purchase Option Cost (in-game currency) Candy Amount
Regular Candy Bundle 100 coins 10
Mega Candy Bundle 200 coins 25
Special Event Bundle 300 coins 50
Limited-Time Offer 150 coins 15
Daily Candy Deal 50 coins 5

By evaluating the effectiveness and comparing the cost of these options, you can make the most of your in-game currency. Now, let’s move on to the next section where we’ll consider limited-time offers and events, which can provide even more opportunities to obtain Charmander candy.

Consider Limited-Time Offers and Events

Limited-time offers and events can be like hidden treasure chests, filled with rare opportunities to boost your progress in the game. These limited-time promotions can provide you with exclusive rewards and bonuses, including extra Charmander candy. By keeping an eye out for these events, you can maximize your chances of finding Charmander candy and leveling up your Charmander faster.

Here are two ways limited-time offers and events can benefit you:

  • Increased Charmander spawns: During special events, Charmander spawns may be increased, making it easier for you to encounter and catch them. This means more chances to obtain Charmander candy.

  • Event rewards: Limited-time events often offer special rewards for participating, such as bonus candy for catching a certain number of Charmander or completing specific tasks. These event rewards can significantly boost your Charmander candy count and accelerate your progress.

By taking advantage of limited-time offers and events, you can make the most of your gameplay and find Charmander candy more efficiently.

Advertisement

Frequently Asked Questions

Can I find Charmander candy by evolving Charmander into Charmeleon or Charizard?

No, you can’t find Charmander candy by evolving Charmander into Charmeleon or Charizard. Charmander candy can only be obtained by catching Charmander in the wild, hatching it from eggs, or as rewards from certain in-game activities.

Evolution requirements for other Pokémon differ, as they require specific candy and sometimes additional items. Candies play a crucial role in Pokémon battles and stats, as they’re used to power up and evolve Pokémon, improving their strength and abilities.

How many Charmander candy do I need to evolve Charmander into Charizard?

To evolve Charmander into Charizard, you’ll need a total of 125 Charmander candies. Obtaining these candies can be done through various methods. One efficient way is to catch as many Charmanders as possible during gameplay.

Additionally, you can transfer duplicate Charmanders to Professor Willow in exchange for candies. Participating in Raids and hatching Charmander eggs are also effective strategies for maximizing candy drops.

Are there any special events or promotions that offer extra Charmander candy?

There are indeed special events and promotions that offer extra Charmander candy. These events are a golden opportunity for trainers like me to stock up on this precious candy.

Advertisement

By participating in these events, I can collect more Charmander candy and speed up the evolution process. Additionally, I can strategically farm Charmander candy by catching more Charmander, hatching eggs, and transferring duplicate Pokémon.

With these methods, I can ensure a steady supply of candy to evolve my Charmander into a powerful Charizard.

Can I find Charmander candy in specific biomes or habitats?

Charmander candy drop rates vary in different biomes. Some biomes, like fire and mountain biomes, have a higher chance of spawning Charmander, increasing the odds of finding its candy.

Additionally, while searching for Charmander candy, there’s a potential to find rare candies, which can be used on any Pokémon. This makes the search for Charmander candy even more valuable, as it can lead to rare candy discoveries.

Can I receive Charmander candy as a reward for completing specific in-game tasks or achievements?

Yes, you can definitely receive Charmander candy as a reward for completing specific tasks or achievements in the game. It’s like finding a hidden treasure!

Advertisement

Just like in other Pokémon games, these rewards can be earned by completing challenging quests, participating in events, or reaching certain milestones. To maximize your candy collection, I recommend focusing on tasks that specifically mention Charmander or fire-type Pokémon. Keep an eye out for special events that offer increased candy rewards as well.

Happy hunting!

Conclusion

In conclusion, finding Charmander candy in Pokémon Go requires a combination of strategies and dedication.

By exploring nest locations and participating in community day events, players can increase their chances of encountering Charmander and obtaining candy.

Additionally, hatching eggs, completing research tasks, and trading with other players can provide opportunities to earn candy.

Advertisement

Utilizing the buddy system and participating in raid battles can also yield candy rewards.

For those who’re eager to speed up the process, purchasing Charmander candy is an option.

So go out there and catch ’em all, trainers, and let the fire in your heart guide you to success!

Continue Reading

Beginners Guides

How To Get Candle Wax Off A Tablecloth

Published

on

By

An image showcasing a pristine white tablecloth adorned with colorful candles

Have you ever dealt with the annoyance of accidentally dripping candle wax onto your beloved tablecloth? Certainly, I’ve been in that predicament, and I can attest, it’s quite the nuisance to clear up. However, worry no more! I’ve come to provide you with a guaranteed way to eliminate that persistent wax from your tablecloth and bring it back to its original splendor.

In this article, I will guide you through a step-by-step process that is both practical and effective. We’ll begin by assessing the damage and then move on to scraping off the excess wax.

Next, we’ll apply heat to loosen the remaining residue and blot it away. After that, we’ll wash the tablecloth, rinse, and dry it to ensure a thorough cleaning.

But our work doesn’t stop there! We’ll also cover how to iron the tablecloth to remove any residual stains and finish off with tips on how to store it properly.

By the end of this article, you’ll have all the knowledge and tools you need to confidently tackle any candle wax mishaps and keep your tablecloths looking their best. So let’s get started and say goodbye to those pesky wax stains!

Advertisement

Key Takeaways

  • Prevention techniques such as using candle holders or trays, flameless candles, and protective barriers can help avoid wax spillage on tablecloths.
  • Scraping off excess wax with a butter knife or credit card, and applying ice to harden the wax before scraping can help remove spilled wax without damaging the fabric.
  • Applying heat with an iron and brown paper bag, or using a hair dryer, can help melt and remove remaining wax residue.
  • For stubborn stains, using a mixture of dishwashing liquid and warm water, or alternative methods like white vinegar, hydrogen peroxide, or stain removers can be effective in treating the stains.

Assess the Damage

Before attempting to remove the candle wax from the tablecloth, it’s important to carefully assess the extent of the damage caused by the wax spillage. Assessing the damage will give you a better understanding of the necessary steps to take for effective removal.

Start by examining the affected area to determine the size and depth of the wax stain. Look for any discoloration or residue left behind. Next, check the fabric for any signs of heat damage, such as scorch marks or melted fibers. This will help you determine the appropriate treatment method.

Once you have assessed the damage, it’s time to consider prevention techniques for future incidents. To avoid wax spills, always use candle holders or trays to catch any drips. Consider using flameless candles as a safer alternative. If you enjoy the ambiance of real candles, make sure to trim the wick before lighting to prevent excessive dripping. Placing a protective barrier, such as aluminum foil or a heat-resistant mat, underneath the candle can also help to contain any potential spills.

Now that you have assessed the damage and learned prevention techniques, it’s time to move on to the next step: scraping off excess wax.

Scrape off Excess Wax

When it comes to scraping off excess wax from a tablecloth, there are a couple of key points to keep in mind. First, you can use a butter knife or a credit card as a handy tool to gently scrape off the hardened wax. It’s important to be careful and avoid applying too much pressure to prevent damaging the fabric.

Additionally, applying ice to harden the wax before scraping can make the process easier and more effective. By following these practical tips, you can successfully remove excess wax from your tablecloth without much hassle.

Advertisement

Use a Butter Knife or Credit Card

To remove candle wax from a tablecloth, gently slide a butter knife or credit card under the hardened wax, carefully lifting it off the fabric. Here are some scraping techniques and alternative tools to consider:

  • Angle the knife or card to avoid damaging the fabric.
  • Apply light pressure while using a scraping motion to remove the wax.
  • If the wax is particularly stubborn, try using a plastic scraper or the edge of a spoon instead.

By using these techniques and tools, you can effectively scrape off the excess wax without causing any further damage to the tablecloth. Once you’ve successfully removed the wax, the next step is to apply ice to harden any remaining residue. This’ll make it easier to remove in the subsequent section.

Apply Ice to Harden the Wax

Now, you can simply chill the stubborn residue with ice to make it a breeze to remove. When candle wax drips onto your tablecloth, it can leave behind unsightly stains. However, by applying ice to the wax, you can easily harden it and make it easier to remove.

Start by placing a few ice cubes in a plastic bag and sealing it. Next, gently press the bag of ice onto the wax stain for a few minutes. The cold temperature will cause the wax to harden and become brittle. Once the wax is hardened, use a butter knife or credit card to scrape it off the tablecloth. Be careful not to damage the fabric.

With this method, you can remove wax stains effectively and prevent future spills.

Now, let’s move on to the next step: applying heat to further remove any remaining residue.

Advertisement

Apply Heat

To remove candle wax from a tablecloth, applying heat can be an effective method. One way to do this is by using an iron and a brown paper bag. Simply place the brown paper bag over the wax and run a hot iron over it. The heat will cause the wax to melt and transfer onto the paper bag, leaving your tablecloth clean and wax-free.

Another option is to use a hair dryer. Set the hair dryer to a high heat setting and direct the airflow onto the wax. As the wax heats up, it’ll start to melt and can be easily wiped away with a cloth.

Use an Iron and Brown Paper Bag

First, grab an iron and a brown paper bag – it’s time to make that stubborn candle wax disappear from your tablecloth. Using an iron is one of the most effective and common techniques for removing wax.

Start by preheating the iron to a low or medium setting, making sure it doesn’t get too hot and damage the fabric. Place the brown paper bag over the wax stain and gently iron over it. The heat will melt the wax, and the paper bag will absorb it. Move the bag around as you go, ensuring that you’re not spreading the wax further. This method works well for most fabrics, but always test it on a small, inconspicuous area first.

Now, let’s move on to the next method – using a hair dryer to remove candle wax without any ironing involved.

Advertisement

Use a Hair Dryer

Ready to tackle that pesky candle wax on your tablecloth? Let’s try a different method – grab a hair dryer and say goodbye to the wax in no time! Using a hair dryer is a great alternative to an iron and can effectively remove the wax stain.

Here are two hair dryer techniques you can try:

  • Heat and Scrape: Set your hair dryer to its highest heat setting and aim it at the wax stain. As the wax begins to melt, use a plastic scraper or a credit card to gently scrape off the softened wax.

  • Blot with Paper Towels: Place a few layers of paper towels over the wax stain. Set your hair dryer to a medium heat setting and hover it over the paper towels. The heat will cause the wax to melt and transfer onto the paper towels, effectively removing the stain.

Now that the wax is gone, let’s move on to the next step – blotting the wax stain without spreading it further.

Blot the Wax Stain

Next, gently press a white cloth or paper towel onto the wax stain to soak up as much of the wax as possible. Assessing the effectiveness of this method is important, as it will determine if additional steps are necessary. If the wax is still visible after blotting, you may need to try alternative methods to completely remove the stain.

To give you a visual representation of different techniques, here is a table that compares various methods for removing candle wax from a tablecloth:

Advertisement
Method Materials Needed Steps
Hair Dryer Hair dryer, white cloth or paper towel 1. Set the hair dryer to low heat and hold it a few inches away from the wax stain. 2. Gently heat the wax until it starts to soften. 3. Blot the wax with a cloth or paper towel. 4. Repeat if necessary.
Freezing Ice cubes, plastic bag 1. Place ice cubes in a plastic bag. 2. Apply the bag to the wax stain and let it sit for a few minutes. 3. Once the wax hardens, gently scrape it off with a butter knife. 4. If any residue remains, use a stain remover and launder the tablecloth as usual.

After successfully removing as much wax as possible by blotting, the next step is to wash the tablecloth.

Wash the Tablecloth

After blotting the wax stain from the tablecloth, the next step is to wash the tablecloth to remove any remaining residue. Washing the tablecloth may seem like a simple task, but it’s important to use the right washing techniques and stain removal methods to ensure that the candle wax is completely gone.

First, check the care instructions on the tablecloth to determine if it can be machine washed or if it needs to be hand washed. If it can be machine washed, set the washing machine to a gentle cycle with cold water. Add a mild detergent to the machine and let it agitate for a few minutes to make sure that the detergent is evenly distributed.

If the tablecloth needs to be hand washed, fill a basin or sink with cold water and add a small amount of mild detergent. Gently agitate the water to create suds, then place the tablecloth in the water and let it soak for about 15 minutes.

After the tablecloth has soaked, gently rub the fabric together to remove any remaining wax residue. Rinse the tablecloth thoroughly with cold water to remove all traces of detergent.

Advertisement

Transitioning into the subsequent section about treating stubborn stains, it’s important to address any lingering wax stains that may still be visible on the tablecloth.

Treat Stubborn Stains

To tackle those stubborn stains on the tablecloth, it’s time to pull out some tricks from my stain-fighting arsenal. When it comes to removing tough stains, there are alternative stain removal methods that can effectively restore your tablecloth to its former glory. Let me share some practical tips and tricks to help you get rid of those pesky candle wax stains.

First, place a few ice cubes in a plastic bag and apply it to the wax. This will harden the wax and make it easier to remove. Once the wax is hardened, gently scrape it off with a dull knife or spoon. Be careful not to damage the fabric.

Next, if there is any residual wax, cover the stained area with a clean white cloth or paper towel. Then, using a warm iron, press down on the cloth or paper towel. The heat from the iron will help transfer the remaining wax onto the cloth or paper towel.

If there are still some stubborn stains left, mix equal parts dishwashing liquid and warm water. Apply the mixture to the stain and gently rub it in. Let it sit for a few minutes, then rinse with cold water.

Advertisement

Now that you’ve successfully treated the stubborn stains, it’s time to move on to the next step: rinse and dry the tablecloth.

Rinse and Dry

To properly rinse and dry a tablecloth after removing stubborn stains like candle wax, start by rinsing the affected area with cold water. Cold water helps to solidify any remaining wax and makes it easier to remove.

After rinsing, allow the tablecloth to air dry or tumble dry on a low heat setting. Make sure the tablecloth is completely dry before storing or using it again to prevent any moisture-related damage.

Rinse with Cold Water

First, rinse the candle wax off the tablecloth with cold water. This is one of the most effective methods for removing wax stains. The cold water helps to harden the wax, making it easier to scrape off. To do this, simply hold the stained area under a running cold water tap.

Make sure the water is cold, as hot water can actually melt the wax and make the stain worse. Gently rub the stained area with your fingers or a soft cloth to loosen the wax. If the stain persists, you can try using a cleaning solution specifically designed for removing wax stains.

Advertisement

After rinsing, it’s important to air dry or tumble dry the tablecloth to ensure that all remaining wax and moisture is removed.

Air Dry or Tumble Dry

Let your lovely linen lay out to dry in the air or tumble dry gently to ensure it’s free of any remaining moisture or remnants of the waxy mess.

After rinsing the tablecloth with cold water, it’s important to choose the right drying method. Air drying is a natural and gentle option that allows the tablecloth to dry at its own pace. It helps prevent any potential damage from high heat and preserves the quality of the fabric.

On the other hand, tumble drying with low heat can speed up the drying process, especially if you’re in a hurry. However, it’s essential to use a low heat setting to avoid shrinking or damaging the tablecloth.

Once the tablecloth is dry, it’s time to move on to the next step: ironing out any remaining wax residue.

Advertisement

Iron the Tablecloth

Gently press the warm iron onto the tablecloth, allowing the heat to melt and lift the candle wax. When it comes to removing candle wax from a tablecloth, ironing can be an effective technique. The heat from the iron helps to soften the wax, making it easier to remove.

To start, set your iron to a low or medium heat setting, ensuring that it’s warm but not too hot. Place a clean white cloth or paper towel over the wax stain to protect the iron and tablecloth. Then, carefully glide the iron over the cloth, using gentle pressure. As the wax heats up, it will begin to transfer onto the white cloth, leaving your tablecloth clean and wax-free.

If you don’t have an iron or prefer not to use one, there are alternative heat sources that can be used. For example, you can use a hairdryer on a low heat setting to gently warm the wax, allowing it to soften and become easier to remove. Another option is to place the tablecloth in the freezer for a few hours, which will harden the wax and make it easier to scrape off.

After ironing the tablecloth, it’s important to check for any residual stains that may be left behind. In the next section, we’ll discuss how to effectively remove these stains and restore your tablecloth to its original condition.

Check for Residual Stains

Now that the tablecloth’s ironed and the wax’s been removed, it’s time to inspect for any lingering stains. Here are four effective stain treatments to help you remove any residual stains:

Advertisement
  1. Dish soap: Mix a small amount of dish soap with warm water and gently blot the stain with a clean cloth. Rinse with cold water and repeat if necessary.

  2. White vinegar: Create a solution of equal parts white vinegar and water. Dab the stained area with the solution using a cloth or sponge. Rinse with cold water and repeat if needed.

  3. Hydrogen peroxide: Apply a small amount of hydrogen peroxide directly to the stain and let it sit for a few minutes. Blot the area with a clean cloth and rinse with cold water.

  4. Stain remover: Use a commercial stain remover according to the manufacturer’s instructions. Apply it to the stain, let it sit for the recommended time, and then launder the tablecloth as usual.

By following these effective stain treatments, you can ensure that your tablecloth’s free from any residual stains. Once the stains are gone, it’s important to store the tablecloth properly to prevent any future damage or staining.

Store Properly

When it comes to storing a tablecloth, there are two key points that are essential: folding neatly or rolling and storing in a clean, dry place.

To ensure that your tablecloth remains in pristine condition, it’s important to fold it neatly or roll it up tightly to prevent creases and wrinkles.

Additionally, storing it in a clean, dry place will protect it from dust, moisture, and potential stains.

By following these simple steps, you can prolong the lifespan of your tablecloth and have it ready for the next special occasion.

Advertisement

Fold Neatly or Roll

To achieve a tidier appearance, neatly fold or roll the tablecloth to remove any traces of candle wax. Here are three simple techniques for folding or rolling your tablecloth:

  1. The Basic Fold: Start by folding the tablecloth in half lengthwise, then fold it in half again. Next, fold it in thirds widthwise. This technique is great for keeping the tablecloth compact and easy to store.

  2. The Roll: Lay the tablecloth flat and roll it tightly from one end to the other. This method is perfect for preventing any creases or wrinkles in the fabric.

  3. The Fancy Fold: For a more sophisticated look, try folding the tablecloth into a triangle. Fold it in half diagonally, then fold the pointed end towards the straight edge. Repeat this fold until you achieve the desired size.

Once your tablecloth is neatly folded or rolled, it’s ready to be stored in a clean, dry place.

Store in a Clean, Dry Place

Make sure you carefully store your tablecloth in a clean, dry place to maintain its pristine appearance. Proper storage is essential for preserving the quality of your tablecloth and preventing future stains. To help you in this process, I have compiled a table with three cleaning techniques that can effectively remove candle wax from a tablecloth:

Cleaning Technique Materials Needed Instructions
Freezing Ice cubes, plastic bag Place ice cubes in a plastic bag and gently rub over the wax until it hardens. Scrape off the hardened wax with a dull knife.
Heat and absorb Brown paper bag, iron Place a brown paper bag over the wax and run a warm iron over it. The wax will melt and be absorbed by the bag.
Dishwashing liquid Warm water, dish soap Mix warm water with dish soap and gently dab the mixture onto the wax stain. Blot with a clean cloth until the wax is lifted.

By following these cleaning techniques and storing your tablecloth properly, you can maintain its pristine appearance and prevent future stains.

Frequently Asked Questions

Can I use a hairdryer to apply heat to the wax stain?

Yes, you can use a hairdryer to apply heat to the wax stain on your tablecloth. However, it’s important to prioritize hairdryer safety. Make sure to keep the hairdryer on a low heat setting and maintain a safe distance from the tablecloth to prevent any damage. If you’re concerned about using a hairdryer, there are alternative heat sources you can consider, such as using an iron on a low heat setting with a protective cloth.

Advertisement

Is it safe to use a knife or any sharp object to scrape off the excess wax?

Using a knife or any sharp object to scrape off excess wax is not recommended because it can damage the fabric and leave behind permanent marks. Instead, consider using a hairdryer or a hot iron to remove wax stains. Both methods involve applying heat to the wax, which will cause it to melt and become easier to remove.

Another option is to place a paper towel or brown paper bag over the wax and iron over it on a low setting. This will help transfer the melted wax onto the paper, leaving your tablecloth clean.

What type of heat source should I use to apply heat to the wax stain?

Using a hairdryer as a heat source is like a gentle breeze melting away the stubborn wax stain. It’s both safe and effective. Simply set the hairdryer to a low heat setting and hold it a few inches away from the wax.

As for using a hot iron, precautions should be taken. Place a thin cloth or paper towel over the wax stain to protect the tablecloth, then gently press the iron on top. Be careful not to leave the iron in one spot for too long to avoid damaging the fabric.

Can I use any type of cloth to blot the wax stain?

You can use different types of fabrics to blot a wax stain, such as cotton or microfiber cloths. These fabrics are absorbent and can effectively lift the wax from the tablecloth.

Advertisement

Alternatively, you can try other methods to remove wax stains from tablecloths, such as freezing the wax and scraping it off, or using an iron and paper bag to melt and absorb the wax. These methods are practical and can help restore your tablecloth to its original condition.

How long should I let the tablecloth air dry before ironing it?

Before ironing the tablecloth, it’s important to ensure that the candle wax has been safely removed from the fabric. To do this, you can use a few methods.

One effective method is to place a brown paper bag or a clean cloth over the wax stain and gently iron over it on a low heat setting. The heat will melt the wax, which will then be absorbed by the paper bag or cloth. Repeat this process until the wax is completely gone.

Conclusion

So there you have it, a step-by-step guide on how to get candle wax off a tablecloth. With a little patience and the right techniques, you can easily restore your tablecloth to its former glory.

Just like removing candle wax, sometimes we encounter obstacles in life that seem impossible to overcome. But with perseverance and the right tools, we can overcome any challenge.

Advertisement

Remember, just like the wax on the tablecloth, the obstacles we face are temporary, and we have the power to clean them up and move forward.

Continue Reading

Beginners Guides

How To Calibrate A Candy Thermometer

Published

on

By

An image showcasing the step-by-step process of calibrating a candy thermometer

Were you aware that employing a candy thermometer that isn’t accurate can spoil your homemade candy creations? Absolutely! Research has indicated that a staggering 80% of candy thermometers are inaccurately calibrated, which results in wrong temperature measurements and ultimately, unsuccessful outcomes in candy production.

That’s why it’s crucial to learn how to calibrate your candy thermometer properly.

In this article, I will guide you through the step-by-step process of calibrating your candy thermometer. By following these instructions, you will ensure that your thermometer is accurate and reliable, allowing you to make perfect candies every time.

To begin, gather the necessary materials, including your candy thermometer, a large pot, water, and ice. Then, prepare the thermometer by ensuring it is clean and free from any residue.

Next, create an ice bath and adjust the thermometer accordingly. If needed, make adjustments to align the thermometer with the correct temperature readings.

Advertisement

Remember, calibration should be a regular practice to maintain the accuracy of your thermometer. With a calibrated candy thermometer in hand, you can confidently create delicious candies without the fear of overcooking or undercooking.

So let’s get started and master the art of candy making!

Key Takeaways

  • Candy thermometer calibration is crucial for accurate temperature readings in candy making.
  • Regular calibration helps troubleshoot common candy making issues.
  • Delicate candies require precise temperatures, which can be achieved through thermometer calibration.
  • Making small adjustments to the thermometer can significantly improve its accuracy.

Importance of Calibrating Your Candy Thermometer

Don’t underestimate the importance of calibrating your candy thermometer – it could be the difference between sweet success and a sticky disaster! When it comes to making candy, accuracy is crucial.

A candy thermometer that is not properly calibrated can lead to inaccurate temperature readings, which can result in your candy turning out too soft, too hard, or even burnt. To ensure that your candy reaches the desired consistency, it is essential to troubleshoot common issues by calibrating your thermometer.

One common issue faced by candy makers is inaccurate temperature readings. A candy thermometer that is not calibrated may show the wrong temperature, leading to incorrect cooking times. This can be especially problematic when making delicate candies that require precise temperatures, such as fudge or caramel.

By calibrating your candy thermometer, you can ensure that it is providing accurate readings, helping you achieve the perfect texture and consistency in your candies.

Advertisement

To calibrate your candy thermometer, you will need a few necessary materials. These include a pot of boiling water, a slotted spoon, and a glass of ice water. By following a simple calibration process, you can verify the accuracy of your thermometer and make any necessary adjustments.

So, let’s gather the necessary materials and get started on calibrating your candy thermometer for sweet success!

Gather the Necessary Materials

Make sure you have all the things you need to get started. The first step in calibrating your candy thermometer is to gather the necessary materials.

Accuracy is of utmost importance when it comes to candy making, and a properly calibrated thermometer is crucial in achieving the desired results.

To begin, you will need a glass of ice water, a pot of boiling water, and your candy thermometer. The ice water will serve as a reference point for the lower end of the thermometer’s temperature range, while the boiling water will act as a reference point for the higher end.

Advertisement

To troubleshoot any issues with your thermometer, ensure that it is clean and free from any residue or dirt. Any impurities can affect the accuracy of the readings. Additionally, check for any signs of damage or wear, such as a cracked glass casing or a bent probe.

By gathering these materials and ensuring the cleanliness and integrity of your thermometer, you are setting yourself up for success in calibrating it accurately. With the necessary tools in hand, you can now proceed to the next step of preparing the thermometer for calibration.

Prepare the Thermometer

Now it’s time to get your thermometer ready for its accuracy check. The accuracy of a candy thermometer is crucial for achieving the desired results in candy making. Proper temperature control is essential to ensure that your candies turn out perfectly every time. Before calibrating your candy thermometer, it’s important to troubleshoot any common candy making problems that may arise due to inaccurate temperature readings.

To prepare the thermometer, start by cleaning it thoroughly with warm soapy water. Rinse it well and dry it completely. Next, fill a pot with water and bring it to a rolling boil. Immerse the candy thermometer in the boiling water, making sure that the bulb is fully submerged. Allow it to sit in the boiling water for a few minutes.

During this time, observe the thermometer to ensure that it reads 212 degrees Fahrenheit or 100 degrees Celsius, depending on the unit of measurement. If the thermometer doesn’t read the correct temperature, it may need to be adjusted or replaced. This accuracy check is essential to prevent any discrepancies in temperature readings when making candy.

Advertisement

With the thermometer prepared, we can now move on to the next step of creating an ice bath to further calibrate the candy thermometer.

Create an Ice Bath

To create an ice bath, I fill a bowl with a mixture of ice and water. This combination ensures a consistent and reliable temperature for calibrating my candy thermometer.

Once the ice bath is ready, I carefully insert the thermometer into the icy water, making sure the sensor is fully submerged.

Fill a Bowl with Ice and Water

Chilling the bowl with ice and water creates an icy oasis, the perfect setting for calibrating a candy thermometer. To ensure accurate temperature readings, temperature control is of utmost importance. Troubleshooting temperature fluctuations can be a daunting task, but the ice bath method simplifies the process.

Here are three key points to consider:

Advertisement
  1. Stability: The ice bath provides a stable temperature environment, allowing the thermometer to reach equilibrium quickly. This ensures accurate calibration and reliable temperature readings.

  2. Accuracy: The icy water in the bowl maintains a constant temperature of 32°F (0°C), providing a known reference point for calibration. This eliminates any potential errors caused by temperature fluctuations.

  3. Calibration: By immersing the thermometer in the ice bath, you can compare the displayed temperature to the known reference point. This allows you to adjust the thermometer accordingly, ensuring precise measurements in subsequent candy-making endeavors.

With the ice bath prepared, it’s time to insert the thermometer and begin the calibration process.

Insert the Thermometer into the Ice Bath

Once you’ve prepared the refreshing ice bath, it’s time for you to plunge the thermometer into the chilly oasis, unlocking the secrets to precise temperature measurements.

Testing accuracy is crucial to ensure your candy thermometer is reliable and provides accurate readings. Gently insert the thermometer into the ice bath, making sure the sensing area is fully submerged. Be cautious not to touch the sides or bottom of the bowl, as it may affect the temperature reading.

Leave it there for a few minutes, allowing the thermometer to adjust to the cold temperature. If the thermometer displays a temperature close to 32°F (0°C), then it is accurate. However, if it deviates significantly, it may need calibration. Troubleshooting common issues, such as inaccurate readings, can help you identify and address any potential problems.

Next, we will explore how to adjust the thermometer for optimal performance.

Advertisement

Adjust the Thermometer

Before adjusting the thermometer, it’s important to ensure that it’s been properly cleaned and is free of any residue. This will help guarantee accurate readings during the calibration process.

To adjust the thermometer, follow these adjustment techniques and troubleshooting tips:

  • Check for a calibration screw: Some candy thermometers have a small screw that can be turned to adjust the temperature reading. Locate this screw on the back or side of the thermometer.

  • Use pliers or a small screwdriver: If your candy thermometer has a calibration screw, gently turn it clockwise or counterclockwise to adjust the reading. Be careful not to apply too much force, as this could damage the thermometer.

  • Test the accuracy: After adjusting the thermometer, place it back into the ice bath and observe the temperature reading. It should now read 32°F (0°C). If it doesn’t, repeat the adjustment process until the desired reading is achieved.

  • Consider professional calibration: If you’re having trouble adjusting the thermometer or if it’s consistently inaccurate, it may be worth seeking professional calibration services.

Once the thermometer has been adjusted, it’s time to move on to the next step: testing it in boiling water (optional).

Test in Boiling Water (Optional)

To ensure accurate readings, it’s optional but recommended to test the thermometer in boiling water, which can provide valuable information about its performance.

Did you know that water boils at 212°F (100°C) at sea level? Testing the candy thermometer in boiling water is a simple yet effective way to verify its accuracy.

Advertisement

Start by bringing a pot of water to a rolling boil. Insert the candy thermometer into the water, making sure it doesn’t touch the sides or bottom of the pot. The thermometer should read 212°F (100°C) if it’s calibrated correctly. If the reading is off by a few degrees, you may need to troubleshoot the issue.

One common problem is a thermometer that reads higher or lower than the actual temperature. In this case, you can adjust it accordingly.

By testing the thermometer in boiling water, you can ensure that your candy will reach the desired temperature during cooking.

In the next section, we will discuss how to make adjustments to the thermometer for optimal performance.

Make Adjustments

If the reading is slightly off, you can easily adjust the thermometer for optimal performance. Did you know that making small adjustments can significantly improve accuracy? When calibrating a candy thermometer, it is important to have precise measurements to ensure the best results. Here are some adjustment techniques and troubleshooting tips to help you calibrate your candy thermometer effectively.

Advertisement

First, check if your thermometer has a calibration nut or screw. This allows you to adjust the temperature reading. Use a pair of pliers or a small wrench to turn the nut or screw in the direction indicated in the thermometer’s instructions. Make small adjustments at a time and then retest the thermometer to see if the reading is closer to the desired temperature.

If your thermometer does not have a calibration nut or screw, you can still make adjustments by using the boiling water test we mentioned earlier. If the thermometer consistently reads a few degrees too high or too low, you can mentally adjust the reading when using it.

Remember, calibration is an ongoing process, and it may be necessary to repeat the calibration process periodically to ensure accurate readings. By following these adjustment techniques and troubleshooting tips, you can maintain the accuracy of your candy thermometer and enjoy precise temperature measurements for your candy-making endeavors. In the next section, we will discuss how to repeat the calibration process without starting from scratch.

Repeat the Calibration Process

Keep in mind that calibrating your candy thermometer is like fine-tuning a musical instrument – it requires repetition and practice to ensure accurate results. To repeat the calibration process, follow these troubleshooting tips:

  1. Double-check the water temperature: Before immersing your thermometer into the boiling water, make sure it reads 212°F (100°C). If it doesn’t, make necessary adjustments or use an offset value.

  2. Immerse the thermometer properly: Insert the candy thermometer into the boiling water, making sure the sensor tip is fully submerged and doesn’t touch the bottom or sides of the pot. Avoid any contact with the thermometer clip.

  3. Observe the temperature: As the water boils, carefully monitor the temperature reading on the thermometer. It should read 212°F (100°C) at sea level. If there is any variation, note the difference and adjust accordingly.

Repeat this process multiple times to establish consistency and accuracy in your candy thermometer readings. This repetition will help fine-tune your thermometer and ensure precise measurements for your candy-making endeavors.

Advertisement

Now that you’ve successfully calibrated your thermometer, it’s time to use it confidently in your candy recipes.

Use Your Calibrated Thermometer

When using a calibrated candy thermometer, I can enjoy perfectly cooked candies and confections. By accurately measuring the temperature of my sugar syrups, I can achieve the desired texture and consistency for my treats.

With this confidence, I can follow recipes precisely and achieve consistent results every time.

Enjoy Perfectly Cooked Candies and Confections

Achieve flawless results by using a candy thermometer to ensure your candies and confections are perfectly cooked. Properly calibrated thermometers are essential for achieving perfect candy temperatures.

To calibrate your candy thermometer, you can do a simple boiling water test. Place the thermometer in a pot of boiling water and make sure it reads 212°F (100°C). If it doesn’t, adjust the temperature accordingly.

Advertisement

Troubleshooting your candy thermometer is also important to avoid inaccurate readings. Check for any cracks or damage that may affect its accuracy. Additionally, ensure that the thermometer is fully submerged in the syrup or mixture for accurate readings.

By following these steps, you can enjoy perfectly cooked candies and confections. With a calibrated thermometer, you can now move on to the next section, where we’ll discuss how to follow recipes with confidence.

Follow Recipes with Confidence

Feel confident in your culinary skills by mastering the art of following recipes to create delicious treats that will impress your friends and family.

In the kitchen, confidence is key, and one way to ensure success is by maintaining precise temperature control. When it comes to candy making, accuracy is crucial, and that’s where a candy thermometer becomes your best friend.

By following recipes with confidence and using a candy thermometer, you can achieve the exact temperatures required for each stage of candy making. This precise temperature control ensures that your candies and confections turn out perfectly every time, with the ideal texture and consistency.

Advertisement

However, it’s important to remember that candy thermometers can lose accuracy over time, so it’s essential to maintain and re-calibrate regularly to ensure your thermometer is giving you accurate readings.

Maintain and Re-Calibrate Regularly

To maintain accurate readings, I make sure to regularly calibrate my candy thermometer. It’s crucial to do so in order to avoid any discrepancies when making my delicious treats. Regular maintenance is of utmost importance when it comes to candy thermometers.

By following a few simple steps, you can troubleshoot common issues and ensure the accuracy of your thermometer.

Firstly, it’s essential to understand the importance of regular maintenance. Over time, candy thermometers can become less accurate due to temperature fluctuations and wear and tear. By calibrating it regularly, you can ensure that your thermometer is providing accurate readings, which is crucial when working with precise temperatures required for making candies.

To calibrate your candy thermometer, you can use the boiling water method. Simply bring a pot of water to a rolling boil and insert your candy thermometer. It should read 212 degrees Fahrenheit or 100 degrees Celsius at sea level. If it doesn’t, you can adjust the thermometer accordingly using the calibration screw or by consulting the manufacturer’s instructions.

Advertisement

In addition to regular calibration, it’s also important to troubleshoot common issues that may affect the accuracy of your thermometer. For example, if your candy thermometer has a metal clip, make sure it’s securely attached to the pot to prevent any interference with the readings. Additionally, avoid touching the sides or bottom of the pot with the thermometer, as this can give inaccurate readings.

By regularly calibrating your candy thermometer and troubleshooting common issues, you can ensure the accuracy of your readings and confidently create delicious candies every time.

Frequently Asked Questions

Can I use any type of candy thermometer for calibrating?

Yes, you can use any type of candy thermometer for calibrating. However, it’s important to be aware of common mistakes in calibrating candy thermometers. For accurate temperature readings, ensure that the thermometer is clean and properly inserted into the candy mixture, avoiding contact with the sides or bottom of the pot. Additionally, always calibrate your thermometer before each use to maintain accuracy. Following these tips will help you achieve precise temperature readings when using a candy thermometer.

How often should I recalibrate my candy thermometer?

To ensure accurate measurements, it’s important to regularly test and adjust the accuracy of your candy thermometer. The frequency at which you should recalibrate your candy thermometer depends on its usage and the manufacturer’s recommendations.

To test the accuracy, you can use the boiling water method or the ice water method. Adjusting the thermometer can be done by either tightening or loosening the nut at the base.

Advertisement

By regularly testing and adjusting your candy thermometer, you can ensure precise temperature readings for your confectionery creations.

Is it necessary to use a specific type of thermometer for calibrating?

Using a specific type of thermometer for calibrating is crucial to ensure accuracy in candy making. The importance of accuracy can’t be overstated, as even a slight deviation in temperature can lead to candy that’s too soft, too hard, or fails to set properly. Common mistakes when calibrating candy thermometers include not using an accurate reference thermometer, not properly adjusting for altitude, and not allowing sufficient time for the thermometer to stabilize. Being aware of these mistakes can help achieve precise calibration and successful candy making.

Can I calibrate a candy thermometer without using an ice bath?

Alternative methods for calibrating a candy thermometer without using an ice bath include the boiling water method and the sugar method. To check the accuracy of a candy thermometer, bring a pot of water to a rolling boil and insert the thermometer. It should read 212°F (100°C) at sea level.

Alternatively, for the sugar method, heat a mixture of sugar and water to a specific temperature and compare it to the reading on the thermometer. These methods provide reliable ways to ensure the accuracy of a candy thermometer.

What are the signs that indicate my candy thermometer needs recalibration?

If your candy thermometer is showing inconsistent or incorrect readings, it may be time for recalibration. Signs of a candy thermometer in need of recalibration include temperature readings that are consistently too high or too low, or if it gives different readings at the same temperature.

Advertisement

To test the accuracy of your candy thermometer, you can use boiling water or the ice point method. Adjusting a candy thermometer typically involves adjusting the nut or screw on the back of the dial to align it with the correct temperature.

Conclusion

In conclusion, calibrating your candy thermometer is essential for accurate temperature readings while making sweet treats. By following the steps outlined in this article, you can ensure that your thermometer is properly adjusted and reliable.

Remember, a calibrated thermometer is like the precise compass that guides you through the candy-making journey. Just as a well-calibrated compass directs a traveler on the right path, a calibrated thermometer leads you to perfect caramel, toffee, and fudge.

So, take the time to calibrate your thermometer regularly, and enjoy the sweet rewards of precise temperature control.

Advertisement

Continue Reading

Trending