Connect with us

Candles

How Much Wax for Candle

Published

on

Ever curious about the right amount of wax needed for candle creation? Search no more! This tutorial delves into the crucial details of picking the ideal wax quantity for your candle crafting pursuits. Through our guidance, you will achieve the expertise you’ve been aiming for in this art form.

We will delve into factors that affect wax quantity, guide you in choosing the right type of wax, and provide step-by-step instructions for calculating the ideal wax weight for different types of candles.

We will even address common measurement mistakes and offer tips for storing leftover wax.

So, join us on this journey and let’s dive into the fascinating world of candle-making!

Advertisement

candlestick

Key Takeaways

  • The size and shape of the candle container or mold will determine the amount of wax needed.
  • Different types of wax, such as paraffin, soy, and beeswax, have different characteristics and burn times.
  • The thickness and length of the wick will affect the fuel consumption and flame size.
  • Blending different types of wax can create unique designs and optimize burn time and scent throw.

Determining Candle Size

To determine the size of a candle, we measure the amount of wax needed. When it comes to candle size options, there are a few factors to consider.

The first is the type of container or mold you plan to use. For a container candle, you’ll need to calculate the volume of the container and choose a wax quantity that will fill it appropriately. For a molded candle, you’ll need to determine the desired height, width, and depth, and then calculate the wax quantity based on these measurements.

Another factor to consider is the desired burn time. A larger candle will generally burn for a longer period of time, so you’ll need to adjust the wax quantity accordingly.

By carefully considering these factors, you can determine the perfect size for your candle.

yankee candle coupon

Moving on to the subsequent section about factors affecting wax quantity, we’ll explore how variables such as fragrance oils, additives, and wick size can impact the amount of wax needed.

Factors Affecting Wax Quantity

When determining the amount of wax needed for a candle, there are two main factors to consider:

Advertisement
  • The size and shape of the candle: This will determine the overall volume of wax required. Different candle sizes and shapes will require different amounts of wax to achieve the desired size and shape of the finished candle.
  • The thickness and length of the wick: This factor will affect how much wax is consumed during burning. A thicker and longer wick will consume more wax, while a thinner and shorter wick will consume less.

These factors must be carefully considered to ensure the right amount of wax is used for a successful and efficient candle.

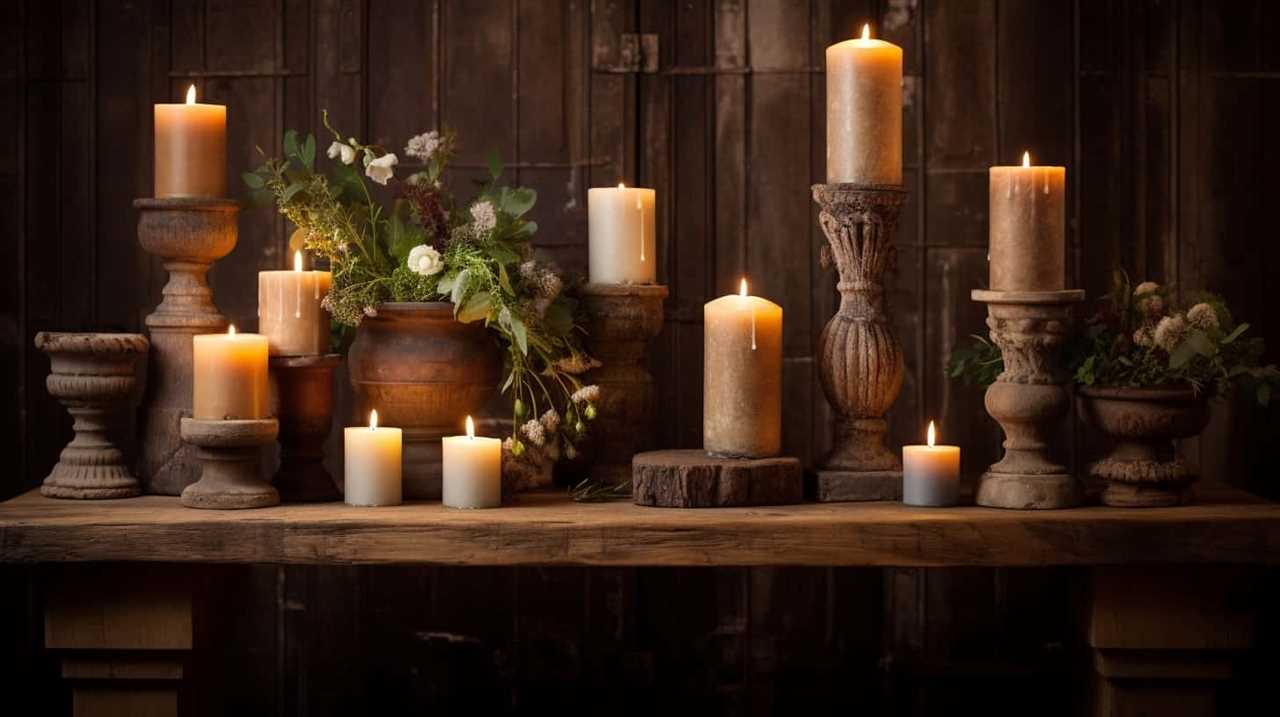
Candle Size and Shape

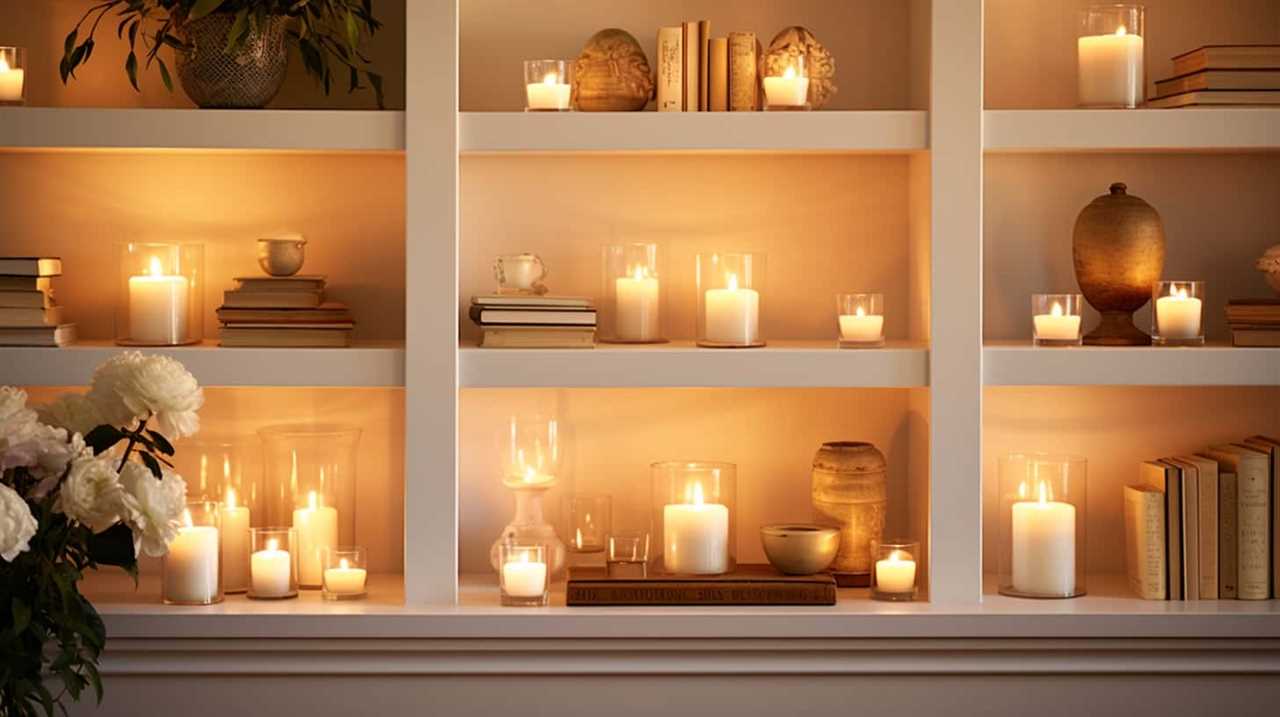
We measure the amount of wax needed for a candle by considering its size and shape. The size and shape of a candle play a significant role in determining the amount of wax required, as they affect the candle’s burning time and overall aesthetic appeal. When it comes to decorative candle shapes, such as pillars, tapers, or votives, the amount of wax needed may vary based on the intricacy of the design and the desired burning time. For example, a larger pillar candle will require more wax than a smaller votive candle due to its longer burning time. To illustrate this further, here is a table showcasing the different candle shapes and their corresponding wax quantities:

uses of candles in daily life

Candle Shape Wax Quantity (in grams)
Pillar 200
Taper 100
Votive 50
Tealight 20
Floating 10

Understanding the impact of candle size and shape on wax quantity is crucial for ensuring the desired burning time and achieving the perfect decorative effect. With this knowledge, we can now move on to discussing the next factor: wick thickness and length.

Wick Thickness and Length

Considering the wick thickness and length is essential for determining the amount of wax required for a candle. The wick thickness determines the amount of fuel the wick can absorb and burn, while the wick length determines the size of the flame.

A thicker wick will burn more fuel, resulting in a larger flame and faster burning rate. On the other hand, a thinner wick will burn less fuel, resulting in a smaller flame and slower burning rate.

The length of the wick will also affect the amount of wax needed, as a longer wick will require more fuel to sustain the flame. By carefully selecting the appropriate wick thickness and length, candle makers can optimize the wax quantity needed for their desired flame size and burning time.

Advertisement

candlelight inn

Now, let’s move on to the next section and discuss the importance of choosing the right wax type.

Choosing the Right Wax Type

When it comes to choosing the right wax type for your candles, there are a few key points to consider.

First, you’ll need to decide between paraffin and soy wax. Paraffin wax is a popular choice due to its affordability and ability to hold fragrance, while soy wax is a natural alternative with a clean burn.

Additionally, beeswax offers benefits such as a longer burn time and a natural honey-like scent.

candle holder

Lastly, blending different types of wax can provide unique characteristics and customization options for your candles.

Advertisement

Paraffin Vs Soy

Choosing the right wax type for our candles can be a crucial decision, and one popular choice is to compare paraffin and soy wax. When it comes to the environmental impact, paraffin wax is made from petroleum, a non-renewable resource, while soy wax is derived from soybeans, a renewable resource. Soy wax has a lower carbon footprint and is biodegradable, making it the more environmentally friendly option.

In terms of pricing, paraffin wax is generally cheaper than soy wax due to its widespread availability and production process. However, it’s important to consider the long-term benefits and sustainability of soy wax.

Transitioning into the subsequent section about ‘beeswax benefits’, beeswax is another natural wax option that offers unique advantages for candle making.

candlelight concerts aberdeen

Beeswax Benefits

As we continue our exploration of different wax types for candle making, it’s important to delve into the unique benefits that beeswax offers.

Beeswax, derived from the honeycomb of bees, possesses a set of remarkable properties that make it an exceptional choice for candle making.

Advertisement

Firstly, beeswax has a higher melting point compared to other waxes, resulting in candles that burn longer and emit a warm, natural glow.

Additionally, beeswax candles release negative ions when burned, which can purify the air and improve overall air quality.

myer

Furthermore, beeswax is a natural, renewable resource, making it an eco-friendly option for those seeking sustainable candle making techniques.

Its pleasant, honey-like fragrance adds a touch of natural beauty to any space.

When it comes to choosing the right wax type, the distinctive properties of beeswax make it an excellent choice for creating high-quality, long-lasting candles.

Advertisement

Blending Wax Types

We prefer to blend different wax types to ensure we choose the right wax for our candles. Blending wax colors can create unique and eye-catching designs that appeal to customers seeking a visually striking candle. By combining different wax types, we can also optimize the burn time and scent throw of our candles, providing a satisfying experience for our customers.

yankee candle

When experimenting with wax additives, we’ve found that blending different wax types allows us to achieve desired results more effectively. By adding additives to specific wax blends, we can enhance the fragrance throw, improve the burn characteristics, or even create specialized effects such as crackling or shimmering. This flexibility allows us to create candles that meet the specific preferences of our customers, ensuring their satisfaction and loyalty.

Calculating Wax Weight for Votive Candles

To determine the amount of wax needed for votive candles, let’s start by using a basic formula. First, we need to calculate the wax volume based on the size of the votive. Measure the height and diameter of the votive, and use these measurements to determine the volume of the candle.

Next, we need to convert the volume into weight. This can be done by multiplying the volume by the density of the wax you’re using. The density of wax varies depending on the type, so make sure to check the specifications provided by the manufacturer.

Once you have the weight of wax needed for one votive candle, you can easily determine the total weight required for a batch.

Advertisement

candlelight concerts london

Now, let’s move on to estimating the wax amount for pillar candles.

Estimating Wax Amount for Pillar Candles

When estimating the wax amount for pillar candles, there are several important points to consider.

Firstly, the melting temperature of the wax is crucial in determining the amount needed for a successful pour.

Additionally, the size of the mold will play a significant role in the estimation process, as larger molds will require more wax.

candle drawing

Lastly, it’s important to follow wick length guidelines to ensure proper burning and optimal performance.

Advertisement

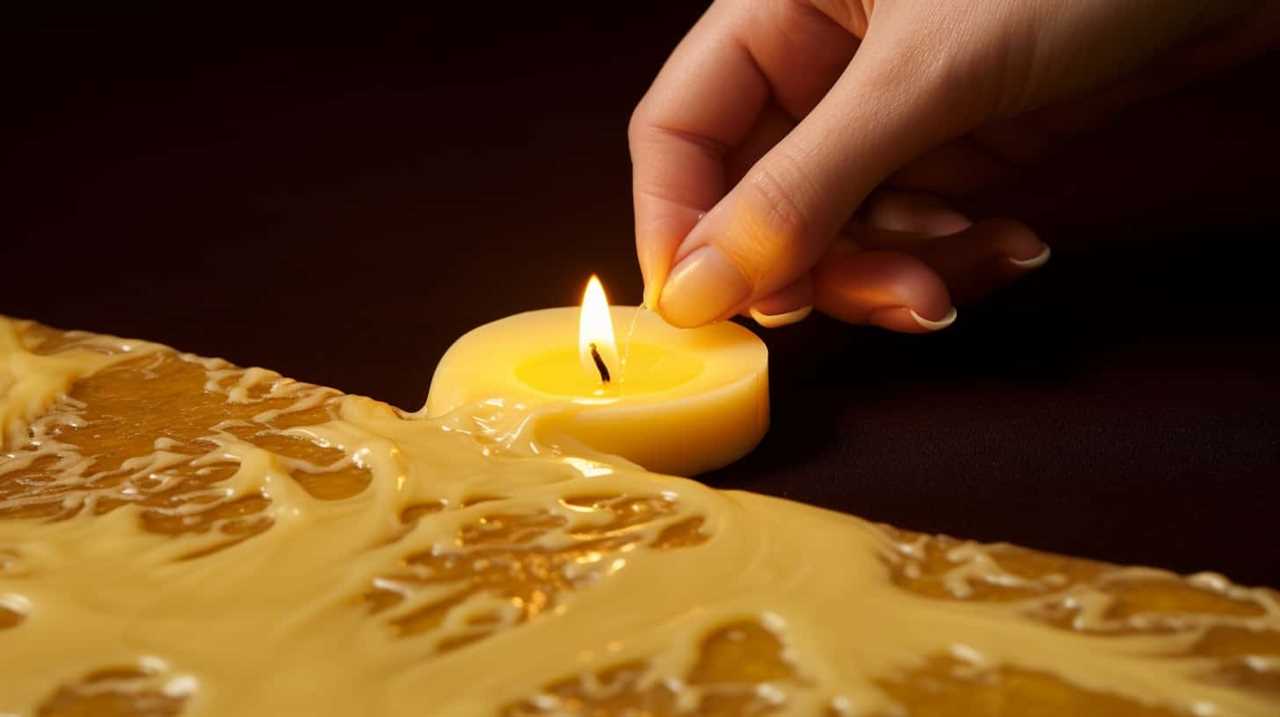
Wax Melting Temperature

The wax melting temperature determines the amount of wax needed for pillar candles. It’s crucial to understand the optimal pouring temperature and various wax melting techniques to ensure the best results. Here are three key factors to consider:

  • Optimal Pouring Temperature: Different types of wax have different melting points. It’s essential to know the specific melting temperature of the wax you’re using to achieve the desired results. This information can usually be found on the packaging or product specifications.
  • Wax Melting Techniques: There are several methods to melt wax, including double boiling, using a wax melter, or using a microwave. Each technique requires careful monitoring to reach and maintain the optimal melting temperature without overheating or scorching the wax.
  • Estimating Wax Amount: The amount of wax needed for pillar candles depends on various factors such as the size and shape of the mold, the desired thickness of the candle, and any additional additives. It’s recommended to use a wax calculator or follow a trusted recipe to determine the precise amount of wax required.

Mastering these aspects of wax melting temperature will ensure that your pillar candles turn out beautifully and burn evenly.

Mold Size Considerations

Considering the mold size is crucial when estimating the amount of wax needed for pillar candles. The size of the mold will determine how much wax is required to fill it completely and create a perfectly shaped candle.

candle making supplies uk

When choosing a mold, it’s important to consider the material it’s made of, as different materials can affect the cooling and releasing process of the candle. For example, silicone molds are flexible and easy to release the candles from, while metal molds may require a bit more effort.

Additionally, the pouring technique used can also impact the amount of wax needed. A slow and controlled pour will help prevent overflow and ensure that the mold is filled evenly.

It’s important to take these factors into consideration to accurately estimate the amount of wax needed for your pillar candles.

Advertisement

Now let’s move on to discussing the appropriate wick length guidelines.

candle online

Wick Length Guidelines

To estimate the amount of wax needed for pillar candles, we should adhere to wick length guidelines. The length of the wick plays a crucial role in achieving a safe and efficient burn. Here are some key considerations when determining the appropriate wick length:

  • Candle Diameter: Choose a wick that’s suitable for the diameter of your candle. A wick that’s too short may result in incomplete burning, while a wick that’s too long can cause excessive smoke and uneven melting.
  • Wax Type: Different waxes have different burn characteristics, so it’s important to select a wick that’s compatible with the specific wax you’re using. This will ensure optimal performance and minimize safety risks.
  • Safety Precautions: Always follow safety guidelines when working with candles. Trim the wick to ¼ inch before lighting and keep the candle away from flammable materials. Never leave a burning candle unattended.

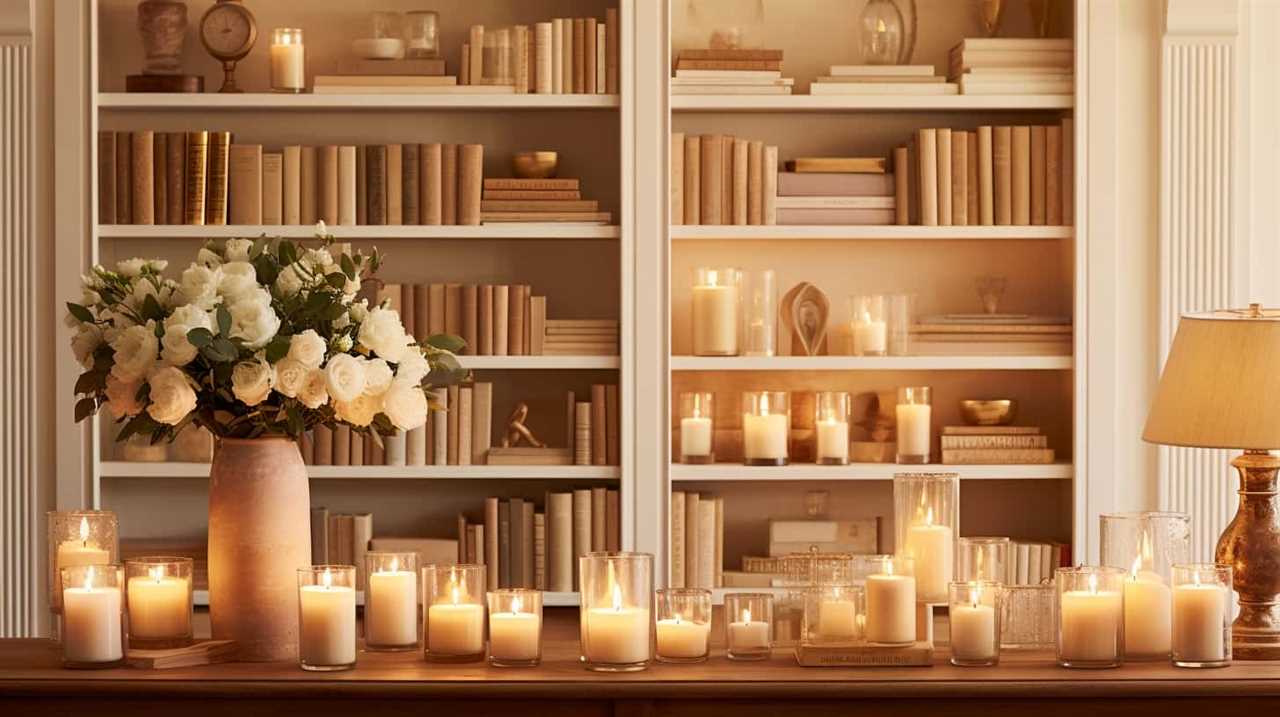
Measuring Wax for Container Candles

We measure the wax for container candles using a scale. Achieving measuring accuracy is crucial to ensure consistent and high-quality candles. When measuring wax, it’s important to convert the weight accurately, as different candle waxes have different densities.

By using a scale, we can precisely measure the required amount of wax for each container. To determine the weight conversion, we refer to the specific gravity of the wax being used. Specific gravity is the ratio of the density of a substance to the density of water, which allows us to convert volume to weight accurately.

This ensures that the wax fills the container properly and allows for optimal burning performance.

candlescience

Now, let’s move on to discussing the appropriate wax quantity for taper candles.

Advertisement

Wax Quantity for Taper Candles

When making taper candles, we determine the wax quantity by measuring it using a scale. The amount of wax needed for taper candles depends on the size of the taper and the desired burning time.

Here are some key factors to consider when determining the wax quantity for taper candles:

  • Taper Size: The length and diameter of the taper candle will affect the amount of wax needed. Longer and thicker tapers require more wax for a longer burning time.
  • Taper Candle Burning Time: The burning time of a taper candle is influenced by the diameter and the type of wax used. Thicker tapers and denser waxes generally burn for a longer duration.
  • Desired Burn Time: If you want your taper candles to burn for a specific period, you need to calculate the wax quantity accordingly.

Determining the wax quantity for taper candles is essential to achieve the desired burn time and ensure a consistent and enjoyable candle experience.

candle making supplies uk

Now, let’s move on to discussing the wax amount for floating candles.

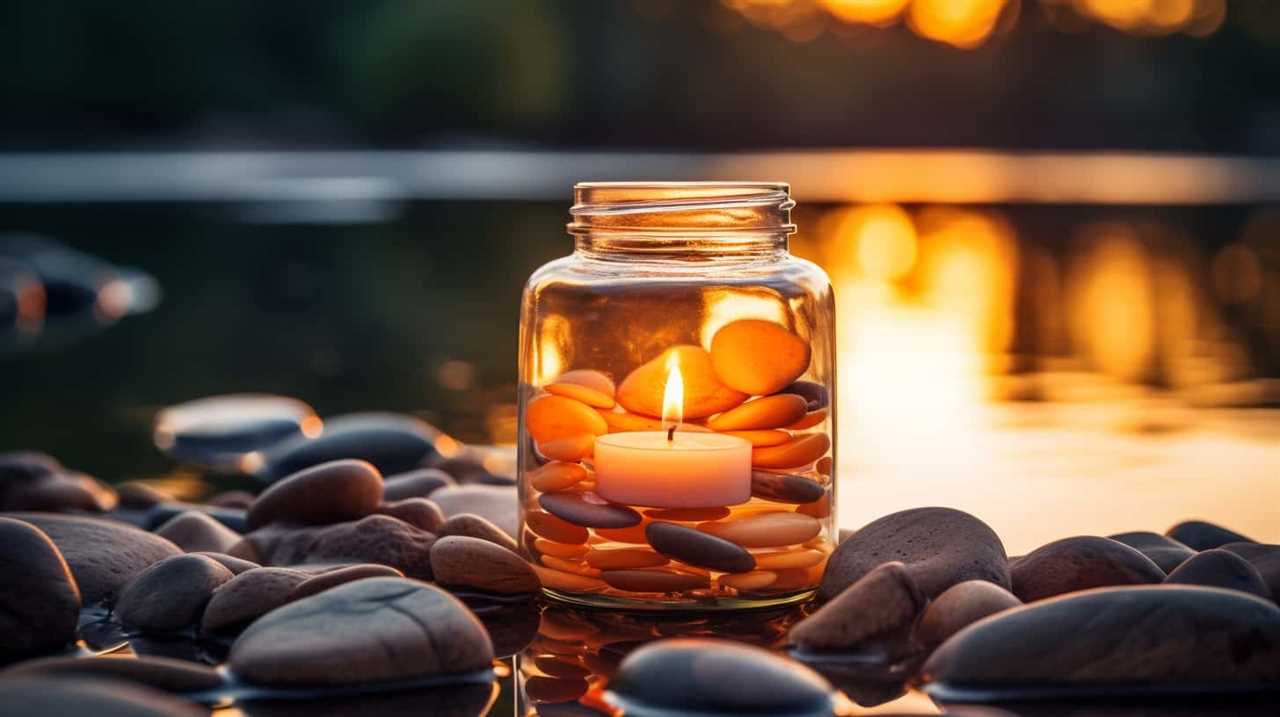
Wax Amount for Floating Candles

For floating candles, the amount of wax required can vary depending on the size and shape of the container. When determining the wax quantity for wedding candles, it’s important to consider the diameter and depth of the container.

Generally, for a standard-sized floating candle, a wax quantity of around 1 ounce is sufficient. However, if you have a larger container, you may need to increase the amount of wax to ensure the candle floats properly. It’s also important to consider the burn time you desire for your floating candles. If you want a longer burn time, you may need to add more wax.

Advertisement

On the other hand, if you’re determining the wax amount for tea light candles, a standard tea light usually requires around 0.5 ounces of wax. However, this can vary depending on the specific tea light container you’re using.

yankee candle

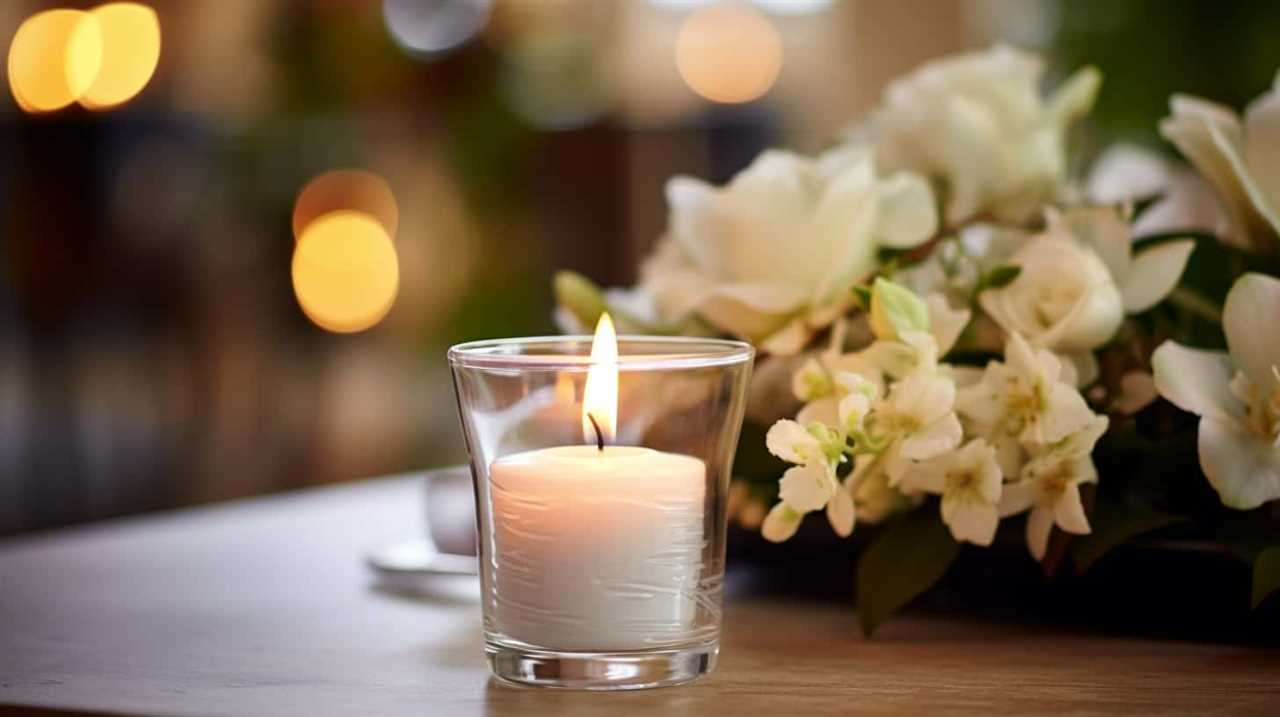
Always conduct a test burn to ensure the wax amount is appropriate for the desired burn time and floating effect.

Scented Candle Wax Considerations

When it comes to scented candle wax considerations, one important factor is the fragrance to wax ratio. Getting the right balance is crucial to ensure that the scent isn’t overpowering or too weak.

Another consideration is choosing the right wax for scented candles, as different types of wax can affect the scent throw and burn quality.

Fragrance Vs. Wax Ratio

In our experience, finding the right fragrance-to-wax ratio is crucial for creating beautifully scented candles. Achieving the perfect balance between fragrance and wax requires careful consideration and experimentation. Here are some key factors to keep in mind:

Advertisement

candle shack discount code

  • Fragrance blending: When blending fragrances, it’s essential to choose scents that complement each other and create a harmonious aroma. Experiment with different combinations to find the perfect blend that suits your preferences.
  • Wax melting technique: The way you melt the wax can also impact the fragrance-to-wax ratio. Ensure that the wax is melted evenly and at the correct temperature to allow for proper fragrance distribution. A consistent and controlled melting technique will help maximize the scent throw of your candles.
  • Testing and adjusting: Don’t be afraid to test your candles and make adjustments to the fragrance-to-wax ratio as needed. Burn the candles and evaluate the scent throw to determine if any modifications are necessary.

Mastering the fragrance-to-wax ratio requires practice and attention to detail. By considering fragrance blending, wax melting technique, and continuous testing, you can create candles that emit a captivating and long-lasting scent.

Choosing the Right Wax

To select the appropriate wax for scented candles, we must carefully consider various factors. One of the first steps in determining wax properties is to decide between natural and synthetic waxes.

Natural waxes, such as soy, beeswax, and coconut wax, offer several benefits. They’re eco-friendly, renewable, and produce a clean and long-lasting burn. Soy wax is known for its excellent fragrance throw, while beeswax provides a warm and natural glow.

On the other hand, synthetic waxes like paraffin offer a lower cost and a wide range of melting points. They also have good scent throw and can hold more fragrance oil.

candlesticks holders

By understanding the benefits of natural waxes and considering other factors like cost and performance, we can make an informed decision when choosing the right wax for our scented candles.

Now, let’s move on to the next step: adding color to your candle wax.

Advertisement

Adding Color to Your Candle Wax

We can enhance the appearance of our candle by incorporating color into the wax. Choosing the right candle dye and employing color mixing techniques can help us achieve the desired look.

Here are some key points to consider:

ecoya penrith

  • Candle dye selection: It’s crucial to choose a candle dye that’s specifically formulated for use with wax. Make sure to select dyes that are highly pigmented and fade-resistant for long-lasting color.
  • Color mixing techniques: Experiment with different dye combinations to create unique shades. Start by adding a small amount of dye and gradually increase until the desired color is achieved. Remember to mix thoroughly to ensure an even distribution of color throughout the wax.

By carefully selecting candle dyes and employing effective color mixing techniques, we can create candles that are visually appealing and personalized.

Now, let’s move on to the next section, where we’ll discuss wax usage for layered candles.

Wax Usage for Layered Candles

To achieve visually stunning layered candles, it’s important to carefully consider the amount of wax needed for each layer. Calculating layered candle wax requires precision and attention to detail. Here are some tips for achieving even layers in your candles:

  1. Measure the wax: Use a scale to accurately measure the amount of wax needed for each layer. This ensures consistency and helps in achieving the desired effect.
  2. Use a mold: Choose a mold that allows you to easily pour each layer without disturbing the previous layers. This helps in creating clean and distinct layers.
  3. Pour at the right temperature: Each layer should be poured at the appropriate temperature to prevent mixing with the previous layers. Follow the instructions provided by the wax manufacturer for optimal pouring temperature.
  4. Use a pouring pitcher: A pouring pitcher with a spout makes it easier to pour the wax evenly, ensuring uniform layers.
  5. Allow each layer to cool and set: Before pouring the next layer, make sure the previous layer has completely cooled and set. This helps in preventing any blending of colors or textures.

Follow these tips and calculations to create beautiful layered candles with even and distinct layers.

scented candle

Overcoming Common Wax Measurement Mistakes

One common mistake we often encounter when measuring wax for candles is underestimating the amount needed for each layer. To avoid this error, it’s crucial to have a precise understanding of the wax’s melting point and the calculation for determining the weight of wax required for container candles.

Advertisement

Here are a few tips to overcome common wax measurement mistakes:

  • Familiarize yourself with the melting point of the wax you’re using. Different waxes have different melting points, and this information will help you determine the appropriate amount of wax needed for each layer.
  • Calculate the weight of wax required for container candles accurately. Consider the size of the container, the desired thickness of the wax layer, and the specific gravity of the wax to determine the optimal amount.

By following these guidelines, you can ensure that you measure the wax accurately and avoid any wastage or insufficient coverage.

Now, let’s move on to adjusting the wax quantity for double-wick candles.

candles uk

Adjusting Wax Quantity for Double-Wick Candles

To ensure proper burning and consistent flame performance in double-wick candles, we must adjust the wax quantity accordingly. Double-wick candles have a unique design that requires careful consideration of the wax-to-wick ratio. When the wax quantity isn’t adjusted correctly, it can lead to uneven burning, excessive smoke, and wasted wax. By adjusting the wax quantity, we can ensure that both wicks receive an equal amount of fuel, resulting in a balanced and efficient burn.

One way to determine the appropriate wax quantity for double-wick candles is by using a simple calculation. Take the total volume of the candle container and divide it by the number of wicks. This will give you the amount of wax needed for each wick. For example, if you have a candle container with a volume of 10 ounces and two wicks, each wick should have approximately 5 ounces of wax.

Adjusting the wick size is also crucial in double-wick candle design. If the wicks are too small, they may not be able to draw up enough wax to sustain the flame. On the other hand, if the wicks are too large, they may produce a flame that’s too big, causing the candle to burn too quickly and unevenly. It’s essential to choose wicks that are appropriate for the diameter of your candle container and the desired burn time.

Advertisement

Storing Leftover Wax for Future Use

When storing leftover wax for future use, we find it beneficial to use airtight containers to maintain its quality and prevent any contamination. Storing wax scraps properly ensures that they remain in good condition and can be easily repurposed for future candle-making projects.

candles direct portugal

Here are three important considerations for storing leftover wax:

  • Clean and dry: Before storing the wax, make sure it’s clean and dry to prevent any moisture or impurities from affecting its quality.
  • Labeling: It’s essential to label your containers with the type and color of wax inside. This will make it easier to identify and select the right wax for your next project.
  • Temperature control: Store the containers in a cool, dry place away from direct sunlight and extreme temperatures. This will help preserve the integrity and consistency of the wax.

Frequently Asked Questions

How Do I Know if I Need to Adjust the Wax Quantity for Double-Wick Candles?

If we’re making double-wick candles, we need to consider adjusting the wax quantity. This helps ensure even burning and prevents issues like tunneling. Troubleshooting uneven burning can involve experimenting with different wax amounts to find the right balance.

Can I Use Leftover Wax for Future Candle Making Projects?

Yes, we can absolutely reuse leftover wax for future candle making projects. By melting the wax using proper techniques, we can ensure its quality and create new candles with ease and efficiency.

What Should I Consider When Using Scented Wax for Candles?

When using scented wax for candles, it’s important to consider the selection process and proper wax measurement. We’ve learned that 80% of candle makers find fragrance strength to be the most critical factor in scent selection.

candle flame zones

How Can I Add Color to My Candle Wax?

Adding color to candle wax can be achieved through various techniques such as dye chips, liquid dyes, or powdered pigments. These methods allow us to create vibrant and customized candles that enhance the ambiance of any space.

Advertisement

Are There Any Common Mistakes to Watch Out for When Measuring Wax for Candles?

When measuring wax for candles, it’s crucial to avoid common mistakes. Achieving measuring accuracy ensures an optimal wax to wick ratio, resulting in a perfect burn. Let us guide you through the process with our detailed expertise.

Conclusion

In conclusion, determining the right amount of wax for your candles is essential for achieving the desired results. By considering factors such as candle size, wax type, and the specific candle design, you can ensure that you have enough wax for a successful project.

Avoid common measurement mistakes and adjust the quantity accordingly for double-wick candles. Remember to store any leftover wax for future use, allowing you to continue enjoying the art of candle making.

candle shack lemongrass and ginger

I'm Jane and I love candles. I have candles everywhere in my house--in every room, on every surface. I love the smell of candles, and I love how they make my place feel warm and cozy. Candles are really important to me. They help me relax and de-stress after a long day. They remind me of happy memories, and they make me feel calm and peaceful. I can't imagine my life without candles!

Continue Reading
Advertisement

Candles

How to Use a Money Candle

Published

on

By

Are you prepared to discover the keys to generating wealth and abundance? Allow us to demonstrate how employing a money candle can draw financial success into your existence.

Imagine this: you light a beautiful green candle, infused with powerful energies of abundance, and watch as its flame dances with magic. As we guide you through the steps, you will learn how to choose the perfect money candle, set a clear intention for wealth, and create a sacred space to enhance the candle’s energy.

Through meditation and visualization, you will tap into the limitless potential of financial abundance. Get ready to ignite your wealth manifestation journey with the power of a money candle.

Let’s begin!

Advertisement

candlesticks patterns

Key Takeaways

  • Choose a money candle based on financial goals and personal preferences, considering candle color, size, shape, and decorations.
  • Set clear intentions for wealth and align them with a chosen money candle.
  • Create a sacred space by clearing clutter, visualizing goals, incorporating symbols of abundance, and invoking divine presence.
  • Light the money candle with a calm and focused state of mind, visualizing the flame as a symbol of financial blessings.

Choosing the Right Money Candle

When selecting a money candle, we should consider our specific financial goals and personal preferences. Finding the best color for the candle is an important aspect to consider. The color of the candle symbolizes different aspects of wealth and abundance. For example, green is often associated with financial prosperity and growth, while gold represents wealth and success. Understanding the symbolism behind each color can help us align our intentions and desires with the energy of the candle.

Additionally, we should also consider the size and shape of the candle, as well as any additional decorations or symbols that resonate with our financial goals. By carefully choosing a money candle that speaks to us on a personal level, we can set the stage for a powerful intention-setting ritual in the next section.

Setting the Intention for Wealth

To set the intention for wealth, we need to focus on our specific financial goals and align our desires with the energy of the chosen money candle. Here are four steps to help you manifest wealth and abundance:

  1. Clarify your financial goals: Take the time to define what wealth means to you. Is it achieving a certain income level, owning a home, or being debt-free? Clearly identify your goals to create a clear intention.
  2. Choose the right money candle: Look for a candle specifically designed for wealth manifestation. Consider candles infused with ingredients like green aventurine or citrine, which are believed to attract prosperity.
  3. Practice affirmations for abundance: Use positive affirmations that align with your financial goals. Repeat phrases like ‘I am worthy of wealth and abundance’ or ‘Money flows easily and effortlessly into my life’ while lighting the money candle.
  4. Visualize your desired outcome: Close your eyes and visualize yourself already achieving your financial goals. Imagine the feeling of wealth and the abundance it brings. Allow this visualization to fill you with positive energy and belief in your ability to manifest wealth.

Cleansing and Preparing the Candle

To cleanse and prepare the money candle, we gather the necessary materials. Before beginning any money manifestation ritual, it’s crucial to cleanse the candle of any negative or stagnant energy. This ensures that the candle is a pure channel for your intentions and desires.

candle salad

There are various methods for cleansing, such as smudging the candle with sacred herbs like sage or palo santo, or passing it through the smoke of incense. Visualizing the candle being cleansed by a stream of white light is also effective.

Once the candle is cleansed, it’s ready to absorb the energy of your intentions and amplify your desires.

With the candle cleansed and prepared, we can now move on to creating a sacred space for the money manifestation ritual.

Advertisement

Creating a Sacred Space

Once the money candle is cleansed and prepared, we create a sacred space to enhance the energy and focus of our money manifestation ritual. Creating a sacred space is essential to cultivating the right atmosphere for abundance to flow into our lives.

floral candle

Here are four key elements to consider when creating a sacred space:

  1. Clear the space: Remove any clutter or negative energy that may be present. Use sage or other cleansing tools to purify the area.
  2. Set intentions: Clearly state your intentions for creating abundance in your life. Visualize your goals and desires as already manifesting.
  3. Use sacred symbols: Incorporate symbols that represent abundance and prosperity, such as money signs, green candles, or images of wealth.
  4. Invoke divine presence: Call upon the energy of the universe, your higher self, or any deity or spirit guide that resonates with you to bless and support your money manifestation ritual.

Lighting the Money Candle

We light the money candle to activate its energy and begin our manifestation process. The lighting technique for a money candle is simple yet important.

Before lighting the candle, ensure that you’re in a calm and focused state of mind. Take a moment to ground yourself and set your intention for attracting abundance and prosperity.

Use a match or a lighter to ignite the wick of the candle, and as you do so, visualize the flame as a symbol of the financial blessings that are coming your way.

candlesticks charts

The benefits of money candles are twofold. Firstly, the act of lighting the candle helps to shift your mindset and align your energy with abundance. Secondly, the candle itself serves as a powerful tool for manifestation, amplifying your intention and attracting financial prosperity.

Advertisement

With the candle lit, we can now move on to the next step: meditating with the money candle.

Meditating With the Money Candle

Now, let’s delve into the practice of meditating with the money candle as we harness its energy to attract abundance and prosperity. Meditation techniques can help us focus our intentions and tap into the power of the candle’s symbolism.

Here are four techniques to enhance your money manifestation meditation:

candlesticks trading

  1. Set your intention: Before starting your meditation, clearly state your intention to attract wealth and abundance into your life. Visualize yourself surrounded by financial prosperity and feel the positive energy flowing towards you.
  2. Use affirmations: Repeat affirmations related to money and abundance during your meditation. For example, you can say, ‘I am open to receiving unlimited wealth and prosperity’ or ‘Money flows to me effortlessly and abundantly.’
  3. Visualize your goals: Imagine yourself achieving your financial goals. See yourself living a life of abundance, enjoying financial freedom, and fulfilling your dreams. Visualize the steps you need to take to manifest these goals.
  4. Practice gratitude: Express gratitude for the money and abundance that already exists in your life. Focus on the blessings and opportunities that money has brought you. This attitude of gratitude attracts more abundance into your life.

Visualizing Financial Abundance

When it comes to achieving financial abundance, visualization plays a crucial role.

By visualizing wealth and abundance, we can manifest our desires into reality.

The power of a positive mindset can’t be underestimated, as it attracts prosperity and opens the door to financial opportunities.

Advertisement

With intention and focus, we can use visualization techniques to attract wealth and create a life of financial abundance.

candle making supplies

Manifesting Wealth Through Visualization

To manifest wealth through visualization, one key step is to clearly envision our ideal financial abundance. Visualization techniques can be a powerful tool in attracting prosperity into our lives. Here are four effective strategies to help us develop an abundance mindset and manifest wealth:

  1. Create a vivid mental picture: Close your eyes and imagine yourself living the life of financial abundance. See yourself achieving your financial goals, surrounded by luxury and comfort.
  2. Use affirmations: Repeat positive affirmations that reinforce your belief in abundance. Affirmations like ‘I am deserving of wealth and success’ or ‘Money flows effortlessly into my life’ can help reprogram your subconscious mind.
  3. Visualize specific financial goals: Focus on visualizing specific financial goals, such as paying off debts, buying a dream house, or starting a successful business. See yourself achieving these goals and experiencing the joy and fulfillment that comes with it.
  4. Practice gratitude: Cultivate a sense of gratitude for the wealth and abundance you already have. By appreciating what you have, you attract more positive experiences and opportunities for financial growth.

By mastering these visualization techniques and adopting an abundance mindset, we can harness the power of our thoughts to manifest wealth and create a life of financial abundance.

Transitioning to the subsequent section about the power of a positive mindset, let’s explore how our mindset can shape our financial reality.

Power of Positive Mindset

As we explore the power of a positive mindset in visualizing financial abundance, we can see how our thoughts and beliefs shape our financial reality. By adopting an abundance mindset and utilizing positive affirmations, we can attract wealth and prosperity into our lives. Positive affirmations are statements that reinforce positive beliefs about ourselves and our financial situation. When repeated daily, they help to reprogram our subconscious mind and align our thoughts with our desired financial outcomes. Here is a table that illustrates the power of positive affirmations in transforming our mindset:

doji candle

Affirmation Belief Outcome
I am deserving of financial abundance Believing in my worthiness for wealth Attracting opportunities for financial success
Money flows freely into my life Trusting in the abundance of the universe Manifesting financial prosperity
I am grateful for the wealth I have Cultivating gratitude for current financial blessings Opening doors for more abundance

Attracting Prosperity With Intention

By intentionally visualizing financial abundance, we can attract prosperity into our lives. It’s important to harness the power of our thoughts and beliefs to manifest our desired financial outcomes. Here are four key strategies for attracting abundance and manifesting money:

Advertisement
  1. Set clear intentions: Clearly define your financial goals and visualize yourself already achieving them. This helps to align your subconscious mind with your desires and signals to the universe what you want to attract.
  2. Practice gratitude: Express gratitude for the abundance that already exists in your life, no matter how small. Gratitude shifts your focus from lack to abundance, attracting more of what you appreciate.
  3. Create a vision board: Compile images and words that represent your financial goals and aspirations. Visualize yourself living your desired lifestyle, focusing on the positive emotions associated with financial abundance.
  4. Take inspired action: Combine visualization with purposeful action towards your financial goals. This shows the universe your commitment and dedication, increasing the likelihood of attracting abundance.

Repeating the Practice for Continued Results

After we have successfully used a money candle to manifest abundance, it is important to continue the practice for sustained and consistent results. Repeating the practice ensures long-term effectiveness, allowing us to harness the full potential of the money candle’s energy. By consistently utilizing this powerful tool, we can cultivate a mindset of abundance and attract financial prosperity into our lives.

To illustrate the importance of repetition, let’s consider the following table:

Week Candle Ritual Affirmations Results
1 Lighting the money candle and visualizing abundance "I am open to receiving wealth and financial success" Increased job opportunities
2 Repeating the ritual with gratitude for current abundance "I am grateful for the money that flows into my life" Unexpected financial windfall
3 Consistently using the money candle to reinforce positive beliefs "I attract wealth effortlessly and easily" Promotion at work
4 Continuing the practice to maintain financial abundance "I am a magnet for prosperity in all areas of my life" Consistent increase in income

Frequently Asked Questions

Can I Use Any Type of Candle for This Money Manifestation Practice?

When selecting a candle for money manifestation, it’s important to consider the type and size. Not just any candle will do. The right candle can enhance the energy and intention behind your practice.

candle drawing

How Long Should I Meditate With the Money Candle?

When meditating with a money candle, it is important to focus on the duration and visualization techniques. We recommend meditating for at least 15 minutes to fully immerse yourself in the manifestation process.

Can I Use the Same Candle for Multiple Money Manifestation Sessions?

Yes, you can reuse candles for multiple money manifestation sessions. However, it’s important to consider the type of candle you’re using. Some candles are specifically designed for one-time use, while others can be used multiple times.

Is There a Specific Time of Day or Phase of the Moon That Is Best for Lighting the Money Candle?

The best time of day to light a money candle and whether the moon phase is important for money manifestation depends on personal preference and belief. Experiment to find what works best for you.

Advertisement

How Often Should I Repeat This Money Manifestation Practice for Optimal Results?

For optimal results in our money manifestation practice, we should repeat it regularly. By consistently engaging in techniques that enhance our manifestation abilities, we can increase the likelihood of achieving our financial goals.

candlescience

Conclusion

In conclusion, using a money candle can be a powerful tool for attracting wealth and abundance into your life. By carefully choosing the right candle, setting clear intentions, and creating a sacred space, you can enhance the effectiveness of this practice.

Through meditation and visualization, you can align your energy with financial abundance. By repeating this practice regularly, you can experience continued results and manifest the financial prosperity you desire.

Start using a money candle today and watch your financial fortunes change.

Advertisement

Continue Reading

Candles

How to Turn on a Candle Without a Lighter

Published

on

By

Are you prepared to learn how to light a candle without using a lighter? In this tutorial, we’ll demonstrate different techniques for kindling a candle through alternative means.

No longer will you be at the mercy of a missing lighter. By following these steps, you will be able to light up your candle with confidence and ease.

From using matches to harnessing the power of the sun, we have got you covered. So, let’s delve into the world of candle lighting mastery and explore these ingenious methods.

Get ready to ignite your candle in ways you never thought possible!

Advertisement

how does a candle burn

Key Takeaways

  • Lighting a candle with matches requires holding the matchstick firmly, striking it against the matchbox, and transferring the flame to the candle wick.
  • When using a stove or gas burner, ensure it is clean and in working condition, trim the candle wick, and hold the candle above the flame to melt the wax and ignite the wick.
  • Using a magnifying glass, focus the sun’s rays onto the wick or use a powerful flashlight with a magnifying glass to ignite the candle.
  • In emergency situations or without a lighter or matches, a makeshift fuse can be created using thick paper rolled tightly into a cylinder, which burns slowly and steadily to ignite the candle flame. Alternatively, a small battery and thin wire can be used to create a circuit and heat up the wire to ignite the wick.

Use Matches to Light the Candle

First, we’ll grab a few matches to light the candle. To safely light a candle using matches, it’s important to ensure that the matchstick is long enough to prevent any accidental burns. Hold the matchstick firmly between your thumb and index finger, striking it smoothly against the matchbox, igniting the tip. Be cautious not to exert too much force, as it may break the match.

Once the match is lit, carefully bring it closer to the wick of the candle, allowing the flame to transfer. Ensure that the match is completely extinguished before discarding it.

Now, let’s move on to the next section where we’ll discuss how to utilize a stove or gas burner for lighting a candle.

Utilize a Stove or Gas Burner

To continue lighting a candle without a lighter, we can also utilize a stove or gas burner. This method should be approached with caution, as it involves open flames and can pose safety risks. Here are some steps to follow:

bell book and candle

  1. Ensure stove safety: Make sure the stove or gas burner is clean and in proper working condition. Check for any gas leaks and ensure good ventilation in the area.
  2. Prepare the candle: Place the candle in a heat-resistant container and remove any packaging or labels. Trim the wick to about 1/4 inch to ensure a clean burn.
  3. Light the candle: Hold the candle above the stove or gas burner flame, allowing the heat to gradually melt the wax and ignite the wick. Be careful not to let the flame come into contact with the container.

Now that we’ve explored the use of a stove or gas burner, let’s move on to another alternative method – lighting the candle with a magnifying glass.

Light the Candle With a Magnifying Glass

After utilizing a stove or gas burner, we can now explore another method to light a candle without a lighter – using a magnifying glass.

When it comes to using a magnifying glass to ignite a candle, there are a few alternatives to consider.

Advertisement

One option is to use the sun’s rays as a natural source of light. Find a sunny spot, hold the magnifying glass between the sunlight and the candle, and focus the light onto the wick until it ignites.

the candle library stockists

Another alternative is to use a powerful flashlight. Position the flashlight close to the magnifying glass, aligning the light beam through the magnifying glass and onto the candle’s wick.

Finally, if you don’t have access to sunlight or a flashlight, you can use the reflection off a shiny surface, such as a mirror or a reflective metal object. Angle the magnifying glass to reflect the light onto the candle’s wick.

To ensure successful magnifying glass ignition, here are a few tips to keep in mind:

  1. Choose a magnifying glass with a large lens to maximize the concentration of light.
  2. Hold the magnifying glass steadily and at the right distance from the candle.
  3. Position the magnifying glass at the correct angle to focus the light onto the wick.
  4. Be patient and allow the concentrated light to heat the wick until ignition occurs.

Create a Makeshift Fuse With a Piece of Paper

As we explore alternative methods to light a candle without a lighter, let’s now consider creating a makeshift fuse with a piece of paper. This simple yet effective technique can be a lifesaver in emergency situations or when you find yourself without a lighter or matches. Here’s how you can make a homemade firestarter using just a piece of paper:

candlestick

  1. Gather your materials: You’ll need a piece of paper, preferably thicker like cardstock or construction paper, to ensure it burns slowly and steadily.
  2. Roll the paper tightly: Start by rolling one corner of the paper tightly towards the opposite corner. Keep rolling until you have a long, thin cylinder.
  3. Light one end: Hold the rolled paper by one end and use a flame source, like a candle or even a lit matchstick, to ignite the other end.

Use a Battery and Wire to Ignite the Candle

Using a battery and wire to ignite a candle is a practical and efficient alternative fire-starting method. With this technique, you can quickly and easily light a candle without the need for a lighter or matches.

It provides a reliable solution when you find yourself without traditional ignition tools.

Advertisement

Battery-Powered Candle Ignition

We can ignite the candle using a battery and wire. This innovative candle lighting method provides an alternative to traditional lighters or matches. Here’s how you can use a battery and wire to light your candle:

  1. Gather the materials: You’ll need a small battery, such as a AA or AAA, and a thin wire, like a paperclip or a stripped electrical wire.
  2. Prepare the wire: Bend the wire into a U shape, leaving a small gap between the ends. This will allow you to create a spark.
  3. Light the candle: Hold one end of the wire against the negative terminal of the battery and touch the other end to the wick of the candle. The spark created between the wire and the wick will ignite the candle.

By using a battery and wire, you can successfully light your candle without a lighter or matches.

candlewood suites

Now let’s explore an alternative fire-starting method.

Alternative Fire-Starting Method

To ignite the candle without a lighter, we can employ an alternative fire-starting method by utilizing a battery and wire. This unconventional ignition method is a useful technique to have in your arsenal of fire-starting techniques.

Here’s how it works:

  1. Gather the following materials:
  • A battery (preferably a 9-volt battery)
  • A thin wire or paperclip
  1. Bend the wire or paperclip into a U-shape, making sure the ends touch each other.
  2. Place one end of the wire on the positive terminal of the battery and the other end on the wick of the candle.
  3. The connection between the wire and the battery will create a small electrical current, causing the wire to heat up and ignite the wick.
  4. Once the wick catches fire, carefully remove the wire and enjoy your candlelit ambiance.

Quick and Easy Candle Lighting

With just a battery and wire, we can easily light a candle in a quick and efficient manner. Here are three creative ways to ignite a candle using alternative candle lighting methods:

candle holders uk

  1. Battery and Steel Wool: Take a piece of steel wool and gently rub it against the positive and negative terminals of a battery. The friction will create sparks, which can be used to light the candle wick. Be careful not to touch the wire ends while the steel wool is connected to the battery.
  2. Battery and Foil: Fold a small piece of aluminum foil into a thin strip and attach one end to the positive terminal of the battery. Hold the other end of the foil near the candle wick. As the foil heats up, it will ignite the wick and light the candle.
  3. Battery and Wire: Connect a wire to both terminals of the battery, creating a circuit. Touch the wire to the candle wick, and the current will cause the wire to heat up, igniting the wick.

These alternative methods provide quick and easy ways to light a candle when a lighter isn’t available. Remember to exercise caution and ensure proper safety measures while using these techniques.

Generate a Spark With Steel Wool and a Battery

Using steel wool and a battery, we can generate a spark to light a candle without a lighter. However, if you don’t have steel wool on hand, there are alternative materials you can use. Fine-grade sandpaper or the rough side of a matchbox can also work.

Advertisement

To start, gather the necessary materials: a small piece of steel wool, a 9-volt battery, and the candle you want to light. First, take the steel wool and rub it against the positive and negative terminals of the battery. This creates a circuit and causes the steel wool to heat up, producing sparks.

Hold the steel wool close to the wick of the candle, and the sparks will ignite the candle. Remember to exercise caution and supervise the process closely to avoid accidents.

yankee candle malaysia

Light a Candle With a Flint and Steel

Flint and steel is a classic method for lighting candles, and understanding the basics is key.

To start, you’ll need a piece of flint and a steel striker. Hold the flint firmly in one hand and strike the steel against it with a quick and forceful motion, aiming for the edge of the flint.

This will create sparks that can ignite the candle wick.

Advertisement

Flint and Steel Basics

We can easily light a candle using a small piece of flint and steel. Flint and steel have been used for centuries as a reliable method to create fire. Here are the basics of using flint and steel to light a candle:

candlesticks charts

  1. Gather your materials: You’ll need a small piece of flint and a steel striker. Alternatively, you can use a ferrocerium rod or a magnesium fire starter as modern alternatives to flint and steel.
  2. Prepare the candle: Place the candle on a stable surface and remove any obstructions around it. Ensure that the wick is trimmed and ready to be lit.
  3. Striking the sparks: Hold the flint firmly in your non-dominant hand and the steel striker in your dominant hand. Position the flint close to the candle wick and strike the steel against the flint at a downward angle, creating sparks that land on the wick and ignite it.

Lighting Technique Variations

Once we’ve mastered the basics of lighting a candle with flint and steel, it’s important to explore various lighting technique variations.

When it comes to lighting methods, there are unconventional approaches that can be highly effective. One such technique is to use charred cloth as tinder. This involves charring a piece of cloth using the flint and steel, creating an ember that can be used to ignite the candle.

Another unconventional approach is the use of charred punkwood. This type of wood is highly flammable and can be easily ignited with the sparks from the flint and steel.

Safety Precautions When Using Flint and Steel

To ensure safety while using flint and steel to light a candle, it’s essential that we take certain precautions. Here are three important safety measures to keep in mind:

candle making kits for adults

  1. Flint and steel maintenance: Regularly inspect the flint and steel for any signs of damage or wear. Replace them if necessary. Keeping the flint sharp and the steel free from rust or corrosion will ensure a reliable spark for lighting the candle.
  2. Proper storage of flint and steel: Store the flint and steel in a dry and secure location. Moisture can degrade the flint and steel, making them less effective. Additionally, keeping them in a dedicated container or pouch will prevent accidental damage or injury.
  3. Use caution when striking: When striking the flint and steel, be mindful of your surroundings. Make sure there are no flammable materials nearby. Hold the steel at a safe distance from your body and others to avoid accidental injuries. Always strike the flint away from your body, directing sparks away from yourself and the candle.

By following these safety precautions, you can enjoy the benefits of using flint and steel to light your candles without compromising your well-being.

Now, let’s transition into the next section, where we’ll explore another alternative method to light a candle – harnessing the power of the sun.

Advertisement

Harness the Power of the Sun to Ignite the Candle

The sun’s radiant energy can be harnessed to ignite a candle without the need for a lighter. Harnessing solar power to light a candle not only eliminates the need for flammable materials, but also carries many benefits.

Solar power is a renewable and sustainable energy source, reducing our reliance on fossil fuels and minimizing environmental impact. By utilizing the sun’s energy, we can create a flame without the risk of accidental fires caused by traditional lighters or matches.

bath and body works candle day

However, it’s important to take fire safety precautions when using solar power to ignite a candle. Ensure the candle is placed on a stable surface, away from flammable objects, and never leave it unattended. Additionally, keep a fire extinguisher or water source nearby in case of emergencies.

Employ a Hairdryer or Heat Gun to Light the Wick

Now let’s explore alternative heat sources that can be used to light the wick of a candle when a lighter isn’t available.

We’ll discuss different techniques for lighting the wick using a hairdryer or a heat gun, and we’ll also cover important safety precautions that need to be taken when using these heat sources.

Advertisement

Alternative Heat Sources

We successfully lit the candle using a hairdryer as an alternative heat source, allowing the wick to ignite without the use of a lighter. When employing unconventional lighting methods, it’s important to consider alternative fuel sources to ensure a successful outcome.

candles myer

Here are three alternative heat sources you can use to light a candle without a lighter:

  1. Hairdryer: Set the hairdryer to its highest heat setting and aim it directly at the candle’s wick. The hot air will provide enough heat to ignite the wick and start the candle.
  2. Heat gun: Similar to a hairdryer, a heat gun can be used to generate enough heat to light the candle. Point the heat gun towards the wick and gradually increase the temperature until the wick catches fire.
  3. Stove burner: If you don’t have access to a hairdryer or heat gun, you can place the candle on a stove burner set to a low heat. Be careful not to melt the candle or ignite any surrounding objects. Once the wick catches fire, remove the candle from the burner and enjoy the warm glow.

These alternative heat sources can be handy when you find yourself without a lighter or matches. Remember to exercise caution and prioritize safety when using unconventional methods to light a candle.

Wick Lighting Techniques

To successfully light the candle without a lighter, we can utilize a hairdryer or heat gun to ignite the wick. This technique is particularly useful when the wick is difficult to reach or when we want to avoid using matches or a lighter.

Before attempting this method, it’s important to ensure proper wick maintenance. Trim the wick to about 1/4 inch before lighting to prevent excessive smoke and soot.

candle & co

When using a hairdryer or heat gun, set it to the lowest heat setting to avoid damaging the candle or causing it to melt. Hold the hairdryer or heat gun about 6 inches away from the candle and direct the hot air towards the wick.

Advertisement

Once the wick catches fire, carefully remove the hairdryer or heat gun and let the candle burn safely.

Remember to always exercise caution and follow candle safety guidelines when using alternative heat sources.

Safety Precautions Involved

After understanding the proper wick lighting techniques, it’s important to be aware of the safety precautions involved when employing a hairdryer or heat gun to light the wick. Fire safety and candle maintenance are crucial when using alternative methods to light a candle. Here are three important safety precautions to keep in mind:

candle birthday

  1. Keep a safe distance: When using a hairdryer or heat gun, ensure that you maintain a safe distance from the candle. This will prevent any accidental contact or damage to the candle.
  2. Avoid flammable materials: Make sure there are no flammable materials nearby when using a hairdryer or heat gun. Keep your surroundings clear of any combustible items that could potentially catch fire.
  3. Use caution with heat: Remember that both hairdryers and heat guns generate heat. Exercise caution when handling them, and avoid touching the heated parts to prevent burns or accidents.

Create a Fire Starter With Cotton Balls and Petroleum Jelly

To create a fire starter with cotton balls and petroleum jelly, gather the necessary materials and follow these simple steps.

First, you’ll need cotton balls, which can be easily substituted with alternative options such as dryer lint or shredded paper.

Next, gather petroleum jelly as your accelerant, as it’s a highly effective choice due to its flammability and ability to burn for an extended period.

Advertisement

Begin by taking a cotton ball and coating it thoroughly with petroleum jelly. Make sure to spread the jelly evenly on the cotton ball to ensure a consistent burn.

candle making workshop

Once coated, store the fire starters in a waterproof container for safekeeping.

When you’re ready to use them, simply ignite the coated cotton ball and place it under your kindling or fuel to start your fire.

Use a Fire Striker or Firesteel to Light the Candle

We can use a fire striker or firesteel to light the candle when we don’t have a lighter. These fire starter alternatives are great for those who want to master the art of candle lighting hacks. Here’s how you can do it:

  1. Prepare your materials: Make sure you have a fire striker or firesteel and a candle ready.
  2. Hold the fire striker: Grip the fire striker firmly in one hand, ensuring a secure hold.
  3. Strike the fire striker: Using a quick and forceful motion, strike the fire striker against the firesteel. This will create sparks that can ignite the candle wick.

Remember to be careful and aim the sparks towards the candle. With practice, you’ll become adept at using fire striker or firesteel as a reliable alternative to light your candle.

uses of candles in daily life

Frequently Asked Questions

Can I Use a Lighter Instead of Matches to Light the Candle?

Yes, we can use a lighter instead of matches to light the candle. However, it’s important to note that there are alternative methods to light a candle without a lighter. Safety precautions must be taken when doing so.

Advertisement

What Is the Best Type of Paper to Use for Creating a Makeshift Fuse?

When it comes to creating a makeshift fuse, there are several alternative materials to consider. However, it is crucial to prioritize safety precautions. Proper knowledge and understanding of homemade fuses is necessary to avoid any potential hazards.

How Long Does It Take for the Sun to Ignite the Candle?

To ignite a candle without a lighter, we can explore alternative ignition methods. However, the ignition time using the sun is dependent on various factors such as sunlight intensity and the candle’s composition.

Can I Use a Blow Dryer Instead of a Hairdryer or Heat Gun?

A blow dryer can be used as an alternative heat source instead of a hairdryer or heat gun. It provides the necessary heat to ignite a candle, making it a viable option in the absence of a lighter.

candle holders uk

Is It Safe to Use Petroleum Jelly as a Fire Starter for Lighting the Candle?

Using petroleum jelly as a fire starter can be safe and effective for lighting a candle. However, there are alternative methods to consider, such as using matches or a stove lighter.

Conclusion

In conclusion, there are numerous creative ways to turn on a candle without a lighter. From using matches, stoves, or magnifying glasses to harnessing the power of the sun or employing a hairdryer, the possibilities are endless.

Advertisement

You can even create a makeshift fuse or utilize a battery and wire for ignition. With these inventive methods at your disposal, lighting a candle becomes an enjoyable and resourceful endeavor.

So go ahead, let your imagination ignite and explore the world of candle lighting beyond the traditional lighter.

candle holders decorative

Continue Reading

Candles

How to Save a Candle Wick

Published

on

By

Have you ever been in a position where your candle wick is nearly at its end? Well, you’re in luck because we have the perfect solution for you!

In this guide, we will show you how to save a candle wick and bring it back to life. Whether it’s a crooked wick, excess wax buildup, or even a detached wick, we’ve got you covered.

With our step-by-step instructions, you’ll be able to master the art of candle wick revival. So grab your scissors and get ready to rescue those flickering flames.

It’s time to save the day and save your candle wick!

Advertisement

candlesticks hotel stamford

Key Takeaways

  • Regularly assess and trim the wick to prevent damage, fraying, and buildup of soot or debris.
  • Trim the wick to about 1/4 inch before each use for longer burn time, more efficient flame, reduced soot, and a safer burn.
  • Properly center the wick before lighting the candle to avoid uneven burn and wasted wax.
  • In case of a detached or drowned wick, reattach or trim the wick to revive it and ensure proper burning.

Assess the Wick’s Condition

First, we need to assess the condition of the wick. Proper wick maintenance is crucial for a well-functioning candle. When troubleshooting wick issues, it’s important to examine the wick closely. Look for any signs of damage, such as fraying or splitting. A damaged wick can prevent the candle from burning evenly or even extinguish the flame altogether.

Additionally, check for any buildup of soot or debris on the wick. This can hinder the wick’s ability to draw up the wax and maintain a steady flame. If you notice any of these issues, it’s time to save the wick. Trim away any damaged portions and gently clean off any buildup.

This will help restore the wick’s functionality and ensure a longer-lasting, more enjoyable candle experience.

Trim the Wick Properly

When it comes to trimming the wick properly, there are two key points to consider: wick length and burn time.

dusk gifts

Keeping the wick trimmed to about 1/4 inch before each use ensures a controlled flame and prevents excessive smoke or soot.

Additionally, proper trimming promotes a longer burn time, allowing you to enjoy your candle for hours on end.

Advertisement

Wick Length and Burn Time

To ensure a longer burn time and optimal performance, we should regularly trim the candle wick to the recommended length. Proper wick maintenance is crucial for achieving maximum burning efficiency. When a wick becomes too long, it can cause a larger flame, excessive smoke, and uneven burning. Trimming the wick to the right length helps control the size of the flame, allowing the candle to burn more evenly and efficiently. The recommended length for a candle wick is typically around 1/4 inch to 1/8 inch. This ensures a steady burn and minimizes the risk of the flame becoming too large or flickering excessively. By following these simple steps, we can prolong the life of our candles and enjoy their warm glow for longer periods.

Wick Length (in inches) Burn Time
1/4 6 hours
1/8 4 hours
3/16 5 hours

Benefits of Proper Trimming

Properly trimming the candle wick offers us numerous benefits, including a longer burn time and a more efficient and even flame. By implementing the right maintenance techniques, we can maximize the performance and lifespan of our candles.

candle shack discount code

Here are some key benefits of trimming the wick properly:

  • Longer burn time: Trimming the wick to the recommended length ensures that the flame burns at an optimal rate, preventing excessive soot and carbon buildup. This allows the candle to burn for a longer duration, giving us more enjoyment.
  • Efficient flame: A properly trimmed wick creates a more efficient flame, resulting in a steady and consistent burn. This means less wasted wax and a more even distribution of fragrance throughout the room.
  • Reduced soot and smoke: Trimming the wick prevents excessive smoke and soot from forming, keeping the air cleaner and healthier to breathe.
  • Safer burn: A well-trimmed wick reduces the risk of the flame becoming too large or flickering excessively, minimizing the chances of accidents or fire hazards.

By understanding the benefits of proper wick trimming, we can ensure an enhanced candle experience.

Now, let’s delve into the next section and explore how to remove excess wax buildup.

Remove Excess Wax Buildup

We can easily remove excess wax buildup from a candle wick by gently scraping it off with a butter knife or a similar tool.

Advertisement

candlesticks patterns

When a candle burns, wax tends to accumulate on the wick, obstructing the flame and preventing it from burning properly. This can lead to a weak or flickering flame, reducing the overall performance of the candle.

To revive an old wick, it’s essential to remove this excess wax buildup. By carefully scraping the wick, we can eliminate the accumulated wax and restore the wick’s functionality.

This step is crucial in preventing wick breakage, as excessive wax buildup can make the wick brittle and prone to breaking. Therefore, it’s important to regularly inspect and clean the wick to ensure optimal burning conditions and extend the life of the candle.

Straighten a Crooked Wick

By gently manipulating the wick, straightening its crooked shape is an effective way to ensure a steady and even burn. To help you master the art of straightening a crooked wick, here are some expert techniques to prevent wick damage:

candle holders amazon

  • Tweezers Method: Use a pair of tweezers to carefully straighten the wick by gently pulling it in the desired direction.
  • Poke and Push Technique: Use a toothpick or a small stick to poke the wick and push it back into a straight position.
  • Heat and Mold Approach: Light the candle and allow the wax to slightly melt. Then, use your fingers to mold the wick into a straight shape before the wax hardens.
  • Rotate and Adjust: Rotate the candle periodically while it’s burning to ensure an even burn and prevent the wick from becoming crooked.

Re-center a Displaced Wick

To re-center a displaced wick, gently guide it back into the center of the candle using a toothpick or small stick.

When a candle is burned, the heat can sometimes cause the wick to shift or move away from the center, which can lead to an uneven burn and wasted wax.

Advertisement

To prevent wick displacement, it’s important to ensure that the wick is properly centered before lighting the candle.

If you notice that the wick has been displaced during burning, it’s relatively easy to reposition it. Simply insert the toothpick or small stick next to the wick and gently push it back towards the center until it’s in the desired position.

candle holders amazon

This will ensure that the candle burns evenly and efficiently, prolonging its lifespan.

Reattach a Detached Wick

Sometimes, candle wicks can become detached from the wax, requiring a simple method to reattach them and continue enjoying a beautiful candle. Here are some effective techniques to reattach a detached wick:

  • Hot glue method: Use a hot glue gun to apply a small amount of hot glue to the base of the detached wick. Press the wick firmly onto the wax, holding it in place until the glue sets.
  • Double-sided tape method: Cut a small piece of double-sided tape and stick it to the base of the detached wick. Press the wick firmly onto the wax, ensuring it’s securely attached.
  • Wick sticker method: Purchase wick stickers, which are adhesive discs specifically designed for reattaching wicks. Place the sticker on the base of the detached wick and press it firmly onto the wax.
  • Wick sustainer method: If the wick sustainer is still intact, slide it back into the base of the detached wick, ensuring it’s secure.

Revive a Drowned Wick

To revive a drowned wick, we can follow a simple method that will help restore its functionality and keep your candle burning brightly. When a wick becomes submerged in melted wax, it can lose its ability to draw up fuel and ignite properly.

To prevent wick drowning in the first place, always trim your wick to about 1/4 inch before lighting your candle. If your wick does end up submerged, there’s no need to despair.

Advertisement

candles uk

First, extinguish the candle and allow it to cool completely. Then, carefully remove any excess wax around the wick using a toothpick or a small knife.

Next, relight the candle and observe if the wick is drawing up the melted wax and burning properly. If not, repeat the process until the wick is fully revived.

Store Candles Properly for Future Use

When it comes to storing candles for future use, there are a few key techniques that can help preserve their quality.

First, it’s important to trim the wick before storing to prevent any potential damage or soot buildup.

candlesticks forex

Additionally, keeping candles in a cool, dry place away from direct sunlight can help extend their lifespan.

Advertisement

Lastly, if you have any old candles with worn-out wicks, there are methods to revive them and make them usable again.

Wick-Saving Techniques

We always store our candles properly to ensure the wicks remain intact for future use. Here are some wick-saving tips that can help prolong the life of your candles:

  • Trim the wick before each use: Trimming the wick to around ¼ inch prevents excessive smoking and mushrooming, which can shorten the lifespan of the wick.
  • Avoid drafts: Placing candles in draft-free areas reduces the likelihood of the wick flickering and burning unevenly, which can lead to wick damage.
  • Use a snuffer: Snuffing out the candle with a snuffer instead of blowing it out helps prevent the wick from getting damaged or displaced.
  • Store candles in a cool, dark place: Extreme temperatures and exposure to sunlight can cause the wax to melt or discolor, affecting the overall quality of the candle.

By following these wick-saving techniques, you can ensure that your candles remain in good condition for future use.

ecoya candles myer

Now, let’s move on to the next section about long-lasting candle storage.

Long-Lasting Candle Storage

Proper candle storage ensures the longevity of our candles for future use. To preserve the fragrance and maximize the lifespan of your candles, follow these longevity tips.

Firstly, store your candles in a cool, dry place away from direct sunlight, as heat can cause them to melt or warp.

Advertisement

Secondly, keep them in airtight containers or bags to prevent dust and dirt from settling on the wax surface. This will help preserve their fragrance and prevent any unwanted odors from seeping in.

candle making supplies

Additionally, make sure to store your candles upright to maintain their shape and prevent any bending or breakage.

Reviving Old Candle Wicks

To bring old candle wicks back to life and ensure their future use, we can revive them through simple yet effective techniques. Here are some ways to revive old candle wicks and preserve their quality:

  • Trim the wick: Use a pair of scissors to trim the burnt or charred part of the wick. This will expose a fresh section of the wick, allowing it to burn more efficiently.
  • Soak the wick: If the wick is dry and brittle, you can soak it in a bowl of warm water for a few minutes. This will help soften the wick and make it more pliable for future use.
  • Use wick alternatives: If the wick is completely unusable, you can consider using wick alternatives such as cotton string, wooden sticks, or even dried herbs like lavender stems. These alternatives can still provide a lovely and fragrant candle experience.
  • Store candles properly: To preserve wick quality for future use, store candles in a cool and dry place away from direct sunlight. This will prevent the wick from drying out or becoming brittle over time.

Frequently Asked Questions

Can I Reuse a Candle Wick That Has Already Been Burned Down Completely?

Yes, you can reuse a candle wick that has been burned down completely. By salvaging burnt wicks, you can trim them and attach them to a new candle. It’s a resourceful way to extend the life of your wicks.

How Often Should I Trim the Wick of a Candle?

When it comes to properly handling a lit candle, it’s essential to know how often to trim the wick. We’ve learned that trimming it to the right size prevents excessive smoking and ensures a clean, even burn.

dusk catalogue 2017

What Can I Do if I Accidentally Break the Wick While Trimming It?

If the wick of a candle accidentally breaks while trimming it, there are a few options. First, you can repair the broken wick by using a wick holder or by tying a new piece of cotton string around it. Alternatively, you can use an alternative wick, such as a wooden or hemp wick, to continue enjoying your candle.

Advertisement

Is It Possible to Save a Wick That Has Been Completely Submerged in Wax?

Recovering submerged wicks can be challenging, but with patience and care, we can save them. Reusing burnt wicks, however, is not recommended as they may not burn evenly or emit a strong fragrance.

What Is the Best Way to Store Candles to Ensure Their Longevity?

Proper candle storage techniques are crucial for extending the lifespan of your candles. By keeping them in a cool, dark place and away from heat sources, you can ensure they burn evenly and last longer.

Conclusion

In conclusion, by following these simple steps, you can easily save a candle wick and prolong the life of your beloved candles.

candle making workshop

Remember to assess the wick’s condition, trim it properly, remove any excess wax buildup, and straighten or re-center it if needed.

In case of a detached or drowned wick, you can reattach or revive it with ease.

Advertisement

By storing your candles properly, you can ensure their future use.

So don’t let a faulty wick dim your candle’s glow, take action and let your light shine bright!

the candle library stockists

Continue Reading

Trending