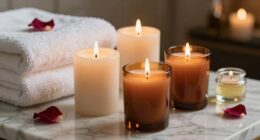
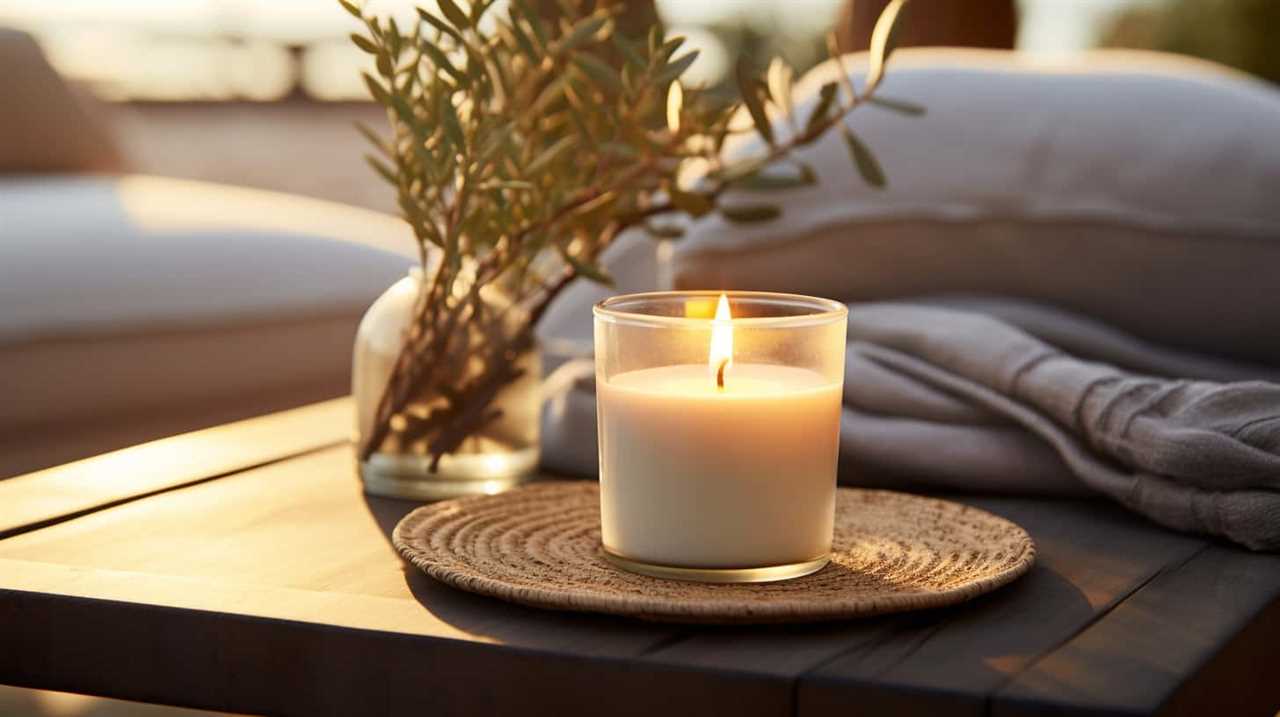
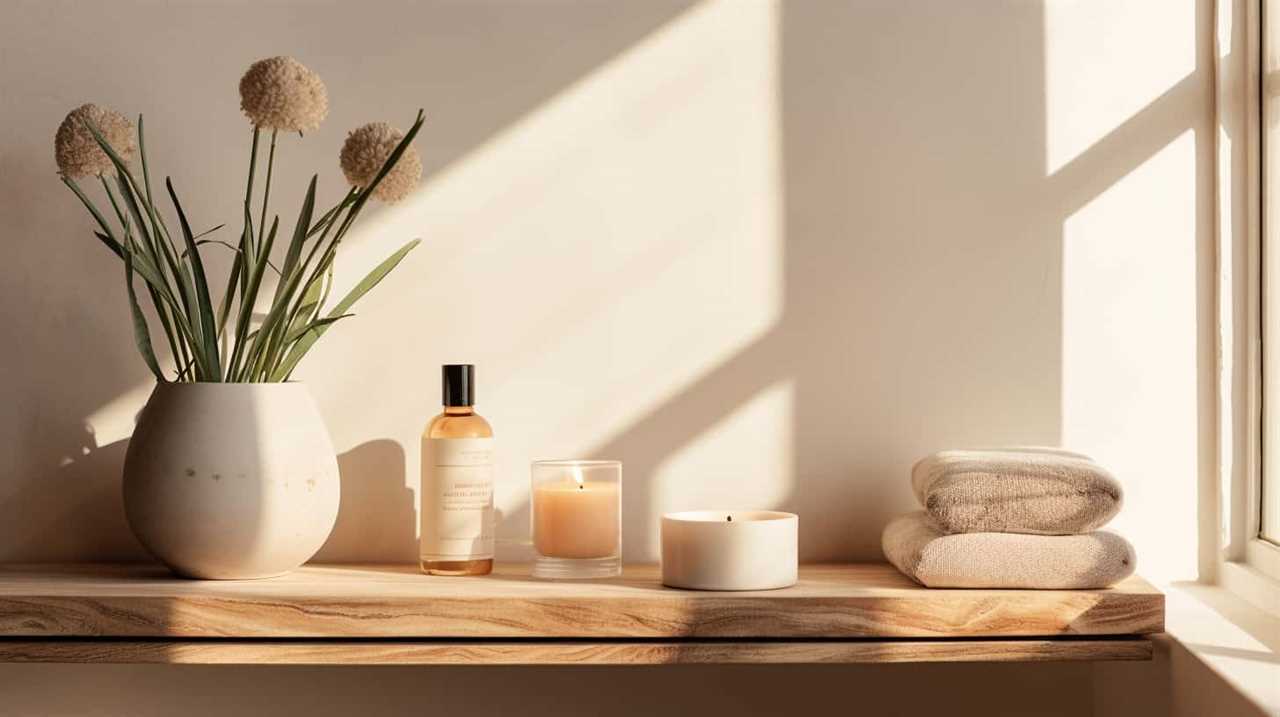
Connect with us

Candles

How Much Soy Wax for 10 Oz Candle

Published

on

Fed up with not achieving the ideal quantity of soy wax for your 10 oz candle? Worry no more! We’ve crafted the ultimate manual to guide you in perfecting the process of measuring wax.

Achieving the right wax-to-container ratio is crucial for a successful candle-making process. In this guide, we will walk you through the steps of calculating the exact weight of soy wax needed for a 10 oz candle.

We will also discuss important factors to consider when melting and pouring the wax, as well as the essential tools and equipment you’ll need for precise measurements.

So, let’s dive in and become experts in the world of soy wax measurements!

Advertisement

candlesticks

Key Takeaways

  • Accurate wax measurement ensures even burning, consistent scent throw, and maximum burn time.
  • The wax-to-container ratio affects burn time and performance of the candle.
  • Proper calculation of wax weight based on container size and desired burn time is crucial.
  • Wax melting techniques and pouring temperature control play a significant role in the final quality of the candle.

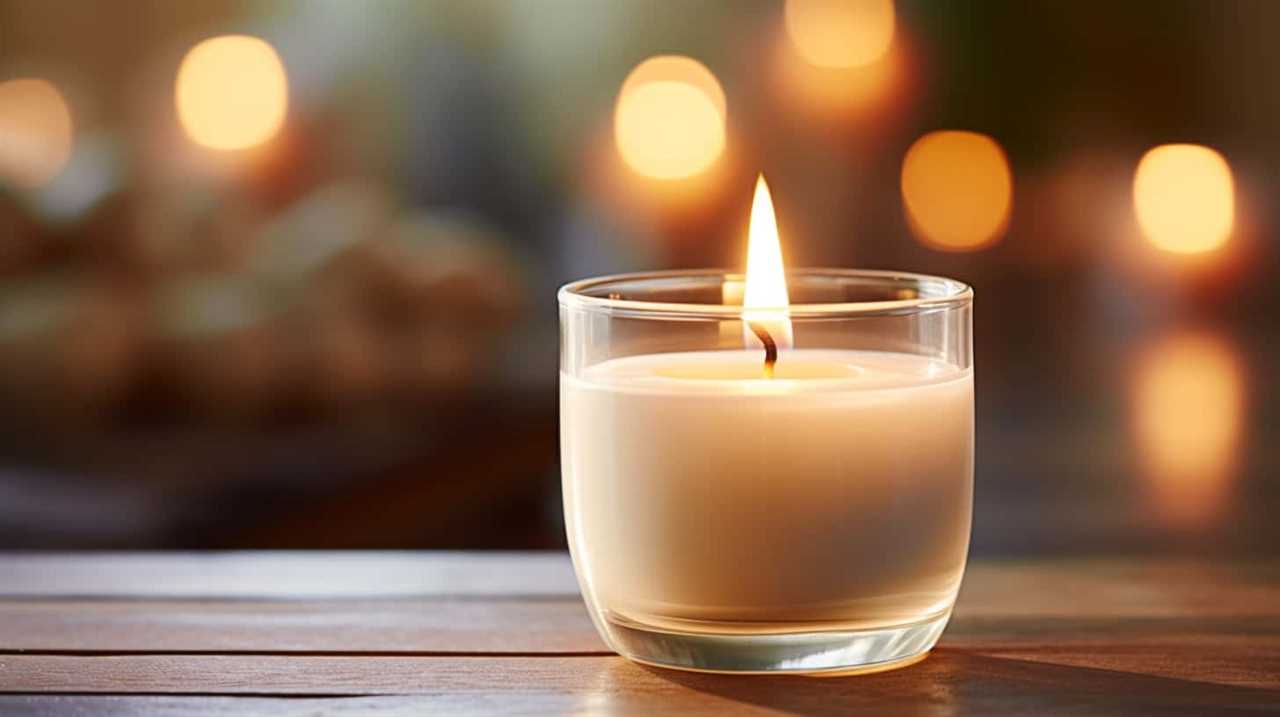
Importance of Proper Wax Measurement

We believe that using the correct amount of soy wax is essential for creating a high-quality 10 oz candle. When it comes to wax measurement techniques, accuracy is key. Accurate measurements ensure that the candle burns evenly, has a consistent scent throw, and maximizes the overall burn time.

To achieve this level of precision, it’s important to use a reliable scale that can measure to the nearest gram. This will allow you to consistently replicate your recipes and produce candles of consistent quality. Accurate measurements also help in understanding the wax-to-container ratio, which we’ll discuss in the next section.

Understanding Wax-to-Container Ratio

To ensure a properly balanced candle, it’s crucial to consider the wax-to-container ratio when making a 10 oz soy wax candle.

The wax-to-container ratio refers to the amount of wax needed to fill the container to the desired level. This ratio is important because it affects the overall burn time and performance of the candle.

dusk gifts

If there’s too much wax in relation to the container size, the candle may burn too quickly or unevenly. On the other hand, if there’s too little wax, the candle may not burn properly or may not fill the container completely.

To determine the appropriate wax-to-container ratio, it’s important to consider factors such as the type of wax being used, the diameter and height of the container, and the desired burn time. Proper wax melting techniques and troubleshooting wax pouring can also help achieve the ideal ratio.

Advertisement

By understanding the wax-to-container ratio, candle makers can create candles that burn evenly and efficiently.

Now, let’s move on to calculating the wax weight for a 10 oz candle.

candle making kits for adults

Calculating Wax Weight for a 10 Oz Candle

When calculating the wax weight for a 10 oz candle, there are a few key points to consider.

First, you need to determine the wax weight calculation based on the wax-to-container ratio. This ratio helps ensure that the candle burns evenly and efficiently.

Additionally, the size of the candle will also play a role in determining the appropriate wax weight, as larger candles may require more wax for optimal performance.

Advertisement

Wax Weight Calculation

Our first step in calculating the wax weight for a 10 oz candle involves determining the appropriate amount of soy wax to use. To do this, we need to consider the wax melting techniques and the measuring container size.

candle homewares

When it comes to melting the wax, it’s important to use a double boiler or a dedicated wax melting pot to ensure even heating and prevent scorching.

As for the measuring container size, it should be able to hold the desired amount of wax for the 10 oz candle, taking into account any additional space needed for fragrance oils or additives.

Once these factors are taken into consideration, we can calculate the wax weight accurately.

Now, let’s move on to the next section, where we’ll discuss candle size considerations.

Advertisement

candle shack europe

Candle Size Considerations

To calculate the appropriate amount of soy wax for a 10 oz candle, we need to consider candle size considerations, such as the desired wax weight and any additional space required for fragrance oils or additives.

The importance of container size can’t be understated when determining the wax weight. A larger container will require more wax to fill and therefore a higher wax weight.

It’s crucial to choose the right wick for your 10 oz candle as well. The size of the wick will depend on the diameter of the container. Using a wick that’s too small may result in a weak flame and poor scent throw, while using a wick that’s too large can lead to excessive smoking and uneven burning.

Therefore, it’s essential to carefully consider both the container size and the appropriate wick choice when calculating the wax weight for a 10 oz candle.

decorative candle

Factors to Consider for Wax Melting and Pouring

We consider several factors in order to achieve optimal wax melting and pouring for our 10 oz candle. To ensure a successful outcome, we take into account the following:

Advertisement
  1. Wax melting techniques: The method used to melt the wax plays a crucial role in the final quality of the candle. We carefully choose between double boiler or microwave methods, depending on the type of wax and the desired results. Double boiler method provides gentle, even heat distribution, while the microwave method offers quicker melting with precise temperature control.
  2. Pouring temperature control: Maintaining the right pouring temperature is essential to prevent issues such as sinkholes or frosting. We monitor and control the temperature during the pouring process using a thermometer. This allows us to pour the wax at the optimal temperature, ensuring a smooth and even distribution throughout the candle.
  3. Cooling and curing process: After pouring the wax, we let the candle cool and cure for the recommended time. This allows the wax to fully harden and settle, enhancing the overall quality and performance of the candle.

Tools and Equipment Needed for Wax Measurement

For accurate wax measurement, we rely on a digital scale. This tool is essential for ensuring precise and consistent measurements.

A digital scale allows us to measure the exact weight of the wax, which is crucial for determining the right amount needed for a 10 oz candle.

When using a digital scale, it’s important to calibrate it before each use to ensure accurate readings. Additionally, it’s recommended to use a scale with a high precision, such as one that measures in grams or ounces, to achieve the desired level of accuracy.

candle making courses

Common mistakes to avoid when using a digital scale include not zeroing it out before measuring, adding or removing wax while the scale is still on, and not double-checking the measurements for accuracy.

Step-by-Step Guide to Measuring Soy Wax

To measure soy wax for a 10 oz candle, we start by gathering the necessary tools and equipment.

Here is a step-by-step guide to help you measure soy wax accurately for your candle making project:

Advertisement
  1. Choose the right wax: When it comes to candle making techniques, selecting the right wax is crucial. Soy wax is a popular choice due to its clean burning properties and eco-friendly nature.
  2. Weighing scale: Obtain a digital weighing scale that can measure in grams or ounces. This will ensure precise measurements for your soy wax.
  3. Double boiler or a microwave-safe container: You’ll need a heat-resistant container to melt your soy wax. A double boiler is recommended for even heat distribution, but a microwave-safe container can also be used if handled with caution.

Adjusting Wax Amounts for Fragrance and Additives

Our recommended approach for adjusting wax amounts for fragrance and additives is to calculate the percentage of fragrance oil or additive you want to use based on the total weight of the soy wax. This ensures that the fragrance blending and additive ratios are accurate and consistent. To help you understand this concept better, here is a table that shows the recommended fragrance oil and additive percentages based on the total weight of the soy wax:

candle making workshop

Wax Weight Fragrance Oil Percentage Additive Percentage
10 oz 6-10% 2-5%
16 oz 6-10% 2-5%
20 oz 6-10% 2-5%
24 oz 6-10% 2-5%

By using these percentages as a guide, you can ensure that your fragrance blending and additive ratios are well-balanced and result in a high-quality candle. Now, let’s move on to the next section, where we will discuss some tips for achieving consistent wax measurements.

Transition: Now that we understand how to adjust wax amounts for fragrance and additives, let’s explore some tips for achieving consistent wax measurements.

Tips for Achieving Consistent Wax Measurements

When it comes to candle making, accurate wax measuring is crucial for achieving consistent results.

Maintaining consistency in wax measurements ensures that each candle you make will have the same amount of wax, which in turn affects burn time and overall quality.

diptyque

Accurate Wax Measuring

We always ensure accurate wax measuring by using a digital scale to weigh the exact amount needed for consistent wax measurements. Achieving accurate measurements is of utmost importance in candle making as it ensures that each candle has the same amount of wax, resulting in consistent burn times and fragrance throw.

Advertisement

Here are three tips for achieving accurate wax measurements:

  1. Use a digital scale: A digital scale provides precise measurements, allowing you to weigh the exact amount of wax required for each candle.
  2. Tare the scale: Before measuring the wax, make sure to zero out the scale by placing an empty container on it and pressing the tare button. This ensures that only the weight of the wax is measured.
  3. Measure by weight, not volume: Measuring wax by weight is more accurate than measuring by volume, as the density of wax can vary. By weighing the wax, you can ensure consistent results every time.

Importance of Consistency

To ensure consistent wax measurements, it’s important to maintain accuracy throughout the candle making process. Precision plays a crucial role in achieving uniformity in your wax measurements. By consistently measuring the exact amount of soy wax for each candle, you can ensure that your candles burn evenly and have consistent scent throw. This level of precision is essential for candle makers who strive for mastery in their craft.

To achieve this, it’s recommended to use a reliable digital scale for measuring your wax. Additionally, it’s important to always level off the wax when measuring, ensuring that the surface is flat and even. By following these tips, you can achieve the desired level of consistency in your wax measurements.

candle holders for pillar candles

Now, let’s explore the common mistakes to avoid in wax measurement.

Common Mistakes to Avoid in Wax Measurement

What are some common mistakes to avoid when measuring wax for a 10 oz candle?

When it comes to wax measurement techniques, it’s crucial to avoid certain mistakes to ensure even wax distribution and achieve a high-quality candle. Here are three common mistakes to avoid:

Advertisement
  1. Inaccurate measuring: One of the biggest mistakes isn’t accurately measuring the amount of wax needed for a 10 oz candle. Using too much or too little wax can result in an uneven burn and affect the overall quality of the candle.
  2. Ignoring the container size: Another common mistake is disregarding the size of the container when measuring the wax. Different containers require different amounts of wax, and failing to account for this can lead to uneven wax distribution and an unsatisfactory burn.
  3. Neglecting to account for shrinkage: Wax shrinkage is a natural occurrence that happens as the candle cools and solidifies. Failing to account for this shrinkage when measuring the wax can result in a candle that isn’t filled to the desired level, leaving empty space at the top.

Testing and Adjusting Wax Amounts for Different Containers

When testing and adjusting wax amounts for different containers, it’s important to consider the size and shape of the container to ensure optimal candle performance.

candlelight

Candle pouring techniques play a vital role in achieving consistent results. Experimenting with different wick sizes is crucial to find the perfect match for the container. A wick that’s too small may cause poor burning, while a wick that’s too large can lead to excessive flame height and melt pool.

To determine the right amount of wax, start by filling the container to the desired level with water and then pour it into a measuring cup. This will give you an accurate measurement of the wax needed. Remember to account for any additional additives or fragrance oils in your calculations.

Adjustments may be necessary after testing, so keep detailed records of your experiments to achieve mastery in candle making.

Using a Wax Weight Calculator for Precision

We use a reliable wax weight calculator to ensure precise measurements when making a 10 oz soy candle. This tool is essential for achieving consistency in our candle-making process.

Candle

Here are three benefits of using a wax weight calculator:

Advertisement
  1. Accurate Wax Amounts: The calculator allows us to input the desired candle weight and the type of wax we’re using. It then calculates the exact amount of wax needed, taking into account factors like the specific gravity of the wax. This ensures that we always have the right amount of wax for a 10 oz candle, eliminating any guesswork.
  2. Time and Cost Savings: By having precise measurements, we can avoid wasting excess wax or falling short of the required amount. This not only saves money but also reduces the time spent on trial and error. The calculator streamlines the process, allowing us to be more efficient in our production.
  3. Consistency in Quality: Precise measurements result in consistent candle quality. When the wax-to-fragrance ratio is accurate, the candle burns evenly and releases a consistent scent. This level of precision is crucial for maintaining customer satisfaction and building a reputable brand.

Using a wax weight calculator is a valuable tool that enhances our wax melting techniques and ensures the benefits of precise measurements are realized in every 10 oz soy candle we create.

When it comes to choosing the best soy wax brands for candle making, there are a few factors to consider. First, you want to ensure that the soy wax you choose is of high quality and has a good reputation among candle makers.

Additionally, look for soy waxes that are known for their long-lasting burn time, as this will ensure that your candles provide hours of enjoyment for your customers.

candle holders wood

Best Soy Wax Brands

After extensive research and testing, our team has identified several top-quality soy wax brands that we highly recommend for candle making. These brands not only offer excellent performance but are also ideal for beginners and eco-conscious individuals who prefer using eco-friendly soy waxes.

Here are our top three recommended soy wax brands:

  1. Golden Brands 464 Soy Wax: This wax is highly popular among candle makers for its smooth and creamy texture, excellent scent throw, and long burn time. It’s easy to work with, making it perfect for beginners.
  2. NatureWax C-3 Soy Wax: Known for its exceptional hot and cold scent throw, this soy wax produces clean-burning candles with minimal soot. It has a great adhesion to containers and provides a smooth finish.
  3. Igi 6006 Soy Wax: This wax is a blend of soy and paraffin, offering the best of both worlds. It has excellent fragrance retention, good adhesion, and a smooth appearance.

These soy wax brands are trusted by experienced candle makers and beginners alike for their superior quality and eco-friendly properties.

Long-Lasting Soy Waxes

As candle makers, we highly recommend these long-lasting soy waxes from our previous subtopic for their exceptional quality and eco-friendly properties.

Advertisement

candlelight carol

When it comes to creating candles with long-lasting fragrance, it’s important to choose a soy wax that has a high fragrance load capacity. Some of the best soy wax brands known for their long-lasting candle fragrances include NatureWax, Golden Brands, and EcoSoya.

These waxes have been specifically formulated to hold and release fragrance oils effectively, resulting in candles that fill the room with their captivating scents for extended periods of time.

Additionally, these soy waxes are eco-friendly candle options as they’re derived from renewable sources and produce less soot compared to other waxes.

Now that we’ve identified these long-lasting soy waxes, let’s move on to the next step of candle making: how to safely melt and pour soy wax.

candles myer

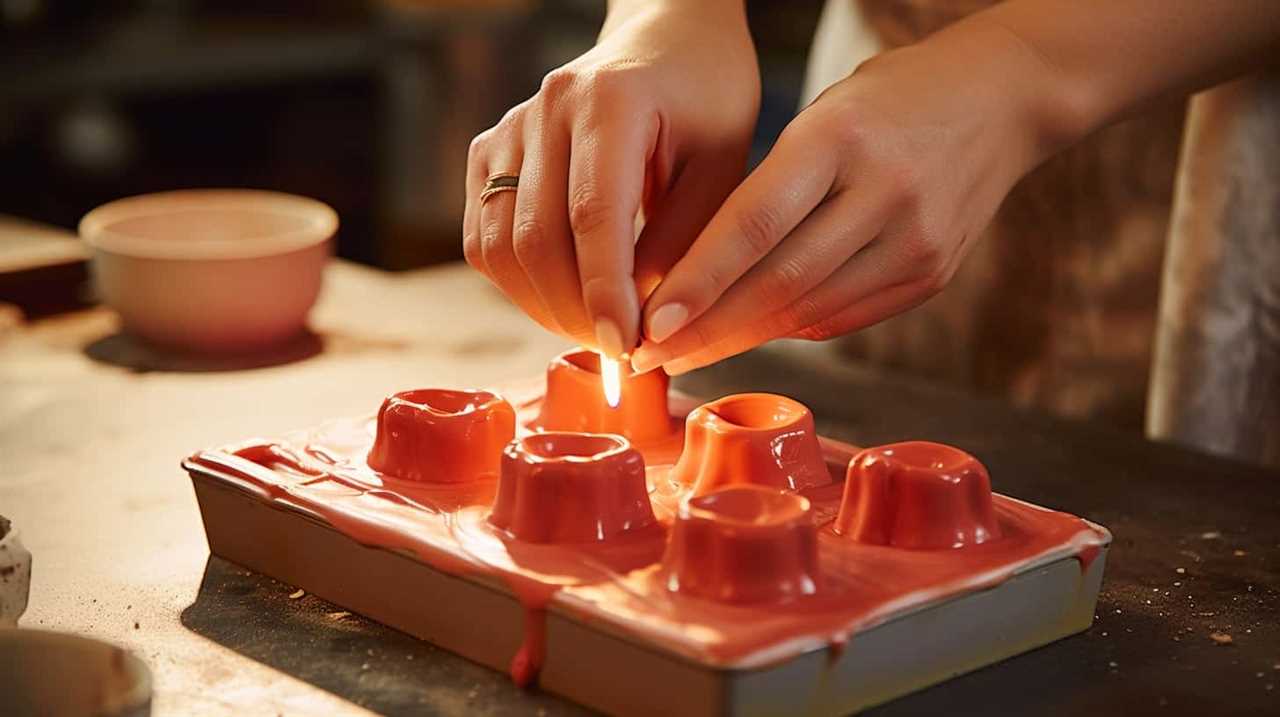
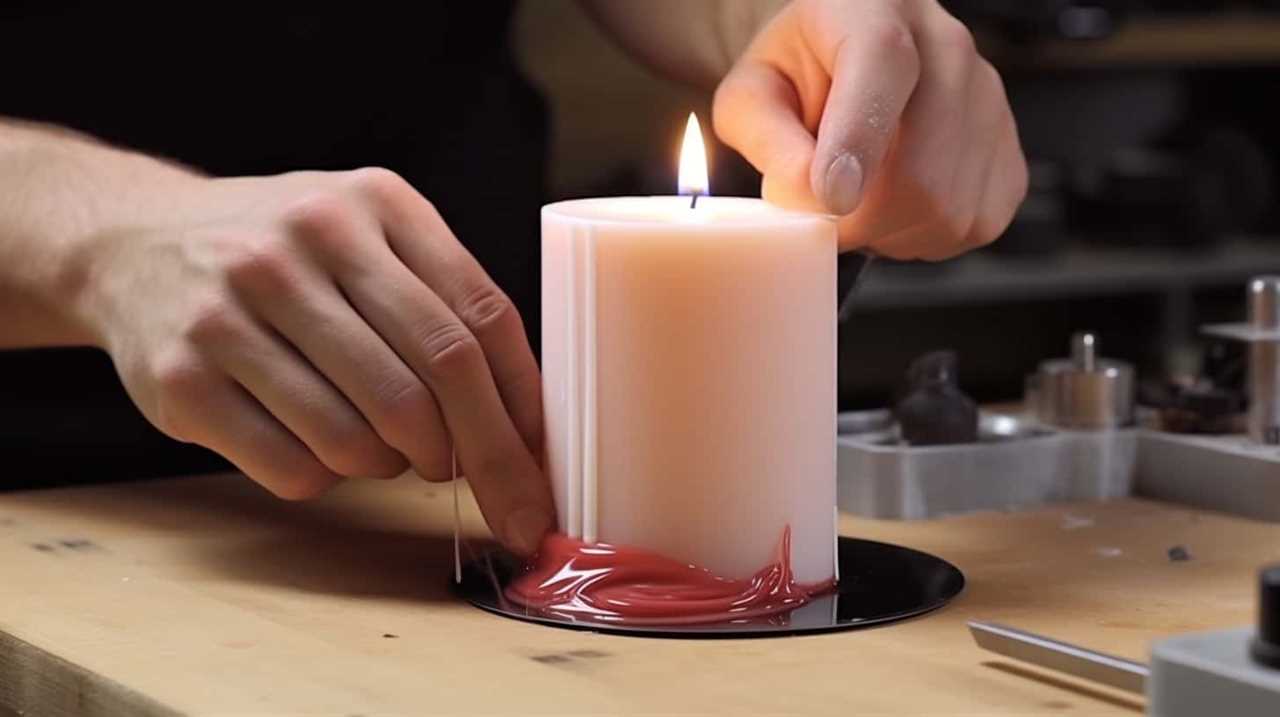
How to Safely Melt and Pour Soy Wax

We can safely melt and pour soy wax by following these steps:

Advertisement
  1. Safety Precautions:
  • Before starting, ensure that your workspace is clean and free from any flammable materials.
  • Use a heat-resistant container specifically designed for candle making.
  • Always work in a well-ventilated area to prevent inhalation of fumes.
  • Wear protective gloves and eyewear to avoid any accidents or burns.
  1. Melting Techniques:
  • Place the desired amount of soy wax flakes into a double boiler or a heat-resistant pouring pitcher.
  • Fill a larger pot with water and place the double boiler or pouring pitcher in it.
  • Heat the water on low to medium heat, allowing the wax to melt slowly and evenly.
  • Stir the wax occasionally to ensure thorough melting.
  1. Pouring the Wax:
  • Once the wax is completely melted, carefully pour it into your chosen candle container.
  • Keep the wick centered and straight using a wick holder or chopstick.
  • Let the candle cool and solidify completely before trimming the wick and enjoying your handmade soy wax candle.

Now that we know how to safely melt and pour soy wax, let’s move on to troubleshooting common issues with wax measurement.

Troubleshooting Common Issues With Wax Measurement

When it comes to measuring wax for candle making, there are a few common issues that can arise.

One issue is over or under pouring the wax, which can affect the final result of the candle.

candles

Another issue is the accuracy of the measuring tools used, as even slight variations can lead to discrepancies in the amount of wax used.

Lastly, problems with wax consistency can also impact the measurement process, making it important to address any issues before pouring the wax.

Over/Under Poured Wax

To troubleshoot common issues with wax measurement, it’s important to assess whether the wax has been over or under poured. This can be determined by comparing the desired amount of wax with the actual amount used. Here are three key factors to consider when troubleshooting over/under poured wax:

Advertisement
  1. Wax Pouring Techniques: Ensure that you’re using the correct pouring technique for the type of candle you’re making. Different candle styles require different pouring methods to achieve consistent results. Take note of any deviations from the recommended pouring technique to identify potential causes of over/under poured wax.
  2. Container Size and Shape: The size and shape of your candle container can impact the amount of wax needed. If you’re consistently experiencing over or under poured wax, double-check that you’re using the correct container size and consider adjusting your measurements accordingly.
  3. Wax Temperature: The temperature at which you pour your wax can affect its final volume. If the wax is poured at too high of a temperature, it may shrink as it cools, resulting in under poured wax. Conversely, pouring at too low of a temperature can lead to over poured wax. Experiment with different pouring temperatures to find the optimal range for your specific wax and container.

By assessing these factors, you can troubleshoot issues with over/under poured wax and work towards achieving consistent results.

candlescience

Now, let’s move on to the next section and discuss the importance of measuring tools accuracy in candle making.

Measuring Tools Accuracy

For accurate wax measurement in candle making, it’s important to ensure the accuracy of your measuring tools. Measuring tools accuracy is crucial in preventing wax consistency problems, such as over or under-pouring. To troubleshoot common issues with wax measurement, start by calibrating your measuring tools.

Use a scale with a high level of precision, preferably one that measures in grams. Make sure to zero out the scale before measuring the wax.

Additionally, use a graduated cylinder or a measuring cup with clear and accurate markings. Avoid using measuring spoons as they may not provide accurate measurements for larger quantities of wax.

candle online

Regularly check and maintain the accuracy of your measuring tools to ensure consistent and accurate wax measurements for your candles.

Advertisement

Wax Consistency Problems

We encountered wax consistency problems while troubleshooting common issues with wax measurement in candle making. Achieving the right wax consistency is crucial for successful candle making. Here are three common problems you may encounter and how to troubleshoot them:

  1. Uneven Wax Distribution: If you notice that the wax isn’t evenly distributed in your candle, it could be due to improper pouring techniques. To solve this issue, make sure to pour the wax slowly and steadily, keeping the container level. Avoid pouring too quickly or from too high of a distance.
  2. Sinkholes or Craters: Sinkholes or craters can occur when the wax cools unevenly, resulting in hollow spaces. To prevent this, ensure that the wax is poured at the recommended temperature range. Additionally, gently tapping the container after pouring can help remove any air bubbles that may contribute to these imperfections.
  3. Frosting or Blooming: Frosting or blooming is a common issue in soy wax candles. It appears as a white, cloudy layer on the surface of the candle. To minimize frosting, try adjusting the pouring temperature and avoid exposing the candles to extreme temperature changes during the cooling process.

Final Thoughts on Perfecting Soy Wax Measurements

After experimenting with various measurements, we’ve found the optimal soy wax ratio for a 10 oz candle. Achieving consistent wax measurements is crucial in the candle-making process to ensure a uniform burn and a quality product.

To perfect soy wax measurements, it’s essential to use a digital scale for accuracy. Start by measuring the weight of an empty container, then add the desired amount of soy wax until the desired weight is reached.

ecoya penrith

It’s recommended to use a ratio of 1.2 ounces of soy wax per ounce of container size. This ratio ensures a proper wax-to-container ratio, allowing for even burning and avoiding tunneling. Remember to account for fragrance oils and additives when calculating the total weight of the wax.

Frequently Asked Questions

How Long Does It Take to Melt Soy Wax?

To prevent crystallization of soy wax, we melt it at a temperature of around 185°F. This allows for a smooth and even melt. The advantages of using soy wax include its renewable nature and ability to hold fragrance well.

Can I Use a Microwave to Melt Soy Wax?

Melting soy wax in a double boiler is the recommended method for precise and controlled melting. Using a microwave may result in uneven heating and potential safety hazards. A wax melter is a more efficient and safer option.

Advertisement

What Is the Ideal Temperature for Pouring Soy Wax Into a Container?

The ideal pouring temperature for soy wax into a container depends on factors such as the size of the container and the desired outcome. It is important to follow guidelines to achieve the best results and ensure proper adhesion and scent throw.

candlestick patterns

How Do I Know if I Have Poured Too Much Soy Wax Into a Container?

To prevent overflow when pouring soy wax, it’s important to measure the appropriate amount for your container. If you accidentally pour too much wax, you can fix it by carefully removing some with a spoon or pouring it into a smaller container.

What Can I Do if I Accidentally Measure the Wrong Amount of Soy Wax for My Candle?

If we accidentally measure the wrong amount of soy wax for our candle, we can troubleshoot the mistake by remelting the wax, adjusting the measurements, and pouring it again. It’s important to be precise in candle making to ensure optimal results.

Conclusion

In conclusion, mastering the art of soy wax measurement is crucial for creating the perfect 10 oz candle.

Just like a skilled chef measures ingredients precisely to create a mouthwatering dish, candle makers must ensure the proper wax-to-container ratio for optimal burning and scent throw.

Advertisement

candle price

By understanding the factors involved in wax melting and pouring, using the right tools and equipment, and choosing reliable soy wax brands, you can confidently create beautiful candles that bring warmth and ambiance to any space.

I'm Jane and I love candles. I have candles everywhere in my house--in every room, on every surface. I love the smell of candles, and I love how they make my place feel warm and cozy. Candles are really important to me. They help me relax and de-stress after a long day. They remind me of happy memories, and they make me feel calm and peaceful. I can't imagine my life without candles!

Continue Reading
Advertisement

Candles

How to Use a Money Candle

Published

on

By

Are you prepared to discover the keys to generating wealth and abundance? Allow us to demonstrate how employing a money candle can draw financial success into your existence.

Imagine this: you light a beautiful green candle, infused with powerful energies of abundance, and watch as its flame dances with magic. As we guide you through the steps, you will learn how to choose the perfect money candle, set a clear intention for wealth, and create a sacred space to enhance the candle’s energy.

Through meditation and visualization, you will tap into the limitless potential of financial abundance. Get ready to ignite your wealth manifestation journey with the power of a money candle.

Let’s begin!

Advertisement

candlesticks patterns

Key Takeaways

  • Choose a money candle based on financial goals and personal preferences, considering candle color, size, shape, and decorations.
  • Set clear intentions for wealth and align them with a chosen money candle.
  • Create a sacred space by clearing clutter, visualizing goals, incorporating symbols of abundance, and invoking divine presence.
  • Light the money candle with a calm and focused state of mind, visualizing the flame as a symbol of financial blessings.

Choosing the Right Money Candle

When selecting a money candle, we should consider our specific financial goals and personal preferences. Finding the best color for the candle is an important aspect to consider. The color of the candle symbolizes different aspects of wealth and abundance. For example, green is often associated with financial prosperity and growth, while gold represents wealth and success. Understanding the symbolism behind each color can help us align our intentions and desires with the energy of the candle.

Additionally, we should also consider the size and shape of the candle, as well as any additional decorations or symbols that resonate with our financial goals. By carefully choosing a money candle that speaks to us on a personal level, we can set the stage for a powerful intention-setting ritual in the next section.

Setting the Intention for Wealth

To set the intention for wealth, we need to focus on our specific financial goals and align our desires with the energy of the chosen money candle. Here are four steps to help you manifest wealth and abundance:

  1. Clarify your financial goals: Take the time to define what wealth means to you. Is it achieving a certain income level, owning a home, or being debt-free? Clearly identify your goals to create a clear intention.
  2. Choose the right money candle: Look for a candle specifically designed for wealth manifestation. Consider candles infused with ingredients like green aventurine or citrine, which are believed to attract prosperity.
  3. Practice affirmations for abundance: Use positive affirmations that align with your financial goals. Repeat phrases like ‘I am worthy of wealth and abundance’ or ‘Money flows easily and effortlessly into my life’ while lighting the money candle.
  4. Visualize your desired outcome: Close your eyes and visualize yourself already achieving your financial goals. Imagine the feeling of wealth and the abundance it brings. Allow this visualization to fill you with positive energy and belief in your ability to manifest wealth.

Cleansing and Preparing the Candle

To cleanse and prepare the money candle, we gather the necessary materials. Before beginning any money manifestation ritual, it’s crucial to cleanse the candle of any negative or stagnant energy. This ensures that the candle is a pure channel for your intentions and desires.

candle salad

There are various methods for cleansing, such as smudging the candle with sacred herbs like sage or palo santo, or passing it through the smoke of incense. Visualizing the candle being cleansed by a stream of white light is also effective.

Once the candle is cleansed, it’s ready to absorb the energy of your intentions and amplify your desires.

With the candle cleansed and prepared, we can now move on to creating a sacred space for the money manifestation ritual.

Advertisement

Creating a Sacred Space

Once the money candle is cleansed and prepared, we create a sacred space to enhance the energy and focus of our money manifestation ritual. Creating a sacred space is essential to cultivating the right atmosphere for abundance to flow into our lives.

floral candle

Here are four key elements to consider when creating a sacred space:

  1. Clear the space: Remove any clutter or negative energy that may be present. Use sage or other cleansing tools to purify the area.
  2. Set intentions: Clearly state your intentions for creating abundance in your life. Visualize your goals and desires as already manifesting.
  3. Use sacred symbols: Incorporate symbols that represent abundance and prosperity, such as money signs, green candles, or images of wealth.
  4. Invoke divine presence: Call upon the energy of the universe, your higher self, or any deity or spirit guide that resonates with you to bless and support your money manifestation ritual.

Lighting the Money Candle

We light the money candle to activate its energy and begin our manifestation process. The lighting technique for a money candle is simple yet important.

Before lighting the candle, ensure that you’re in a calm and focused state of mind. Take a moment to ground yourself and set your intention for attracting abundance and prosperity.

Use a match or a lighter to ignite the wick of the candle, and as you do so, visualize the flame as a symbol of the financial blessings that are coming your way.

candlesticks charts

The benefits of money candles are twofold. Firstly, the act of lighting the candle helps to shift your mindset and align your energy with abundance. Secondly, the candle itself serves as a powerful tool for manifestation, amplifying your intention and attracting financial prosperity.

Advertisement

With the candle lit, we can now move on to the next step: meditating with the money candle.

Meditating With the Money Candle

Now, let’s delve into the practice of meditating with the money candle as we harness its energy to attract abundance and prosperity. Meditation techniques can help us focus our intentions and tap into the power of the candle’s symbolism.

Here are four techniques to enhance your money manifestation meditation:

candlesticks trading

  1. Set your intention: Before starting your meditation, clearly state your intention to attract wealth and abundance into your life. Visualize yourself surrounded by financial prosperity and feel the positive energy flowing towards you.
  2. Use affirmations: Repeat affirmations related to money and abundance during your meditation. For example, you can say, ‘I am open to receiving unlimited wealth and prosperity’ or ‘Money flows to me effortlessly and abundantly.’
  3. Visualize your goals: Imagine yourself achieving your financial goals. See yourself living a life of abundance, enjoying financial freedom, and fulfilling your dreams. Visualize the steps you need to take to manifest these goals.
  4. Practice gratitude: Express gratitude for the money and abundance that already exists in your life. Focus on the blessings and opportunities that money has brought you. This attitude of gratitude attracts more abundance into your life.

Visualizing Financial Abundance

When it comes to achieving financial abundance, visualization plays a crucial role.

By visualizing wealth and abundance, we can manifest our desires into reality.

The power of a positive mindset can’t be underestimated, as it attracts prosperity and opens the door to financial opportunities.

Advertisement

With intention and focus, we can use visualization techniques to attract wealth and create a life of financial abundance.

candle making supplies

Manifesting Wealth Through Visualization

To manifest wealth through visualization, one key step is to clearly envision our ideal financial abundance. Visualization techniques can be a powerful tool in attracting prosperity into our lives. Here are four effective strategies to help us develop an abundance mindset and manifest wealth:

  1. Create a vivid mental picture: Close your eyes and imagine yourself living the life of financial abundance. See yourself achieving your financial goals, surrounded by luxury and comfort.
  2. Use affirmations: Repeat positive affirmations that reinforce your belief in abundance. Affirmations like ‘I am deserving of wealth and success’ or ‘Money flows effortlessly into my life’ can help reprogram your subconscious mind.
  3. Visualize specific financial goals: Focus on visualizing specific financial goals, such as paying off debts, buying a dream house, or starting a successful business. See yourself achieving these goals and experiencing the joy and fulfillment that comes with it.
  4. Practice gratitude: Cultivate a sense of gratitude for the wealth and abundance you already have. By appreciating what you have, you attract more positive experiences and opportunities for financial growth.

By mastering these visualization techniques and adopting an abundance mindset, we can harness the power of our thoughts to manifest wealth and create a life of financial abundance.

Transitioning to the subsequent section about the power of a positive mindset, let’s explore how our mindset can shape our financial reality.

Power of Positive Mindset

As we explore the power of a positive mindset in visualizing financial abundance, we can see how our thoughts and beliefs shape our financial reality. By adopting an abundance mindset and utilizing positive affirmations, we can attract wealth and prosperity into our lives. Positive affirmations are statements that reinforce positive beliefs about ourselves and our financial situation. When repeated daily, they help to reprogram our subconscious mind and align our thoughts with our desired financial outcomes. Here is a table that illustrates the power of positive affirmations in transforming our mindset:

doji candle

Affirmation Belief Outcome
I am deserving of financial abundance Believing in my worthiness for wealth Attracting opportunities for financial success
Money flows freely into my life Trusting in the abundance of the universe Manifesting financial prosperity
I am grateful for the wealth I have Cultivating gratitude for current financial blessings Opening doors for more abundance

Attracting Prosperity With Intention

By intentionally visualizing financial abundance, we can attract prosperity into our lives. It’s important to harness the power of our thoughts and beliefs to manifest our desired financial outcomes. Here are four key strategies for attracting abundance and manifesting money:

Advertisement
  1. Set clear intentions: Clearly define your financial goals and visualize yourself already achieving them. This helps to align your subconscious mind with your desires and signals to the universe what you want to attract.
  2. Practice gratitude: Express gratitude for the abundance that already exists in your life, no matter how small. Gratitude shifts your focus from lack to abundance, attracting more of what you appreciate.
  3. Create a vision board: Compile images and words that represent your financial goals and aspirations. Visualize yourself living your desired lifestyle, focusing on the positive emotions associated with financial abundance.
  4. Take inspired action: Combine visualization with purposeful action towards your financial goals. This shows the universe your commitment and dedication, increasing the likelihood of attracting abundance.

Repeating the Practice for Continued Results

After we have successfully used a money candle to manifest abundance, it is important to continue the practice for sustained and consistent results. Repeating the practice ensures long-term effectiveness, allowing us to harness the full potential of the money candle’s energy. By consistently utilizing this powerful tool, we can cultivate a mindset of abundance and attract financial prosperity into our lives.

To illustrate the importance of repetition, let’s consider the following table:

Week Candle Ritual Affirmations Results
1 Lighting the money candle and visualizing abundance "I am open to receiving wealth and financial success" Increased job opportunities
2 Repeating the ritual with gratitude for current abundance "I am grateful for the money that flows into my life" Unexpected financial windfall
3 Consistently using the money candle to reinforce positive beliefs "I attract wealth effortlessly and easily" Promotion at work
4 Continuing the practice to maintain financial abundance "I am a magnet for prosperity in all areas of my life" Consistent increase in income

Frequently Asked Questions

Can I Use Any Type of Candle for This Money Manifestation Practice?

When selecting a candle for money manifestation, it’s important to consider the type and size. Not just any candle will do. The right candle can enhance the energy and intention behind your practice.

candle drawing

How Long Should I Meditate With the Money Candle?

When meditating with a money candle, it is important to focus on the duration and visualization techniques. We recommend meditating for at least 15 minutes to fully immerse yourself in the manifestation process.

Can I Use the Same Candle for Multiple Money Manifestation Sessions?

Yes, you can reuse candles for multiple money manifestation sessions. However, it’s important to consider the type of candle you’re using. Some candles are specifically designed for one-time use, while others can be used multiple times.

Is There a Specific Time of Day or Phase of the Moon That Is Best for Lighting the Money Candle?

The best time of day to light a money candle and whether the moon phase is important for money manifestation depends on personal preference and belief. Experiment to find what works best for you.

Advertisement

How Often Should I Repeat This Money Manifestation Practice for Optimal Results?

For optimal results in our money manifestation practice, we should repeat it regularly. By consistently engaging in techniques that enhance our manifestation abilities, we can increase the likelihood of achieving our financial goals.

candlescience

Conclusion

In conclusion, using a money candle can be a powerful tool for attracting wealth and abundance into your life. By carefully choosing the right candle, setting clear intentions, and creating a sacred space, you can enhance the effectiveness of this practice.

Through meditation and visualization, you can align your energy with financial abundance. By repeating this practice regularly, you can experience continued results and manifest the financial prosperity you desire.

Start using a money candle today and watch your financial fortunes change.

Advertisement

Continue Reading

Candles

How to Turn on a Candle Without a Lighter

Published

on

By

Are you prepared to learn how to light a candle without using a lighter? In this tutorial, we’ll demonstrate different techniques for kindling a candle through alternative means.

No longer will you be at the mercy of a missing lighter. By following these steps, you will be able to light up your candle with confidence and ease.

From using matches to harnessing the power of the sun, we have got you covered. So, let’s delve into the world of candle lighting mastery and explore these ingenious methods.

Get ready to ignite your candle in ways you never thought possible!

Advertisement

how does a candle burn

Key Takeaways

  • Lighting a candle with matches requires holding the matchstick firmly, striking it against the matchbox, and transferring the flame to the candle wick.
  • When using a stove or gas burner, ensure it is clean and in working condition, trim the candle wick, and hold the candle above the flame to melt the wax and ignite the wick.
  • Using a magnifying glass, focus the sun’s rays onto the wick or use a powerful flashlight with a magnifying glass to ignite the candle.
  • In emergency situations or without a lighter or matches, a makeshift fuse can be created using thick paper rolled tightly into a cylinder, which burns slowly and steadily to ignite the candle flame. Alternatively, a small battery and thin wire can be used to create a circuit and heat up the wire to ignite the wick.

Use Matches to Light the Candle

First, we’ll grab a few matches to light the candle. To safely light a candle using matches, it’s important to ensure that the matchstick is long enough to prevent any accidental burns. Hold the matchstick firmly between your thumb and index finger, striking it smoothly against the matchbox, igniting the tip. Be cautious not to exert too much force, as it may break the match.

Once the match is lit, carefully bring it closer to the wick of the candle, allowing the flame to transfer. Ensure that the match is completely extinguished before discarding it.

Now, let’s move on to the next section where we’ll discuss how to utilize a stove or gas burner for lighting a candle.

Utilize a Stove or Gas Burner

To continue lighting a candle without a lighter, we can also utilize a stove or gas burner. This method should be approached with caution, as it involves open flames and can pose safety risks. Here are some steps to follow:

bell book and candle

  1. Ensure stove safety: Make sure the stove or gas burner is clean and in proper working condition. Check for any gas leaks and ensure good ventilation in the area.
  2. Prepare the candle: Place the candle in a heat-resistant container and remove any packaging or labels. Trim the wick to about 1/4 inch to ensure a clean burn.
  3. Light the candle: Hold the candle above the stove or gas burner flame, allowing the heat to gradually melt the wax and ignite the wick. Be careful not to let the flame come into contact with the container.

Now that we’ve explored the use of a stove or gas burner, let’s move on to another alternative method – lighting the candle with a magnifying glass.

Light the Candle With a Magnifying Glass

After utilizing a stove or gas burner, we can now explore another method to light a candle without a lighter – using a magnifying glass.

When it comes to using a magnifying glass to ignite a candle, there are a few alternatives to consider.

Advertisement

One option is to use the sun’s rays as a natural source of light. Find a sunny spot, hold the magnifying glass between the sunlight and the candle, and focus the light onto the wick until it ignites.

the candle library stockists

Another alternative is to use a powerful flashlight. Position the flashlight close to the magnifying glass, aligning the light beam through the magnifying glass and onto the candle’s wick.

Finally, if you don’t have access to sunlight or a flashlight, you can use the reflection off a shiny surface, such as a mirror or a reflective metal object. Angle the magnifying glass to reflect the light onto the candle’s wick.

To ensure successful magnifying glass ignition, here are a few tips to keep in mind:

  1. Choose a magnifying glass with a large lens to maximize the concentration of light.
  2. Hold the magnifying glass steadily and at the right distance from the candle.
  3. Position the magnifying glass at the correct angle to focus the light onto the wick.
  4. Be patient and allow the concentrated light to heat the wick until ignition occurs.

Create a Makeshift Fuse With a Piece of Paper

As we explore alternative methods to light a candle without a lighter, let’s now consider creating a makeshift fuse with a piece of paper. This simple yet effective technique can be a lifesaver in emergency situations or when you find yourself without a lighter or matches. Here’s how you can make a homemade firestarter using just a piece of paper:

candlestick

  1. Gather your materials: You’ll need a piece of paper, preferably thicker like cardstock or construction paper, to ensure it burns slowly and steadily.
  2. Roll the paper tightly: Start by rolling one corner of the paper tightly towards the opposite corner. Keep rolling until you have a long, thin cylinder.
  3. Light one end: Hold the rolled paper by one end and use a flame source, like a candle or even a lit matchstick, to ignite the other end.

Use a Battery and Wire to Ignite the Candle

Using a battery and wire to ignite a candle is a practical and efficient alternative fire-starting method. With this technique, you can quickly and easily light a candle without the need for a lighter or matches.

It provides a reliable solution when you find yourself without traditional ignition tools.

Advertisement

Battery-Powered Candle Ignition

We can ignite the candle using a battery and wire. This innovative candle lighting method provides an alternative to traditional lighters or matches. Here’s how you can use a battery and wire to light your candle:

  1. Gather the materials: You’ll need a small battery, such as a AA or AAA, and a thin wire, like a paperclip or a stripped electrical wire.
  2. Prepare the wire: Bend the wire into a U shape, leaving a small gap between the ends. This will allow you to create a spark.
  3. Light the candle: Hold one end of the wire against the negative terminal of the battery and touch the other end to the wick of the candle. The spark created between the wire and the wick will ignite the candle.

By using a battery and wire, you can successfully light your candle without a lighter or matches.

candlewood suites

Now let’s explore an alternative fire-starting method.

Alternative Fire-Starting Method

To ignite the candle without a lighter, we can employ an alternative fire-starting method by utilizing a battery and wire. This unconventional ignition method is a useful technique to have in your arsenal of fire-starting techniques.

Here’s how it works:

  1. Gather the following materials:
  • A battery (preferably a 9-volt battery)
  • A thin wire or paperclip
  1. Bend the wire or paperclip into a U-shape, making sure the ends touch each other.
  2. Place one end of the wire on the positive terminal of the battery and the other end on the wick of the candle.
  3. The connection between the wire and the battery will create a small electrical current, causing the wire to heat up and ignite the wick.
  4. Once the wick catches fire, carefully remove the wire and enjoy your candlelit ambiance.

Quick and Easy Candle Lighting

With just a battery and wire, we can easily light a candle in a quick and efficient manner. Here are three creative ways to ignite a candle using alternative candle lighting methods:

candle holders uk

  1. Battery and Steel Wool: Take a piece of steel wool and gently rub it against the positive and negative terminals of a battery. The friction will create sparks, which can be used to light the candle wick. Be careful not to touch the wire ends while the steel wool is connected to the battery.
  2. Battery and Foil: Fold a small piece of aluminum foil into a thin strip and attach one end to the positive terminal of the battery. Hold the other end of the foil near the candle wick. As the foil heats up, it will ignite the wick and light the candle.
  3. Battery and Wire: Connect a wire to both terminals of the battery, creating a circuit. Touch the wire to the candle wick, and the current will cause the wire to heat up, igniting the wick.

These alternative methods provide quick and easy ways to light a candle when a lighter isn’t available. Remember to exercise caution and ensure proper safety measures while using these techniques.

Generate a Spark With Steel Wool and a Battery

Using steel wool and a battery, we can generate a spark to light a candle without a lighter. However, if you don’t have steel wool on hand, there are alternative materials you can use. Fine-grade sandpaper or the rough side of a matchbox can also work.

Advertisement

To start, gather the necessary materials: a small piece of steel wool, a 9-volt battery, and the candle you want to light. First, take the steel wool and rub it against the positive and negative terminals of the battery. This creates a circuit and causes the steel wool to heat up, producing sparks.

Hold the steel wool close to the wick of the candle, and the sparks will ignite the candle. Remember to exercise caution and supervise the process closely to avoid accidents.

yankee candle malaysia

Light a Candle With a Flint and Steel

Flint and steel is a classic method for lighting candles, and understanding the basics is key.

To start, you’ll need a piece of flint and a steel striker. Hold the flint firmly in one hand and strike the steel against it with a quick and forceful motion, aiming for the edge of the flint.

This will create sparks that can ignite the candle wick.

Advertisement

Flint and Steel Basics

We can easily light a candle using a small piece of flint and steel. Flint and steel have been used for centuries as a reliable method to create fire. Here are the basics of using flint and steel to light a candle:

candlesticks charts

  1. Gather your materials: You’ll need a small piece of flint and a steel striker. Alternatively, you can use a ferrocerium rod or a magnesium fire starter as modern alternatives to flint and steel.
  2. Prepare the candle: Place the candle on a stable surface and remove any obstructions around it. Ensure that the wick is trimmed and ready to be lit.
  3. Striking the sparks: Hold the flint firmly in your non-dominant hand and the steel striker in your dominant hand. Position the flint close to the candle wick and strike the steel against the flint at a downward angle, creating sparks that land on the wick and ignite it.

Lighting Technique Variations

Once we’ve mastered the basics of lighting a candle with flint and steel, it’s important to explore various lighting technique variations.

When it comes to lighting methods, there are unconventional approaches that can be highly effective. One such technique is to use charred cloth as tinder. This involves charring a piece of cloth using the flint and steel, creating an ember that can be used to ignite the candle.

Another unconventional approach is the use of charred punkwood. This type of wood is highly flammable and can be easily ignited with the sparks from the flint and steel.

Safety Precautions When Using Flint and Steel

To ensure safety while using flint and steel to light a candle, it’s essential that we take certain precautions. Here are three important safety measures to keep in mind:

candle making kits for adults

  1. Flint and steel maintenance: Regularly inspect the flint and steel for any signs of damage or wear. Replace them if necessary. Keeping the flint sharp and the steel free from rust or corrosion will ensure a reliable spark for lighting the candle.
  2. Proper storage of flint and steel: Store the flint and steel in a dry and secure location. Moisture can degrade the flint and steel, making them less effective. Additionally, keeping them in a dedicated container or pouch will prevent accidental damage or injury.
  3. Use caution when striking: When striking the flint and steel, be mindful of your surroundings. Make sure there are no flammable materials nearby. Hold the steel at a safe distance from your body and others to avoid accidental injuries. Always strike the flint away from your body, directing sparks away from yourself and the candle.

By following these safety precautions, you can enjoy the benefits of using flint and steel to light your candles without compromising your well-being.

Now, let’s transition into the next section, where we’ll explore another alternative method to light a candle – harnessing the power of the sun.

Advertisement

Harness the Power of the Sun to Ignite the Candle

The sun’s radiant energy can be harnessed to ignite a candle without the need for a lighter. Harnessing solar power to light a candle not only eliminates the need for flammable materials, but also carries many benefits.

Solar power is a renewable and sustainable energy source, reducing our reliance on fossil fuels and minimizing environmental impact. By utilizing the sun’s energy, we can create a flame without the risk of accidental fires caused by traditional lighters or matches.

bath and body works candle day

However, it’s important to take fire safety precautions when using solar power to ignite a candle. Ensure the candle is placed on a stable surface, away from flammable objects, and never leave it unattended. Additionally, keep a fire extinguisher or water source nearby in case of emergencies.

Employ a Hairdryer or Heat Gun to Light the Wick

Now let’s explore alternative heat sources that can be used to light the wick of a candle when a lighter isn’t available.

We’ll discuss different techniques for lighting the wick using a hairdryer or a heat gun, and we’ll also cover important safety precautions that need to be taken when using these heat sources.

Advertisement

Alternative Heat Sources

We successfully lit the candle using a hairdryer as an alternative heat source, allowing the wick to ignite without the use of a lighter. When employing unconventional lighting methods, it’s important to consider alternative fuel sources to ensure a successful outcome.

candles myer

Here are three alternative heat sources you can use to light a candle without a lighter:

  1. Hairdryer: Set the hairdryer to its highest heat setting and aim it directly at the candle’s wick. The hot air will provide enough heat to ignite the wick and start the candle.
  2. Heat gun: Similar to a hairdryer, a heat gun can be used to generate enough heat to light the candle. Point the heat gun towards the wick and gradually increase the temperature until the wick catches fire.
  3. Stove burner: If you don’t have access to a hairdryer or heat gun, you can place the candle on a stove burner set to a low heat. Be careful not to melt the candle or ignite any surrounding objects. Once the wick catches fire, remove the candle from the burner and enjoy the warm glow.

These alternative heat sources can be handy when you find yourself without a lighter or matches. Remember to exercise caution and prioritize safety when using unconventional methods to light a candle.

Wick Lighting Techniques

To successfully light the candle without a lighter, we can utilize a hairdryer or heat gun to ignite the wick. This technique is particularly useful when the wick is difficult to reach or when we want to avoid using matches or a lighter.

Before attempting this method, it’s important to ensure proper wick maintenance. Trim the wick to about 1/4 inch before lighting to prevent excessive smoke and soot.

candle & co

When using a hairdryer or heat gun, set it to the lowest heat setting to avoid damaging the candle or causing it to melt. Hold the hairdryer or heat gun about 6 inches away from the candle and direct the hot air towards the wick.

Advertisement

Once the wick catches fire, carefully remove the hairdryer or heat gun and let the candle burn safely.

Remember to always exercise caution and follow candle safety guidelines when using alternative heat sources.

Safety Precautions Involved

After understanding the proper wick lighting techniques, it’s important to be aware of the safety precautions involved when employing a hairdryer or heat gun to light the wick. Fire safety and candle maintenance are crucial when using alternative methods to light a candle. Here are three important safety precautions to keep in mind:

candle birthday

  1. Keep a safe distance: When using a hairdryer or heat gun, ensure that you maintain a safe distance from the candle. This will prevent any accidental contact or damage to the candle.
  2. Avoid flammable materials: Make sure there are no flammable materials nearby when using a hairdryer or heat gun. Keep your surroundings clear of any combustible items that could potentially catch fire.
  3. Use caution with heat: Remember that both hairdryers and heat guns generate heat. Exercise caution when handling them, and avoid touching the heated parts to prevent burns or accidents.

Create a Fire Starter With Cotton Balls and Petroleum Jelly

To create a fire starter with cotton balls and petroleum jelly, gather the necessary materials and follow these simple steps.

First, you’ll need cotton balls, which can be easily substituted with alternative options such as dryer lint or shredded paper.

Next, gather petroleum jelly as your accelerant, as it’s a highly effective choice due to its flammability and ability to burn for an extended period.

Advertisement

Begin by taking a cotton ball and coating it thoroughly with petroleum jelly. Make sure to spread the jelly evenly on the cotton ball to ensure a consistent burn.

candle making workshop

Once coated, store the fire starters in a waterproof container for safekeeping.

When you’re ready to use them, simply ignite the coated cotton ball and place it under your kindling or fuel to start your fire.

Use a Fire Striker or Firesteel to Light the Candle

We can use a fire striker or firesteel to light the candle when we don’t have a lighter. These fire starter alternatives are great for those who want to master the art of candle lighting hacks. Here’s how you can do it:

  1. Prepare your materials: Make sure you have a fire striker or firesteel and a candle ready.
  2. Hold the fire striker: Grip the fire striker firmly in one hand, ensuring a secure hold.
  3. Strike the fire striker: Using a quick and forceful motion, strike the fire striker against the firesteel. This will create sparks that can ignite the candle wick.

Remember to be careful and aim the sparks towards the candle. With practice, you’ll become adept at using fire striker or firesteel as a reliable alternative to light your candle.

uses of candles in daily life

Frequently Asked Questions

Can I Use a Lighter Instead of Matches to Light the Candle?

Yes, we can use a lighter instead of matches to light the candle. However, it’s important to note that there are alternative methods to light a candle without a lighter. Safety precautions must be taken when doing so.

Advertisement

What Is the Best Type of Paper to Use for Creating a Makeshift Fuse?

When it comes to creating a makeshift fuse, there are several alternative materials to consider. However, it is crucial to prioritize safety precautions. Proper knowledge and understanding of homemade fuses is necessary to avoid any potential hazards.

How Long Does It Take for the Sun to Ignite the Candle?

To ignite a candle without a lighter, we can explore alternative ignition methods. However, the ignition time using the sun is dependent on various factors such as sunlight intensity and the candle’s composition.

Can I Use a Blow Dryer Instead of a Hairdryer or Heat Gun?

A blow dryer can be used as an alternative heat source instead of a hairdryer or heat gun. It provides the necessary heat to ignite a candle, making it a viable option in the absence of a lighter.

candle holders uk

Is It Safe to Use Petroleum Jelly as a Fire Starter for Lighting the Candle?

Using petroleum jelly as a fire starter can be safe and effective for lighting a candle. However, there are alternative methods to consider, such as using matches or a stove lighter.

Conclusion

In conclusion, there are numerous creative ways to turn on a candle without a lighter. From using matches, stoves, or magnifying glasses to harnessing the power of the sun or employing a hairdryer, the possibilities are endless.

Advertisement

You can even create a makeshift fuse or utilize a battery and wire for ignition. With these inventive methods at your disposal, lighting a candle becomes an enjoyable and resourceful endeavor.

So go ahead, let your imagination ignite and explore the world of candle lighting beyond the traditional lighter.

candle holders decorative

Continue Reading

Candles

How to Save a Candle Wick

Published

on

By

Have you ever been in a position where your candle wick is nearly at its end? Well, you’re in luck because we have the perfect solution for you!

In this guide, we will show you how to save a candle wick and bring it back to life. Whether it’s a crooked wick, excess wax buildup, or even a detached wick, we’ve got you covered.

With our step-by-step instructions, you’ll be able to master the art of candle wick revival. So grab your scissors and get ready to rescue those flickering flames.

It’s time to save the day and save your candle wick!

Advertisement

candlesticks hotel stamford

Key Takeaways

  • Regularly assess and trim the wick to prevent damage, fraying, and buildup of soot or debris.
  • Trim the wick to about 1/4 inch before each use for longer burn time, more efficient flame, reduced soot, and a safer burn.
  • Properly center the wick before lighting the candle to avoid uneven burn and wasted wax.
  • In case of a detached or drowned wick, reattach or trim the wick to revive it and ensure proper burning.

Assess the Wick’s Condition

First, we need to assess the condition of the wick. Proper wick maintenance is crucial for a well-functioning candle. When troubleshooting wick issues, it’s important to examine the wick closely. Look for any signs of damage, such as fraying or splitting. A damaged wick can prevent the candle from burning evenly or even extinguish the flame altogether.

Additionally, check for any buildup of soot or debris on the wick. This can hinder the wick’s ability to draw up the wax and maintain a steady flame. If you notice any of these issues, it’s time to save the wick. Trim away any damaged portions and gently clean off any buildup.

This will help restore the wick’s functionality and ensure a longer-lasting, more enjoyable candle experience.

Trim the Wick Properly

When it comes to trimming the wick properly, there are two key points to consider: wick length and burn time.

dusk gifts

Keeping the wick trimmed to about 1/4 inch before each use ensures a controlled flame and prevents excessive smoke or soot.

Additionally, proper trimming promotes a longer burn time, allowing you to enjoy your candle for hours on end.

Advertisement

Wick Length and Burn Time

To ensure a longer burn time and optimal performance, we should regularly trim the candle wick to the recommended length. Proper wick maintenance is crucial for achieving maximum burning efficiency. When a wick becomes too long, it can cause a larger flame, excessive smoke, and uneven burning. Trimming the wick to the right length helps control the size of the flame, allowing the candle to burn more evenly and efficiently. The recommended length for a candle wick is typically around 1/4 inch to 1/8 inch. This ensures a steady burn and minimizes the risk of the flame becoming too large or flickering excessively. By following these simple steps, we can prolong the life of our candles and enjoy their warm glow for longer periods.

Wick Length (in inches) Burn Time
1/4 6 hours
1/8 4 hours
3/16 5 hours

Benefits of Proper Trimming

Properly trimming the candle wick offers us numerous benefits, including a longer burn time and a more efficient and even flame. By implementing the right maintenance techniques, we can maximize the performance and lifespan of our candles.

candle shack discount code

Here are some key benefits of trimming the wick properly:

  • Longer burn time: Trimming the wick to the recommended length ensures that the flame burns at an optimal rate, preventing excessive soot and carbon buildup. This allows the candle to burn for a longer duration, giving us more enjoyment.
  • Efficient flame: A properly trimmed wick creates a more efficient flame, resulting in a steady and consistent burn. This means less wasted wax and a more even distribution of fragrance throughout the room.
  • Reduced soot and smoke: Trimming the wick prevents excessive smoke and soot from forming, keeping the air cleaner and healthier to breathe.
  • Safer burn: A well-trimmed wick reduces the risk of the flame becoming too large or flickering excessively, minimizing the chances of accidents or fire hazards.

By understanding the benefits of proper wick trimming, we can ensure an enhanced candle experience.

Now, let’s delve into the next section and explore how to remove excess wax buildup.

Remove Excess Wax Buildup

We can easily remove excess wax buildup from a candle wick by gently scraping it off with a butter knife or a similar tool.

Advertisement

candlesticks patterns

When a candle burns, wax tends to accumulate on the wick, obstructing the flame and preventing it from burning properly. This can lead to a weak or flickering flame, reducing the overall performance of the candle.

To revive an old wick, it’s essential to remove this excess wax buildup. By carefully scraping the wick, we can eliminate the accumulated wax and restore the wick’s functionality.

This step is crucial in preventing wick breakage, as excessive wax buildup can make the wick brittle and prone to breaking. Therefore, it’s important to regularly inspect and clean the wick to ensure optimal burning conditions and extend the life of the candle.

Straighten a Crooked Wick

By gently manipulating the wick, straightening its crooked shape is an effective way to ensure a steady and even burn. To help you master the art of straightening a crooked wick, here are some expert techniques to prevent wick damage:

candle holders amazon

  • Tweezers Method: Use a pair of tweezers to carefully straighten the wick by gently pulling it in the desired direction.
  • Poke and Push Technique: Use a toothpick or a small stick to poke the wick and push it back into a straight position.
  • Heat and Mold Approach: Light the candle and allow the wax to slightly melt. Then, use your fingers to mold the wick into a straight shape before the wax hardens.
  • Rotate and Adjust: Rotate the candle periodically while it’s burning to ensure an even burn and prevent the wick from becoming crooked.

Re-center a Displaced Wick

To re-center a displaced wick, gently guide it back into the center of the candle using a toothpick or small stick.

When a candle is burned, the heat can sometimes cause the wick to shift or move away from the center, which can lead to an uneven burn and wasted wax.

Advertisement

To prevent wick displacement, it’s important to ensure that the wick is properly centered before lighting the candle.

If you notice that the wick has been displaced during burning, it’s relatively easy to reposition it. Simply insert the toothpick or small stick next to the wick and gently push it back towards the center until it’s in the desired position.

candle holders amazon

This will ensure that the candle burns evenly and efficiently, prolonging its lifespan.

Reattach a Detached Wick

Sometimes, candle wicks can become detached from the wax, requiring a simple method to reattach them and continue enjoying a beautiful candle. Here are some effective techniques to reattach a detached wick:

  • Hot glue method: Use a hot glue gun to apply a small amount of hot glue to the base of the detached wick. Press the wick firmly onto the wax, holding it in place until the glue sets.
  • Double-sided tape method: Cut a small piece of double-sided tape and stick it to the base of the detached wick. Press the wick firmly onto the wax, ensuring it’s securely attached.
  • Wick sticker method: Purchase wick stickers, which are adhesive discs specifically designed for reattaching wicks. Place the sticker on the base of the detached wick and press it firmly onto the wax.
  • Wick sustainer method: If the wick sustainer is still intact, slide it back into the base of the detached wick, ensuring it’s secure.

Revive a Drowned Wick

To revive a drowned wick, we can follow a simple method that will help restore its functionality and keep your candle burning brightly. When a wick becomes submerged in melted wax, it can lose its ability to draw up fuel and ignite properly.

To prevent wick drowning in the first place, always trim your wick to about 1/4 inch before lighting your candle. If your wick does end up submerged, there’s no need to despair.

Advertisement

candles uk

First, extinguish the candle and allow it to cool completely. Then, carefully remove any excess wax around the wick using a toothpick or a small knife.

Next, relight the candle and observe if the wick is drawing up the melted wax and burning properly. If not, repeat the process until the wick is fully revived.

Store Candles Properly for Future Use

When it comes to storing candles for future use, there are a few key techniques that can help preserve their quality.

First, it’s important to trim the wick before storing to prevent any potential damage or soot buildup.

candlesticks forex

Additionally, keeping candles in a cool, dry place away from direct sunlight can help extend their lifespan.

Advertisement

Lastly, if you have any old candles with worn-out wicks, there are methods to revive them and make them usable again.

Wick-Saving Techniques

We always store our candles properly to ensure the wicks remain intact for future use. Here are some wick-saving tips that can help prolong the life of your candles:

  • Trim the wick before each use: Trimming the wick to around ¼ inch prevents excessive smoking and mushrooming, which can shorten the lifespan of the wick.
  • Avoid drafts: Placing candles in draft-free areas reduces the likelihood of the wick flickering and burning unevenly, which can lead to wick damage.
  • Use a snuffer: Snuffing out the candle with a snuffer instead of blowing it out helps prevent the wick from getting damaged or displaced.
  • Store candles in a cool, dark place: Extreme temperatures and exposure to sunlight can cause the wax to melt or discolor, affecting the overall quality of the candle.

By following these wick-saving techniques, you can ensure that your candles remain in good condition for future use.

ecoya candles myer

Now, let’s move on to the next section about long-lasting candle storage.

Long-Lasting Candle Storage

Proper candle storage ensures the longevity of our candles for future use. To preserve the fragrance and maximize the lifespan of your candles, follow these longevity tips.

Firstly, store your candles in a cool, dry place away from direct sunlight, as heat can cause them to melt or warp.

Advertisement

Secondly, keep them in airtight containers or bags to prevent dust and dirt from settling on the wax surface. This will help preserve their fragrance and prevent any unwanted odors from seeping in.

candle making supplies

Additionally, make sure to store your candles upright to maintain their shape and prevent any bending or breakage.

Reviving Old Candle Wicks

To bring old candle wicks back to life and ensure their future use, we can revive them through simple yet effective techniques. Here are some ways to revive old candle wicks and preserve their quality:

  • Trim the wick: Use a pair of scissors to trim the burnt or charred part of the wick. This will expose a fresh section of the wick, allowing it to burn more efficiently.
  • Soak the wick: If the wick is dry and brittle, you can soak it in a bowl of warm water for a few minutes. This will help soften the wick and make it more pliable for future use.
  • Use wick alternatives: If the wick is completely unusable, you can consider using wick alternatives such as cotton string, wooden sticks, or even dried herbs like lavender stems. These alternatives can still provide a lovely and fragrant candle experience.
  • Store candles properly: To preserve wick quality for future use, store candles in a cool and dry place away from direct sunlight. This will prevent the wick from drying out or becoming brittle over time.

Frequently Asked Questions

Can I Reuse a Candle Wick That Has Already Been Burned Down Completely?

Yes, you can reuse a candle wick that has been burned down completely. By salvaging burnt wicks, you can trim them and attach them to a new candle. It’s a resourceful way to extend the life of your wicks.

How Often Should I Trim the Wick of a Candle?

When it comes to properly handling a lit candle, it’s essential to know how often to trim the wick. We’ve learned that trimming it to the right size prevents excessive smoking and ensures a clean, even burn.

dusk catalogue 2017

What Can I Do if I Accidentally Break the Wick While Trimming It?

If the wick of a candle accidentally breaks while trimming it, there are a few options. First, you can repair the broken wick by using a wick holder or by tying a new piece of cotton string around it. Alternatively, you can use an alternative wick, such as a wooden or hemp wick, to continue enjoying your candle.

Advertisement

Is It Possible to Save a Wick That Has Been Completely Submerged in Wax?

Recovering submerged wicks can be challenging, but with patience and care, we can save them. Reusing burnt wicks, however, is not recommended as they may not burn evenly or emit a strong fragrance.

What Is the Best Way to Store Candles to Ensure Their Longevity?

Proper candle storage techniques are crucial for extending the lifespan of your candles. By keeping them in a cool, dark place and away from heat sources, you can ensure they burn evenly and last longer.

Conclusion

In conclusion, by following these simple steps, you can easily save a candle wick and prolong the life of your beloved candles.

candle making workshop

Remember to assess the wick’s condition, trim it properly, remove any excess wax buildup, and straighten or re-center it if needed.

In case of a detached or drowned wick, you can reattach or revive it with ease.

Advertisement

By storing your candles properly, you can ensure their future use.

So don’t let a faulty wick dim your candle’s glow, take action and let your light shine bright!

the candle library stockists

Continue Reading

Trending