Connect with us

Candles

How Long Does a 8 Oz Candle Burn

Published

on

Were you aware that the lifespan of an 8 oz candle can differ greatly? Grasping the duration of a candle’s burn is essential for individuals aspiring to excel in the art of candle maintenance.

In this guide, we will explore the factors that influence the duration of an 8 oz candle’s burn. From the type of wax used to the fragrance added, each element plays a role in determining how quickly the candle will burn.

By learning about these factors and taking proper care of your candles, you can estimate the burn time of an 8 oz candle accurately. So, let’s delve into the world of candle burning times and uncover the secrets behind a long-lasting, fragrant glow.

Key Takeaways

  • The size and shape of the candle, as well as the thickness of the wick, can affect the burn time of an 8 oz candle.
  • Factors such as the composition of the wax and the presence of additives or enhancers can also impact the burn time of an 8 oz candle.
  • Environmental conditions, such as temperature and airflow, can influence how long an 8 oz candle burns.
  • Proper candle care, including trimming the wick and using the appropriate candle care tools, is important for maximizing the burn time of an 8 oz candle.

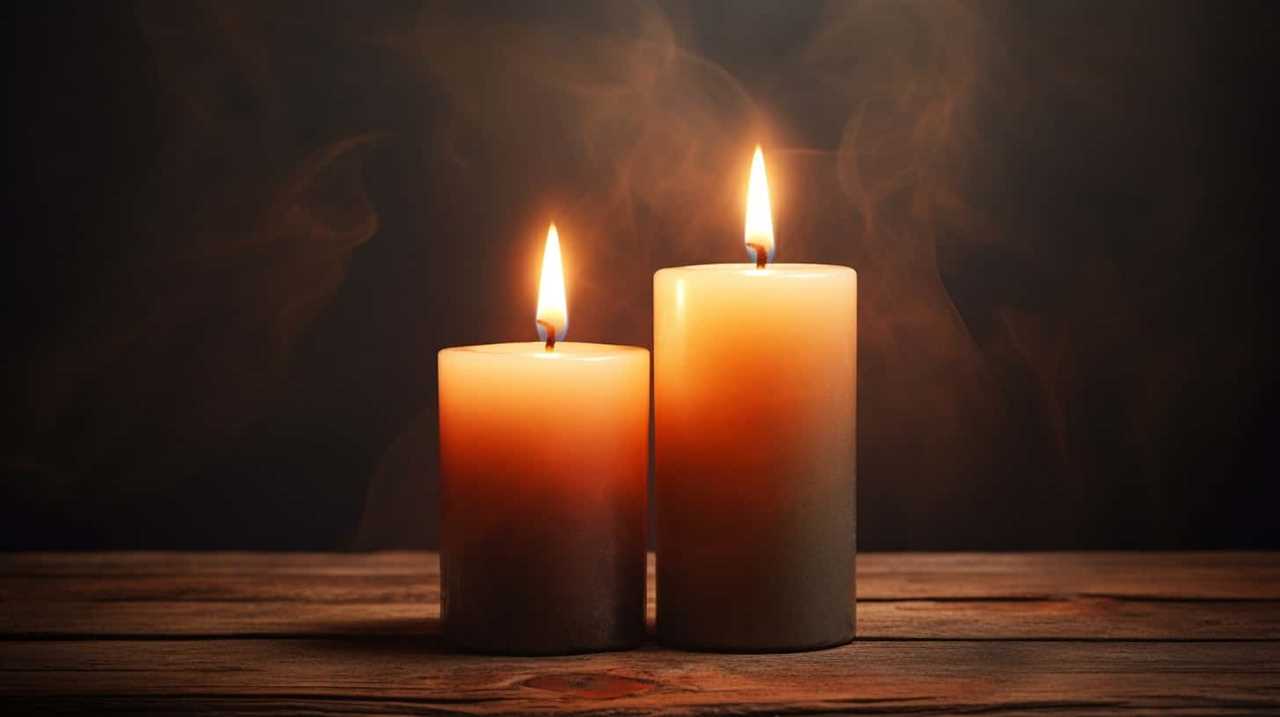
Candle Size and Burn Time

In our experience, the larger the size of the candle, the longer it tends to burn. When it comes to factors affecting burn time, candle size plays a significant role. A larger candle contains more wax, which means there’s more fuel for the flame. This results in a longer burning duration compared to smaller candles.

candlewood suites

Additionally, larger candles tend to have a wider surface area, allowing for a more consistent and even burn. This not only maximizes fragrance dispersal but also ensures a longer-lasting scent experience. It’s important for those seeking mastery to consider the size of the candle when selecting one to maximize fragrance and extend burn time.

Advertisement

Understanding the relationship between candle size and burn time is crucial in optimizing the overall candle experience. Moving forward, let’s explore the various factors that influence burning duration.

Factors That Influence Burning Duration

Several factors can influence the burning duration of an 8 oz candle. To maximize burn time, it’s important to consider the following factors:

  1. Wax Composition: The type and quality of wax used in the candle can greatly affect its burning duration. Harder waxes, such as soy wax or beeswax, tend to burn slower and last longer compared to softer waxes like paraffin.
  2. Wick Size: The size of the wick plays a crucial role in the burn time of the candle. A larger wick will produce a bigger flame and result in faster burn, while a smaller wick will produce a smaller flame and slower burn.
  3. Drafts and Airflow: Excessive drafts or strong airflow can cause the candle to burn faster. It’s important to keep the candle away from open windows, fans, or air conditioning vents to maximize its burning duration.
  4. Candle Care: Proper candle care techniques, such as trimming the wick before each use and ensuring the candle burns evenly, can help maximize the burning duration of an 8 oz candle.

Understanding Candle Wick Types

To understand candle wick types, we need to examine how they affect the burning duration of an 8 oz candle. Candle wicks come in various materials, such as cotton, hemp, or wood, each with its own characteristics. The size and composition of the wick determines the amount of fuel the candle can draw and burn.

candle homewares

A larger wick will typically produce a larger flame and burn more fuel, resulting in a shorter burning time. On the other hand, a smaller wick will produce a smaller flame, conserving the fuel and prolonging the burning duration. Understanding flame height is crucial in maintaining the optimal burning conditions for your candle. By regularly trimming the wick to a quarter of an inch and ensuring it’s centered, you can promote an even and steady burn.

With this understanding of candle wick types and maintenance, we can now explore the role of wax type in burning time.

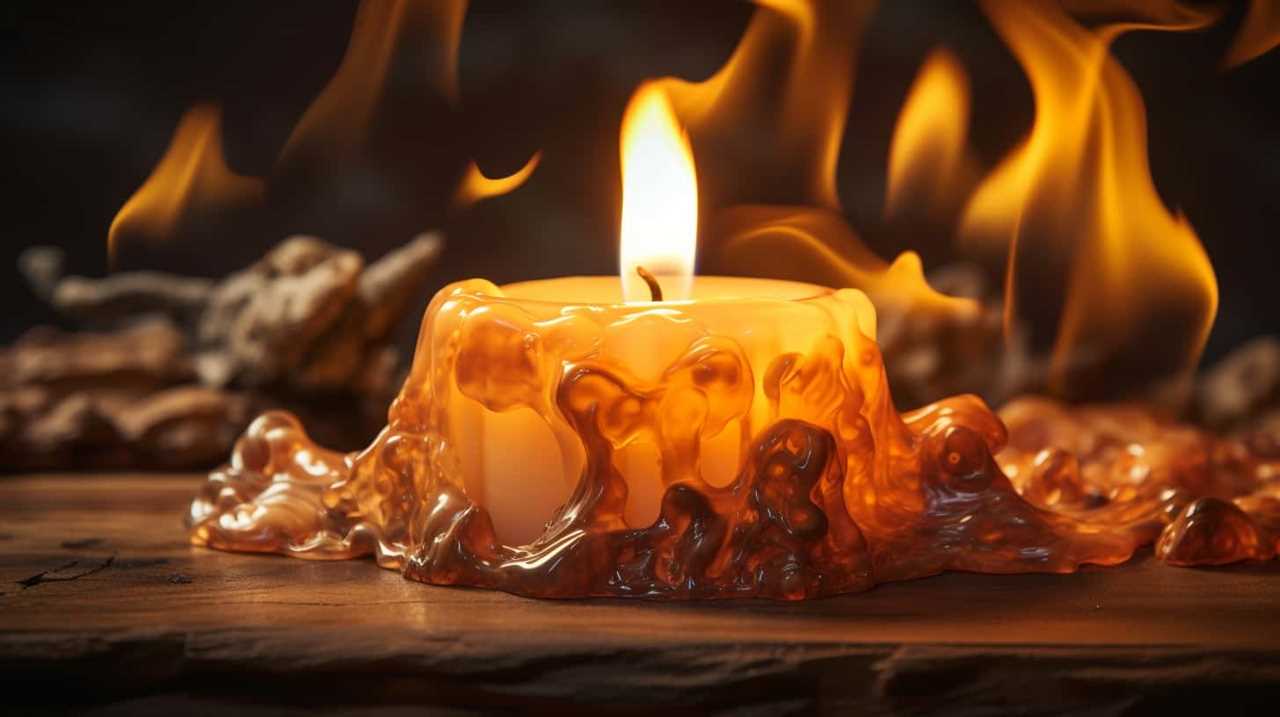
The Role of Wax Type in Burning Time

When it comes to the burning time of an 8 oz candle, the type of wax used plays a crucial role. Different wax types have different melting points and densities, which directly affect the candle’s burn time.

Advertisement

For example, soy wax tends to burn slower than paraffin wax, resulting in a longer-lasting candle. Therefore, understanding the role of wax type in burning time is essential for candle enthusiasts looking to maximize their candle’s lifespan.

yankee candle uk

Wax Type and Duration

Discussing the role of wax type in burning time, we found that different types of wax affect the duration of an 8 oz candle. Here are four key factors that impact the burning time of a candle:

  1. Candle Melting Point: The melting point of the wax determines how quickly it will liquefy and evaporate, affecting the rate at which the candle burns. Waxes with higher melting points tend to burn slower and last longer.
  2. Candle Fragrance Options: Some wax types, like soy or beeswax, have the ability to hold fragrance oils better than others. The presence of fragrance oils can impact the burning time, as the added oils contribute to the overall burn rate.
  3. Wax Density: The density of the wax affects how much fuel it contains. Denser waxes typically have a longer burning time as they provide a greater amount of fuel for the flame.
  4. Wax Additives: Various additives, such as stearic acid or vybar, can be incorporated into the wax to enhance its performance. These additives can alter the burning characteristics and duration of the candle.

Understanding the role of wax type in burning time is crucial to selecting the right candle for your needs. Now, let’s delve deeper into the relationship between burning time and wax.

Burning Time and Wax

Different wax types play a significant role in determining the burning time of an 8 oz candle. The choice of wax can affect the candle burn rate and overall duration.

When it comes to burning time, the type of wax used is crucial. Some commonly used waxes include paraffin, soy, and beeswax. Paraffin wax, which is derived from petroleum, is known for its long burn time. It has a slow burn rate, making it ideal for candles that need to last longer.

candle making kits for adults

On the other hand, soy wax, made from soybean oil, tends to have a faster burn rate compared to paraffin wax. Beeswax, derived from bees, also burns slowly, contributing to longer burning times.

Advertisement

Additionally, the shape of the candle can also impact burning time. Candles with wider diameters tend to burn faster, while taller, narrower candles tend to burn slower due to the smaller surface area exposed to the flame.

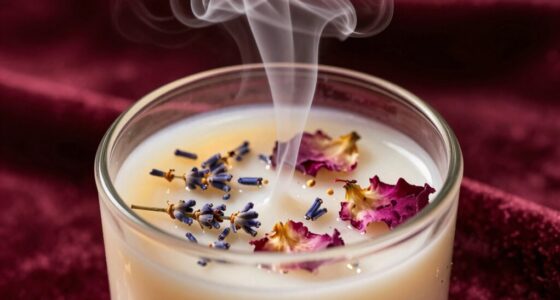
How Fragrance Affects Burn Time

Fragrance significantly impacts the burn time of an 8 oz candle. The type and strength of the candle fragrance can have a profound effect on how long the candle will last. Here are four key factors to consider:

  1. Concentration: A highly concentrated fragrance oil will release a stronger scent, but it may also burn faster due to the higher amount of fragrance being released into the air.
  2. Type of fragrance: Some fragrances, such as floral or fruity scents, tend to have a lighter molecular structure, resulting in a faster burn time. On the other hand, woody or spicy scents with heavier molecules may burn slower.
  3. Quality of fragrance oil: Higher quality fragrance oils often contain fewer impurities, resulting in a cleaner burn and longer-lasting scent.
  4. Wick size: The size of the wick should be appropriate for the fragrance strength. A larger wick may release more fragrance, but it can also cause the candle to burn faster.

Understanding how candle fragrance and scent impact burn time is essential for maximizing the longevity of your 8 oz candle. Now, let’s explore some tips for maximizing burn time.

candle shack lemongrass and ginger

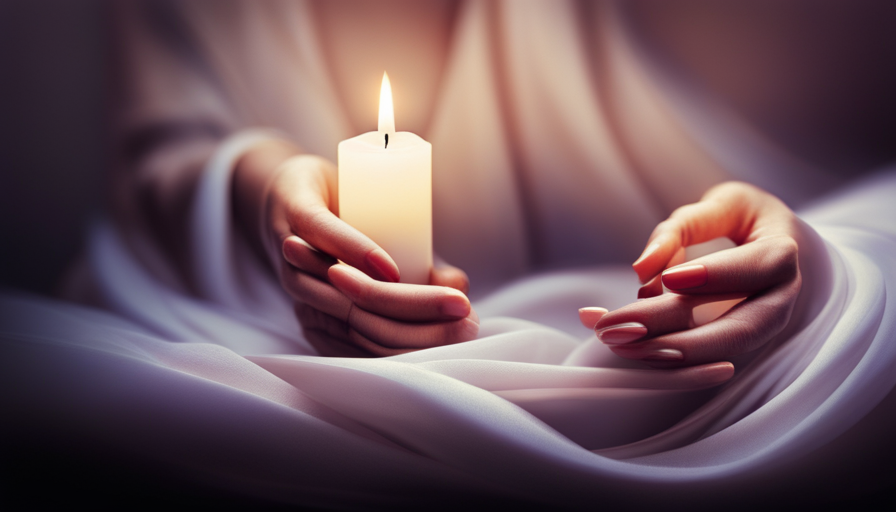
Tips for Maximizing Burn Time

To maximize the burn time of our 8 oz candle, there are several tips that we can follow.

First, maximizing scent throw is essential. Ensure that the candle is placed in a well-ventilated area to allow the fragrance to disperse effectively. Avoid placing the candle near drafts, as it can cause uneven burning and reduce the burn time.

Second, choosing the right candle holder is crucial. Opt for a holder that’s heat resistant and properly sized for the candle. This will prevent heat damage and ensure a consistent burn.

Advertisement

Additionally, using a candle snuffer instead of blowing out the flame can help maintain the integrity of the wick, leading to a longer burn time.

candle salad

By following these tips, we can optimize the burn time and enjoy the fragrance of our 8 oz candle for longer periods.

Transitioning to the importance of proper candle care, let’s explore how simple steps can extend the lifespan of our candles.

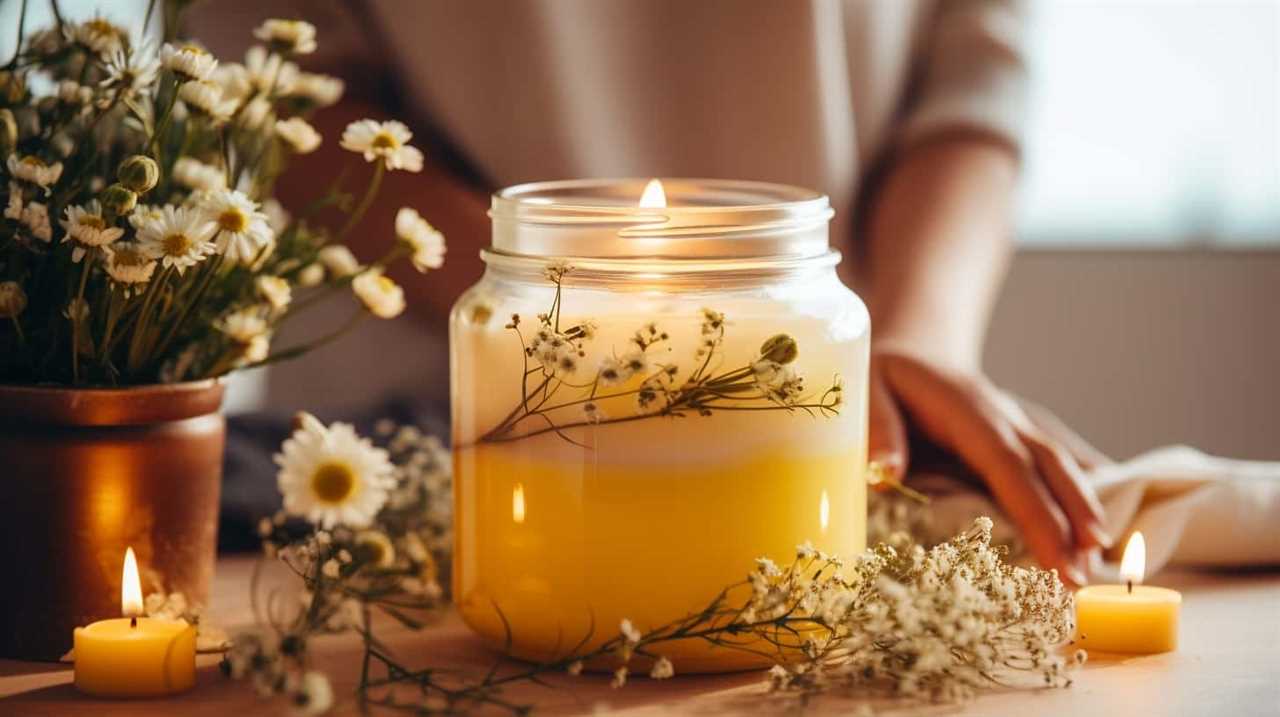
The Importance of Proper Candle Care

Proper candle care is essential to ensure optimal burn time and a safe candle experience.

Regularly trimming the wick to a quarter of an inch helps promote a clean and even burn, preventing excessive smoke and soot.

Advertisement

candle holder

Avoiding tunneling issues by allowing the candle to burn long enough for the wax to melt to the edges helps maximize the lifespan of the candle.

Always remember to extinguish the candle by gently blowing it out or using a snuffer to prevent accidents and prolong the candle’s burn time.

Wick Trimming Techniques

We regularly trim the wick of our 8 oz candles to ensure optimal burning conditions. Proper wick maintenance is essential for achieving a clean and even burn.

Here are four candle burning tips to help you master the art of wick trimming:

doji candle

  1. Trim the wick to 1/4 inch before each use: A shorter wick promotes a steady flame and reduces soot and smoke.
  2. Use sharp scissors or wick trimmers: Cutting the wick cleanly prevents fraying and ensures an even burn.
  3. Remove any debris or ash from the candle: This prevents the wick from getting clogged and helps maintain an even flame.
  4. Avoid over-trimming: Trimming the wick too short may cause the flame to become weak or extinguish.

By following these wick trimming techniques, you’ll maximize the lifespan of your candle and achieve a consistent, enjoyable burn.

Now, let’s move on to discussing how to avoid tunneling issues.

Advertisement

Avoiding Tunneling Issues

Implementing proper candle care techniques can help prevent tunneling issues, ensuring a longer burn time and maximizing the enjoyment of your 8 oz candle. Tunneling occurs when the candle burns unevenly, leaving a tunnel down the center and wasting valuable wax. To avoid candle tunneling, it is crucial to trim the wick to a quarter of an inch before each use. This ensures a clean, even burn and prevents the flame from becoming too large, which can lead to uneven burning. Additionally, it is important to allow the candle to burn for a sufficient amount of time during each use. This allows the entire top layer of wax to liquefy, preventing tunneling and ensuring an even burn throughout the life of the candle. By following these simple candle care techniques, you can avoid tunneling and enjoy a longer-lasting, more beautiful burn.

Candle Care Techniques Benefits
Trim the wick Prevents tunneling, ensures even burn
Burn for sufficient time Allows top layer of wax to liquefy, prevents tunneling
Avoid drafts Promotes even burn, prevents tunneling

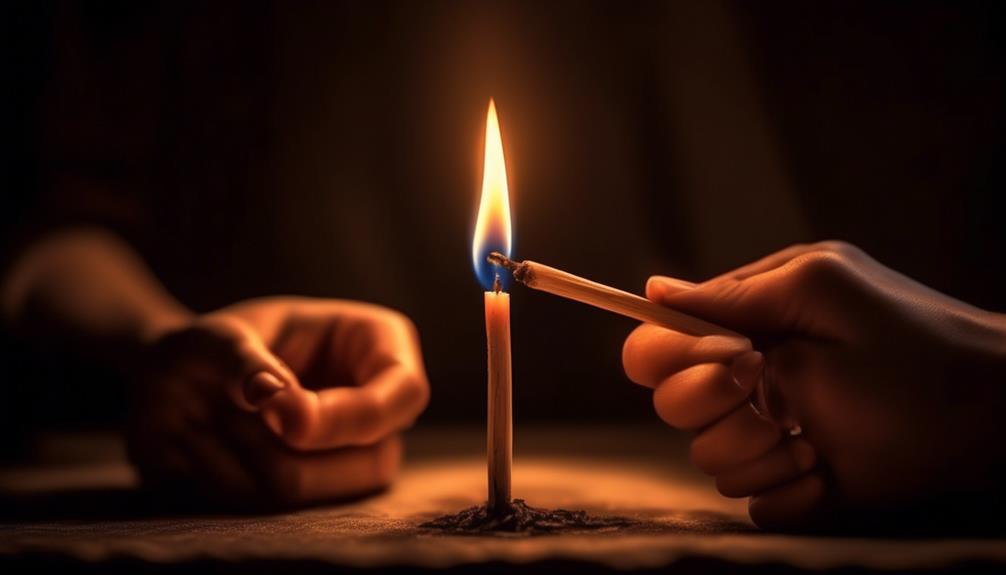
Proper Extinguishing Methods

To ensure a longer burn time and maintain the overall quality of your 8 oz candle, it’s important to understand the significance of proper extinguishing methods. Here are four extinguishing techniques for candle safety and common mistakes to avoid:

candle in the wind

  1. Snuffing: Gently press a snuffer or a metal spoon against the wick until it’s submerged in the wax. This prevents smoke and minimizes soot buildup.
  2. Candle dipper: Use a candle dipper to bend the wick into the melted wax pool. This cuts off the oxygen supply, extinguishing the flame without smoke or splattering wax.
  3. Candle cap: Place a heat-resistant cap or lid over the candle, suffocating the flame. This method is effective for jar candles.
  4. Never blow: Blowing out a candle can cause hot wax to splatter or reignite the flame. It also creates unnecessary smoke and odor.

By employing these proper extinguishing methods, you can ensure a safer burning experience and maximize the longevity of your 8 oz candle.

Now let’s move on to how to estimate burn time for an 8 oz candle.

How to Estimate Burn Time for an 8 Oz Candle

To calculate the burn time for an 8 oz candle, measure the diameter and height of the candle. The burn time of a candle can vary depending on several factors, including the composition of the wax, the wick size, and the environment in which it is burned. By estimating the burn time, you can better plan for the duration of the candle’s use.

Here is a table that illustrates the burn time estimates for an 8 oz candle based on diameter and height:

Advertisement

yankee candle singapore

Diameter (inches) Height (inches) Estimated Burn Time (hours)
2 3 20
3 4 30
4 5 40

Keep in mind that these estimates are approximate and can vary depending on the specific factors influencing the duration of the candle. In the next section, we will compare the burn times of different candle sizes to provide a broader understanding of candle burn times.

Comparing Burn Times of Different Candle Sizes

When comparing the burn times of different candle sizes, there are a few key points to consider.

Firstly, burn time variations can occur due to factors such as wax type, wick size, and fragrance concentration.

Additionally, the size of the candle can impact its burn time, with larger candles typically burning for a longer duration.

candles direct sale

Lastly, it’s important to determine which candle holds the title for the longest burning time, as this can vary depending on the specific candle size and other factors.

Advertisement

Burn Time Variations

When comparing the burn times of different candle sizes, we can observe variations in their duration. The burn time variability is influenced by several factors affecting burn time. Here are four key factors to consider:

  1. Candle size: Larger candles usually have a longer burn time compared to smaller ones. This is because they contain more wax and therefore have more fuel to burn.
  2. Wick thickness: Thicker wicks tend to burn more slowly, resulting in a longer burn time. Thinner wicks, on the other hand, may burn faster and have a shorter duration.
  3. Wax quality: The type and quality of wax used in a candle can affect its burn time. Certain waxes, such as soy or beeswax, generally burn slower and last longer than others.
  4. Environmental conditions: The surrounding environment plays a role in burn time. Factors like air circulation, humidity, and temperature can impact how quickly a candle burns.

Understanding these factors can help you choose the right candle size and type to achieve your desired burn time.
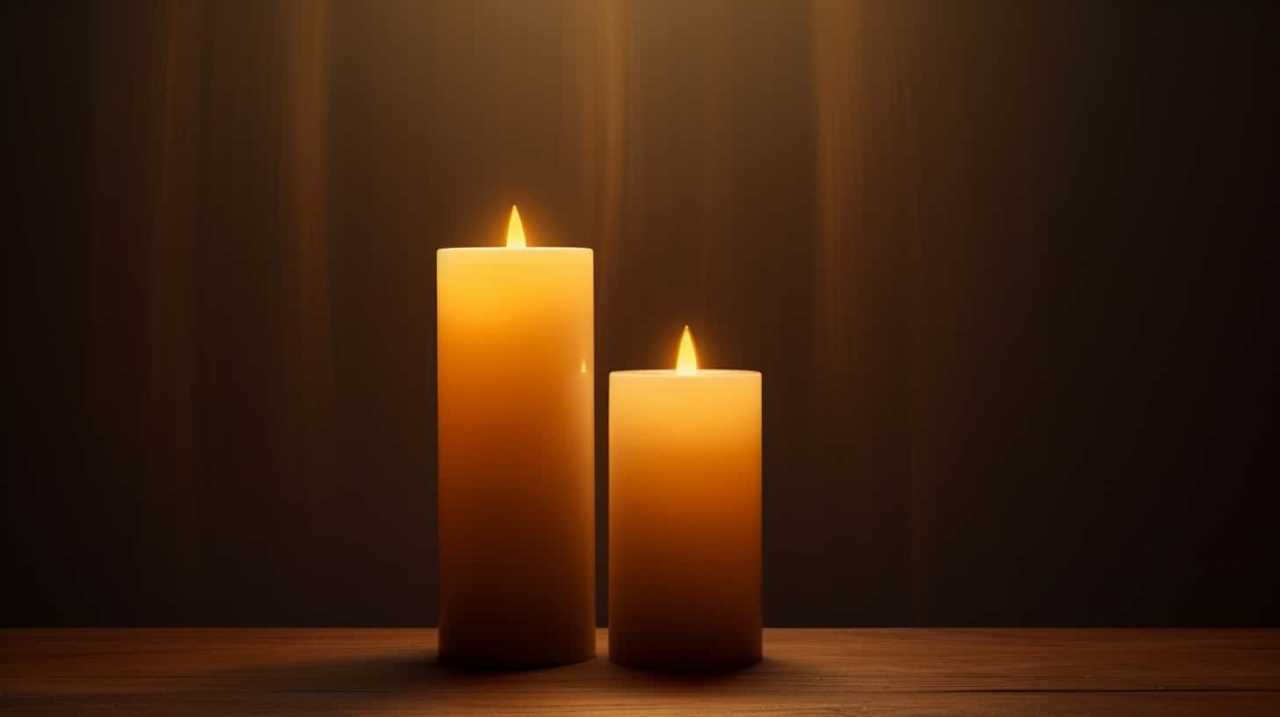
Candle Size Impact

As we compare the burn times of different candle sizes, the impact of candle size becomes evident. When it comes to candle size comparison, larger candles generally have longer burn times compared to smaller ones. This is because larger candles contain more wax and have larger wicks, allowing for a slower and more controlled burn. Additionally, the container shape can also have an impact on the burn time of a candle. A cylinder-shaped container, for example, provides a more efficient burn compared to other shapes, as it allows for better air circulation and heat distribution. To illustrate this, here is a table showcasing the burn times of different candle sizes and container shapes:

cheap candles online australia

Candle Size Container Shape Burn Time
8 oz Cylinder 40 hours
4 oz Square 20 hours
12 oz Round 60 hours

Longest Burning Candle?

We frequently compare the burn times of different candle sizes to determine which one is the longest burning. When it comes to long burning candles, the candle burn rate becomes a crucial factor.

Here are four examples of candle sizes and their estimated burn times:

  1. 8 oz candle: This size typically burns for around 40-50 hours, making it a popular choice for everyday use.
  2. 16 oz candle: With a larger size, this candle can burn for approximately 80-100 hours, perfect for longer-lasting fragrance.
  3. 3-wick candle: These candles, often found in larger glass jars, can burn for an impressive 100-150 hours due to the multiple wicks.
  4. Pillar candle: These thick, cylindrical candles can vary in size, but the larger ones can burn for up to 200 hours, providing a long-lasting source of light and ambiance.

Understanding the burn times of different candle sizes allows you to select the perfect option for your needs, whether it’s for relaxation, decoration, or creating a cozy atmosphere.

Frequently Asked Questions About Candle Burning Times

Throughout our experience with candles, we’ve often been asked about the burning times of different candle sizes and weights. When it comes to candle burning times, there are several factors to consider, including the size and weight of the candle, the type of wax used, and the quality of the wick.

Advertisement

ecoya hand cream set

Generally, larger and heavier candles will burn for a longer period of time compared to smaller ones. However, it’s important to prioritize candle safety and follow best practices for candle care to ensure a clean and even burn. This includes trimming the wick to ¼ inch before each use, placing the candle on a heat-resistant surface, and keeping it away from drafts or flammable objects.

Frequently Asked Questions

Are There Any Safety Precautions to Consider When Burning an 8 Oz Candle?

Safety tips and best practices when burning an 8 oz candle include keeping it away from flammable objects, not leaving it unattended, and ensuring proper ventilation. Following these precautions will help prevent accidents and ensure a safe candle-burning experience.

Can I Leave the Candle Unattended While It’s Burning?

Leaving candles unattended poses a safety risk. Safety precautions must be taken when burning an 8 oz candle. It is important to never leave a burning candle unsupervised to prevent potential accidents or fire hazards.

Are There Any Specific Instructions for Trimming the Wick of an 8 Oz Candle?

When trimming the wick of an 8 oz candle, it is essential to ensure it is cut to a length of about 1/4 inch. This promotes a cleaner burn and prolongs the candle’s burning time.

candlelight concerts bristol

Can I Use a Different Size Wick for My 8 Oz Candle to Extend Its Burn Time?

Using a different wick size for an 8 oz candle can potentially extend its burn time. However, it’s important to consider the wick material and its compatibility with the candle’s wax.

Advertisement

Are There Any Specific Storage Recommendations for 8 Oz Candles to Maintain Their Quality and Burn Time?

When it comes to maintaining the quality and burn time of 8 oz candles, there are a few storage tips to keep in mind. Properly store them in a cool, dry place away from sunlight to preserve their fragrance and longevity.

Conclusion

In conclusion, while we may expect an 8 oz candle to burn for a specific amount of time, various factors can influence its burning duration.

From the type of wax and fragrance used, to the care and maintenance of the candle, there are many variables to consider.

candle shack calculator

So, next time you light your 8 oz candle, remember that its burn time may just surprise you. Keep those wicks trimmed and enjoy the flickering glow of irony in the world of candle burning.

Advertisement

I'm Jane and I love candles. I have candles everywhere in my house--in every room, on every surface. I love the smell of candles, and I love how they make my place feel warm and cozy. Candles are really important to me. They help me relax and de-stress after a long day. They remind me of happy memories, and they make me feel calm and peaceful. I can't imagine my life without candles!

Continue Reading
Advertisement

Candles

How to Use a Money Candle

Published

on

By

Are you prepared to discover the keys to generating wealth and abundance? Allow us to demonstrate how employing a money candle can draw financial success into your existence.

Imagine this: you light a beautiful green candle, infused with powerful energies of abundance, and watch as its flame dances with magic. As we guide you through the steps, you will learn how to choose the perfect money candle, set a clear intention for wealth, and create a sacred space to enhance the candle’s energy.

Through meditation and visualization, you will tap into the limitless potential of financial abundance. Get ready to ignite your wealth manifestation journey with the power of a money candle.

Let’s begin!

Advertisement

candlesticks patterns

Key Takeaways

  • Choose a money candle based on financial goals and personal preferences, considering candle color, size, shape, and decorations.
  • Set clear intentions for wealth and align them with a chosen money candle.
  • Create a sacred space by clearing clutter, visualizing goals, incorporating symbols of abundance, and invoking divine presence.
  • Light the money candle with a calm and focused state of mind, visualizing the flame as a symbol of financial blessings.

Choosing the Right Money Candle

When selecting a money candle, we should consider our specific financial goals and personal preferences. Finding the best color for the candle is an important aspect to consider. The color of the candle symbolizes different aspects of wealth and abundance. For example, green is often associated with financial prosperity and growth, while gold represents wealth and success. Understanding the symbolism behind each color can help us align our intentions and desires with the energy of the candle.

Additionally, we should also consider the size and shape of the candle, as well as any additional decorations or symbols that resonate with our financial goals. By carefully choosing a money candle that speaks to us on a personal level, we can set the stage for a powerful intention-setting ritual in the next section.

Setting the Intention for Wealth

To set the intention for wealth, we need to focus on our specific financial goals and align our desires with the energy of the chosen money candle. Here are four steps to help you manifest wealth and abundance:

  1. Clarify your financial goals: Take the time to define what wealth means to you. Is it achieving a certain income level, owning a home, or being debt-free? Clearly identify your goals to create a clear intention.
  2. Choose the right money candle: Look for a candle specifically designed for wealth manifestation. Consider candles infused with ingredients like green aventurine or citrine, which are believed to attract prosperity.
  3. Practice affirmations for abundance: Use positive affirmations that align with your financial goals. Repeat phrases like ‘I am worthy of wealth and abundance’ or ‘Money flows easily and effortlessly into my life’ while lighting the money candle.
  4. Visualize your desired outcome: Close your eyes and visualize yourself already achieving your financial goals. Imagine the feeling of wealth and the abundance it brings. Allow this visualization to fill you with positive energy and belief in your ability to manifest wealth.

Cleansing and Preparing the Candle

To cleanse and prepare the money candle, we gather the necessary materials. Before beginning any money manifestation ritual, it’s crucial to cleanse the candle of any negative or stagnant energy. This ensures that the candle is a pure channel for your intentions and desires.

candle salad

There are various methods for cleansing, such as smudging the candle with sacred herbs like sage or palo santo, or passing it through the smoke of incense. Visualizing the candle being cleansed by a stream of white light is also effective.

Once the candle is cleansed, it’s ready to absorb the energy of your intentions and amplify your desires.

With the candle cleansed and prepared, we can now move on to creating a sacred space for the money manifestation ritual.

Advertisement

Creating a Sacred Space

Once the money candle is cleansed and prepared, we create a sacred space to enhance the energy and focus of our money manifestation ritual. Creating a sacred space is essential to cultivating the right atmosphere for abundance to flow into our lives.

floral candle

Here are four key elements to consider when creating a sacred space:

  1. Clear the space: Remove any clutter or negative energy that may be present. Use sage or other cleansing tools to purify the area.
  2. Set intentions: Clearly state your intentions for creating abundance in your life. Visualize your goals and desires as already manifesting.
  3. Use sacred symbols: Incorporate symbols that represent abundance and prosperity, such as money signs, green candles, or images of wealth.
  4. Invoke divine presence: Call upon the energy of the universe, your higher self, or any deity or spirit guide that resonates with you to bless and support your money manifestation ritual.

Lighting the Money Candle

We light the money candle to activate its energy and begin our manifestation process. The lighting technique for a money candle is simple yet important.

Before lighting the candle, ensure that you’re in a calm and focused state of mind. Take a moment to ground yourself and set your intention for attracting abundance and prosperity.

Use a match or a lighter to ignite the wick of the candle, and as you do so, visualize the flame as a symbol of the financial blessings that are coming your way.

candlesticks charts

The benefits of money candles are twofold. Firstly, the act of lighting the candle helps to shift your mindset and align your energy with abundance. Secondly, the candle itself serves as a powerful tool for manifestation, amplifying your intention and attracting financial prosperity.

Advertisement

With the candle lit, we can now move on to the next step: meditating with the money candle.

Meditating With the Money Candle

Now, let’s delve into the practice of meditating with the money candle as we harness its energy to attract abundance and prosperity. Meditation techniques can help us focus our intentions and tap into the power of the candle’s symbolism.

Here are four techniques to enhance your money manifestation meditation:

candlesticks trading

  1. Set your intention: Before starting your meditation, clearly state your intention to attract wealth and abundance into your life. Visualize yourself surrounded by financial prosperity and feel the positive energy flowing towards you.
  2. Use affirmations: Repeat affirmations related to money and abundance during your meditation. For example, you can say, ‘I am open to receiving unlimited wealth and prosperity’ or ‘Money flows to me effortlessly and abundantly.’
  3. Visualize your goals: Imagine yourself achieving your financial goals. See yourself living a life of abundance, enjoying financial freedom, and fulfilling your dreams. Visualize the steps you need to take to manifest these goals.
  4. Practice gratitude: Express gratitude for the money and abundance that already exists in your life. Focus on the blessings and opportunities that money has brought you. This attitude of gratitude attracts more abundance into your life.

Visualizing Financial Abundance

When it comes to achieving financial abundance, visualization plays a crucial role.

By visualizing wealth and abundance, we can manifest our desires into reality.

The power of a positive mindset can’t be underestimated, as it attracts prosperity and opens the door to financial opportunities.

Advertisement

With intention and focus, we can use visualization techniques to attract wealth and create a life of financial abundance.

candle making supplies

Manifesting Wealth Through Visualization

To manifest wealth through visualization, one key step is to clearly envision our ideal financial abundance. Visualization techniques can be a powerful tool in attracting prosperity into our lives. Here are four effective strategies to help us develop an abundance mindset and manifest wealth:

  1. Create a vivid mental picture: Close your eyes and imagine yourself living the life of financial abundance. See yourself achieving your financial goals, surrounded by luxury and comfort.
  2. Use affirmations: Repeat positive affirmations that reinforce your belief in abundance. Affirmations like ‘I am deserving of wealth and success’ or ‘Money flows effortlessly into my life’ can help reprogram your subconscious mind.
  3. Visualize specific financial goals: Focus on visualizing specific financial goals, such as paying off debts, buying a dream house, or starting a successful business. See yourself achieving these goals and experiencing the joy and fulfillment that comes with it.
  4. Practice gratitude: Cultivate a sense of gratitude for the wealth and abundance you already have. By appreciating what you have, you attract more positive experiences and opportunities for financial growth.

By mastering these visualization techniques and adopting an abundance mindset, we can harness the power of our thoughts to manifest wealth and create a life of financial abundance.

Transitioning to the subsequent section about the power of a positive mindset, let’s explore how our mindset can shape our financial reality.

Power of Positive Mindset

As we explore the power of a positive mindset in visualizing financial abundance, we can see how our thoughts and beliefs shape our financial reality. By adopting an abundance mindset and utilizing positive affirmations, we can attract wealth and prosperity into our lives. Positive affirmations are statements that reinforce positive beliefs about ourselves and our financial situation. When repeated daily, they help to reprogram our subconscious mind and align our thoughts with our desired financial outcomes. Here is a table that illustrates the power of positive affirmations in transforming our mindset:

doji candle

Affirmation Belief Outcome
I am deserving of financial abundance Believing in my worthiness for wealth Attracting opportunities for financial success
Money flows freely into my life Trusting in the abundance of the universe Manifesting financial prosperity
I am grateful for the wealth I have Cultivating gratitude for current financial blessings Opening doors for more abundance

Attracting Prosperity With Intention

By intentionally visualizing financial abundance, we can attract prosperity into our lives. It’s important to harness the power of our thoughts and beliefs to manifest our desired financial outcomes. Here are four key strategies for attracting abundance and manifesting money:

Advertisement
  1. Set clear intentions: Clearly define your financial goals and visualize yourself already achieving them. This helps to align your subconscious mind with your desires and signals to the universe what you want to attract.
  2. Practice gratitude: Express gratitude for the abundance that already exists in your life, no matter how small. Gratitude shifts your focus from lack to abundance, attracting more of what you appreciate.
  3. Create a vision board: Compile images and words that represent your financial goals and aspirations. Visualize yourself living your desired lifestyle, focusing on the positive emotions associated with financial abundance.
  4. Take inspired action: Combine visualization with purposeful action towards your financial goals. This shows the universe your commitment and dedication, increasing the likelihood of attracting abundance.

Repeating the Practice for Continued Results

After we have successfully used a money candle to manifest abundance, it is important to continue the practice for sustained and consistent results. Repeating the practice ensures long-term effectiveness, allowing us to harness the full potential of the money candle’s energy. By consistently utilizing this powerful tool, we can cultivate a mindset of abundance and attract financial prosperity into our lives.

To illustrate the importance of repetition, let’s consider the following table:

Week Candle Ritual Affirmations Results
1 Lighting the money candle and visualizing abundance "I am open to receiving wealth and financial success" Increased job opportunities
2 Repeating the ritual with gratitude for current abundance "I am grateful for the money that flows into my life" Unexpected financial windfall
3 Consistently using the money candle to reinforce positive beliefs "I attract wealth effortlessly and easily" Promotion at work
4 Continuing the practice to maintain financial abundance "I am a magnet for prosperity in all areas of my life" Consistent increase in income

Frequently Asked Questions

Can I Use Any Type of Candle for This Money Manifestation Practice?

When selecting a candle for money manifestation, it’s important to consider the type and size. Not just any candle will do. The right candle can enhance the energy and intention behind your practice.

candle drawing

How Long Should I Meditate With the Money Candle?

When meditating with a money candle, it is important to focus on the duration and visualization techniques. We recommend meditating for at least 15 minutes to fully immerse yourself in the manifestation process.

Can I Use the Same Candle for Multiple Money Manifestation Sessions?

Yes, you can reuse candles for multiple money manifestation sessions. However, it’s important to consider the type of candle you’re using. Some candles are specifically designed for one-time use, while others can be used multiple times.

Is There a Specific Time of Day or Phase of the Moon That Is Best for Lighting the Money Candle?

The best time of day to light a money candle and whether the moon phase is important for money manifestation depends on personal preference and belief. Experiment to find what works best for you.

Advertisement

How Often Should I Repeat This Money Manifestation Practice for Optimal Results?

For optimal results in our money manifestation practice, we should repeat it regularly. By consistently engaging in techniques that enhance our manifestation abilities, we can increase the likelihood of achieving our financial goals.

candlescience

Conclusion

In conclusion, using a money candle can be a powerful tool for attracting wealth and abundance into your life. By carefully choosing the right candle, setting clear intentions, and creating a sacred space, you can enhance the effectiveness of this practice.

Through meditation and visualization, you can align your energy with financial abundance. By repeating this practice regularly, you can experience continued results and manifest the financial prosperity you desire.

Start using a money candle today and watch your financial fortunes change.

Advertisement

Continue Reading

Candles

How to Turn on a Candle Without a Lighter

Published

on

By

Are you prepared to learn how to light a candle without using a lighter? In this tutorial, we’ll demonstrate different techniques for kindling a candle through alternative means.

No longer will you be at the mercy of a missing lighter. By following these steps, you will be able to light up your candle with confidence and ease.

From using matches to harnessing the power of the sun, we have got you covered. So, let’s delve into the world of candle lighting mastery and explore these ingenious methods.

Get ready to ignite your candle in ways you never thought possible!

Advertisement

how does a candle burn

Key Takeaways

  • Lighting a candle with matches requires holding the matchstick firmly, striking it against the matchbox, and transferring the flame to the candle wick.
  • When using a stove or gas burner, ensure it is clean and in working condition, trim the candle wick, and hold the candle above the flame to melt the wax and ignite the wick.
  • Using a magnifying glass, focus the sun’s rays onto the wick or use a powerful flashlight with a magnifying glass to ignite the candle.
  • In emergency situations or without a lighter or matches, a makeshift fuse can be created using thick paper rolled tightly into a cylinder, which burns slowly and steadily to ignite the candle flame. Alternatively, a small battery and thin wire can be used to create a circuit and heat up the wire to ignite the wick.

Use Matches to Light the Candle

First, we’ll grab a few matches to light the candle. To safely light a candle using matches, it’s important to ensure that the matchstick is long enough to prevent any accidental burns. Hold the matchstick firmly between your thumb and index finger, striking it smoothly against the matchbox, igniting the tip. Be cautious not to exert too much force, as it may break the match.

Once the match is lit, carefully bring it closer to the wick of the candle, allowing the flame to transfer. Ensure that the match is completely extinguished before discarding it.

Now, let’s move on to the next section where we’ll discuss how to utilize a stove or gas burner for lighting a candle.

Utilize a Stove or Gas Burner

To continue lighting a candle without a lighter, we can also utilize a stove or gas burner. This method should be approached with caution, as it involves open flames and can pose safety risks. Here are some steps to follow:

bell book and candle

  1. Ensure stove safety: Make sure the stove or gas burner is clean and in proper working condition. Check for any gas leaks and ensure good ventilation in the area.
  2. Prepare the candle: Place the candle in a heat-resistant container and remove any packaging or labels. Trim the wick to about 1/4 inch to ensure a clean burn.
  3. Light the candle: Hold the candle above the stove or gas burner flame, allowing the heat to gradually melt the wax and ignite the wick. Be careful not to let the flame come into contact with the container.

Now that we’ve explored the use of a stove or gas burner, let’s move on to another alternative method – lighting the candle with a magnifying glass.

Light the Candle With a Magnifying Glass

After utilizing a stove or gas burner, we can now explore another method to light a candle without a lighter – using a magnifying glass.

When it comes to using a magnifying glass to ignite a candle, there are a few alternatives to consider.

Advertisement

One option is to use the sun’s rays as a natural source of light. Find a sunny spot, hold the magnifying glass between the sunlight and the candle, and focus the light onto the wick until it ignites.

the candle library stockists

Another alternative is to use a powerful flashlight. Position the flashlight close to the magnifying glass, aligning the light beam through the magnifying glass and onto the candle’s wick.

Finally, if you don’t have access to sunlight or a flashlight, you can use the reflection off a shiny surface, such as a mirror or a reflective metal object. Angle the magnifying glass to reflect the light onto the candle’s wick.

To ensure successful magnifying glass ignition, here are a few tips to keep in mind:

  1. Choose a magnifying glass with a large lens to maximize the concentration of light.
  2. Hold the magnifying glass steadily and at the right distance from the candle.
  3. Position the magnifying glass at the correct angle to focus the light onto the wick.
  4. Be patient and allow the concentrated light to heat the wick until ignition occurs.

Create a Makeshift Fuse With a Piece of Paper

As we explore alternative methods to light a candle without a lighter, let’s now consider creating a makeshift fuse with a piece of paper. This simple yet effective technique can be a lifesaver in emergency situations or when you find yourself without a lighter or matches. Here’s how you can make a homemade firestarter using just a piece of paper:

candlestick

  1. Gather your materials: You’ll need a piece of paper, preferably thicker like cardstock or construction paper, to ensure it burns slowly and steadily.
  2. Roll the paper tightly: Start by rolling one corner of the paper tightly towards the opposite corner. Keep rolling until you have a long, thin cylinder.
  3. Light one end: Hold the rolled paper by one end and use a flame source, like a candle or even a lit matchstick, to ignite the other end.

Use a Battery and Wire to Ignite the Candle

Using a battery and wire to ignite a candle is a practical and efficient alternative fire-starting method. With this technique, you can quickly and easily light a candle without the need for a lighter or matches.

It provides a reliable solution when you find yourself without traditional ignition tools.

Advertisement

Battery-Powered Candle Ignition

We can ignite the candle using a battery and wire. This innovative candle lighting method provides an alternative to traditional lighters or matches. Here’s how you can use a battery and wire to light your candle:

  1. Gather the materials: You’ll need a small battery, such as a AA or AAA, and a thin wire, like a paperclip or a stripped electrical wire.
  2. Prepare the wire: Bend the wire into a U shape, leaving a small gap between the ends. This will allow you to create a spark.
  3. Light the candle: Hold one end of the wire against the negative terminal of the battery and touch the other end to the wick of the candle. The spark created between the wire and the wick will ignite the candle.

By using a battery and wire, you can successfully light your candle without a lighter or matches.

candlewood suites

Now let’s explore an alternative fire-starting method.

Alternative Fire-Starting Method

To ignite the candle without a lighter, we can employ an alternative fire-starting method by utilizing a battery and wire. This unconventional ignition method is a useful technique to have in your arsenal of fire-starting techniques.

Here’s how it works:

  1. Gather the following materials:
  • A battery (preferably a 9-volt battery)
  • A thin wire or paperclip
  1. Bend the wire or paperclip into a U-shape, making sure the ends touch each other.
  2. Place one end of the wire on the positive terminal of the battery and the other end on the wick of the candle.
  3. The connection between the wire and the battery will create a small electrical current, causing the wire to heat up and ignite the wick.
  4. Once the wick catches fire, carefully remove the wire and enjoy your candlelit ambiance.

Quick and Easy Candle Lighting

With just a battery and wire, we can easily light a candle in a quick and efficient manner. Here are three creative ways to ignite a candle using alternative candle lighting methods:

candle holders uk

  1. Battery and Steel Wool: Take a piece of steel wool and gently rub it against the positive and negative terminals of a battery. The friction will create sparks, which can be used to light the candle wick. Be careful not to touch the wire ends while the steel wool is connected to the battery.
  2. Battery and Foil: Fold a small piece of aluminum foil into a thin strip and attach one end to the positive terminal of the battery. Hold the other end of the foil near the candle wick. As the foil heats up, it will ignite the wick and light the candle.
  3. Battery and Wire: Connect a wire to both terminals of the battery, creating a circuit. Touch the wire to the candle wick, and the current will cause the wire to heat up, igniting the wick.

These alternative methods provide quick and easy ways to light a candle when a lighter isn’t available. Remember to exercise caution and ensure proper safety measures while using these techniques.

Generate a Spark With Steel Wool and a Battery

Using steel wool and a battery, we can generate a spark to light a candle without a lighter. However, if you don’t have steel wool on hand, there are alternative materials you can use. Fine-grade sandpaper or the rough side of a matchbox can also work.

Advertisement

To start, gather the necessary materials: a small piece of steel wool, a 9-volt battery, and the candle you want to light. First, take the steel wool and rub it against the positive and negative terminals of the battery. This creates a circuit and causes the steel wool to heat up, producing sparks.

Hold the steel wool close to the wick of the candle, and the sparks will ignite the candle. Remember to exercise caution and supervise the process closely to avoid accidents.

yankee candle malaysia

Light a Candle With a Flint and Steel

Flint and steel is a classic method for lighting candles, and understanding the basics is key.

To start, you’ll need a piece of flint and a steel striker. Hold the flint firmly in one hand and strike the steel against it with a quick and forceful motion, aiming for the edge of the flint.

This will create sparks that can ignite the candle wick.

Advertisement

Flint and Steel Basics

We can easily light a candle using a small piece of flint and steel. Flint and steel have been used for centuries as a reliable method to create fire. Here are the basics of using flint and steel to light a candle:

candlesticks charts

  1. Gather your materials: You’ll need a small piece of flint and a steel striker. Alternatively, you can use a ferrocerium rod or a magnesium fire starter as modern alternatives to flint and steel.
  2. Prepare the candle: Place the candle on a stable surface and remove any obstructions around it. Ensure that the wick is trimmed and ready to be lit.
  3. Striking the sparks: Hold the flint firmly in your non-dominant hand and the steel striker in your dominant hand. Position the flint close to the candle wick and strike the steel against the flint at a downward angle, creating sparks that land on the wick and ignite it.

Lighting Technique Variations

Once we’ve mastered the basics of lighting a candle with flint and steel, it’s important to explore various lighting technique variations.

When it comes to lighting methods, there are unconventional approaches that can be highly effective. One such technique is to use charred cloth as tinder. This involves charring a piece of cloth using the flint and steel, creating an ember that can be used to ignite the candle.

Another unconventional approach is the use of charred punkwood. This type of wood is highly flammable and can be easily ignited with the sparks from the flint and steel.

Safety Precautions When Using Flint and Steel

To ensure safety while using flint and steel to light a candle, it’s essential that we take certain precautions. Here are three important safety measures to keep in mind:

candle making kits for adults

  1. Flint and steel maintenance: Regularly inspect the flint and steel for any signs of damage or wear. Replace them if necessary. Keeping the flint sharp and the steel free from rust or corrosion will ensure a reliable spark for lighting the candle.
  2. Proper storage of flint and steel: Store the flint and steel in a dry and secure location. Moisture can degrade the flint and steel, making them less effective. Additionally, keeping them in a dedicated container or pouch will prevent accidental damage or injury.
  3. Use caution when striking: When striking the flint and steel, be mindful of your surroundings. Make sure there are no flammable materials nearby. Hold the steel at a safe distance from your body and others to avoid accidental injuries. Always strike the flint away from your body, directing sparks away from yourself and the candle.

By following these safety precautions, you can enjoy the benefits of using flint and steel to light your candles without compromising your well-being.

Now, let’s transition into the next section, where we’ll explore another alternative method to light a candle – harnessing the power of the sun.

Advertisement

Harness the Power of the Sun to Ignite the Candle

The sun’s radiant energy can be harnessed to ignite a candle without the need for a lighter. Harnessing solar power to light a candle not only eliminates the need for flammable materials, but also carries many benefits.

Solar power is a renewable and sustainable energy source, reducing our reliance on fossil fuels and minimizing environmental impact. By utilizing the sun’s energy, we can create a flame without the risk of accidental fires caused by traditional lighters or matches.

bath and body works candle day

However, it’s important to take fire safety precautions when using solar power to ignite a candle. Ensure the candle is placed on a stable surface, away from flammable objects, and never leave it unattended. Additionally, keep a fire extinguisher or water source nearby in case of emergencies.

Employ a Hairdryer or Heat Gun to Light the Wick

Now let’s explore alternative heat sources that can be used to light the wick of a candle when a lighter isn’t available.

We’ll discuss different techniques for lighting the wick using a hairdryer or a heat gun, and we’ll also cover important safety precautions that need to be taken when using these heat sources.

Advertisement

Alternative Heat Sources

We successfully lit the candle using a hairdryer as an alternative heat source, allowing the wick to ignite without the use of a lighter. When employing unconventional lighting methods, it’s important to consider alternative fuel sources to ensure a successful outcome.

candles myer

Here are three alternative heat sources you can use to light a candle without a lighter:

  1. Hairdryer: Set the hairdryer to its highest heat setting and aim it directly at the candle’s wick. The hot air will provide enough heat to ignite the wick and start the candle.
  2. Heat gun: Similar to a hairdryer, a heat gun can be used to generate enough heat to light the candle. Point the heat gun towards the wick and gradually increase the temperature until the wick catches fire.
  3. Stove burner: If you don’t have access to a hairdryer or heat gun, you can place the candle on a stove burner set to a low heat. Be careful not to melt the candle or ignite any surrounding objects. Once the wick catches fire, remove the candle from the burner and enjoy the warm glow.

These alternative heat sources can be handy when you find yourself without a lighter or matches. Remember to exercise caution and prioritize safety when using unconventional methods to light a candle.

Wick Lighting Techniques

To successfully light the candle without a lighter, we can utilize a hairdryer or heat gun to ignite the wick. This technique is particularly useful when the wick is difficult to reach or when we want to avoid using matches or a lighter.

Before attempting this method, it’s important to ensure proper wick maintenance. Trim the wick to about 1/4 inch before lighting to prevent excessive smoke and soot.

candle & co

When using a hairdryer or heat gun, set it to the lowest heat setting to avoid damaging the candle or causing it to melt. Hold the hairdryer or heat gun about 6 inches away from the candle and direct the hot air towards the wick.

Advertisement

Once the wick catches fire, carefully remove the hairdryer or heat gun and let the candle burn safely.

Remember to always exercise caution and follow candle safety guidelines when using alternative heat sources.

Safety Precautions Involved

After understanding the proper wick lighting techniques, it’s important to be aware of the safety precautions involved when employing a hairdryer or heat gun to light the wick. Fire safety and candle maintenance are crucial when using alternative methods to light a candle. Here are three important safety precautions to keep in mind:

candle birthday

  1. Keep a safe distance: When using a hairdryer or heat gun, ensure that you maintain a safe distance from the candle. This will prevent any accidental contact or damage to the candle.
  2. Avoid flammable materials: Make sure there are no flammable materials nearby when using a hairdryer or heat gun. Keep your surroundings clear of any combustible items that could potentially catch fire.
  3. Use caution with heat: Remember that both hairdryers and heat guns generate heat. Exercise caution when handling them, and avoid touching the heated parts to prevent burns or accidents.

Create a Fire Starter With Cotton Balls and Petroleum Jelly

To create a fire starter with cotton balls and petroleum jelly, gather the necessary materials and follow these simple steps.

First, you’ll need cotton balls, which can be easily substituted with alternative options such as dryer lint or shredded paper.

Next, gather petroleum jelly as your accelerant, as it’s a highly effective choice due to its flammability and ability to burn for an extended period.

Advertisement

Begin by taking a cotton ball and coating it thoroughly with petroleum jelly. Make sure to spread the jelly evenly on the cotton ball to ensure a consistent burn.

candle making workshop

Once coated, store the fire starters in a waterproof container for safekeeping.

When you’re ready to use them, simply ignite the coated cotton ball and place it under your kindling or fuel to start your fire.

Use a Fire Striker or Firesteel to Light the Candle

We can use a fire striker or firesteel to light the candle when we don’t have a lighter. These fire starter alternatives are great for those who want to master the art of candle lighting hacks. Here’s how you can do it:

  1. Prepare your materials: Make sure you have a fire striker or firesteel and a candle ready.
  2. Hold the fire striker: Grip the fire striker firmly in one hand, ensuring a secure hold.
  3. Strike the fire striker: Using a quick and forceful motion, strike the fire striker against the firesteel. This will create sparks that can ignite the candle wick.

Remember to be careful and aim the sparks towards the candle. With practice, you’ll become adept at using fire striker or firesteel as a reliable alternative to light your candle.

uses of candles in daily life

Frequently Asked Questions

Can I Use a Lighter Instead of Matches to Light the Candle?

Yes, we can use a lighter instead of matches to light the candle. However, it’s important to note that there are alternative methods to light a candle without a lighter. Safety precautions must be taken when doing so.

Advertisement

What Is the Best Type of Paper to Use for Creating a Makeshift Fuse?

When it comes to creating a makeshift fuse, there are several alternative materials to consider. However, it is crucial to prioritize safety precautions. Proper knowledge and understanding of homemade fuses is necessary to avoid any potential hazards.

How Long Does It Take for the Sun to Ignite the Candle?

To ignite a candle without a lighter, we can explore alternative ignition methods. However, the ignition time using the sun is dependent on various factors such as sunlight intensity and the candle’s composition.

Can I Use a Blow Dryer Instead of a Hairdryer or Heat Gun?

A blow dryer can be used as an alternative heat source instead of a hairdryer or heat gun. It provides the necessary heat to ignite a candle, making it a viable option in the absence of a lighter.

candle holders uk

Is It Safe to Use Petroleum Jelly as a Fire Starter for Lighting the Candle?

Using petroleum jelly as a fire starter can be safe and effective for lighting a candle. However, there are alternative methods to consider, such as using matches or a stove lighter.

Conclusion

In conclusion, there are numerous creative ways to turn on a candle without a lighter. From using matches, stoves, or magnifying glasses to harnessing the power of the sun or employing a hairdryer, the possibilities are endless.

Advertisement

You can even create a makeshift fuse or utilize a battery and wire for ignition. With these inventive methods at your disposal, lighting a candle becomes an enjoyable and resourceful endeavor.

So go ahead, let your imagination ignite and explore the world of candle lighting beyond the traditional lighter.

candle holders decorative

Continue Reading

Candles

How to Save a Candle Wick

Published

on

By

Have you ever been in a position where your candle wick is nearly at its end? Well, you’re in luck because we have the perfect solution for you!

In this guide, we will show you how to save a candle wick and bring it back to life. Whether it’s a crooked wick, excess wax buildup, or even a detached wick, we’ve got you covered.

With our step-by-step instructions, you’ll be able to master the art of candle wick revival. So grab your scissors and get ready to rescue those flickering flames.

It’s time to save the day and save your candle wick!

Advertisement

candlesticks hotel stamford

Key Takeaways

  • Regularly assess and trim the wick to prevent damage, fraying, and buildup of soot or debris.
  • Trim the wick to about 1/4 inch before each use for longer burn time, more efficient flame, reduced soot, and a safer burn.
  • Properly center the wick before lighting the candle to avoid uneven burn and wasted wax.
  • In case of a detached or drowned wick, reattach or trim the wick to revive it and ensure proper burning.

Assess the Wick’s Condition

First, we need to assess the condition of the wick. Proper wick maintenance is crucial for a well-functioning candle. When troubleshooting wick issues, it’s important to examine the wick closely. Look for any signs of damage, such as fraying or splitting. A damaged wick can prevent the candle from burning evenly or even extinguish the flame altogether.

Additionally, check for any buildup of soot or debris on the wick. This can hinder the wick’s ability to draw up the wax and maintain a steady flame. If you notice any of these issues, it’s time to save the wick. Trim away any damaged portions and gently clean off any buildup.

This will help restore the wick’s functionality and ensure a longer-lasting, more enjoyable candle experience.

Trim the Wick Properly

When it comes to trimming the wick properly, there are two key points to consider: wick length and burn time.

dusk gifts

Keeping the wick trimmed to about 1/4 inch before each use ensures a controlled flame and prevents excessive smoke or soot.

Additionally, proper trimming promotes a longer burn time, allowing you to enjoy your candle for hours on end.

Advertisement

Wick Length and Burn Time

To ensure a longer burn time and optimal performance, we should regularly trim the candle wick to the recommended length. Proper wick maintenance is crucial for achieving maximum burning efficiency. When a wick becomes too long, it can cause a larger flame, excessive smoke, and uneven burning. Trimming the wick to the right length helps control the size of the flame, allowing the candle to burn more evenly and efficiently. The recommended length for a candle wick is typically around 1/4 inch to 1/8 inch. This ensures a steady burn and minimizes the risk of the flame becoming too large or flickering excessively. By following these simple steps, we can prolong the life of our candles and enjoy their warm glow for longer periods.

Wick Length (in inches) Burn Time
1/4 6 hours
1/8 4 hours
3/16 5 hours

Benefits of Proper Trimming

Properly trimming the candle wick offers us numerous benefits, including a longer burn time and a more efficient and even flame. By implementing the right maintenance techniques, we can maximize the performance and lifespan of our candles.

candle shack discount code

Here are some key benefits of trimming the wick properly:

  • Longer burn time: Trimming the wick to the recommended length ensures that the flame burns at an optimal rate, preventing excessive soot and carbon buildup. This allows the candle to burn for a longer duration, giving us more enjoyment.
  • Efficient flame: A properly trimmed wick creates a more efficient flame, resulting in a steady and consistent burn. This means less wasted wax and a more even distribution of fragrance throughout the room.
  • Reduced soot and smoke: Trimming the wick prevents excessive smoke and soot from forming, keeping the air cleaner and healthier to breathe.
  • Safer burn: A well-trimmed wick reduces the risk of the flame becoming too large or flickering excessively, minimizing the chances of accidents or fire hazards.

By understanding the benefits of proper wick trimming, we can ensure an enhanced candle experience.

Now, let’s delve into the next section and explore how to remove excess wax buildup.

Remove Excess Wax Buildup

We can easily remove excess wax buildup from a candle wick by gently scraping it off with a butter knife or a similar tool.

Advertisement

candlesticks patterns

When a candle burns, wax tends to accumulate on the wick, obstructing the flame and preventing it from burning properly. This can lead to a weak or flickering flame, reducing the overall performance of the candle.

To revive an old wick, it’s essential to remove this excess wax buildup. By carefully scraping the wick, we can eliminate the accumulated wax and restore the wick’s functionality.

This step is crucial in preventing wick breakage, as excessive wax buildup can make the wick brittle and prone to breaking. Therefore, it’s important to regularly inspect and clean the wick to ensure optimal burning conditions and extend the life of the candle.

Straighten a Crooked Wick

By gently manipulating the wick, straightening its crooked shape is an effective way to ensure a steady and even burn. To help you master the art of straightening a crooked wick, here are some expert techniques to prevent wick damage:

candle holders amazon

  • Tweezers Method: Use a pair of tweezers to carefully straighten the wick by gently pulling it in the desired direction.
  • Poke and Push Technique: Use a toothpick or a small stick to poke the wick and push it back into a straight position.
  • Heat and Mold Approach: Light the candle and allow the wax to slightly melt. Then, use your fingers to mold the wick into a straight shape before the wax hardens.
  • Rotate and Adjust: Rotate the candle periodically while it’s burning to ensure an even burn and prevent the wick from becoming crooked.

Re-center a Displaced Wick

To re-center a displaced wick, gently guide it back into the center of the candle using a toothpick or small stick.

When a candle is burned, the heat can sometimes cause the wick to shift or move away from the center, which can lead to an uneven burn and wasted wax.

Advertisement

To prevent wick displacement, it’s important to ensure that the wick is properly centered before lighting the candle.

If you notice that the wick has been displaced during burning, it’s relatively easy to reposition it. Simply insert the toothpick or small stick next to the wick and gently push it back towards the center until it’s in the desired position.

candle holders amazon

This will ensure that the candle burns evenly and efficiently, prolonging its lifespan.

Reattach a Detached Wick

Sometimes, candle wicks can become detached from the wax, requiring a simple method to reattach them and continue enjoying a beautiful candle. Here are some effective techniques to reattach a detached wick:

  • Hot glue method: Use a hot glue gun to apply a small amount of hot glue to the base of the detached wick. Press the wick firmly onto the wax, holding it in place until the glue sets.
  • Double-sided tape method: Cut a small piece of double-sided tape and stick it to the base of the detached wick. Press the wick firmly onto the wax, ensuring it’s securely attached.
  • Wick sticker method: Purchase wick stickers, which are adhesive discs specifically designed for reattaching wicks. Place the sticker on the base of the detached wick and press it firmly onto the wax.
  • Wick sustainer method: If the wick sustainer is still intact, slide it back into the base of the detached wick, ensuring it’s secure.

Revive a Drowned Wick

To revive a drowned wick, we can follow a simple method that will help restore its functionality and keep your candle burning brightly. When a wick becomes submerged in melted wax, it can lose its ability to draw up fuel and ignite properly.

To prevent wick drowning in the first place, always trim your wick to about 1/4 inch before lighting your candle. If your wick does end up submerged, there’s no need to despair.

Advertisement

candles uk

First, extinguish the candle and allow it to cool completely. Then, carefully remove any excess wax around the wick using a toothpick or a small knife.

Next, relight the candle and observe if the wick is drawing up the melted wax and burning properly. If not, repeat the process until the wick is fully revived.

Store Candles Properly for Future Use

When it comes to storing candles for future use, there are a few key techniques that can help preserve their quality.

First, it’s important to trim the wick before storing to prevent any potential damage or soot buildup.

candlesticks forex

Additionally, keeping candles in a cool, dry place away from direct sunlight can help extend their lifespan.

Advertisement

Lastly, if you have any old candles with worn-out wicks, there are methods to revive them and make them usable again.

Wick-Saving Techniques

We always store our candles properly to ensure the wicks remain intact for future use. Here are some wick-saving tips that can help prolong the life of your candles:

  • Trim the wick before each use: Trimming the wick to around ¼ inch prevents excessive smoking and mushrooming, which can shorten the lifespan of the wick.
  • Avoid drafts: Placing candles in draft-free areas reduces the likelihood of the wick flickering and burning unevenly, which can lead to wick damage.
  • Use a snuffer: Snuffing out the candle with a snuffer instead of blowing it out helps prevent the wick from getting damaged or displaced.
  • Store candles in a cool, dark place: Extreme temperatures and exposure to sunlight can cause the wax to melt or discolor, affecting the overall quality of the candle.

By following these wick-saving techniques, you can ensure that your candles remain in good condition for future use.

ecoya candles myer

Now, let’s move on to the next section about long-lasting candle storage.

Long-Lasting Candle Storage

Proper candle storage ensures the longevity of our candles for future use. To preserve the fragrance and maximize the lifespan of your candles, follow these longevity tips.

Firstly, store your candles in a cool, dry place away from direct sunlight, as heat can cause them to melt or warp.

Advertisement

Secondly, keep them in airtight containers or bags to prevent dust and dirt from settling on the wax surface. This will help preserve their fragrance and prevent any unwanted odors from seeping in.

candle making supplies

Additionally, make sure to store your candles upright to maintain their shape and prevent any bending or breakage.

Reviving Old Candle Wicks

To bring old candle wicks back to life and ensure their future use, we can revive them through simple yet effective techniques. Here are some ways to revive old candle wicks and preserve their quality:

  • Trim the wick: Use a pair of scissors to trim the burnt or charred part of the wick. This will expose a fresh section of the wick, allowing it to burn more efficiently.
  • Soak the wick: If the wick is dry and brittle, you can soak it in a bowl of warm water for a few minutes. This will help soften the wick and make it more pliable for future use.
  • Use wick alternatives: If the wick is completely unusable, you can consider using wick alternatives such as cotton string, wooden sticks, or even dried herbs like lavender stems. These alternatives can still provide a lovely and fragrant candle experience.
  • Store candles properly: To preserve wick quality for future use, store candles in a cool and dry place away from direct sunlight. This will prevent the wick from drying out or becoming brittle over time.

Frequently Asked Questions

Can I Reuse a Candle Wick That Has Already Been Burned Down Completely?

Yes, you can reuse a candle wick that has been burned down completely. By salvaging burnt wicks, you can trim them and attach them to a new candle. It’s a resourceful way to extend the life of your wicks.

How Often Should I Trim the Wick of a Candle?

When it comes to properly handling a lit candle, it’s essential to know how often to trim the wick. We’ve learned that trimming it to the right size prevents excessive smoking and ensures a clean, even burn.

dusk catalogue 2017

What Can I Do if I Accidentally Break the Wick While Trimming It?

If the wick of a candle accidentally breaks while trimming it, there are a few options. First, you can repair the broken wick by using a wick holder or by tying a new piece of cotton string around it. Alternatively, you can use an alternative wick, such as a wooden or hemp wick, to continue enjoying your candle.

Advertisement

Is It Possible to Save a Wick That Has Been Completely Submerged in Wax?

Recovering submerged wicks can be challenging, but with patience and care, we can save them. Reusing burnt wicks, however, is not recommended as they may not burn evenly or emit a strong fragrance.

What Is the Best Way to Store Candles to Ensure Their Longevity?

Proper candle storage techniques are crucial for extending the lifespan of your candles. By keeping them in a cool, dark place and away from heat sources, you can ensure they burn evenly and last longer.

Conclusion

In conclusion, by following these simple steps, you can easily save a candle wick and prolong the life of your beloved candles.

candle making workshop

Remember to assess the wick’s condition, trim it properly, remove any excess wax buildup, and straighten or re-center it if needed.

In case of a detached or drowned wick, you can reattach or revive it with ease.

Advertisement

By storing your candles properly, you can ensure their future use.

So don’t let a faulty wick dim your candle’s glow, take action and let your light shine bright!

the candle library stockists

Continue Reading

Trending