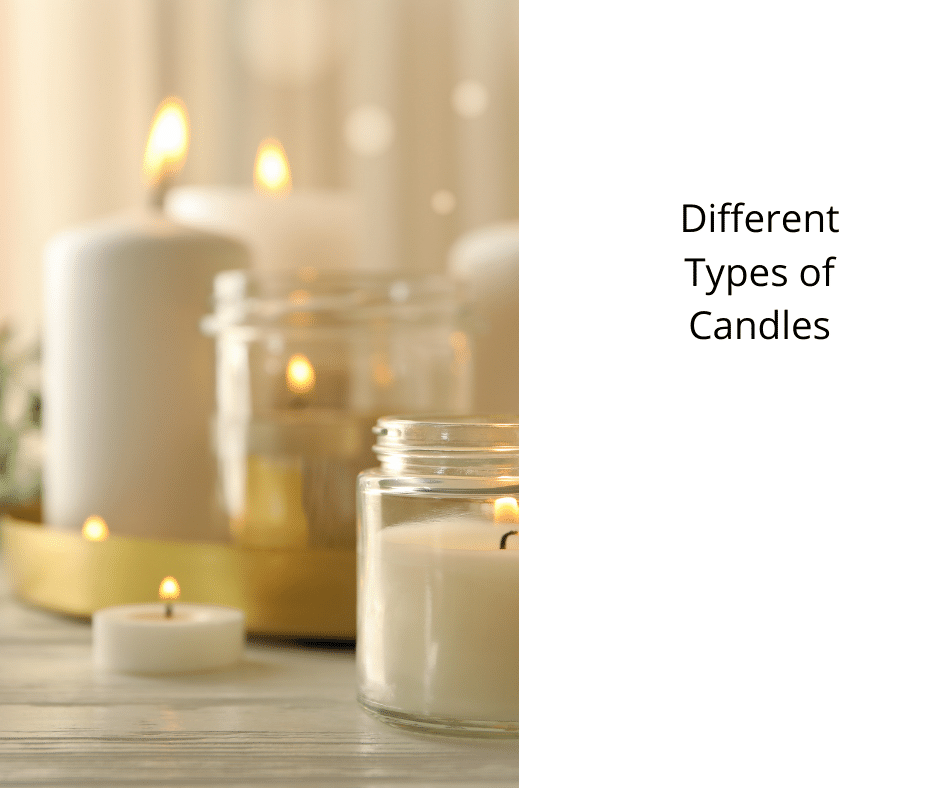
Connect with us

Beginners Guides

Different Types of Candles

Published

on

Numerous candle varieties exist, such as pillar candles and votive candles, with their primary distinction being their form. Votive candles are tiny and circular, whereas pillar candles are characterized by their elongated, cylindrical shape. Despite the higher price tag associated with pillar candles in comparison to tea lights, they remain the most prevalent and frequently encountered type.

Votive candles

Votive candles are small, beeswax candles used in Christian prayer. These candles are usually white or yellow in appearance. Many Christian denominations, including Lutheran and Roman Catholic, use votive candles. Their use is based on religious observances such as the Eucharist, which requires people to light a candle of some type.

Votive candles can be used in many rooms, and they are a great choice for table settings. Votive candles are not as overwhelming as tall taper candles. They are also not too intrusive and won’t block guests’ view. They are affordable and will make any table look elegant.

Pillar candles

Pillar candles are a variety of candles made from rigid wax that have a pillar-shaped shape. Their typical size is about 2 to 4 inches in diameter and a height of three to nine inches. They can be made in many different sizes and shapes. For special occasions, you can order pillar candles in custom shapes.

Pillar candles are tall, durable, and striking in appearance. Depending on their size, pillar candles can be placed next to a fireplace or on a table. They also look great outside. The wax is more dense, so a pillar candle will burn for a longer period of time.

Gel candles

Gel candles are a variety of candles made from a gel material. They are usually made in glass containers, such as champagne glasses or votive holders. It is important to select a glass container that is thick enough to hold the temperature of the wax. If the container should be broken or dropped, it must be safe.

The main difference between gel and paraffin candles is the material used to create them. Gel candles are made from petroleum refinery by-products. Crude oil has to be collected by drilling, which contributes to environmental pollution and loss of habitats. It must then be refined and subject to a variety of heavy manufacturing processes. This process is the third biggest industrial contributor to greenhouse gases. Once the oil is refined, it is separated into a number of components. One of these components, the wick, is made from polymer resin.

Beeswax candles

It is easy to make your own beeswax candles. To start making your own candles, you will need a large pot with water halfway filled. Place the pot on medium heat. Be careful not to overheat the wax as this can cause it to change color. Depending on the size of the beeswax, it will take between 10 and 30 minutes to melt.

Because they are made from high-quality materials, beeswax candles can be expensive. You can save money by making your own beeswax candles. They burn longer than other types of candles. You can make these candles in a variety of shapes and sizes, including jar candles and taper candles.

Soy wax candles

Soy wax candles differ from paraffin-based candles in several ways. First, they are made from renewable resources, including soybeans. Classic paraffin wax, on the other hand, is a non-renewable fossil fuel. Second, soy wax is slower to burn and produces less soot compared to paraffin. Soy wax is an excellent carrier for fragrances. Fourth, unlike paraffin wax soy candles don’t contain chemical amplifiers.

Soy wax candles are made from soybeans. They are cracked, cleaned, and dehulled. The soybean flakes are then processed to extract the oil, which is then hydrogenated. This results in a natural wax which solidifies at room temperatures. The popularity of soy wax candles has grown as consumers demand more environmentally friendly candle options. In fact, soy wax is often considered to be the best candle wax for containers.

Palm wax candles

Palm wax candles are a natural and environmentally-friendly alternative to petroleum-based candles. They are biodegradable and don’t produce any harmful chemicals. Some candle companies are moving towards more sustainable palm wax farming and labor practices. This wax is great for making candles, even though it can be very expensive.

One type of palm wax candle is a pillar candle. They are self-standing and are typically made of beeswax or palm wax. There are also varieties made from different wax blends. A container candle is another type of candle. A container candle is placed inside a jar. Container candles can be made from different waxes, each with its own unique characteristics.

Scented candles

Scented candles can make your home scrumptious when it comes to fragrance. However, there are some important things to know when choosing your next scent. Use scented candles in small quantities to avoid skin irritations and allergic reactions. The Food and Drug Administration states that burning candles can release small amounts of harmful chemicals but not enough to pose a risk to your health. To make sure that you’re not exposing yourself to toxins, read labels carefully.

Using soy wax in scented candles is a better option than paraffin wax. Paraffin wax is a petroleum byproduct. It is best used for tall candles. Soy candles burn at a lower temperature and last longer.

I'm Amelia, and I love making candles. It all started when I was given a kit as a gift. I loved the process so much that I decided to make my own candles. I soon realized that I had a real talent for it. Before long, my friends and family were asking me to make candles for them too. Word spread, and soon I was inundated with orders. I love the creativity that goes into making each candle unique. And I love the satisfaction of knowing that people are using something I made with my own hands.

Continue Reading

Beginners Guides

How To Remove Wax From Candle Stick

Published

on

By

An image showcasing a step-by-step guide on removing candle wax from a candlestick

Getting wax off a candlestick might feel like a tricky task, but don’t worry! I’m here to walk you through the steps with professional accuracy and step-by-step guidance. Believe me, after reading this article, your candlesticks will shine as if they were brand new.

Now, picture this: you have a beautiful candle stick that’s covered in layers upon layers of stubborn wax. It’s like a fortress that refuses to let go. But fret not, for I have gathered the ultimate arsenal of materials and techniques to conquer this waxy enemy.

We’ll start by freezing the wax, making it brittle and easy to scrape off. Then, we’ll bring in hot water or even a hair dryer to melt away any leftover residue.

For those tougher spots, vinegar and baking soda will come to the rescue. And don’t worry about leaving any mess behind – trusty paper towels will ensure cleanliness.

So sit back, relax, and prepare yourself for a journey towards candle stick perfection. With my guidance, you’ll become an expert at removing wax in no time!

Key Takeaways

  • Freezing the wax makes it easier to scrape off
  • Hot water or a hair dryer can be used to melt away leftover residue
  • Vinegar and baking soda can be used for tougher spots
  • Paper towels are convenient for removing wax and ensuring cleanliness

Gather Your Materials

Gather all the materials you’ll need to remove wax from your candle stick. To successfully remove wax, you’ll need a few items readily available around the house. First and foremost, grab some ice cubes or a freezer bag filled with ice. This will come in handy later on when we freeze the wax.

Next, find a butter knife or a similar dull tool that won’t damage the surface of your candlestick. You’ll also want to have paper towels or a clean cloth nearby for wiping away any excess residue.

Now that you’ve gathered all your materials, let’s move on to the steps to remove wax from your candle stick. The first step is to place your candle stick in the freezer for about 30 minutes. Freezing the wax will make it easier to break off and remove from the surface. Once the time has passed, take out your candle stick and use the dull tool to gently scrape off as much of the frozen wax as possible. Be careful not to scratch or damage the candlestick while doing this.

By gathering these essential materials and following these simple steps, you can effectively remove wax from your candle stick without causing any harm.

Freeze the Wax

Chill the melted substance until it’s as solid as ice, allowing for easy extraction without any residue left behind. This step is crucial in removing wax from a candlestick effectively. To freeze the wax, there are two simple methods you can choose from.

Firstly, you can use ice cubes to freeze the melted wax. Place several ice cubes directly on top of the spilled wax and let them sit for about 10-15 minutes. The cold temperature will cause the wax to harden quickly.

Alternatively, you can also place the affected area in a freezer for around 30 minutes. Make sure to cover it with a plastic bag or wrap it in aluminum foil to prevent any moisture or odor transfer while freezing.

Once the wax has hardened completely, take a butter knife or any other blunt utensil and gently scrape off the frozen wax from the surface of your candlestick. Be careful not to scratch or damage the material underneath.

With that said, now that we’ve removed all traces of wax from our candlestick using ice cubes and a freezer, let’s move on to the next step: scraping off any remaining bits of stubborn residue.

Scrape off the Wax

Once the solidified substance has been properly frozen, you can delicately use a butter knife or another gentle tool to carefully scrape away any remaining remnants from the surface. When scraping off the wax from a candle stick, it’s important to use proper techniques to avoid damaging the material underneath.

Start by gently inserting the edge of the knife under the wax and slowly lifting it up. Be cautious not to apply too much pressure as this may cause scratches or gouges on the surface.

To effectively remove stubborn wax, you can also employ heat methods. One technique is using a hairdryer set on low heat. Hold the hairdryer approximately six inches away from the wax and move it in circular motions over the affected area. The gentle heat will soften the wax, making it easier to scrape off with your knife.

Another effective method is using a warm towel or cloth. Place a cloth soaked in hot water onto the wax and let it sit for a few minutes until the wax becomes soft and pliable. Then, gently scrape off any loosened wax residues.

By employing these scraping techniques and utilizing heat methods, you can successfully remove all traces of unwanted wax from your candle stick surface. Transitioning into our next section about using hot water, we’ll explore another effective method for removing stubborn residue left behind by melted candle wax without causing damage or leaving marks on your beloved candle holders.

Use Hot Water

To remove wax from a candlestick holder, I’d start by filling a sink or bowl with hot water. Then, I’d immerse the candlestick holder in the hot water and let the wax soften for a few minutes.

Once the wax has softened, I’d gently scrub it off using a toothbrush, being careful not to damage the holder’s surface. This method effectively removes wax residue and restores the candlestick holder to its original state.

Fill a Sink or Bowl with Hot Water

First, grab a sink or bowl and fill it with hot water. Hot water has numerous benefits when it comes to removing wax from candlesticks. It helps to soften the wax, making it easier to remove without causing any damage. Additionally, hot water can be used for various other purposes like cleaning greasy dishes or even soothing sore muscles.

Once you have filled the sink or bowl with hot water, make sure it’s deep enough to fully immerse the candlestick holder. This will ensure that the heat reaches all areas of the wax and effectively loosens it from the surface.

Now that you’ve prepared the hot water, let’s move on to immersing the candlestick holder in order to continue removing the wax.

Immerse the Candlestick Holder

After filling the sink or bowl with hot water, it’s time to tackle the next step in removing wax from a candlestick holder. Immerse the holder into the water, making sure that it’s completely covered.

The hot water will help to melt and loosen the wax, making it easier to remove. Be cautious not to use boiling water, as it could damage certain types of candlestick holders, especially those made of delicate materials like glass or porcelain. If you’re unsure about whether your holder can handle hot water, opt for lukewarm or room temperature instead.

Additionally, different types of candlestick holders may require different lengths of immersion time depending on their size and material composition.

Once the holder has been fully immersed in hot water, we can move on to the next section: letting the wax soften and become pliable for easy removal.

Let the Wax Soften

Immerse your candlestick holder in hot water and watch as the wax begins to soften, making it easier to free from its grip. This method is effective because heat melts the wax, loosening its hold on the candlestick.

To achieve the best results, use a container that can comfortably fit your candlestick holder and fill it with hot water. Ensure that the water isn’t boiling, as this may damage delicate materials.

When choosing materials for removing wax, opt for a soft cloth or sponge to gently wipe away any residue after soaking. Avoid using abrasive materials that could scratch or damage the surface of your candlestick holder.

Once the wax has softened, transition into gently scrubbing with a toothbrush to remove any remaining stubborn bits without causing harm.

Gently Scrub with a Toothbrush

After letting the wax soften, it’s time to move on to the next step in removing wax from a candlestick. Gently scrubbing with a toothbrush is an effective way to tackle any remaining wax residue.

However, if you don’t have a toothbrush handy, there are alternative options you can consider. For example, an old nylon brush or even a soft-bristled paintbrush can work just as well. The key is to use something that won’t damage the surface of the candlestick while still providing enough friction to remove the softened wax.

Additionally, if any wax has spilled onto fabric, this method can also be used to gently scrub away the excess without causing any damage.

Now that we’ve tackled this step successfully, let’s move on to using a hair dryer for further removal of stubborn wax residue.

Use a Hair Dryer

To easily get rid of wax from your candlestick, just grab a hairdryer and let it work its magic. Use a heat gun or try a blow dryer to remove the wax without damaging the candlestick. Here’s how you can do it:

  1. Set the hairdryer to a low or medium heat setting. High heat may cause the wax to melt too quickly and create a mess.

  2. Hold the hairdryer about 6 inches away from the wax residue on the candlestick.

  3. Move the hairdryer in circular motions, evenly distributing the warm air over the wax.

  4. As you apply heat, you’ll notice that the wax starts to soften and melt.

  5. Use a clean cloth or paper towel to gently wipe away the melted wax.

By using this technique, you can effortlessly remove even stubborn wax stains from your candlestick without causing any damage.

Once you have removed most of the wax residue, it’s time to move on to another method like using dish soap for further cleaning.

Use Dish Soap

Using dish soap can be a great solution for effectively cleaning the residue left behind on your candlestick. Dish soap is not only useful for washing dishes, but it can also be used for various other cleaning purposes around the house. Its powerful formula helps to break down grease and grime, making it an ideal choice for removing wax.

To begin, fill a sink or basin with warm water and add a few drops of dish soap. Make sure the water isn’t too hot as it may damage the candlestick. Gently place the candlestick into the soapy water and let it soak for a few minutes. This will help to loosen any stubborn wax.

Next, take a soft cloth or sponge and gently scrub away the remaining wax from the surface of the candlestick. The dish soap will help to lift off any residue without damaging the material of the candlestick.

If you don’t have dish soap on hand, there are alternatives you can try. For example, rubbing alcohol or vinegar mixed with warm water can also be effective in removing wax from candlesticks.

Using dish soap is an excellent method for removing wax from your candlestick. However, if you don’t have any available, there are other options you can explore such as vinegar, which we’ll discuss in detail in the next section.

Use Vinegar

To remove wax residue from a candle stick, I highly recommend using vinegar. First, soak a cotton swab in vinegar and make sure it’s well saturated. Then, carefully dab the wax residue with the vinegar-soaked swab, allowing the vinegar to break down the wax. Finally, gently rub the wax away using a circular motion until it’s completely removed.

Vinegar is an effective solution that easily dissolves stubborn wax without damaging the surface of your candle stick.

Soak a Cotton Swab in Vinegar

First, grab a cotton swab and dunk it in vinegar to tackle that stubborn wax on your candlestick. Vinegar is an excellent cleaning agent that can effectively dissolve wax residue. By using vinegar, you’re opting for a natural and non-toxic method to remove the wax. This alternative approach eliminates the need for harsh chemicals or expensive commercial products.

As you soak the cotton swab in vinegar, the acetic acid in the vinegar will break down the wax, making it easier to remove. Additionally, vinegar has antibacterial properties that can sanitize your candlestick at the same time.

After soaking the cotton swab, gently dab the wax residue with the vinegar-soaked swab to lift it off completely. With this simple yet effective technique, you can restore your candlestick to its original beauty without any hassle or mess.

Dab the Wax Residue with the Vinegar-Soaked Swab

Once you’ve saturated the cotton swab in vinegar, gently glide it over the wax residue like a gentle breeze sweeping away fallen leaves. The vinegar acts as a powerful solvent, dissolving the wax and making it easier to remove.

If you don’t have vinegar on hand, there are alternative cleaning methods you can try. One popular vinegar alternative is rubbing alcohol, which also works well at breaking down wax. Simply soak a cotton swab in rubbing alcohol and follow the same process of dabbing the residue until it’s gone.

After using either vinegar or rubbing alcohol, you may notice that some wax remains on the surface. Don’t worry! In the next section, we’ll discuss how to gently rub the remaining wax away without causing any damage to your candlestick.

Gently Rub the Wax Away

Next, you’ll delicately massage the residue in circular motions, gradually loosening the remaining remnants until they effortlessly vanish from sight. To prevent wax buildup in the future, there are a few simple steps you can take. Firstly, trim your candle wicks to ¼ inch before each use to ensure a clean and even burn. Additionally, placing candles in draft-free areas will help avoid uneven melting and excessive drips. If you’re looking for alternative methods to remove wax residue, one effective option is using ice cubes. Simply freeze the wax with an ice cube and then gently scrape it off with a plastic card or butter knife. Another method involves using a hairdryer on low heat to melt the wax and then wiping it away with a paper towel or cloth. Moving on to the next section about ‘use baking soda’, let’s explore another technique for removing stubborn wax stains.

Ways to Prevent Wax Buildup Alternative Methods for Removing Wax Residue
Trim candle wicks before each use Freeze the wax with an ice cube
Place candles in draft-free areas Use a hairdryer on low heat

Use Baking Soda

To remove wax residue from a candle stick, I recommend using baking soda. First, make a paste by mixing baking soda and water until it’s thick. Then, apply the paste to the wax residue and let it sit for a few minutes to allow it to penetrate the wax.

Finally, scrub the area with a toothbrush to gently remove the residue. This method is effective in getting rid of stubborn wax without damaging the candle stick’s surface.

Make a Paste with Baking Soda and Water

Mix together baking soda and water to create a paste that’ll effectively remove the wax from your candle stick, ensuring a spotless finish. Baking soda’s known for its versatile cleaning properties, making it an ideal choice for removing wax residue. It’s gentle on surfaces and acts as a natural abrasive that helps break down and lift away stubborn stains. This method’s an excellent alternative to using harsh chemicals or scraping tools that could damage the surface of your candle stick. By creating a paste with baking soda and water, you can easily apply it directly onto the wax residue, allowing it to work its magic. This’ll ensure that every trace of wax is thoroughly removed, leaving your candle stick looking as good as new.

Apply the Paste to the Wax Residue

Now that you’ve got your powerful baking soda paste ready, it’s time to get down to business and tackle that stubborn residue on your beloved candlestick.

Here are a few things that will make this process easier and more effective:

  • Gentle toothbrush scrubbing: Take a clean toothbrush and dip it into the baking soda paste. Gently scrub the wax residue in circular motions. The abrasive nature of the baking soda will help lift off the wax without damaging the surface of your candlestick.

  • Hair dryer heating: If there are still some stubborn spots remaining, use a hair dryer on low heat to soften the wax. Hold the hair dryer about 6 inches away from the residue and move it around for even heating. This will make it easier to remove with the toothbrush.

  • Patience: Removing wax can be a tedious task, so take your time and be patient. Don’t rush or apply excessive force, as this may damage your candlestick.

  • Repeat if necessary: If there is still some residue left after one round of cleaning, repeat these steps until all traces of wax are gone.

With these techniques, you’ll be able to successfully remove all the wax residue from your candlestick.

Now, let’s move on to the next step – letting it sit for a few minutes before proceeding further.

Let it Sit for a Few Minutes

After applying the baking soda paste, give it a few minutes to work its magic. During this time, you can further enhance the removal process by using a hairdryer or soaking the candlestick in vinegar. The heat from the hairdryer helps soften and loosen the wax residue, making it easier to remove. On the other hand, soaking the candlestick in vinegar breaks down the wax and aids in its removal. To emphasize these options, consider the following table:

Method Benefits
Hairdryer Softens wax
Vinegar soak Breaks down residue

Once you’ve let the baking soda paste sit for a few minutes and considered utilizing either a hairdryer or vinegar soak, you’re ready to move on to scrubbing with a toothbrush. This step will effectively eliminate any remaining wax and leave your candlestick looking clean and polished.

Scrub with a Toothbrush

To achieve the ultimate level of cleanliness and shine, it’s time to unleash the power of a toothbrush on your unsuspecting candlestick. A toothbrush isn’t only effective in removing wax from candlesticks but also serves as a versatile tool for wax removal on other surfaces.

If you don’t have a toothbrush handy, don’t worry! There are toothbrush alternatives that can get the job done just as well. Simply dip the bristles of the toothbrush in warm, soapy water and begin scrubbing away at the wax residue. The firm bristles will agitate the wax, loosening its grip on the candlestick surface. Remember to use gentle but firm strokes to avoid scratching or damaging delicate materials.

Once you’ve thoroughly scrubbed off as much wax as possible, it’s time to move on to the next step: using paper towels for a final touch-up.

Use Paper Towels

Gently press a paper towel against the wax on your candlestick, allowing it to absorb the melted wax and leave behind a clean surface. This method is effective in removing wax residue without causing damage to the candlestick.

Here are three reasons why using paper towels can be beneficial:

  • Convenience: Paper towels are readily available in most households, making them a convenient option for quick cleanups. Unlike toilet paper or cloth towels, which may require washing afterwards, paper towels can simply be disposed of after use.

  • Absorbency: Paper towels have excellent absorbent properties, enabling them to soak up melted wax effectively. Their porous texture allows them to quickly absorb the liquid wax and prevent it from spreading further onto the candlestick’s surface.

  • Versatility: Paper towels can be easily maneuvered into crevices and corners to remove stubborn wax residue. Their soft texture ensures that they won’t scratch or damage delicate surfaces while cleaning.

Once you have removed the wax using paper towels, you can proceed to polish and clean your candlestick for a pristine finish. By following these steps, you’ll be able to restore your candlestick’s original beauty and ensure its longevity without any hassle.

Polish and Clean

When it comes to polishing my candlestick holder, I always reach for a clean cloth. Using gentle circular motions, I carefully polish the surface until it shines.

Once I’ve removed all the wax residue, I can finally enjoy my clean and wax-free candlestick holders.

Use a Clean Cloth to Polish the Candlestick Holder

First, grab a soft cloth and start polishing the candlestick holder to remove any remaining wax. Using a clean cloth is an effective method for getting rid of wax buildup on the holder’s surface. Gently rub the cloth in circular motions, applying light pressure to ensure a thorough cleaning. If there are stubborn wax stains, you can try alternative methods such as using a hairdryer to melt the wax and then wiping it away with the cloth. Make sure to be cautious while using heat and avoid damaging the candlestick holder.

Once you’ve finished polishing, proceed to wipe away any remaining residue from the surface. This will leave your candlestick holder looking clean and ready for use again without any leftover wax residue.

Wipe Away any Remaining Residue

After using a clean cloth to polish the candlestick holder, you may still notice some stubborn wax residue lingering on the surface. But fear not! There are a couple of effective methods to completely wipe away any remaining wax.

One option is to use a blow dryer on low heat to gently warm up the wax. As it softens, you can easily scrape it off with a plastic card or your fingernail (be careful not to scratch the surface!).

Another solution is rubbing alcohol. Dampen a clean cloth with rubbing alcohol and gently rub the residue until it dissolves and comes off. Remember to test this method on a small, inconspicuous area first to ensure it doesn’t damage or discolor the candlestick holder.

With these techniques, you’ll quickly say goodbye to any trace of waxy buildup and be ready to enjoy your clean and wax-free candlestick holders!

Enjoy Your Clean and Wax-Free Candlestick Holders!

Now that your candlestick holders are sparkling clean and free from any wax residue, you can bask in the delightful ambiance they create for your favorite evening activities.

To ensure that your candlestick holders remain wax-free and maintain their pristine condition, it’s important to follow some cleaning methods and maintenance tips. After removing the initial wax using the freezer or hot water method, wipe away any remaining residue with a soft cloth or paper towel. For stubborn residue, gently scrape it off using a plastic scraper or credit card. Avoid using sharp objects that may damage the surface of the holder.

Once all the wax has been removed, give them a final wipe down with a mild soap solution to remove any lingering grime or fingerprints. Remember to dry them thoroughly before storing or displaying them again.

By regularly following these cleaning methods and maintenance tips, you can enjoy your candlestick holders in their best condition for years to come.

Frequently Asked Questions

Can I use a hairdryer to remove wax from a candlestick?

Yes, you can use a hairdryer to remove wax from a candlestick. Simply aim the hairdryer at the wax and apply heat until it begins to melt. Once melted, you can wipe away the wax with a cloth or paper towel.

However, if you prefer alternatives to using a hairdryer, there are other methods available. For example, placing the candlestick in the freezer can also help harden the wax, making it easier to remove.

What other materials can be used to remove wax from a candlestick?

Oh, the joy of wax-covered candlesticks! Fear not, my fellow enthusiasts, for I’ve unearthed a treasure trove of alternative methods to rid your precious candle holders from that stubborn wax.

Prepare yourself for a journey into the realm of household items that possess magical wax-removing powers. Brace yourself for the wonders of ice cubes, which harden the wax and make it easily scrapeable.

And lo and behold, behold the mighty power of boiling water, which melts away the waxy mess in an instant!

Can I use vinegar to clean the candlestick after removing the wax?

Yes, you can use vinegar to clean the candlestick after removing the wax. However, I’d recommend using lemon juice instead as it’s more effective in breaking down any remaining wax residue. Simply soak a cloth or sponge in lemon juice and gently scrub the candlestick until it’s clean. Additionally, rubbing alcohol is highly effective in removing wax residue from the candlestick. Apply some rubbing alcohol to a cloth and wipe away any stubborn spots of wax.

Is it necessary to polish the candlestick after removing the wax?

Polishing candlesticks after removing wax offers several benefits. Firstly, it restores the shine and luster of the metal, enhancing its appearance. Secondly, polishing helps to remove any residual dirt or grime that may have accumulated on the surface.

However, if you prefer not to polish your candlestick, there are alternatives available. For instance, you can use a gentle cleanser and warm water to clean it thoroughly without the need for polishing.

Can I use baking soda to remove wax stains from the candlestick?

Yes, you can use baking soda as an alternative to remove wax stains from a candlestick. Baking soda is known for its effectiveness in cleaning various surfaces and materials, including removing wax. Its fine particles work to absorb the wax residue and lift it away from the surface of the candlestick.

Simply mix baking soda with water to create a paste, apply it onto the stained areas, gently scrub, and then wipe clean for optimal results.

Conclusion

In conclusion, removing wax from candle sticks can be a daunting task, but with the right techniques and materials, it can be easily accomplished.

By freezing the wax and carefully scraping it off, using hot water or a hair dryer to melt away any remaining residue, and using vinegar or baking soda to dissolve stubborn stains, you can restore your candle sticks to their former glory.

With a little patience and some elbow grease, you’ll have clean and polished candle sticks that’ll add beauty to any space.

So go ahead and give your candle sticks the TLC they deserve!

Continue Reading

Beginners Guides

How To Remove Wax From Candle Holder

Published

on

By

An image showcasing a glass candle holder covered in melted wax

As I look upon the soft glow of my preferred fragranced candle, I find myself in awe of its elegance and the serene atmosphere it brings forth. Yet, following numerous hours of illumination, a persistent coating of wax frequently adheres to the holder of the candle, lessening its charm.

But fear not! In this article, I will guide you through the process of effortlessly removing wax from your candle holders.

Whether you have glass, metal, or ceramic holders, each requires a specific approach. From freezing the wax to applying heat and even using vinegar or alcohol for those hard-to-reach crevices, I will share all the tried-and-true techniques to restore your candle holders’ pristine shine.

By following these simple yet effective steps, you’ll be able to enjoy your clean candle holders once again. So gather your supplies and prepare for a satisfying cleaning journey that will leave your cherished holders looking as good as new.

Say goodbye to that pesky wax buildup and hello to an unobstructed glow that enhances any space in an instant!

Key Takeaways

  • Different materials require different cleaning methods for removing wax.
  • Freezing the wax makes it easier to remove and prevents it from spreading.
  • Applying heat softens the wax, making it easier to remove.
  • Vinegar and alcohol can be used to remove stubborn wax residue from candle holders.

Assess the Type of Candle Holder

Take a look at your candle holder and see what kind of wax mess you’re dealing with. The first step in removing wax from a candle holder is assessing the type of material it’s made of.

Different materials require different cleaning methods. If your candle holder is made of glass or metal, you’re in luck as these are easier to clean. Glass holders can be placed in the freezer for a few hours until the wax hardens and then easily scraped off with a butter knife or credit card. Metal holders can be treated similarly by freezing them and then using a cloth to wipe away the hardened wax.

If your candle holder is made of ceramic or porcelain, freezing may cause the material to crack or break, so it’s best to avoid this method. Instead, fill a basin with warm water and dish soap and soak the holder for about 30 minutes. This will help loosen the wax, making it easier to remove with a soft cloth or sponge.

Now that you’ve assessed your candle holder materials and determined the best cleaning method, let’s move on to freezing the wax without damaging your beautiful holder.

Freeze the Wax

To expedite the process, simply pop your candle holder in the freezer for a few hours until the wax hardens completely. Did you know that freezing the wax can make it up to 50% easier to clean?

Freezing is a preventive measure that helps prevent any residual wax from spreading or seeping into other parts of the holder. By freezing, you ensure that the wax remains contained and solidifies, making it simpler to remove.

Once the wax has hardened, take out the candle holder from the freezer and gently tap it on a hard surface. The frozen wax will easily detach from the holder, often in one piece or large chunks. Use a knife or your fingers to scrape off any remaining bits of frozen wax.

Although freezing is an effective method, there are alternative methods to remove wax from candle holders. One popular option is using hot water. By pouring boiling water into the holder, you can melt and loosen stubborn remnants of wax. This will be discussed further in the next section.

By freezing your candle holder before cleaning, you significantly reduce time and effort spent on removing melted wax. Now let’s move on to another method – using hot water – which offers its own advantages for effectively cleaning candle holders without damaging them.

Use Hot Water

When tackling the cleaning process, you’ll be amazed at how easily hot water can help you restore your candle holder to its pristine condition. Using boiling water is a simple and effective method for removing wax from your candle holder. Here’s how you can do it:

  • Boil a pot of water on the stove.
  • Carefully pour the boiling water into the candle holder, ensuring that it covers all areas with wax residue.
  • Let the hot water sit in the candle holder for a few minutes to soften the wax.
  • Use a soft cloth or sponge to scrub away any remaining wax.

Alternatively, there are other methods you can try if hot water isn’t suitable for your specific candle holder material. Some alternative methods for removing wax include using heat guns, hairdryers, or even rubbing alcohol.

By using hot water or one of these alternative methods, you can easily remove stubborn wax from your candle holder without damaging it. Once all the wax has been removed, proceed to scrape off any residual bits before moving on to the next step of restoring your candle holder.

Now let’s move on to learning how to scrape off the remaining wax from your candle holder…

Scrape off the Wax

Now, it’s time to get rid of that stubborn wax clinging to your candle holder like a clingy friend. To scrape off the wax effectively, you’ll need some basic tools and follow a few simple scraping techniques. But before we dive into the details, let me show you a handy table that outlines the steps involved in this process.

Scrape Off Wax
Step 1: Gather Tools – Butter knife
– Plastic scraper
– Paper towels or cloth
– Rubbing alcohol (optional)
– Dish soap solution (optional)
Step 2: Cool Down Wax Place the candle holder in the freezer for about an hour to harden the wax.
Step 3: Scrape Gently Use the butter knife or plastic scraper to gently scrape off as much wax as possible from the surface of the holder. Be careful not to scratch or damage it.
Step 4: Remove Residue Dampen a paper towel or cloth with rubbing alcohol or dish soap solution and wipe away any remaining residue.

When using scraping techniques to remove wax, always remember some safety precautions. Avoid using sharp objects that could harm yourself or damage the holder. Take your time and be patient while scraping off the wax to prevent accidents.

With all that stubborn wax successfully removed from your candle holder, let’s move on to our next step: applying heat to further clean and restore its original shine.

Apply Heat

Using heat is a simple yet effective way to revive the beauty of your candle holder and restore its original shine. When wax hardens on your candle holder, applying heat can help soften it, making it easier to remove.

There are several methods you can use to apply heat. One option is to use a hairdryer on a low heat setting. Hold the hairdryer about six inches away from the wax and move it back and forth until the wax starts melting.

Another alternative method is to place the candle holder in a preheated oven at a low temperature, around 150°F (65°C), for a few minutes until the wax becomes soft and pliable.

By applying heat, you make it much simpler to scrape off the softened wax using a plastic scraper or an old credit card. Be sure not to scratch or damage the surface of your candle holder while scraping off the wax.

Once you have removed most of the melted wax, proceed to wipe any remaining residue with a cloth, as we’ll discuss in detail in the subsequent section.

Wipe with a Cloth

After applying heat, gently wipe the softened residue off your candle holder with a soft cloth, revealing its renewed radiance. When it comes to cloth wiping techniques, there are a few options to consider. Firstly, you can use a microfiber cloth, which is known for its ability to trap dirt and dust particles effectively. This type of cloth is gentle on delicate surfaces like glass or ceramic candle holders and will prevent any scratches or damage. Alternatively, you can also use an old cotton t-shirt or a lint-free cloth for this task.

To maximize the effectiveness of your cleaning technique, make sure to apply moderate pressure while wiping in circular motions. This will help remove any stubborn wax residue that may still be clinging onto the surface. Additionally, you may want to consider using alternative cleaning methods if the wax proves difficult to remove with just a cloth. In the next section, we will explore how vinegar or alcohol can aid in the removal process.

By incorporating these simple cloth wiping techniques and exploring alternative cleaning methods like vinegar or alcohol, you’ll be able to restore your candle holder’s original beauty effortlessly.

Use Vinegar or Alcohol

After wiping the candle holder with a cloth, I found that there were still some stubborn wax residue remaining. That’s when I decided to try using vinegar or alcohol as a cleaning agent.

Vinegar is known for its natural cleaning properties and can be used effectively to remove wax. To use vinegar, simply soak a cloth in undiluted white vinegar and gently rub it over the wax stains. The acidity of the vinegar helps break down the wax, making it easier to wipe away.

Another option is to use alcohol, such as rubbing alcohol or isopropyl alcohol. Alcohol dissolves wax quickly and effectively without leaving any residue behind. Simply dampen a cloth with alcohol and gently rub it over the wax stains until they disappear.

Using vinegar or alcohol not only removes the wax but also helps disinfect the candle holder, leaving it clean and fresh. Vinegar is an eco-friendly option that’s safe to use around pets and children, while alcohol provides quick results.

Now that we’ve successfully removed most of the wax using these methods, let’s move on to the next step: scrubbing with baking soda.

Scrub with Baking Soda

Now, let’s get our hands dirty and scrub away the stubborn residue like a determined gardener tending to their soil. When it comes to removing wax from candle holders, baking soda is an excellent natural alternative. Not only does it effectively remove the wax, but it also offers several benefits over chemical-based cleaners.

Baking soda works by acting as a gentle abrasive that helps lift off the wax without scratching or damaging the surface of your candle holder. To use baking soda, simply sprinkle a generous amount onto the affected area and gently scrub in circular motions using a soft cloth or sponge. The baking soda will absorb the wax and leave your candle holder looking clean and shiny.

One of the main benefits of using natural ingredients like baking soda is that they are safe for both you and the environment. Chemical-based cleaners often contain harsh ingredients that can be harmful if ingested or come into contact with your skin. By opting for natural alternatives, you can ensure a safer cleaning experience.

Now that we have successfully removed the wax residue from our candle holder, let’s move on to polishing it to restore its original shine.

Polish the Holder

To bring out the natural shine of your candle holder, you can easily polish it using a simple household ingredient. Using metal polish for candle holders is an effective way to restore their luster and remove any remaining wax residue.

First, make sure the holder is clean and dry before applying the polish. Take a small amount of metal polish onto a soft cloth and gently rub it onto the surface of the holder in circular motions. This will help to remove any tarnish or dullness. Once you’ve finished polishing, use another clean cloth to buff the holder until it shines.

After polishing, consider applying a protective coating for long-lasting shine. There are various products available specifically designed for protecting metal surfaces. Simply follow the instructions on the packaging to apply the coating evenly over your candle holder. This will not only enhance its shine but also provide a barrier against future wax buildup.

Now that your candle holder is sparkling clean and polished, enjoy its beauty! Place your favorite candles inside and create a cozy atmosphere in your home.

Enjoy Your Clean Candle Holders!

Bask in the beauty of your newly polished candle holders and create a warm, inviting ambiance in your home. Now that your candle holders are clean and shiny, it’s time to get creative with repurposing them! Don’t let those old holders go to waste – there are so many ways you can give them a new life.

One idea is to turn them into mini succulent planters. Simply place a small succulent or cactus inside each holder and watch as they add a touch of greenery to any space. Another option is to use them as stylish storage containers for small items like cotton balls, paperclips, or even jewelry.

To freshen up your repurposed candle holders, consider using essential oils. These oils not only provide a pleasant aroma but also help keep your holders clean and sanitized. Lavender oil is known for its calming properties, while lemon oil adds a refreshing scent. Alternatively, you could try eucalyptus oil for its soothing effects.

Incorporate these ideas into your home decor and enjoy the versatility of your newly cleaned candle holders. They’re not just functional anymore – they’re now beautiful pieces that add character and charm wherever you place them.

Frequently Asked Questions

Can I use a blow dryer to remove wax from a candle holder?

Yes, using a blow dryer is a great alternative to remove wax from a candle holder. However, another effective method is by using hot water. Start by placing the candle holder in a sink or bowl filled with hot water and let it sit for a few minutes. The heat will melt the wax, allowing you to easily wipe it away with a cloth or paper towel. Remember to be careful when handling hot objects and always prioritize safety.

Is it safe to use abrasive materials like steel wool to remove wax from a candle holder?

Using abrasive materials like steel wool to remove wax from a glass candle holder can cause potential risks and damage. Statistics show that 1 in 5 people accidentally break their candle holders when using abrasive methods.

Instead, try alternative non-abrasive methods such as freezing the candle holder or using hot water and dish soap. These methods are effective without risking any damage to your candle holder.

What is the best way to remove colored wax stains from a glass candle holder?

The best way to remove colored wax stains from a glass candle holder is to freeze the holder first. Place it in the freezer for a couple of hours until the wax hardens. Then, gently scrape off as much wax as possible using a plastic scraper or your fingernail.

To remove any remaining residue, soak the holder in warm soapy water and scrub with a soft sponge. Alternatively, you can use rubbing alcohol or vinegar for stubborn stains.

How long should I leave the candle holder in the freezer before attempting to remove the wax?

I’m not one to freeze time, but when it comes to removing wax from a candle holder, I’ll gladly make an exception.

If you’re using the freezer method, it’s best to leave the holder in there for about two hours. However, if you prefer a quicker approach, grab that trusty blow dryer and heat the wax until it softens. Just be careful not to overheat!

Alternatively, there are other methods like boiling water or using rubbing alcohol.

Can I use a dishwasher to clean my candle holders after removing the wax?

Using vinegar to clean candle holders is a safe and effective method. However, using hot water to remove wax from a candle holder can be risky as it may cause the wax to melt and spread further. It’s best to use warm water instead.

Additionally, make sure to place the candle holder in a sink or basin before pouring the water to prevent any mess.

Conclusion

Well, there you have it! By following these simple steps, you can easily remove wax from your candle holder and have them looking as good as new.

From assessing the type of holder to freezing the wax and using hot water, we’ve covered all the bases. Don’t forget to apply heat, use vinegar or alcohol, scrub with baking soda, and polish the holder for that extra sparkle.

Now you can enjoy your clean candle holders and impress your guests with your impeccable cleaning skills!

Continue Reading

Beginners Guides

How To Get Wax Out Of Candle Jar Tiktok

Published

on

By

An image capturing a TikTok-inspired tutorial on removing wax from a candle jar

Have you ever ended up with an attractive candle container that you simply couldn’t bring yourself to discard? I faced a similar issue not too long ago. Once I finished my preferred fragrant candle, I found myself with a jar that had remnants of wax stuck to its edges. Resolute in my decision to repurpose it, I sought out inventive ideas on TikTok.

In this article, I will guide you through the process of getting wax out of a candle jar using popular TikTok hacks. With just a few simple steps and common household items, you’ll be able to repurpose your empty candle jars in no time.

First, we’ll gather our supplies and then freeze the candle jar to easily remove any remaining wax.

We’ll use hot water to melt away stubborn remnants and thoroughly clean the jar with soap and water.

Finally, we’ll polish the jar for a sparkling finish that will make it look brand new.

So grab your old candle jars and let’s dive into the world of TikTok-inspired candle hacks!

Key Takeaways

  • Repurpose empty candle jars using TikTok hacks
  • Use hot water and freezing techniques to remove wax residue
  • Clean the jar with soap, water, and rubbing alcohol to remove stubborn residue
  • Polish the jar for a sparkling finish before repurposing

Gather Your Supplies

Now you’re ready to start the fun part – grab your trusty oven mitt and a butter knife! When it comes to getting wax out of a candle jar, there are a few different methods you can try.

One option is candle jar recycling, where you simply clean out the remaining wax and reuse the jar for another candle or storage container. Another alternative is using various wax removal methods that allow you to repurpose the jar for other purposes.

To begin, put on your oven mitt to protect your hands from any potential heat. Take your butter knife and carefully insert it between the edge of the wax and the side of the jar. Gently pry up on the wax until it starts to loosen. Continue working around the edges until all of the wax has been lifted out.

Once you have removed as much wax as possible with this method, there may still be some residue left behind. To tackle this, consider freezing the candle jar. This will cause any remaining wax to harden and shrink away from the sides of the jar, making it easier to scrape off with your butter knife.

Now that we have gathered our supplies and removed most of the wax from our candle jar, let’s move on to freezing it for easier cleanup.

Freeze the Candle Jar

First, try popping that candle jar in the freezer and watch the magic unfold as the ice-cold temperatures work their wonders. Freezing the candle jar is one of the best cleaning hacks I’ve come across for removing wax. Not only does it make clean-up easier, but it also allows you to recycle the jar for other purposes.

To freeze the candle jar, simply remove any remaining wax or wick from inside. Then, place the empty jar in your freezer and let it sit for a few hours or overnight. The freezing temperature will cause the wax to contract and harden, making it much simpler to remove.

Once you take out the frozen candle jar, use a spoon or knife to gently pry off the solidified wax. Start at one edge and slowly work your way around until all of the wax has been removed. Be careful not to scratch or damage the glass.

With this simple trick, you can easily repurpose your candle jars for storage or decoration without wasting any wax! So go ahead and give freezing a try – it’s an effective method that will save you time and provide you with endless recycling ideas for your old candle jars.

Now let’s move on to removing any remaining residue with a spoon or knife…

Remove the Wax with a Spoon or Knife

Once you’ve frozen the candle jar, use a spoon or knife to delicately scrape away the hardened wax. This step is crucial in removing wax stains and preparing the jar for alternative wax removal methods.

The freezing process helps solidify the wax, making it easier to remove from the glass surface. To begin, gently insert the edge of a spoon or knife between the wax and the jar’s side. Slowly work your way around, applying slight pressure to lift and loosen the wax. Be cautious not to damage or scratch the glass as you scrape.

As you scrape off larger chunks of wax, you may notice some residue still clinging stubbornly to the glass. In such cases, use gentle back-and-forth motions with your tool to dislodge those last bits. Take your time and be patient; being too forceful can cause accidents or damage.

Now that most of the hardened wax has been removed, we can move on to melting any remaining residue using hot water. But before we do that, let’s make sure all visible pieces have been scraped off completely.

Transitioning into our next step about using hot water to melt remaining wax…

Use Hot Water to Melt Remaining Wax

To effortlessly remove any lingering wax residue, simply pour hot water into the jar and let it work its magic. The hot water will help to melt the remaining wax, making it easier to clean out of the jar. You can use a hairdryer on a low heat setting to speed up the process if you’re in a hurry.

Start by filling the jar with enough hot water to cover the remaining wax. Allow the water to sit in the jar for a few minutes, giving it time to soften and loosen the wax. As the water cools down, you may notice that some of the melted wax starts to solidify again. Don’t worry – this is completely normal.

Once you’ve given it enough time, carefully pour out the water along with any melted wax remnants. If there are stubborn stains left behind, you can try using vinegar as a gentle cleanser. Simply dampen a cloth or sponge with vinegar and gently scrub away at any tough spots.

After removing all of the wax residue, it’s important to clean the jar thoroughly with soap and water before using it for anything else. This will ensure that no traces of wax or vinegar remain in order to have a clean and fresh candle jar ready for reuse or repurposing.

Clean the Jar with Soap and Water

Now, it’s time to give the jar a thorough cleaning using soap and water. Cleaning techniques are crucial to remove any remaining wax and ensure that the jar is ready for its alternative uses.

Start by filling a sink or basin with warm water and adding a few drops of dish soap. Gently place the jar in the soapy water, making sure it’s fully submerged. Let it soak for about 10 minutes to loosen any residue.

After soaking, take a clean sponge or cloth and scrub the inside of the jar, paying extra attention to areas where wax may have stuck. Use circular motions to effectively remove any remaining wax. Rinse the jar thoroughly with warm water to get rid of any soap residue.

Once cleaned, dry the jar completely with a clean towel or let it air dry. Now that your jar is clean, you can move on to removing stubborn residue with rubbing alcohol.

By following these cleaning techniques, you’ll be able to repurpose your candle jar for various uses such as storing small trinkets or organizing office supplies. Removing stubborn residue with rubbing alcohol will help ensure that your jar is perfectly clean and ready for its new purpose without leaving behind any trace of wax.

Remove Stubborn Residue with Rubbing Alcohol

If you’re struggling to remove stubborn residue from your candle jar, try using rubbing alcohol for a spotless finish. Rubbing alcohol is a great option because it effectively breaks down the wax and leaves your jar looking brand new.

Here’s how to use it:

  1. Gather your supplies: You’ll need rubbing alcohol, cotton balls or a soft cloth, and warm water.

  2. Pour some rubbing alcohol onto a cotton ball or dip a cloth into it. Gently rub the residue in circular motions until it starts to loosen.

  3. If the residue is particularly stubborn, you can try using vinegar instead of rubbing alcohol. Vinegar has similar properties and can also help dissolve the wax.

Remember to be gentle when cleaning your jar so that you don’t scratch or damage it.

If you’re dealing with hardened wax inside the jar as well, here’s a bonus tip: try using a hairdryer to melt the wax faster before cleaning with rubbing alcohol or vinegar.

Once you’ve successfully removed all the residue, you can move on to polishing the jar for a sparkling finish without any traces of wax left behind.

Polish the Jar for a Sparkling Finish

Once you’ve conquered the residue battle, it’s time to make that jar shine like a diamond. To achieve a sparkling jar, start by ensuring that all the residual wax and rubbing alcohol have been completely removed from the surface. Use a clean cloth or paper towel to wipe away any remaining residue.

Next, gather some materials to polish the jar. You’ll need a soft microfiber cloth and some glass cleaner or vinegar solution. Spray a small amount of cleaner onto the cloth and gently rub it in circular motions all over the jar’s surface. This’ll help remove any smudges or fingerprints, leaving your jar looking shiny and flawless.

For an extra touch of sparkle, consider adding some creative candle decorations to your newly cleaned jar. You can tie a ribbon around the rim or attach small decorative charms with adhesive glue. Another idea is to fill the empty space inside with colorful beads or marbles for an eye-catching display.

With your sparkling jar ready, you can now move on to repurposing it in imaginative ways. Whether you use it as a stylish pen holder, a container for makeup brushes, or even as a mini terrarium for succulents, the possibilities’re endless!

Repurpose the Clean Candle Jar

Transform your newly cleaned candle jar into a versatile and stylish storage solution that’ll elevate any space.

Once the jar’s clean and free of wax residue, let your creativity shine by exploring different repurpose ideas.

One option is to turn it into a beautiful succulent or herb planter. Simply fill the jar with soil, plant your favorite greenery, and watch it thrive in its new home.

Another idea is to use the jar as a makeup brush holder or pen organizer on your desk. Its transparent design will make finding what you need a breeze.

If you’re feeling crafty, consider transforming the jar into a unique centerpiece for your dining table. Fill it with colorful stones or marbles, add some artificial flowers or candles, and voila! You have an eye-catching decoration that’ll impress your guests.

For those who love DIY projects, try turning the candle jar into a personalized lantern by adding fairy lights inside. This cozy addition creates a warm and inviting ambiance in any room.

Get inspired by browsing online for more decorating ideas using repurposed candle jars. The possibilities are endless!

Now that you’ve transformed your candle jar into something amazing, share your success on TikTok to inspire others to get creative with their empty jars too!

Share Your Success on TikTok

Show off your incredible candle jar creations and inspire others on TikTok with your creative genius! Sharing your success on TikTok is a great way to showcase your talents and connect with like-minded individuals. Here are some tips for going viral on TikTok and maximizing your reach.

Firstly, make sure to create engaging content that stands out from the crowd. Whether it’s a time-lapse video of you transforming an old candle jar or a step-by-step tutorial, captivate your audience with visually appealing and informative videos. Use catchy captions and hashtags related to candles, DIY projects, or home decor to increase discoverability.

Additionally, consider collaborating with other creators in the candle-making community. This not only expands your network but also exposes you to their followers, increasing the chances of going viral. Don’t forget to engage with your audience by responding to comments and addressing any questions they may have.

Furthermore, stay consistent in posting new content regularly. The algorithm favors active users who consistently provide valuable content. Experiment with different video formats such as behind-the-scenes footage, challenges, or even comedic skits related to candle jars.

By sharing your success stories and implementing these tips for going viral on TikTok, you can inspire others while gaining recognition for your creativity.

Now let’s explore more creative candle hacks on TikTok without delay!

Explore More Creative Candle Hacks on TikTok

Ignite your creativity and discover a world of mesmerizing candle hacks on TikTok that’ll leave you spellbound! TikTok’s a treasure trove of inspiration when it comes to candle decorating and DIY candle making. From simple techniques to intricate designs, there’s something for everyone to explore.

One popular trend on TikTok is using dried flowers or herbs to decorate candles. This adds a beautiful touch and creates a unique visual appeal. You can press flowers between wax paper and then gently place them onto the surface of the candle before it solidifies. The result? A stunning botanical masterpiece that can be customized to match any aesthetic.

Another creative hack involves using cookie cutters as molds for your homemade candles. Simply melt your wax, add your desired fragrance or color, and pour it into the cookie cutter. Once it solidifies, you’ll have beautifully shaped candles that’re perfect for gifting or displaying in your home.

If you’re feeling adventurous, try experimenting with different colors and scents by layering melted wax in various shades. This technique creates captivating ombre effects that’re sure to impress.

TikTok’s also filled with tutorials on how to create marbled candles using nail polish or acrylic paint. By swirling different colors together, you can achieve stunning patterns that resemble marble stone.

So why not dive into the world of candle hacks on TikTok? With endless inspiration at your fingertips, you’ll be amazed at what you can create with just a few simple materials and some imagination!

Frequently Asked Questions

Can I use any type of soap to clean the jar?

Yes, you can use dish soap to clean the jar. It’s an effective and safe option for removing wax residue. Simply fill the jar with hot water and add a few drops of dish soap. Let it sit for a few minutes to loosen the wax, then scrub the inside of the jar with a sponge or brush. Rinse thoroughly with warm water to remove any soap residue. If there are stubborn residues, you can also try other methods like using vinegar or rubbing alcohol.

How long should I freeze the candle jar for?

How long should you freeze the candle jar for? Well, here’s a better question: Do you want to remove wax from your candle jar without freezing it? If so, I’ve got some tips for you!

First, try placing the jar in the freezer for about 30 minutes. Then, use a butter knife or spoon to gently pry out the hardened wax. Alternatively, you can heat the jar slightly with a hairdryer and wipe away the melted wax.

Remember, these methods are great if you want to clean candle jars without using water!

Can I use a hairdryer to melt the remaining wax instead of hot water?

Yes, you can use a hairdryer to melt the remaining wax in a candle jar. However, there are other methods that may be more effective.

Using a blowtorch is an option for removing wax residue, but it requires caution and should only be done by experienced individuals.

Another method is melting the wax with a candle warmer, which provides gentle heat and allows for easy removal of the melted wax.

Are there any alternative methods to remove stubborn residue besides rubbing alcohol?

There are several alternative methods you can try for removing stubborn residue besides using rubbing alcohol. One option is to use a mixture of vinegar and warm water, which can help break down the residue.

Another method is to use baking soda and water paste, applying it to the residue and gently scrubbing it away.

Additionally, you can try using lemon juice or dish soap mixed with warm water to effectively remove the stubborn residue.

Can I use the cleaned candle jar for food storage?

Yes, you can use a cleaned candle jar for food storage as long as you follow proper cleaning techniques to ensure food safety. Start by scraping out any remaining wax and then wash the jar with hot soapy water. Rinse thoroughly and sanitize it by soaking in a mixture of bleach and water or using a dishwasher.

Once clean, you can repurpose the candle jar for storing dry goods like grains, nuts, or even homemade snacks. It’s a creative way to reduce waste and add functionality to your kitchen storage.

Conclusion

In conclusion, removing wax from a candle jar can be a simple and satisfying DIY project. By following the steps outlined in this article, you can easily clean out your candle jar and give it a new lease on life.

Whether you choose to repurpose it as a storage container or create a unique decor piece, the possibilities are endless. One example of repurposing a clean candle jar is using it to hold small office supplies such as paperclips and thumbtacks, creating an organized workspace that sparks creativity.

So why not give it a try and share your success on TikTok? You might just inspire others to get creative with their candle jars too!

Continue Reading

Trending