Connect with us

Beginners Guides

Where Does The Wax In A Candle Go

Published

on

An image capturing the mesmerizing sight of a lit candle gradually melting, showcasing the delicate streams of molten wax elegantly cascading down the sides and pooling at the base, revealing the mysterious destination of the enigmatic substance

Ever pondered the destination of candle wax after it has been ignited? The process is enthralling, featuring the complex chemistry involved in the combustion of a candle. As a chemist, I have explored the scientific principles underlying this occurrence and am eager to discuss my discoveries with you.

When we light a candle, the wax undergoes a series of transformations, transitioning from solid to liquid to gas. These phases occur due to the heat generated by the flame and the interaction between the wax, the wick, and the surrounding air.

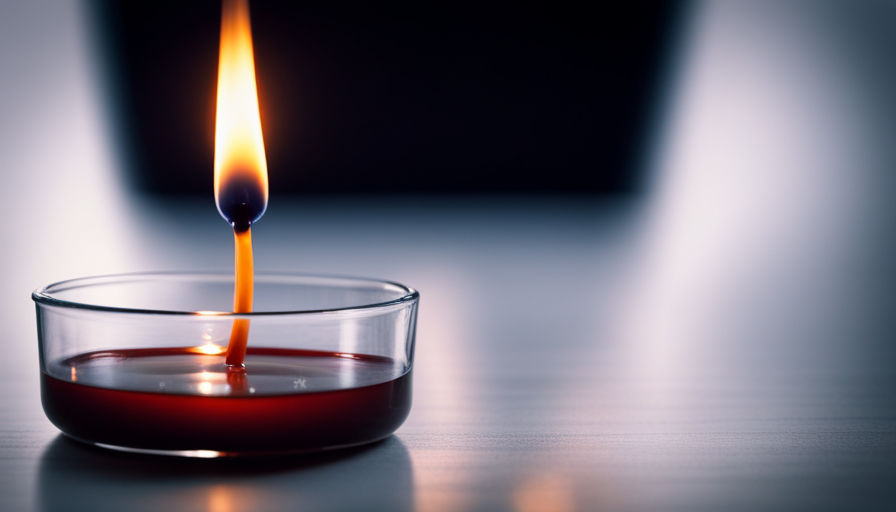
The wax is drawn up the wick through capillary action, where it is vaporized and burned, releasing heat and light.

Understanding this process is not only intriguing but also crucial in maximizing candle efficiency and ensuring safety. Moreover, it’s essential to explore alternative candle options to minimize environmental impact.

In this article, we will delve into the chemistry of candle burning, the role of the wick and oxygen, the release of heat and light, and the environmental implications. Join me as we unravel the secrets of where the wax in a candle goes and discover the fascinating world of candle chemistry.

Advertisement

Key Takeaways

  • The wax in a candle goes through a series of phases, including melting, vaporization, and combustion.
  • During combustion, the wax reacts with oxygen to release heat and light, with the main products being carbon dioxide and water.
  • The design of the wick and flame height determine the path of wax combustion, affecting the rate of wax consumption.
  • Candle burning can impact indoor air quality and the environment, releasing soot particles and contributing to air pollution and the release of harmful chemicals.

The Chemistry of Candle Burning

As the candle burns, the wax magically transforms into a mesmerizing dance of vibrant flames and flickering light. This captivating process is driven by the understanding of combustion reactions.

When the heat from the flame reaches the solid wax, it causes the wax to melt and vaporize. These vapors then react with the oxygen in the air, resulting in a chemical reaction known as combustion. The main products of this reaction are carbon dioxide (CO2) and water (H2O), along with some trace amounts of other gases and soot particles.

The combustion of wax is an exothermic reaction, meaning it releases heat energy. This heat further sustains the combustion process, allowing the flame to continue burning. The release of carbon dioxide is an important aspect of candle burning. It is this gas that contributes to the vibrant flames we see. As the carbon atoms in the wax vapor combine with oxygen, they form carbon dioxide gas, which is responsible for the blue portion of the flame.

Understanding the phases of candle burning is crucial in comprehending where the wax goes. It involves the transformation of solid wax into liquid and gaseous forms, followed by the combustion of these gaseous wax molecules. This process ensures that the wax is fully utilized, leaving behind minimal residue.

Understanding the Phases of Candle Burning

In understanding the phases of candle burning, there are three key points to consider.

First, the melting of the wax occurs as the heat from the flame is transferred to the solid wax, causing it to turn into a liquid.

Advertisement

Second, the liquid wax then vaporizes as the heat continues to increase, resulting in the formation of a gaseous phase.

Finally, the vaporized wax undergoes combustion as it reacts with oxygen in the air, producing heat and light.

Melting of the Wax

When the candle burns, the wax melts and transforms into a liquid state. This process of melting occurs due to the heat generated by the flame. The melting point of wax varies depending on the type of wax used, but generally falls between 110 to 150 degrees Fahrenheit. As the heat from the flame is applied to the solid wax, the temperature rises and surpasses the melting point, causing the wax to change from a solid to a liquid. This phase transition is an important step in the overall combustion process of the candle. Once the wax has melted, it enters the next stage of the burning process, where it vaporizes and combines with oxygen to produce heat, light, water vapor, and carbon dioxide.

Vaporization of the Liquid Wax

After the wax has melted, you’ll see it transform into a vapor as it combines with oxygen to create heat and light.

The vaporization process occurs when the liquid wax reaches its boiling point and turns into a gas. This is a result of the wax molecules gaining enough energy to overcome the forces holding them together.

Advertisement

Once in the gas phase, the wax molecules mix with the surrounding air, creating a mixture of vaporized wax and oxygen. This mixture is highly flammable and can ignite when exposed to a flame or spark, leading to combustion.

The wax evaporation is a crucial step in the candle’s burning process, allowing the wax to release energy in the form of heat and light.

Combustion of the Vaporized Wax

The vaporized wax combines with oxygen and transforms into a highly flammable mixture, ready to be ignited and release energy in the form of heat and light. During the phases of combustion, the vaporized wax undergoes a series of chemical reactions.

First, it breaks down into smaller hydrocarbon molecules, such as carbon dioxide and water vapor. These reactions release heat, which sustains the combustion process. As the wax continues to burn, more oxygen is drawn in through the wick, providing a constant supply of fuel for the flame. This continuous supply of wax vapor and oxygen ensures that the combustion process remains steady.

Throughout this process, the wax is gradually consumed, converting into gaseous byproducts. This transformation is essential for the candle to continue burning. Moving on to the role of the wick, it plays a crucial role in the combustion process.

Advertisement

The Role of the Wick

You may be surprised to learn that the wick in a candle plays a crucial role in determining where the wax goes. The design of the wick and the height of the flame are key factors in this process.

Wick Design:nnThe size and material of the wick affect how much wax is drawn up and burned. A larger wick will draw up more wax, resulting in a larger flame and faster burn rate.nnThe shape of the wick also influences the flow of melted wax. A twisted or braided wick creates capillary action, drawing the liquid wax upward.

Flame Height:nnThe height of the flame is determined by the amount of fuel being burned. A taller flame indicates a higher rate of wax consumption.nnIf the wick is too long, the flame can become too large, leading to excessive wax being consumed and wasted.

These factors work together to determine where the wax goes during combustion. The wick design and flame height directly affect the rate of wax consumption and can result in uneven burning or dripping. Understanding the role of the wick helps explain why some candles burn more efficiently than others.

Transitioning into the subsequent section about the role of oxygen in candle burning, we can explore how the availability of oxygen impacts the combustion process.

Advertisement

The Role of Oxygen in Candle Burning

Imagine being able to control the intensity and duration of your candle’s flame simply by adjusting the amount of oxygen it receives. Oxygen plays a crucial role in the burning process of a candle.

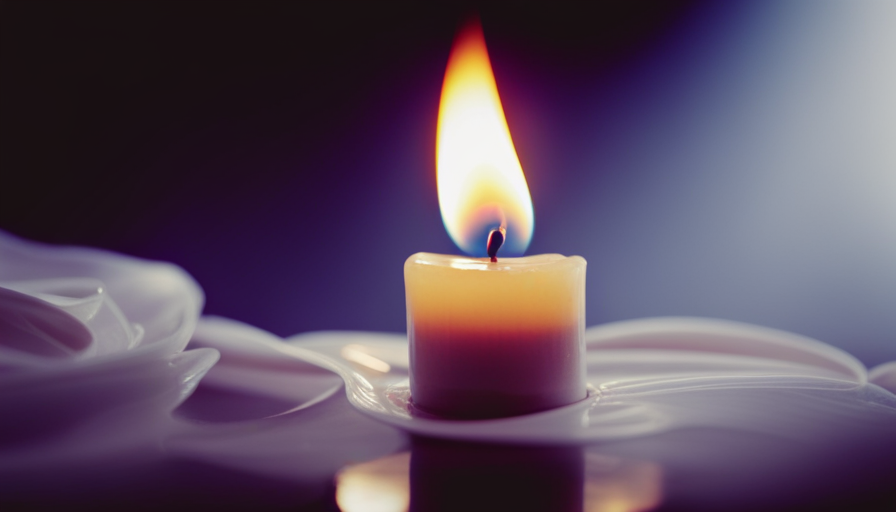
As the flame burns, it consumes oxygen from the surrounding air. This process, known as oxygen consumption, is essential for the candle to continue burning. The availability of oxygen directly affects the size and color of the flame. When there is a limited oxygen supply, the flame becomes smaller and flickers. On the other hand, when there is an abundant supply of oxygen, the flame burns brighter and steadier.

The color of the flame also changes with the amount of oxygen present. A well-oxygenated flame tends to have a blue color, indicating complete combustion. In contrast, a flame with limited oxygen appears more yellow or orange due to incomplete combustion.

Understanding the role of oxygen in candle burning allows us to manipulate the flame’s characteristics by controlling its oxygen supply. This brings us to the next section, where we will explore the release of heat and light.

The Release of Heat and Light

In the previous subtopic, we discussed the role of oxygen in candle burning. Now let’s dive into the current subtopic, which is the release of heat and light during the burning process.

Advertisement

When a candle burns, it undergoes a series of chemical reactions that result in the release of energy. This energy is primarily in the form of heat and light. The main component of a candle, the wax, serves as the fuel for these reactions.

As the heat from the flame melts the wax near the wick, it’s drawn up the wick and vaporized. This vapor then reacts with the oxygen in the air, producing carbon dioxide and water vapor. The heat generated during these reactions sustains the flame and keeps the process going.

The release of light occurs when the heated particles in the flame emit energy in the form of visible light. This process is known as incandescence.

To summarize, the burning of a candle involves the release of energy through chemical reactions, resulting in the production of heat and light. Now, let’s explore where exactly the wax goes during this process.

Where Does the Wax Go?

When a candle burns, the wax is consumed by the flame, undergoing a chemical reaction called combustion. This process releases heat and light, but also produces byproducts such as carbon dioxide and water vapor.

Advertisement

Additionally, as the wax burns, residue and soot can form, which may adhere to surfaces near the candle.

Consumption of the Wax

Did you know that when you burn a candle, the wax actually gets consumed in the process? The consumption of wax during the burning of a candle is a fascinating phenomenon to study. Wax depletion occurs as the heat from the flame melts the solid wax, turning it into a liquid.

This liquid wax is then drawn up the wick through capillary action, where it undergoes combustion. As the wax burns, it releases heat and light energy. The heat further melts the wax, sustaining the burning process. Over time, the wax level decreases, indicating the consumption of the wax.

Understanding the consumption of wax is crucial for candle makers and enthusiasts alike. Now, let’s explore the byproducts of candle burning to gain a comprehensive understanding of the entire process.

The Byproducts of Candle Burning

After the consumption of the wax, another important aspect to consider is the byproducts that are generated during the burning process. These byproducts can have a significant impact on both the environment and indoor air quality.

Advertisement
  1. Soot: When a candle burns, it produces tiny, black particles called soot. These particles can be released into the air and settle on surfaces, causing potential health issues and respiratory problems.

  2. Residue formation: As the candle burns, some of the wax can be left behind in the form of residue. This residue can accumulate on the candle holder, surrounding surfaces, and even on walls, requiring regular cleaning and maintenance.

  3. Environmental impact: The burning of candles contributes to air pollution by releasing harmful chemicals and greenhouse gases. This can have adverse effects on the environment, including air quality degradation and climate change.

Transitioning into the next section, the residue and soot formation play a crucial role in understanding the complete picture of where the wax goes after burning.

Residue and Soot Formation

To truly understand the impact of burning candles, picture the residue and soot that form, coating surfaces and lingering in the air around you. These byproducts are not only unsightly but can also pose health risks. Residue prevention and soot reduction are key considerations when it comes to candle usage.

To illustrate the extent of the issue, consider the following table:

Surface Residue (grams) Soot (micrograms)
Walls 4.2 2.8
Furniture 2.9 1.5
Curtains 1.6 1.2
Air (per hour) 7.1 4.6

These numbers highlight the importance of taking measures to minimize residue and soot. Regularly cleaning surfaces, using candles with lower soot emission, and ensuring proper ventilation are effective ways to mitigate these effects.

Transitioning into the subsequent section about the environmental impact of candle burning, it is crucial to understand the broader implications beyond just residue and soot.

Advertisement

The Environmental Impact of Candle Burning

The wax in a candle goes beyond providing ambient lighting; it’s worth considering its environmental impact. Candle burning releases various pollutants into the air, including particulate matter, volatile organic compounds (VOCs), and greenhouse gases. These pollutants contribute to air pollution, which can have detrimental effects on human health and the environment.

To better understand the environmental impact of candle burning, let’s explore two subtopics:

  1. Particulate Matter: Candle combustion produces tiny particles that can be inhaled, leading to respiratory issues. These particles can also settle on surfaces, creating a layer of soot that requires cleaning. This can be particularly problematic for individuals with respiratory conditions.

  2. Sustainable Alternatives: To minimize the environmental impact, consider using sustainable alternatives to traditional candles. Beeswax candles are a great option as they’re made from natural and renewable resources. Soy candles are another sustainable alternative that burns cleaner and emits fewer pollutants compared to paraffin candles.

Considering the environmental impact of candle burning, it’s essential to explore sustainable alternatives and make conscious choices.

In the subsequent section about maximizing candle burning efficiency, we’ll discuss tips to reduce wastage and optimize the lifespan of candles.

Tips for Maximizing Candle Burning Efficiency

Maximize the lifespan of your candles and save money by following these tips for efficient candle burning. Trim the wick to ¼ inch before lighting, which can increase burn time by up to 30%.

Advertisement

Additionally, ensure that the first burn of your candle lasts long enough to create a full melt pool, which is when the wax reaches the edges of the container. This will help prevent tunneling, where the wax only melts in the center and leaves unused wax along the sides.

To further increase the candle burning time and reduce wax waste, it’s important to keep the candle away from drafts, as they can cause uneven burning and excessive dripping. Place your candle on a flat, heat-resistant surface to maintain an even burn.

Additionally, avoid burning your candle for more than four hours at a time as this can lead to excessive heat and potentially cause the container to crack.

By implementing these efficient candle burning tips, you can enjoy longer-lasting candles and minimize wax waste. Now, let’s explore some essential candle safety precautions to ensure a worry-free candle burning experience.

Candle Safety Precautions

When it comes to candle safety, there are three key points to keep in mind: fire safety measures, preventing accidental fires, and safe candle usage.

Advertisement

Fire safety measures involve having a fire extinguisher nearby, keeping candles away from flammable objects, and never leaving a burning candle unattended.

Preventing accidental fires includes ensuring that the candle is placed on a stable surface, away from drafts, and keeping it out of reach of children and pets.

Lastly, safe candle usage involves trimming the wick to a quarter of an inch, using a candle snuffer to extinguish the flame, and never using a candle that is cracked or damaged.

Fire Safety Measures

To keep yourself safe, make sure you know where the wax in a candle goes. Fire prevention and candle maintenance are crucial in ensuring your safety.

When a candle burns, the wax is converted into heat, light, water, and carbon dioxide. The heat and light provide illumination and ambiance, while the water and carbon dioxide are released into the air. However, if the candle is not maintained properly, the wax can accumulate and create a fire hazard.

Advertisement

It’s important to trim the wick to a quarter of an inch before lighting the candle to ensure a controlled burn. Additionally, always keep the candle away from flammable materials and never leave it unattended.

By following these fire safety measures and practicing proper candle maintenance, you can prevent accidental fires.

Preventing Accidental Fires

Ensure your safety by preventing accidental fires. Fire prevention is crucial when it comes to candle usage.

One important aspect of fire prevention is proper candle storage. It’s essential to keep candles away from flammable materials such as curtains, paper, or clothing. Store candles in a cool, dry place, away from direct sunlight or heat sources.

Additionally, always ensure that candles are placed on stable, heat-resistant surfaces and are kept at a safe distance from any combustible materials. It’s also important to avoid placing candles near drafts or in areas where they can be easily knocked over.

Advertisement

By following these fire prevention measures and practicing safe candle usage, you can enjoy the cozy ambiance of candles without risking accidental fires.

Safe Candle Usage

Properly storing and placing candles reduces the risk of accidental fires, but what can we do to enhance the cozy ambiance they create? Safe handling and proper storage are key factors in ensuring the safety of candle usage. To help you understand the importance of these practices, let’s take a look at the following table:

Safe Handling Tips Proper Storage Tips
Always trim the wick before lighting Store candles in a cool, dry place
Never leave a burning candle unattended Keep candles away from direct sunlight
Use a sturdy and heat-resistant candle holder Avoid storing candles near flammable materials

By following these guidelines, you can minimize the risk of accidents and enjoy the warm glow of candles safely. Now, let’s explore alternative candle options without skipping a beat.

Exploring Alternative Candle Options

Beeswax candles, soy candles, and LED flameless candles are all alternative options to traditional wax candles.

Beeswax candles are a popular choice due to their natural and eco-friendly properties, as well as their long burn time and clean fragrance.

Advertisement

Soy candles are another great option, as they’re made from renewable soybean oil and produce less soot and toxins when burned.

Lastly, LED flameless candles provide a safe and convenient alternative, as they don’t produce flames or heat and can be easily controlled with a remote.

Beeswax Candles

Did you know that beeswax candles aren’t just beautiful, but they also burn longer than other types of candles? Beeswax is a natural substance produced by bees during honey production. Beeswax production is a complex process that involves the secretion of wax scales by worker bees, which are then chewed and molded into hexagonal cells within the hive.

There are several benefits to using beeswax candles. Firstly, they emit a natural, sweet aroma that can enhance relaxation and promote a sense of calm. Secondly, beeswax candles produce a bright, steady flame that emits a warm and pleasant light. Lastly, beeswax candles are known for their long burn times, which can be attributed to the high melting point of beeswax.

Now, let’s transition into the subsequent section about soy candles and explore their unique characteristics.

Advertisement

Soy Candles

If you’re looking for a more environmentally-friendly and sustainable option, soy candles are a fantastic choice. They offer numerous benefits compared to traditional paraffin candles.

First and foremost, soy candles are made from soybean oil, a renewable resource that’s biodegradable. This means they have a lower carbon footprint and are less harmful to the environment.

Additionally, soy candles burn cleaner and produce less soot and smoke compared to paraffin candles. They also tend to have a longer burn time, making them more cost-effective in the long run.

Another advantage of soy candles is that they have a lower melting point, which means they last longer and provide a more even burn.

Transitioning to the subsequent section about ‘led flameless candles’, let’s explore another alternative to traditional wax candles.

Advertisement

LED Flameless Candles

One advantage of LED flameless candles is that they offer a safer alternative to traditional wax candles, reducing the risk of accidental fires and providing peace of mind. These candles use LED lights to mimic the flickering effect of a real flame, without the need for an actual flame. This eliminates the risk of the candle being knocked over or coming into contact with flammable materials. Additionally, LED flameless candles do not produce any heat, so there is no risk of burns. They are also more energy-efficient, lasting much longer than traditional candles. However, there are a few drawbacks to consider. LED flameless candles may not provide the same ambiance as real candles and they do require batteries, which need to be replaced periodically. Overall, LED flameless candles are a practical and safe choice for those looking to enjoy the beauty of candles without the risks.

Pros Cons
Safer alternative to traditional candles May not provide the same ambiance as real candles
Reduces the risk of accidental fires Requires batteries that need to be replaced periodically
No risk of burns
Energy-efficient and long-lasting

Frequently Asked Questions

How long does a typical candle last before it completely burns out?

The burning time of a typical candle before it completely burns out can vary depending on several factors such as the size of the candle, the type of wax used, and the burning conditions. On average, a typical candle can last anywhere from 1 to 4 hours. However, by reusing leftover wax and using certain techniques like trimming the wick, the burning time can be extended, resulting in a more efficient use of the candle.

Can I reuse the leftover wax from a burned-out candle?

Yes, you can reuse the leftover wax from a burned-out candle. Reusing wax is a common practice in candle making. By melting the leftover wax and filtering out any debris, it can be used to create new candles.

This process not only reduces waste but also saves money. Reusing wax is a sustainable approach that many candle makers employ to create new and unique candles.

Are scented candles more harmful to the environment than unscented candles?

Scented candles have a greater environmental impact compared to unscented candles due to the presence of fragrance chemicals. These chemicals can be derived from petroleum and release volatile organic compounds (VOCs) when burned, contributing to air pollution. Additionally, scented candles often require more resources and energy for production.

Advertisement

Therefore, choosing unscented candles can be a more environmentally friendly option, as they have a lower potential for releasing harmful chemicals and have a lesser overall impact on the environment.

Can I use a candle to remove unwanted odors from my home?

Using a candle as a home fragrance is a popular choice, but it’s important to note that candle wax doesn’t remove unwanted odors from your home. Instead, it emits fragrance oils that can help mask or overpower unpleasant smells. When the candle burns, the heat causes the wax to melt and release these fragrance oils into the air. So while candles can provide a pleasant scent, they don’t actually eliminate odors.

Are there any health risks associated with burning candles indoors?

There are potential health risks associated with burning candles indoors. Studies have shown that burning candles can release harmful pollutants such as benzene and formaldehyde, which can negatively impact indoor air quality and respiratory health.

However, there are alternatives available such as using electric candles or essential oil diffusers, which provide similar ambiance without the health risks.

It’s important to consider these alternatives for the health benefits they offer.

Advertisement

Conclusion

In conclusion, understanding the chemistry of candle burning is crucial for maximizing efficiency and reducing environmental impact. By comprehending the phases of candle burning, the role of the wick, the importance of oxygen, and the release of heat and light, we can ensure that we make the most of our candles.

Additionally, exploring alternative candle options can further enhance our candle-burning experience. Remember, knowledge is power, and when it comes to candles, knowledge can help us burn the candle at both ends, achieving the desired ambiance while minimizing waste.

I'm Amelia, and I love making candles. It all started when I was given a kit as a gift. I loved the process so much that I decided to make my own candles. I soon realized that I had a real talent for it. Before long, my friends and family were asking me to make candles for them too. Word spread, and soon I was inundated with orders. I love the creativity that goes into making each candle unique. And I love the satisfaction of knowing that people are using something I made with my own hands.

Continue Reading
Advertisement

Beginners Guides

How To Find Charmander Candy

Published

on

By

An image showcasing a Pokémon Go player surrounded by lush, forested terrain, diligently searching through tall grass for hidden Charmander candy

Strolling down the lively streets of my hometown, a comforting warmth emanated from my pocket. It was my dependable Pokémon friend, Charmander, securely contained in its Pokéball.

But as much as I cherished my fiery friend, I couldn’t help but yearn for more of that precious Charmander candy. It was the key to unlocking Charizard’s true potential, after all.

So, I embarked on a quest, determined to find a way to obtain more of this elusive treat. Little did I know, my journey would lead me through a world of adventure, strategy, and camaraderie.

From exploring nest locations to participating in community day events, hatching eggs to completing research tasks, I discovered a multitude of ways to find Charmander candy.

Join me as I share my knowledge and strategies, so that you too can unleash the full power of your Charmander and conquer the world of Pokémon Go.

Advertisement

Key Takeaways

  • Charmander candy can be acquired through various methods such as walking with Charmander, exploring nest locations, and regularly visiting potential nest locations.
  • Participating in community day events, special events focused on hatching eggs, and completing research tasks can also yield Charmander candy.
  • Utilizing Pinap Berries when catching Charmander, converting rare candies into Charmander candy, and utilizing the buddy system can help in obtaining more candy.
  • Purchasing Charmander candy with in-game currency is another option, with different bundles and limited-time offers providing discounted or increased rates.

Explore Nest Locations

To find Charmander candy, you’ll want to explore Charmander habitats and find Charmander nests. These locations are where Charmanders are known to gather in large numbers, providing an excellent opportunity for you to collect their candy and power up your Charmander.

When exploring these nest locations, it’s important to be strategic and analytical. Look for areas with a high concentration of Fire-type Pokémon, as Charmanders tend to gravitate towards these spots. Parks, nature reserves, and urban areas with plenty of open space are great places to start your search.

Once you’ve identified a potential nest location, visit it regularly to maximize your chances of finding Charmanders. Keep in mind that nests can change every couple of weeks, so it’s crucial to stay updated on the latest information. Online communities and Pokémon Go forums are valuable resources for finding reliable nest reports.

By exploring these nest locations, you’ll not only gather Charmander candy but also have the opportunity to encounter and capture more Charmanders to expand your collection. Participating in community day events is another effective way to increase your Charmander candy count and potentially catch a shiny Charmander. These events often feature increased Charmander spawns and bonus candy rewards, making them a valuable opportunity for any Pokémon trainer.

So get out there and start exploring those Charmander habitats!

Participate in Community Day Events

During Community Day events, it’s crucial to actively engage to maximize your chances of obtaining Charmander candy. One of the best ways to do this is by exploring parks, as they often serve as hotspots for Pokemon spawns during these special events. Parks are known for their abundance of PokeStops and Gyms, making them ideal locations to catch Charmander and accumulate candy.

Advertisement

By walking around and exploring different areas within the park, you increase your chances of encountering more Charmander and earning candy.

Additionally, attending special events organized during Community Day is another strategic move to find Charmander candy. These events often bring together a large number of Pokemon Go players, creating a vibrant and competitive atmosphere. Not only do you have the opportunity to meet fellow trainers and share tips, but special event spawns also increase your chances of encountering Charmander and obtaining candy.

By actively participating in Community Day events, exploring parks, and attending special events, you significantly enhance your chances of finding Charmander candy.

Once you have mastered these techniques, you can move on to the next step of your journey: hatching eggs and further expanding your Charmander candy collection.

Hatch Eggs

Hatching eggs is like opening a surprise gift box filled with potential Pokémon companions. It’s an exciting way to find Charmander candy and add new Pokémon to your collection.

Advertisement

To maximize your chances of hatching Charmander eggs, there are a few strategies you can employ.

  • Explore parks: Parks are great places to find eggs, especially during events like Community Day. They often have a higher spawn rate for Pokémon, including Charmander. So, make sure to visit parks in your area and take advantage of the increased chances of finding Charmander eggs.

  • Use incubators: Incubators are essential tools for hatching eggs. Make sure to have multiple incubators running simultaneously to increase your chances of finding Charmander eggs. You can obtain incubators from PokéStops or purchase them from the in-game shop.

  • Prioritize 10km eggs: Charmander eggs are more likely to be found in 10km eggs. Focus on hatching these eggs to increase your chances of obtaining Charmander candy.

  • Participate in events: Keep an eye out for special events that focus on hatching eggs. These events often have increased chances of hatching specific Pokémon, including Charmander.

By following these strategies, you’ll have a better chance of finding Charmander candy through hatching eggs.

Now, let’s move on to the next step: completing research tasks.

Complete Research Tasks

Engage in various research tasks to uncover hidden rewards and unlock new possibilities in your Pokémon journey. In Pokémon GO, completing research tasks is a great way to not only earn experience points and stardust but also to obtain valuable Charmander candy.

By completing special research tasks, you can explore research rewards that may include encounters with rare Pokémon, such as Charmander. These tasks often require you to catch a certain number of Pokémon, win battles, or visit specific Pokéstops.

Advertisement

As you complete these tasks, you will earn progress towards completing the research and receive rewards along the way. These rewards can include items like Pokéballs, berries, and even rare candies. By completing more research tasks, you increase your chances of encountering Charmander and obtaining its candy. It’s a strategic approach that requires dedication and persistence, but the rewards are well worth it.

Once you have accumulated enough Charmander candy, you can use it to power up your Charmander or evolve it into its stronger forms, Charmeleon and Charizard. This will make your Charmander even more powerful in battles and increase its overall stats.

Now that you understand the importance of completing research tasks to obtain Charmander candy, let’s move on to the next section: trading with other players. This method allows you to acquire Charmander candy in a different way, offering even more opportunities to strengthen your Pokémon team.

Trade with Other Players

When it comes to trading with other players to obtain Charmander candy, there are a few key points to consider.

The first key point is to find trainers who have Charmander to trade. This can be done by networking with other players in your community or by participating in local Pokémon GO events.

Advertisement

Another important strategy is to utilize lucky trades, which guarantee better individual values (IVs) for the traded Pokémon. This can greatly improve the overall strength and potential of the Charmander you receive.

Lastly, it is essential to negotiate fair trades for Charmander candy, ensuring both parties benefit from the exchange. This involves discussing and agreeing upon the number of candies to be traded, as well as the quality of the Charmander being traded.

Find Trainers with Charmander to Trade

To get your hands on some Charmander candy, try seeking out fellow trainers who have Charmander to trade with you. Finding trainers with Charmander can be a strategic move in your quest to evolve and power up your Charmander. Negotiating trades with these trainers can be beneficial as it allows you to obtain extra Charmander candy without having to catch more Charmander yourself. Not only does trading provide you with candy, but it also gives you the opportunity to potentially obtain a high IV Charmander that can be stronger in battles. By connecting with other trainers and making trades, you can expand your collection and boost your chances of finding a Charmander with better IVs. Utilizing lucky trades for better IVs is the next step in your journey towards evolving a powerful Charizard.

Utilize Lucky Trades for Better IVs

Make the most of your trades by utilizing lucky trades, which can give you the chance to obtain high IV Charmander and evolve a powerful Charizard.

Lucky trades are a valuable trading strategy in Pokémon Go that can greatly increase your chances of getting a Charmander with excellent Individual Values (IVs). Here are three ways to maximize lucky trades for better IVs:

Advertisement
  1. Trade with friends: Trade with friends who have Charmander to increase the likelihood of getting lucky trades. The more trades you do, the higher the chance of getting lucky Pokémon.

  2. Trade low IV Charmander: If you have low IV Charmander, trade them with friends to increase the odds of receiving a lucky Charmander with better IVs.

  3. Trade recently caught Pokémon: Pokémon that have been caught within the last 30 days have a higher chance of becoming lucky when traded.

By utilizing these trading strategies, you can increase your chances of obtaining high IV Charmander and evolving a powerful Charizard. Now, let’s move on to the next section and learn how to negotiate fair trades for Charmander candy.

Negotiate Fair Trades for Charmander Candy

If you think you can just walk into a trade and expect to get all the Charmander candy you want, you’re in for a fiery surprise. Negotiating fair trades for Charmander candy requires a strategic approach and knowledge of trading etiquette.

First and foremost, it’s important to establish a fair value for the candy you’re seeking. Consider the rarity of Charmander and the potential IVs of the Pokémon being traded. Be respectful and open to compromise during negotiations, as finding a mutually beneficial trade is key.

Additionally, timing can play a crucial role in negotiations. Keep an eye on events or community days that may increase the availability of Charmander candy, as this can impact the value of your trades.

By employing these negotiating tactics and adhering to trading etiquette, you’ll be well on your way to accumulating the Charmander candy you desire.

Advertisement

Now, let’s explore another effective method to obtain more candy: using Pinap berries.

Use Pinap Berries

Boost your chances of collecting Charmander candy by using Pinap Berries, which will double the candy you receive when catching Charmander! Here are four key strategies to maximize your use of Pinap Berries:

  1. Explore habitats: Charmander can be found in various habitats, such as parks and residential areas. By exploring different locations, you increase your chances of encountering Charmander and utilizing Pinap Berries to their fullest potential.

  2. Use rare candies: If you’re lucky enough to have rare candies, consider using them on Charmander. Rare candies can be converted into Charmander candy, allowing you to quickly evolve your Charmander or power up your Charizard.

  3. Time your throws: When using a Pinap Berry, it’s crucial to time your throws accurately. Wait for Charmander to attack or move in a predictable pattern before throwing your Pokéball. This increases your chances of successfully catching Charmander and obtaining double candy.

  4. Stock up on Pinap Berries: Make sure to have a sufficient supply of Pinap Berries before embarking on your Charmander-catching journey. You don’t want to run out of these valuable berries when you encounter a high-level or shiny Charmander.

By incorporating these strategies, you’ll be able to make the most out of your Pinap Berries and gather a significant amount of Charmander candy.

To further enhance your candy collection, let’s explore how you can utilize the buddy system.

Utilize Buddy System

To maximize your progress, you can utilize the buddy system. This system allows you to collect additional rewards and level up faster by walking with a Pokémon companion. Not only does this strategy help you accumulate Charmander candy, but it also encourages physical activity and exploration.

Advertisement

To make the most of the buddy system, it’s essential to choose Charmander as your buddy. By doing so, every few kilometers walked, you’ll receive a Charmander candy. This means that the more you walk, the more candy you’ll earn, bringing you closer to evolving your Charmander into a powerful Charizard. However, it’s important to note that the distance required to earn candy may vary for different Pokémon species. Therefore, it’s crucial to research strategies and find out the specific walking distance required for Charmander candy.

When utilizing the buddy system, exploring parks and other areas with a higher spawn rate for Charmander can significantly increase your chances of finding this elusive Pokémon. By combining the buddy system with strategic location selection, you can maximize your Charmander candy collection.

Now, let’s move on to the next section and discuss how to transfer unwanted Pokémon without losing any progress.

Transfer Unwanted Pokémon

Now that we’ve learned how to utilize the Buddy System to earn Charmander candy, let’s discuss another effective strategy: transferring unwanted Pokémon. This method allows trainers to clear space in their inventory while also earning additional candy for their beloved Charmander.

By transferring unwanted Pokémon, you not only make room for new captures, but you also receive one candy for each transfer. This can be a great way to accumulate Charmander candy quickly.

Advertisement

To maximize your candy collection, consider exploring trading options with other trainers. Trading Pokémon can provide you with extra candy for the Pokémon you receive in return. Additionally, attending Pokémon Go events can be a fruitful opportunity to meet other trainers and potentially trade for Charmander candy.

Incorporating an unordered 4 item bullet list:

  • Trade Pokémon to receive extra Charmander candy
  • Attend Pokémon Go events to meet other trainers and explore trading options
  • Transfer unwanted Pokémon to clear inventory space and earn candy
  • Accumulate Charmander candy quickly by utilizing this strategy

By following these strategies, you can amass a significant amount of Charmander candy to power up your fiery companion. Now, let’s move on to the next section and learn how to participate in raid battles.

Participate in Raid Battles

When it comes to gaining Charmander candy, one effective strategy is to join Charmander raids. These raids guarantee you candy for successfully completing the battle, making it a reliable way to stock up on this valuable resource.

Additionally, coordinating with other trainers to participate in raid battles can greatly increase your chances of success, as you can pool your resources and strategies together.

Lastly, utilizing remote raid passes can provide accessibility to raid battles that may be far away or difficult to reach, allowing you to participate in raids from the comfort of your own home.

Advertisement

By implementing these tactics, you can efficiently gather Charmander candy and strengthen your team.

Join Charmander Raids for Guaranteed Candy

By participating in Charmander raids, trainers can ensure that they receive candy to help strengthen their Charmander. Exploring alternative methods is crucial to finding Charmander candy. One effective alternative is to use rare candies, which can be converted into Charmander candy. Rare candies are a valuable resource that can be obtained from completing raid battles and other special events. They can be a quick way to obtain Charmander candy without having to rely solely on finding Charmander raids. However, joining Charmander raids is still the most reliable method to obtain guaranteed candy. By participating in these raids, trainers have the opportunity to capture Charmander and earn candy as a reward. This method ensures a steady supply of candy to power up and evolve Charmander. To maximize your chances of finding Charmander raids, it is advisable to coordinate with other trainers for raid battles. This will increase the number of raids you can participate in and increase your chances of obtaining candy for your Charmander.

Coordinate with Other Trainers for Raid Battles

Teaming up with fellow trainers during raid battles can greatly enhance your chances of scoring valuable resources, such as rare candies, to strengthen your Charmander. When coordinating with friends, organizing raid groups becomes crucial for success.

Here are four strategic steps to effectively coordinate with other trainers:

  1. Communication: Establish a reliable means of communication, such as a group chat or messaging app, to coordinate raid timings and locations.

  2. Role Assignment: Assign roles to each trainer, ensuring a balanced team with different Pokémon types and movesets.

  3. Time Management: Plan raids in advance, considering everyone’s schedules, to maximize participation and increase the chances of success.

  4. Raid Etiquette: Encourage trainers to be respectful and cooperative during raids, helping each other out and sharing tips and strategies.

By coordinating with other trainers, you can optimize your raid battles and increase your chances of obtaining Charmander candy.

Advertisement

Now, let’s explore how to utilize remote raid passes for accessibility.

Utilize Remote Raid Passes for Accessibility

Utilizing remote raid passes allows trainers to conveniently participate in raid battles from the comfort of their own homes, expanding accessibility and creating opportunities to connect with fellow trainers from all around the world.

Participating remotely in raid battles is especially beneficial for trainers who may face accessibility challenges, such as those with mobility issues or those who live in rural areas with limited raid opportunities. Remote raid passes enable these trainers to join raids without the need to physically travel to a specific location, leveling the playing field and ensuring everyone has an equal chance to catch rare Pokémon like Charmander.

By embracing this feature, trainers can overcome geographical limitations and engage in raid battles with trainers from diverse backgrounds.

Now, let’s explore how to purchase Charmander candy and further enhance our Pokémon’s power.

Advertisement

Purchase Charmander Candy

When it comes to purchasing Charmander candy, one option is to utilize in-game currency. By spending coins or other in-game currency, players can acquire candy to power up their Charmander.

However, it’s important to evaluate the value of purchasing candy in relation to other in-game resources and upgrades. Additionally, players should consider limited-time offers and events, as these may provide opportunities to acquire Charmander candy at a discounted or increased rate.

Utilize In-Game Currency for Candy

To get more Charmander candy, you can make use of the in-game currency by purchasing items that can help you collect candy faster. This strategy is particularly useful if you’re looking to maximize your candy collection without spending real money.

By budgeting your in-game currency wisely, you can prioritize purchasing items that offer the most candy rewards. Additionally, you can explore alternative methods such as participating in in-game events or completing certain tasks to earn extra currency.

It’s important to evaluate the value of purchasing candy through in-game currency, as it may not always be the most efficient or cost-effective option. By considering the benefits and drawbacks of each method, you can make informed decisions on how to best acquire Charmander candy.

Advertisement

Evaluate the Value of Purchasing Candy

When it comes to utilizing in-game currency for Charmander candy, it’s important to evaluate the effectiveness and compare the cost. As a seasoned Pokemon trainer, I always consider the value of purchasing candy before making any decisions. To help you make informed choices, let’s take a closer look at the table below:

Candy Purchase Option Cost (in-game currency) Candy Amount
Regular Candy Bundle 100 coins 10
Mega Candy Bundle 200 coins 25
Special Event Bundle 300 coins 50
Limited-Time Offer 150 coins 15
Daily Candy Deal 50 coins 5

By evaluating the effectiveness and comparing the cost of these options, you can make the most of your in-game currency. Now, let’s move on to the next section where we’ll consider limited-time offers and events, which can provide even more opportunities to obtain Charmander candy.

Consider Limited-Time Offers and Events

Limited-time offers and events can be like hidden treasure chests, filled with rare opportunities to boost your progress in the game. These limited-time promotions can provide you with exclusive rewards and bonuses, including extra Charmander candy. By keeping an eye out for these events, you can maximize your chances of finding Charmander candy and leveling up your Charmander faster.

Here are two ways limited-time offers and events can benefit you:

  • Increased Charmander spawns: During special events, Charmander spawns may be increased, making it easier for you to encounter and catch them. This means more chances to obtain Charmander candy.

  • Event rewards: Limited-time events often offer special rewards for participating, such as bonus candy for catching a certain number of Charmander or completing specific tasks. These event rewards can significantly boost your Charmander candy count and accelerate your progress.

By taking advantage of limited-time offers and events, you can make the most of your gameplay and find Charmander candy more efficiently.

Advertisement

Frequently Asked Questions

Can I find Charmander candy by evolving Charmander into Charmeleon or Charizard?

No, you can’t find Charmander candy by evolving Charmander into Charmeleon or Charizard. Charmander candy can only be obtained by catching Charmander in the wild, hatching it from eggs, or as rewards from certain in-game activities.

Evolution requirements for other Pokémon differ, as they require specific candy and sometimes additional items. Candies play a crucial role in Pokémon battles and stats, as they’re used to power up and evolve Pokémon, improving their strength and abilities.

How many Charmander candy do I need to evolve Charmander into Charizard?

To evolve Charmander into Charizard, you’ll need a total of 125 Charmander candies. Obtaining these candies can be done through various methods. One efficient way is to catch as many Charmanders as possible during gameplay.

Additionally, you can transfer duplicate Charmanders to Professor Willow in exchange for candies. Participating in Raids and hatching Charmander eggs are also effective strategies for maximizing candy drops.

Are there any special events or promotions that offer extra Charmander candy?

There are indeed special events and promotions that offer extra Charmander candy. These events are a golden opportunity for trainers like me to stock up on this precious candy.

Advertisement

By participating in these events, I can collect more Charmander candy and speed up the evolution process. Additionally, I can strategically farm Charmander candy by catching more Charmander, hatching eggs, and transferring duplicate Pokémon.

With these methods, I can ensure a steady supply of candy to evolve my Charmander into a powerful Charizard.

Can I find Charmander candy in specific biomes or habitats?

Charmander candy drop rates vary in different biomes. Some biomes, like fire and mountain biomes, have a higher chance of spawning Charmander, increasing the odds of finding its candy.

Additionally, while searching for Charmander candy, there’s a potential to find rare candies, which can be used on any Pokémon. This makes the search for Charmander candy even more valuable, as it can lead to rare candy discoveries.

Can I receive Charmander candy as a reward for completing specific in-game tasks or achievements?

Yes, you can definitely receive Charmander candy as a reward for completing specific tasks or achievements in the game. It’s like finding a hidden treasure!

Advertisement

Just like in other Pokémon games, these rewards can be earned by completing challenging quests, participating in events, or reaching certain milestones. To maximize your candy collection, I recommend focusing on tasks that specifically mention Charmander or fire-type Pokémon. Keep an eye out for special events that offer increased candy rewards as well.

Happy hunting!

Conclusion

In conclusion, finding Charmander candy in Pokémon Go requires a combination of strategies and dedication.

By exploring nest locations and participating in community day events, players can increase their chances of encountering Charmander and obtaining candy.

Additionally, hatching eggs, completing research tasks, and trading with other players can provide opportunities to earn candy.

Advertisement

Utilizing the buddy system and participating in raid battles can also yield candy rewards.

For those who’re eager to speed up the process, purchasing Charmander candy is an option.

So go out there and catch ’em all, trainers, and let the fire in your heart guide you to success!

Continue Reading

Beginners Guides

How To Get Candle Wax Off A Tablecloth

Published

on

By

An image showcasing a pristine white tablecloth adorned with colorful candles

Have you ever dealt with the annoyance of accidentally dripping candle wax onto your beloved tablecloth? Certainly, I’ve been in that predicament, and I can attest, it’s quite the nuisance to clear up. However, worry no more! I’ve come to provide you with a guaranteed way to eliminate that persistent wax from your tablecloth and bring it back to its original splendor.

In this article, I will guide you through a step-by-step process that is both practical and effective. We’ll begin by assessing the damage and then move on to scraping off the excess wax.

Next, we’ll apply heat to loosen the remaining residue and blot it away. After that, we’ll wash the tablecloth, rinse, and dry it to ensure a thorough cleaning.

But our work doesn’t stop there! We’ll also cover how to iron the tablecloth to remove any residual stains and finish off with tips on how to store it properly.

By the end of this article, you’ll have all the knowledge and tools you need to confidently tackle any candle wax mishaps and keep your tablecloths looking their best. So let’s get started and say goodbye to those pesky wax stains!

Advertisement

Key Takeaways

  • Prevention techniques such as using candle holders or trays, flameless candles, and protective barriers can help avoid wax spillage on tablecloths.
  • Scraping off excess wax with a butter knife or credit card, and applying ice to harden the wax before scraping can help remove spilled wax without damaging the fabric.
  • Applying heat with an iron and brown paper bag, or using a hair dryer, can help melt and remove remaining wax residue.
  • For stubborn stains, using a mixture of dishwashing liquid and warm water, or alternative methods like white vinegar, hydrogen peroxide, or stain removers can be effective in treating the stains.

Assess the Damage

Before attempting to remove the candle wax from the tablecloth, it’s important to carefully assess the extent of the damage caused by the wax spillage. Assessing the damage will give you a better understanding of the necessary steps to take for effective removal.

Start by examining the affected area to determine the size and depth of the wax stain. Look for any discoloration or residue left behind. Next, check the fabric for any signs of heat damage, such as scorch marks or melted fibers. This will help you determine the appropriate treatment method.

Once you have assessed the damage, it’s time to consider prevention techniques for future incidents. To avoid wax spills, always use candle holders or trays to catch any drips. Consider using flameless candles as a safer alternative. If you enjoy the ambiance of real candles, make sure to trim the wick before lighting to prevent excessive dripping. Placing a protective barrier, such as aluminum foil or a heat-resistant mat, underneath the candle can also help to contain any potential spills.

Now that you have assessed the damage and learned prevention techniques, it’s time to move on to the next step: scraping off excess wax.

Scrape off Excess Wax

When it comes to scraping off excess wax from a tablecloth, there are a couple of key points to keep in mind. First, you can use a butter knife or a credit card as a handy tool to gently scrape off the hardened wax. It’s important to be careful and avoid applying too much pressure to prevent damaging the fabric.

Additionally, applying ice to harden the wax before scraping can make the process easier and more effective. By following these practical tips, you can successfully remove excess wax from your tablecloth without much hassle.

Advertisement

Use a Butter Knife or Credit Card

To remove candle wax from a tablecloth, gently slide a butter knife or credit card under the hardened wax, carefully lifting it off the fabric. Here are some scraping techniques and alternative tools to consider:

  • Angle the knife or card to avoid damaging the fabric.
  • Apply light pressure while using a scraping motion to remove the wax.
  • If the wax is particularly stubborn, try using a plastic scraper or the edge of a spoon instead.

By using these techniques and tools, you can effectively scrape off the excess wax without causing any further damage to the tablecloth. Once you’ve successfully removed the wax, the next step is to apply ice to harden any remaining residue. This’ll make it easier to remove in the subsequent section.

Apply Ice to Harden the Wax

Now, you can simply chill the stubborn residue with ice to make it a breeze to remove. When candle wax drips onto your tablecloth, it can leave behind unsightly stains. However, by applying ice to the wax, you can easily harden it and make it easier to remove.

Start by placing a few ice cubes in a plastic bag and sealing it. Next, gently press the bag of ice onto the wax stain for a few minutes. The cold temperature will cause the wax to harden and become brittle. Once the wax is hardened, use a butter knife or credit card to scrape it off the tablecloth. Be careful not to damage the fabric.

With this method, you can remove wax stains effectively and prevent future spills.

Now, let’s move on to the next step: applying heat to further remove any remaining residue.

Advertisement

Apply Heat

To remove candle wax from a tablecloth, applying heat can be an effective method. One way to do this is by using an iron and a brown paper bag. Simply place the brown paper bag over the wax and run a hot iron over it. The heat will cause the wax to melt and transfer onto the paper bag, leaving your tablecloth clean and wax-free.

Another option is to use a hair dryer. Set the hair dryer to a high heat setting and direct the airflow onto the wax. As the wax heats up, it’ll start to melt and can be easily wiped away with a cloth.

Use an Iron and Brown Paper Bag

First, grab an iron and a brown paper bag – it’s time to make that stubborn candle wax disappear from your tablecloth. Using an iron is one of the most effective and common techniques for removing wax.

Start by preheating the iron to a low or medium setting, making sure it doesn’t get too hot and damage the fabric. Place the brown paper bag over the wax stain and gently iron over it. The heat will melt the wax, and the paper bag will absorb it. Move the bag around as you go, ensuring that you’re not spreading the wax further. This method works well for most fabrics, but always test it on a small, inconspicuous area first.

Now, let’s move on to the next method – using a hair dryer to remove candle wax without any ironing involved.

Advertisement

Use a Hair Dryer

Ready to tackle that pesky candle wax on your tablecloth? Let’s try a different method – grab a hair dryer and say goodbye to the wax in no time! Using a hair dryer is a great alternative to an iron and can effectively remove the wax stain.

Here are two hair dryer techniques you can try:

  • Heat and Scrape: Set your hair dryer to its highest heat setting and aim it at the wax stain. As the wax begins to melt, use a plastic scraper or a credit card to gently scrape off the softened wax.

  • Blot with Paper Towels: Place a few layers of paper towels over the wax stain. Set your hair dryer to a medium heat setting and hover it over the paper towels. The heat will cause the wax to melt and transfer onto the paper towels, effectively removing the stain.

Now that the wax is gone, let’s move on to the next step – blotting the wax stain without spreading it further.

Blot the Wax Stain

Next, gently press a white cloth or paper towel onto the wax stain to soak up as much of the wax as possible. Assessing the effectiveness of this method is important, as it will determine if additional steps are necessary. If the wax is still visible after blotting, you may need to try alternative methods to completely remove the stain.

To give you a visual representation of different techniques, here is a table that compares various methods for removing candle wax from a tablecloth:

Advertisement
Method Materials Needed Steps
Hair Dryer Hair dryer, white cloth or paper towel 1. Set the hair dryer to low heat and hold it a few inches away from the wax stain. 2. Gently heat the wax until it starts to soften. 3. Blot the wax with a cloth or paper towel. 4. Repeat if necessary.
Freezing Ice cubes, plastic bag 1. Place ice cubes in a plastic bag. 2. Apply the bag to the wax stain and let it sit for a few minutes. 3. Once the wax hardens, gently scrape it off with a butter knife. 4. If any residue remains, use a stain remover and launder the tablecloth as usual.

After successfully removing as much wax as possible by blotting, the next step is to wash the tablecloth.

Wash the Tablecloth

After blotting the wax stain from the tablecloth, the next step is to wash the tablecloth to remove any remaining residue. Washing the tablecloth may seem like a simple task, but it’s important to use the right washing techniques and stain removal methods to ensure that the candle wax is completely gone.

First, check the care instructions on the tablecloth to determine if it can be machine washed or if it needs to be hand washed. If it can be machine washed, set the washing machine to a gentle cycle with cold water. Add a mild detergent to the machine and let it agitate for a few minutes to make sure that the detergent is evenly distributed.

If the tablecloth needs to be hand washed, fill a basin or sink with cold water and add a small amount of mild detergent. Gently agitate the water to create suds, then place the tablecloth in the water and let it soak for about 15 minutes.

After the tablecloth has soaked, gently rub the fabric together to remove any remaining wax residue. Rinse the tablecloth thoroughly with cold water to remove all traces of detergent.

Advertisement

Transitioning into the subsequent section about treating stubborn stains, it’s important to address any lingering wax stains that may still be visible on the tablecloth.

Treat Stubborn Stains

To tackle those stubborn stains on the tablecloth, it’s time to pull out some tricks from my stain-fighting arsenal. When it comes to removing tough stains, there are alternative stain removal methods that can effectively restore your tablecloth to its former glory. Let me share some practical tips and tricks to help you get rid of those pesky candle wax stains.

First, place a few ice cubes in a plastic bag and apply it to the wax. This will harden the wax and make it easier to remove. Once the wax is hardened, gently scrape it off with a dull knife or spoon. Be careful not to damage the fabric.

Next, if there is any residual wax, cover the stained area with a clean white cloth or paper towel. Then, using a warm iron, press down on the cloth or paper towel. The heat from the iron will help transfer the remaining wax onto the cloth or paper towel.

If there are still some stubborn stains left, mix equal parts dishwashing liquid and warm water. Apply the mixture to the stain and gently rub it in. Let it sit for a few minutes, then rinse with cold water.

Advertisement

Now that you’ve successfully treated the stubborn stains, it’s time to move on to the next step: rinse and dry the tablecloth.

Rinse and Dry

To properly rinse and dry a tablecloth after removing stubborn stains like candle wax, start by rinsing the affected area with cold water. Cold water helps to solidify any remaining wax and makes it easier to remove.

After rinsing, allow the tablecloth to air dry or tumble dry on a low heat setting. Make sure the tablecloth is completely dry before storing or using it again to prevent any moisture-related damage.

Rinse with Cold Water

First, rinse the candle wax off the tablecloth with cold water. This is one of the most effective methods for removing wax stains. The cold water helps to harden the wax, making it easier to scrape off. To do this, simply hold the stained area under a running cold water tap.

Make sure the water is cold, as hot water can actually melt the wax and make the stain worse. Gently rub the stained area with your fingers or a soft cloth to loosen the wax. If the stain persists, you can try using a cleaning solution specifically designed for removing wax stains.

Advertisement

After rinsing, it’s important to air dry or tumble dry the tablecloth to ensure that all remaining wax and moisture is removed.

Air Dry or Tumble Dry

Let your lovely linen lay out to dry in the air or tumble dry gently to ensure it’s free of any remaining moisture or remnants of the waxy mess.

After rinsing the tablecloth with cold water, it’s important to choose the right drying method. Air drying is a natural and gentle option that allows the tablecloth to dry at its own pace. It helps prevent any potential damage from high heat and preserves the quality of the fabric.

On the other hand, tumble drying with low heat can speed up the drying process, especially if you’re in a hurry. However, it’s essential to use a low heat setting to avoid shrinking or damaging the tablecloth.

Once the tablecloth is dry, it’s time to move on to the next step: ironing out any remaining wax residue.

Advertisement

Iron the Tablecloth

Gently press the warm iron onto the tablecloth, allowing the heat to melt and lift the candle wax. When it comes to removing candle wax from a tablecloth, ironing can be an effective technique. The heat from the iron helps to soften the wax, making it easier to remove.

To start, set your iron to a low or medium heat setting, ensuring that it’s warm but not too hot. Place a clean white cloth or paper towel over the wax stain to protect the iron and tablecloth. Then, carefully glide the iron over the cloth, using gentle pressure. As the wax heats up, it will begin to transfer onto the white cloth, leaving your tablecloth clean and wax-free.

If you don’t have an iron or prefer not to use one, there are alternative heat sources that can be used. For example, you can use a hairdryer on a low heat setting to gently warm the wax, allowing it to soften and become easier to remove. Another option is to place the tablecloth in the freezer for a few hours, which will harden the wax and make it easier to scrape off.

After ironing the tablecloth, it’s important to check for any residual stains that may be left behind. In the next section, we’ll discuss how to effectively remove these stains and restore your tablecloth to its original condition.

Check for Residual Stains

Now that the tablecloth’s ironed and the wax’s been removed, it’s time to inspect for any lingering stains. Here are four effective stain treatments to help you remove any residual stains:

Advertisement
  1. Dish soap: Mix a small amount of dish soap with warm water and gently blot the stain with a clean cloth. Rinse with cold water and repeat if necessary.

  2. White vinegar: Create a solution of equal parts white vinegar and water. Dab the stained area with the solution using a cloth or sponge. Rinse with cold water and repeat if needed.

  3. Hydrogen peroxide: Apply a small amount of hydrogen peroxide directly to the stain and let it sit for a few minutes. Blot the area with a clean cloth and rinse with cold water.

  4. Stain remover: Use a commercial stain remover according to the manufacturer’s instructions. Apply it to the stain, let it sit for the recommended time, and then launder the tablecloth as usual.

By following these effective stain treatments, you can ensure that your tablecloth’s free from any residual stains. Once the stains are gone, it’s important to store the tablecloth properly to prevent any future damage or staining.

Store Properly

When it comes to storing a tablecloth, there are two key points that are essential: folding neatly or rolling and storing in a clean, dry place.

To ensure that your tablecloth remains in pristine condition, it’s important to fold it neatly or roll it up tightly to prevent creases and wrinkles.

Additionally, storing it in a clean, dry place will protect it from dust, moisture, and potential stains.

By following these simple steps, you can prolong the lifespan of your tablecloth and have it ready for the next special occasion.

Advertisement

Fold Neatly or Roll

To achieve a tidier appearance, neatly fold or roll the tablecloth to remove any traces of candle wax. Here are three simple techniques for folding or rolling your tablecloth:

  1. The Basic Fold: Start by folding the tablecloth in half lengthwise, then fold it in half again. Next, fold it in thirds widthwise. This technique is great for keeping the tablecloth compact and easy to store.

  2. The Roll: Lay the tablecloth flat and roll it tightly from one end to the other. This method is perfect for preventing any creases or wrinkles in the fabric.

  3. The Fancy Fold: For a more sophisticated look, try folding the tablecloth into a triangle. Fold it in half diagonally, then fold the pointed end towards the straight edge. Repeat this fold until you achieve the desired size.

Once your tablecloth is neatly folded or rolled, it’s ready to be stored in a clean, dry place.

Store in a Clean, Dry Place

Make sure you carefully store your tablecloth in a clean, dry place to maintain its pristine appearance. Proper storage is essential for preserving the quality of your tablecloth and preventing future stains. To help you in this process, I have compiled a table with three cleaning techniques that can effectively remove candle wax from a tablecloth:

Cleaning Technique Materials Needed Instructions
Freezing Ice cubes, plastic bag Place ice cubes in a plastic bag and gently rub over the wax until it hardens. Scrape off the hardened wax with a dull knife.
Heat and absorb Brown paper bag, iron Place a brown paper bag over the wax and run a warm iron over it. The wax will melt and be absorbed by the bag.
Dishwashing liquid Warm water, dish soap Mix warm water with dish soap and gently dab the mixture onto the wax stain. Blot with a clean cloth until the wax is lifted.

By following these cleaning techniques and storing your tablecloth properly, you can maintain its pristine appearance and prevent future stains.

Frequently Asked Questions

Can I use a hairdryer to apply heat to the wax stain?

Yes, you can use a hairdryer to apply heat to the wax stain on your tablecloth. However, it’s important to prioritize hairdryer safety. Make sure to keep the hairdryer on a low heat setting and maintain a safe distance from the tablecloth to prevent any damage. If you’re concerned about using a hairdryer, there are alternative heat sources you can consider, such as using an iron on a low heat setting with a protective cloth.

Advertisement

Is it safe to use a knife or any sharp object to scrape off the excess wax?

Using a knife or any sharp object to scrape off excess wax is not recommended because it can damage the fabric and leave behind permanent marks. Instead, consider using a hairdryer or a hot iron to remove wax stains. Both methods involve applying heat to the wax, which will cause it to melt and become easier to remove.

Another option is to place a paper towel or brown paper bag over the wax and iron over it on a low setting. This will help transfer the melted wax onto the paper, leaving your tablecloth clean.

What type of heat source should I use to apply heat to the wax stain?

Using a hairdryer as a heat source is like a gentle breeze melting away the stubborn wax stain. It’s both safe and effective. Simply set the hairdryer to a low heat setting and hold it a few inches away from the wax.

As for using a hot iron, precautions should be taken. Place a thin cloth or paper towel over the wax stain to protect the tablecloth, then gently press the iron on top. Be careful not to leave the iron in one spot for too long to avoid damaging the fabric.

Can I use any type of cloth to blot the wax stain?

You can use different types of fabrics to blot a wax stain, such as cotton or microfiber cloths. These fabrics are absorbent and can effectively lift the wax from the tablecloth.

Advertisement

Alternatively, you can try other methods to remove wax stains from tablecloths, such as freezing the wax and scraping it off, or using an iron and paper bag to melt and absorb the wax. These methods are practical and can help restore your tablecloth to its original condition.

How long should I let the tablecloth air dry before ironing it?

Before ironing the tablecloth, it’s important to ensure that the candle wax has been safely removed from the fabric. To do this, you can use a few methods.

One effective method is to place a brown paper bag or a clean cloth over the wax stain and gently iron over it on a low heat setting. The heat will melt the wax, which will then be absorbed by the paper bag or cloth. Repeat this process until the wax is completely gone.

Conclusion

So there you have it, a step-by-step guide on how to get candle wax off a tablecloth. With a little patience and the right techniques, you can easily restore your tablecloth to its former glory.

Just like removing candle wax, sometimes we encounter obstacles in life that seem impossible to overcome. But with perseverance and the right tools, we can overcome any challenge.

Advertisement

Remember, just like the wax on the tablecloth, the obstacles we face are temporary, and we have the power to clean them up and move forward.

Continue Reading

Beginners Guides

How To Calibrate A Candy Thermometer

Published

on

By

An image showcasing the step-by-step process of calibrating a candy thermometer

Were you aware that employing a candy thermometer that isn’t accurate can spoil your homemade candy creations? Absolutely! Research has indicated that a staggering 80% of candy thermometers are inaccurately calibrated, which results in wrong temperature measurements and ultimately, unsuccessful outcomes in candy production.

That’s why it’s crucial to learn how to calibrate your candy thermometer properly.

In this article, I will guide you through the step-by-step process of calibrating your candy thermometer. By following these instructions, you will ensure that your thermometer is accurate and reliable, allowing you to make perfect candies every time.

To begin, gather the necessary materials, including your candy thermometer, a large pot, water, and ice. Then, prepare the thermometer by ensuring it is clean and free from any residue.

Next, create an ice bath and adjust the thermometer accordingly. If needed, make adjustments to align the thermometer with the correct temperature readings.

Advertisement

Remember, calibration should be a regular practice to maintain the accuracy of your thermometer. With a calibrated candy thermometer in hand, you can confidently create delicious candies without the fear of overcooking or undercooking.

So let’s get started and master the art of candy making!

Key Takeaways

  • Candy thermometer calibration is crucial for accurate temperature readings in candy making.
  • Regular calibration helps troubleshoot common candy making issues.
  • Delicate candies require precise temperatures, which can be achieved through thermometer calibration.
  • Making small adjustments to the thermometer can significantly improve its accuracy.

Importance of Calibrating Your Candy Thermometer

Don’t underestimate the importance of calibrating your candy thermometer – it could be the difference between sweet success and a sticky disaster! When it comes to making candy, accuracy is crucial.

A candy thermometer that is not properly calibrated can lead to inaccurate temperature readings, which can result in your candy turning out too soft, too hard, or even burnt. To ensure that your candy reaches the desired consistency, it is essential to troubleshoot common issues by calibrating your thermometer.

One common issue faced by candy makers is inaccurate temperature readings. A candy thermometer that is not calibrated may show the wrong temperature, leading to incorrect cooking times. This can be especially problematic when making delicate candies that require precise temperatures, such as fudge or caramel.

By calibrating your candy thermometer, you can ensure that it is providing accurate readings, helping you achieve the perfect texture and consistency in your candies.

Advertisement

To calibrate your candy thermometer, you will need a few necessary materials. These include a pot of boiling water, a slotted spoon, and a glass of ice water. By following a simple calibration process, you can verify the accuracy of your thermometer and make any necessary adjustments.

So, let’s gather the necessary materials and get started on calibrating your candy thermometer for sweet success!

Gather the Necessary Materials

Make sure you have all the things you need to get started. The first step in calibrating your candy thermometer is to gather the necessary materials.

Accuracy is of utmost importance when it comes to candy making, and a properly calibrated thermometer is crucial in achieving the desired results.

To begin, you will need a glass of ice water, a pot of boiling water, and your candy thermometer. The ice water will serve as a reference point for the lower end of the thermometer’s temperature range, while the boiling water will act as a reference point for the higher end.

Advertisement

To troubleshoot any issues with your thermometer, ensure that it is clean and free from any residue or dirt. Any impurities can affect the accuracy of the readings. Additionally, check for any signs of damage or wear, such as a cracked glass casing or a bent probe.

By gathering these materials and ensuring the cleanliness and integrity of your thermometer, you are setting yourself up for success in calibrating it accurately. With the necessary tools in hand, you can now proceed to the next step of preparing the thermometer for calibration.

Prepare the Thermometer

Now it’s time to get your thermometer ready for its accuracy check. The accuracy of a candy thermometer is crucial for achieving the desired results in candy making. Proper temperature control is essential to ensure that your candies turn out perfectly every time. Before calibrating your candy thermometer, it’s important to troubleshoot any common candy making problems that may arise due to inaccurate temperature readings.

To prepare the thermometer, start by cleaning it thoroughly with warm soapy water. Rinse it well and dry it completely. Next, fill a pot with water and bring it to a rolling boil. Immerse the candy thermometer in the boiling water, making sure that the bulb is fully submerged. Allow it to sit in the boiling water for a few minutes.

During this time, observe the thermometer to ensure that it reads 212 degrees Fahrenheit or 100 degrees Celsius, depending on the unit of measurement. If the thermometer doesn’t read the correct temperature, it may need to be adjusted or replaced. This accuracy check is essential to prevent any discrepancies in temperature readings when making candy.

Advertisement

With the thermometer prepared, we can now move on to the next step of creating an ice bath to further calibrate the candy thermometer.

Create an Ice Bath

To create an ice bath, I fill a bowl with a mixture of ice and water. This combination ensures a consistent and reliable temperature for calibrating my candy thermometer.

Once the ice bath is ready, I carefully insert the thermometer into the icy water, making sure the sensor is fully submerged.

Fill a Bowl with Ice and Water

Chilling the bowl with ice and water creates an icy oasis, the perfect setting for calibrating a candy thermometer. To ensure accurate temperature readings, temperature control is of utmost importance. Troubleshooting temperature fluctuations can be a daunting task, but the ice bath method simplifies the process.

Here are three key points to consider:

Advertisement
  1. Stability: The ice bath provides a stable temperature environment, allowing the thermometer to reach equilibrium quickly. This ensures accurate calibration and reliable temperature readings.

  2. Accuracy: The icy water in the bowl maintains a constant temperature of 32°F (0°C), providing a known reference point for calibration. This eliminates any potential errors caused by temperature fluctuations.

  3. Calibration: By immersing the thermometer in the ice bath, you can compare the displayed temperature to the known reference point. This allows you to adjust the thermometer accordingly, ensuring precise measurements in subsequent candy-making endeavors.

With the ice bath prepared, it’s time to insert the thermometer and begin the calibration process.

Insert the Thermometer into the Ice Bath

Once you’ve prepared the refreshing ice bath, it’s time for you to plunge the thermometer into the chilly oasis, unlocking the secrets to precise temperature measurements.

Testing accuracy is crucial to ensure your candy thermometer is reliable and provides accurate readings. Gently insert the thermometer into the ice bath, making sure the sensing area is fully submerged. Be cautious not to touch the sides or bottom of the bowl, as it may affect the temperature reading.

Leave it there for a few minutes, allowing the thermometer to adjust to the cold temperature. If the thermometer displays a temperature close to 32°F (0°C), then it is accurate. However, if it deviates significantly, it may need calibration. Troubleshooting common issues, such as inaccurate readings, can help you identify and address any potential problems.

Next, we will explore how to adjust the thermometer for optimal performance.

Advertisement

Adjust the Thermometer

Before adjusting the thermometer, it’s important to ensure that it’s been properly cleaned and is free of any residue. This will help guarantee accurate readings during the calibration process.

To adjust the thermometer, follow these adjustment techniques and troubleshooting tips:

  • Check for a calibration screw: Some candy thermometers have a small screw that can be turned to adjust the temperature reading. Locate this screw on the back or side of the thermometer.

  • Use pliers or a small screwdriver: If your candy thermometer has a calibration screw, gently turn it clockwise or counterclockwise to adjust the reading. Be careful not to apply too much force, as this could damage the thermometer.

  • Test the accuracy: After adjusting the thermometer, place it back into the ice bath and observe the temperature reading. It should now read 32°F (0°C). If it doesn’t, repeat the adjustment process until the desired reading is achieved.

  • Consider professional calibration: If you’re having trouble adjusting the thermometer or if it’s consistently inaccurate, it may be worth seeking professional calibration services.

Once the thermometer has been adjusted, it’s time to move on to the next step: testing it in boiling water (optional).

Test in Boiling Water (Optional)

To ensure accurate readings, it’s optional but recommended to test the thermometer in boiling water, which can provide valuable information about its performance.

Did you know that water boils at 212°F (100°C) at sea level? Testing the candy thermometer in boiling water is a simple yet effective way to verify its accuracy.

Advertisement

Start by bringing a pot of water to a rolling boil. Insert the candy thermometer into the water, making sure it doesn’t touch the sides or bottom of the pot. The thermometer should read 212°F (100°C) if it’s calibrated correctly. If the reading is off by a few degrees, you may need to troubleshoot the issue.

One common problem is a thermometer that reads higher or lower than the actual temperature. In this case, you can adjust it accordingly.

By testing the thermometer in boiling water, you can ensure that your candy will reach the desired temperature during cooking.

In the next section, we will discuss how to make adjustments to the thermometer for optimal performance.

Make Adjustments

If the reading is slightly off, you can easily adjust the thermometer for optimal performance. Did you know that making small adjustments can significantly improve accuracy? When calibrating a candy thermometer, it is important to have precise measurements to ensure the best results. Here are some adjustment techniques and troubleshooting tips to help you calibrate your candy thermometer effectively.

Advertisement

First, check if your thermometer has a calibration nut or screw. This allows you to adjust the temperature reading. Use a pair of pliers or a small wrench to turn the nut or screw in the direction indicated in the thermometer’s instructions. Make small adjustments at a time and then retest the thermometer to see if the reading is closer to the desired temperature.

If your thermometer does not have a calibration nut or screw, you can still make adjustments by using the boiling water test we mentioned earlier. If the thermometer consistently reads a few degrees too high or too low, you can mentally adjust the reading when using it.

Remember, calibration is an ongoing process, and it may be necessary to repeat the calibration process periodically to ensure accurate readings. By following these adjustment techniques and troubleshooting tips, you can maintain the accuracy of your candy thermometer and enjoy precise temperature measurements for your candy-making endeavors. In the next section, we will discuss how to repeat the calibration process without starting from scratch.

Repeat the Calibration Process

Keep in mind that calibrating your candy thermometer is like fine-tuning a musical instrument – it requires repetition and practice to ensure accurate results. To repeat the calibration process, follow these troubleshooting tips:

  1. Double-check the water temperature: Before immersing your thermometer into the boiling water, make sure it reads 212°F (100°C). If it doesn’t, make necessary adjustments or use an offset value.

  2. Immerse the thermometer properly: Insert the candy thermometer into the boiling water, making sure the sensor tip is fully submerged and doesn’t touch the bottom or sides of the pot. Avoid any contact with the thermometer clip.

  3. Observe the temperature: As the water boils, carefully monitor the temperature reading on the thermometer. It should read 212°F (100°C) at sea level. If there is any variation, note the difference and adjust accordingly.

Repeat this process multiple times to establish consistency and accuracy in your candy thermometer readings. This repetition will help fine-tune your thermometer and ensure precise measurements for your candy-making endeavors.

Advertisement

Now that you’ve successfully calibrated your thermometer, it’s time to use it confidently in your candy recipes.

Use Your Calibrated Thermometer

When using a calibrated candy thermometer, I can enjoy perfectly cooked candies and confections. By accurately measuring the temperature of my sugar syrups, I can achieve the desired texture and consistency for my treats.

With this confidence, I can follow recipes precisely and achieve consistent results every time.

Enjoy Perfectly Cooked Candies and Confections

Achieve flawless results by using a candy thermometer to ensure your candies and confections are perfectly cooked. Properly calibrated thermometers are essential for achieving perfect candy temperatures.

To calibrate your candy thermometer, you can do a simple boiling water test. Place the thermometer in a pot of boiling water and make sure it reads 212°F (100°C). If it doesn’t, adjust the temperature accordingly.

Advertisement

Troubleshooting your candy thermometer is also important to avoid inaccurate readings. Check for any cracks or damage that may affect its accuracy. Additionally, ensure that the thermometer is fully submerged in the syrup or mixture for accurate readings.

By following these steps, you can enjoy perfectly cooked candies and confections. With a calibrated thermometer, you can now move on to the next section, where we’ll discuss how to follow recipes with confidence.

Follow Recipes with Confidence

Feel confident in your culinary skills by mastering the art of following recipes to create delicious treats that will impress your friends and family.

In the kitchen, confidence is key, and one way to ensure success is by maintaining precise temperature control. When it comes to candy making, accuracy is crucial, and that’s where a candy thermometer becomes your best friend.

By following recipes with confidence and using a candy thermometer, you can achieve the exact temperatures required for each stage of candy making. This precise temperature control ensures that your candies and confections turn out perfectly every time, with the ideal texture and consistency.

Advertisement

However, it’s important to remember that candy thermometers can lose accuracy over time, so it’s essential to maintain and re-calibrate regularly to ensure your thermometer is giving you accurate readings.

Maintain and Re-Calibrate Regularly

To maintain accurate readings, I make sure to regularly calibrate my candy thermometer. It’s crucial to do so in order to avoid any discrepancies when making my delicious treats. Regular maintenance is of utmost importance when it comes to candy thermometers.

By following a few simple steps, you can troubleshoot common issues and ensure the accuracy of your thermometer.

Firstly, it’s essential to understand the importance of regular maintenance. Over time, candy thermometers can become less accurate due to temperature fluctuations and wear and tear. By calibrating it regularly, you can ensure that your thermometer is providing accurate readings, which is crucial when working with precise temperatures required for making candies.

To calibrate your candy thermometer, you can use the boiling water method. Simply bring a pot of water to a rolling boil and insert your candy thermometer. It should read 212 degrees Fahrenheit or 100 degrees Celsius at sea level. If it doesn’t, you can adjust the thermometer accordingly using the calibration screw or by consulting the manufacturer’s instructions.

Advertisement

In addition to regular calibration, it’s also important to troubleshoot common issues that may affect the accuracy of your thermometer. For example, if your candy thermometer has a metal clip, make sure it’s securely attached to the pot to prevent any interference with the readings. Additionally, avoid touching the sides or bottom of the pot with the thermometer, as this can give inaccurate readings.

By regularly calibrating your candy thermometer and troubleshooting common issues, you can ensure the accuracy of your readings and confidently create delicious candies every time.

Frequently Asked Questions

Can I use any type of candy thermometer for calibrating?

Yes, you can use any type of candy thermometer for calibrating. However, it’s important to be aware of common mistakes in calibrating candy thermometers. For accurate temperature readings, ensure that the thermometer is clean and properly inserted into the candy mixture, avoiding contact with the sides or bottom of the pot. Additionally, always calibrate your thermometer before each use to maintain accuracy. Following these tips will help you achieve precise temperature readings when using a candy thermometer.

How often should I recalibrate my candy thermometer?

To ensure accurate measurements, it’s important to regularly test and adjust the accuracy of your candy thermometer. The frequency at which you should recalibrate your candy thermometer depends on its usage and the manufacturer’s recommendations.

To test the accuracy, you can use the boiling water method or the ice water method. Adjusting the thermometer can be done by either tightening or loosening the nut at the base.

Advertisement

By regularly testing and adjusting your candy thermometer, you can ensure precise temperature readings for your confectionery creations.

Is it necessary to use a specific type of thermometer for calibrating?

Using a specific type of thermometer for calibrating is crucial to ensure accuracy in candy making. The importance of accuracy can’t be overstated, as even a slight deviation in temperature can lead to candy that’s too soft, too hard, or fails to set properly. Common mistakes when calibrating candy thermometers include not using an accurate reference thermometer, not properly adjusting for altitude, and not allowing sufficient time for the thermometer to stabilize. Being aware of these mistakes can help achieve precise calibration and successful candy making.

Can I calibrate a candy thermometer without using an ice bath?

Alternative methods for calibrating a candy thermometer without using an ice bath include the boiling water method and the sugar method. To check the accuracy of a candy thermometer, bring a pot of water to a rolling boil and insert the thermometer. It should read 212°F (100°C) at sea level.

Alternatively, for the sugar method, heat a mixture of sugar and water to a specific temperature and compare it to the reading on the thermometer. These methods provide reliable ways to ensure the accuracy of a candy thermometer.

What are the signs that indicate my candy thermometer needs recalibration?

If your candy thermometer is showing inconsistent or incorrect readings, it may be time for recalibration. Signs of a candy thermometer in need of recalibration include temperature readings that are consistently too high or too low, or if it gives different readings at the same temperature.

Advertisement

To test the accuracy of your candy thermometer, you can use boiling water or the ice point method. Adjusting a candy thermometer typically involves adjusting the nut or screw on the back of the dial to align it with the correct temperature.

Conclusion

In conclusion, calibrating your candy thermometer is essential for accurate temperature readings while making sweet treats. By following the steps outlined in this article, you can ensure that your thermometer is properly adjusted and reliable.

Remember, a calibrated thermometer is like the precise compass that guides you through the candy-making journey. Just as a well-calibrated compass directs a traveler on the right path, a calibrated thermometer leads you to perfect caramel, toffee, and fudge.

So, take the time to calibrate your thermometer regularly, and enjoy the sweet rewards of precise temperature control.

Advertisement

Continue Reading

Trending