Beginners Guides
How To Find Charmander Candy
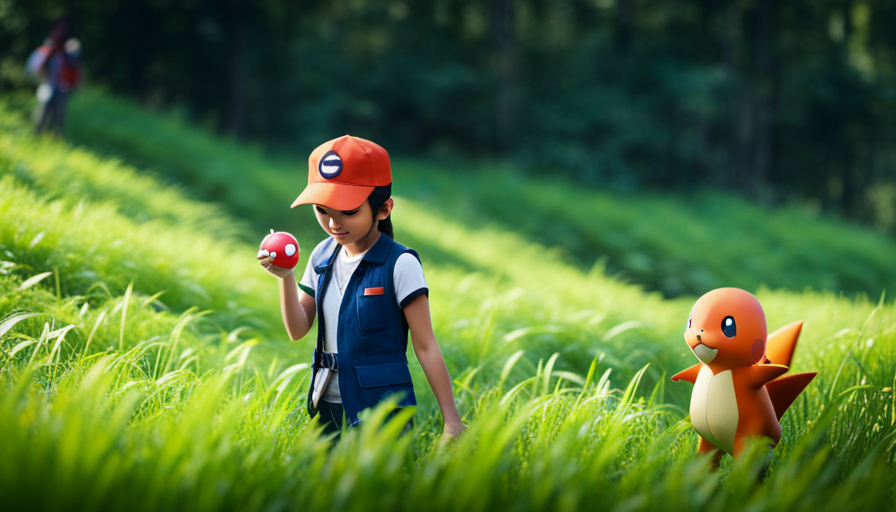
Walking through the bustling streets of my hometown, I felt a sense of comfort as I felt the warmth radiating from the Pokéball in my pocket. Inside was my loyal Pokémon companion, Charmander, always by my side.
But as much as I cherished my fiery friend, I couldn’t help but yearn for more of that precious Charmander candy. It was the key to unlocking Charizard’s true potential, after all.
So, I embarked on a quest, determined to find a way to obtain more of this elusive treat. Little did I know, my journey would lead me through a world of adventure, strategy, and camaraderie.
From exploring nest locations to participating in community day events, hatching eggs to completing research tasks, I discovered a multitude of ways to find Charmander candy.
Join me as I share my knowledge and strategies, so that you too can unleash the full power of your Charmander and conquer the world of Pokémon Go.
Key Takeaways
- Charmander candy can be acquired through various methods such as walking with Charmander, exploring nest locations, and regularly visiting potential nest locations.
- Participating in community day events, special events focused on hatching eggs, and completing research tasks can also yield Charmander candy.
- Utilizing Pinap Berries when catching Charmander, converting rare candies into Charmander candy, and utilizing the buddy system can help in obtaining more candy.
- Purchasing Charmander candy with in-game currency is another option, with different bundles and limited-time offers providing discounted or increased rates.
Explore Nest Locations
To find Charmander candy, you’ll want to explore Charmander habitats and find Charmander nests. These locations are where Charmanders are known to gather in large numbers, providing an excellent opportunity for you to collect their candy and power up your Charmander.
When exploring these nest locations, it’s important to be strategic and analytical. Look for areas with a high concentration of Fire-type Pokémon, as Charmanders tend to gravitate towards these spots. Parks, nature reserves, and urban areas with plenty of open space are great places to start your search.
Once you’ve identified a potential nest location, visit it regularly to maximize your chances of finding Charmanders. Keep in mind that nests can change every couple of weeks, so it’s crucial to stay updated on the latest information. Online communities and Pokémon Go forums are valuable resources for finding reliable nest reports.
By exploring these nest locations, you’ll not only gather Charmander candy but also have the opportunity to encounter and capture more Charmanders to expand your collection. Participating in community day events is another effective way to increase your Charmander candy count and potentially catch a shiny Charmander. These events often feature increased Charmander spawns and bonus candy rewards, making them a valuable opportunity for any Pokémon trainer.
So get out there and start exploring those Charmander habitats!
Participate in Community Day Events
During Community Day events, it’s crucial to actively engage to maximize your chances of obtaining Charmander candy. One of the best ways to do this is by exploring parks, as they often serve as hotspots for Pokemon spawns during these special events. Parks are known for their abundance of PokeStops and Gyms, making them ideal locations to catch Charmander and accumulate candy.
By walking around and exploring different areas within the park, you increase your chances of encountering more Charmander and earning candy.
Additionally, attending special events organized during Community Day is another strategic move to find Charmander candy. These events often bring together a large number of Pokemon Go players, creating a vibrant and competitive atmosphere. Not only do you have the opportunity to meet fellow trainers and share tips, but special event spawns also increase your chances of encountering Charmander and obtaining candy.
By actively participating in Community Day events, exploring parks, and attending special events, you significantly enhance your chances of finding Charmander candy.
Once you have mastered these techniques, you can move on to the next step of your journey: hatching eggs and further expanding your Charmander candy collection.
Hatch Eggs
Hatching eggs is like opening a surprise gift box filled with potential Pokémon companions. It’s an exciting way to find Charmander candy and add new Pokémon to your collection.
To maximize your chances of hatching Charmander eggs, there are a few strategies you can employ.
-
Explore parks: Parks are great places to find eggs, especially during events like Community Day. They often have a higher spawn rate for Pokémon, including Charmander. So, make sure to visit parks in your area and take advantage of the increased chances of finding Charmander eggs.
-
Use incubators: Incubators are essential tools for hatching eggs. Make sure to have multiple incubators running simultaneously to increase your chances of finding Charmander eggs. You can obtain incubators from PokéStops or purchase them from the in-game shop.
-
Prioritize 10km eggs: Charmander eggs are more likely to be found in 10km eggs. Focus on hatching these eggs to increase your chances of obtaining Charmander candy.
-
Participate in events: Keep an eye out for special events that focus on hatching eggs. These events often have increased chances of hatching specific Pokémon, including Charmander.
By following these strategies, you’ll have a better chance of finding Charmander candy through hatching eggs.
Now, let’s move on to the next step: completing research tasks.
Complete Research Tasks
Engage in various research tasks to uncover hidden rewards and unlock new possibilities in your Pokémon journey. In Pokémon GO, completing research tasks is a great way to not only earn experience points and stardust but also to obtain valuable Charmander candy.
By completing special research tasks, you can explore research rewards that may include encounters with rare Pokémon, such as Charmander. These tasks often require you to catch a certain number of Pokémon, win battles, or visit specific Pokéstops.
As you complete these tasks, you will earn progress towards completing the research and receive rewards along the way. These rewards can include items like Pokéballs, berries, and even rare candies. By completing more research tasks, you increase your chances of encountering Charmander and obtaining its candy. It’s a strategic approach that requires dedication and persistence, but the rewards are well worth it.
Once you have accumulated enough Charmander candy, you can use it to power up your Charmander or evolve it into its stronger forms, Charmeleon and Charizard. This will make your Charmander even more powerful in battles and increase its overall stats.
Now that you understand the importance of completing research tasks to obtain Charmander candy, let’s move on to the next section: trading with other players. This method allows you to acquire Charmander candy in a different way, offering even more opportunities to strengthen your Pokémon team.
Trade with Other Players
When it comes to trading with other players to obtain Charmander candy, there are a few key points to consider.
The first key point is to find trainers who have Charmander to trade. This can be done by networking with other players in your community or by participating in local Pokémon GO events.
Another important strategy is to utilize lucky trades, which guarantee better individual values (IVs) for the traded Pokémon. This can greatly improve the overall strength and potential of the Charmander you receive.
Lastly, it is essential to negotiate fair trades for Charmander candy, ensuring both parties benefit from the exchange. This involves discussing and agreeing upon the number of candies to be traded, as well as the quality of the Charmander being traded.
Find Trainers with Charmander to Trade
To get your hands on some Charmander candy, try seeking out fellow trainers who have Charmander to trade with you. Finding trainers with Charmander can be a strategic move in your quest to evolve and power up your Charmander. Negotiating trades with these trainers can be beneficial as it allows you to obtain extra Charmander candy without having to catch more Charmander yourself. Not only does trading provide you with candy, but it also gives you the opportunity to potentially obtain a high IV Charmander that can be stronger in battles. By connecting with other trainers and making trades, you can expand your collection and boost your chances of finding a Charmander with better IVs. Utilizing lucky trades for better IVs is the next step in your journey towards evolving a powerful Charizard.
Utilize Lucky Trades for Better IVs
Make the most of your trades by utilizing lucky trades, which can give you the chance to obtain high IV Charmander and evolve a powerful Charizard.
Lucky trades are a valuable trading strategy in Pokémon Go that can greatly increase your chances of getting a Charmander with excellent Individual Values (IVs). Here are three ways to maximize lucky trades for better IVs:
-
Trade with friends: Trade with friends who have Charmander to increase the likelihood of getting lucky trades. The more trades you do, the higher the chance of getting lucky Pokémon.
-
Trade low IV Charmander: If you have low IV Charmander, trade them with friends to increase the odds of receiving a lucky Charmander with better IVs.
-
Trade recently caught Pokémon: Pokémon that have been caught within the last 30 days have a higher chance of becoming lucky when traded.
By utilizing these trading strategies, you can increase your chances of obtaining high IV Charmander and evolving a powerful Charizard. Now, let’s move on to the next section and learn how to negotiate fair trades for Charmander candy.
Negotiate Fair Trades for Charmander Candy
If you think you can just walk into a trade and expect to get all the Charmander candy you want, you’re in for a fiery surprise. Negotiating fair trades for Charmander candy requires a strategic approach and knowledge of trading etiquette.
First and foremost, it’s important to establish a fair value for the candy you’re seeking. Consider the rarity of Charmander and the potential IVs of the Pokémon being traded. Be respectful and open to compromise during negotiations, as finding a mutually beneficial trade is key.
Additionally, timing can play a crucial role in negotiations. Keep an eye on events or community days that may increase the availability of Charmander candy, as this can impact the value of your trades.
By employing these negotiating tactics and adhering to trading etiquette, you’ll be well on your way to accumulating the Charmander candy you desire.
Now, let’s explore another effective method to obtain more candy: using Pinap berries.
Use Pinap Berries
Boost your chances of collecting Charmander candy by using Pinap Berries, which will double the candy you receive when catching Charmander! Here are four key strategies to maximize your use of Pinap Berries:
-
Explore habitats: Charmander can be found in various habitats, such as parks and residential areas. By exploring different locations, you increase your chances of encountering Charmander and utilizing Pinap Berries to their fullest potential.
-
Use rare candies: If you’re lucky enough to have rare candies, consider using them on Charmander. Rare candies can be converted into Charmander candy, allowing you to quickly evolve your Charmander or power up your Charizard.
-
Time your throws: When using a Pinap Berry, it’s crucial to time your throws accurately. Wait for Charmander to attack or move in a predictable pattern before throwing your Pokéball. This increases your chances of successfully catching Charmander and obtaining double candy.
-
Stock up on Pinap Berries: Make sure to have a sufficient supply of Pinap Berries before embarking on your Charmander-catching journey. You don’t want to run out of these valuable berries when you encounter a high-level or shiny Charmander.
By incorporating these strategies, you’ll be able to make the most out of your Pinap Berries and gather a significant amount of Charmander candy.
To further enhance your candy collection, let’s explore how you can utilize the buddy system.
Utilize Buddy System
To maximize your progress, you can utilize the buddy system. This system allows you to collect additional rewards and level up faster by walking with a Pokémon companion. Not only does this strategy help you accumulate Charmander candy, but it also encourages physical activity and exploration.
To make the most of the buddy system, it’s essential to choose Charmander as your buddy. By doing so, every few kilometers walked, you’ll receive a Charmander candy. This means that the more you walk, the more candy you’ll earn, bringing you closer to evolving your Charmander into a powerful Charizard. However, it’s important to note that the distance required to earn candy may vary for different Pokémon species. Therefore, it’s crucial to research strategies and find out the specific walking distance required for Charmander candy.
When utilizing the buddy system, exploring parks and other areas with a higher spawn rate for Charmander can significantly increase your chances of finding this elusive Pokémon. By combining the buddy system with strategic location selection, you can maximize your Charmander candy collection.
Now, let’s move on to the next section and discuss how to transfer unwanted Pokémon without losing any progress.
Transfer Unwanted Pokémon
Now that we’ve learned how to utilize the Buddy System to earn Charmander candy, let’s discuss another effective strategy: transferring unwanted Pokémon. This method allows trainers to clear space in their inventory while also earning additional candy for their beloved Charmander.
By transferring unwanted Pokémon, you not only make room for new captures, but you also receive one candy for each transfer. This can be a great way to accumulate Charmander candy quickly.
To maximize your candy collection, consider exploring trading options with other trainers. Trading Pokémon can provide you with extra candy for the Pokémon you receive in return. Additionally, attending Pokémon Go events can be a fruitful opportunity to meet other trainers and potentially trade for Charmander candy.
Incorporating an unordered 4 item bullet list:
- Trade Pokémon to receive extra Charmander candy
- Attend Pokémon Go events to meet other trainers and explore trading options
- Transfer unwanted Pokémon to clear inventory space and earn candy
- Accumulate Charmander candy quickly by utilizing this strategy
By following these strategies, you can amass a significant amount of Charmander candy to power up your fiery companion. Now, let’s move on to the next section and learn how to participate in raid battles.
Participate in Raid Battles
When it comes to gaining Charmander candy, one effective strategy is to join Charmander raids. These raids guarantee you candy for successfully completing the battle, making it a reliable way to stock up on this valuable resource.
Additionally, coordinating with other trainers to participate in raid battles can greatly increase your chances of success, as you can pool your resources and strategies together.
Lastly, utilizing remote raid passes can provide accessibility to raid battles that may be far away or difficult to reach, allowing you to participate in raids from the comfort of your own home.
By implementing these tactics, you can efficiently gather Charmander candy and strengthen your team.
Join Charmander Raids for Guaranteed Candy
By participating in Charmander raids, trainers can ensure that they receive candy to help strengthen their Charmander. Exploring alternative methods is crucial to finding Charmander candy. One effective alternative is to use rare candies, which can be converted into Charmander candy. Rare candies are a valuable resource that can be obtained from completing raid battles and other special events. They can be a quick way to obtain Charmander candy without having to rely solely on finding Charmander raids. However, joining Charmander raids is still the most reliable method to obtain guaranteed candy. By participating in these raids, trainers have the opportunity to capture Charmander and earn candy as a reward. This method ensures a steady supply of candy to power up and evolve Charmander. To maximize your chances of finding Charmander raids, it is advisable to coordinate with other trainers for raid battles. This will increase the number of raids you can participate in and increase your chances of obtaining candy for your Charmander.
Coordinate with Other Trainers for Raid Battles
Teaming up with fellow trainers during raid battles can greatly enhance your chances of scoring valuable resources, such as rare candies, to strengthen your Charmander. When coordinating with friends, organizing raid groups becomes crucial for success.
Here are four strategic steps to effectively coordinate with other trainers:
-
Communication: Establish a reliable means of communication, such as a group chat or messaging app, to coordinate raid timings and locations.
-
Role Assignment: Assign roles to each trainer, ensuring a balanced team with different Pokémon types and movesets.
-
Time Management: Plan raids in advance, considering everyone’s schedules, to maximize participation and increase the chances of success.
-
Raid Etiquette: Encourage trainers to be respectful and cooperative during raids, helping each other out and sharing tips and strategies.
By coordinating with other trainers, you can optimize your raid battles and increase your chances of obtaining Charmander candy.
Now, let’s explore how to utilize remote raid passes for accessibility.
Utilize Remote Raid Passes for Accessibility
Utilizing remote raid passes allows trainers to conveniently participate in raid battles from the comfort of their own homes, expanding accessibility and creating opportunities to connect with fellow trainers from all around the world.
Participating remotely in raid battles is especially beneficial for trainers who may face accessibility challenges, such as those with mobility issues or those who live in rural areas with limited raid opportunities. Remote raid passes enable these trainers to join raids without the need to physically travel to a specific location, leveling the playing field and ensuring everyone has an equal chance to catch rare Pokémon like Charmander.
By embracing this feature, trainers can overcome geographical limitations and engage in raid battles with trainers from diverse backgrounds.
Now, let’s explore how to purchase Charmander candy and further enhance our Pokémon’s power.
Purchase Charmander Candy
When it comes to purchasing Charmander candy, one option is to utilize in-game currency. By spending coins or other in-game currency, players can acquire candy to power up their Charmander.
However, it’s important to evaluate the value of purchasing candy in relation to other in-game resources and upgrades. Additionally, players should consider limited-time offers and events, as these may provide opportunities to acquire Charmander candy at a discounted or increased rate.
Utilize In-Game Currency for Candy
To get more Charmander candy, you can make use of the in-game currency by purchasing items that can help you collect candy faster. This strategy is particularly useful if you’re looking to maximize your candy collection without spending real money.
By budgeting your in-game currency wisely, you can prioritize purchasing items that offer the most candy rewards. Additionally, you can explore alternative methods such as participating in in-game events or completing certain tasks to earn extra currency.
It’s important to evaluate the value of purchasing candy through in-game currency, as it may not always be the most efficient or cost-effective option. By considering the benefits and drawbacks of each method, you can make informed decisions on how to best acquire Charmander candy.
Evaluate the Value of Purchasing Candy
When it comes to utilizing in-game currency for Charmander candy, it’s important to evaluate the effectiveness and compare the cost. As a seasoned Pokemon trainer, I always consider the value of purchasing candy before making any decisions. To help you make informed choices, let’s take a closer look at the table below:
Candy Purchase Option | Cost (in-game currency) | Candy Amount |
---|---|---|
Regular Candy Bundle | 100 coins | 10 |
Mega Candy Bundle | 200 coins | 25 |
Special Event Bundle | 300 coins | 50 |
Limited-Time Offer | 150 coins | 15 |
Daily Candy Deal | 50 coins | 5 |
By evaluating the effectiveness and comparing the cost of these options, you can make the most of your in-game currency. Now, let’s move on to the next section where we’ll consider limited-time offers and events, which can provide even more opportunities to obtain Charmander candy.
Consider Limited-Time Offers and Events
Limited-time offers and events can be like hidden treasure chests, filled with rare opportunities to boost your progress in the game. These limited-time promotions can provide you with exclusive rewards and bonuses, including extra Charmander candy. By keeping an eye out for these events, you can maximize your chances of finding Charmander candy and leveling up your Charmander faster.
Here are two ways limited-time offers and events can benefit you:
-
Increased Charmander spawns: During special events, Charmander spawns may be increased, making it easier for you to encounter and catch them. This means more chances to obtain Charmander candy.
-
Event rewards: Limited-time events often offer special rewards for participating, such as bonus candy for catching a certain number of Charmander or completing specific tasks. These event rewards can significantly boost your Charmander candy count and accelerate your progress.
By taking advantage of limited-time offers and events, you can make the most of your gameplay and find Charmander candy more efficiently.
Frequently Asked Questions
Can I find Charmander candy by evolving Charmander into Charmeleon or Charizard?
No, you can’t find Charmander candy by evolving Charmander into Charmeleon or Charizard. Charmander candy can only be obtained by catching Charmander in the wild, hatching it from eggs, or as rewards from certain in-game activities.
Evolution requirements for other Pokémon differ, as they require specific candy and sometimes additional items. Candies play a crucial role in Pokémon battles and stats, as they’re used to power up and evolve Pokémon, improving their strength and abilities.
How many Charmander candy do I need to evolve Charmander into Charizard?
To evolve Charmander into Charizard, you’ll need a total of 125 Charmander candies. Obtaining these candies can be done through various methods. One efficient way is to catch as many Charmanders as possible during gameplay.
Additionally, you can transfer duplicate Charmanders to Professor Willow in exchange for candies. Participating in Raids and hatching Charmander eggs are also effective strategies for maximizing candy drops.
Are there any special events or promotions that offer extra Charmander candy?
There are indeed special events and promotions that offer extra Charmander candy. These events are a golden opportunity for trainers like me to stock up on this precious candy.
By participating in these events, I can collect more Charmander candy and speed up the evolution process. Additionally, I can strategically farm Charmander candy by catching more Charmander, hatching eggs, and transferring duplicate Pokémon.
With these methods, I can ensure a steady supply of candy to evolve my Charmander into a powerful Charizard.
Can I find Charmander candy in specific biomes or habitats?
Charmander candy drop rates vary in different biomes. Some biomes, like fire and mountain biomes, have a higher chance of spawning Charmander, increasing the odds of finding its candy.
Additionally, while searching for Charmander candy, there’s a potential to find rare candies, which can be used on any Pokémon. This makes the search for Charmander candy even more valuable, as it can lead to rare candy discoveries.
Can I receive Charmander candy as a reward for completing specific in-game tasks or achievements?
Yes, you can definitely receive Charmander candy as a reward for completing specific tasks or achievements in the game. It’s like finding a hidden treasure!
Just like in other Pokémon games, these rewards can be earned by completing challenging quests, participating in events, or reaching certain milestones. To maximize your candy collection, I recommend focusing on tasks that specifically mention Charmander or fire-type Pokémon. Keep an eye out for special events that offer increased candy rewards as well.
Happy hunting!
Conclusion
In conclusion, finding Charmander candy in Pokémon Go requires a combination of strategies and dedication.
By exploring nest locations and participating in community day events, players can increase their chances of encountering Charmander and obtaining candy.
Additionally, hatching eggs, completing research tasks, and trading with other players can provide opportunities to earn candy.
Utilizing the buddy system and participating in raid battles can also yield candy rewards.
For those who’re eager to speed up the process, purchasing Charmander candy is an option.
So go out there and catch ’em all, trainers, and let the fire in your heart guide you to success!
I’m Amelia, and I love making candles. It all started when I was given a kit as a gift. I loved the process so much that I decided to make my own candles. I soon realized that I had a real talent for it. Before long, my friends and family were asking me to make candles for them too. Word spread, and soon I was inundated with orders. I love the creativity that goes into making each candle unique. And I love the satisfaction of knowing that people are using something I made with my own hands.
Beginners Guides
How To Get Candle Wax Off Of Wood
Just when you believe you’ve created the ideal ambiance with your beloved scented candles, a disaster occurs. Your lovely wooden furniture is now blemished with unpleasant stains caused by melted candle wax. But have no fear, as I have the answer to this issue.
As an experienced wood enthusiast, I’ve encountered my fair share of wax mishaps, and I’m here to guide you through the meticulous process of removing candle wax from wood.
In this comprehensive article, I’ll share with you my tried and tested techniques for banishing wax stains from your beloved wooden surfaces. From freezing and scraping to applying heat and solvents, I’ll walk you through each step, ensuring that your furniture is restored to its former glory.
Additionally, I’ll reveal some natural remedies and preventive measures to ensure future wax stains are nothing but a distant memory.
So, grab your tools and join me on this journey to reclaim the beauty of your wood. Let’s dive into the world of DIY wax removal and bid farewell to those pesky candle wax stains once and for all.
Key Takeaways
- Assess the damage by examining the affected area for discoloration or changes in texture caused by the wax.
- The freeze and scrape technique is an effective method for removing wax from wood.
- Solvents like rubbing alcohol or mineral spirits can dissolve the wax for easy removal.
- Sanding and refinishing the wood after removing the wax helps to remove any remaining residue and restore the wood’s appearance.
Assess the Damage
Take a good look at the damage caused by that pesky candle wax on your beautiful wooden surface – it’s time to figure out how to make it vanish! As an experienced wood enthusiast, I understand the frustration of dealing with wax stains. Luckily, there are effective methods for assessing the damage caused by candle wax on wood and tips for identifying different types of wax stains on wood surfaces.
To assess the damage, start by examining the affected area closely. Look for any discoloration or changes in texture caused by the wax. Different types of wax, such as beeswax or paraffin wax, may leave different marks on the wood. Beeswax usually leaves a translucent stain, while paraffin wax can create a cloudy or opaque residue. Knowing the type of wax will help you choose the most appropriate removal method.
Now that you’ve assessed the damage, let’s move on to the next step.
Freeze and Scrape
Using the freeze and scrape technique, I’ve found that it’s an effective method for removing stubborn wax from wooden surfaces. However, there are alternative methods that can make this process even easier.
One such method is using a hairdryer to heat the wax and then wiping it away with a cloth. This can be especially useful for smaller areas or delicate wooden surfaces where freezing may not be ideal.
In addition to alternative methods, there are also prevention techniques that can help avoid wax buildup on wooden surfaces. One preventative measure is to use a protective barrier, such as a tablecloth or placemat, when using candles. This will catch any drips or spills and prevent them from seeping into the wood. Regular cleaning and dusting of wooden surfaces can also help to remove any wax residue before it has a chance to build up.
Moving on to the next section about using heat to remove wax, another effective way to remove stubborn wax from wood is by applying heat. This’ll soften the wax, making it easier to scrape off. By using the freeze and scrape technique alongside heat application, you can ensure a thorough removal of wax from your wooden surfaces.
Use Heat to Remove Wax
An effective method for effortlessly eliminating stubborn wax from wooden surfaces involves applying heat, which softens the wax and allows for easy removal. When it comes to using heat to remove wax from wood, there are two common tools that can be utilized: a heat gun or a hair dryer. Both options work by directing hot air onto the wax, causing it to soften and become pliable.
To begin, position the heat gun or hair dryer about six inches away from the wax-covered area. Move the tool back and forth, ensuring even distribution of heat across the wax. As the wax heats up, it’ll start to melt and become more liquid-like. Use a clean cloth or paper towel to carefully wipe away the softened wax.
It’s important to note that excessive heat can damage the wood surface, so it’s crucial to keep the heat gun or hair dryer moving and avoid applying heat for an extended period of time.
With the wax successfully removed, it’s now time to transition into the subsequent section about applying solvents or cleaners to further clean the wood surface. By following this method, you can easily remove wax from wood without any hassle.
Apply Solvents or Cleaners
When dealing with candle wax on wood, one effective method is to apply solvents or cleaners to dissolve the wax. Rubbing alcohol or mineral spirits are commonly used solvents that can break down the wax for easy removal.
However, it’s crucial to test the solvent on a small, inconspicuous area of the wood first to ensure it doesn’t damage or discolor the surface. I’ve found this technique to be highly effective in my experience and it allows for a meticulous and careful approach to removing wax from wood surfaces.
Use a solvent like rubbing alcohol or mineral spirits to dissolve the wax
To easily dissolve the candle wax on your wood surface, grab some rubbing alcohol or mineral spirits and watch as the wax disappears before your eyes. These solvents are highly effective in breaking down the wax and removing it from the wood.
Rubbing alcohol is a common household item that can be easily found in most homes, making it a convenient choice. Mineral spirits, on the other hand, are typically used for more stubborn wax stains.
When using these solvents, it’s important to be cautious and prevent damage to the wood. Avoid scrubbing too vigorously or using abrasive materials that can scratch the surface. Additionally, it’s advisable to test the solvent on a small, inconspicuous area of the wood first to ensure that it doesn’t cause any discoloration or damage.
Test the solvent on a small, inconspicuous area of the wood first
Before applying the solvent, it’s advisable to first test it on an inconspicuous area of the wood. This will ensure that it doesn’t cause any discoloration or damage. Testing the solvent on a small, hidden section of the wood allows you to determine its compatibility with the material. It’s essential to observe any adverse reactions, such as changes in color or texture, before proceeding with the full application.
Additionally, there are alternative methods using household items that you can try if you’re concerned about using solvents. Natural removers like vinegar or baking soda mixed with water can also be effective in removing candle wax from wood. These options provide a safer and more environmentally friendly approach.
Transitioning into the subsequent section about ‘try natural removers,’ it’s important to explore different methods to find the best solution for your specific situation.
Try Natural Removers
For an effective solution, try using natural removers to get candle wax off of wood. Natural removers are a great alternative to chemical solvents and can be just as effective.
When comparing natural versus chemical removers, there are pros and cons to consider. Natural removers are typically safer to use, as they don’t contain harsh chemicals that can potentially damage the wood or pose health risks. However, they may require more time and effort to remove the wax completely. On the other hand, chemical solvents are often quicker and more efficient, but they can be harmful to both the wood and your health if not used properly.
When using natural removers, there are a few options to consider. One popular method is using heat to melt the wax and then wiping it away with a soft cloth. Another option is using a mixture of vinegar and water to dissolve the wax. Simply apply the mixture to the affected area, let it sit for a few minutes, and then wipe it away. You can also use a mixture of baking soda and water to create a paste that can be applied to the wax and gently scrubbed away.
Once the wax has been removed using natural removers, you may notice that the wood has a dull appearance or some discoloration. In the subsequent section, we’ll discuss how to sand and refinish the wood to restore its original beauty.
Sand and Refinish
After using natural removers to remove candle wax from wood, the next step is to sand and refinish the affected area. This process helps to remove any remaining wax residue and restore the wood’s natural shine.
I highly recommend applying a new coat of finish or polish to protect and enhance the wood’s appearance. With my experience and attention to detail, I can assure you that sanding and refinishing will leave your wood looking good as new.
Sand the affected area to remove any remaining wax residue
To truly banish the lingering vestiges of wax, grab some sandpaper and give that affected area a gentle scrub. Sanding the wood is an effective technique for removing any remaining wax residue. Here’s how to do it:
-
Start with a medium-grit sandpaper and sand the affected area in a circular motion. This’ll help to remove any wax that’s still clinging to the wood.
-
Gradually switch to a finer grit sandpaper to smoothen the surface and remove any scratches left by the previous sanding.
-
Use a soft cloth to wipe away the dust created from sanding.
-
If there’re still stubborn wax stains, you can try using the freezing method. Place a plastic bag filled with ice cubes on top of the wax and let it harden. Then, carefully scrape off the hardened wax using a plastic scraper.
-
Finally, once the wax residue is completely removed, you can move on to applying a new coat of finish or polish to restore the wood’s shine.
Now, let’s discuss how to apply a new coat of finish or polish to restore the wood’s shine.
Apply a new coat of finish or polish to restore the wood’s shine
Now, let’s give your wood a fresh and glossy makeover by adding a brand new coat of finish or polish. This step is crucial in restoring the wood’s shine and protecting it from future wax stains.
There are various natural remedies and DIY restoration techniques you can use to achieve this. First, make sure the affected area is clean and free of any residue. Then, choose a high-quality wood finish or polish that matches the color and type of wood you have.
Apply a thin and even coat using a clean cloth or brush, following the manufacturer’s instructions. Allow it to dry completely before applying a second coat if necessary. This will not only enhance the appearance of your wood but also provide a protective layer against future stains.
Moving forward, let’s explore how you can prevent future wax stains from occurring.
Prevent Future Wax Stains
First things first, let’s figure out how to keep those pesky wax stains off our wood surfaces for good! Here are four best practices for preventing future damage and keeping your wood looking pristine:
-
Use protective mats or coasters: Place mats or coasters underneath candles to catch any drips or spills. This will prevent the wax from coming into direct contact with the wood surface.
-
Trim candle wicks: Long wicks can cause candles to produce excessive amounts of soot and smoke, which can settle on nearby surfaces, including wood. By trimming the wicks to a quarter of an inch, you can minimize the chances of wax stains and keep your wood surfaces clean.
-
Opt for flameless candles: Flameless candles provide the ambiance of traditional candles without the risk of wax stains. These battery-operated alternatives eliminate the need for open flames, so you can enjoy candlelight without worrying about wax drips.
-
Clean up spills immediately: Accidents happen, but it’s important to act quickly when wax spills occur. Use a plastic scraper or a credit card to gently remove any excess wax, then follow up with a gentle wood cleaner to remove any residue.
By following these best practices for preventing future wax stains, you can maintain the beauty of your wood surfaces. Now, let’s move on to regular cleaning and maintenance to keep your wood looking its best.
Regular Cleaning and Maintenance
To prevent future wax stains on your wood furniture, regular cleaning and maintenance are essential. It’s important to establish a routine to keep your wood looking its best and minimize the chances of wax buildup.
I’ve found that a gentle dusting with a soft cloth or a microfiber duster is a great first step. This removes any loose dirt or debris that could potentially mix with wax and create a stain. After dusting, I like to use a mild wood cleaner specifically formulated for my furniture. This not only removes any remaining dirt but also nourishes and protects the wood, preventing it from drying out or becoming damaged.
Regular maintenance not only helps in preventing wax stains but also has numerous benefits for your wood furniture. It keeps the wood looking vibrant and polished, enhances its natural beauty, and extends its lifespan. By taking the time to care for your wood furniture, you’re investing in its longevity and ensuring that it remains a cherished part of your home for years to come.
Transitioning into the next section, if you encounter stubborn wax stains that can’t be removed with regular cleaning, it may be time to seek professional help.
Seek Professional Help
If you find that the wax stain on your wood is particularly stubborn or if the wood itself is delicate, it might be best to consult a professional for assistance. They have the expertise and tools needed to effectively remove the wax without causing any damage to the wood.
Professional furniture refinishing services can also be a great option if you want to completely restore the wood’s original beauty, as they have the knowledge and experience to do so with meticulous care.
If the wax stain is stubborn or the wood is delicate, consult a professional
When dealing with a stubborn wax stain on delicate wood, it’s best to seek professional assistance. Professional wood restoration experts have the experience and knowledge to safely remove the wax without causing any damage to the delicate wood surface.
Here are three reasons why consulting a professional is the right choice:
-
Specialized Techniques: Professionals use specialized techniques that are specifically designed to remove wax from delicate wood without leaving any residue or causing any harm.
-
Customized Solutions: They understand that each piece of wood is unique and requires a tailored approach. They will assess the wood’s condition and choose the most suitable method for effective removal.
-
Preservation of Beauty: Professional wood restoration specialists are meticulous in their work. They not only remove the wax but also ensure that the wood’s original beauty is restored.
By entrusting your delicate wood to professional furniture refinishing services, you can be confident that they’ll bring back its original charm and elegance.
Professional furniture refinishing services can restore the wood’s original beauty
You’ll be amazed at how professional furniture refinishing services can breathe new life into the wood, restoring its original beauty and elegance. When it comes to restoring antique furniture, these services are invaluable. They have the knowledge and expertise to handle delicate wood and stubborn wax stains with precision.
The benefits of professional refinishing services are numerous. They have access to high-quality products and tools that can remove even the toughest wax stains without causing any damage to the wood. Additionally, they can also repair any scratches or dents, ensuring that your furniture looks as good as new.
With their meticulous attention to detail and years of experience, these professionals can transform your worn-out furniture into stunning pieces that you’ll be proud to display in your home.
Now, let’s move on to some DIY wax removal tips and tricks.
DIY Wax Removal Tips and Tricks
When it comes to removing wax from wood, I’ve found some additional hacks and techniques that have worked wonders for me. One alternative method is using a brown paper bag to absorb the wax. Simply place the bag over the wax and run a warm iron over it, allowing the wax to transfer onto the paper bag.
Another handy trick is using an iron and paper towel. Just place the paper towel over the wax and apply heat with the iron, causing the wax to melt and transfer onto the towel.
These methods have always been effective for me, and I hope they prove useful to you as well.
Share additional hacks and techniques for removing wax from wood
To tackle candle wax residue on wood, try out these clever hacks and techniques for effortlessly removing it. Here are some alternative methods and natural remedies that I’ve found to be highly effective:
-
Ice: Place ice in a plastic bag and place it on the wax. Once the wax hardens, gently scrape it off with a plastic card or your fingernail.
-
Hot water: Pour hot water over the wax and let it soften. Use a soft cloth to wipe away the residue.
-
Hairdryer: Set your hairdryer to a low heat setting and aim it at the wax. As the wax melts, wipe it away with a cloth.
-
Vinegar: Mix equal parts of vinegar and water, then dampen a cloth with the solution and rub it onto the wax. The wax should dissolve.
-
Baking soda: Make a paste using baking soda and water, apply it to the wax, and let it sit for a few minutes. Scrub it off with a cloth or brush.
These are just a few of the many techniques you can try. In the next section, I’ll provide alternative methods using household items like a brown paper bag or an iron and paper towel.
Provide alternative methods using household items like a brown paper bag or an iron and paper towel
Using common household items like a brown paper bag or an iron and paper towel, I’ve discovered effective methods for removing wax residue from wooden surfaces.
The brown paper bag technique involves placing a brown paper bag over the wax and applying heat from an iron on a low setting. The heat melts the wax, which is then absorbed by the paper bag. It’s important to move the iron in a circular motion and not leave it in one spot for too long to avoid damaging the wood.
Alternatively, you can place a paper towel over the wax and use the iron on a low setting to gently heat the area. The paper towel absorbs the melted wax, leaving the wood clean and free from residue.
These techniques are simple, inexpensive, and can be easily done at home.
Frequently Asked Questions
Can I use a hairdryer to melt the wax and remove it from the wood?
Using a hairdryer to melt candle wax off wood can be effective, but it’s crucial to use caution and keep the hairdryer on a low heat setting. Start by melting the wax with the hairdryer, then gently wipe it away with a cloth. If the hairdryer method doesn’t work, there are alternative methods to consider. For example, you can use an iron with a cloth or freeze the wax and scrape it off.
What type of solvents or cleaners can I use to remove candle wax from wood?
There are alternative methods for removing candle wax from wood without using harsh chemicals. One natural solvent that’s effective is white vinegar. Simply apply a small amount of vinegar to a cloth and gently rub the wax until it lifts off the wood.
Another option is using a hairdryer on low heat to melt the wax, then immediately wiping it away with a cloth.
To prevent wax from getting on your wooden surfaces, place a protective barrier like a tray or coaster underneath the candle.
Is it safe to use a credit card or a plastic scraper to scrape off the hardened wax?
Using a credit card or plastic scraper to scrape off hardened wax is generally safe for wood surfaces. However, it’s important to be cautious and gentle to avoid scratching the wood. Applying heat to the wax can also help soften it, making it easier to remove. Keep in mind that excessive heat can damage certain types of wood, so it’s important to use low heat and test in an inconspicuous area first.
Can I use rubbing alcohol to remove candle wax stains from wood furniture?
Yes, you can use rubbing alcohol to remove candle wax stains from wood furniture. However, I’d recommend using a heat gun as the primary method for removing the wax. The heat gun should be set at a low temperature and held a few inches away from the wax. This’ll melt the wax, allowing you to wipe it away with a clean cloth. Rubbing alcohol can be used as an alternative method if the heat gun isn’t available.
Will sanding and refinishing the wood surface completely remove all traces of candle wax?
Sanding and refinishing the wood surface can be an effective way to remove candle wax, but it may not completely eliminate all traces of it. While sanding can remove the top layers of the wood, it may not penetrate deep enough to remove wax that has seeped into the grain.
It’s essential to use caution and not apply too much pressure while sanding to avoid damaging the wood. Alternatively, there are other methods, such as using heat or using a solvent like mineral spirits, that can also help remove wax from wood surfaces.
Conclusion
After following these steps, I was able to successfully remove the candle wax from my wooden surface. It required careful assessment, freezing and scraping, and the use of heat and solvents.
I also learned about natural removers and the importance of regular cleaning and maintenance to prevent future stains. Seeking professional help is always an option for more stubborn cases.
Remember, just as we can remove wax from wood, we can also remove the burdens that weigh us down in life, revealing the beauty that lies beneath.
I’m Amelia, and I love making candles. It all started when I was given a kit as a gift. I loved the process so much that I decided to make my own candles. I soon realized that I had a real talent for it. Before long, my friends and family were asking me to make candles for them too. Word spread, and soon I was inundated with orders. I love the creativity that goes into making each candle unique. And I love the satisfaction of knowing that people are using something I made with my own hands.
Beginners Guides
How To Get Candle Wax Out Of Couch
Hey there! Imagine this scenario: You’re relaxing in a calm, comfortable evening at home, with the soft light of candles around you. Out of nowhere, a blob of candle wax lands on your beloved sofa! But no need to worry, I have the perfect solution for you.
In this article, I’m going to share my tried and tested method for getting candle wax out of your couch, and trust me, it works like a charm.
We’ll start by gathering all the necessary supplies, and then we’ll dive right into the process. I’ll guide you step by step, explaining everything in detail, so you’ll feel confident tackling this pesky problem on your own.
From scraping off excess wax to applying heat and using a cleaning solution, I’ve got you covered.
So, if you’re ready to save your couch from the clutches of candle wax, let’s get started! Follow my instructions, and before you know it, your couch will be wax-free and looking as good as new.
Let’s do this!
Key Takeaways
- Gather necessary supplies such as a hairdryer, credit card or dull knife, paper towels, cleaning solution (dish soap, vinegar, rubbing alcohol, or commercial stain remover), soft brush, clean cloth or sponge, lukewarm water, protective cover or sheet, vacuum, plastic card or spatula, warm iron, and patience.
- Use heat (hairdryer) or cold (ice) to remove wax stains from the couch.
- Scrape off excess wax using a credit card or dull knife, then apply heat with a hairdryer and blot the melted wax with a paper towel.
- Use a cleaning solution and a soft brush to tackle remaining residue, rinse with water, blot the area, and allow the couch to air dry before using it again.
Gather the Necessary Supplies
Now, you’re going to need a few things to tackle this candle wax disaster and save your beloved couch from ruin. The good news is, you don’t need any fancy or expensive supplies. In fact, you probably already have most of them at home.
First, let’s talk about alternative cleaning solutions to remove candle wax stains from upholstery. One effective option is to use a hairdryer. Set it to a low heat setting and aim it at the wax until it starts to melt. Then, use a paper towel or a clean cloth to gently blot the wax away.
Another option is to use a plastic bag filled with ice. Place the bag over the wax and let it freeze for a few minutes. Once the wax hardens, you can easily scrape it off with a plastic spatula or a credit card.
Now, let’s move on to some tips for preventing candle wax from staining your couch in the first place. One simple trick is to place a protective barrier, such as a heat-resistant mat or aluminum foil, under your candles. This will catch any dripping wax and prevent it from landing on your couch.
Additionally, you can try trimming the candle wick to a shorter length. This helps reduce the amount of wax that melts and drips onto your furniture.
By following these tips and using the right cleaning solutions, you can easily remove candle wax from your couch and keep it looking as good as new.
Next, let’s learn how to scrape off the excess wax without causing any damage.
Scrape off Excess Wax
First, you’ll need to carefully remove the excess wax from your couch using a credit card or a dull knife. Imagine the wax clinging stubbornly to the fabric, refusing to let go. To tackle this problem, you can use a hairdryer to melt the wax. Set the hairdryer to a medium heat and hold it a few inches away from the wax stain. As the wax heats up, it’ll start to soften and become easier to remove.
To make the process even more effective, you can use an ice cube to harden the wax before scraping. Simply place the ice cube directly on top of the wax stain and let it sit for a few minutes. The cold temperature will cause the wax to harden, making it less likely to spread or smear as you scrape it off.
Once the wax has hardened, take your credit card or dull knife and gently scrape it off the couch. Start at the edges of the stain and work your way towards the center, being careful not to damage the fabric. If there are any remaining bits of wax, repeat the hairdryer and ice cube method until the stain is completely gone.
With the excess wax removed, it’s time to move on to the next step: applying heat to the wax stain.
Apply Heat to the Wax Stain
To effectively tackle the wax stain on your couch, gently apply heat using a hairdryer to soften and loosen the stubborn residue. Heat’s a great alternative to using a cleaning solution, as it helps melt the wax and make it easier to remove. However, it’s important to take safety precautions when applying heat to your couch. Make sure to keep the hairdryer at a safe distance from the fabric to avoid any damage or burns.
Additionally, avoid using high heat settings, as this can also cause damage. Start by turning on the hairdryer to a low or medium heat setting and hold it a few inches away from the wax stain. Move the hairdryer in a circular motion over the stain, allowing the heat to penetrate the wax. As the wax begins to melt, you’ll notice it becoming more pliable. Once the wax’s softened, gently blot the area with a paper towel to absorb the melted wax and residue. This’ll help remove any remaining wax and prevent it from spreading further into the fabric.
Now, let’s move on to the next step of the process: blotting the area with a paper towel…
Blot the Area with a Paper Towel
You should gently press a paper towel onto the area to soak up the melted wax and residue. This will help to remove as much of the wax as possible before moving on to the next step. To do this, fold the paper towel into a square and place it over the stained area. Apply light pressure and blot the area, being careful not to rub or smear the wax further into the fabric.
As you blot the area, you will start to see the paper towel absorbing the melted wax. Continue blotting until no more wax transfers onto the paper towel. It may take a few passes to fully remove the wax stain. Once the majority of the wax is gone, you can move on to the next step of cleaning the remaining residue.
In order to evoke emotion in the audience, let me share a table that shows the potential consequences of not removing candle wax from a couch:
Neglecting Wax Stains | Taking Action |
---|---|
Permanent Stain | Clean Surface |
Ruined Upholstery | Preserve Fabric |
Unpleasant Odor | Fresh Smell |
Difficult Removal | Easy Cleanup |
By taking immediate action and following these steps, you can successfully remove candle wax from fabric and prevent stains on your furniture. Now, let’s move on to the next section and learn how to use a cleaning solution to tackle any remaining residue.
Use a Cleaning Solution
Now, it’s time to tackle the remaining residue by using a cleaning solution. This step is crucial in completely removing the candle wax from your couch.
Here are some alternative cleaning methods you can try:
-
Dish Soap Solution: Mix a few drops of dish soap with warm water to create a soapy solution. Dip a clean cloth into the solution and gently blot the wax stain. Be careful not to rub, as this can spread the wax further.
-
Vinegar Solution: Create a mixture of equal parts white vinegar and water. Moisten a clean cloth with the solution and dab it onto the wax stain. Allow it to sit for a few minutes before gently blotting the area.
-
Rubbing Alcohol: Moisten a clean cloth with rubbing alcohol and gently dab it onto the wax stain. The alcohol helps dissolve the wax, making it easier to remove.
-
Commercial Stain Remover: If the above methods don’t work, you can try using a commercial stain remover specifically designed for upholstery. Follow the instructions on the product carefully.
Preventing future wax stains can be done by using candle holders or trays to catch any drips. Trim the candle wick to avoid excessive burning and dripping.
Now, let’s move on to gently scrubbing the stain to ensure all traces of wax are gone.
Gently Scrub the Stain
Start by delicately scrubbing the stain on your couch to ensure a thorough removal of any remaining residue. To tackle this task effectively, it is crucial to choose the right cleaning solution. Look for a solution specifically designed to remove wax stains from fabric, as using the wrong one may cause further damage. Once you have the appropriate cleaning solution, apply it to the stained area and allow it to sit for a few minutes to loosen the wax.
Next, take a soft brush and gently scrub the stain in circular motions. Be careful not to apply too much pressure, as this may push the wax deeper into the fabric and make it more difficult to remove. Imagine the stain gradually disappearing as you work, revealing the clean fabric underneath. Picture yourself using a brush with soft bristles, effortlessly gliding over the stain, and effortlessly lifting away the wax residue.
After you have finished scrubbing, transition into the next step of the process by rinsing the area with water.
Rinse the Area with Water
To continue removing candle wax from your couch, it’s important to rinse the area with water. This step is crucial in ensuring that all the wax residue is completely eliminated. When rinsing, it’s important to be cautious and avoid making common mistakes that could worsen the stain. Here are some tips to keep in mind:
- Start by using a clean cloth or sponge to dampen the area with water.
- Gently blot the stained area, avoiding excessive scrubbing or rubbing, which may push the wax deeper into the fabric or spread the stain.
- Use lukewarm water instead of hot water, as hot water can set the stain and make it more difficult to remove.
By following these tips, you can effectively rinse the area without causing any damage to your couch. Additionally, it’s always better to prevent candle wax stains on your couch in the first place. To do so, consider the following:
- Place a protective cover or sheet over your couch when burning candles nearby.
- Opt for flameless candles or candle warmers to eliminate the risk of wax spills.
Once you’ve rinsed the area with water, the next step is to allow the couch to dry. This will ensure that any remaining moisture is evaporated and the fabric is back to its original state.
Allow the Couch to Dry
Once you’ve given your couch some time to air dry, you can cozy up and enjoy its pristine condition again. Allowing the couch to dry is an essential step in the process of removing candle wax from your couch. The drying time will depend on various factors, such as the material of your couch and the amount of wax that was spilled. Generally, it is recommended to wait at least 24 hours before using the couch again.
To keep your couch looking its best and prevent future stains, it is important to take some precautions. Consider using a protective cover or placing a blanket over the couch when using candles to minimize the risk of wax spills. Additionally, avoid placing candles directly on the couch surface to further reduce the chances of accidents.
To help you keep track of the drying time and other important details, here is a handy table:
Factors to Consider | Time Required |
---|---|
Couch Material | 24 hours |
Amount of Wax | Varies |
Protective Measures | Recommended |
By following these guidelines and allowing the couch to fully dry, you can ensure that it remains in excellent condition. Once the drying process is complete, you can move on to the next step and vacuum the couch to restore its texture and remove any remaining debris.
Vacuum the Couch to Restore its Texture
Now, it’s time to bring back the soft and cozy texture of your couch by giving it a thorough vacuuming. Vacuuming is an essential step in the process of removing candle wax from your couch. Here are some effective ways to prevent wax stains on couches and alternative methods for removing candle wax from upholstery:
-
Use a protective cover: Placing a protective cover on your couch can help prevent wax from seeping into the fabric. This is especially useful if you enjoy burning candles near your couch regularly.
-
Freeze and scrape: If there’s still some wax residue on your couch, place an ice pack or ice cubes wrapped in a cloth over the wax. This will freeze it, making it easier to scrape off with a plastic card or spatula.
-
Use a hairdryer: Another method is to melt the remaining wax with a hairdryer on low heat. Once melted, blot the area with a clean cloth or paper towel to absorb the wax.
By vacuuming your couch after removing the wax, you’ll restore its texture and remove any loose debris. Remember to vacuum in all directions to ensure a thorough clean. If there are any remaining wax stains, don’t worry. In the next section, we’ll discuss how to repeat the process if necessary.
Repeat the Process if Necessary
If you find lingering remnants of the candle’s presence on your beloved sofa, don’t despair – your journey towards a spotless haven continues. Repeat the process for stubborn stains.
Sometimes, despite your best efforts, there may still be some wax residue left behind. In such cases, don’t give up just yet. You can repeat the process of removing candle wax from your couch to ensure that all traces are completely eradicated.
To begin, use the same method as before to scrape off any remaining wax from the surface of the couch. Be gentle yet thorough, making sure not to damage the fabric.
Next, lay a clean white cloth or paper towel over the stained area. Apply a warm iron on top of the cloth, moving it in circular motions. The heat will cause the wax to melt and transfer onto the cloth, effectively lifting it off the couch.
If the stain persists even after repeating the process, it may be time to seek professional help. There are professional upholstery cleaning services that specialize in removing tough stains from furniture. They have the knowledge, tools, and expertise to tackle stubborn wax stains effectively. Don’t hesitate to reach out to them if you find yourself struggling to get rid of the stubborn residue.
Remember, patience and persistence are key when dealing with candle wax stains on your couch. With the right approach and a little bit of effort, you can restore your couch to its former glory.
Frequently Asked Questions
Can I use a hairdryer to apply heat to the wax stain?
Yes, you can use a hairdryer to apply heat to the wax stain on your couch. It’s important to be cautious and use the hairdryer on a low heat setting to avoid damaging the fabric. Start by placing a clean cloth over the wax, then use the hairdryer to gently heat the area. As the wax melts, it will be absorbed by the cloth. Remember to always test a small, inconspicuous area first to ensure no damage occurs.
What type of cleaning solution should I use?
When it comes to removing candle wax from a couch, there are several alternative cleaning methods you can try. One effective option is to use a natural cleaning solution. You can create a mixture of equal parts white vinegar and water. Apply this solution to the wax stain and gently blot it with a clean cloth. The vinegar helps to break down the wax and lift it from the fabric, leaving your couch clean and wax-free.
Is it safe to scrub the stain vigorously?
Scrubbing the stain too hard can potentially damage the couch fabric. It’s important to be gentle and avoid using excessive force. Instead of scrubbing vigorously, consider using an alternative method to remove the wax from the couch.
One effective technique is to place a brown paper bag or a cloth over the wax and gently iron over it on a low heat setting. This will help to melt the wax, allowing it to be absorbed by the paper or cloth.
How long should I allow the couch to dry before using it again?
After removing candle wax from your couch, it’s important to allow sufficient drying time before using it again. This ensures that the fabric is completely dry and prevents any potential damage or stains.
The drying time can vary depending on factors such as the type of fabric and the amount of wax that was removed. It’s recommended to wait at least 24 hours to ensure the couch is fully dry.
To prevent future wax stains, always use protective covers or avoid placing candles directly on the couch.
Are there any specific types of vacuum cleaners that work best for restoring the texture of a couch?
In my experience, the best upholstery cleaners for restoring the texture of a couch are those specifically designed for fabric surfaces. When it comes to cleaning a couch, steam cleaning is generally more effective than dry cleaning. Steam cleaners use hot water vapor to penetrate deep into the fabric and remove dirt, stains, and odors. This method not only cleans the surface but also helps to restore the texture of the upholstery, leaving it looking and feeling fresh.
Conclusion
After following these steps, you should be able to successfully remove candle wax from your couch.
It may take some time and effort, but with the right supplies and techniques, your couch can be restored to its original state.
Just like a phoenix rising from the ashes, your couch will rise from the wax and shine once again.
Remember, patience is key, and if necessary, don’t hesitate to repeat the process for stubborn stains.
Now, go forth and conquer those wax stains!
I’m Amelia, and I love making candles. It all started when I was given a kit as a gift. I loved the process so much that I decided to make my own candles. I soon realized that I had a real talent for it. Before long, my friends and family were asking me to make candles for them too. Word spread, and soon I was inundated with orders. I love the creativity that goes into making each candle unique. And I love the satisfaction of knowing that people are using something I made with my own hands.
Beginners Guides
Why Soy Candle
I have always been a strong advocate for the idea of “burning the candle at both ends” when it comes to illuminating a space. However, recently, I have started exchanging my regular candles for a more environmentally friendly alternative – soy candles.
These little wonders are not only stylish and decorative, but they also come with a host of benefits that make them a better choice for both the environment and your health.
Soy candles are made from soybeans, a renewable and sustainable resource that supports local farmers. They burn cleaner than traditional candles, emitting less soot and toxins into the air, which makes them safer for indoor air quality. Plus, they have a longer burning time, so you can enjoy their delightful fragrances for longer periods.
What I love most about soy candles is that they are made with all-natural ingredients. They are biodegradable and non-toxic, which means you can feel good about using them in your home.
So, if you want to create a cozy and inviting atmosphere while being mindful of the planet, give soy candles a try. You won’t be disappointed!
Key Takeaways
- Soy candles are a more eco-friendly alternative to traditional candles, as they are made from renewable and sustainable soybeans.
- Soy candles burn cleaner and emit less soot and toxins into the air, making them safer for indoor air quality.
- Soy candles have a longer burning time compared to traditional candles, providing a longer-lasting fragrance experience.
- Soy candles are made with all-natural ingredients, are biodegradable, and come in eco-friendly packaging, reducing waste and supporting responsible farming practices.
Eco-Friendly Alternative to Traditional Candles
If you’re looking for a more environmentally friendly option, soy candles are the perfect alternative to traditional candles. Not only do they provide a soothing and aromatic ambiance, but they also come with a host of benefits for both your health and the planet.
One of the standout features of soy candles is their use of biodegradable packaging. Unlike traditional candles that often come in plastic or non-recyclable materials, soy candles are often packaged in eco-friendly materials such as recycled paper or glass. This reduces the amount of waste produced and contributes to a cleaner environment.
In addition to their eco-friendly packaging, soy candles also offer health benefits. Traditional candles are often made from paraffin wax, which can release harmful toxins and chemicals when burned. Soy candles, on the other hand, are made from natural soybean oil, which burns cleaner and produces less soot. This means that you can enjoy a clean and healthy atmosphere without worrying about inhaling harmful pollutants.
Transitioning into the subsequent section about ‘clean burning properties,’ it’s important to note that soy candles not only have eco-friendly packaging and health benefits, but they also have clean burning properties.
Clean Burning Properties
To ensure a healthier environment, you’ll be pleased to know that clean burning properties are a key reason why choosing a soy candle is beneficial. Soy candles are made from soybean oil, a renewable resource that burns cleaner than traditional paraffin wax candles. Here are four reasons why the clean burning properties of soy candles are advantageous:
-
Reduced Indoor Air Pollution: Unlike paraffin candles, soy candles don’t release harmful toxins, such as benzene and toluene, when burned. This leads to improved indoor air quality, reducing the risk of respiratory issues and allergies.
-
Non-Toxic and Safe: Soy candles are free from harmful chemicals and additives, making them a safe choice for your home and family. They don’t produce soot or emit harmful carcinogens, making them a healthier option for those with sensitivities or respiratory conditions.
-
Longer Burn Time: Soy candles have a longer burn time compared to traditional candles. This means you can enjoy their clean fragrance for a longer period, reducing the need for frequent replacements.
-
Biodegradable and Sustainable: Soy candles are environmentally friendly as they’re made from a renewable resource. They’re biodegradable, meaning they break down naturally without leaving a harmful residue.
With the numerous benefits of soy candles, including their clean burning properties, it’s no wonder that they’re gaining popularity as a healthier and more sustainable alternative to traditional candles. Transitioning to the next section, let’s explore another advantage of soy candles: their longer-lasting fragrance.
Longer Lasting Fragrance
With their captivating scents lingering in the air, the fragrant essence of soy candles extends far beyond the moment of ignition, creating an aromatic symphony that dances through space and time. Not only do soy candles provide a clean burn, but they also offer a longer lasting fragrance compared to other types of candles. This is due to the unique properties of soy wax, which allows it to hold and release fragrance oils more effectively.
To highlight the benefits of soy candles’ longer lasting fragrance, let’s take a look at the following table:
Candle Type | Average Fragrance Duration |
---|---|
Soy Candle | 50-60 hours |
Paraffin Candle | 35-45 hours |
Beeswax Candle | 30-40 hours |
Coconut Wax Candle | 40-50 hours |
Palm Wax Candle | 25-35 hours |
As you can see, soy candles outshine other options in terms of fragrance longevity. This makes them an excellent choice for those seeking increased relaxation and an affordable luxury. The longer lasting fragrance allows you to enjoy the soothing scents for a longer period, creating a calming and serene atmosphere in your space.
Transitioning into the next section about ‘all-natural ingredients’, soy candles not only offer a longer lasting fragrance, but they also provide peace of mind knowing that they are made from all-natural ingredients.
All-Natural Ingredients
Immerse yourself in a world of pure tranquility and peace of mind as you indulge in the natural goodness of handcrafted soy candles. Made from soy wax, these candles offer a wide range of benefits that make them a popular choice among candle enthusiasts.
One of the key advantages of soy wax is its ability to hold and release fragrance for a longer period of time compared to other types of wax. This means that you can enjoy the alluring scent of your soy candle for many hours, creating a soothing and inviting atmosphere in your home.
But what sets soy candles apart is their all-natural composition. Unlike traditional candles that are often made from petroleum-based paraffin wax, soy candles are derived from soybeans, a renewable and sustainable resource. This makes them an eco-friendly choice that supports responsible farming practices. Additionally, soy wax burns cleaner with little to no soot, reducing the risk of indoor air pollution and ensuring a healthier environment for you and your loved ones.
Not only are soy candles better for the environment, but they also offer health benefits. Soy wax is non-toxic and does not release harmful chemicals or toxins when burned. This makes soy candles a safer option, particularly for individuals with respiratory sensitivities or allergies. By choosing soy candles, you can fill your living space with delightful scents while promoting a healthier indoor air quality.
Transitioning to the subsequent section about ‘safer for indoor air quality’, soy candles provide a natural and clean burning experience that can enhance your home environment.
Safer for Indoor Air Quality
Enhance the air quality in your home with the clean and natural burn of these handcrafted soy candles. Soy candles aren’t only a great way to create a cozy and inviting atmosphere, but they also offer several benefits for indoor air quality.
Unlike traditional paraffin candles, soy candles are made from all-natural ingredients, including soybean oil, which burns cleaner and produces less soot and toxins. This means that when you light a soy candle, you can breathe easier knowing that you’re not releasing harmful chemicals into the air.
In addition to being safer for indoor air quality, soy candles can also have a positive impact on your mood and overall well-being. The natural fragrance of soy candles can help improve your mood and reduce stress. Certain scents, such as lavender or vanilla, have been found to promote relaxation and calmness, making them perfect for creating a soothing environment in your home.
Transitioning into the next section about ‘no harmful toxins or chemicals’, soy candles are a great choice for those who are concerned about the potential health risks associated with burning candles. With their all-natural ingredients and clean burn, soy candles offer a safer alternative to traditional candles that may contain harmful toxins or chemicals. So, not only do soy candles enhance the air quality in your home, but they also provide peace of mind knowing that you’re creating a healthier environment for you and your loved ones.
No Harmful Toxins or Chemicals
Rest easy and breathe freely as you fill your home with the warm glow and inviting scent of these toxin-free, chemical-free candles. Soy candles are a great choice for sensitive individuals who want to create a cozy and relaxing atmosphere without compromising their health. Here are four reasons why soy candles are the best choice for those concerned about harmful toxins or chemicals:
-
All-natural ingredients: Soy candles are made from 100% soybean oil, which is a renewable and sustainable resource. This means they don’t contain any harmful chemicals or toxins that could be released into the air when burned.
-
Cleaner burning: Unlike paraffin candles, soy candles produce minimal soot and smoke. This makes them ideal for individuals with respiratory issues or allergies, as they won’t irritate the lungs or trigger any sensitivities.
-
Longer burning time: Soy wax has a lower melting point than paraffin wax, which means soy candles burn slower and last longer. This allows you to enjoy the soothing scent and warm glow for a longer period of time.
-
Variety of scent options: Soy candles come in a wide range of delightful scents, from calming lavender to invigorating citrus. Whether you prefer floral, fruity, or earthy fragrances, there’s a soy candle scent that’ll suit your personal taste and mood.
So, not only are soy candles safer for your indoor air quality, but they also offer a variety of scent options to enhance your home environment. Now, let’s delve into why soy is a renewable and sustainable resource.
Renewable and Sustainable Resource
When it comes to choosing a candle, there are many factors to consider. In my previous section, I discussed how soy candles are free from harmful toxins and chemicals, making them a healthier option for you and your home. Now, let’s delve into another important aspect of soy candles: their renewable and sustainable nature.
Soy candles are made from soybean oil, which is sourced from soybeans. Soybeans are a renewable resource, meaning they can be grown and harvested year after year without depleting the earth’s resources. This is in stark contrast to candles made from paraffin wax, which is derived from petroleum, a non-renewable fossil fuel.
Not only are soy candles renewable, but they also have a lower environmental impact compared to paraffin candles. The production of soy candles requires less energy and produces fewer greenhouse gas emissions. Additionally, soy candles have a longer burn time, meaning less waste and fewer candles needed overall.
To summarize, soy candles are not only healthier for you, but they also contribute to a more sustainable future. In the next section, we will explore how soy candles support local farmers without taking another "step".
Supports Local Farmers
Supporting local farmers is an important way to invest in the community and promote sustainable agriculture practices. By choosing soy candles, you’re actively supporting local farmers who grow soybeans. Here are four reasons why supporting local farmers through soy candles is beneficial:
-
Farmers’ market: Purchasing soy candles from local farmers’ markets creates a direct connection between consumers and farmers. It allows you to learn more about the farmers, their practices, and the quality of the soybeans they grow.
-
Community support: Buying soy candles from local farmers not only stimulates the local economy but also fosters a sense of community. It helps to create a strong bond between consumers and local farmers, encouraging a sustainable and mutually beneficial relationship.
-
Environmental impact: Soybean cultivation requires less land and water compared to other crops used for candle production. By supporting local soy farmers, you’re promoting environmentally friendly practices and reducing the carbon footprint associated with candle manufacturing.
-
Quality control: Local farmers often prioritize quality over quantity. They take pride in growing high-quality soybeans, resulting in superior soy candles. By supporting them, you’re ensuring that you receive a premium product.
Supporting local farmers through soy candles is just one step towards a more sustainable lifestyle. In the subsequent section, we’ll explore how soy candles are biodegradable and non-toxic, further highlighting their environmental benefits.
Biodegradable and Non-Toxic
As I mentioned earlier, supporting local farmers is one of the great reasons to choose soy candles. But that’s not all, there are many other benefits to using soy candles.
One of the most important advantages is that soy candles are biodegradable and non-toxic. Unlike traditional paraffin candles, which are made from petroleum, soy candles are made from natural soybean oil. This means that when you burn a soy candle, you’re not releasing harmful toxins into the air. This is particularly important for people with respiratory issues or allergies, as soy candles don’t produce the same level of soot or irritants as paraffin candles.
Additionally, soy candles are biodegradable, which means they’re environmentally friendly and won’t contribute to the buildup of waste in landfills. So not only are you improving the air quality in your home by using soy candles, but you’re also doing your part to protect the planet.
The health benefits of using soy candles can’t be overstated. They provide a cleaner and healthier alternative to traditional candles, making them a great choice for anyone concerned about their well-being.
Now, let’s move on to the next section and explore some stylish and decorative options for soy candles.
Stylish and Decorative Options
If you’re looking to add flair and pizzazz to your space, there are plenty of trendy and eye-catching options available for your home decor. When it comes to soy candles, not only do they offer a biodegradable and non-toxic alternative to traditional candles, but they also come in a variety of stylish designs and unique containers.
Soy candles are known for their versatility in design. From sleek and modern to rustic and vintage, there’s a soy candle style to suit every taste and aesthetic. Whether you prefer clean lines and minimalist designs or intricate patterns and vibrant colors, there’s a soy candle out there for you. These stylish designs can instantly enhance the visual appeal of any room, adding a touch of elegance and sophistication.
In addition to their stylish designs, soy candles also come in a wide range of unique containers. From mason jars and vintage tins to glass jars with wooden lids, the options are endless. These unique containers not only add to the overall aesthetic of the candle but also make them a great decorative piece for any space. They can be easily incorporated into your existing home decor, adding a touch of charm and personality.
Soy candles not only offer a biodegradable and non-toxic option for your home, but they also provide a variety of stylish designs and unique containers to choose from. With their ability to add flair and pizzazz to any space, soy candles are a must-have for anyone looking to elevate their home decor.
Frequently Asked Questions
Are soy candles more expensive than traditional candles?
Soy candles can be more expensive than traditional candles due to the higher cost of soy wax compared to paraffin wax. However, the cost comparison should also consider the environmental impact.
Soy candles are made from natural soybean oil, a renewable resource, and produce less soot and toxins when burned. This makes them a more eco-friendly choice. Although they may cost more upfront, their long burn time and cleaner burn make them a worthwhile investment for many.
How do soy candles compare to other eco-friendly candle options?
When comparing soy candles to other eco-friendly candle options, one popular alternative is beeswax candles. Soy candles are made from soybean oil, while beeswax candles are made from the wax produced by bees. Both options have their benefits, but soy candles are often favored for their lower carbon emissions during production.
Additionally, soy candles are a renewable resource, as soybeans can be replanted and grown again, making them a sustainable choice for the environment.
Can soy candles be used outdoors?
Soy candles can be used outdoors, but it’s important to prioritize outdoor candle safety. According to a study conducted by the National Fire Protection Association, candles are responsible for an average of 8,200 home fires annually. However, soy candles have certain benefits that make them a safer option for outdoor use.
Soy wax burns at a lower temperature, reducing the risk of accidents. Additionally, soy candles emit less soot and toxins, making them a healthier choice for the environment.
Do soy candles emit any smoke or soot?
Soy candles don’t emit smoke or soot when burned properly, making them a healthier alternative to traditional paraffin candles. This is because soy wax is derived from soybeans and doesn’t contain the same toxins as paraffin wax.
Additionally, soy candles have benefits such as a longer burning time, cleaner burning with less soot buildup, and a more natural fragrance.
Overall, soy candles are a safer and more eco-friendly choice for your home.
Are there any specific precautions to take when using soy candles?
When using soy candles, it’s important to take certain precautions to ensure safety. First, always trim the wick to 1/4 inch before lighting to prevent excessive flame and soot.
Place the candle on a heat-resistant surface and away from flammable objects.
Never leave a burning candle unattended and keep it out of reach of children and pets.
Finally, extinguish the candle completely before leaving the room or going to sleep. These safety measures will help prevent accidents and ensure a pleasant candle experience.
Conclusion
In conclusion, choosing soy candles not only benefits the environment but also enhances your living space. By opting for this eco-friendly alternative, you’re supporting local farmers and contributing to a renewable and sustainable resource.
Not only do soy candles burn cleaner and longer, but they also provide a safer option for indoor air quality. They offer a stylish and decorative way to add warmth and fragrance to your surroundings with their all-natural ingredients and biodegradable properties.
So why settle for anything less when you can have all these benefits in one glowing package?
I’m Amelia, and I love making candles. It all started when I was given a kit as a gift. I loved the process so much that I decided to make my own candles. I soon realized that I had a real talent for it. Before long, my friends and family were asking me to make candles for them too. Word spread, and soon I was inundated with orders. I love the creativity that goes into making each candle unique. And I love the satisfaction of knowing that people are using something I made with my own hands.
-
Beginners Guides2 weeks ago
How to Determine If Candles Will Melt Outside
-
Beginners Guides2 weeks ago
The Similarities of Candle and Light Bulb Lamps
-
Beginners Guides2 months ago
How To Burn A Candle Without A Wick
-
Candles4 weeks ago
How to Make Scented Candles
-
Beginners Guides4 weeks ago
How to Make Soy Candles
-
Beginners Guides4 weeks ago
Are Yankee Candles Vegan?
-
Beginners Guides1 month ago
How to Make Candles in 5 Easy Steps
-
Beginners Guides2 months ago
How To Calibrate A Candy Thermometer