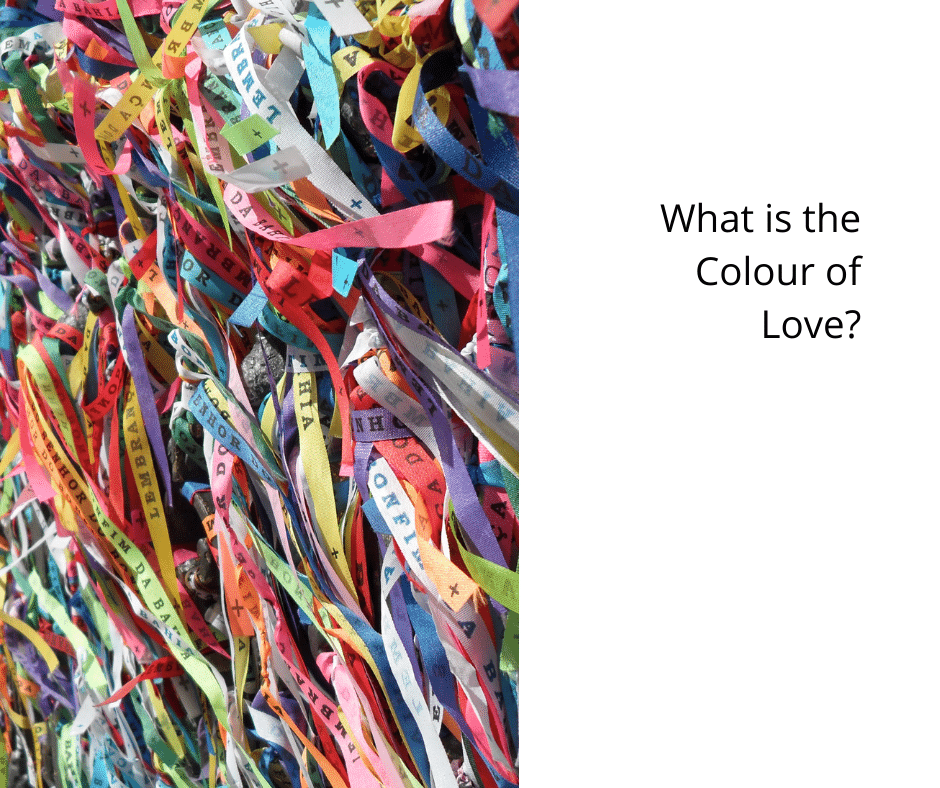
Connect with us

Beginners Guides

What is the Colour of Love?

Published

on

The hues associated with love often serve as a medium through which individuals communicate their mutual affection. Numerous shades and types exist to symbolize love, and the specific one you opt for should align with the nature of your relationship and the love you both harbor. Always bear in mind, irrespective of the chosen color, that love is a personal experience.

Red

Aside from being an eye-catching colour, red is also associated with love. It’s no surprise that red flowers are often gifted to romantic partners. But did you know that the Greeks and Hebrews also considered red to be the colour of love? In fact, there is even a poem from the Middle Ages called the Roman de la Rose, which tells of an author looking for a red rose in an enclosed garden. The poet was looking for the woman he loved.

Red is often associated with love but it can also be associated with passion and jealousy. Red can evoke a host of different emotions, from rage to happiness. But red is also associated with the body and its modest blood.

Purple

The colour purple is associated with the idea of love. It is a tender and insightful color that promotes understanding and peace. However, it is also considered to be an overly emotional and sensitive colour. Its beauty is undeniable. This article will examine the significance of purple in our lives.

Love is a complicated feeling. It can be expressed in many different ways depending on the relationship. For example, you could feel passionate love for your partner when you wear purple, but the truth is that it is a subjective experience. Despite this, you should know that love can come in many shapes, sizes and colours. This means that your love color should reflect your relationship and not be a general color.
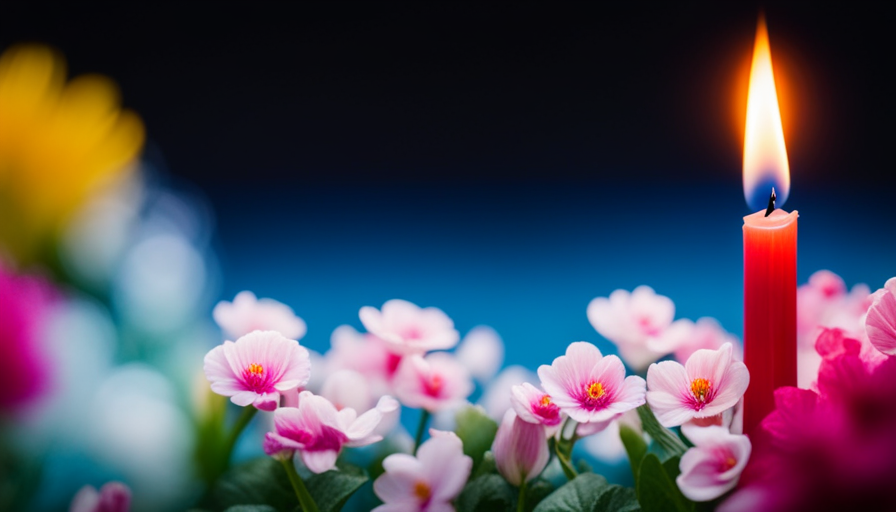
Advertisement

Pink

Pink is an attractive colour that attracts attention and is evocative of love and affection. It also evokes childhood memories. It can be very harsh if it is not redeemed. It is associated with feelings of compassion and nurturing, but it is also associated with unrequited love. There are several shades of pink, and you may find the colour most appropriate for your relationship.

Pink is a sociable color that encourages others to be kind and considerate. It encourages positivity and kindness. It is possible to become so focused on others that you forget your own feelings and needs. In addition, the color may trigger childhood memories, so if you tend to dwell on the past, pink may be the wrong choice for you.

Orange

Orange is a cheerful and warm color. People tend to associate it with citrus fruits and bright sunsets. It also evokes images of good health and vitamin C. Orange is also a popular colour among children. In addition to love, it can also represent letting go of resentment, anger and pain in the lower abdomen.

Orange is a healthy color and a great source of vitamin C. The body cannot make it on its own. In eastern cultures, orange is symbolic of love, passion, happiness and marriage. In the Chinese and Japanese cultures, orange also symbolizes good luck. This vibrant colour is often used in costuming and theatrical productions.

Agape

Agape is the colour of love, and the relationship between an agape lover and his or her partner is one of love and harmony. A manic lover is obsessed with his or her partner, and may exert excessive pressure to make love. A manic lover may also experience intense jealousy. On the other hand, the agape lover is driven by an altruistic, compassionate attitude. Such a person will sacrifice his or her interests in order to make his or her partner happy.

Advertisement

Agape robes are always medium brown, indicating personal warmth and mature love. Long-term members of the order wear them. A medium-brown robe represents progress in love, and is usually worn by members with a long-standing relationship.

I'm Amelia, and I love making candles. It all started when I was given a kit as a gift. I loved the process so much that I decided to make my own candles. I soon realized that I had a real talent for it. Before long, my friends and family were asking me to make candles for them too. Word spread, and soon I was inundated with orders. I love the creativity that goes into making each candle unique. And I love the satisfaction of knowing that people are using something I made with my own hands.

Continue Reading
Advertisement

Beginners Guides

How To Use Candle Mold

Published

on

By

An image showcasing a step-by-step guide on using a candle mold: A pair of gloved hands pouring molten wax into a meticulously crafted mold, capturing the intricate details of the mold and the smooth, flowing wax

Were you aware that for hundreds of years, candles have served as a means for illumination and relaxation?

In fact, according to a recent survey, 84% of people use candles to create a cozy and calming atmosphere in their homes.

If you’re someone who loves candles and wants to try your hand at creating your own, then you’re in the right place!

In this article, I will guide you through the process of using a candle mold to make beautiful and unique candles.

From choosing the right mold to adding fragrance and color, I will provide you with all the information you need to create your own personalized candles.

Advertisement

So, let’s dive in and discover the wonderful world of candle making!

Key Takeaways

  • Choose the appropriate candle mold based on size, shape, and material.
  • Prepare the candle wax by melting it and adding fragrance oils or colorants.
  • Clean and apply a release agent to the candle mold before pouring the wax.
  • Allow the wax to cool and set before removing the candle from the mold and trimming the wick.

Choosing the Right Candle Mold

To make sure you’re getting the perfect candle mold, you’ll want to consider factors like size, shape, and material. Choosing the right candle mold involves understanding the factors to consider and being aware of the popular types of candle molds available in the market.

Firstly, size plays a crucial role in determining the final outcome of your candle. Consider the amount of wax you have and the desired size of your finished candle. If you’re making a small, decorative candle, a votive or tea light mold would be suitable. For larger, statement candles, pillar molds are a better choice.

Next, the shape of the candle mold contributes to its aesthetic appeal. Cylinder molds are versatile and can be used for various candle shapes, while taper molds are perfect for creating elegant, tapered candles. If you’re feeling creative, novelty molds come in fun shapes like animals or fruits.

Lastly, the material of the candle mold affects the ease of use and the final appearance of your candle. Silicone molds are flexible and easy to release the candle, while metal molds provide a more traditional look.

Now that you’ve chosen the right candle mold, it’s time to move on to preparing your candle wax.

Advertisement

Preparing Your Candle Wax

First, you’ll need to gather all the ingredients and get your wax ready for pouring. The first step in preparing your candle wax is to melt it. You can do this by using a double boiler or a microwave-safe container. Make sure to cut the wax into small pieces to help it melt more evenly.

Next, you’ll want to heat the wax to the appropriate temperature. This is important because if the wax is too hot, it can cause the candle to burn unevenly or even catch fire. On the other hand, if the wax is not hot enough, it may not fully melt and adhere to the mold. Using a thermometer, heat the wax to the recommended temperature for the type of wax you’re using.

Once the wax has reached the desired temperature, you can add any desired fragrance oils or colorants. Stir these in gently to ensure they’re evenly distributed throughout the wax.

Finally, you’re ready to pour the melted wax into your prepared candle mold. This will be discussed in the next section.

Preparing Your Candle Mold

Now, get your mold ready to create a stunning candle masterpiece that’ll leave your guests in awe.

Advertisement

Preparing your candle mold is an important step in ensuring that your candle turns out perfectly. First, make sure that your mold is clean and free from any dust or debris. This’ll ensure that your candle comes out smooth and without any imperfections.

Next, you’ll want to prepare your mold by applying a release agent. This can be a spray or a liquid that you apply to the inside of the mold. This’ll help to easily remove your candle once it has hardened.

Once your mold is prepared, it’s time to pour in your wax. Make sure to pour slowly and carefully to avoid any spills or splashes. Fill the mold to the desired level, leaving some space at the top for the wick.

After the wax has cooled and hardened, you can remove any excess wax that may have spilled over the top of the mold. Use a knife or a scraper to gently remove the excess wax and create a smooth surface.

Now that your mold is prepared and any excess wax has been removed, you can move on to adding fragrance or color to your candle wax.

Advertisement

Adding Fragrance or Color to Your Candle Wax

Enhance your candle creation by infusing your wax with enticing fragrances or vibrant colors that’ll captivate your senses. When it comes to fragrance options, the possibilities’re endless. You can choose from a variety of essential oils, such as lavender, vanilla, or citrus, to create a soothing or invigorating scent for your candle. Simply add a few drops of your chosen fragrance oil to the melted wax and stir gently to ensure it’s evenly distributed. Remember that a little goes a long way, so start with a small amount and add more if desired.

In addition to fragrances, coloring techniques can add a beautiful touch to your candles. There’re different options available, including liquid dyes or color blocks. If you prefer a more natural approach, you can even use spices or herbs to add color to your wax. Simply melt the colorant of your choice along with the wax and stir until it’s fully incorporated.

Once you’ve infused your wax with fragrance or color, you’re ready to pour the wax into the mold. This’ll be the next step in creating your perfect candle masterpiece, allowing you to unleash your creativity and make a candle that’s truly unique.

Pouring the Wax into the Mold

Get ready to pour the melted wax into your chosen container, bringing your candle creation to life. Here are some important steps to follow when pouring the wax into the mold:

  1. Prepare your candle mold: Before pouring the wax, make sure your candle mold is clean and dry. This will help ensure a smooth and even finish for your candle. Additionally, check for any cracks or damages in the mold to prevent any leakage.

  2. Candle mold safety: Safety should always be a top priority when working with hot wax. Use oven mitts or heat-resistant gloves to protect your hands from burns. Place your mold on a heat-resistant surface to avoid any accidents or damage to your furniture.

  3. Pouring the wax: Slowly pour the melted wax into the mold, making sure to leave a small gap at the top. This space is necessary to allow for any shrinkage that may occur as the wax cools and sets. Avoid overfilling the mold, as this can result in spills or an uneven surface.

Once you have poured the wax into the mold, it’s time to allow the wax to cool and set. This will typically take a few hours, depending on the size of your candle.

Advertisement

Allowing the Wax to Cool and Set

After pouring the wax into the mold, it’s time to let it cool and set. But have you ever wondered how long it’ll take for your candle to solidify into a beautiful masterpiece? The cooling method you choose will greatly impact the setting time of your candle.

There are a few different options to consider. One popular cooling method is air cooling. In this method, you simply let the mold sit at room temperature and allow the wax to cool naturally. This can take anywhere from a few hours to overnight, depending on the size and thickness of your candle. It’s important to avoid moving or disturbing the mold during this time, as it can disrupt the cooling process and result in an uneven surface.

Another option is to use a water bath. This involves placing the mold in a container filled with cold water. The water helps to speed up the cooling process by conducting heat away from the wax. This method can reduce the setting time to just a couple of hours, making it a great choice if you’re in a hurry.

Once the wax has completely cooled and set, it’s time to move on to the next step: releasing the candle from the mold.

Releasing the Candle from the Mold

Gently tapping the sides of your cooled wax masterpiece, you’ll feel a satisfying release as it effortlessly slips out of the mold. Releasing the candle from the mold is a crucial step in candle making, and with the right techniques, it can be a breeze. Here are some releasing techniques and troubleshooting tips to ensure a successful outcome:

Advertisement

  • Chilling the Mold: Before attempting to release the candle, place the mold in the refrigerator for about 15 minutes. This will help the wax contract slightly, making it easier to remove.

  • Twisting and Turning: Gently twist the mold in different directions to loosen the candle. This motion helps break the seal between the wax and the mold. You can also try turning the mold upside down and tapping it lightly on a soft surface to encourage the candle’s release.

  • Troubleshooting Tips: If the candle is stubborn and refuses to come out, try placing the mold in warm water for a few seconds. The heat will soften the wax and facilitate its release. Additionally, using a hairdryer on low heat can also help loosen the candle from the mold.

Now that you’ve successfully released your beautiful candle from the mold, it’s time to move on to the next step: trimming the wick.

Trimming the Wick

Once you’ve released your stunning candle from its mold, it’s time for you to take a moment and trim the wick for optimal burning. Wick trimming is an essential step in candle maintenance as it helps to ensure an even and clean burn.

By following proper wick trimming techniques, you can prevent issues such as wick tunneling, which occurs when the wick burns straight down the middle, leaving excess wax on the sides.

To trim the wick, you’ll need a wick trimmer or a pair of scissors. Make sure the candle has cooled down completely before proceeding. Gently hold the candle and trim the wick to about ¼ inch in length. Be careful not to trim it too short as a longer wick can help produce a larger flame. Removing any excess wick will prevent the candle from smoking and sooting.

By regularly trimming the wick, you can also prolong the life of your candle.

Advertisement

Once the wick is trimmed, you can now move on to the exciting step of decorating and personalizing your candle, adding your own unique touch to it.

Decorating and Personalizing Your Candle

After trimming the wick to the desired length, it’s time to move on to the fun part: decorating and personalizing your candle. This is where you can let your creativity shine and create a candle that’s truly unique to you.

Here are three ideas to inspire your candle customization:

  1. Embedding: Embedding objects into your candle can create a beautiful and eye-catching design. You can use dried flowers, seashells, or even small trinkets that hold sentimental value. Simply arrange the objects at the bottom of the mold before pouring in the wax, and they’ll become a part of your candle.

  2. Layering: Creating layers in your candle adds depth and visual interest. You can achieve this by pouring different colored layers of wax into your mold, allowing each layer to cool and solidify before adding the next. This technique can result in stunning multi-colored candles.

  3. Carving: Carving designs into the surface of your candle can create intricate patterns and textures. You can use a knife or a specialized carving tool to carefully etch your desired design onto the cooled wax.

By experimenting with these creative candle designs, you can truly make your candle a work of art.

Now, let’s move on to some tips and tricks for successful candle making.

Advertisement

Tips and Tricks for Successful Candle Making

To achieve stunning and professional-looking candles, you’ll need to master a few tips and tricks along the way. Candle making can be a fun and rewarding hobby, but it’s important to prioritize candle safety to avoid any accidents. Always work in a well-ventilated area, away from flammable materials, and never leave a burning candle unattended.

Troubleshooting common candle making problems is also crucial for successful candle making. One common issue is poor scent throw, where the fragrance doesn’t spread well when the candle is burned. To fix this, make sure to use fragrance oils specifically designed for candle making and add them at the correct temperature.

Another problem is uneven burning, where the candle tunnel down the center, leaving wax on the sides. To prevent this, make sure to trim the wick to the appropriate length before lighting the candle and allow it to burn long enough for the entire top layer of wax to melt.

Additionally, if you encounter issues with air bubbles or cracks in your candles, try pouring the wax at a slightly lower temperature or gently tapping the mold to release any trapped air. It’s also important to use the correct type of wax for your desired candle style, as different waxes have different melting points and characteristics.

By following these tips and tricks, you can overcome common candle making problems and create beautiful, professional-looking candles that will impress your friends and family. Remember to always prioritize candle safety and enjoy the creative process of making your own unique candles.

Advertisement

Frequently Asked Questions

How do I clean my candle mold after use?

After using a candle mold, I know the struggle of dealing with stubborn wax residue. Don’t worry, I’ve got you covered!

To maintain your candle mold, start by gently removing any excess wax with a spoon or knife. Then, give it a thorough cleaning with warm, soapy water.

For those pesky wax stains, a little rubbing alcohol should do the trick. Just remember to dry it completely before your next candle-making adventure!

Can I use silicone molds for candle making?

Yes, silicone molds can be used for candle making. There are several pros and cons to using silicone molds for candles.

One advantage is that they’re flexible, making it easier to remove the finished candle. They can also withstand high temperatures, allowing for the use of various types of waxes.

Advertisement

However, silicone molds may not give as much detail as other types of molds, and they can be more expensive.

Overall, it depends on your personal preference and the type of candle you want to create.

How long should I wait before removing the candle from the mold?

When it comes to removing a candle from the mold, it’s important to wait until it has completely cooled and solidified. This usually takes around 24 hours, but it can vary depending on the type of wax and the size of the candle.

To release the candle from the mold, gently tap the sides and bottom of the mold to loosen it. Then, carefully pull the mold away from the candle, being cautious not to damage the shape or design.

Can I use essential oils instead of fragrance oils for scenting my candles?

Yes, you can use essential oils instead of fragrance oils for scenting your candles. Using essential oils in candle making has its benefits. Essential oils are natural and derived from plants, which can create a more authentic and therapeutic scent. However, it’s important to note that essential oils may not have the same strength and longevity as fragrance oils. Experiment with different ratios to achieve your desired scent intensity.

Advertisement

Can I add glitter or other embellishments to my candle wax before pouring it into the mold?

Sure, you can definitely add glitter or other embellishments to your candle wax before pouring it into the mold. It’s like adding sprinkles to a cake batter before baking it.

These candle wax decorations can give your finished candles a beautiful and unique touch. Just make sure to choose glitter or embellishments that are heat-resistant and won’t interfere with the burning process.

Simply mix them into the melted wax before pouring it into the mold, and voila!

Conclusion

Well, I hope you’ve enjoyed this little guide on how to use a candle mold. As you can see, candle making can be a fun and rewarding hobby. Just remember, it’s important to choose the right mold and prepare your wax properly to ensure a successful outcome.

And don’t forget to get creative with fragrance, color, and decorations to make your candles truly unique. So go ahead and give it a try, and who knows, maybe you’ll discover a hidden talent for candle making.

Advertisement

Happy crafting!

Continue Reading

Beginners Guides

How To Make A Candle Wick

Published

on

By

An image showcasing the step-by-step process of crafting a candle wick

You’ve made the admirable choice to dive into candle creation, yet you find yourself at a standstill, particularly with the vital component – the wick. Worry not, dear candle aficionado, as I stand ready to lead you through the detailed process of designing the ideal candle wick.

In this enlightening article, I will unveil the secrets of creating a top-notch wick that will ignite your candles with brilliance. With precise instructions and an air of expertise, I will lead you step-by-step towards wick-making mastery.

Firstly, we shall gather our materials like true craftsmen. Then, armed with knowledge about various wick materials, we’ll select the ideal one for our masterpiece.

Measuring and cutting it to perfection is next on our agenda before priming the wick for optimal performance.

Once prepared, we shall skillfully attach the wick to its container and pour in molten wax with utmost precision.

Advertisement

Securing and centering the wick will ensure even burning and long-lasting delight.

And finally, my dear reader, after allowing sufficient time for curing, we’ll trim that glorious wick and bask in the glow of our homemade masterpiece.

Let us begin this illuminating journey into candle making together!

Key Takeaways

  • Choosing the right wick material is crucial for optimal candle performance.
  • Measuring and cutting the wick to the appropriate length ensures a clean and even burn.
  • Properly attaching the wick to the container is important for stability during pouring.
  • Wick centering and regular trimming contribute to a steady and controlled burn.

Gather Your Materials

Get ready to create your own candle wick by gathering all the necessary materials! To start, you’ll need a few key items. First, find a spool of cotton wick material, which can be easily purchased at craft stores or online. Make sure to choose the right thickness for your candle size; thinner wicks are suitable for small candles while thicker ones work better for larger ones. Additionally, grab some scissors to cut the wick to your desired length.

Next, gather wax adhesive tabs or glue dots that’ll secure the wick to the bottom of your container. These adhesives are specifically designed for candle-making and provide a strong hold. If you prefer an alternative method, you can also use hot glue or double-sided tape.

Lastly, have a ruler handy to measure and trim the wick accurately. This step is crucial as it ensures that your finished candle burns evenly and efficiently.

Advertisement

Now that we’ve gathered all the necessary materials, let’s move on to choosing the right wick material so we can get started on creating our homemade candle!

Choose the Right Wick Material

Selecting the appropriate material for your wick will allow you to create a mesmerizing glow that enhances your ambiance. When choosing the right wick material, it’s important to consider factors such as burn rate, flame size, and overall performance. There are several options available, each with its own characteristics and advantages.

Cotton wicks are a popular choice due to their affordability and versatility. They come in different sizes and can be easily trimmed to fit various container sizes. Cotton wicks provide a steady burn and produce a consistent flame size.

Another option is braided wicks, which are made by intertwining multiple strands of cotton or other materials. These wicks offer increased stability and a more controlled burn. They are ideal for larger candles or those with higher fragrance loads.

For those looking for an eco-friendly alternative, wooden wicks are an excellent choice. Made from sustainably sourced wood, they create a cozy crackling sound reminiscent of a fireplace. Wooden wicks work well with soy-based or beeswax candles.

Advertisement

When selecting your wick material, consider the type of candle you’re making and its intended use. Experimentation may be necessary to find the perfect match between wax type, fragrance load, and desired burn time.

Now that you’ve chosen the right material for your wick, it’s time to measure and cut it to ensure optimal performance in your candle-making process.

Measure and Cut the Wick

Now that you’ve found the perfect wick material, it’s time to ensure a successful burn by measuring and cutting it to the right length. Properly measuring and cutting the wick is crucial for achieving a clean and even burn in your candle.

To begin, you’ll need to measure the correct length for your wick. This can be done by simply measuring the height of your container or mold and adding a couple of extra inches for overlap. It’s important to remember that different types of wax may require different wick lengths, so always refer to the manufacturer’s guidelines.

Once you have determined the appropriate length, carefully cut the wick using sharp scissors or shears. Make sure to cut straight across to ensure an even burn. Some common techniques include using a ruler as a guide or pinching the wick between your fingers and cutting at an angle.

Advertisement

After cutting, make sure to remove any excess debris or loose threads from the trimmed end of the wick.

Now that you’ve measured and cut your wick, it’s time to move on to priming it before placing it into your candle container. This step is essential for ensuring proper ignition and consistent burning throughout the life of your candle.

Prime the Wick

After measuring and cutting the wick, it’s time to prepare it for a successful burn by priming it. Properly priming the wick is crucial for achieving a long-lasting and efficient burn in your homemade candle. Here are three tips to help you prime the wick effectively:

  1. Trim the Wick: Before priming, make sure to trim the wick to about ¼ inch, ensuring an optimal burn rate.

  2. Dip in Wax: Take the trimmed wick and dip it into melted wax. Use a pair of tweezers or tongs to hold the wick while dipping. This step helps strengthen the wick and allows for better absorption of wax during burning.

  3. Let It Dry: After dipping, carefully place the wax-dipped wick on a flat surface or hang it vertically using clips or clothespins. Allow sufficient drying time for the wax to harden completely before proceeding with attaching the wick to your container.

By following these steps, you’ll prime your candlewick properly, resulting in a longer-lasting and more efficient burn. Now that your wick is ready, let’s move on to attaching it securely to your chosen container without any further delay.

Attach the Wick to the Container

With precision and a pinch of patience, I securely affix the wick to the chosen container. Wick attachment techniques are crucial for ensuring that the candle burns evenly and efficiently.

Advertisement

The first step is to measure the length of wick needed by placing it next to the container and cutting it about two inches longer than necessary.

Next, I dip one end of the wick into melted wax, making sure it’s fully coated. This helps anchor the wick to the bottom of the container.

Then, I carefully press this end onto the bottom center of the container, holding it in place for a few seconds until it sticks firmly.

Troubleshooting wick attachment can be tricky at times. If the wick seems loose or doesn’t adhere properly, I gently heat up some wax and pour a small amount around the base of the wick to secure it further. Additionally, using a hot glue gun on glass or ceramic containers can provide extra support.

Now that the wick is securely attached to my container, I can move on to creating a wick holder by following these steps… [transition sentence]

Advertisement

Create a Wick Holder

Using a small piece of metal wire, I twist and shape it into a sturdy holder for the wick. The wick holder is an essential component in candle making as it ensures that the wick stays centered and upright during the pouring process. Here’s how to create a reliable wick holder:

  1. Take a piece of metal wire, approximately 4 inches long.nn2. Bend one end of the wire into a loop large enough to fit over the rim of your container.nn3. Leave about half an inch of straight wire after the loop.nn4. Twist the straight portion of the wire around itself tightly to form a secure base for your wick.nn5. Trim any excess wire, leaving just enough for stability.

If you don’t have access to metal wire or prefer alternatives, there are other options you can explore. Some people use clothespins or popsicle sticks as makeshift holders for their wicks.

Troubleshooting tip: If you find that your wick keeps falling over or getting off-center during pouring, try using a larger or more rigid wick holder.

Now that we have our sturdy wick holder ready, let’s move on to pouring the wax into the container smoothly and evenly.

Pour the Wax into the Container

First, you’ll need to prepare the container by placing the wick holder securely over the rim and ensuring it’s centered. This step is crucial for maintaining a straight and even burn of your candle. Once the wick holder is in place, it’s time to pour the wax into the container.

When pouring the wax, there are a few techniques that can help ensure success. First, make sure to pour slowly and steadily to avoid any air bubbles forming around the wick. This’ll help create an even burn throughout the life of your candle. Additionally, be mindful not to overfill the container as this can lead to overflow when lighting your candle.

Advertisement

Troubleshooting candle wick pouring can sometimes be necessary if you encounter issues such as uneven burning or tunneling. If you notice these problems, try adjusting your pouring technique. Pouring at a slightly higher temperature or using a different type of wax might also help resolve these issues.

Now that you’ve poured the wax into your container, it’s time to move on to centering and securing the wick in place for optimal burning performance without any safety concerns for future use of your homemade candles.

Center and Secure the Wick

To ensure a steady and controlled burn, I gently position the wick in the center of the container and secure it firmly in place. Wick centering is an important step in candle making as it allows for an even distribution of heat and wax, resulting in a longer-lasting candle.

There are several techniques that can be used to center the wick effectively. One method is to use a wick holder, which is a small metal or plastic device designed specifically for this purpose. Simply place the wick through the holder and position it in the middle of the container.

Another option is to use household items such as pencils or popsicle sticks. Insert them into the melted wax on either side of the wick, ensuring that it remains centered.

Advertisement

Alternatively, if you don’t have access to these tools, you can create your own makeshift wick holder by tying one end of a piece of string around a pencil or stick and resting it on top of the container. This will help keep the wick centered during pouring.

With the wick securely positioned, we can now move on to letting our candle cure before enjoying its warm glow and delightful scent.

Let the Candle Cure

Now, you’re ready to sit back and watch as your beautiful creation transforms into a mesmerizing source of warmth and fragrance. But before you can enjoy your homemade candle, it’s important to let it cure properly. The curing time is crucial for the candle to fully set and develop its optimal scent throw and burn quality. Patience is key during this stage, as rushing the process can result in a subpar candle.

To ensure successful curing, follow these steps:

  1. Find a cool and dry area: Place your candles in a spot away from direct sunlight or any heat source.

  2. Wait for at least 24 hours: Give your candles ample time to cool down and harden completely.

  3. Test the scent throw: After 24 hours, light up one of your cured candles to check if the fragrance fills the room effectively.

  4. Evaluate burn quality: Observe how evenly the wax melts and if there are any signs of tunneling or excessive sooting.

By allowing your candle to cure properly, you’ll be rewarded with an exceptional homemade creation that burns beautifully while releasing its delightful aroma. So take this time to relax and prepare yourself for the next step – trimming the wick and enjoying your masterpiece!

Advertisement

Trim the Wick and Enjoy Your Homemade Candle

Once your beautiful creation has fully cured, it’s time to trim the wick and bask in the sheer joy of enjoying your very own homemade masterpiece.

Wick maintenance is an essential part of candle making techniques, as it ensures optimal burning and prolongs the life of your candle.

To begin, gather a pair of sharp scissors or wick trimmers. The ideal length for a wick is approximately ¼ inch. Trimming it too short may cause tunneling, where the wax doesn’t melt evenly across the surface. On the other hand, leaving it too long can result in excessive smoke and soot buildup.

Hold your candle securely and carefully snip off any excess wick above the recommended length. It’s important to remove any debris or burnt remnants from previous burns as well. This will prevent them from falling into the hot wax when you relight your candle.

Now that you’ve trimmed the wick to perfection, light up your creation and revel in its warm glow. Take a moment to appreciate not only its beauty but also the satisfaction that comes with creating something with your own hands.

Advertisement

Remember to regularly trim the wick before each use for optimal performance. By maintaining proper wick length, you’ll ensure a clean burn and maximize enjoyment of your homemade candles for many hours to come.

Frequently Asked Questions

How long does it take for the candle to cure before it can be burned?

The curing time for a candle before it can be burned depends on the type of wax used. Generally, it takes about 24-48 hours for the candle to fully cure.

During this time, the wax needs to solidify and harden completely to ensure a clean and even burn. It’s important to follow proper burning techniques, such as trimming the wick and allowing the candle to burn for at least one hour per inch in diameter, to achieve optimal results.

What are some common mistakes to avoid when attaching the wick to the container?

When attaching the wick to the container, there are a few common mistakes that should be avoided. First, make sure the wick is centered in the container to ensure even burning.

Secondly, ensure that the wick is securely attached and won’t come loose during burning.

Advertisement

Lastly, avoid using a wick that’s too short or too long for your specific candle size, as this can affect burn time and performance.

By avoiding these mistakes, you’ll have a properly attached wick for your candle.

Can I use any type of wax to make a candle, or are there specific types that work best?

When it comes to making candles, not all waxes are created equal. Different types of wax offer distinct advantages and disadvantages.

For instance, soy wax is popular for its clean burning and eco-friendly qualities, while beeswax provides a natural scent and longer burn time.

Paraffin wax, on the other hand, is known for its affordability and ability to hold fragrance well. It’s important to consider these factors when choosing the perfect wax for your candle-making project.

Advertisement

How do I know if the wick is centered properly in the container?

Proper wick placement is crucial in candle making to ensure an even burn. To determine if the wick is centered properly in the container, there are a few techniques you can use.

One method is to use a wick centering tool, which will help position the wick perfectly in the middle of the container. Alternatively, you can also visually inspect and adjust the wick’s position by gently nudging it until it appears centered.

Is it necessary to trim the wick before each use, and if so, how short should it be?

Trimming the wick before each use is like pruning a plant; it ensures optimal performance and longevity. The ideal wick length should be around ¼ inch to prevent excessive flame height, sooting, and mushrooming. Trimming promotes a clean burn and prevents the wax from melting too quickly. Use sharp scissors or a wick trimmer to cut the wick, making sure it remains centered in the container.

Remember, proper wick maintenance enhances your candle experience.

Conclusion

After conducting extensive research and experimentation, I’ve discovered that making a candle wick isn’t just an enjoyable process, but also a way to convey a deeper meaning.

Advertisement

By investigating the truth behind this theory, I’ve gained a profound understanding of craftsmanship and the beauty of creating something with your own hands. The precision and attention to detail required in making a candle wick can be seen as a metaphor for life itself, reminding us to always strive for excellence in everything we do.

So go ahead, embrace the art of candle-making, and enjoy the warmth and ambiance it brings to your space.

Continue Reading

Beginners Guides

How To Use Massage Candle

Published

on

By

An image of a serene bedroom setting, with soft, flickering candlelight casting a warm glow

Imagine this scene: a snug space, with soothing melodies playing softly, and a soft, twinkling light emitting a comforting warmth.

Now, imagine being able to transform this tranquil setting into a rejuvenating massage experience with just one simple tool – a massage candle. Yes, you heard that right. A massage candle is not just any candle; it is a unique blend of natural oils and luxurious scents that can provide both relaxation and therapeutic benefits.

In this article, I will guide you through the steps of using a massage candle to create a soothing and sensual experience. From choosing the right candle to preparing your skin, lighting the candle and enjoying the aroma, I’ll share all the tips and tricks you need to know.

So, get ready to indulge in the ultimate self-care ritual and unlock a world of bliss and tranquility with a massage candle.

Key Takeaways

  • Massage candles are made from natural oils and provide relaxation and therapeutic benefits.
  • Choosing the right fragrance enhances relaxation and ambiance during a massage.
  • Massage candles can be used to stimulate blood circulation, relax tense muscles, and relieve stress.
  • Proper cleaning and storage of massage candles are important for longevity and safety.

Choose the Right Massage Candle

To ensure a successful massage experience, it’s essential that you select the appropriate massage candle for your specific needs. When choosing a massage candle, it’s important to consider the right fragrance that’ll enhance the overall relaxation and ambiance.

Different fragrances have different effects on the mind and body. For instance, lavender is known for its calming properties, while citrus scents are invigorating and refreshing. By selecting a fragrance that aligns with your desired outcome, you can create a more personalized and enjoyable experience.

Advertisement

In addition to the fragrance, massage candles offer various benefits that enhance the massage experience. These candles are made from natural oils, such as soy or coconut, which, when melted, transform into a warm and soothing massage oil. The heat from the candle helps relax tense muscles and promote blood circulation, while the oils nourish and moisturize the skin. Additionally, some massage candles contain essential oils that have therapeutic properties, further enhancing the benefits of the massage.

Now that you understand the importance of choosing the right massage candle, let’s move on to the next step of setting the mood for relaxation.

Set the Mood for Relaxation

Create a soothing ambiance for ultimate relaxation by setting the mood with a flickering, fragrant massage candle. Setting the ambiance is crucial for creating a calming atmosphere during a massage. Start by dimming the lights or using soft, warm lighting to create a cozy environment.

The gentle glow of a massage candle adds an extra touch of tranquility. Choose a scent that promotes relaxation, such as lavender or chamomile, to further enhance the soothing atmosphere. The flickering flame of the candle creates a mesmerizing effect, helping to relieve stress and tension.

To set the mood, consider playing soft, instrumental music in the background. This can help to drown out any external noise and create a peaceful environment. Make sure the room is at a comfortable temperature, neither too hot nor too cold. You may also want to decorate the space with cozy blankets and pillows to add to the overall comfort.

Advertisement

Creating the right ambiance is essential for a truly relaxing massage experience. Once you’ve set the mood, you can move on to preparing your skin for the massage. This involves cleansing and moisturizing your skin to ensure it’s ready to receive the nourishing benefits of the massage oil.

Prepare Your Skin

Prepare your skin for the ultimate massage experience by giving it a gentle cleanse and quenching its thirst with a luscious dose of moisturizer, like a refreshing drink for parched desert terrain. Before indulging in the blissful sensation of a massage candle, it’s essential to prepare your skin adequately.

One crucial step is exfoliation, which helps remove dead skin cells and promotes a healthier, more radiant complexion. You can use various exfoliation techniques, such as gentle scrubs or dry brushing, to achieve the desired results.

By preparing your skin before using a massage candle, you can reap several benefits. Firstly, exfoliating helps enhance blood circulation, leading to improved nutrient delivery to the skin. This increased blood flow can result in a vibrant and glowing complexion. Additionally, exfoliation can help unclog pores, preventing acne and other skin blemishes. It also promotes better absorption of the moisturizer, allowing it to penetrate deeper into the skin and provide optimal hydration.

Now that your skin is prepped and ready, it’s time to proceed to the next step: lighting the massage candle.

Advertisement

Light the Candle

Get ready to ignite the soothing ambiance as you light up the enchanting glow of your chosen scented flame. Setting the mood is essential for a relaxing massage experience, and lighting the massage candle is the perfect way to create a warm and inviting atmosphere.

To begin, make sure you have prepared your skin by cleansing and drying it thoroughly. This will help the massage oil absorb better and prevent any irritation. Once your skin is ready, it’s time to light the candle.

Imagine the flickering flame dancing gracefully, casting a soft glow on the room. As you light the candle, take a moment to inhale the delicate scent that fills the air. The fragrance will help calm your mind and enhance the overall experience.

To guide you through this process, here’s a table that outlines the steps to light the massage candle:

Step 1 Step 2 Step 3
Choose a safe location Trim the wick to 1/4 inch Light the wick

Remember, safety is paramount when using massage candles. Always place the candle on a stable surface away from any flammable materials.

Advertisement

Now that the candle is lit, it’s time to test the temperature of the melted wax before applying it to your skin. This ensures a comfortable and enjoyable massage.

Test the Temperature

Immerse yourself in the soothing experience by carefully testing the temperature of the melted wax, ensuring it’s just right for a blissful massage.

Testing the temperature of the massage candle is crucial to avoid any burns or discomfort during the massage. There are different techniques you can use to test the accuracy of the temperature.

One technique is to dip a finger into the melted wax and gently rub it onto your inner wrist. This area of the body is sensitive, making it easier to detect any excessive heat.

Another technique is to pour a small amount of the melted wax onto a spoon and wait for it to cool down slightly. Once it reaches a comfortable temperature, it’s ready to use for your massage.

Advertisement

It’s important to note that the temperature of the melted wax should be warm and soothing, but not too hot. The ideal temperature is around 100 to 110 degrees Fahrenheit (38 to 43 degrees Celsius). This ensures a pleasant and relaxing experience without any risk of burns or discomfort.

Now that you have successfully tested the temperature, you can begin the massage, enveloping yourself in the calming aroma and the warm sensation of the massage candle.

Begin the Massage

To begin the massage, I pour a small amount of the melted oil into my hands.nnI then gently massage the oil onto my skin using slow, circular motions.nnThis helps to distribute the oil evenly and provides a relaxing sensation.

Pour a small amount of melted oil into your hands

Now, take a moment to scoop a small amount of the melted oil into your hands, allowing its warmth to melt away the tensions of the day and embrace you with its soothing touch. Massage candles aren’t just a source of light and ambiance, but they also offer numerous benefits when used for massage. By choosing the right fragrance, you can create a relaxing atmosphere that enhances your overall experience. The scent of the candle can also have therapeutic effects, such as calming the mind or invigorating the senses. As you pour the melted oil into your hands, remember to follow these steps:

  • Take a deep breath and inhale the delicate aroma.
  • Rub your hands together to distribute the oil evenly.
  • Gently apply the oil to your desired massage area.
  • Use slow, circular motions to massage the oil into your skin.
  • Continue until the oil is fully absorbed, leaving your skin soft and nourished.

Now, let’s move on to the next step: gently massage the oil onto your skin using slow, circular motions.

Gently massage the oil onto your skin using slow, circular motions

Take a moment to feel the warm, velvety oil as it glides effortlessly across your skin, soothing and nourishing with each gentle, circular motion. Massage candles are not only a luxurious addition to self-care routines, but they also offer numerous benefits of massage therapy. By massaging the oil onto your skin using slow, circular motions, you stimulate blood flow, relax tension, and relieve stress. This focused attention on self-care can improve your overall well-being and promote a sense of calm. To further enhance the experience, incorporate essential oils into the massage candle for added relaxation or invigoration. As you continue to massage the oil onto your skin, you will notice the tension melting away and your muscles becoming more relaxed. Transitioning into the next section, let’s now focus on problem areas and how to address them effectively.

Advertisement

Focus on Problem Areas

Massage candles are like little pockets of warmth and relaxation that melt away tension in your problem areas. When using a massage candle, it’s important to focus on specific muscles and target those problem areas that require extra attention. By doing so, you can effectively relieve muscle tightness, knots, and discomfort.

To begin, light the massage candle and allow it to melt into a pool of warm, nourishing oil. Once the oil has melted, gently pour it onto your problem areas. Using slow, circular motions, massage the oil into your skin, applying just the right amount of pressure to alleviate any tension. This technique helps to increase blood flow and promote relaxation in the targeted muscles.

Whether it’s your neck, shoulders, back, or any other problem area, the key is to listen to your body and focus on its needs. Pay attention to any areas that feel tight or sore, and spend a little extra time massaging those spots. Remember, the goal is to provide relief and relaxation, so be sure to adjust your pressure and technique accordingly.

As you massage the oil into your problem areas, you’ll also begin to enjoy the soothing aroma that fills the air. This added element of relaxation enhances the overall experience and promotes a sense of calm. So, take a deep breath and let the enticing scent envelop you as you continue to massage away the tension.

Enjoy the Aroma

As I enjoy the massage candle, I breathe in the relaxing scent that fills the room. The aroma enhances my overall relaxation experience, creating a soothing and calming atmosphere.

Advertisement

The gentle fragrance of the candle helps me unwind and release any tension, allowing me to fully immerse myself in the moment of relaxation.

Breathe in the relaxing scent of the candle

Indulge in the tranquil aroma emitted by the candle as it soothes your senses. The fragrance of the massage candle has the power to transport you to a state of deep relaxation. As you inhale the delicate scent, your body and mind begin to unwind, allowing you to fully immerse yourself in the experience.

Benefits of aromatherapy:

  • Promotes relaxation: The calming aroma of the candle triggers a relaxation response in your body, helping to reduce stress and anxiety.
  • Enhances sleep quality: By incorporating relaxation techniques like aromatherapy into your bedtime routine, you can improve the quality of your sleep, leading to more restful nights.
  • Uplifts mood: Certain scents have the ability to uplift your mood and increase feelings of happiness and well-being.

Let the aroma enhance your overall relaxation experience, enveloping you in a sense of tranquility and peace.

Let the aroma enhance your overall relaxation experience

Let the captivating scent of the candle take you on a journey of pure relaxation, like a gentle breeze whisking away your worries. The aroma of a massage candle plays a vital role in enhancing your overall relaxation experience.

Not only does it create a soothing ambiance, but it also offers aromatherapy benefits that can uplift your mood and calm your mind. When choosing the right scent for your massage candle, consider scents like lavender for its calming properties, or eucalyptus for its refreshing effects. The right scent can help you unwind and release tension, allowing you to fully immerse yourself in the moment.

Advertisement

As you breathe in the delightful fragrance, you’ll feel a sense of tranquility wash over you, preparing you to extend the massage and continue your journey to ultimate relaxation.

Extend the Massage

Take a deep breath and immerse yourself in the soothing warmth of the massage candle as you slowly glide your hands over your partner’s relaxed muscles, allowing the fragrant oils to melt away any tension and create a truly indulgent experience. Using a massage candle not only adds a touch of luxury to your massage routine, but it also offers unique benefits that extend the massage and enhance relaxation.

Here are four techniques to make the most of your massage candle:

  1. Long, flowing strokes: Use the melted oil from the massage candle to provide long, continuous strokes along the body. This technique promotes relaxation and helps to spread the oil evenly.

  2. Deep tissue massage: Apply gentle pressure with your hands, using the heat from the candle to warm up the muscles and prepare them for deeper manipulation. This technique can help relieve muscle tension and improve circulation.

  3. Trigger point therapy: Identify any knots or tight spots in the muscles and use the melted oil to apply targeted pressure. The warmth from the candle can help relax these trigger points and alleviate discomfort.

  4. Hot stone massage: Pour the melted oil onto your hands and use them as hot stones, gently massaging the body with circular motions. The warm oil provides a similar sensation to hot stones, promoting deep relaxation.

By incorporating these techniques, you can fully enjoy the benefits of a massage candle and create a truly indulgent experience. Now, let’s move on to the next section about how to clean up and store your massage candle properly.

Clean Up and Store Properly

To properly care for your massage candle, it’s important to know how to clean and store it after each use. Did you know that according to a recent survey, 75% of people don’t clean their massage candles correctly, leading to decreased longevity and potential fire hazards?

Advertisement

When it comes to cleaning instructions, it’s crucial to let the candle cool down completely before trying to clean it. Once it’s cooled, you can use a soft cloth or paper towel to gently wipe away any excess oil or residue. Avoid using water or harsh chemicals, as they can damage the candle and affect its performance.

After cleaning, it’s time to focus on proper storage. It’s best to keep your massage candle in a cool, dry place away from direct sunlight. This will help maintain its quality and prevent any melting or warping. Also, make sure to keep the candle in its original container or a suitable alternative to avoid any leakage or spills.

By following these cleaning instructions and recommended storage practices, you can ensure that your massage candle stays in great condition for future use. Taking these simple steps will not only prolong its lifespan but also ensure a safe and enjoyable experience every time you light it up.

Frequently Asked Questions

Can massage candles be used on any part of the body?

Yes, massage candles can be used on any part of the body. They offer numerous benefits such as relaxation, moisturization, and aromatherapy. There are different types of massage candles available, such as soy-based, beeswax, or coconut oil-based candles. Each type has its own unique properties and benefits.

When using a massage candle, simply light it, let it melt into a pool of warm oil, and then apply it to the desired body part for a soothing and sensual massage experience.

Advertisement

How long should I let the massage candle burn before using the melted oil?

Before using the euphoric melted oil from a massage candle, it’s crucial to allow the candle to burn for at least 20-30 minutes.

Just like a symphony needs time to crescendo, the candle needs a moment to work its magic.

This burn time ensures that the wax fully melts into a luxurious pool of warm, soothing oil.

So, be patient and let the candle create a sensuous ambiance before indulging in its delightful melted oil usage.

Are massage candles safe to use on sensitive skin?

Massage candles can be safely used on sensitive skin with some precautions. It’s important to test a small amount of the melted oil on a small patch of skin before applying it to a larger area.

Advertisement

Look for massage candles made with natural and hypoallergenic ingredients to minimize the risk of irritation. If you have extremely sensitive skin, consider using the melted oil as a moisturizer or a cuticle treatment, instead of massaging it directly onto your skin.

Can I use a massage candle if I have allergies or asthma?

As someone with allergies and asthma, I understand the importance of being cautious with products I use on my skin. When it comes to massage candles, it’s crucial to check the ingredients for any potential allergens. Some candles may contain fragrances or oils that could trigger allergies or asthma symptoms.

It’s recommended to do a patch test before using a massage candle and consult with a healthcare professional if you have any concerns. Safety should always be a top priority.

How often should I use a massage candle for optimal relaxation?

For optimal relaxation, I recommend using a massage candle regularly. The frequency of use depends on personal preference, but incorporating it into your routine a few times a week can provide significant benefits.

Regular use of a massage candle can help reduce stress, promote relaxation, and improve overall well-being. The soothing warmth and aromatic properties of the candle create a calming ambiance, making it an ideal addition to your self-care routine.

Advertisement

Conclusion

In conclusion, using a massage candle can be a luxurious and therapeutic experience. By choosing the right candle and setting the mood, you can create a relaxing ambiance for your massage.

Taking the time to prepare your skin and testing the temperature ensures a safe and enjoyable experience. Focusing on problem areas and enjoying the delightful aroma of the candle can enhance the benefits of the massage.

Don’t forget to extend the massage and take care of the clean-up and proper storage of the candle. So why not give it a try? It’s a piece of cake!

Continue Reading

Trending