‘Tis the time of year to share holiday cheer, and what better way to do so than by giving a beautifully wrapped candle for Christmas? Just as a flickering flame brings warmth to the soul, a candle in a charming package can bring happiness and comfort to any household.
In this article, I will guide you through the art of wrapping a candle for Christmas, turning a simple gift into a stunning masterpiece. With a few materials and some creative flair, you can transform an ordinary candle into a festive treasure.
I’ll show you how to:
- Measure and cut the perfect wrapping paper
- Securely wrap the candle
- Add delightful embellishments and decorations
- Tie a bow
- Consider adding scented elements
- Explore unique ways to display your wrapped candle
Plus, I’ll share some gift-wrapping tips and tricks to make your presents stand out under the Christmas tree.
So, join me on this merry journey as we embrace the holiday spirit and learn how to wrap a candle for Christmas. Let’s ignite the joy and enchantment of the season, one beautifully wrapped candle at a time!
Key Takeaways
- Wrapping a candle can turn it into a stunning masterpiece.
- Materials needed include wrapping paper, scissors, tape, ribbon or twine, and embellishments.
- Safety should always be a top priority when wrapping a candle.
- Different embellishment ideas include ribbon wrap, glittery glam, nature-inspired, and ornament accent.

Yarcony Candle Birthday Wrapping Paper Roll – 17Inch X 33Feet – Elegant Rainbow Gold Foil Candles Birthday Gift Wrap Paper for Birthday, Christmas, Holiday, Party and Sophisticated Celebration
- Design: Gold foil birthday candles with joyful lettering
- Size: 17 inches by 33 feet roll
- Coverage: 46.8 square feet of wrapping paper
As an affiliate, we earn on qualifying purchases.
As an affiliate, we earn on qualifying purchases.
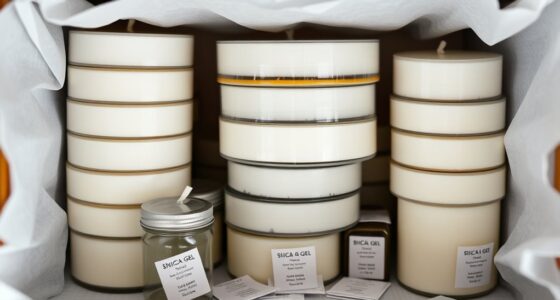
Gather Your Materials
Gather all the materials you’ll need to create a festive and beautiful Christmas candle wrap. When it comes to gift wrapping ideas, it’s all about getting creative with your packaging.
To start, you’ll need some wrapping paper in a design that suits your holiday theme. Look for patterns like snowflakes, reindeer, or even a classic plaid print. Don’t forget to grab a pair of scissors to cut the paper to the right size.
Next, you’ll need some tape to secure the wrapping paper in place. Clear tape works best so it doesn’t distract from the overall look. If you want to add a little extra flair to your candle wrap, consider using some ribbon or twine. You can tie it around the paper to create a bow or add a small decorative ornament for a finishing touch.
Gather some embellishments like glitter, faux snow, or small ornaments to add a touch of sparkle to your creation. These little details can really make your candle wrap stand out.
With all your materials ready, you’re now ready to measure and cut the wrapping paper, ensuring a perfect fit for your candle.
Measure and Cut the Wrapping Paper
First, grab a ruler and carefully measure the dimensions of your shiny new festive paper. This step is crucial to ensure that your wrapping paper will fit perfectly around the candle. Gift wrapping techniques come in all shapes and sizes, so let’s get creative!
-
Imagine the paper unfolding like a magical carpet, ready to embrace the candle with its vibrant colors and holiday patterns.
-
As you measure and cut the wrapping paper, envision the candle nestled snugly in its cozy new home, waiting to bring warmth and joy to its recipient.
-
Picture yourself carefully folding the edges of the paper, creating crisp lines that mimic the precision of a winter snowflake.
Once you have measured and cut the perfect piece of wrapping paper, it’s time to move on to the next step: wrapping the candle securely. By following these creative wrapping ideas, you can transform a simple candle into a beautiful gift that’ll bring holiday cheer to anyone who receives it.
Wrap the Candle Securely
Envision the paper hugging the delicate glow of the festive centerpiece, ensuring its safety throughout the holiday season. When it comes to wrapping a candle, safety should always be a top priority.
You want to make sure that the wrapping paper is securely fastened, preventing any accidents or damage. One alternative method for wrapping a candle is to use a piece of fabric instead of traditional wrapping paper. This not only adds a unique touch to your gift, but it also provides an extra layer of protection for the candle.
Simply wrap the fabric around the candle, making sure it’s snug but not too tight. Use a ribbon or twine to secure the fabric in place, tying a bow for an added decorative touch.
Another option is to use a clear plastic wrap to cover the candle. This’ll allow the beauty of the candle to shine through while still providing protection.
Whichever method you choose, remember to always prioritize candle safety.
Now, let’s move on to the next step: adding embellishments and decorations to make your wrapped candle truly stand out.
Add Embellishments and Decorations
Now it’s time to get creative and make your wrapped centerpiece truly stand out with your choice of embellishments and decorations. Adding these finishing touches will give your candle a festive and personalized touch. There are countless embellishment ideas to choose from, so let your imagination run wild! You can use a variety of materials such as ribbons, bows, glitter, ornaments, or even dried flowers to adorn your wrapped candle.
To help you brainstorm some ideas, here’s a table showcasing four different ways you can creatively decorate your candle:
| Embellishment Idea | Description | Materials Needed |
|---|---|---|
| Ribbon Wrap | Wrap a vibrant ribbon around the candle, securing it with a small dab of glue. | Ribbon, Glue |
| Glittery Glam | Apply a thin layer of glue to the candle’s surface and sprinkle glitter on top for a sparkling effect. | Glue, Glitter |
| Nature-inspired | Glue dried flowers, leaves, or pinecones onto the candle for a rustic and natural look. | Glue, Dried Flowers |
| Ornament Accent | Tie a small ornament or charm around the candle using a thin string or twine. | Ornament, String |
Once you’ve chosen your preferred embellishment, it’s time to move on to the next step: tie a festive ribbon or bow.
Tie a Festive Ribbon or Bow
Get ready to add the final touch to your masterpiece by tying a festive ribbon or bow around your wrapped centerpiece, giving it an elegant and charming finish.
When it comes to festive ribbon ideas, the possibilities are endless. You can choose a classic red or green ribbon for a traditional look, or go for a more unique option like a plaid or metallic ribbon to add a modern twist. Consider adding some texture to your design by incorporating ribbons with different widths or patterns. For a rustic touch, you could even use a burlap or twine ribbon.
Now that you have your ribbon selected, it’s time to master the art of tying a bow. Start by making a loop with one end of the ribbon, leaving a tail that’s long enough to hang down. Then, cross the other end of the ribbon over the loop and bring it through the hole created. Pull the ends tight to secure the bow. You can make a simple bow or get creative by making multiple loops or adding extra tails.
With your festive ribbon or bow securely in place, your candle is almost complete. But before you move on, let’s take a moment to create a personalized gift tag to add an extra special touch.
Create a Personalized Gift Tag
To add a personal touch to your beautifully wrapped centerpiece, imagine attaching a charming and personalized gift tag.
Gift tag designs are the perfect way to showcase your creativity and make your gift stand out. Here are a few personalized gift ideas to inspire you:
-
Handmade Tags: Create your own gift tags with cardstock, stamps, and decorative elements. Add a personal message or the recipient’s name to make it truly special.
-
Photo Tags: Print out a favorite photo of you and the recipient and attach it to the gift tag. This not only adds a personal touch but also serves as a cherished keepsake.
-
Calligraphy Tags: Use a calligraphy pen to write the recipient’s name in beautiful and elegant script. This adds a touch of sophistication and class to your gift.
By incorporating these gift tag designs into your holiday wrapping, you can make your present even more memorable and unique.
Consider adding scented elements to further enhance the festive experience.
Consider Adding Scented Elements
Imagine the delightful aroma of a winter wonderland filling the air as your loved one unwraps their gift, thanks to the addition of scented pinecones or cinnamon sticks tied to the gift tag. Adding scented elements to your wrapped candle not only enhances the overall presentation but also brings the gift to life with the power of fragrance.
Scented candles have long been used for their aromatherapy benefits, promoting relaxation and creating a cozy atmosphere during the holiday season. By incorporating scented pinecones or cinnamon sticks, you can take this experience to the next level.
Scented pinecones are not only visually appealing but also provide a subtle and natural fragrance. They can be easily attached to the gift tag using a festive ribbon or twine. The pinecones can be scented with essential oils, such as pine or cedar, to create a refreshing and invigorating scent that evokes the essence of a winter forest.
Alternatively, cinnamon sticks can be used for a warm and comforting aroma. Simply tie a few sticks together and attach them to the gift tag for a touch of spice and sweetness.
Now that you have added the scented elements to your gift, it’s time to think about how to display your wrapped candle. [Sentence transition into the subsequent section about ‘display your wrapped candle’]
Display Your Wrapped Candle
Enhance the beauty of your carefully wrapped gift by showcasing the elegance of your scented creation with a captivating display.
When it comes to candle display ideas, the possibilities are endless. Here are three creative candle arrangements that will surely impress your loved ones:
-
Clustered Delight: Create an enchanting centerpiece by grouping candles of different heights and sizes on a decorative tray. Surround them with fresh greenery, pinecones, and berries for a festive touch. The varying heights will add depth and visual interest to your display.
-
Floating Wonder: Fill a glass bowl with water and add floating candles for a mesmerizing effect. You can also scatter flower petals or colorful glass beads in the water to enhance the ambiance. Place the bowl on a mirrored surface to create a stunning reflection.
-
Nature’s Charm: Bring the outdoors in by using natural elements like tree branches, twigs, and dried leaves to create a rustic candle holder. Secure the branches together with twine or ribbon and attach small votive candles to the branches. This unique arrangement will add a touch of whimsy to your gift.
Now that you’ve mastered the art of candle display, let’s move on to some gift-wrapping tips and tricks.
Gift-Wrapping Tips and Tricks
Create a stunning presentation for your beautifully wrapped gift with these clever tips and tricks. When it comes to candle wrapping techniques, there are endless possibilities to make your gift stand out.
One creative gift wrapping idea is to use transparent cellophane wrapping paper. Start by placing the wrapped candle in the center of the paper, then gather the edges and tie a festive ribbon or string around it. This not only adds a touch of elegance but also protects the wrapping from getting damaged.
Another technique is to use a decorative gift box. Place the wrapped candle inside the box, add some tissue paper for cushioning, and close the box with a bow or ribbon. You can also personalize the wrapping by adding small ornaments or embellishments that match the theme of your gift.
Now, with your beautifully wrapped candle ready, you can move on to the next section and enjoy the festive glow of your Christmas creation.
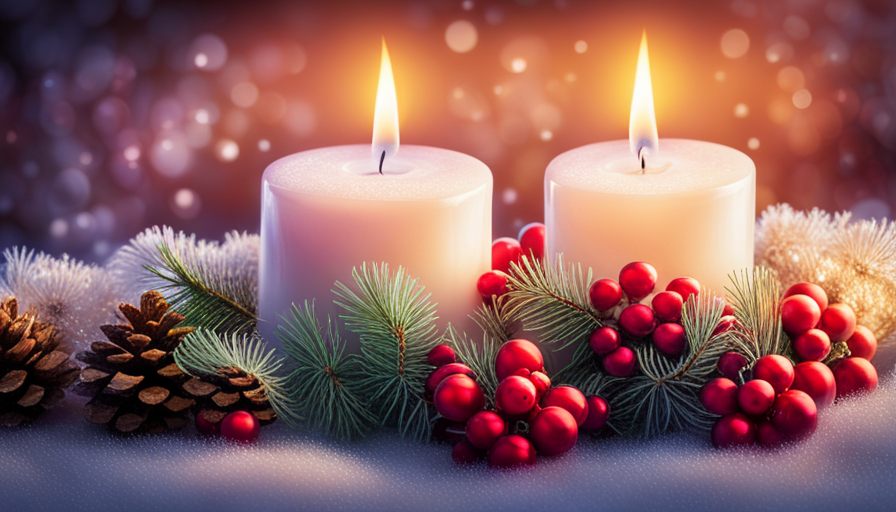
Enjoy the Festive Glow
Experience the warm and inviting ambiance of the holiday season as you bask in the festive glow of twinkling lights and joyful decorations. One way to enhance this magical atmosphere is by incorporating beautifully decorated candles into your Christmas decor. Candle decoration ideas can range from simple and elegant to whimsical and creative. To add a personal touch, consider wrapping your candles in festive paper or fabric. This not only protects the candle but also adds a charming and decorative element. There are various candle wrapping techniques you can try, such as using ribbons, twine, or even lace to secure the wrapping. You can also adorn the wrapped candle with small ornaments or dried flowers, adding an extra touch of holiday cheer. To inspire your creativity, here is a table showcasing different candle decoration ideas:
| Technique | Materials |
|---|---|
| Ribbon Wrap | Satin ribbon, decorative stickers |
| Twine Tie | Jute twine, pinecones |
| Lace Sleeve | Lace ribbon, adhesive dots |
| Ornament Dangle | Mini ornaments, fishing line |
These techniques offer endless possibilities for creating unique and festive candle displays. So, let your imagination run wild and let the festive glow of beautifully wrapped candles illuminate your holiday celebrations.
Frequently Asked Questions
How do I choose the right size of wrapping paper for my candle?
When choosing the right size of wrapping paper for your candle, it’s important to consider the symbolism behind it. Just like a perfectly fitted glove, the wrapping paper should embrace the candle snugly, enhancing its beauty.
Start by measuring the circumference and height of the candle accurately. This will help you select an appropriate size of wrapping paper that will showcase the candle’s elegance and charm when it’s all wrapped up for Christmas.
Can I use any type of wrapping paper for wrapping a candle?
Yes, you can use any type of wrapping paper to wrap a candle. However, it’s important to consider the type of wrapping paper that’ll best suit the candle. Some wrapping papers may be too thin and easily tear, while others may be too thick and difficult to fold neatly. It’s also possible to use fabric instead of wrapping paper for a unique and creative look. Just make sure that the fabric is non-flammable and can be secured tightly around the candle.
What kind of embellishments and decorations can I add to the wrapped candle?
Looking to add some extra pizzazz to your wrapped candle? Well, you’re in luck! Decorative ribbons are a fantastic way to make your candle truly stand out. Whether you choose a classic satin ribbon or a sparkly metallic one, it’s sure to add a touch of elegance.
And why stop there? Festive stickers are a fun and playful way to add some holiday cheer. From snowflakes to Santa Claus, the options are endless!
Is it necessary to use scented elements when wrapping a candle for Christmas?
When wrapping a candle for Christmas, it’s not necessary to use scented elements. Candle wrapping techniques can involve various materials like ribbons, fabric, or even dried flowers.
These alternative materials can add a festive touch to the wrapping without overpowering the candle’s natural scent. However, if you prefer a scented candle, you can incorporate scented ribbons or attach a small scented sachet to the wrapping for a subtle fragrance.
The choice is yours, and it depends on your personal preference and the overall aesthetic you want to achieve.
Are there any specific tips or tricks for wrapping a candle in an elegant and professional-looking way?
Choosing the right ribbon for candle wrapping is crucial to achieve an elegant and professional look. Opt for a wide satin or velvet ribbon in a festive color that complements the candle.
To add a personalized touch, consider attaching a small charm or ornament to the ribbon.
Another creative idea is to use a strip of decorative paper with the recipient’s name handwritten on it, creating a unique and thoughtful gift.
Conclusion
As I’m sitting here, admiring the beautifully wrapped candle in front of me, I can’t help but feel a sense of accomplishment and excitement for the upcoming holiday season.
Wrapping a candle for Christmas may seem like a simple task, but it’s the little details and personal touches that truly make it shine. So go ahead, gather your materials, measure and cut the wrapping paper, add embellishments and decorations, tie a festive ribbon or bow, and consider adding scented elements.
And just like that, you’ll have a gift that’s not only visually stunning, but also fills the room with a warm and inviting glow. With every flicker of the flame, it’s a reminder of the joy and wonder that this time of year brings.
So get creative and enjoy the process of creating a gift that’s as beautiful as it is meaningful. After all, it’s the thought and effort that count, and this wrapped candle is sure to light up the faces of your loved ones this holiday season.