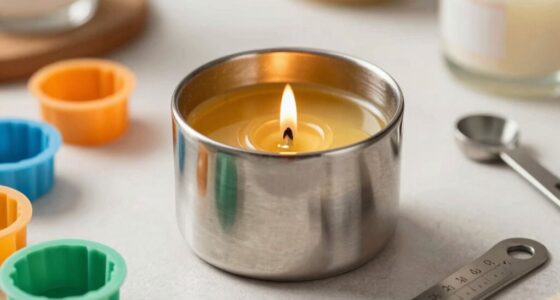

Just like moths are attracted to the gentle, flickering glow of candles, I am captivated by their soothing and enchanting light. While candles can leave a stubborn wax residue on candlesticks as time goes by, the thought of cleaning it off may seem overwhelming. But do not worry! With a few easy steps, you can effortlessly bring back the shining beauty of your candlestick.
Firstly, assess the wax buildup on your candlestick. Is it thick or thin? This will determine the best method for removal.
Next, freeze the candlestick by placing it in the freezer for a couple of hours. Once frozen solid, carefully scrape off the hardened wax using a plastic scraper or credit card.
To remove any residual wax, apply heat using a hairdryer on low setting or place the candlestick in warm water until the remaining wax softens. Wipe away the softened wax with a cloth soaked in warm water.
After cleaning off all traces of wax, polish and buff your candlestick to bring back its shine.
Finally, apply a protective wax coating to prevent future build-up and store it properly to maintain its beauty.
With these techniques at your disposal, you can bid farewell to unwanted wax on your beloved candlesticks and enjoy their radiant glow once more!
Key Takeaways
- Freezing the candlestick before removing wax can make it easier to scrape off.
- Applying heat with a hairdryer or warm water can help soften and remove residual wax.
- Regularly cleaning candle holders and trimming candle wicks can prevent wax buildup.
- Applying a protective wax coating and storing candlesticks properly can help maintain their beauty and prevent future buildup.

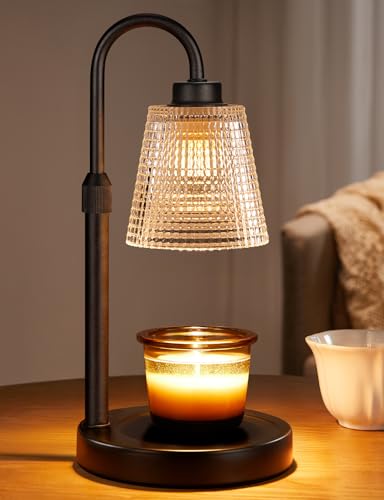
Modern Candle Warmer Lamp with Timer, Dimmable Candle Lamp Warmer, Mothers Day Birthday Gifts for Women Men, Black Candle Warmer, Adjustable Candle Light Warmer, Cozy Living Room Bedroom Home Decor
Enjoy Your Favorite Candle: If you want enjoy scented candles in a safe and non-flame way, Funistree candle...
As an affiliate, we earn on qualifying purchases.
Assess the Wax Buildup
Now, take a close look at your candlestick and assess the wax buildup that’s accumulated over time. You’ll be amazed at how much of a difference removing it’ll make in restoring the beauty of your candlestick.
Assessing wax buildup is essential before proceeding with any troubleshooting wax removal techniques. Start by examining the candlestick from different angles and inspecting every crevice where wax may have dripped or pooled. Note the thickness and extent of the wax buildup, as this’ll determine which method you should use for removal. Look out for any discoloration or damage caused by the hardened wax.
Next, identify any areas where the wax might be stuck more firmly, such as cracks or intricate designs. These areas may require additional attention during the removal process to ensure thorough cleaning without causing any harm to the candlestick itself.
Once you’ve assessed the wax buildup, you can move on to freezing the candlestick using an appropriate method. Freezing will help harden the wax, making it easier to remove later on.
Innqoo Candle Warmer Lamp with Timer, Dimmable Candle Warmer for Jar Candles, Height Adjustable Wax Melts Warmer, Birthday Gifts for Women Mom, House Warming Gifts New Home Decor
【Flame-Free & Eco-Safe Candle Warmer】Unlike traditional candles, our candle lamp warmer uses light source to melt the candle...
As an affiliate, we earn on qualifying purchases.
Freeze the Candlestick
First, you’ll want to chill your candle holder in the freezer. Freezing the candlestick is a simple yet effective method to remove wax buildup. Not only does it make the wax brittle and easier to remove, but it also has other alternative uses that come in handy.
Before proceeding with this technique, it’s important to take safety precautions. Ensure that there are no flammable materials nearby and handle the frozen candlestick with care to avoid any injuries.
To freeze the candlestick, place it securely in a plastic bag or wrap it tightly with plastic wrap to prevent any contact with food items in your freezer. Leave it inside for at least two hours or until the wax is completely frozen solid.
Freezing not only helps remove excess wax from your candle holder but also provides an opportunity for repurposing old candles or creating new ones. Once the candlestick is frozen, you can easily scrape off the frozen wax using a dull knife or your fingernail without damaging the surface of your holder.
With the frozen wax removed, you can now move on to the next step of scraping off any remaining residue from your candle holder.

GODONLIF Gold Candle Warmer Lamp with Cycle Timer, Birthday Gifts for Women Mom Her, House Warming Gifts New Home Room Decor, Wax Melt Warmer for Jar Candles with 2 Bulbs
Safety and Environmental Friendliness: Our electric Candle Warmer Lamp gently melting the candle from the top down. With...
As an affiliate, we earn on qualifying purchases.
Scrape off the Frozen Wax
To effectively remove the frozen wax, gently scrape it off using a dull knife or your fingernail.
Here are four scraping techniques you can try using common household items:
-
Use a credit card: Slide the edge of a credit card under the wax and slowly lift it away from the surface of the candlestick.
-
Employ a plastic spatula: Similar to the credit card method, insert a plastic spatula under the frozen wax and carefully pry it off.
-
Utilize a spoon: Hold a metal spoon upside down and heat its bowl with hot water for a few seconds. Press the warm spoon against the wax, causing it to soften and stick to the metal. Then, gently scrape off the softened wax.
-
Try adhesive tape: Wrap a piece of adhesive tape around your finger with the sticky side facing outward. Press it onto the wax and peel it away in one swift motion, pulling up as much wax as possible.
By employing these scraping techniques using household items, you can effectively remove most of the frozen wax from your candlestick.
Transitioning into our next section about using heat to remove residual wax…

Candle Warmer Lamp with Timer Dimmer Adjustable Height for New Home Decor, Birthday Gifts for Women,Candle Warmer for Women Mom Christmas Mother's Day Gfit
CANDLE WARMER LAMP WITH DIMMER & ADJUSTABLE BRIGHTNESS: Engpure candle warmer lamp has dimmer function and four adjustable...
As an affiliate, we earn on qualifying purchases.
Use Heat to Remove Residual Wax
Next, you’ll want to unleash the fiery power of heat to liberate every last stubborn vestige of that waxy intruder clinging to your beloved candle holder. Using a hairdryer is an effective method for melting the wax away. Hold the hairdryer about 6 inches away from the wax and set it on high heat. As you apply the heat, you will notice the wax starting to melt and become liquid again. Be careful not to hold the hairdryer too close or for too long, as it can cause damage to certain materials.
If there are still remnants of wax left after using the hairdryer, another option is to use boiling water to dissolve the residual wax. Fill a bowl or sink with enough boiling water to submerge your candlestick holder. Carefully place your candlestick holder into the boiling water and let it sit for a few minutes. The hot water will soften and dissolve any remaining wax.
Once you have successfully removed all traces of wax using heat, it’s time to move on to the next step: wiping with a cloth and warm water.
Wipe with a Cloth and Warm Water
After using heat to eliminate all remnants of wax, I proceed to gently wipe the candle holder with a soft cloth soaked in warm water. This method is an effective way to remove any remaining residue and restore the candlestick’s original appearance. The warmth of the water helps soften the wax, making it easier to wipe away without causing any damage to the surface.
When wiping, it’s important to use a soft cloth to avoid scratching or damaging the candle holder. I recommend using a microfiber cloth as it’s gentle yet effective in removing dirt and grime. Begin by dipping the cloth into warm water and wringing out any excess moisture. Then, carefully wipe down the entire surface of the candlestick, paying special attention to areas where wax may have accumulated.
In addition to removing existing wax, this method also helps prevent future buildup. By regularly wiping down your candle holders with warm water, you can keep them clean and free from residue. This will not only maintain their aesthetic appeal but also ensure that they function properly when you need them for future use.
Now that we’ve successfully removed residual wax using warm water, let’s move on to discussing alternative methods such as using vinegar or rubbing alcohol for stubborn stains without causing any damage or discoloration.
Use Vinegar or Rubbing Alcohol for Stubborn Stains
If you’re dealing with stubborn stains on your candle holder, try using vinegar or rubbing alcohol as an effective solution.
For example, imagine you have a beautiful glass candle holder that has accumulated tough, dried-on wax residue over time. Vinegar and rubbing alcohol are both natural alternatives for removing wax stains from various surfaces.
To begin, gather a soft cloth or sponge and soak it in either vinegar or rubbing alcohol. Gently rub the stained area with the cloth in a circular motion. The acidity of the vinegar or the solvent properties of rubbing alcohol will help dissolve the wax and lift it away from the surface. Be sure to apply enough pressure to remove all traces of wax without damaging the material of your candle holder.
Additionally, preventing wax buildup on candlesticks can help avoid future stubborn stains. Trim your candles’ wicks regularly to prevent excess dripping and ensure even burning. Placing a small dish beneath your candle can also catch any melting wax before it reaches your holder.
By utilizing vinegar or rubbing alcohol as cleaning agents for stubborn wax stains and implementing preventative measures, you can maintain the pristine appearance of your candle holders effortlessly. Once you’ve successfully removed all traces of wax residue, transition into polishing and buffing your candlestick for that extra shine without leaving any streaks behind.
Polish and Buff the Candlestick
After successfully removing stubborn stains with vinegar or rubbing alcohol, the next step in restoring the beauty of your candlestick is to polish and buff it. To achieve a high shine on your candlestick, you’ll need the proper tools. A soft cloth or microfiber cloth is ideal for polishing as it won’t scratch the surface. You’ll also need a metal polish specifically designed for the type of material your candlestick is made of, such as brass or silver.
Begin by applying a small amount of metal polish onto the cloth and gently rub it onto the surface of the candlestick in circular motions. Be sure to cover all areas evenly. Pay special attention to any intricate details or crevices where wax residue may still be present.
Once you’ve applied the metal polish, use another clean section of the cloth to buff and shine your candlestick. Apply some pressure while buffing to bring out that beautiful luster.
By following these techniques and using appropriate tools, you can achieve a high shine on your candlestick, restoring its original elegance and charm. This’ll set a perfect foundation for the final step: applying a protective wax coating that’ll further enhance its appearance and preserve its beauty for years to come.
Apply a Protective Wax Coating
To preserve the radiant shine of your newly polished candlestick, it’s time to apply a protective wax coating that’ll ensure its lasting beauty. A wax coating doesn’t just add an extra layer of protection but also enhances the overall appearance of the candlestick.
Here are three alternatives to consider for a protective wax coating:
-
Beeswax: Known for its natural properties, beeswax offers excellent protection against dust and moisture. It creates a smooth and glossy finish, enhancing the visual appeal of your candlestick.
-
Carnauba Wax: Derived from palm leaves, carnauba wax is renowned for its durability and high melting point. This makes it ideal for withstanding heat produced by burning candles while providing long-lasting protection.
-
Microcrystalline Wax: This synthetic wax is commonly used in conservation work due to its excellent resistance to temperature changes and aging. It forms a strong barrier against dirt and pollutants, ensuring your candlestick retains its luster for years to come.
Applying a protective wax coating has several benefits including preventing dust accumulation, repelling moisture, and reducing tarnish or oxidation on the surface of your candlestick. By doing so, you’ll maintain its original shine and prolong its lifespan.
Now that we’ve protected our candlestick with a reliable wax coating, let’s move on to learn how we can store it properly to prevent future buildup without compromising its aesthetics or quality.
Store Properly to Prevent Future Buildup
Make sure you store your candlestick in a clean and dry area to prevent future buildup and maintain its pristine condition. Preventive measures are essential in ensuring that no more wax residue accumulates on the surface. Proper storage techniques can greatly help in achieving this goal.
Firstly, make sure to remove any excess wax from the candlestick before storing it. You can do this by gently scraping off the remaining wax using a plastic scraper or a dull knife.
Next, wrap the candlestick in a soft cloth or tissue paper to protect it from dust and moisture. Place it in a sturdy box or container with a lid to further shield it from potential damage.
Additionally, keep the candlestick away from direct sunlight or extreme temperatures as these can cause the wax to melt and stick onto other surfaces.
By following these proper storage techniques, you can ensure that your candlestick remains free of wax residue for future use.
Now let’s explore some alternative methods and tips for removing any existing wax residue without causing any damage to the candlestick itself…
Alternative Methods and Tips for Removing Wax Residue
Looking for other ways to get rid of leftover wax on your candlestick? Let’s explore some alternative methods and handy tips that won’t damage your precious candle accessory.
When it comes to candlestick maintenance, natural wax removal methods are a great option. Here are three sub-lists with different emotions evoked:
-
Efficiency: One effective method is placing the candlestick in the freezer for a couple of hours. The cold temperature causes the wax to contract, making it easier to chip away with a butter knife or your fingernail.
-
Gentleness: Another gentle approach is using hot water. Fill a bowl with warm water and place the candlestick inside, allowing the residual wax to soften. Once soft, gently scrape off the wax using a plastic card or your fingers.
-
Eco-friendly: For those who prefer eco-friendly solutions, try using vinegar or lemon juice. Soak a cloth in either liquid and apply it directly to the wax residue. The acid in these substances helps dissolve the wax without causing any harm.
By utilizing these alternative methods and following these handy tips, you can effectively remove wax from your candlestick without causing any damage or scratches. Remember to always be cautious when handling sharp objects and hot water. Happy cleaning!
Frequently Asked Questions
Can I use a hairdryer instead of freezing the candlestick to remove wax?
Using a hairdryer as an alternative to freezing the candlestick can be a viable option for removing wax. By applying gentle heat from the hairdryer, the wax will melt and become easier to remove without the need for freezing. However, it’s essential to exercise caution and avoid direct contact with the flame or overheating the candlestick. Remember, safety should always come first when dealing with any kind of heat source near flammable objects.
How long should I freeze the candlestick before attempting to scrape off the wax?
Before attempting to scrape off the wax, I’d recommend freezing the candlestick for at least two hours. This allows the wax to harden and become easier to remove. Once frozen, you can use scraping techniques such as using a butter knife or credit card to gently scrape off the wax.
Alternatively, you can try alternative methods like using a hairdryer to melt the wax and then wiping it away with a cloth.
What type of cloth should I use to wipe off the residual wax with warm water?
When it comes to wiping off residual wax with warm water, I suggest using a soft, lint-free cloth. The right cloth can make all the difference in effectively removing the wax without causing any damage or leaving behind any fibers.
Microfiber cloths or old cotton t-shirts work well for this task. Alternatively, you can try using rubbing alcohol or a commercial wax remover for stubborn residue.
Can I use a different type of cleaning solution instead of vinegar or rubbing alcohol for stubborn stains?
For stubborn stains, there are alternative cleaning solutions that can be effective. While vinegar and rubbing alcohol are commonly used, other options include baking soda paste or dish soap mixed with warm water.
Baking soda paste can be made by combining baking soda with a small amount of water to form a thick consistency. Apply the paste to the stain and let it sit for a few minutes before scrubbing with a cloth.
Dish soap mixed with warm water can also be effective in breaking down stubborn stains.
How often should I apply a protective wax coating to the candlestick to prevent future wax buildup?
To prevent future wax buildup on my candlestick, I should regularly apply a protective wax coating. There are alternative options available, such as beeswax or paraffin wax. The frequency of applying the protective wax depends on how often I use the candlestick and how quickly wax accumulates. It’s recommended to apply a new coat every few months or whenever I notice a significant amount of wax buildup occurring.
Conclusion
As I wiped away the last remnants of wax from my candlestick, a sense of accomplishment washed over me. It was more than just removing wax; it was a symbol of renewal and transformation. The process may have been meticulous, but every step was worth it to restore the candlestick’s beauty.
Now, as it sits proudly on display, it serves as a reminder that with patience and care, we can overcome any obstacle. So go forth and conquer those stubborn wax stains, for in doing so, you’ll unleash your own inner strength and resilience.