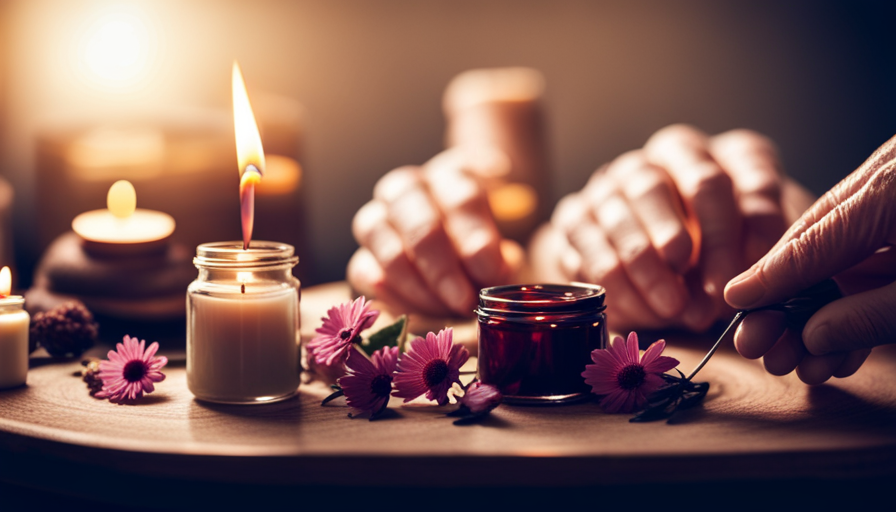
Connect with us

Beginners Guides

How To Make A Massage Candle

Published

on

An image depicting a serene setting with soft, warm lighting

Picture a tranquil haven where the soft flicker of candlelight plays across your skin, while the warm, aromatic wax wraps you in a seductive clasp.

Creating your own massage candle is like capturing this tranquil escape in a jar. As a candle enthusiast and self-care advocate, I have perfected the art of crafting these luxurious treats for the body and soul.

In this article, I will guide you through the step-by-step process of making your very own massage candle, providing you with the tools and knowledge needed to create a truly indulgent experience. From selecting the perfect fragrance to testing the optimal temperature, I will share my expertise to ensure your candle delivers the ultimate relaxation and therapeutic benefits.

So, let’s dive into the world of massage candles and ignite your senses on a journey of pure bliss.

Key Takeaways

  • Melting soy wax flakes in a heat-resistant container is the first step in making a massage candle.
  • Essential oils can be added to the melted wax to enhance the therapeutic benefits of the candle.
  • The wax should be heated to a temperature of 120 to 140 degrees Fahrenheit using a double boiler to prevent overheating.
  • Slow pouring of the wax ensures even distribution and allows the fragrance oils to mix seamlessly with the wax.

Gather Your Supplies

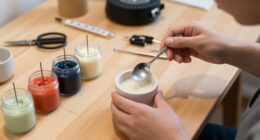
Now that you’ve got everything you need, it’s time to gather your supplies like a bee collecting nectar from flowers. To make a massage candle, you’ll need the following supplies: soy wax flakes, a heat-resistant container, a wick, essential oils, a thermometer, and a double boiler.

The first step in the candle making process is to melt the wax. Place the soy wax flakes in the heat-resistant container and set it in a double boiler filled with water. Heat the water over medium heat until the wax melts completely.

Advertisement

While the wax is melting, prepare the wick by attaching it to the bottom of the container. You can use a small amount of melted wax to secure the wick in place.

Once the wax has melted, remove it from the heat and let it cool slightly. This is the perfect time to add your chosen essential oils. Be sure to use oils that are safe for skin contact and that blend well together. Stir the oils into the melted wax until they’re well incorporated.

With your supplies gathered and the wax melted, you’re now ready to move on to the next step in creating your massage candle, which is pouring the wax into the container.

Melt the Wax

First, you’ll need to begin by melting the wax until it transforms into a smooth, velvety liquid. This step is crucial in creating the perfect massage candle. To ensure the wax is at the right temperature, use a thermometer to test it. The ideal temperature for massage candles is around 120 to 140 degrees Fahrenheit. This ensures that the wax won’t burn the skin when applied during a massage.

When melting the wax, it’s important to use a double boiler to prevent direct heat contact and minimize the risk of overheating. Place the wax in the top pot of the double boiler and fill the bottom pot with water. Heat the water to a gentle simmer and allow the wax to melt slowly. This method provides a consistent and controlled heat source.

Advertisement

One of the benefits of using massage candles is that they can provide a warm and soothing ambiance to enhance relaxation. The melted wax can be poured directly onto the skin, providing a luxurious and moisturizing massage experience. The combination of heat and nourishing oils can help relieve muscle tension and promote blood circulation.

Now that the wax has melted to the perfect temperature and consistency, it’s time to move on to the next step: adding fragrance and essential oils. By infusing the wax with delightful scents, you can further enhance the therapeutic benefits of the massage candle.

Add Fragrance and Essential Oils

After melting the wax to the perfect temperature and consistency, it’s time to enhance the therapeutic benefits of your massage candle by infusing it with delightful scents and essential oils. Studies have shown that these oils can provide additional relaxation and stress-relief benefits.

When it comes to fragrance options, the possibilities are endless. You can choose from a wide range of essential oils, such as lavender for its calming properties, eucalyptus for its invigorating effect, or chamomile for its soothing aroma. Experimenting with different combinations can be fun and allows you to create a unique scent that suits your preferences.

Blending techniques play a crucial role in creating the perfect fragrance for your massage candle. One technique is to blend different essential oils together, creating a harmonious and balanced scent. Start by combining a base note oil, like vanilla or sandalwood, with a middle note oil, such as rose or jasmine, and finish with a top note oil like bergamot or lemon. This layering technique ensures that the scent evolves as the candle burns, providing a more enjoyable experience.

Advertisement

Now that the fragrance and essential oils have been carefully selected and blended, it’s time to pour the wax into the container.

Pour the Wax into the Container

When pouring the wax into the container, it’s important to secure the wick in place to ensure it stays centered and upright. This can be done by using a wick sticker or a small amount of melted wax to adhere the wick to the bottom of the container. Once the wick is secure, slowly pour the melted wax into the container, taking care to avoid any spills or splatters. By following these steps, you can ensure a successful and professional-looking massage candle.

Secure the Wick

To ensure a stable flame, it’s crucial to securely fasten the wick in place for your massage candle. Proper wick placement is essential for both the functionality and safety of your candle.

Begin by centering the wick in the middle of the container, ensuring it’s straight and upright. You can use a wick sticker or a small amount of melted wax to secure the wick at the bottom of the container. Gently press the wick into the wax to hold it firmly in place. This’ll prevent the wick from moving or falling over while the candle burns.

Once the wick is securely fastened, you can move on to the next step of slowly pouring the wax into the container, creating a soothing and aromatic massage candle.

Advertisement

Slowly Pour the Wax

As you carefully pour the wax, a river of warmth and fragrance flows into the container, transforming it into a tranquil haven. Slowly pouring the wax is crucial in creating a massage candle that not only looks beautiful but also provides a luxurious experience.

By pouring the wax slowly, you allow it to evenly distribute and adhere to the container, preventing any air bubbles or uneven surfaces. This ensures a smooth and flawless appearance once the candle solidifies. Additionally, slow pouring allows the fragrance oils to mix seamlessly with the wax, creating a harmonious blend that fills the room with a captivating aroma.

The benefits of slow pouring extend beyond aesthetics and scent. It also helps to prevent any potential overheating of the container, which could lead to cracks or breakage. So, take your time and pour the wax slowly, savoring each moment of the process.

Now, let the candle cool and set, allowing the magic to happen.

Let the Candle Cool and Set

Once the candle has finished melting, you can sit back and watch as it slowly cools and solidifies into a beautifully scented massage candle.

Advertisement

The cooling process is a crucial step in candle making as it allows the wax to harden and set properly. Patience is key during this stage, as rushing the cooling process can result in uneven texture or cracking of the candle.

During the cooling process, it’s important to resist the temptation to touch or move the candle. Any disturbance to the wax can cause imperfections in the final product. Instead, find a safe and undisturbed spot for the candle to cool, away from drafts and direct sunlight.

As the candle cools, you may notice a slight color change and a thin film forming on the surface. This is completely normal and indicates that the wax is solidifying.

Allow the candle to cool completely, which usually takes a couple of hours, before continuing to the next step.

Once the candle is fully cooled and set, it’s time to trim the wick. Trimming the wick ensures a clean and even burn, allowing the candle to last longer.

Advertisement

Trim the Wick

After the candle has cooled and set, it’s time to give the wick a little trim for a cleaner and longer-lasting burn. Proper wick trimming techniques are essential to ensure that your massage candle performs optimally. By trimming the wick, you remove any excess charred bits, allowing the flame to burn evenly and reducing the risk of soot and smoke.

To trim the wick, you’ll need the best wick trimmers available. Look for trimmers specifically designed for candles, as they have a unique shape that allows for precision trimming. These trimmers typically have a long handle and a curved blade, making it easy to reach the wick without disturbing the surrounding wax.

When trimming the wick, make sure to leave about 1/4 inch of wick above the wax surface. This length is ideal for a controlled and steady burn. Trim any longer wicks to prevent the flame from becoming too large and potentially causing the wax to overheat.

Now that the wick is trimmed, you’re ready to light and enjoy your massage candle. The carefully trimmed wick will ensure a clean and efficient burn, providing you with hours of relaxation and ambiance.

Light and Enjoy

Before enjoying the massage candle, it’s important to find a relaxing environment where you can fully immerse yourself in the experience. This could be a quiet room with soft lighting and comfortable furniture.

Advertisement

Once you’ve created the perfect ambiance, it’s time to light the candle and let the soothing fragrance fill the air. Take a moment to breathe in the calming scent and allow yourself to unwind as the candle begins to melt, releasing the warm, nourishing oils.

Find a Relaxing Environment

To create a truly serene atmosphere for your massage candle experience, immerse yourself in a tranquil environment that is free from distractions. Creating a peaceful ambiance is crucial to enhance relaxation and promote a sense of calm. Start by choosing a room that is quiet and comfortable, ensuring the temperature is just right. Dim the lights or use candles to create a soft, soothing glow. Selecting the right music is another essential element in setting the mood. Opt for gentle melodies or nature sounds that will help you unwind and destress. To assist you further, here is a table with three suggestions for creating a relaxing environment:

Element Description
Lighting Soft, warm lighting to create a cozy atmosphere
Scent Aromatherapy scents like lavender or chamomile for relaxation
Comfortable Seating Plush cushions or a comfortable massage table for ultimate comfort

Now, let’s transition into the next section and learn how to light the candle for your massage experience.

Light the Candle

Illuminate the room by igniting the wick of your scented wax, infusing the air with a gentle flicker and a soothing fragrance. When lighting the candle, it’s important to consider the lighting techniques that can enhance the benefits of candlelight therapy.

Soft, warm lighting creates a calming ambiance that promotes relaxation and reduces stress. The gentle glow of the candlelight can help to create a peaceful atmosphere, allowing you to unwind and fully immerse yourself in the massage experience.

Advertisement

Candlelight therapy has been known to have numerous benefits, including improved sleep quality, reduced anxiety, and enhanced mood. As the flickering flame dances, it creates a sense of tranquility, helping you to let go of any tension or worries.

Now that the candle is lit, let’s move on to the next step and melt the wax for massage.

Melt the Wax for Massage

Once the wax’s fully melted, carefully pour it into the candle jar. This step’s crucial in creating a perfect massage candle. To ensure a smooth and even pour, it’s important to melt the wax using proper techniques.

There are various wax melting techniques that can be employed, such as using a double boiler or a microwave. It’s essential to choose the method that suits your preferences and the type of wax you’re using.

When it comes to massage candles, there’re different types available in the market. Some’re made from soy wax, while others’re made from beeswax or a blend of various oils. Each type has its own unique properties and benefits, so it’s worth exploring the options and finding the one that best suits your needs.

Advertisement

To evoke a sense of excitement and anticipation in our audience, here’re some discussion ideas to consider:

  • Discover the soothing properties of soy wax.
  • Explore the alluring scent options available.
  • Delve into the benefits of using beeswax in massage candles.
  • Learn about the different techniques to personalize your massage candle.

Now that the wax’s been poured into the candle jar, the next step’s to test the temperature before using it for a massage.

Test the Temperature

After melting the wax for the massage candle, it’s important to test the temperature before pouring it into the container. This step ensures that the wax is at a safe and comfortable temperature for use on the skin. To test the temperature, I recommend using a thermometer specifically designed for candle making. Simply insert the thermometer into the melted wax and wait for it to stabilize. The ideal temperature for massage candles is between 110 to 130 degrees Fahrenheit (43 to 54 degrees Celsius). This range ensures that the wax is warm enough to provide a soothing and relaxing experience, but not too hot to cause discomfort or burns.

To emphasize the importance of temperature testing, I have created a table below:

Temperature Range Effect on the Skin
Below 110°F (43°C) Wax will be too cool and may not provide desired warmth
110°F – 130°F (43°C – 54°C) Optimal temperature for a soothing and relaxing massage
Above 130°F (54°C) Wax will be too hot and may cause burns

By ensuring the wax is within the recommended temperature range, you can experience the full benefits of massage candles without any discomfort. In the next section, we will explore the various benefits you can expect from using massage candles.

Experience the Benefits

Indulge in the numerous advantages of incorporating massage candles into your self-care routine. Not only do these candles create a warm and soothing ambiance, but they also offer a host of benefits that enhance your overall well-being.

Advertisement

Massage therapy has been known to relieve stress, reduce muscle tension, and improve circulation. By using a massage candle, you can experience these benefits in the comfort of your own home.

One of the key benefits of massage therapy is its ability to promote relaxation. The gentle warmth from the candle, combined with the calming scent of essential oils, can help you unwind after a long and stressful day. Additionally, the act of massaging the melted oil onto your skin can release tension and tightness, leaving you feeling rejuvenated and refreshed.

Another advantage of massage candles is their versatility. Depending on your needs, you can choose from different types of massage techniques. For example, a Swedish massage candle is ideal for relieving muscle tension and promoting relaxation, while a deep tissue massage candle provides a more intense and targeted therapy for sore muscles.

Incorporating massage candles into your self-care routine can provide a multitude of benefits for both your body and mind. So why not treat yourself to a little indulgence and experience the wonders of massage therapy in the comfort of your own home?

Frequently Asked Questions

How do I choose the right fragrance and essential oils for my massage candle?

Choosing the right fragrance for your massage candle is crucial. The aroma should transport you to a world of relaxation and bliss. I recommend indulging in exotic scents like lavender, eucalyptus, or vanilla.

Advertisement

As for essential oils, they offer a multitude of benefits. Lavender promotes calmness, eucalyptus helps alleviate muscle tension, and vanilla creates a warm and soothing atmosphere.

These carefully selected fragrances and oils will enhance your massage experience and leave you feeling rejuvenated.

Can I use any type of container to pour the wax into?

Choosing the right container for your massage candle is crucial for creating a high-quality massage oil. The type of container you use can affect the overall quality of the oil and the experience for the person receiving the massage.

It’s important to choose a container that is heat-resistant, non-toxic, and preferably made of glass or metal. These materials ensure that the candle burns evenly and the oil is safe and free from any harmful chemicals.

How long does it take for the candle to cool and set?

The cooling and setting time of a massage candle can vary depending on various factors, such as the size of the candle and the type of wax used. Generally, it takes around 1-2 hours for the candle to cool and set completely.

Advertisement

During this time, it’s important to ensure that the candle is placed in a cool and undisturbed area to allow it to solidify properly. This will ensure that the candle is ready for use and will provide an optimal massage experience.

Is it necessary to trim the wick before lighting the candle?

Yes, it’s necessary to trim the wick before lighting the candle. Wick maintenance is an important aspect of candle safety. Trimming the wick to about 1/4 inch helps prevent the flame from becoming too large and causing the candle to burn unevenly or produce excessive smoke. By regularly trimming the wick, you can ensure a cleaner and safer burning experience while enjoying the soothing ambiance of your massage candle.

What are the benefits of using a massage candle?

Using a massage candle is like experiencing a warm embrace that melts away stress and tension. The benefits of using a massage candle are numerous.

Firstly, it provides a soothing and aromatic ambiance, creating a calming atmosphere for relaxation.

Secondly, the warm, melted wax can be applied directly to the skin, providing a luxurious and moisturizing massage experience.

Advertisement

To effectively use a massage candle for relaxation, simply light the candle, allow it to melt, and then pour the warm wax onto the desired area for a blissful and rejuvenating massage.

Conclusion

In conclusion, making your own massage candle can be a fun and rewarding experience. By following these simple steps, you can create a luxurious and relaxing atmosphere in your own home.

So go ahead and gather your supplies, melt the wax, add your favorite fragrance and essential oils, pour into a container, let it cool and set, and then light it up to enjoy the soothing benefits. Trust me, you’ll be feeling like a pampered queen in no time!

I'm Amelia, and I love making candles. It all started when I was given a kit as a gift. I loved the process so much that I decided to make my own candles. I soon realized that I had a real talent for it. Before long, my friends and family were asking me to make candles for them too. Word spread, and soon I was inundated with orders. I love the creativity that goes into making each candle unique. And I love the satisfaction of knowing that people are using something I made with my own hands.

Continue Reading
Advertisement

Beginners Guides

How To Get Candle Wax Off Wall

Published

on

By

An image showcasing a close-up shot of a wall with residual candle wax

Were you aware that stains from candle wax on walls represent a significant household cleaning obstacle? Indeed, more than half of homeowners have faced difficulties in eliminating persistent wax stains from their walls.

But fear not! I’m here to share my expert tips on how to easily and effectively get candle wax off your walls. With just a few simple steps and some basic supplies, you’ll have your walls looking as good as new in no time.

From scraping off excess wax to using heat and solvents, I’ll guide you through each method so you can choose the best approach for your specific situation.

So let’s dive in and say goodbye to those unsightly wax stains once and for all!

Key Takeaways

  • Gather essential supplies: plastic scraper or credit card, hairdryer or iron, clean white cloths or paper towels, rubbing alcohol.
  • Use a hairdryer or iron on low heat to warm up the remaining wax.
  • Place a clean cloth or paper towel over the softened wax and press down firmly to absorb it.
  • Use rubbing alcohol on a clean cloth to remove any residue left behind.

Gather Your Supplies

Now that you’ve got your supplies ready, it’s time to tackle that pesky candle wax on your wall. Removing candle wax safely is crucial to protect your walls from any damage. To start, gather a few essential items: a plastic scraper or credit card, a hairdryer or iron, clean white cloths or paper towels, and rubbing alcohol.

To begin the process of removing the candle wax from your wall without causing any harm, first scrape off excess wax gently using the plastic scraper or credit card. Be cautious not to scratch the wall surface as you do this.

Advertisement

Once you have removed as much of the excess wax as possible, use a hairdryer or iron on a low heat setting to warm up the remaining wax.

As the residual wax softens from the heat, place a clean cloth or paper towel over it and press down firmly. The cloth will absorb melted wax while protecting walls from any potential staining. Repeat this step until no more wax transfers onto the cloth.

With all excess and melted wax removed, it’s time to move on to the next step: cleaning up any residue left behind by applying rubbing alcohol onto another clean cloth. Gently rub over the affected area in circular motions until all traces of wax are gone.

Transitioning into scraping off excess wax without stating ‘step,’ let’s now focus on how to effectively remove stubborn residue left behind by scraping off excess wax more thoroughly.

Scrape off Excess Wax

First, take a credit card or an expired gift card from your wallet and gently press it against the excess wax on the wall. This will help to scrape off as much of the wax as possible before using any heat source. To further assist you in removing candle wax from different surfaces, I have prepared a table below that compares the effectiveness of using a hairdryer versus an iron.

Advertisement
Hairdryer Iron
Ease of Use Easy Requires more caution
Time Required Longer Quicker
Surface Safety Safer for delicate surfaces Riskier for some

Now that you have successfully scraped off the excess wax, let’s move on to the next step where we will discuss using either a hairdryer or an iron to remove any remaining residue. Both methods involve applying heat to melt the wax, allowing it to be absorbed by a cloth or paper towel.

Use a Hairdryer or Iron

To effectively remove the excess wax, imagine yourself using either a hairdryer or an iron to melt and absorb the remaining residue. Both methods have their pros and cons.

Let’s start with the hairdryer. It’s convenient and easy to use, as most people already have one at home. Simply set it on a low heat setting and hold it about six inches away from the wax-stained wall. The warm air will gradually melt the wax, allowing you to wipe it away with a cloth or paper towel. However, be careful not to hold the hairdryer too close or use high heat settings, as this can damage paint or wallpaper.

On the other hand, using an iron can be more effective for larger wax spills. Set your iron on a low heat setting without steam and cover it with a clean cloth or paper bag. Gently press the covered iron onto the wax stain for a few seconds, allowing the heat to transfer to the cloth or paper bag and melt the wax underneath. As you lift off the iron, carefully peel away any residue that sticks to the fabric.

Now that we’ve discussed removing excess wax with a hairdryer or an iron, let’s move on to applying heat with a cloth or paper bag in our next section about how to get candle wax off walls without leaving stains behind…

Advertisement

Apply Heat with a Cloth or Paper Bag

Start by taking a clean cloth or paper bag and applying heat to the wax-stained area using a hairdryer or iron. The heat method is an effective way to remove candle wax from walls without causing damage.

Here are some tips to make the process easier and more efficient:

  • Use a hairdryer on low heat setting or an iron on low heat with no steam.
  • Hold the heated cloth or paper bag over the wax stain and gently press it against the wall.
  • Move the cloth or bag in circular motions to distribute the heat evenly.
  • Continue applying heat until you notice the wax starting to melt.

Using this method, the warmth will gradually soften the wax, allowing it to be absorbed by the cloth or paper bag. This technique may require some patience as you want to avoid overheating and spreading melted wax further onto your wall.

Once you have successfully removed most of the wax using heat, transition into using a solvent or cleaning solution for any residue that remains.

Use a Solvent or Cleaning Solution

As I tackle the stubborn residue left behind, a powerful solvent or cleaning solution comes to my rescue, effortlessly dissolving away any remaining traces.

When it comes to removing candle wax from walls, there are various cleaning techniques and alternative methods that can be employed. One option is using rubbing alcohol or isopropyl alcohol. These solvents are effective at breaking down the wax and can be applied directly to the affected area using a cloth or sponge. Gently rub the solvent onto the wax until it starts to dissolve and then wipe away with a clean cloth.

Advertisement

Another option is using a cleaning solution specifically designed for removing wax, such as a commercial adhesive remover or degreaser. These products are formulated to break down tough substances like wax and can be found at most hardware stores.

It’s important to note that before applying any solvent or cleaning solution, it’s advisable to test a small area first to ensure that it doesn’t damage your wall paint or finish. This simple step will help you avoid any potential mishaps while effectively getting rid of that pesky candle wax residue.

Test a Small Area First

Before you begin, make sure to test a small area of your wall first to avoid any potential damage to the paint or finish. Testing a small area is important because different walls may react differently to solvents or cleaning solutions.

To conduct the test, apply a small amount of the solvent or cleaning solution on an inconspicuous spot on your wall and wait for a few minutes. If there’s no adverse reaction, such as discoloration or peeling, then it should be safe to proceed with the rest of the wall.

Taking these test precautions is crucial because some solvents can be harsh and may cause more harm than good if not used correctly. It’s always better to be safe than sorry when dealing with delicate surfaces like painted walls. In case the solvent causes any damage during testing, consider using alternative methods for removing candle wax from your wall.

Advertisement

Now that you’ve tested a small area and ensured it’s safe, it’s time to move onto gently scrubbing with a soft cloth or sponge.

Gently Scrub with a Soft Cloth or Sponge

Once you’ve ensured the small area is safe, it’s time to delicately scrub the affected surface using a soft cloth or sponge, gently removing any residue left behind. When dealing with candle wax on walls, it’s essential to proceed cautiously to avoid causing damage. To assist you in this process, consider the following discussion ideas:

  1. Alternative methods for removing candle wax from walls: Apart from gently scrubbing with a soft cloth or sponge, there are alternative techniques that may be effective in eliminating candle wax from walls. For instance, using a blow dryer on low heat can melt the wax, allowing you to wipe it away easily. Another option is placing a brown paper bag over the wax and running a warm iron over it; this method helps transfer the melted wax onto the paper bag.

  2. Preventing damage to painted walls while removing candle wax: It’s crucial to take precautions when dealing with painted walls to prevent any damage during the removal process. Before scrubbing, ensure that your cloth or sponge is clean and free of any abrasive materials that could scratch or mar the paint surface. Additionally, refrain from exerting excessive pressure while scrubbing as it may cause paint peeling or discoloration.

To transition into rinsing and drying the wall section without explicitly stating ‘step,’ continue by preparing the surface for further cleaning.

Rinse and Dry the Wall

To ensure the wall is thoroughly cleaned, you’ll want to rinse the area with warm water and then carefully dry it with a clean, soft towel. Here are four simple steps to follow in order to effectively remove candle wax from painted walls or wallpaper:

  1. Gently scrape off excess wax: Use a plastic scraper or credit card to gently remove any excess wax from the surface of the wall. Be careful not to damage the paint or wallpaper while doing this.

  2. Apply heat: Place a folded brown paper bag or an old towel over the remaining wax on the wall. Set your iron on low heat and gently press it over the bag/towel for a few seconds. The heat will help melt the wax, allowing it to transfer onto the bag/towel.

  3. Repeat if necessary: If there is still some wax residue left, repeat step 2 until all of it has been removed from the wall.

  4. Clean with warm water and mild detergent: Mix a small amount of mild detergent with warm water and use a sponge or soft cloth to gently scrub away any remaining marks or stains.

After completing these steps, you may notice that some touch-up work with paint is necessary in certain areas where the candle wax was particularly stubborn to remove without damaging the paint or wallpaper.

Advertisement

Touch Up with Paint, if Necessary

If there are any stubborn spots left on the wall, you might need to give them a touch-up with paint. Touching up the wall can help cover up any remaining wax residue and restore the wall’s original appearance.

When it comes to touch-up techniques, there are a few things to keep in mind. First, make sure you have the right type of paint for your wall. If you don’t already know the color code or name of your current paint, try taking a small chip of paint to your local hardware store for matching. Once you have the correct paint, use a small brush or sponge applicator to carefully apply it to the affected areas. Take your time and try to blend in the new paint with the existing color as seamlessly as possible.

Choosing the right paint color is crucial for achieving a satisfactory result. Make sure to select a shade that matches or closely resembles your current wall color. This will ensure that any touch-ups are not easily noticeable once they dry.

Now that you’ve learned how to touch up those stubborn spots with paint, let’s move on to preventing future wax stains without having to take such drastic measures.

Prevent Future Wax Stains

In order to avoid future wax stains, it’s essential to implement preventive measures. One of the most effective ways to prevent wax residue from getting on walls is by using candle holders or containers. By placing candles in a sturdy and stable holder, you can ensure that any melted wax will remain contained and not drip onto the walls.

Advertisement

Another important step in preventing wax stains is to keep candles away from fabrics. If you enjoy burning candles near curtains or upholstered furniture, consider using protective barriers such as glass cloches or candle shades. These accessories not only add a decorative touch but also create a barrier between the flame and surrounding fabrics.

When it comes to removing wax from fabric, prevention is key. Always be cautious when burning candles near clothing or linens, as hot wax can easily splatter and leave stubborn stains. However, if wax does end up on fabric, there are steps you can take to remove it safely. First, allow the wax to cool completely before attempting removal. Then gently scrape off any excess wax with a dull knife or spoon. Next, place a clean cloth over the affected area and carefully apply heat with an iron set on low temperature. The heat will melt the remaining wax which will then transfer onto the cloth.

By implementing these preventive measures and knowing how to remove wax from fabric properly, you can enjoy your candles without worrying about unsightly stains on your walls or favorite fabrics in the future.

Frequently Asked Questions

Can I use a regular cloth instead of a soft cloth or sponge to scrub off the wax?

Yes, you can use a regular cloth to scrub off candle wax from walls. While a soft cloth or sponge is recommended, using a regular cloth can still be effective. However, keep in mind that it may require more effort and time to remove the wax completely. Alternatively, you can try using other materials like an old toothbrush or a plastic scraper to gently scrape off the hardened wax before wiping it with a cloth.

How long should I apply heat with a hairdryer or iron?

Applying heat to remove candle wax from a wall should be done cautiously. It’s important not to overdo it, as too much heat can damage the wall’s surface. Generally, I would recommend using a hairdryer or iron on a low setting and applying heat for short intervals of about 20-30 seconds at a time.

Advertisement

If this method doesn’t work, there are alternative methods you can try, such as freezing the wax with an ice pack or using a commercial wax remover solution.

Is it safe to use a solvent or cleaning solution on painted walls?

Using solvents or cleaning solutions on painted walls can have both pros and cons. On the positive side, they can effectively dissolve the candle wax and make it easier to remove. However, there’s a risk of damaging the paint if the solvent is too strong or left on for too long.

Alternatively, you can try removing the wax without solvents by gently scraping it off with a plastic card or using a hairdryer to melt and absorb it with paper towels.

What kind of paint should I use for touch-up, if necessary?

When it comes to touch-up painting, choosing the right type of paint finish is crucial for seamless results. There are various types of paint finishes available, such as matte, satin, and semi-gloss. Each has its own characteristics and level of durability.

To achieve the best results, it’s important to match the existing paint finish as closely as possible. Additionally, using a small brush or roller and employing feathering techniques can help blend the new paint with the surrounding area seamlessly.

Advertisement

How can I prevent future wax stains on my walls?

To prevent future wax stains on your walls, there are a few steps you can take. First, always use candle holders or trays to catch any drips.

Additionally, consider placing a heat-resistant mat or tray under the candle to catch any spills. If a spill does occur, act quickly and gently scrape off as much wax as possible before using a cleaning solution specifically designed for removing wax stains.

Regularly inspecting and maintaining your candles can also help prevent accidents and minimize potential damage to your walls.

Conclusion

In conclusion, removing candle wax from a wall may seem like a daunting task, but with the right techniques and supplies, it can be easily accomplished. By following the steps outlined in this article, such as using heat to melt the wax and gently scrubbing with a soft cloth or sponge, you can restore your wall to its original state.

Remember to take preventative measures in the future to avoid any more wax stains. Just like peeling away layers of uncertainty, revealing a clean and vibrant surface awaits you.

Advertisement

Continue Reading

Beginners Guides

How Long Does Candy Corn Last

Published

on

By

An image showcasing a clear glass jar filled with vibrant candy corn, nestled on a rustic wooden shelf

Were you aware that candy corn has been a quintessential part of Halloween festivities for more than a century? Indeed, it’s a fact! This vibrant, triangle-shaped sweet has turned into a symbol of the eerie holiday, decorating candy dishes and filling up trick-or-treat bags all over the country.

But have you ever wondered how long candy corn can last? Well, here’s a fascinating statistic for you: on average, candy corn has a shelf life of about 9 months. That’s right – you can enjoy these sugary delights long after the Halloween decorations have been packed away.

In this article, we will delve into the factors that affect candy corn’s freshness, how to recognize signs of spoiled candy corn, and even how to safely consume expired candy corn. So, if you’re curious about the lifespan of candy corn and want to make the most of your Halloween sweets, keep reading to discover all the fascinating details.

Key Takeaways

  • Candy corn has a shelf life of about 9 months when stored properly.
  • Exposure to air, moisture, and odors can affect the freshness of candy corn.
  • Proper packaging and storage, such as using airtight containers and keeping it in a cool, dry place, can extend the shelf life of candy corn by up to 50%.
  • Spoiled candy corn may exhibit changes in texture, unusual odors, and flavors, so it is important to consider storage conditions and best by dates.

The Shelf Life of Candy Corn

You might be wondering, how long does candy corn last before it starts to lose its vibrant colors and become stale? Well, the shelf life of candy corn can vary depending on several factors affecting its freshness.

Candy corn is made primarily from sugar, corn syrup, and artificial flavorings, which can contribute to its long shelf life. When stored properly in a cool, dry place, unopened candy corn can last for up to a year.

However, once you open a package of candy corn, its freshness can begin to deteriorate. Exposure to air and moisture can cause the candy corn to become sticky and lose its original texture. Additionally, if the candy corn is not stored in an airtight container, it can absorb odors from its surroundings, which can affect its taste.

Advertisement

Signs of spoilage in candy corn include a change in color, a sticky or slimy texture, or a rancid smell. If you notice any of these signs, it’s best to discard the candy corn.

Factors that affect candy corn’s freshness include exposure to air, moisture, and odors. These factors can accelerate the process of spoilage and affect the overall quality of the candy corn.

Factors that Affect Candy Corn’s Freshness

When it comes to the freshness of candy corn, two important factors to consider are its packaging and storage, as well as its exposure to air and moisture.

Proper packaging and storage, such as sealing the candy corn in an airtight container, can help to maintain its freshness for a longer period. Additionally, minimizing the candy corn’s exposure to air and moisture can prevent it from becoming stale or sticky.

Packaging and Storage

Proper packaging and storage can significantly extend the shelf life of candy corn. When it comes to candy corn packaging, it’s important to choose airtight containers or bags that can prevent exposure to air and moisture. This is because air and moisture can cause the candy corn to become stale and lose its freshness.

Advertisement

Additionally, it’s crucial to store candy corn in a cool and dry place, away from direct sunlight and heat sources. This will help to maintain its texture and flavor for a longer period of time. By following these packaging and storage guidelines, you can ensure that your candy corn stays fresh and delicious for as long as possible.

Moving on to the next section about exposure to air and moisture, it’s important to take certain precautions to maintain the freshness of candy corn without compromising its taste.

Exposure to Air and Moisture

To maintain the delectable taste and freshness of candy corn, it’s crucial to keep it shielded from air and moisture. Exposure to air and moisture can cause candy corn to become stale and lose its original flavor.

When candy corn is exposed to air, the moisture present in the candy begins to evaporate, leading to a dry and hard texture. Additionally, air contains oxygen which can react with the sugars in candy corn, causing it to oxidize and develop an off-flavor.

Moisture, on the other hand, can lead to the growth of mold and bacteria, making the candy unsafe to consume. To prevent staleness and maintain the quality of candy corn, it should be stored in airtight containers in a cool and dry place. This will help to preserve its taste and texture.

Advertisement

Recognizing signs of spoiled candy corn is important to ensure it is not consumed, which will be discussed in the subsequent section about identifying spoilage indicators.

Recognizing Signs of Spoiled Candy Corn

If you want to avoid a disappointing taste experience, you should keep an eye out for telltale signs of spoiled candy corn. Recognizing signs of spoiled candy corn is essential for safe consumption. Here are some key indicators to look for:

  • Mold: Check for any visible signs of mold on the candy corn. Mold can grow in moist environments and can make the candy corn unsafe to eat.

  • Off smell: Spoiled candy corn may have a foul odor. If the candy corn smells strange or unpleasant, it’s best to discard it.

  • Texture changes: Fresh candy corn has a soft and chewy texture. If the candy corn becomes hard, sticky, or has a powdery consistency, it may have gone bad.

  • Discoloration: Watch out for any changes in color. If the candy corn appears discolored or has dark spots, it could be a sign of spoilage.

  • Taste: Give the candy corn a small taste test. If it tastes off or has a rancid flavor, it’s best to spit it out and not consume any more.

By recognizing these signs of spoiled candy corn, you can ensure safe consumption of expired candy corn. It’s important to be cautious and aware of any potential risks when consuming expired food products.

Safe Consumption of Expired Candy Corn

When it comes to consuming expired candy corn, personal preference plays a significant role. Some individuals may not mind the change in texture or taste, while others may find it unpleasant. Additionally, the quality of expired candy corn can vary depending on factors such as storage conditions and the presence of moisture. Ultimately, it’s important to consider these factors and use your own judgment when deciding whether or not to consume expired candy corn.

Personal Preference

While personal preference may vary, it’s fascinating to note that 53% of people actually enjoy candy corn. As for me, I must confess that I’m part of that 53%.

Advertisement

There’s something about the sweet and creamy texture of candy corn that just appeals to my taste buds. And I’m not alone in this, as many others also have candy corn as one of their favorite candy flavors.

It’s interesting to see how different individuals have different tastes when it comes to candies.

Moving on to the next section about quality and taste, it’s important to consider how the personal preference for candy corn relates to its overall quality and taste.

Quality and Taste

You’ll be delighted to discover the delightful combination of flavors and the impeccable taste of high-quality candy corn. The taste of candy corn can vary depending on personal preferences, but overall, it offers a unique and satisfying flavor experience.

The quality of candy corn plays a significant role in its taste. High-quality candy corn is made with premium ingredients, resulting in a rich and creamy texture that melts in your mouth. Additionally, the flavors are carefully balanced to create a perfect blend of sweetness and a hint of vanilla.

Advertisement

When it comes to extending the freshness of candy corn, proper storage is crucial. In the next section, we will explore some useful tips to ensure your candy corn lasts as long as possible.

Proper Storage Tips for Extending Candy Corn’s Lifespan

When it comes to extending the lifespan of candy corn, proper storage is key. One important tip is to store the candy corn in airtight containers, which helps to prevent moisture from seeping in and causing the candy to become stale.

Additionally, it’s crucial to keep the candy corn in a cool and dry environment, as excessive heat and humidity can accelerate the deterioration process.

By following these storage tips, you can ensure that your candy corn remains fresh and delicious for a longer period of time.

Airtight Containers

Stored in airtight containers, candy corn can stay fresh for a significantly longer period of time. Proper organization is key when it comes to preserving the quality and taste of candy corn. Using suitable containers ensures that the candy is protected from external factors that could lead to spoilage.

Advertisement

Airtight containers create a barrier against moisture, air, and other contaminants that can cause candy corn to become stale or lose its flavor. These containers prevent the absorption of odors from the surrounding environment, maintaining the candy’s original taste. Additionally, airtight containers help to prevent the candy from becoming sticky or clumped together.

This method of storage is particularly effective when combined with keeping the candy corn in a cool and dry environment. By maintaining these optimal conditions, the candy corn can stay fresh and delicious, ready to be enjoyed for an extended period of time.

Cool and Dry Environment

To maintain the freshness and flavor of candy corn, it’s crucial to store it in a cool and dry environment. Studies have shown that ideal conditions can extend its shelf life by up to 50%. Here are the best storage methods to keep your candy corn fresh for longer:

  1. Temperature Control: Store candy corn in a cool place, ideally between 60-70°F (15-21°C). Heat can cause the sugars to melt and affect the texture.

  2. Humidity Control: Keep candy corn away from moisture and humidity. This can lead to clumping and loss of flavor.

  3. Airtight Containers: Store candy corn in airtight containers to prevent exposure to air, which can cause staleness.

  4. Avoid Light Exposure: Keep candy corn away from direct sunlight or artificial light sources. Light can accelerate the degradation of flavors.

By following these guidelines, you can extend the freshness of your candy corn and enjoy its delightful taste for a longer period.

Now, let’s discuss creative ways to use leftover candy corn without wasting a single piece.

Advertisement

Creative Ways to Use Leftover Candy Corn

One fun idea for using up leftover candy corn is to incorporate it into a delicious homemade trail mix. Candy corn can add a sweet burst of flavor and a pop of color to your trail mix, making it a tasty treat for any occasion.

To create your candy corn trail mix, start by gathering your favorite nuts, seeds, and dried fruits. Mix them together in a bowl and then add a handful of candy corn. The candy corn will provide a delightful crunch and a hint of sweetness to balance out the other ingredients.

You can also experiment with different combinations by adding chocolate chips, pretzels, or even popcorn for an extra twist. Once your trail mix is complete, store it in an airtight container to keep it fresh. It’s a great snack to have on hand for hikes, road trips, or simply as a delicious treat to enjoy at home.

Now, let’s explore some alternatives to candy corn that you can try in your next trail mix creation.

Alternatives to Candy Corn

After exploring some creative ways to use leftover candy corn, it’s time to consider alternatives to this popular Halloween treat. While candy corn is a classic favorite, there are other options that can provide a delicious and unique twist to your holiday celebrations.

Advertisement

Here are four alternative treats that you might want to consider:

  • Gummy Worms: These squiggly, fruity candies can add a fun and creepy element to your Halloween festivities.

  • Chocolate-covered Pretzels: The combination of sweet and salty flavors in these treats is sure to satisfy any sweet tooth.

  • Caramel Apples: This traditional fall treat is a perfect alternative to candy corn. The juicy apple paired with the rich caramel creates a delectable combination.

  • Pumpkin Spice Popcorn: Elevate your popcorn game by adding pumpkin spice flavoring. It’s a tasty and festive alternative that will surely impress your guests.

When it comes to finding alternatives to candy corn, the possibilities are endless. Whether you opt for gummy worms, chocolate-covered pretzels, caramel apples, or pumpkin spice popcorn, you can still enjoy the sweetness of Halloween.

Now, let’s delve into the fascinating history and tradition of candy corn.

The History and Tradition of Candy Corn

The history and tradition of candy corn dates back to the late 1800s when it was originally called ‘chicken feed’ and was sold in boxes with a rooster on the front. This iconic Halloween treat has a rich and fascinating history, as well as a deep cultural significance. To truly appreciate the legacy of candy corn, let’s take a closer look at its origins and evolution through a captivating table:

Year Event Cultural Significance
1880 Creation of candy corn by George Renninger A new and unique candy
1898 Candy corn production by the Wunderle Candy Company A growing demand for sugary treats
1900 Goelitz Confectionery Company starts producing candy corn Candy corn becomes widely available
1950 Brach’s Candy Company becomes the largest producer of candy corn A Halloween staple is born

The history of candy corn reveals its enduring popularity and cultural significance as a symbol of Halloween. Its vibrant colors and distinctive shape have become synonymous with the holiday. Candy corn has also become an integral part of fall festivals and harvest celebrations, evoking a sense of nostalgia and tradition. Understanding the history and cultural significance of candy corn allows us to appreciate its enduring appeal.

Advertisement

Now, let’s explore how to dispose of expired candy corn without compromising the environment or our health.

How to Dispose of Expired Candy Corn

If you find yourself with a surplus of expired candy corn, here’s how to safely get rid of it without harming the environment or your health. Safe disposal of candy corn is important to prevent any negative impact on the ecosystem.

One eco-friendly option is to compost the expired candy corn. Candy corn is made from sugar, corn syrup, and other natural ingredients that can break down in a compost pile. However, it’s crucial to remove any packaging or wrappers before adding it to the compost.

Another option is to donate the expired candy corn to local farms as a treat for animals. Some animals, like pigs and chickens, can enjoy the sweet treat in moderation.

Additionally, you can consider repurposing the candy corn for arts and crafts. It can be used to create colorful decorations or even melted down to make homemade candles.

Advertisement

By utilizing these safe disposal methods, you can ensure that your expired candy corn has a second life while minimizing waste. Transitioning to the subsequent section about the "final thoughts on candy corn’s shelf life," it’s important to understand the potential risks of consuming expired candy corn.

Final Thoughts on Candy Corn’s Shelf Life

Now that we know how to properly dispose of expired candy corn, let’s discuss the final thoughts on candy corn’s shelf life.

As an avid candy corn lover, I understand the importance of knowing how long this sugary treat can last before it becomes unsafe for consumption.

When it comes to candy corn, it’s crucial to recognize the signs of spoilage to ensure safe consumption. One of the first indicators of candy corn going bad is a change in texture. If the candy corn becomes sticky or hard, it’s a clear indication that it has surpassed its prime. Additionally, if you notice any unusual odors or flavors, it’s best to err on the side of caution and discard the candy corn.

To further understand the shelf life of candy corn, here are three key points to keep in mind:

Advertisement
  1. Storage conditions: Properly storing candy corn in a cool and dry place can extend its shelf life.

  2. Package integrity: Check the packaging for any signs of damage or tampering, as this can affect the candy corn’s freshness.

  3. Best by date: While candy corn can still be consumed after the best by date, it’s important to monitor its quality closely.

By being knowledgeable about the signs of spoilage and following these guidelines, you can enjoy your candy corn safely and deliciously.

Frequently Asked Questions

Can candy corn be stored in the refrigerator to extend its freshness?

Does refrigerating candy corn really help preserve its freshness? The answer might surprise you.

While it’s true that storing candy corn in the refrigerator can extend its shelf life, it’s not necessarily the best option. The cold temperature can cause the candy corn to become hard and lose its original texture.

Instead, it’s recommended to store candy corn in an airtight container at room temperature to maintain its freshness and enjoy it at its best.

Can expired candy corn make you sick?

Expired candy corn can indeed pose safety concerns. As candy corn ages, it can become stale and lose its texture and flavor. However, consuming expired candy corn is unlikely to make you sick, as it doesn’t contain any ingredients that are known to cause foodborne illnesses. Nevertheless, it’s always important to check for any signs of mold or unusual odors before consuming expired candy corn, as these could indicate bacterial contamination.

Advertisement

What are some fun recipes or crafts that can be made with leftover candy corn?

There are several fun crafts and creative recipes that can be made with leftover candy corn. For crafts, you can create colorful and festive wreaths, garlands, or even mosaic art by gluing candy corn onto a surface.

As for recipes, you can make candy corn popcorn, candy corn bark, or candy corn cookies. These delicious treats and engaging crafts are sure to make good use of your leftover candy corn and provide plenty of entertainment for everyone involved.

Are there any other similar candies with a longer shelf life than candy corn?

When it comes to long-lasting candies, alternatives to candy corn do exist. Let me introduce you to the stalwart of confectionery endurance: the everlasting gobstopper. This marvel of candy engineering is designed to last for an impressively long time, ensuring a satisfying and enduring sweet experience.

With its multiple layers and slow dissolving nature, the gobstopper outshines candy corn in terms of shelf life. So, if you’re looking for a candy that can go the distance, consider the everlasting gobstopper as your tasty alternative.

How long has candy corn been a popular Halloween treat?

Candy corn has been a popular Halloween treat for over a century. Its history dates back to the late 1800s when it was first created by the Wunderle Candy Company.

Advertisement

Since then, candy corn has become a beloved symbol of Halloween. It is often associated with traditional Halloween traditions such as trick-or-treating and decorating homes with festive colors.

The longevity of candy corn’s popularity can be attributed to its unique shape, sweet taste, and nostalgic charm.

Conclusion

In conclusion, knowing the shelf life of candy corn is essential for anyone who enjoys indulging in this sweet treat. Just like a ticking time bomb, candy corn has a limited lifespan before it loses its freshness and flavor. By understanding the factors that affect its quality and recognizing signs of spoilage, and practicing safe consumption, you can ensure that every bite of candy corn is a delightful experience.

Remember to store it properly and consider alternative treats if your candy corn has expired. Enjoy your candy corn responsibly and savor the tradition and history behind this iconic Halloween treat.

Advertisement

Continue Reading

Beginners Guides

Why Does My Candle Smell Burnt

Published

on

By

An image capturing the essence of a charred wick emerging from a partially melted, discolored candle

Have you ever excitedly lit a candle, expecting a comforting scent to envelop your room, only to find yourself greeted by an unpleasant, burnt odor instead? It feels like a wave of letdown drifting in the air. However, worry not, as I’ve come to illuminate this baffling situation for you.

In this article, we will delve into the various factors that can contribute to a candle smelling burnt. From the quality and burn time to the placement and container material, we will leave no stone unturned. We will also explore the ingredients used in scented candles and how they can affect the fragrance. Proper candle extinguishing techniques and burning time will also be addressed. Furthermore, we will touch upon candle quality testing and the possibility of manufacturing defects.

So, if you’re tired of your candles smelling less than pleasant, join me on this journey of uncovering the mysteries behind that burnt scent.

Key Takeaways

  • Factors such as fragrance and type of wax can contribute to a burnt smell in candles.
  • Proper wick trimming and allowing the candle to burn long enough can prevent excess soot and smoke.
  • Placing the candle away from drafts and flammable objects helps maintain an even burn and prevents a burnt smell.
  • Proper storage in a cool, dry place away from sunlight and strong odors helps maintain the fragrance of the candle.

Quality of the Candle

You’re probably wondering why on earth your candle smells so burnt, huh? Well, let’s start by talking about the quality of the candle.

One possible reason for the burnt smell is the candle fragrance itself. Some fragrances, especially those with notes of musk or wood, can give off a smoky scent when burned. This doesn’t necessarily mean that the candle is low quality, but rather that the fragrance itself is designed to have a stronger, more intense aroma.

Another factor that can contribute to a burnt smell is the type of candle wax used. Different waxes have different burn properties, and some may produce a stronger scent when burned. For example, paraffin wax, which is commonly used in candles, can release a slightly burnt odor when it’s not properly mixed with fragrance oils.

Advertisement

Now, let’s move on to the next section about burn time and candle care. Understanding the burn time of your candle and taking proper care of it can significantly affect its overall scent and performance.

Burn Time and Candle Care

When it comes to burn time and candle care, there are two key points to keep in mind. First, it’s important to trim the wick regularly to ensure a clean and even burn. By trimming the wick to about 1/4 inch before each use, you can prevent the candle from producing excess soot and smoke.

Secondly, allowing the candle to burn long enough is crucial for optimal performance. It’s recommended to burn the candle for at least one hour for every inch in diameter to ensure a full melt pool, which will help prevent tunneling and ensure an even burn throughout the life of the candle.

Trim the Wick Regularly

Regularly trimming the wick of your candle is like giving it a stylish haircut, ensuring a clean burn and preventing that unpleasant burnt smell. Wick maintenance is crucial for both the longevity of your candle and the quality of its fragrance. When the wick is too long, it can create a larger flame that burns too hot and causes the wax to melt unevenly, resulting in that undesirable burnt scent. By trimming the wick to about 1/4 inch before each use, you allow for a controlled and steady burn, maximizing the lifespan of your candle and enhancing the release of its delightful aroma. It’s important to remember that a well-maintained wick not only improves the overall candle experience but also promotes a safer environment. Now that we’ve covered wick maintenance, let’s move on to the next step: allowing the candle to burn long enough.

Allow the Candle to Burn Long Enough

To fully experience the aromatic dance of scents, let the candle burn long enough to create a warm and inviting atmosphere. This allows the fragrance to disperse and fill the room, enhancing the overall ambiance. Here are some tips to ensure you achieve the desired results:

Advertisement
  1. Extinguishing techniques: Avoid blowing out the candle as it can cause the wick to smolder and emit a burnt smell. Instead, use a candle snuffer or gently dip the wick into the melted wax to extinguish it.

  2. Wick length: Trim the wick to about 1/4 inch before lighting the candle. A longer wick can create a larger flame, leading to excessive heat and a burnt scent.

  3. Avoid drafts: Place the candle away from windows, fans, or open doors to prevent the flame from flickering and producing a burnt smell.

  4. Burn time: Allow the candle to burn for at least one hour per inch of its diameter. This ensures that the wax melts evenly and prevents tunneling.

By following these tips for extinguishing techniques and maintaining the right wick length, you can enjoy a beautifully scented candle without any burnt odors. Now, let’s move on to the next section about candle placement to enhance your candle experience further.

Candle Placement

Place your candle in a well-ventilated area to prevent it from emitting a burnt smell. When it comes to candle safety and choosing the right candle, proper placement is crucial.

Placing your candle in a well-ventilated area allows for proper air circulation, which helps prevent the accumulation of soot and reduces the chances of a burnt smell. This is especially important for candles made from materials like paraffin, which can release more soot when burned.

Additionally, the placement of your candle can affect its burn time and fragrance throw. Placing it away from drafts and flammable objects ensures an even burn and reduces the risk of accidents. Avoid placing candles near curtains, papers, or any other flammable materials. This not only prevents the potential for fire hazards but also helps maintain the quality of the candle’s scent.

Now, let’s move on to the next important aspect of candle maintenance – the container material.

Advertisement

Container Material

When choosing a candle, opt for containers made of glass or ceramic, as they’re not only aesthetically pleasing but also provide a safe and durable option for your candle. Glass containers are particularly popular due to their transparency, allowing you to fully enjoy the beauty of the candle flame. Additionally, glass is non-porous, meaning it won’t absorb any of the candle’s scent or color. This ensures that the fragrance remains true and the color stays vibrant throughout the burning process.

On the other hand, metal containers can also be used for candles, but they have some drawbacks. While metal containers can give a sleek and modern look to your candle, they can become extremely hot during burning, posing a potential fire hazard. Furthermore, metal is a conductive material, which means it can transfer heat quickly, leading to uneven burning and potentially causing the candle to smell burnt.

With this in mind, it’s best to choose a candle with a glass container to ensure both safety and optimal fragrance. Speaking of fragrance, let’s delve into the next section and explore the importance of scented candle ingredients.

Scented Candle Ingredients

Get ready to discover the secret behind what makes scented candles so captivating and alluring. The fragrance of a scented candle is created by combining various ingredients. These ingredients typically include fragrance oils, essential oils, and sometimes natural extracts.

Fragrance oils are synthetic oils that are specifically designed to create a particular scent. Essential oils, on the other hand, are derived from natural sources such as plants and flowers. These oils not only provide a pleasant aroma but also have therapeutic benefits.

Advertisement

It is important to note that not all scented candles are created equal, and some may use low-quality or even harmful ingredients. To ensure candle safety, it is essential to choose candles made with high-quality fragrance oils and essential oils. Additionally, it’s always a good idea to follow the manufacturer’s instructions for burning the candle safely.

With the knowledge of candle fragrance and candle safety, let’s now delve into the next section about candle storage, where we will explore how to properly store scented candles to maintain their aroma and quality.

Candle Storage

Make sure you keep your scented candles stored properly if you want to preserve their captivating aroma and quality for years to come. Proper candle storage is essential to maintain the fragrance and longevity of your candles. Here are some important tips to follow:

  • Store your scented candles in a cool, dry place away from direct sunlight. Heat can cause the candle wax to melt, altering the fragrance and consistency.

  • Avoid storing your candles near strong odors or chemicals. They can absorb these smells, affecting the intended fragrance when burned.

  • Keep your candles upright to prevent the wax from shifting or melting unevenly. This will ensure a clean and even burn each time you light them.

  • Consider using airtight containers or sealable bags to protect your candles from dust and moisture, which can degrade the quality of the fragrance.

By following these storage guidelines, you can prolong the life of your scented candles and enjoy their delightful fragrance for a long time.

Now, let’s move on to the next section about proper candle extinguishing, to ensure you get the most out of your candle experience.

Advertisement

Proper Candle Extinguishing

To fully savor the experience of your scented candles, it’s important to know the proper way to extinguish them. Candle safety should always be a top priority to prevent any accidents. Here’s a step-by-step guide on how to safely extinguish your candles:

Step Procedure
1 Use a candle snuffer or a metal spoon to gently push the wick into the melted wax. This helps to prevent smoke and soot.
2 Avoid blowing out the candle, as it can cause hot wax to splatter. Instead, suffocate the flame by placing a heat-resistant lid or a plate over the candle jar.
3 Wait for the candle to cool down completely before touching it or moving it. This prevents burns and ensures safety.
4 Always double-check that the candle is completely extinguished before leaving the room or going to bed. Safety should never be compromised.

By following these guidelines, you can enjoy your scented candles without any worries. Now, let’s move on to the next section about candle burning time and how it can affect the scent and overall experience.

Candle Burning Time

Candle burning time can greatly impact the longevity of the fragrance and overall enjoyment of the experience. The duration for which a candle burns depends on various factors, including the size of the candle, the type of wax used, and the environment in which it is burned.

Here are some key points to consider:

  1. Candle scent preferences: Different people have different scent preferences, and the burning time of a candle can affect how long the scent lingers in the air. Some individuals may prefer a stronger fragrance that lasts for a shorter period, while others may enjoy a milder scent that lingers for a longer time.

  2. Environmental impact of candle burning: It is important to be mindful of the environmental impact of burning candles. Some candles are made from natural waxes, such as soy or beeswax, which are more eco-friendly options compared to candles made from paraffin wax. Additionally, using candles with lead-free wicks and avoiding candles with excessive fragrance can also minimize the environmental impact.

Considering these factors when choosing a candle and determining its burning time can help enhance the overall candle burning experience.

Advertisement

In the next section about candle quality testing, we will explore how to ensure that the candles we choose are of the highest quality.

Candle Quality Testing

When evaluating the quality of a candle, one can discern its excellence through various tests. One important aspect to consider is the fragrance of the candle. Candle fragrance testing is a crucial step in determining the quality of a candle. This test involves burning the candle and evaluating the strength and quality of its scent.

A high-quality candle should have a pleasant and consistent fragrance that fills the room without being overpowering.

In addition to fragrance testing, candle safety measures should also be taken into account. A well-made candle should be designed with safety in mind. This includes using high-quality materials that are less likely to cause accidents such as cracking or exploding. The candle should also have proper wick placement and should burn evenly without producing excessive smoke or soot.

By conducting these tests, one can ensure that the candle meets the necessary quality standards. However, it’s important to note that even with these tests, there may still be possible manufacturing defects that can affect the overall quality of the candle. These defects can include issues with the wax, wick, or fragrance, and may result in a burnt smell or other undesirable characteristics.

Advertisement

Possible Manufacturing Defects

After discussing candle quality testing, let’s move on to the current subtopic: possible manufacturing defects that could cause your candle to smell burnt.

When a candle smells burnt, it can be an indication of potential issues during the manufacturing process.

One possible manufacturing defect that could lead to a burnt smell is overheating. If the candle wax is heated at too high of a temperature or for too long, it can result in a burnt scent. This can happen if the manufacturer doesn’t have proper temperature control during the melting and pouring process.

Another potential issue is improper scent distribution. If the fragrance oil isn’t evenly mixed with the melted wax, certain areas of the candle may have a higher concentration of scent. When these areas burn, they can release an overpowering or burnt smell. This can occur if the manufacturer doesn’t thoroughly blend the fragrance oil with the wax or if there are inconsistencies in the pouring process.

Possible manufacturing defects such as overheating and improper scent distribution can contribute to a burnt smell in candles. It’s important for manufacturers to maintain proper temperature control and ensure even distribution of fragrance oil to prevent these issues.

Advertisement

Frequently Asked Questions

How can I determine the quality of a candle before purchasing it?

When it comes to determining the quality of a candle before purchasing it, there are a few key factors to consider.

Firstly, pay attention to the candle fragrance. A high-quality candle should have a pleasant and natural scent that isn’t overpowering or artificial.

Additionally, inspect the candle wick. It should be centered and made of quality materials, ensuring a clean and even burn.

These indicators can help you choose a candle that’ll provide a satisfying and long-lasting fragrance experience.

What is the recommended burn time for a candle?

When it comes to the burn time of a candle, it’s important to follow the manufacturer’s recommendations. Burning a candle for too long can lead to a compromised fragrance and a burnt smell.

Advertisement

Just like overcooking a dish can alter its taste, leaving a candle burning for an extended period can affect the quality of its fragrance.

To ensure optimal scent and longevity, always adhere to the suggested burn time for your candle.

Can I place a candle near flammable objects?

Candle safety precautions are essential when it comes to placement. It’s important to keep candles away from flammable objects such as curtains, paper, or furniture. This reduces the risk of accidental fires.

Additionally, understanding why candles produce black soot is crucial. Candles can produce soot when the wick is too long or when there’s a draft. Proper trimming and placing the candle in an area without drafts can minimize soot production and help prevent a burnt smell.

What are the different types of materials used for candle containers?

There are various materials used for candle containers, each with its own unique qualities. Copper candleholders can add a touch of elegance and warmth to your space. They’re durable and can withstand high temperatures, making them perfect for holding candles.

Advertisement

Glass candle jars, on the other hand, provide a sleek and modern look. They’re transparent, allowing the beautiful glow of the candle to shine through.

Both options offer a safe and stylish way to display your candles.

Are there any harmful ingredients commonly found in scented candles?

Scented candles often contain harmful ingredients that can have negative effects on our health. Some common harmful ingredients found in scented candles include paraffin wax, lead wicks, and synthetic fragrances.

Paraffin wax releases toxic chemicals when burned, lead wicks release lead into the air, and synthetic fragrances can cause respiratory issues and allergies.

These harmful effects and health concerns highlight the importance of choosing natural and non-toxic candles to ensure a safer and healthier environment.

Advertisement

Conclusion

In conclusion, when it comes to a candle that smells burnt, it’s important to consider various factors. From the quality and care of the candle to its placement and container material, each element can impact the scent and overall experience.

Additionally, understanding the ingredients used in scented candles and proper extinguishing techniques is vital. By taking these factors into account and conducting quality testing, you can identify any possible manufacturing defects.

So, the next time you light a candle, remember to create a fragrant oasis rather than a burnt aroma.

Continue Reading

Trending