Hello! Have you ever desired the warm glow of a candle but been concerned about the risks of an open flame? You’re in for a treat! In this tutorial, we will demonstrate how to create your own candle warmer. This clever gadget will gently warm up your preferred scented candles, diffusing their delightful aroma all around your area.
It’s like time-traveling back to the days of yore when candlelight ruled the world! With just a few supplies and some easy steps, you’ll be able to create your very own candle warmer.
So, let’s get started and bring that warm, inviting glow into your home without any fuss or worries. Shall we?
Key Takeaways
- The materials and supplies needed for a candle warmer include a heat-resistant container, alternative heat source, candle specifically designed for candle warmers, safety measures, and additional options for supplies.
- The preparation of the base and heating element involves choosing suitable materials, assembling the base, positioning and securing the heating element, and considering alternative heating methods.
- The usage and enjoyment of the candle warmer include placing the candle in the holder or on the heating element, lighting the candle or turning on the electric warmer, monitoring the candle warmer, and enjoying the cozy ambiance and fragrance.
- Safety precautions for candle warmer usage include ensuring the safety and stability of the candle warmer, following best practices, placing it on a stable and heat-resistant surface, keeping away from flammable materials, and never leaving it unattended.

VEVOR 20Lbs Wax Melter for Candle Making, 10 L Extra Large Electric Wax Melting Pot, with Easy Pour Spout and 9-Level Temp Control, Easy Clean for Candle Soap Cream Beauty Bulk Production Business
Quick Heating: This wax melting pot with easy pour spout can quickly heat and melt wax with 1100W...
As an affiliate, we earn on qualifying purchases.
Materials Needed
To make a candle warmer, we’ll need three main materials.

The first material we need is a heat-resistant container. This can be a ceramic dish or a glass jar that can withstand high temperatures.
The second material is an alternative heat source. Instead of using an open flame, which can be dangerous, we can use a tea light or an electric warmer. These options provide a safer way to warm the candle without the risk of fire.
Lastly, we’ll need a candle. It’s important to choose a candle that’s specifically designed for candle warmers. This ensures that the wax will melt evenly and release the fragrance effectively.
When working with these materials, it’s crucial to follow safety measures such as keeping flammable objects away and never leaving the candle warmer unattended.

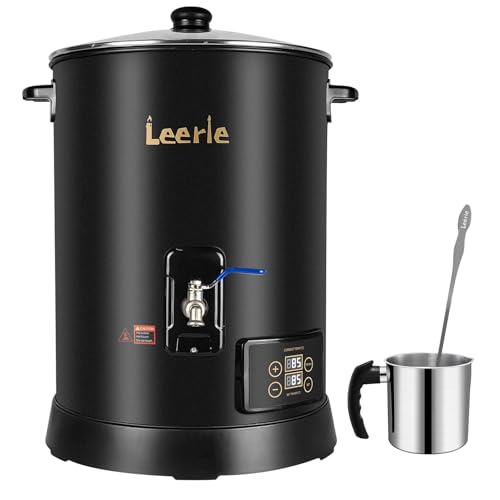
Leerie 30Lbs Digital Commercial Wax Melter for Candle Making - D15 Large Candle Wax Melting Pot with Accurate Temperature Control & Holds 30Lbs Melted Wax for Candle Making Business
✔ MELT MORE, SELL MORE—30LBS AT ONCE : Scale up without slowing down. Designed for professional makers, the...
As an affiliate, we earn on qualifying purchases.
Step 1: Gather the Supplies
When it comes to making a candle warmer, gathering the right supplies is crucial for a successful project. We’ll discuss the essential supplies needed, such as a ceramic plate or electric candle warmer, to safely heat your candle.
Additionally, we’ll explore alternative supply options that you can use if you don’t have access to the traditional materials, ensuring that you can still enjoy the cozy ambiance of a warm candle.
Essential Supplies Needed
We will gather the essential supplies needed to make a candle warmer. When it comes to alternative heating methods, a candle warmer is a creative and practical choice.
To get started, you’ll need a few key supplies. First, you’ll need a ceramic dish or a small metal container. This will serve as the base for your candle warmer.
Next, you’ll need a tea light candle or a small jar candle. The candle will provide the heat necessary to warm your chosen dish.
Additionally, you’ll need a glass jar or a decorative holder to place your candle in. This will add a touch of style to your candle warmer.
Finally, you may want to consider using a metal stand or a decorative plate to elevate your candle warmer and enhance its overall design.
With these supplies in hand, you’re ready to move on to the next step in making your own candle warmer.
Alternative Supply Options
Our preferred choice of supplies for making a candle warmer includes a ceramic dish or small metal container for the base, a tea light candle or small jar candle for heat, a glass jar or decorative holder for the candle, and a metal stand or decorative plate for added elevation and design. However, if you’re looking for alternative suppliers or cost-effective options, there are several alternatives you can consider. For the base, you can use a heat-resistant glass dish or even a small clay pot. Instead of a tea light candle, you can opt for a beeswax or soy wax candle, which are more environmentally friendly and longer-lasting. As for the candle holder, you can find inexpensive options at thrift stores or repurpose old glass jars. Finally, for the stand or decorative plate, you can use a stack of small books or a wooden cutting board. Being resourceful and thinking outside the box can help you create a beautiful and functional candle warmer without breaking the bank.
| Base Alternatives | Heat Alternatives | Holder Alternatives |
|---|---|---|
| Heat-resistant glass dish | Beeswax or soy wax candle | Thrift store finds |
| Small clay pot | Repurposed glass jars | |

TOAUTO 30Lbs Commercial Wax Melter for Candle Making Large Electric Wax Melting Pot for Candle Making Business with Temperature Control & Quick Pour Spout
Fast Melt 60 Candles for You: Achieving a rush order for a bulk order was made easy. TOAUTO...
As an affiliate, we earn on qualifying purchases.
Step 2: Prepare the Base
When it comes to preparing the base for a candle warmer, there are several key points to consider.
First, choosing suitable materials is crucial to ensure the stability and longevity of the warmer.
Second, mastering base assembly techniques will help create a sturdy and functional product.

Lastly, it’s essential to prioritize safety precautions and follow tips to prevent any accidents or mishaps.
Choosing Suitable Materials
To start preparing the base for your candle warmer, gather all the necessary materials.
When it comes to choosing suitable materials, there are a few options to consider. If you’re looking for alternative material options that are also cost-effective, you might consider using materials such as ceramic, glass, or even metal.
Ceramic is a popular choice for candle warmers as it’s a good conductor of heat and can withstand high temperatures.

Glass is another great option as it not only looks elegant but also allows the warm glow of the candle to shine through.
Metal, such as stainless steel or aluminum, is durable and can provide a modern and sleek look to your candle warmer.
Consider your preferences, budget, and overall aesthetic when choosing the materials for your candle warmer base.
Base Assembly Techniques
We will now discuss the techniques for assembling the base of the candle warmer. The base construction is a crucial step in creating a sturdy and functional candle warmer. Follow these steps to ensure a successful base assembly:

- Choose a durable material for the base, such as wood or metal. This will provide stability and support for the candle warmer.
- Measure and cut the base material to the desired size and shape. It should be large enough to accommodate the heating element and the candle jar.
- Carefully position and secure the heating element onto the base. Make sure it’s centered and securely attached to prevent any accidents or damage.
By following these base assembly techniques, you’ll create a solid foundation for your candle warmer.
Now, let’s move on to the next section where we’ll discuss important safety precautions and tips to keep in mind during the candle warmer assembly process.
Safety Precautions and Tips
Our first priority in preparing the base for the candle warmer is ensuring its safety and stability. When it comes to candle warmer alternatives, safety is of the utmost importance.
To ensure a safe and enjoyable experience, it’s essential to follow the best practices for candle warmer usage. One important tip is to always place the candle warmer on a stable and heat-resistant surface. This will prevent any accidents or fire hazards. Additionally, it’s crucial to keep the candle warmer away from any flammable materials or objects.
Another safety precaution is to never leave the candle warmer unattended while it’s in use. Always remember to extinguish the candle before leaving the room or going to sleep.

Leerie 20Lbs Commercial Wax Melter for Candle Making, L10 Extra Large Electric Wax Melting Pot Kit for Candle Making Business with Heating Core Brass Spout & Temp Control & Heat Resistant Handle
✔MAXIMIZE YOUR PRODUCTIVITY - With the Leerie L10 Wax Melter generous 10qts/20 lbs capacity(10L Inner), you can produce...
As an affiliate, we earn on qualifying purchases.
Step 3: Attach the Heating Element
After thoroughly preparing the candle warmer, we carefully and securely attach the heating element. The heating element is a crucial component of the candle warmer, as it’s responsible for generating heat and melting the wax. There are various alternatives to consider when choosing a heating element, such as a hot plate, a light bulb, or even a low-temperature electric coil.
However, it’s important to prioritize safety when selecting and installing the heating element. Here are three safety precautions to keep in mind:
- Choose a heating element that’s specifically designed for candle warmers to ensure compatibility and prevent any potential hazards.
- Follow the manufacturer’s instructions carefully when installing the heating element to ensure proper installation and avoid any electrical risks.
- Regularly inspect the heating element for any signs of damage or wear and tear, and promptly replace it if necessary to maintain optimal safety and functionality.
Step 4: Create the Candle Holder
To create the candle holder, gather the necessary materials and follow these simple steps. The candle holder design should be sturdy and able to withstand the heat from the candle warmer. You will need a few basic materials to create a functional and attractive candle holder. Here are the materials you will need:
| Materials |
|---|
| Glass jar |
| Metal wire |
| Pliers |
| Decorative elements |
| Adhesive |
First, choose a glass jar that is suitable for holding a candle. It should be heat-resistant and have a wide enough opening to accommodate the candle. Next, use the metal wire and pliers to create a secure holder for the jar. You can bend the wire into a circular shape and attach it to a base for stability. Decorate the candle holder with your desired decorative elements, such as ribbons or beads. Finally, use adhesive to secure the jar to the wire holder. Now you have a beautiful candle holder ready to be used with your candle warmer.
Step 5: Connect the Heating Element
Now that we’ve successfully created the candle holder, it’s time to move on to the crucial step of connecting the heating element.
This step requires careful attention to ensure proper installation, wiring connections, and safety precautions.
Heating Element Installation Tips
We connect the heating element by securely attaching the wires to the power source. This step is crucial to ensure the proper functioning and safety of the candle warmer. Here are some tips to help you with the heating element installation:
- Double-check the connections: Before powering up the candle warmer, make sure that the wires are correctly connected to the heating element and the power source. Loose or faulty connections can lead to heating element malfunctions and potential hazards.
- Insulate the connections: To prevent any accidental shocks or short circuits, it’s essential to insulate the connections properly. Use electrical tape or heat shrink tubing to cover the exposed wires and ensure they’re securely sealed.
- Test for functionality: After connecting the heating element, perform a quick functionality test. Turn on the power and observe if the element heats up evenly. If there are any issues, such as uneven heating or no heat at all, refer to the heating element troubleshooting section for further guidance.
Remember to follow all heating element safety precautions throughout the installation process to ensure a safe and effective candle warmer.
Wiring Connections and Safety
After securely attaching the wires to the power source, we can proceed to connect the heating element, ensuring proper wiring connections and safety. When it comes to wiring techniques, it’s crucial to follow the manufacturer’s instructions carefully.
Start by identifying the positive and negative terminals on the heating element. Strip the wire ends and twist them securely around the corresponding terminals. To ensure a tight connection, you can use wire connectors or solder the connections. It’s essential to double-check that there are no loose wires or exposed connections.
Additionally, always make sure you’re working with the power turned off and use insulated tools to prevent electrical accidents. By following these electrical safety practices, you can minimize the risk of electrical shocks or fires.
With the heating element connected, we can now move on to the next step: testing the candle warmer to ensure its functionality and safety.
Step 6: Test the Candle Warmer
To ensure the functionality of the candle warmer, it’s essential to test it using a thermometer. Testing the candle warmer allows us to verify if it’s operating at the desired temperature and if the temperature control mechanism is working effectively.
Here are three testing methods you can use to ensure your candle warmer is working as intended:
- Temperature measurement: Use a thermometer to measure the temperature of the candle warmer. Place the thermometer in close proximity to the candle and monitor the temperature over time to ensure it reaches and maintains the desired temperature range.
- Heat distribution test: Place multiple candles on the warmer and observe how evenly the heat is distributed. A well-functioning candle warmer should evenly heat the candles, ensuring consistent fragrance release.
- Timer functionality test: If your candle warmer has a built-in timer, test its functionality by setting different time intervals and observing if the warmer shuts off automatically after the specified time.
Step 7: Make Any Necessary Adjustments
Now that we’ve tested our candle warmer, it’s time to address any necessary adjustments.

When it comes to making adjustments, there are a few options to consider.
Firstly, we can adjust the temperature settings to ensure the ideal level of heat for our candles.
Secondly, if we notice any issues such as uneven melting or poor scent throw, we can troubleshoot and make adjustments accordingly.
Adjustment Options for Warmer
Making any necessary adjustments to the candle warmer will ensure optimal performance. Here are three adjustment techniques that can help you achieve the desired temperature control:
- Thermostat calibration: Check the accuracy of the thermostat by using an external thermometer. If the temperature reading is off, adjust the thermostat accordingly to match the desired temperature.
- Heat level control: Some candle warmers come with adjustable heat settings. Experiment with different heat levels to find the one that works best for your specific candle type and fragrance intensity.
- Airflow adjustment: Proper airflow is crucial for efficient heat distribution. If you notice uneven heating or excessive heat buildup, try adjusting the airflow vents or fan speed to achieve a more balanced and controlled heat distribution.
Troubleshooting Common Warmer Issues
We address any necessary adjustments by fine-tuning the temperature control and airflow of the candle warmer.
When troubleshooting common warmer issues, it’s essential to first check the heating element. If the warmer isn’t heating properly, it could be due to a malfunctioning heating element. This can be resolved by replacing the faulty element.
Another common issue is base assembly problems, which can cause the warmer to be unstable or not function correctly. In such cases, ensuring that all the components are securely assembled and tightened can solve the problem.
Additionally, adjusting the airflow by opening or closing the vents can help regulate the heat distribution. By making these adjustments, we can ensure that the candle warmer operates efficiently and provides optimal performance.

Now that we’ve addressed any necessary adjustments, let’s move on to step 8: decorating the candle warmer.
Step 8: Decorate the Candle Warmer
To add a personalized touch, we can decorate the candle warmer using various materials and techniques. Here are three creative candle warmer ideas to inspire your candle warmer design:
- Paint: Use acrylic paint to add color and patterns to the surface of your candle warmer. You can create intricate designs or simple abstract patterns to match your decor.
- Decoupage: Decorate your candle warmer by gluing decorative paper or fabric onto the surface using decoupage glue. This technique allows you to create a unique and custom look by choosing patterns and colors that reflect your personal style.
- Embellishments: Add embellishments such as beads, rhinestones, or charms to your candle warmer for a touch of glamour. You can glue them onto the surface or thread them onto a wire and wrap it around the warmer for a more intricate design.
Step 9: Safety Precautions
Taking safety precautions is essential when using a candle warmer to ensure a safe and enjoyable experience. Candle warmer safety tips should be followed to prevent accidents and ensure the longevity of your candle warmer.
First and foremost, always place the candle warmer on a heat-resistant surface and keep it away from flammable materials. Avoid leaving the candle warmer unattended and make sure to turn it off when not in use. It’s also important to keep the candle warmer out of reach of children and pets.
Regularly clean and maintain the candle warmer to prevent dust buildup and potential fire hazards. By following these precautions for using candle warmers, you can relax and enjoy the cozy ambiance without worry.
Now, let’s move on to step 10: using the candle warmer.
Step 10: Using the Candle Warmer
To use the candle warmer safely and effectively, it’s important to follow these simple steps:
- Place the candle warmer on a flat, heat-resistant surface. This will prevent any accidents or damage to your furniture.
- Insert the candle into the warmer, making sure it’s centered and secure. Avoid using candles with flammable decorations or materials.
- Turn on the candle warmer and adjust the temperature to your desired level. The gentle heat will gradually melt the wax, releasing the fragrance without the need for an open flame.
Using a candle warmer for other purposes can also bring several benefits. Not only does it eliminate the risk of fire hazards associated with traditional candles, but it also allows you to enjoy your favorite scents for longer periods of time.
Additionally, candle warmers can be used to repurpose old or partially burned candles, reducing waste and saving money.
Step 11: Maintenance and Cleaning Tips
After using the candle warmer, it’s important to properly maintain and clean it to ensure its longevity and optimal performance. Regular cleaning is essential to remove any wax residue or buildup that may accumulate over time. To clean the candle warmer, start by unplugging it and allowing it to cool completely. Use a soft cloth or sponge to wipe away any excess wax. For stubborn residue, you can use a mild soap solution and gently scrub the surface. Avoid using abrasive cleaners or tools that may damage the warmer.
It’s also recommended to establish a maintenance schedule, such as cleaning the warmer after each use or at least once a week. By following these cleaning techniques and maintaining a regular maintenance schedule, you can ensure that your candle warmer lasts for a long time and continues to function optimally.
Now that we’ve covered maintenance and cleaning tips, let’s move on to the next section about troubleshooting common issues in step 12.
Step 12: Troubleshooting Common Issues
To troubleshoot any common issues that may arise with the candle warmer, we can carefully assess its functionality and address any potential problems. Here are some troubleshooting tips to help you resolve any common problems:
- Uneven Heating: If you notice that your candle warmer isn’t heating the candle evenly, try adjusting the placement of the candle on the warmer. Ensure that it’s centered and level for optimal heat distribution.
- No Heat Output: If your candle warmer isn’t producing any heat, check if the power cord is securely plugged in. If it is, try using a different outlet to rule out any electrical issues. If the problem persists, the heating element may need to be replaced.
- Excessive Smoke or Soot: If you experience excessive smoke or soot while using the candle warmer, ensure that you’re using the correct size and type of candle. Avoid using candles with a high fragrance concentration, as this can lead to increased smoke. Additionally, regularly clean the candle warmer to remove any built-up residue that can contribute to soot production.
Step 13: Conclusion and Final Thoughts
Now that we’ve addressed any common issues with the candle warmer, let’s wrap up our discussion with some final thoughts and conclusions.
When it comes to improvements for future candle warmer designs, there are a few ideas worth considering. Firstly, incorporating an adjustable temperature control feature would allow users to customize the heat level according to their preferences. This would enhance the overall user experience and make the candle warmer more versatile. Additionally, implementing a timer function would be beneficial, as it would automatically turn off the warmer after a certain period of time, ensuring safety and energy efficiency.
In terms of comparing homemade candle warmers to store-bought options, there are pros and cons to consider. Homemade candle warmers can be cost-effective and provide a sense of satisfaction from creating something with your own hands. On the other hand, store-bought options often come with advanced features, sleek designs, and warranty protection. It ultimately depends on individual preferences and priorities.
Frequently Asked Questions
How Long Does It Take for the Candle Warmer to Heat Up?
It takes a few minutes for the candle warmer to heat up. The efficiency of the warmer affects the optimal heating time. We’ve found that with a high-quality warmer, you can enjoy warm, fragrant candles in no time.
Can I Use Any Type of Candle With the Candle Warmer?
Yes, we can use various types of candles with the candle warmer. From scented to soy to beeswax, the options are endless. The benefits of using a candle warmer include longer burn time, no soot, and a safer alternative to open flames.
Is It Safe to Leave the Candle Warmer Unattended?
Yes, it can be dangerous to leave a candle warmer unattended. One time, we left ours on by mistake and it caused a small fire. Always follow safety guidelines and never leave it alone.
How Often Should I Clean the Candle Warmer?
We should clean the candle warmer regularly to ensure its optimal performance and safety. Cleaning frequency depends on usage, but a general rule is to clean it every 2-4 weeks. Here are some maintenance tips to keep your candle warmer in great condition.
What Should I Do if the Candle Warmer Is Not Heating up Properly?
If your candle warmer is not heating up properly, there are a few troubleshooting tips you can try. First, check if the power source is connected properly. If that’s not the issue, try using a different candle or adjusting the temperature settings.
Conclusion
In conclusion, creating your own candle warmer can be a fun and rewarding experience. By following the steps outlined in this article, you can enjoy the soothing glow and fragrance of your favorite candles without the worry of an open flame.
Remember to properly maintain and clean your candle warmer for optimal performance.
So go ahead, embrace your creativity and enjoy the cozy ambiance that a candle warmer provides.
Happy crafting!