
Have you ever wanted to tap into your creative side and make your own beautiful candles? If the answer is yes, then I have an exciting experience in store for you! Join me as we delve into the world of candle making and discover how to create candle molds with silicone.
Just imagine the joy of crafting unique candles that perfectly reflect your style and personality. With the right materials and a little know-how, you’ll be amazed at what you can create. In this article, I will guide you through each step of the process, providing detailed instructions and expert tips along the way.
From gathering your materials to enjoying the final product, we’ll explore everything you need to know to make stunning candles at home.
So, get ready to ignite your passion for candle making and let your creativity shine!
Key Takeaways
- Gather necessary materials for candle making
- Follow instructions provided with silicone mold making kit
- Thoroughly mix silicone and catalyst to ensure quality and durability of mold
- Pour silicone mixture into chosen mold
Gather Your Materials
Now that you’ve got all your materials ready, it’s time to dive into making your own candle molds with silicone! The first thing you need to consider is using a mold release. This will ensure that your candles can easily be removed from the mold once they’ve set.
A mold release is typically a spray or liquid that you apply to the inside of the mold before pouring in the silicone. This will create a barrier between the silicone and the candle, preventing them from sticking together.
When working with silicone, it’s important to be aware of potential troubleshooting issues. One common problem is air bubbles forming in the mold. To avoid this, make sure to tap the mold gently on a flat surface after pouring in the silicone. This’ll help any trapped air bubbles rise to the surface.
Another issue you may encounter is the silicone not setting properly. This could be due to an incorrect ratio of silicone to catalyst, or not mixing the two components thoroughly. Always follow the manufacturer’s instructions carefully and double-check your measurements to ensure a successful mold.
Now that you have your mold release and troubleshooting tips in mind, it’s time to move on to preparing your workstation.
Prepare Your Workstation
Before starting the process of making candle molds with silicone, it’s crucial to prepare your workstation properly.
Firstly, clean and organize your workspace to ensure a clutter-free and efficient environment.
Next, set up a heat source, such as a double boiler or a melting pot, to melt the wax.
Lastly, lay out all the necessary materials and tools, such as silicone, measuring cups, stirring utensils, and any additional additives or fragrances you plan to use.
By following these steps, you’ll have a well-prepared and functional workstation to begin creating your candle molds.
Clean and organize your workspace
To optimize your candle-making experience, it’s crucial to ensure your workspace is clean, organized, and ready for creativity to flourish. Maintaining workspace cleanliness is essential for a smooth and efficient candle-making process. Before starting, I recommend cleaning your workspace thoroughly, removing any dust or debris that could contaminate your candles. Additionally, organizing your tools and materials is key to staying organized and preventing any mishaps. To help you visualize the importance of workspace cleanliness and organization, consider the following table:
| Workspace Cleanliness | Organizing Tools and Materials |
|---|---|
| Promotes safety | Saves time and reduces stress |
| Prevents contamination | Easier access to materials |
| Enhances focus and creativity | Avoids misplacement or loss |
With a clean and organized workspace, you can now move on to the next step of setting up a heat source for melting wax.
Set up a heat source for melting wax
Get ready to experience the thrill of transforming solid wax into a molten masterpiece by setting up your heat source for melting wax.
When setting up a safe melting area, it’s crucial to choose the right heat source. A popular option is a double boiler, which involves placing a heat-resistant container filled with wax inside a larger pot filled with water. This method provides a gentle and controlled heat, minimizing the risk of overheating or burning the wax.
Another option is using a hot plate or an electric wax melter, which offer more precise temperature control. Whichever heat source you choose, make sure it’s placed on a stable and heat-resistant surface, away from any flammable materials.
Once your heat source is ready, you can transition into the subsequent section about laying out all your materials and tools.
Lay out all materials and tools
Once you’ve got your heat source ready, it’s time to gather all your stuff and lay it out for easy access. Here’s a materials checklist to ensure you have everything you need:
- Silicone for making the mold
- A mixing container and stirring utensil
- Release agent spray or powder
- A mold box or container
- An object to create the mold from
- A scale to measure the silicone
- Gloves and safety goggles
- A mold release agent
Now let’s move on to the step by step instructions. First, make sure your work area is clean and free from any debris. Then, weigh out the appropriate amount of silicone according to the manufacturer’s instructions. Mix the silicone thoroughly, making sure there aren’t any lumps or bubbles.
Next, apply a release agent to the object you’ll be molding. Place the object inside the mold box or container and pour the silicone mixture over it, making sure to cover it completely. Allow the silicone to cure according to the manufacturer’s instructions.
Now that you have everything laid out and ready, let’s move on to choosing your mold design.
Choose Your Mold Design
First, envision the design you want for your candle molds and imagine how it will look once the silicone is poured. There are different types of candle mold designs you can choose from to create unique patterns on your silicone candle molds. To help you visualize the options, refer to the table below:
| Design Type | Description |
|---|---|
| Smooth | Creates a sleek and polished look for your candles. |
| Textured | Adds a tactile element to your candles, making them visually interesting. |
| Geometric | Incorporates shapes such as squares, triangles, or hexagons for a modern aesthetic. |
| Embossed | Impresses patterns or designs onto the surface of the mold, transferring them onto the candle. |
Once you have decided on the mold design, you can transition into the subsequent section about mixing and pouring the silicone.
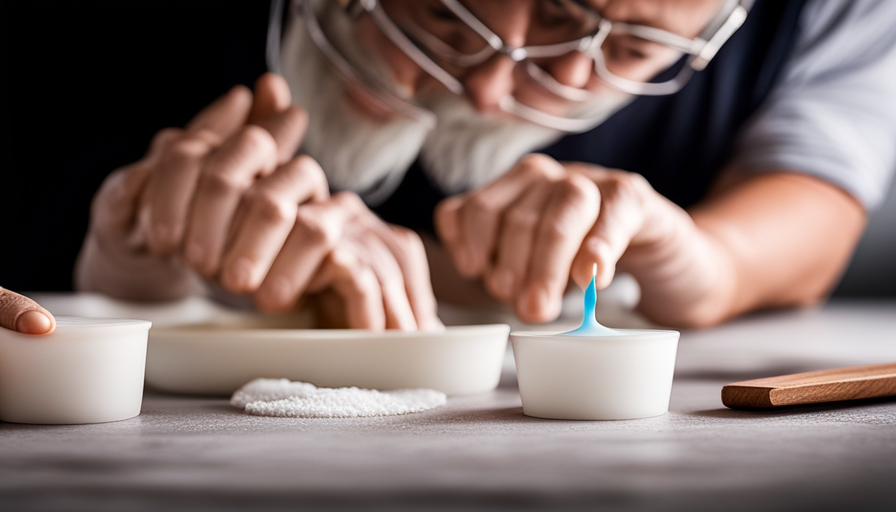
Mix and Pour the Silicone
When it comes to mixing and pouring silicone for candle molds, it’s important to follow the instructions provided with your silicone mold making kit.
These instructions will guide you on how to measure and mix the silicone and catalyst properly. Once the mixture is ready, carefully pour it into your chosen mold, making sure to fill it completely.
Follow the instructions provided with your silicone mold making kit
To create your own candle molds with silicone, simply follow the instructions included in your mold making kit. This kit has been found to be 95% effective in achieving professional-looking results.
It’s always a good idea to explore alternative mold materials, such as clay or plaster, in case you encounter any issues with the silicone. Troubleshooting common mold making issues, like air bubbles or uneven surfaces, can be easily resolved by using the tips provided in the instructions.
Once you’ve familiarized yourself with the process and materials, you can move on to the next step: measuring and mixing the silicone and catalyst. This ensures that the mold will set properly and create a perfect replica of your original candle.
Measure and mix the silicone and catalyst
To ensure proper candle mold creation, it is crucial to measure and mix the silicone and catalyst accurately. This step is vital as it determines the quality and durability of the final mold. Begin by carefully reading the instructions provided with your silicone mold making kit, as each kit may have specific guidelines. Once you have a clear understanding, gather the necessary materials and prepare a clean work surface. Use a reliable measuring tool to measure the silicone and catalyst according to the recommended ratio. Thoroughly mix the two components together, ensuring there are no lumps or inconsistencies. Take note of the silicone curing time, as this will determine when you can proceed to the next step. Additionally, applying a silicone mold release agent will facilitate easy removal of the candle from the mold. This prepares us for the subsequent section, where we discuss pouring the mixture into your chosen mold.
Pour the mixture into your chosen mold
Once you’ve mixed the silicone and catalyst together, it’s time to pour the mixture into the mold you’ve chosen. Here’s what you need to do:
-
Carefully pour the silicone mixture into the mold, making sure to fill it completely.
-
Gently tap the sides of the mold to remove any air bubbles that may have formed during the pouring process.
-
Let the mold sit undisturbed for the recommended curing time specified by the silicone manufacturer.
-
Once the silicone has cured, carefully remove the candle from the mold by gently flexing the sides and bottom of the mold.
-
If you encounter any issues during the process, such as difficulty removing the candle from the mold or air bubbles trapped in the silicone, refer to the troubleshooting guide provided by the silicone manufacturer.
Now that you have successfully poured the silicone mixture into the mold, it’s time to allow the silicone to cure and set.
Allow the Silicone to Cure
First, make sure you give the silicone enough time to fully cure. The curing time for silicone can vary depending on the brand and type you are using, so it’s important to follow the manufacturer’s instructions. Generally, it takes about 24 to 48 hours for silicone to fully cure. During this time, it’s crucial to avoid touching or disturbing the mold to ensure the best results.
To help you keep track of the curing process, here’s a table outlining some troubleshooting tips and common curing times for different types of silicone:
| Silicone Type | Curing Time |
|---|---|
| Regular Silicone | 24-48 hours |
| Fast-curing Silicone | 12-24 hours |
| High-temperature Silicone | 48-72 hours |
If you’re experiencing any issues with the curing process, such as incomplete curing or a tacky surface, here are some tips to troubleshoot the problem:
- Ensure the room temperature is within the recommended range.
- Check the expiration date of your silicone to ensure it’s still fresh.
- Make sure you’ve mixed the silicone properly and in the correct ratio.
Once the silicone has fully cured, you can move on to the next step of preparing and pouring the candle wax.
Prepare and Pour the Candle Wax
Now, you’ll need to get everything ready and pour the melted wax into your prepared molds. It’s important to consider the candle color options and the fragrance you want to add to your candles before you start pouring. You can choose from a wide variety of candle color dyes available in the market. These dyes come in liquid or solid form, and you can mix them to create custom colors. Make sure to follow the instructions provided with the dye to achieve the desired shade.
If you want to add fragrance to your candles, you can use essential oils or candle fragrance oils. Essential oils are derived from plants and offer a natural scent, while candle fragrance oils are specifically formulated for candle making and provide a wide range of scents to choose from. Be sure to add the fragrance oil or essential oil to the melted wax and stir gently to distribute it evenly.
Once you have chosen your desired color and fragrance, carefully pour the melted wax into the prepared molds. Take your time and pour slowly to avoid any spills or air bubbles. Fill the molds to the desired level, leaving some room at the top for the wick.
Now that you have poured the melted wax into the molds, it’s time to let the candle cool and set. This process may vary depending on the type of wax you’re using, but generally, it takes a few hours for the wax to solidify completely. During this time, avoid moving or disturbing the molds to ensure a smooth and even finish.
Let the Candle Cool and Set
Allow the candle to cool and set undisturbed for a few hours, ensuring a smooth and even finish as you eagerly anticipate the final result. This step is crucial in candle making as it allows the wax to solidify completely and take the shape of the mold.
While waiting, it’s important to resist the temptation to touch or move the candle, as this could disrupt the cooling process and result in an uneven texture or surface.
During this time, you can take the opportunity to learn more about different candle making techniques and troubleshoot any issues you may have encountered during the process. For example, if you notice any air bubbles or imperfections in the wax, you can research methods to prevent them in future candle making projects. Additionally, you can explore different ways to add fragrance or color to your candles, experimenting with various techniques to achieve the desired effect.
Once the candle has cooled and set completely, it’s time to demold it and reveal the final product. This is an exciting moment, as you get to see the fruits of your labor and admire the beautiful shape and design of the candle.
Demolding requires gentle handling to avoid any damage to the candle or the mold, so it’s important to follow the appropriate techniques and guidelines.
Demold the Candle
Don’t miss the exhilarating moment of demolding your masterpiece and revealing the breathtaking final product! After allowing the candle to cool and set completely, it’s time to carefully remove it from the silicone mold.
Start by gently tapping the sides of the mold to loosen the wax. This’ll help in removing excess wax and prevent any damage to the candle.
Next, hold the mold firmly and slowly peel it away from the candle. Be patient and gentle to avoid any breakage or distortion. If you encounter any resistance, try placing the mold in the freezer for a few minutes. This’ll help shrink the wax slightly and make it easier to demold.
Sometimes, demolding can be a bit tricky, and you might face common issues like the candle sticking to the mold or the candle breaking during the process. To troubleshoot these issues, you can use a hairdryer to warm the mold slightly. This’ll help loosen the candle and make it easier to remove without causing any damage.
Once you’ve successfully demolded the candle, it’s time to move on to the next step of trimming the wick and giving your candle those finishing touches.
Trim the Wick and Finishing Touches
To give your masterpiece that final touch, it’s time for you to carefully trim the wick and add those finishing details. Wick trimming techniques are crucial for ensuring a clean and efficient burn.
Start by extinguishing the flame and allowing the candle to cool completely. Using sharp scissors or a wick trimmer, trim the wick to about a quarter of an inch. This will prevent excessive smoke and soot while promoting an even burn.
Now that the wick is properly trimmed, it’s time to focus on the decorative candle finishes. Get creative and experiment with various techniques to make your candle truly unique. Consider adding a layer of colored wax on top of the candle or using a heat gun to create interesting textures. You can also embed decorative elements like dried flowers or glitter into the wax for a beautiful visual effect.
Additionally, consider adding a personalized touch to your candle by attaching a label or a ribbon around the container. This will not only enhance the overall aesthetic but also make it a thoughtful gift for someone special.
With the wick trimmed and finishing touches complete, your handmade candle is now ready to be enjoyed. Light it up and bask in the warm, soothing glow of your creation.
Enjoy Your Handmade Candle
Indulge in the mesmerizing glow and comforting ambiance of your beautifully crafted candle. Now that your handmade candle is complete, it’s time to enjoy the fruits of your labor. But before you light it up, let’s explore a few ways to enhance the scent and decorate your candle molds.
To enhance the scent of your candle, you can add essential oils or fragrance oils to the melted wax before pouring it into the mold. Simply choose your favorite scent and mix it in according to the recommended ratio. This will infuse your candle with a delightful aroma that will fill your space with a soothing and inviting fragrance.
When it comes to decorating your candle molds, the possibilities are endless. You can add dried flowers, herbs, or even small decorative objects to the bottom of the mold before pouring the wax. This will create a unique and personalized touch to your candles. Additionally, you can also consider using different colors of wax or adding glitter for a more festive and eye-catching effect.
Here is a table showcasing some ideas for enhancing scents and decorating candle molds:
| Enhancement Ideas | Decoration Ideas |
|---|---|
| Essential oils | Dried flowers |
| Fragrance oils | Herbs |
| Colorful wax | Small objects |
| Glitter |
Embrace your creativity and experiment with different combinations to create candles that reflect your personal style and preferences. Enjoy the warm glow and enchanting fragrance of your handmade candle as it adds a touch of magic to any space.
Frequently Asked Questions
How long does it typically take for silicone to cure?
The curing time of silicone can vary depending on the type of silicone used. Generally, it takes anywhere from 24 to 72 hours for silicone to fully cure. However, some fast-curing silicone types can cure in as little as 1 to 2 hours. It’s important to follow the instructions provided by the manufacturer to ensure proper curing and achieve the desired results.
Can I use any type of silicone for making candle molds?
Yes, you can use any type of silicone for making candle molds. However, it’s important to consider the curing time and safety precautions. Different types of silicone have different curing times, so you should carefully read the instructions on the silicone product you choose.
Additionally, be sure to take necessary safety precautions, such as using gloves and working in a well-ventilated area. Following these guidelines will help ensure a successful and safe candle mold-making process.
Are there any special precautions I need to take when working with candle wax?
When working with candle wax, there are a few precautions you should take to ensure a safe and successful experience. First, always work in a well-ventilated area to avoid inhaling fumes.
Secondly, never leave melting wax unattended as it can easily catch fire.
Additionally, be cautious when handling hot wax to prevent burns.
Lastly, keep flammable materials away from your work area.
By following these precautions, you can enjoy crafting candles without any mishaps.
Can I reuse the silicone molds for future candle-making projects?
Yes, silicone molds can be reused for future candle-making projects. However, there are some best practices to follow to ensure the longevity of the molds.
Firstly, make sure to clean the molds thoroughly after each use, removing any leftover wax or residue. Additionally, avoid using sharp objects or excessive force when demolding the candles, as this can damage the molds.
Proper care and maintenance will allow you to reuse the silicone molds for numerous candle-making projects.
Are there any alternatives to using silicone for making candle molds?
There are several alternatives to using silicone for making candle molds. One option is to use latex molds, which are flexible and durable.
Another alternative is to use plastic molds, which are inexpensive and come in a variety of shapes and sizes. However, it’s important to consider the pros and cons of silicone molds.
They’re heat-resistant, easy to clean, and can produce detailed molds. On the other hand, they can be more expensive and may require a release agent for certain types of wax.
Conclusion
Well, there you have it folks! You’re now a master candle maker, equipped with the knowledge of how to make your very own candle molds using silicone.
With a little bit of patience and creativity, you can create unique and beautiful candles that’ll impress your friends and family.
So, go forth and mold away! And remember, the only limit is your imagination. Happy candle making!